How it Works
Log In / Sign Up
Buy Points
How it Works
FAQ
Contact Us
Questions and Suggestions
Users
Hotpoint
Loading...
E
EBM 18110 T
EBM 18110 T F
EBM 18120
EBM 18120 T F
EBM 18200 F
EBM 18210
EBM18210F
EBM18220F
EBM 18220 X F
EBM 18260 V
EBM 18281 V
EBM 18311 V
EBM 18311 V 03 AI
EBM 18321 V
EBM 18321 X
EBM 18340
EBMH 18200 V
EBMH 18211 V O3
EBMH 18221 V O3
EBMH 18221 X V O3 AI
EBMH 18320 X V
EBMHxxxxxF
EBMxxxxxF
EBOH 18201 F
EBOH 18223 X F SL
EBY 20303 F O3
EBYH 18213 O3 F
EBYH 18221 NX
EBYH 18223 O3 F
EBYH 18242 D F
EBYH 18242 F
EBYH 18343 F
EBYH 20323 F D O3
EBYH 20422 V
EBYH 20423 X F
EC6005
EC6011
EC6014
EC604
ECECO95T2IWH
ECF 87
ECF 87BP UK
ECO6D 1291
ECO6F 109
ECO6L 129
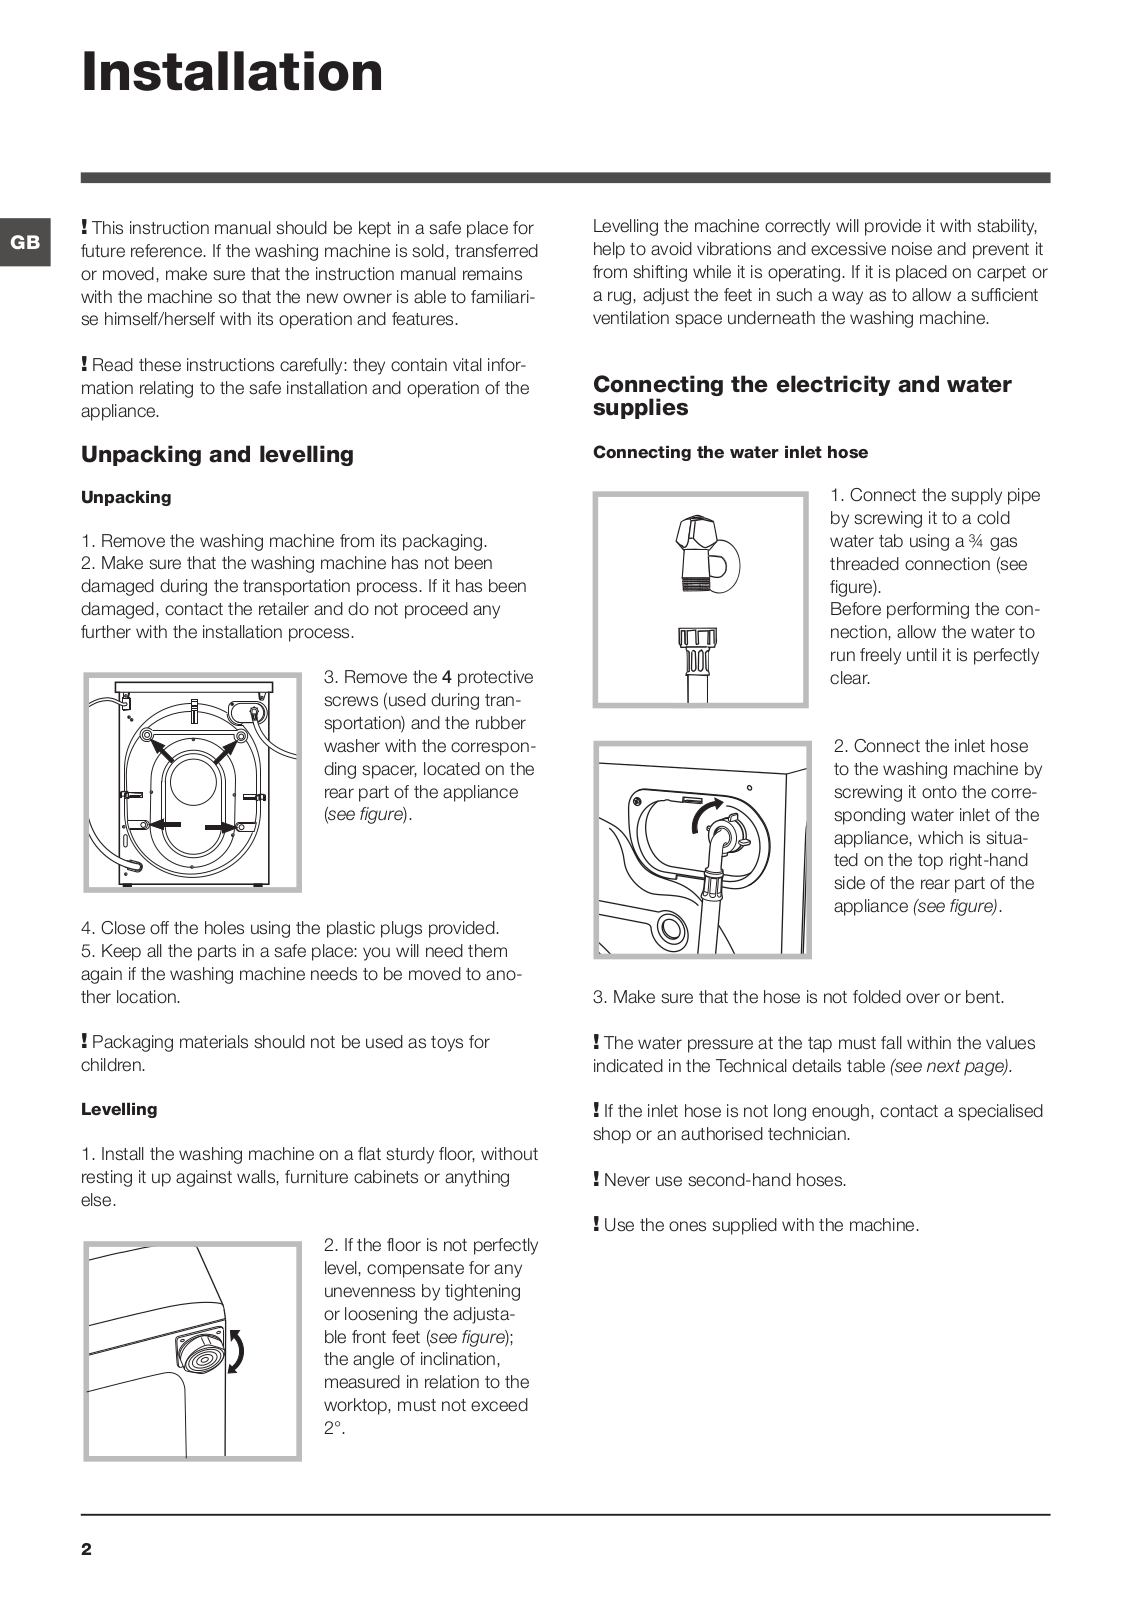
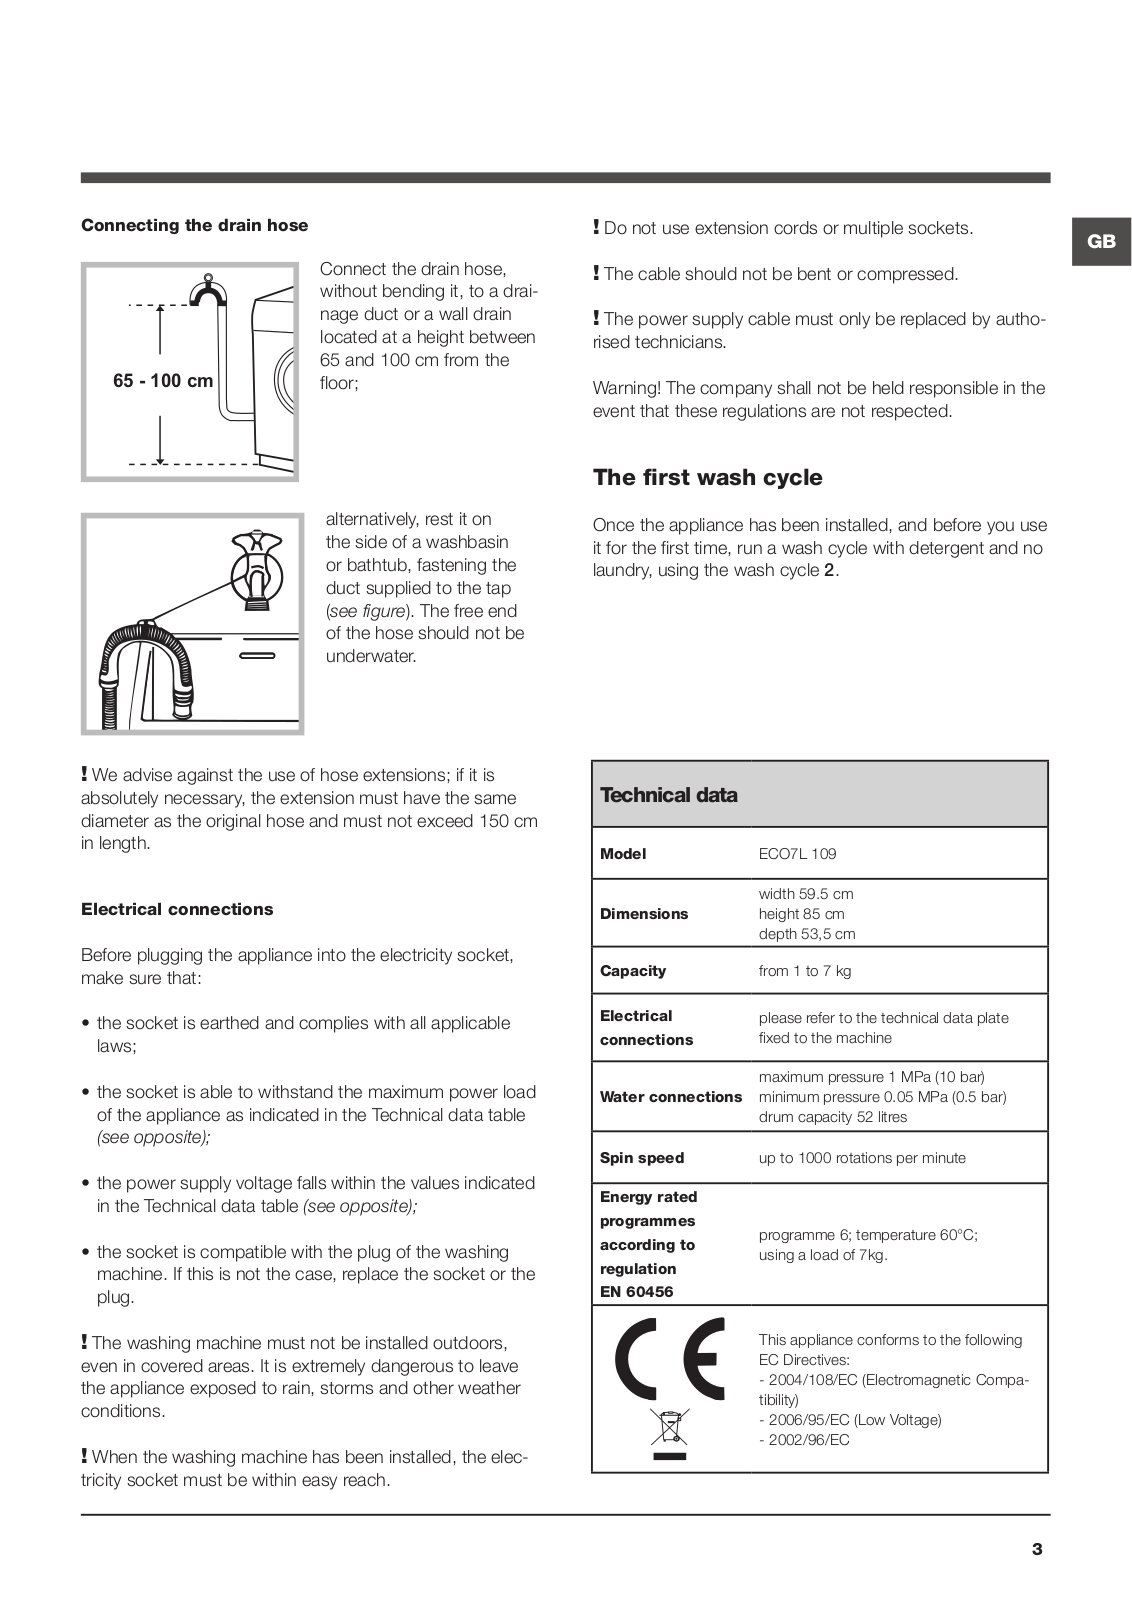
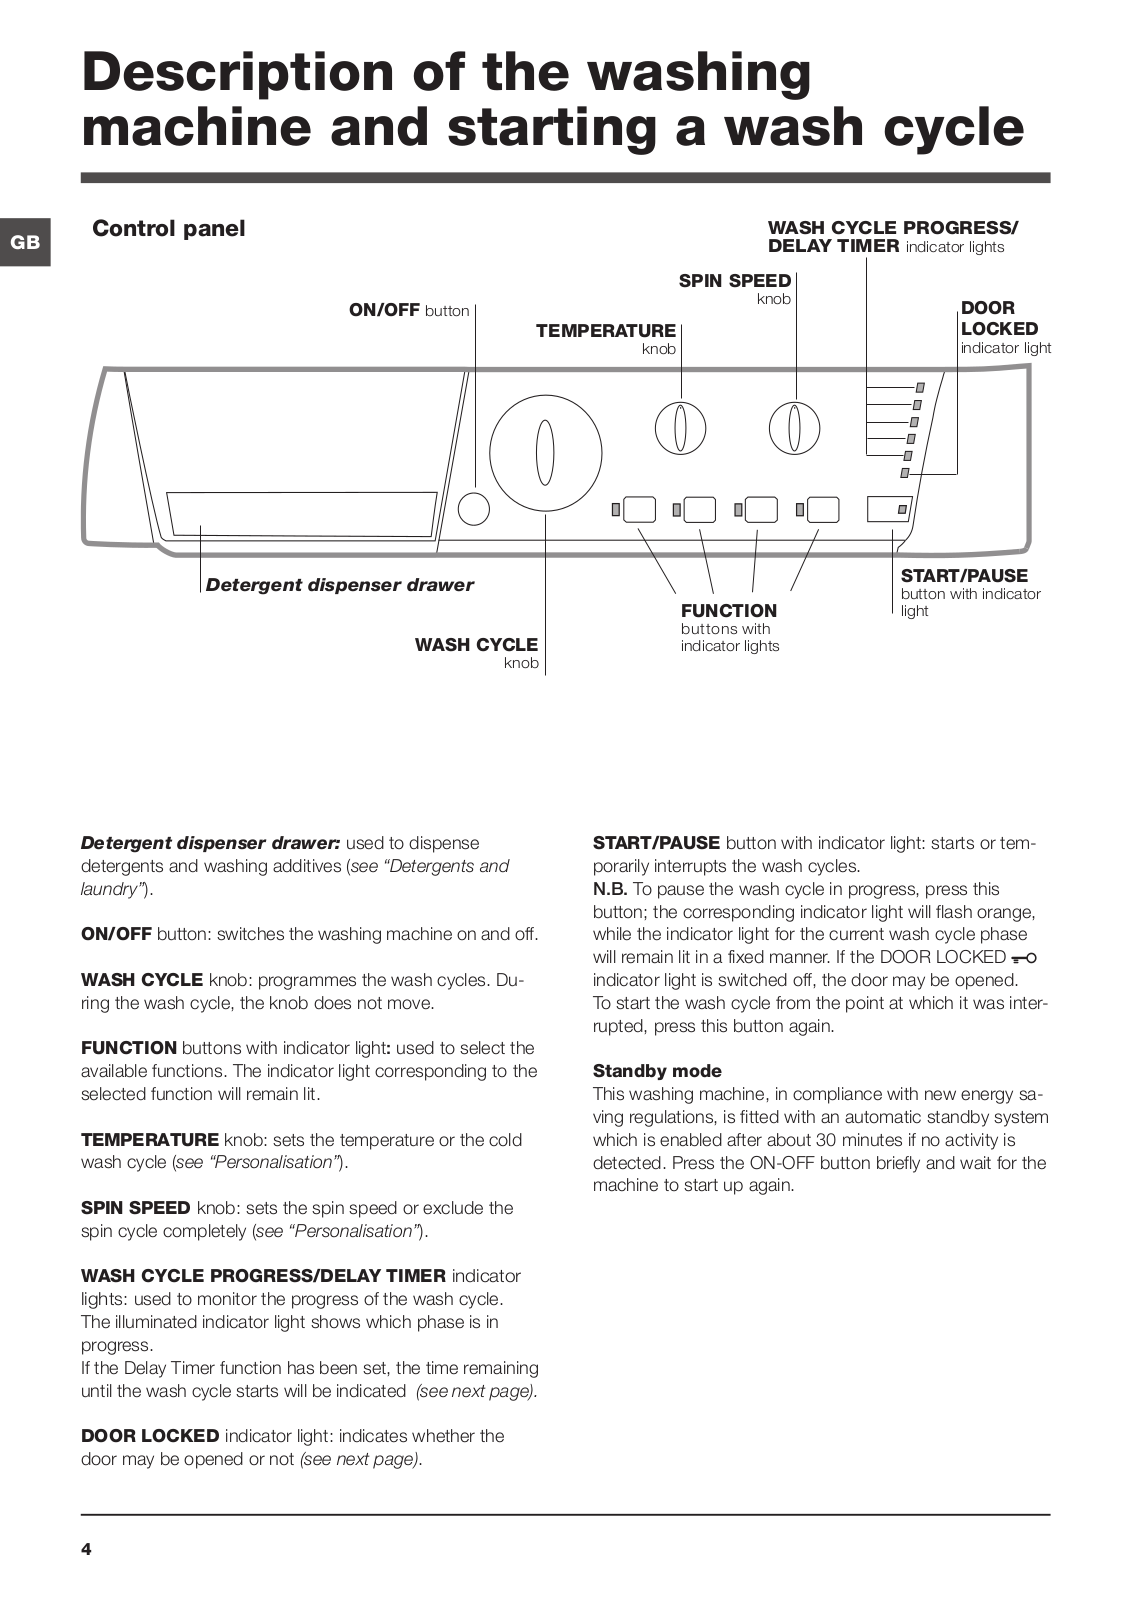
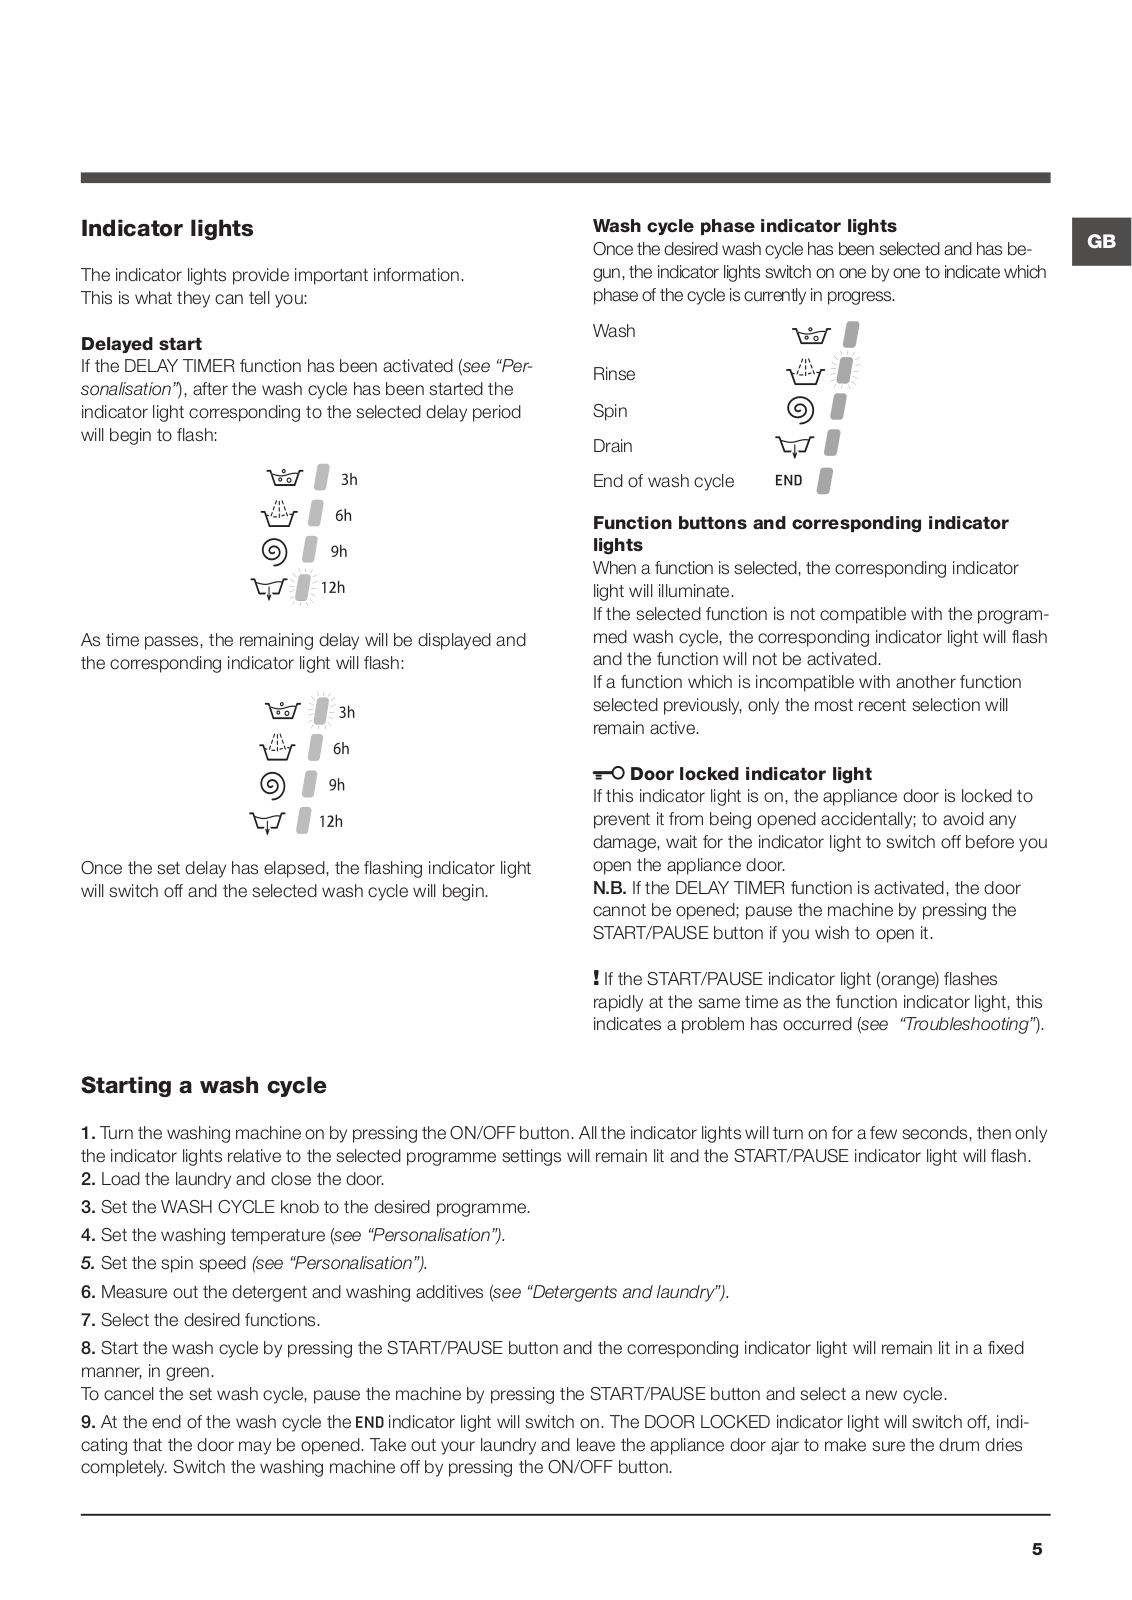
2
ECO7D 1092 S
ECO7F 1292
ECO 7 F 1292 EU
ECO7L 1051
ECO7L 1051 EU
ECO7L 109
ECO7L 1252 EU
ECO7L 1252 EU.M
ECO7L 1252 EU.T
ECO8D 129
ECO8D 1292
ECO8D 1492
2
ECO8D 1492 K
ECO8F 129
ECO8F 1292
ECO8L 1051 EU
ECO8L 1252 EU
ECO8L 1252 EU.M
ECO9F 1091
2
ECO9F 149
ECO9F 1491
2
ECOFL 1810 C
ECOFL 1810 P
ECOFL 181 P
ECOFM 171 P
ECORM172P
ECOS6L 851 EU
ECOSD 129
ECOSF 109
ECOSF 129
ECOT55L 85
ECOT6D 1491
ECOT6F 1291
ECOT6L 105
ECOT6L 1051 EU B
ECOT6L 125
ECOT6L 145
ECOT6L 85
ECOT7D 149
ECOT7D 1491
ECOT7D 1492 EU
ECOT7F 109
ECOT7F 129
ECOT7F 1291
ECOT7F 1292
ECOT7F 1292 EU
ECOT7L 109
ECOT7L 89
ECOTF 1051
ECOTF 1251
ECOTL 1051
EDC51
EDF 260 XL
EFMF 1023 EU
EFMF 1023 FR
Loading...
Loading...
Nothing found
ECO7L 109
User Manual
60 pgs
1.83 Mb
0
Table of contents
Loading...
Hotpoint ECO7L 109 User Manual
...
Hotpoint User Manual
Download
Specifications and Main Features
Frequently Asked Questions
User Manual
Download
Loading...
+
hidden pages
Unhide
You need points to download manuals.
1 point = 1 manual.
You can buy points or you can get point for every manual you upload.
Buy points
Upload your manuals
 Loading...