

Page 1

Brugervejledning
DK
Dansk, 1
CP65SFA DK/HA
GB
English,16
KOMFUR OG OVN
DK
Oversigt
Installation, 2-5
Placering og planstilling
Elektrisk tilslutning
Tilslutning af gas
Tilpasning til forskellige gastyper
Specifikationer for gasblus og dyser
Tabel med specifikationer
Beskrivelse af apparatet, 6
Samlet illustration
Betjeningspanel
Display
Start og brug, 7-11
Brug af kogefladen
Indstilling af uret
Indstilling af minuttælleren
Brug af ovnen
Manuelle tilberedningsprogrammer
Automatiske tilberedningsprogrammer
Programmering af tilberedning
Praktiske råd til tilberedning
Tabel over tilberedning i ovn
Forskrifter og råd, 12
Generelt om sikkerheden
Bortskaffelse
Spar på energien og værn om miljøet
Vedligeholdelse, 13-14
Afbrydelse af strømmen
Rengøring af apparatet
Sådan udskiftes lyspæren i ovnen:
Vedligeholdelse af gashanerne
Automatisk rengøring FAST CLEAN
Service, 15
Page 2

Installation
DK
Det er vigtigt at opbevare dette hæfte et sted, så
det nemt kan konsulteres. Hvis komfuret sælges,
overdrages eller flyttes, skal man sikre sig, at
hæftet følger med.
Læs omhyggeligt instruktionerne. De indeholder
vigtige oplysninger om installation, anvendelse og
sikkerhed.
Installationen skal udføres i overensstemmelse
med instruktionerne og af en kvalificeret tekniker.
Komfurets strømforsyning skal frakobles inden
justering eller vedligeholdelse af apparatet.
Udluftning af rummet
Apparatet må kun installeres i rum med konstant
udluftning i overensstemmelse med de gældende
nationale regler. I rummet, hvor apparatet installeres,
skal der tilføres tilstrækkelig med luft til en
regelmæssig gasforbrænding (luftmængden må
ikke være mindre end 2 m
3
/h pr. kW af installeret
effekt).
Luftåbningerne, der er beskyttet af riste, skal have
en rørføring på mindst 100 cm
2
i anvendelig tværsnit
og de skal placeres således, at de ikke blokeres,
heller ikke delvist (se figur A).
Åbningerne skal være dobbelt så store - minimum
200 cm
2
hvis apparatet ikke er udstyret med en
sikkerhedsanordning til slukning ved manglende
flamme og hvis lufttilførslen sker indirekte fra
tilstødende lokaler (se figur B) såfremt de ikke er
opholdsrum, brandfarlige omgivelser eller
soveværelser - udstyret med ventilationskanaler ud i
det fri som ovenfor beskrevet.
Tilstødende
A
lokale
B
Lokale med behov for
ventilation
Efter længere tids brug af apparatet tilrådes det at
åbne et vindue eller øge styrken på eventuelle
ventilatorer.
Udledning af forbrændingsrøggasser
Udledningen af røggasser fra forbrændingen skal
ske ved hjælp af en emhætte, der er tilsluttet et
effektivt trækrør eller ved hjælp af en elektrisk
ventilator, der automatisk aktiveres, hver gang man
tænder for apparatet (se figur).
Udledning direkte
ud i det fri
Udledning gennem stigrør
eller trækrør med
forgreninger (kun til
kogeapparater)
Propangas (flaskegas) er tungere end luft og samles
således i nærheden af gulvet, og derfor skal rum med
gasflasker have en lavtmonteret åbning ud til det fri for
udledning af eventuelle gasudslip.
Derfor må propangasflasker hverken tomme eller
halvt fyldte ikke installeres eller opbevares i lokaler
eller rum under jordoverfladen (kældre etc.). Opbevar
kun de gasflasker, der er i anvendelse i rummet, og på
afstand af varmekilder (ovne, brændeovne), der kan
bringe temperaturen over 50° C.
Placering og planstilling
Apparatet kan installeres ved siden af
køkkenelementer, der ikke er højere end
arbejdsfladen.
A
Ventilationsåbninger for
luft til forbrænding
2
Forstørrelse af
mellemrummet mellem
dør og gulv
Væggene, der er i kontakt med apparatets
bagside, skal være i ikke-brændbar materiale, der
kan modstå varme (T 90° C).
For korrekt installation:
Apparatet kan installeres i køkkenet, i spisestuen
eller i et kombineret køkken/stue, men ikke i et
badeværelse.
Hvis komfuret er højere end de tilstødende møbler/
køkkenelementer, skal disse placeres mindst 600
mm fra apparatet.
Page 3
Hvis komfuret
installeres under et skab,
skal der være en
afstand på minimum
420 mm fra komfurets
overflade.
700 mm. without hood
min. 650 mm. with hood
Denne afstand skal
min.
mm.
420
Min.
HOOD
Min. mm.
600
420
Min. mm.
være 700 mm, hvis
skabet er lavet i
brændbart materiale
(se figuren);
Der må ikke hænge gardiner bag komfuret, og
disse skal hænge mindst 200 mm fra siderne af
komfuret.
Eventuelle emhætter skal installeres i
overensstemmelse med den medfølgende
brugervejledning.
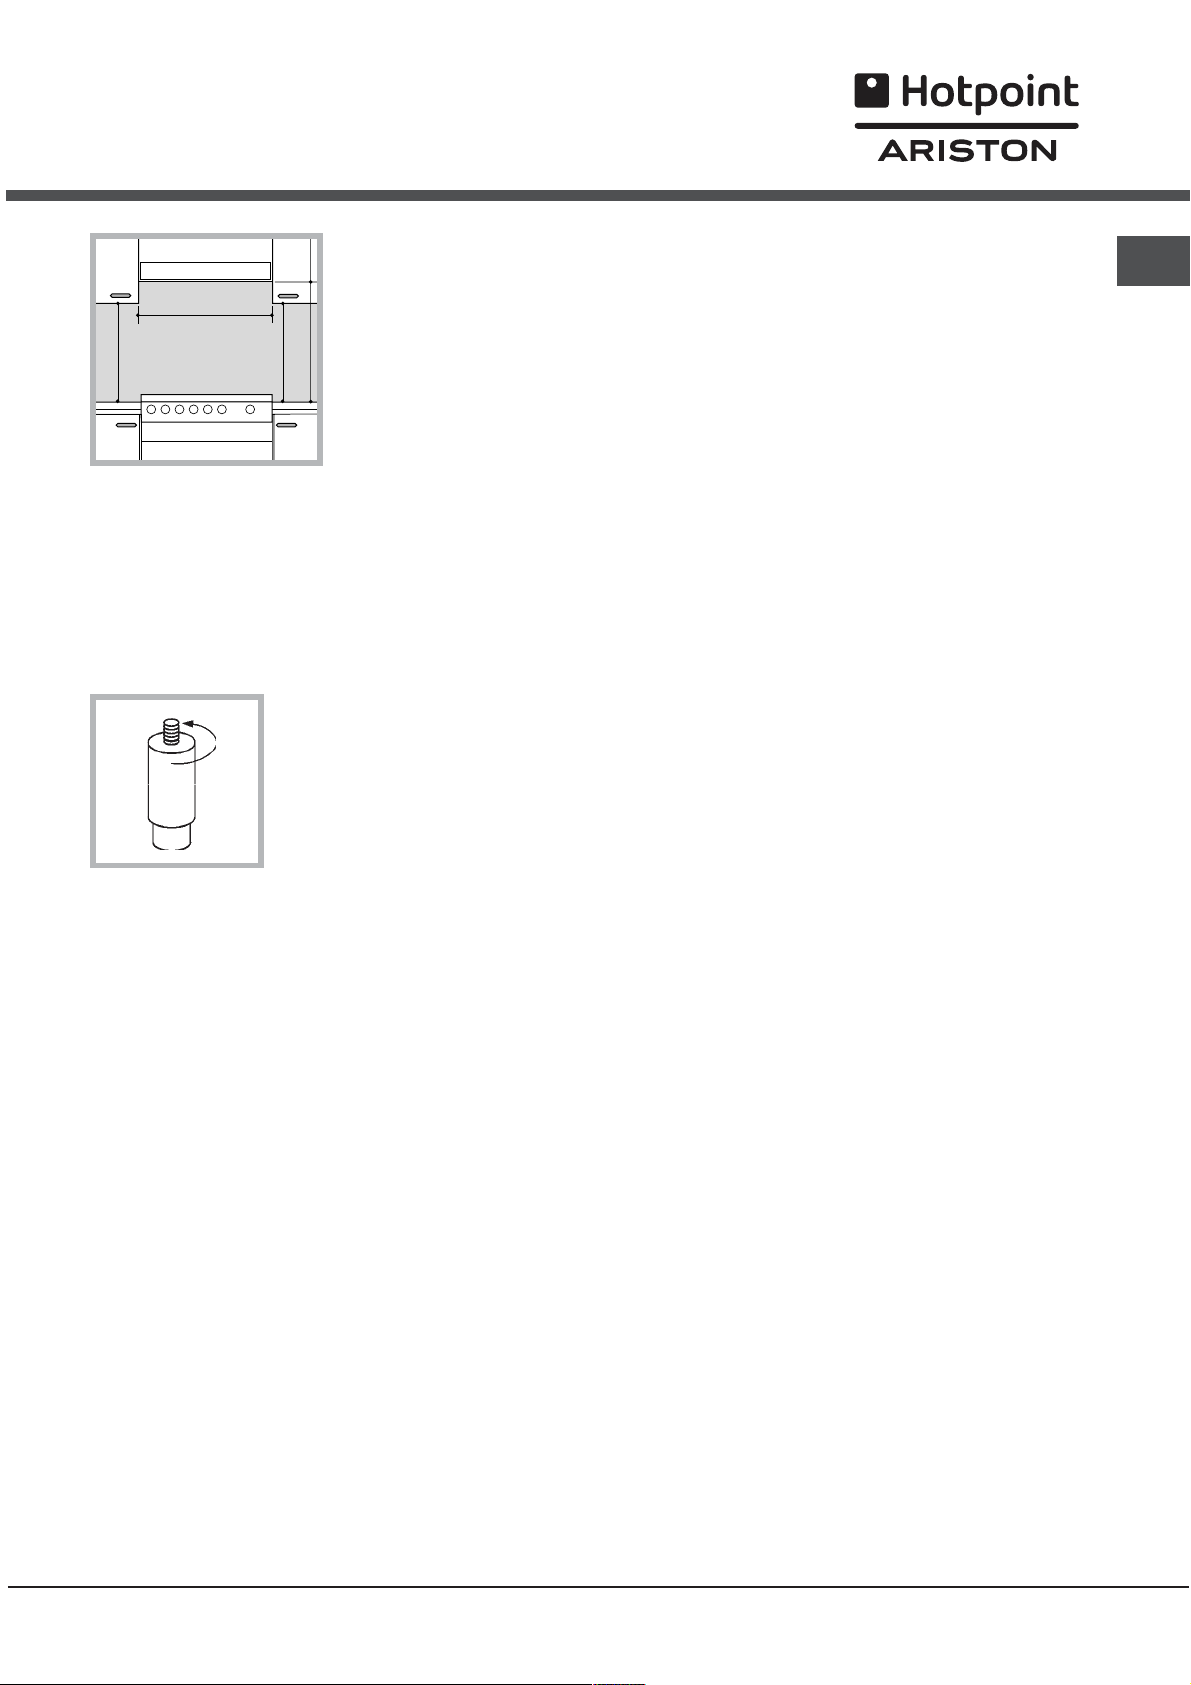
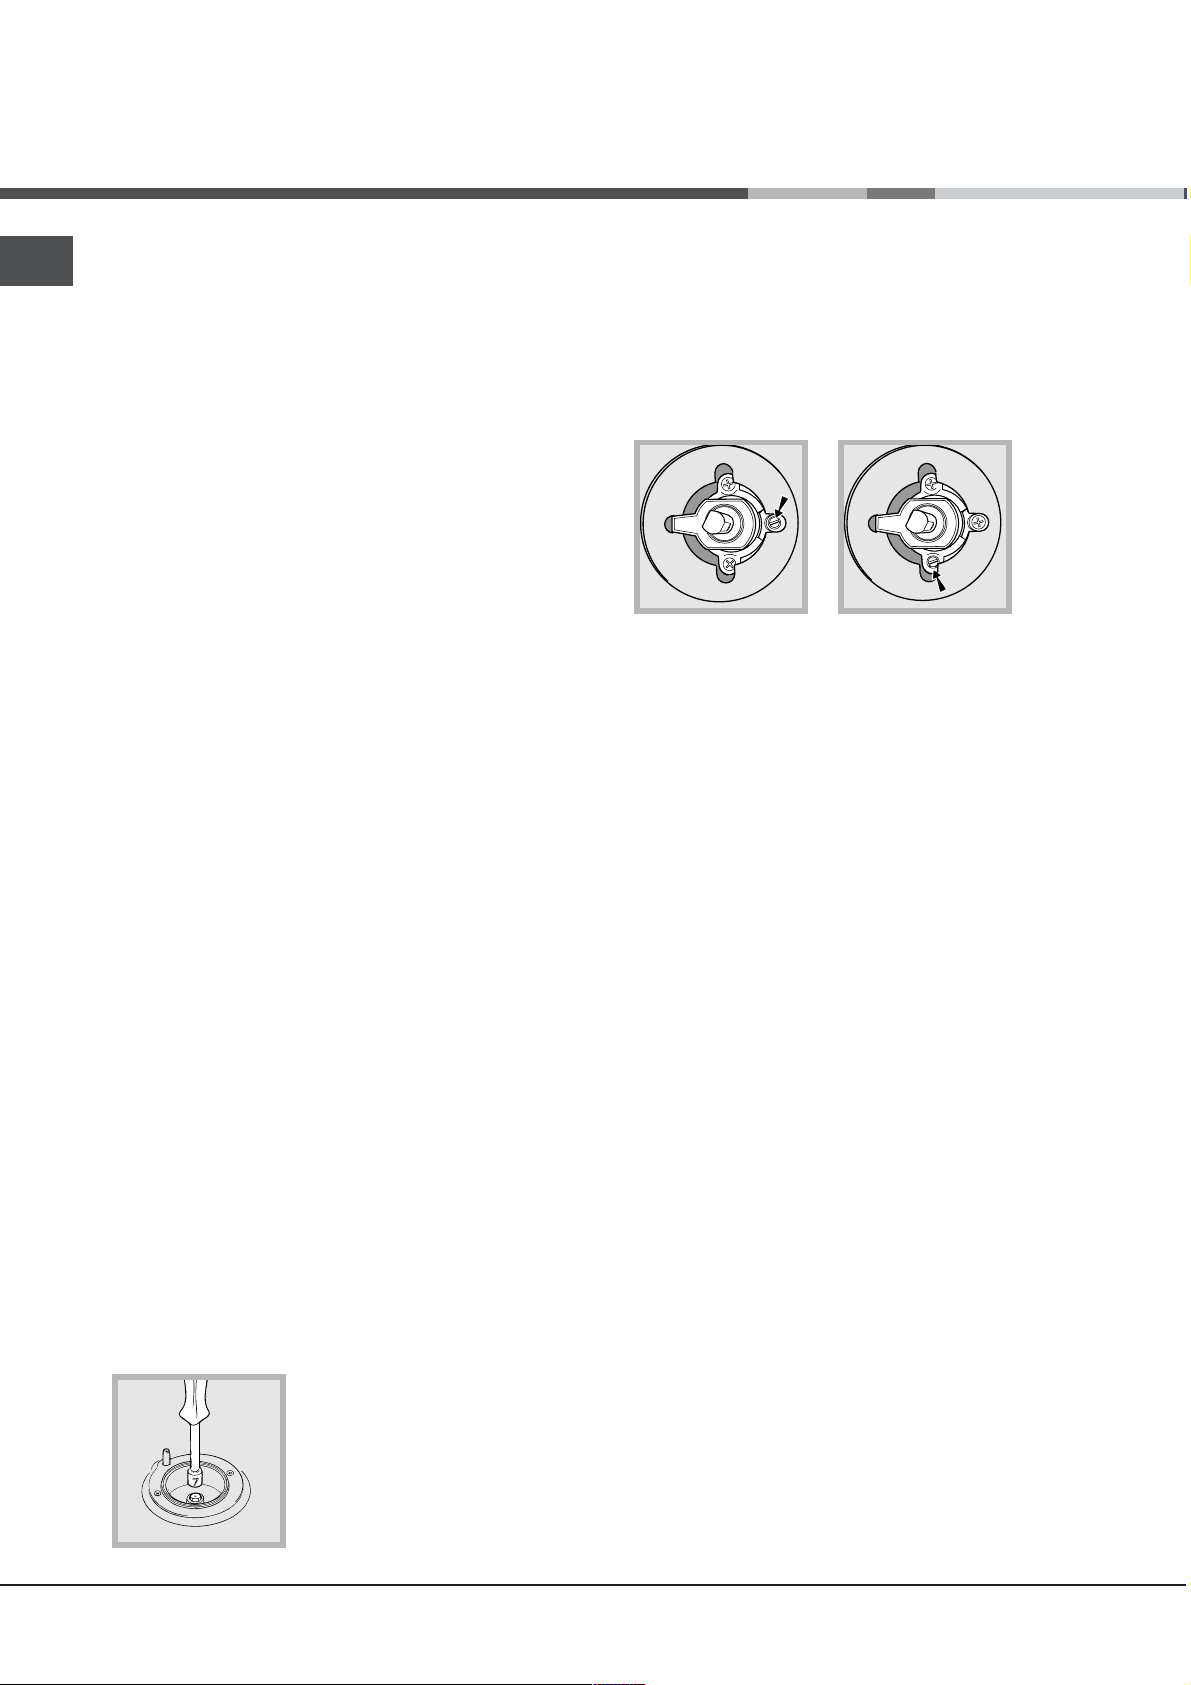
Planstilling
Hvis det er nødvendigt at
planstille apparater, skal man
skrue de medfølgende ben i
hullerne i hjørnerne på
komfurets sokkel (se figuren).
Når apparatet er installeret, skal man nemt kunne
nå ind til både ledning og stikkontakt.
Ledningen må ikke bøjes eller trykkes sammen.
Ledningen skal regelmæssigt kontrolleres og må
kun udskiftes af autoriserede teknikere.
Virksomheden fralægger sig ethvert ansvar,
såfremt disse regler ikke overholdes.
Tilslutning af gas
Tilslutning til gasforsyningen eller til gasflaske kan
udføres med en gummi- eller stålslange i henhold til
de gældende nationale regler og efter at man har
kontrolleret, at apparatet er indstillet til den type
gas, der anvendes (se mærkatet på toppen - eller
se herunder). Såfremt apparatet skal forsynes med
flydende gas fra flasker, skal der anvendes
trykregulatorer, der opfylder kravene i de gældende
nationale regler. For at gøre tilslutningen nemmere,
sidder gasforsyningen på siden*. Byt
gummiholderen til tilslutning ud med proppen, og
udskift den medfølgende pakning.
DK
Elektrisk tilslutning
Anvend et standardstik på kablet til den belastning,
der er anført på apparatet (se tabellen over Tekniske
data).
Hvis man ønsker en direkte forbindelse til el-nettet,
skal man indsætte en flerpolet afbryder med en
minimumsåbning mellem kontakterne på 3 mm. i
overensstemmelse med belastningen og i
overensstemmelse med de gældende regler (der
skal ikke være en afbryder på jordforbindelsen).
Forsyningskablet skal være placeret på en sådan
måde, at det ikke når en temperatur på 50º C over
omgivelsestemperaturen på noget punkt.
Inden tilslutningen udføres, skal man kontrollere
følgende:
at stikkontakten har jordforbindelse og er i
overensstemmelse med loven,
at stikkontakten kan bære ovnens maksimale
spændingsbelastning, som angivet på
typeskiltet,
at forsyningsspændingen ligger inden for
værdierne, som angivet på typeskiltet,
at stikkontakten passer til apparatets stik. I
modsat fald skal man udskifte stikkontakten eller
stikket. Undgå anvendelse af forlængerledninger
eller flerdobbelte stikdåser.
For at sikre korrekt brug af apparatet, optimal
udnyttelse af energiforbruget samt forlængelse af
apparatets driftsperiode skal det kontrolleres, at
forsyningstrykket er i overensstemmelse med
værdierne, der er angivet i tabellen over
Specifikationer for gasblus og dyser (se herunder).
Tilslutning af gas ved hjælp af gummislange
Kontroller, at slangen opfylder kravene i de
gældende nationale regler. Den indvendige diameter
på den anvendte slange skal være: 8 mm ved
forsyning med flydende gas og 13 mm ved
forsyning med metangas.
Tilslut slangen, og kontroller herefter:
at den på intet punkt er i kontakt med dele, der
når op på en temperatur over 50° C,
at den ikke udsættes for træk- og
vridpåvirkninger og ikke er bøjet eller revnet,
at den ikke er i berøring med skærende dele,
skarpe hjørner eller bevægelige dele eller
klemmes sammen,
at den nemt kan inspiceres i hele dens længde,
så man kan kontrollere dens tilstand,
at den ikke er længere end 1500 mm,
at den er solidt fastgjort i enderne, hvor den skal
fastgøres med spændskiver, der opfylder
kravene i de gældende nationale regler.
3
Page 4
DK
Hvis en eller flere af ovennævnte betingelser ikke
kan opfyldes, eller hvis komfuret installeres efter
betingelserne i klasse 2 - underklasse 1 (apparat
indbygget mellem to køkkenelementer), skal man i
stedet anvende en stålslange (se herunder).
Tilslutning af gas ved hjælp af helstøbt rørslange
i rustfrit stål med gevindskårne koblinger
Kontroller, at slangen og pakningerne opfylder
kravene i de gældende nationale regler.
Inden slangen tages i brug skal man fjerne
gummiholderen på apparatet (gastilførselsstudsen
på apparatet er et gevindskåret 1/2 gas
cylinderformet hanstik).
Udfør tilslutningen således, at længden på slangen
ikke overstiger 2 meter, og kontroller, at slangen
ikke kommer i kontakt med bevægelige dele og at
den ikke klemmes sammen.
Minimumsindstilling af gasblussene på kogefladen:
1. Indstil hanen i positionen for minimum.
2. Fjern betjeningsknappens dæksel, og drej på
justeringsskruen, der er anbragt indvendigt i
betjeningsknappen eller ved siden af styrepinden,
indtil der opnås en ensartet flamme.
Anvendes der flydende gas, skal justeringsskruen
strammes helt i bund.
3. Kontroller, at gasblussene ikke går ud, når
kontrolknappen drejes hurtigt fra maks. til min.
effekt.
Kontrol af tæthed
Når installationen er afsluttet skal man kontrollere, at
alle de anvendte samlestykker er tætte ved hjælp af
en påført sæbeblanding, og aldrig ved brug af åben
ild.
Tilpasning til forskellige gastyper
Man kan tilpasse apparatet til brug med forskellige
gastyper (gastyperne er angivet på mærkatet på
toppen).
Tilpasning af kogefladen
Udskiftning af gasblussenes dyser:
1. Fjern ristene fra gasblussene, og fjern
gasblussene fra de respektive sæder.
2. Løsn dyserne ved hjælp af en 7 mm topnøgle (se
figuren). Udskift herefter dyserne med de dyser, der
er egnet til den nye gastype (se tabellen
Specifikationer for gasblus og dyser)..
3. Sæt alle komponenterne på plads igen ved at
følge ovennævnte trin i omvendt rækkefølge.
Det er ikke nødvendigt at justere gasblussenes
primærluft.
Efter tilpasning til en anden gastype, skal man
udskifte mærkatet med gastypen med et mærkat,
der angiver den nye gastype, som fås hos de
autoriserede tekniske servicecentre.
Hvis det anvendte gastryk er anderledes (eller
varierer) i forhold til den beregnede gastype, er det
nødvendigt at installere en egnet trykregulator på
indgangsrøret i overensstemmelse med de
gældende nationale regler for kanaliserede
gasregulatorer.
4
Page 5
Specifikationer for gasblus og dyser
Tabel 1 Flydende gas Naturgas Hygas
Diameter
(mm)
Gasblus
Varmeeffekt kW
(H.s.*)
By-pass
1/100
Dyse
1/100
Kapacitet *
g/t
Dyse
1/100
Kapacitet*
l/t
Dyse
1/100
DK
Kapacitet*
l/t
(mm)
Nomin. Reduc. G30 G31 G20 G110
Hurtigblus
C.
Normalt blus
B.
Hjælpeblus 55 1.00 0.4 30 50 73 71 79 95 145 227
A.
Tredobbelt (flydende gas, bygas)) 130 3.25 1.5 63 91 236 232 285 736
D.
Tredobbelt (naturgas) 130 3.40 1.5 133 324
D.
Forsyningstryk
100 3.00 0.7 40 86 218 214 116 286 260 680
75 1.90 0.4 30 70 138 136 106 181 200 431
Nomin.
Minimum
Maksimal
(mm)
28-30
20
35
37
25
45
(mm)
(mm)
20
17
25
* Ved 15°C og 1013 mbar-tør gas
G31 Øvre brændværdi = 50,37 MJ/kg
G30 Øvre brændværdi = 49,47 MJ/kg
G20 Øvre brændværdi = 37,78 MJ/m
G110 Øvre brændværdi = 15,87 MJ/m
3
3
8
6
15
TABEL MED SPECIFIKATIONER
Ovnens størrelse
HxLxD
Volumen lt. 56
Gasblus
Forsyningsspænd
ing og frekvens
32x43,5x40 cm
Kan tilpasses alle de gastyper,
der er angivet på typeskiltet
se typeskiltet
Direktiv 2002/40/EF på de
elektriske ovnes etikette Standard
ENERGI
MÆRKNING
EN 50304
Energiforbrug forceret
luftcirkulation opvarmningsfunktion Gratin.
EU-direktiver: 2006/95/EØF af
12/12/06 (Lavspænding) og
efterfølgende ændringer 89/336/EØF af 03/05/89
(Elektromagnetisk kompatibilitet)
og efterfølgende ændringer 90/369/EØF af 29/06/90 (Gas) og
efterfølgende ændringer 93/68/EØF af 22/07/93 og
efterfølgende ændringer 2002/96/EF.
5
Page 6
Beskrivelse af apparatet
Hjælpegasblus
DK
Samlet illustration
Hurtiggasblus
Hjælpegasblus
Hjælpegasblus
Rist til arbejdsfladen
Normalt gasblus
Tredobbelt gasblus
Betjeningspanel
Betjeningspanel
Display
Ikon for anbefalet
tilberedningsposition
af GASBLUSSENE på kogefladen
Knapper til betjening
Indikator for
Foropvarmning
STOP
ikon
Indicatore
BLOKERET DØR
MINUTTÆLLER
TERMOSTATKNAP
Ikon for
PROGRAMVÆLGER
Tast ti
FAST CLEAN
Knap til
TIDSINDSTILLING
Ikoner for AUTOMATISKE
PROGRAMMER
Ikon for
AFSLUTNING AF TILBEREDNING
Ikon for
VARIGHED
Tast til
TIDSINDSTILLING
Angivelse af TEMPERATUR
og TIDSINDSTILLINGER
Ikon for
UR
DISPLAY
6
Page 7
Start og brug
Brug af kogefladen
Tænding af gasblussene
Ud for hver knap til GASBLUSSENE er der en cirkel,
der viser det tilsvarende gasblus.
Sådan tændes gasblussene:
1. Sæt en tændstik eller en lighter i nærheden af
blusset.
2. Tryk og drej samtidig knappen til GASBLUS
venstre om på symbolet for maksimal flamme -.
3. Indstil styrken på flammen ved at dreje knappen
til GASBLUS venstre om: På minimum +, på
maksimum - eller på en mellemliggende styrke.
Hvis apparatet er udstyret
med elektronisk tænding* (se
figuren), er det tilstrækkeligt
at trykke og samtidig dreje
knappen til GASBLUS venstre
om på symbolet for maksimal
flamme, indtil blusset tænder.
Det kan ske, at blusset
slukker, når man slipper knappen. Så skal man bare
trykke knappen ned igen og holde den nede i
længere tid.
Hvis flammen ved et uheld går ud, skal man
slukke for blusset og vente mindst 1 minut, inden
man tænder igen.
Hvis apparatet er udstyret med en
sikkerhedsanordning* til slukning ved manglende
flamme, skal man holde knappen til GASBLUS nede
i ca. 2-3 sekunder for at holde flammen tændt og
aktivere anordningen.
For at slukke gasblusset skal man dreje knappen
helt om til stoppet .
Gasblus
Hurtigblus (R) 24 - 26
Normalt blus (S) 16 - 22
Hjælpeblus (A) 10 - 14
Tredobbelt gasblus (TC) 24 - 26
Der henvises til figurerne i afsnittet Specifikationer
for gasblus og dyser for at fastslå hvilken type
gasblus, der anvendes.
Undgå, at pander og gryder rager ud over
komfurets kanter under brug.
På modeller med reduktionsrist må risten kun
anvendes på det mindste gasblus i forbindelse med
tilberedning i gryder eller pander, hvis diameter er
mindre end 12 cm.
ø Diameter på gryder
og pander (cm)
Indstilling af uret
Indstillingerne kan både foretages, når ovnen er
slukket og når den er tændt, men ikke når der er
programmeret et afslutningstidspunkt for
tilberedningen.
1. Tryk gentagne gange på tasten
og de to første cifre på DISPLAYET blinker.
2. Drej knappen til TIDSINDSTILLING mod + og -
for at indstille timetallet.
3. Tryk igen på tasten
næste cifre på DISPLAYET blinker.
4. Drej knappen til TIDSINDSTILLING mod + og -
for at indstille minuttallet.
5. Tryk igen på tasten
indstillingen.
, indtil ikonet og de to
for at bekræfte
, indtil ikonet
DK
Praktiske råd til brug af gasblussene
For en højere ydelse i gasblussene og et lavere
forbrug af gas, skal man bruge pander og gryder
med flad bund og låg, der i størrelsen passer til
blusset.
Findes kun på nogle modeller.
*
Indstilling af minuttælleren
Denne funktion afbryder ikke tilberedningen og
påvirker ikke brugen af ovnen. Den gør det kun
muligt at aktivere et lydsignal, når det indstillede
antal minutter er gået.
1. Tryk gentagne gange på tasten
og de tre første cifre på DISPLAYET blinker.
2. Drej knappen til TIDSINDSTILLING mod + eller
- for at indstille minuttallet.
3. Tryk igen på tasten
indstillingen.
Herefter vises nedtællingen indtil lydsignalet høres.
for at bekræfte
, indtil ikonet
7
Page 8

DK
Brug af ovnen
Inden brug skal man fjerne plastikfilmen på siderne
af apparatet.
Når ovnen tændes første gang, anbefales det at
lade ovnen være i funktion i tom tilstand i mindst en
time med termostaten indstillet på maksimum og
ovndøren lukket. Herefter skal man åbne ovndøren
og udlufte lokalet. Lugten, der opstår, skyldes
fordampning af beskyttelsesmidlerne i ovnen.
1. Vælg det ønskede tilberedningsprogram ved at
dreje på PROGRAMKNAPPEN.
2. Ovnen påbegynder opvarmningen, når indikatoren
for opvarmning tænder.
Temperaturen kan ændres ved at dreje på
TERMOSTATKNAPPEN.
3. Når opvarmningslampen
høres et lydsignal, er opvarmningen fuldført. Tag
grydehandsker på.
4. DISPLAYET viser ikonet
bradepanden skal placeres.
5. Under tilberedningen er det altid muligt at:
- ændre programmet ved at dreje på
PROGRAMKNAPPEN,
- ændre temperaturen ved hjælp af
TERMOSTATKNAPPEN,
- indstille varighed og afslutningstidspunkt for
tilberedningen (se tilberedningsprogrammer),
- afbryde tilberedningen ved at dreje
PROGRAMKNAPPEN over på position 0.
6. Ovnen slukker automatisk efter to timer. Denne tid
er indstillet af sikkerhedsmæssige årsager for alle
tilberedningsprogrammer.
Det er muligt at ændre tilberedningstiden (se
tilberedningsprogrammer).
7. I tilfælde af strømafbrydelse, og hvis ovnens
temperatur ikke er faldet for meget, er ovnen
udstyret med et system til genoptagelse af
programmet fra det punkt, hvor det blev afbrudt.
Hvis der er indstillet til forsinket start, gemmes
indstillingen dog ikke, og man skal foretage
indstillingen igen, når strømmen vender tilbage.
Der udføres ingen forvarmning i programmet
BARBECUE.
slukker og der
, der anbefaler hvor
Afkølingsventilation
For at reducere den udvendige temperatur skaber
afkølingsblæseren en luftstrøm, der ledes ud mellem
betjeningspanelet og ovndøren. I starten af programmet
FAST CLEAN tænder blæseren på lav hastighed.
Ved afsluttet tilberedning fortsætter blæseren med at
være tændt, indtil ovnen er passende afkølet.
Ovnlys
Selvom ovnen er slukket, kan man til enhver tid tænde for
lyset ved at åbne ovndøren.
Manuelle tilberedningsprogrammer
Alle programmer har en forudindstillet
tilberedningstemperatur. Den kan indstilles manuelt til
mellem 40° C og 250° C.
I programmet BARBECUE er den forudindstillede
værdi en effekt angivet i %. Den kan også indstilles
manuelt.
Programmet VARMLUFT
Varmeelementerne tændes, og blæseren starter. Da
varmen er konstant og jævn i hele ovnen, tilbereder og
steger luften maden jævnt overalt. Der kan maks.
anvendes to plader samtidig.
Programmet BARBECUE
Det øverste varmeelement tændes.. Ved at dreje på
TERMOSTATKNAPPEN viser DISPLAYET de
effektniveauer, der kan indstilles, som går fra 5 % til
100 %. Det anbefales at anvende grillfunktionen med en
højere og mere direkte temperatur til madvarer, der kræver
en høj overfladetemperatur. Udfør tilberedningen med
ovndøren lukket.
Programmet GRATIN
Det øverste varmeelement tænder, og under
opvarmningen tændes også det runde
varmeelement. Blæseren starter. Denne funktion
forener den ensrettede varmeudsendelse med
forceret luftcirkulation i ovnen.
Dette forhindrer forbrænding af overfladen på
maden, således at varmeindtrængningen bliver
større. Udfør tilberedningen med ovndøren lukket.
Undgå at placere genstande i bunden af ovnen, da
det kan beskadige ovnens lakering.
Placér altid beholderne på den medfølgende rist.
8
Page 9
Programmerne LAV TEMPERATUR
Denne type tilberedning er velegnet til hævning og
optøning af madvarer samt til tilberedning af
yoghurt, til hurtig eller langsom opvarmning og
langsom tilberedning ved lave temperaturer. Der kan
vælges mellem følgende temperaturer: 40, 65, 90 °C.
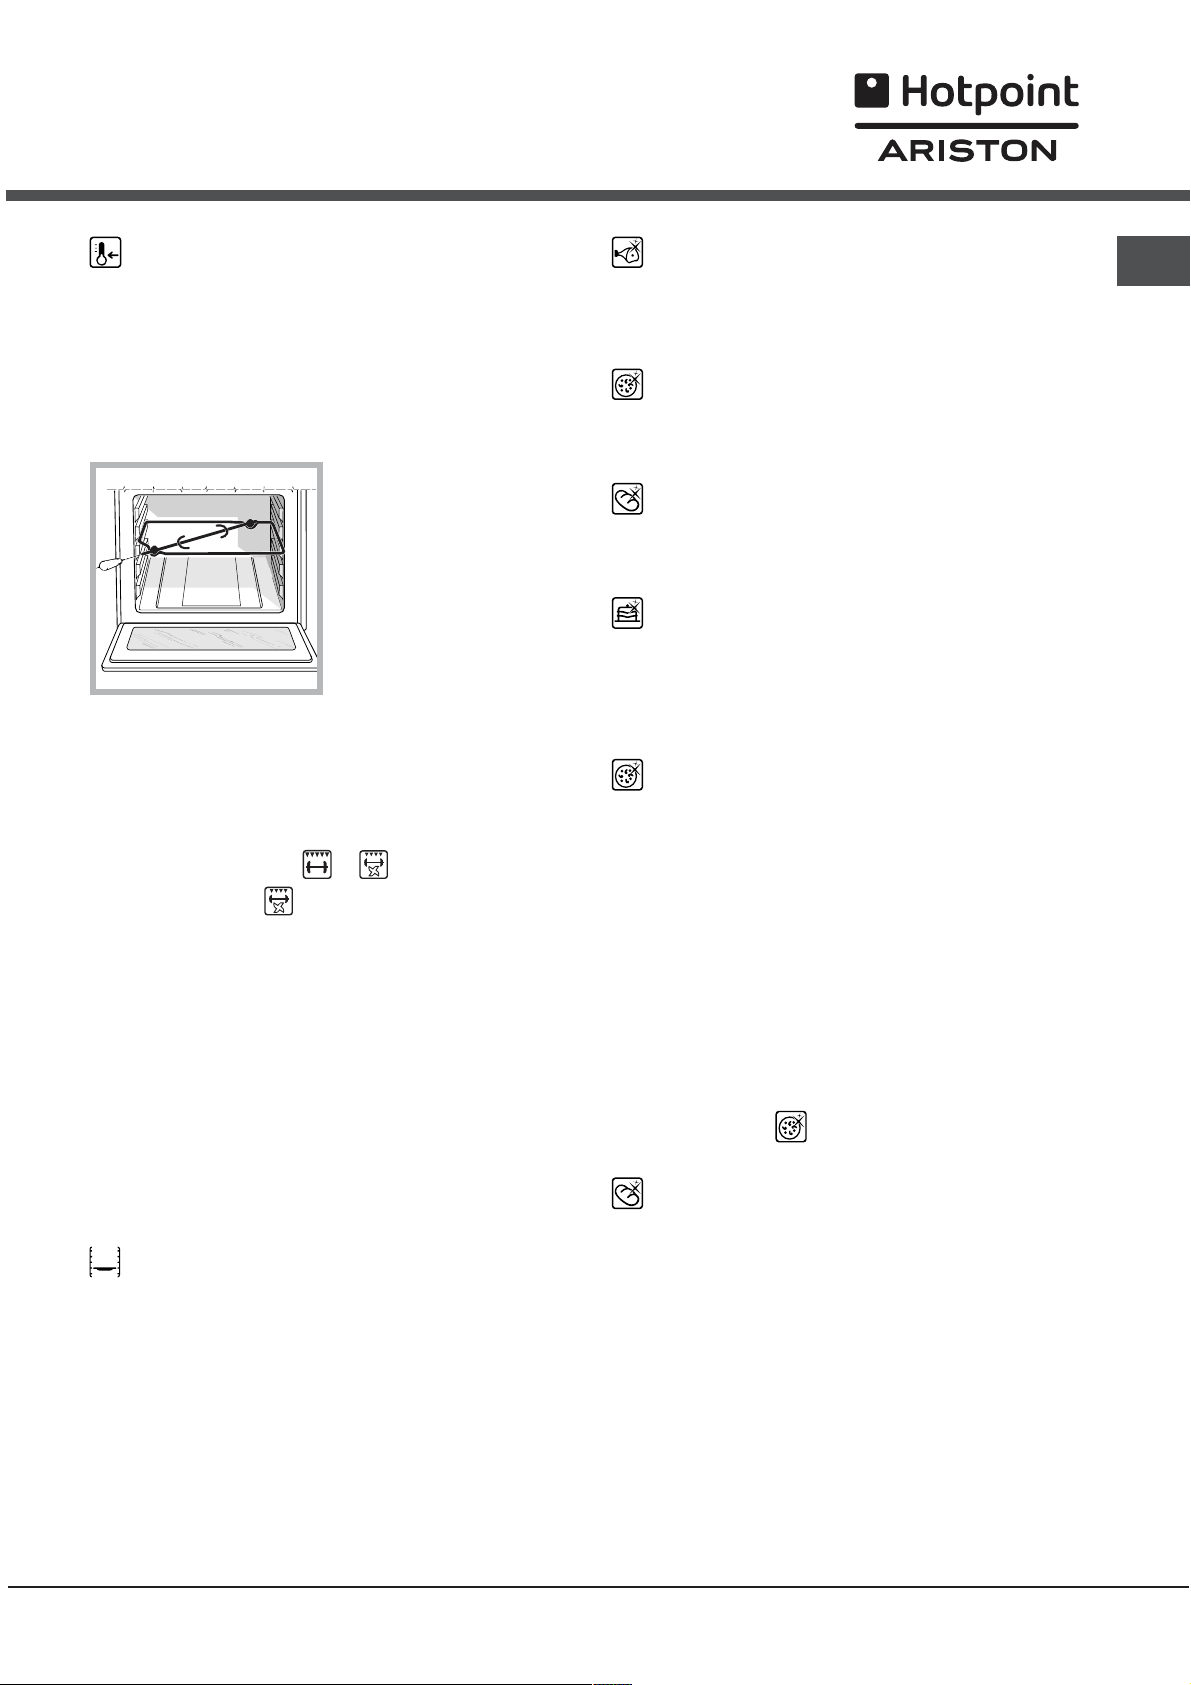
Drejeindretning (kun på nogle modeller)
Benyt følgende
fremgangsmåde (se
figuren) for at starte
drejeindretningen:
Programmet KØD
Brug denne funktion til tilberedning af kalvekød,
svinekød og lammekød. Sæt maden i en kold ovn
Maden kan også sættes i en varm ovn.
Programmet PIZZA
Brug denne funktion til tilberedning af pizza. Se næste
afsnit for oplysninger om opskrifter.
Programmet BRØD
Brug denne funktion til bagning af brød. Se næste afsnit
for oplysninger om opskrifter.
Programmet BAGVÆRK
Denne funktion er ideel til tilberedning af bagværk
med enten gær eller med bagepulver og uden gær.
Maden sættes i en kold ovn. Maden kan også
sættes i en varm ovn.
DK
1. Placér bradepanden i rille 1.
2. Placér grillspydets holder i rille 3, og indsæt
spiddet i hullet bagest i ovnen.
3. Drejeindretningen startes ved at indstille
PROGRAMKNAPPEN
Hvis programmet
standser grillspydet.
o .
er tændt og døren åbnes,
Automatiske tilberedningsprogrammer
Temperatur og tilberedningsvarighed er
forudindstillet , og kan ikke ændres, ved hjælp af
systemet C.O.P.® (Programmeret optimal
tilberedning), som automatisk sikrer et perfekt
resultat. Tilberedningen afbrydes automatisk, og
ovnen udsender et signal, når maden er klar.
Tilberedningen kan startes ved kold eller varm ovn.
For placering af bradepanden henvises til ikonet
.
Når ovnens tilberedningsfase er nået, udsendes et
lydsignal.
Undgå at åbne ovndøren, så tilberedningstiden og
temperaturen ikke ændres.
Programmet PIZZA
For at opnå de bedste resultater anbefales det at følge
anvisningerne nøje:
Følg opskriften.
Dejen skal veje mellem 500 og 700 g.
Smør bradepanden let.
Opskrift til PIZZA:
1 bradepande, laveste rille, kold eller varm ovn
Opskrift til 3 pizzaer af ca. 550 g. 1000 g mel, 500 g vand,
20 g salt, 20 g sukker, 10 cl olivenolie, 20 g frisk gær (eller
2 poser tørgær).
Lad dejen hæve ved stuetemperatur i 1 time.
Sæt pizzaerne i en kold ovn eller varm ovn.
Start funktionen
Programmet BRØD
For at opnå de bedste resultater anbefales det at følge
anvisningerne nøje:
Følg opskriften.
Maks. vægt pr. bradepande.
Glem ikke at hælde 1 dl koldt vand i
bradepanden i rille 5;
Dejen skal hæve ved stuetemperatur i 1 time eller
1 ½ time alt efter temperaturen i rummet, eller
indtil dejen er hævet til dobbelt størrelse.
PIZZA
9
Page 10
DK
Opskrift til BRØD:
1 bradepande med maks. 1000 g, laveste rille.
2 bradepander med maks. 1000 g, laveste og mellemste
rille.
Opskrift på 1000 g dej: 600 g mel, 360g vand, 11g salt,
25 g frisk gær (eller 2 poser tørgær).
Fremgangsmåde:
Bland mel og salt sammen i en stor skål.
Opløs gæret i lunkent vand (ca. 35 grader).
Spred melet ud til siderne.
Hæld blandingen af vand og gær i.
Ælt dejen til en ensartet og ikke klæbrig masse
ved brug af håndfladerne, mens den foldes
sammen i 10 minutter.
Form en kugle og læg dejen i en skål og tildæk
den med gennemsigtig film, så dejen ikke tørrer
ud. Stil skålen i ovnen på LAV TEMPERATUR 40°
C og lad den hæve i ca. 1 time (dejen skal hæve
til dobbelt størrelse)
Del kuglen i flere brød.
Læg dem på bradepanden på bagepapir i ovnen.
Strø lidt mel over brødene.
Lav ridser i brødenes overflade.
Hæld 1 dl koldt vand i bunden af ovnen. Til rengøring
anbefales brug af vand og eddike.
Sæt maden i en kold ovn
Start funktionen
Når brødene er bagt færdig lægges de på en rist til
afkøling.
BRØD
Programmering af tilberedning
Programmering af afslutningstidspunkt for
tilberedningen
Programmering af afslutningstidspunktet for
tilberedningen kan kun udføres, efter at man har
indstillet varigheden.
1. Benyt samme fremgangsmåde som beskrevet
under punkt 1 til 3 for varigheden.
2. Tryk derefter gentagne gange på tasten
ikonet
blinker.
3. Drej knappen til TIDSINDSTILLING mod + eller
- for at indstille timetallet.
4. Tryk igen på tasten
næste cifre på DISPLAYET blinker.
5. Drej knappen til TIDSINDSTILLING mod + og -
for at indstille minuttallet.
6. Tryk igen på tasten
indstillingen.
7. Når tiden er gået, vises meddelelsen END på
DISPLAYET, ovnen afslutter tilberedningen og der
udsendes et lydsignal.
Eksempel: Klokken er 9:00, og der programmeres
en tilberedningstid på 1 time og 15 minutter.
Afslutningstidspunktet indstilles til klokken 12:30.
Programmet starter automatisk kl. 11:15:00.
De tændte ikoner
en programmering. På DISPLAYET vises hhv.
afslutningstidspunkt og varighed for tilberedningen.
For at annullere programmeringen, skal man dreje
PROGRAMKNAPPEN over i position 0.
og de to første cifre på DISPLAYET
, indtil ikonet og de to
for at bekræfte
og viser, at der er foretaget
, indtil
Det er kun muligt at programmere tilberedningen,
efter man har valgt et tilberedningsprogram.
Programmering af tilberedningsvarighed
1. Tryk gentagne gange på tasten
og de tre første cifre på DISPLAYET blinker.
2. Drej knappen til TIDSINDSTILLING mod + eller
- for at indstille den ønskede varighed.
3. Tryk igen på tasten
indstillingen.
4. Når tiden er gået, vises meddelelsen END på
DISPLAYET, ovnen afslutter tilberedningen og der
udsendes et lydsignal.
Eksempel: Klokken er 9:00, og der programmeres
en tilberedningstid på 1 time og 15 minutter.
Programmet standser automatisk kl. 10:15.
for at bekræfte
, indtil ikonet
Praktiske råd til tilberedning
Ved tilberedning med varmluft skal man undgå at
anvende rillerne 1 og 5. De rammes direkte af den
varme luft, hvilket kan medføre at ømtålelige
madvarer brændes.
Ved brug af programmerne BARBECUE og
GRATIN, især hvis drejeindretningen anvendes, skal
man placere en bradepande i rille 1 til opsamling af
madrester (sovs og/eller fedt).
VARMLUFT
Brug rillerne 2 og 4, og placér de madvarer, der
kræver størst varme i rille 2.
Placér bradepanden nederst og risten øverst.
10
Page 11

BARBECUE
Placér risten i rille 3 eller 4, og placér madvarerne
midt på risten.
Det anbefales at indstille energiniveauet på maks.
Bliv ikke bekymret, hvis det øverste
varmeelement ikke bliver ved med at være tændt.
Funktionen styres af en termostat.
Tabel over tilberedning i ovn
PIZZA
DK
Benyt en let aluminiumsbeholder, der skal stilles
på den medfølgende rist.
Hvis der benyttes en bradepande, tager
bagningen længere tid, og det vil være svært at
få en sprød pizza.
Ved pizza med meget tilbehør anbefales det at
tilføje mozzarellaosten midtvejs i tilberedningen.
Placerin g af plader (rille) Programmer Madvarer Vægt (kg)
standard
skinner
Pizza på 2 plader
Tærter på 2 plader/Kager på 2
plader
Sukkerbrødskage på 2 plader (i
bradepande)
Stegt kylling + kartofler
Varmluft*
Barbecue*
Gratin*
Lav temperatur
Pizza
automatisk
Brød
automatisk
Bagværk
automatisk
Kød
automatisk
* Tilberedningstiderne er kun vejledende, og kan variere på grundlag af personlige præferencer. Tiderne for foropvarmning af ovnen er forudindstillet
og kan ikke ændres.
Lammekød
Makrel
Lasagne
Vandbakkelser på 2 plader
Småkager på 2 plader
Saltstænger af butterdej med ost
på 2 plader
Saltede tærter
Makreller
Søtunger og blæksprutter
Reje- og calamarispid
Torskefilet
Grillede grøntsager
Kalvesteak
Pølser
Hamburger
Toast (eller ristet brød)
Kylling på drejespid (hvis det er
monteret)
Lam på drejespid (hvis det er
monteret)
Grill-kylling
Blæksprutte
Kylling på drejespid (hvis det er
monteret)
And på drejespid (hvis det er
monteret)
Kalve- eller oksesteg
Flæskesteg
Lammekød
Optøning
Hævning
Opvarmning af maden
Pasteurisering
Pizza (se opskrift)
Focaccia (brøddej)
Brød (se opskrift) 1 2 2 Nej - 55
Bagværk med dej, der skal hæve 1 2 eller 3 2 Nej - 35-55
Stege 1 2 eller 3 2 Nej - 60-80
1+1
1
1
1
1
0,7
0,7
0,7
0,5
0,8
0,7
4 eller 5
4 eller 6
1
1
1,5
1
1,5
1,5
1
1
1
2 eller 3
1
1
2 og 4
2 og 4
2 og 4
1 og 2/3
1 eller 2
2 og 4
2 og 4
2 og 4
1 og 3
3 eller 4
2 eller 3
2 eller 3
2 eller 3
2
2
4
4
4
4
4
4
4
4
-
-
2
2
-
-
2
2
2
2
2
glideskinner
1 og 3
1 og 3
1 og 3
1 og 3
1
1
1
1 og 3
1 og 3
1 og 3
1 og 3
3
3
3
3
2 eller 3
3
3
3
3
-
-
2
2
-
-
2
2
2
2
2
2
2
2
2
Foropvarmning Anbefalet
Ja
Ja
Ja
Ja
Ja
Ja
Ja
Ja
Ja
Ja
Ja
Nej
Nej
Nej
Nej
Nej
Nej
Nej
Nej
Nej
Nej
Nej
Nej
Nej
Nej
Nej
Nej
Nej
Nej
Nej
Nej
Nej
Nej
Nej
Nej
temperatur
(°C)
220-230
180
170
200-210
190-200
180
190-200
190
190
210
200
100%
100%
100%
100%
100%
100%
100%
100%
100%
100%
100%
210
200
210
210
210
210
210
-
-
-
-
-
-
Tilbered
ningstid
(min.)
20-25
30-35
20-25
65-75
45-50
30-35
35-40
20-25
10-20
20-25
20-30
15-20
10-15
8-10
10-15
15-20
15-20
15-20
10-12
3-5
70-80
70-80
55-60
30-35
70-80
60-70
60-75
70-80
40-45
-
60-90
-
-
23-33
23-33
11
Page 12

Forskrifter og råd
DK
Apparatet er udviklet og konstrueret i
overensstemmelse med internationale
sikkerhedsbestemmelser.
Disse advarsler gives af sikkerhedsmæssige
årsager og skal læses omhyggeligt.
Generelt om sikkerheden
Apparatet er udviklet til ikke professionel brug i
almindelige hjem.
Det må ikke installeres udendørs, heller ikke på et
sted med læ, da det er farligt at lade det stå
udsat under regn og uvejr.
Undgå at røre ved apparatet, hvis du har bare
fødder eller våde eller fugtige hænder eller fødder.
Apparatet må kun anvendes til tilberedning af
mad og af voksne personer i henhold til
anvisningerne beskrevet i dette hæfte.
Dette apparat tilhører klasse 1 (isoleret) eller
klasse 2 underklasse 1 (indsat mellem to
skabe).
Under brug af ovnen bliver varmelegemerne og
nogle steder på ovndøren meget varme. Pas på
ikke at røre ved dem, og hold børn på afstand.
Sørg for at forsyningsledningerne fra andre
husholdningsapparater ikke kommer i kontakt
med apparatets varme dele.
Undgå at blokere for ventilationsåbningerne og
varmeudledningen.
Benyt altid grillhandsker ved indsættelse og
udtagning af varme beholdere.
Anvend ikke antændelige væsker (alkohol,
benzin, etc) i nærheden af apparatet, mens dette
er i brug.
Når apparatet ikke er i brug, skal man kontrollere,
at knapperne er i position
Træk ikke stikket ud af stikkontakten ved at hive i
ledningen, men tag derimod fat om selve stikket.
Afbryd strømforsyningen ved at trække stikket
ud, inden der udføres rengøring eller
vedligeholdelse.
Ved fejlfunktion må man aldrig skille apparatet ad
for at forsøge at reparere de indvendige
mekanismer. Kontakt Servicetjenesten.
Lad ikke tunge genstande hvile på den åbne
ovndør.
.
Apparatet må ikke anvendes af personer
(herunder børn), der ikke er i besiddelse af de
fornødne fysiske, sansemæssige eller mentale
evner, eller af personer, der ikke har kendskab til
produktet, medmindre de overvåges af en
person, der er ansvarlig for deres sikkerhed, eller
medmindre de forinden har fået anvisninger i brug
af apparatet.
Lad ikke børn lege med apparatet.
Bortskaffelse
Bortskaffelse af emballagematerialet. Emballagen
skal bortskaffes i overensstemmelse med lokale
regler, så det kan genbruges.
Det europæiske direktiv 2002/96/EF om affald af
elektrisk og elektronisk udstyr (WEEE) foreskriver,
at husholdningsapparater ikke må bortskaffes
med almindeligt byaffald. Apparaterne skal
indsamles særskilt for at optimere omfanget af
genanvendelse og genbrug af materialerne og for
at forhindre eventuel skade på helbred og miljø.
Affaldssymbolet er påtrykt alle produkter for at
minde om, at de skal indsamles separat.
For yderligere oplysninger om korrekt
bortskaffelse af husholdningsapparater kan man
rette henvendelse til den offentlige renovation eller
til forhandleren.
Energibesparelse og miljøvenlighed
Ved at tænde for ovnen i timerne fra sen
eftermiddag til de tidlige morgentimer bidrager
man til, at belastningen for el-selskaberne
reduceres. Muligheden for at indstille
programmerne, især funktionerne forsinket start
(se afsnittet Programmer) og forsinket automatisk
rengøring (se afsnittet Vedligeholdelse) gør det
muligt at mindske belastningen.
Det anbefales altid at anvende programmerne
BARBECUE og GRATIN med lukket ovndør. Ovnen
skal være lukket for at sikre optimale resultater og
en betydelig energibesparelse (cirka 10 %).
Hold gummilisterne i god stand og rene, så de
slutter helt tæt mod ovndøren og varmen ikke
siver ud.
12
Page 13

Vedligeholdelse
Afbrydelse af strømmen
Inden der udføres rengøring eller vedligeholdelse
skal den elektriske strømforsyning afbrydes.
Rengøring af apparatet
Benyt aldrig rengøringsapparater med damp eller
højtryk til rengøring af apparatet.
De ydre overflader med lakering eller i rustfrit stål
samt gummilisterne skal rengøres med en svamp
opblødt i lunken vand og neutral sæbe. Hvis
pletterne er svære at fjerne, skal man anvende
specialprodukter. Efter rengøring skal man skylle
og tørre omhyggeligt efter. Anvend ikke slibende
midler eller korroderende produkter.
Riste, dæksler, flammefordelerkranse og blus på
kogefladen kan tages af for nemmere rengøring.
Vask delene i varmt vand og med brug af et ikke
slibende rengøringsmiddel, og sørg for at fjerne
alle indtørrede madrester. Vent med at montere
delene, indtil de er helt tørre.
Rengør ofte yderenden af sikkerhedsanordningen*
til slukning ved manglende flamme.
Ovnen skal helst rengøres indvendigt efter hver
brug, mens den stadig er lun. Brug koldt vand og
et rengøringsmiddel og skyl og tør efter med en
blød klud. Undgå brug af slibende midler.
Ovndøren skal rengøres med en svamp og et
ikke-slibende rengøringsmiddel og skal tørres
efter med en blød klud. Undgå brug af ru og
slibende materialer eller metalspartler, som kan
ridse overfladen og medføre, at glasset revner.
Ovnens pakninger skal kontrolleres.
DK
Gummilisterne omkring ovndøren skal kontrolleres
jævnligt. Hvis de er ødelagte, bedes man henvende
sig til det nærmeste servicecenter. Der henstilles til,
at ovnen ikke anvendes før den er blevet repareret.
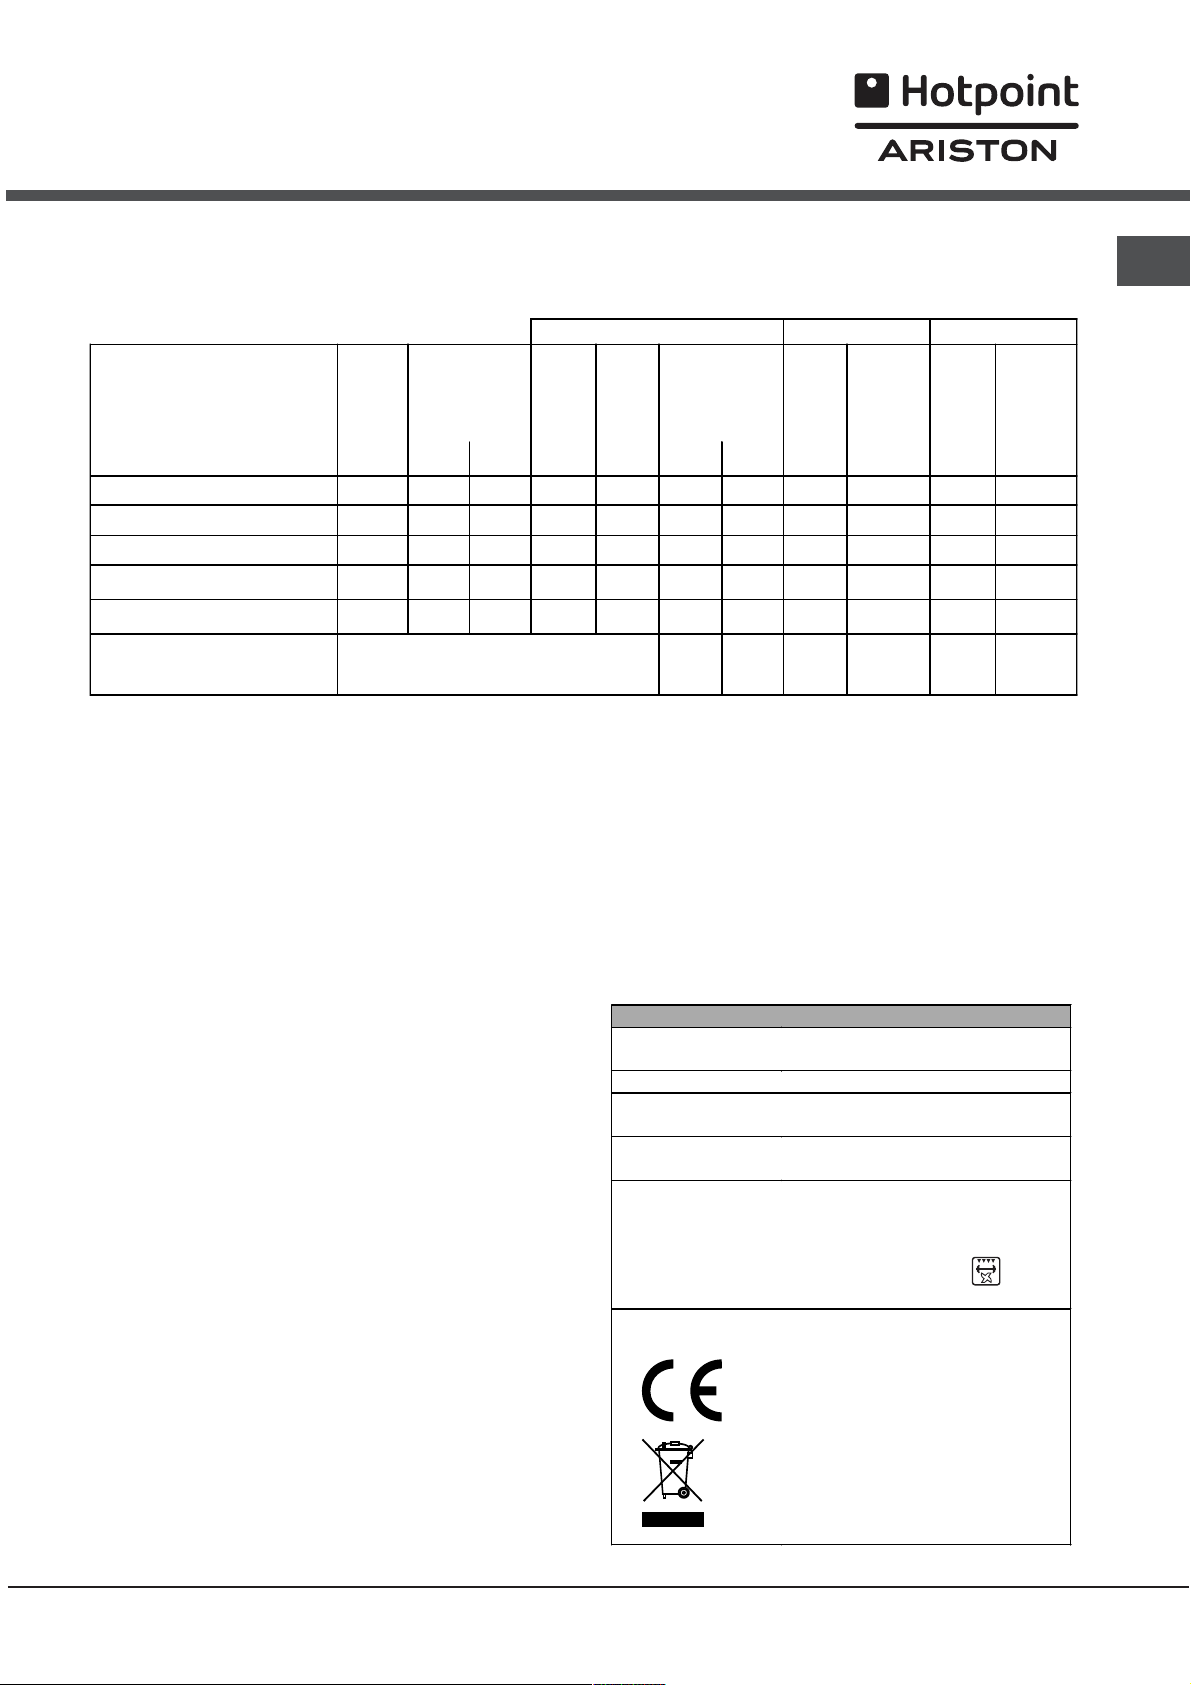
Udskiftning af lyspæren i ovnen.
Sådan udskiftes
lyspæren i ovnen:
1. Fjern glaslåget ved hjælp af en skruetrækker.
2. Tag pæren ud, og udskift den med en af samme
type: Effekt 15 W, fatning E 14.
Sæt glasdækslet på igen, og sørg for, at indsætte
pakningen korrekt (se figuren).
Vedligeholdelse af gashanerne
Efter længere tids brug af apparatet kan det ske, at
en hane i kontrolknapperne blokeres, eller at det er
vanskeligt at dreje den. Såfremt dette sker, er det
nødvendigt at udskifte hanen.
Dette indgreb skal udføres af en autoriseret
tekniker.
Tilbehøret kan vaskes af som alt andet normalt
opvask, også i opvaskemaskinen.
Findes kun på nogle modeller.
*
13
Page 14

DK
Automatisk rengøring FAST CLEAN
Programmet FAST CLEAN bringer temperaturen i
ovnen op på 500° C og igangsætter
pyrolyseprocessen, dvs. forkulningen af
madresterne. Snavset brændes bogstavelig talt af.
Under den automatiske rengøring kan overfladerne
blive meget varme. Hold derfor børn på afstand.
Man kan se partikler, der lyser op, gennem
ovndørens rude. Det drejer sig om intern
forbrænding, noget der er helt normalt, og som ikke
medfører fare.
Inden aktivering af FAST CLEAN:
Fjern de største madrester inden i ovnen med en
fugtig svamp. Brug ikke rengøringsmidler.
Sikkerhedsanordninger
Hvis ikonet
at ovndøren automatisk blokeres, så snart
temperaturen når et vist niveau.
Ikonet
tasten
rengøringscyklus.
I tilfælde af uregelmæssigheder afbrydes
strømforsyningen til varmeelementerne.
Når ovndøren blokeres, er det ikke muligt at
foretage ændringer i indstillingerne for varighed
og afslutning.
, er det muligt at annullere en
på displayet lyser, betyder det,
angiver, at når der trykkes på
Tag alt tilbehør ud.
Efterlad aldrig viskestykker eller grydelapper på
håndtaget.
Drej PROGRAMKNAPPEN på 0.
! Hvis ovnen er for varm, kan det være at pyrolysen
ikke går i gang. Vent på at ovnen køles ned.
! Programmet kan kun startes, når ovndøren er
lukket.
For at starte FAST CLEAN-funktionen, skal man
trykke og holde tasten
Med knappen til TIDSINDSTILLING kan man vælge
det ønskede rengøringsniveau med en forudindstillet
varighed, som ikke kan ændres:
1. Økonomisk (ECO): Drej knappen mod -.
Varighed 1 time.
2. Normal (NOR): Indledende niveau. Varighed 1
time og 30 minutter.
3. Intensiv (INT): Drej knappen mod +. Varighed 2
timer.
4. Tryk på tasten
nede i ca. 4 sekunder.
for at bekræfte.
Programmering af afslutningstidspunktet for
automatisk rengøring
1. Tryk på tasten
cifre på DISPLAYET blinker.
2. Drej knappen til TIDSINDSTILLING mod + eller
- for at indstille timetallet.
3. Tryk igen på tasten
næste cifre på DISPLAYET blinker.
4. Drej knappen til TIDSINDSTILLING mod + og -
for at indstille minuttallet.
5. Tryk igen på tasten
indstillingen.
6. Når tiden er gået, vises meddelelsen END på
DISPLAYET, og der udsendes et lydsignal.
Eksempel: Klokken er 9:00 og der vælges FAST
CLEAN på økonomisk niveau og således en
forudindstillet varighed på 1 time. Funktionen
indstilles til at slutte klokken 12:30. Programmet
starter automatisk kl. 11:30.
De tændte ikonere
en programmering. På DISPLAYET vises hhv.
afslutningstidspunkt og varighed for FAST CLEANfunktionen.
, indtil ikonet og de to første
, indtil ikonet og de to
for at bekræfte
og viser, at der er foretaget
På samme måde som ved normal tilberedning, kan
man også med FAST CLEAN-funktionen
programmere et afslutningstidspunkt for rengøringen
(se Programmering af afslutningstidspunkt for
automatisk rengøring).
14
Efter den automatiske rengøring
Døren kan ikke åbnes før temperaturen i ovnen er
tilpas lav. Herefter kan man se nogle aflejringer af
hvidt pulver i bunden af ovnen og på siderne. De
kan fjernes med en fugtig svamp, når ovnen er kold.
Hvis man derimod ønsker at udnytte varmen til
tilberedning, kan man også lade pulveret være og
fjerne det bagefter. Pulveret er ikke farligt for
madvarerne, der skal tilberedes.
Page 15

Service
Pas på:
Ovnen er udstyret med et fejlfindingssystem, der giver mulighed for automatisk at finde eventuelle
fejlfunktioner. Disse vises på displayet med meddelelser som for eksempel: F efterfulgt af tal.
I sådanne tilfælde skal ovnen efterses af en tekniker.
Ret aldrig henvendelse til ikke-autoriserede teknikere.
Oplys om:
Fejlens art.
Ovnens model (Mod.).
Serienummer (S/N).
Disse sidste oplysninger findes på typeskiltet på apparatet.
DK
15
Page 16

GB
Operating Instructions
DK
Dansk,1
GB
English,16
CP65SFA DK/HA
Contents
Installation, 17-20
Positioning and levelling
Electrical connection
Gas connection
Adapting to different types of gas
Table of burner and nozzle specifications
Table of characteristics
Description of the appliance, 21
Overall view
Control panel
Display
Start-up and use, 22-26
Using the hob
Setting the clock
Setting the timer
Using the oven
Manual cooking modes
Automatic cooking modes
Programming cooking
Practical cooking advice
Oven cooking advice table
COOKER AND OVEN
Precautions and tips, 27
General safety
Disposal
Respecting and conserving the environment
Care and maintenance, 28-29
Switching the appliance off
Cleaning the appliance
Replacing the oven light bulb
Gas tap maintenance
Automatic cleaning using the FAST CLEAN function
Assistance, 30
Page 17

Installation
Before placing your new appliance into operation
please read these operating instructions carefully. It
contains important information concerning the safe
installation and operation of the appliance.
Please keep these operating instructions for future
reference. Make sure that the instructions are kept
with the appliance if it is sold, given away or moved.
The appliance must be installed by a qualified
professional in accordance with the instructions
provided.
Any necessary adjustment or maintenance must be
performed after the cooker has been disconnected
from the electricity supply.
Room ventilation
The appliance may only be installed in permanentlyventilated rooms, according to current national
legislation. The room in which the appliance is
installed must be ventilated adequately in order to
provide as much air as is needed by the normal gas
combustion process (the flow of air must not be lower
than 2 m
3
/h per kW of installed power).
The air inlets, protected by grilles, should have a
duct with an inner cross section of at least 100 cm
2
and should be positioned so that they are not liable
to even partial obstruction (see figure A).
These inlets should be enlarged by 100% - with a
minimum of 200 cm
2
- whenever the surface of the
hob is not equipped with a flame failure safety
device. When the flow of air is provided in an indirect
manner from adjacent rooms (see figure B), provided
that these are not communal parts of a building,
areas with increased fire hazards or bedrooms, the
inlets should be fitted with a ventilation duct leading
outside as described above.
Adjacent room
A
B
Room requiring ventilation
After prolonged use of the appliance, it is
advisable to open a window or increase the speed of
any fans used.
Disposing of combustion fumes
The efficient disposal of combustion fumes should
be guaranteed using a hood which is connected to a
safe and efficient natural suction chimney, or using
an electric fan which begins to operate automatically
every time the appliance is switched on (see figure).
Fumes channelled
straight outside
Fumes channelled through
a chimney or a branched
flue system (
reserved for
cooking appliances)
The liquefied petroleum gases are heavier than air
and collect by the floor, therefore all rooms
containing LPG cylinders must have openings
leading outside so that any leaked gas can escape
easily.
LPG cylinders, therefore, whether partially or
completely full, must not be installed or stored in
rooms or storage areas which are below ground level
(cellars, etc.). Only the cylinder being used should
be stored in the room; this should also be kept well
away from sources of heat (ovens, chimneys,
stoves) which may cause the temperature of the
cylinder to rise above 50°C.
Positioning and levelling
GB
A
Ventilation opening for
comburent air
Increase in the gap
between the door and
the flooring
The appliance may be installed alongside any
cupboards whose height does not exceed that of the
hob surface.
Make sure that the wall in contact with the back of
the appliance is made from a non-flammable, heatresistant material (T 90°C).
To install the appliance correctly:
Place it in the kitchen, the dining room or the
studio flat (not in the bathroom).
If the top of the hob is higher than the cupboards,
the appliance must be installed at least 600 mm
away from them.
17
Page 18

GB
If the cooker is
installed underneath a
wall cabinet, there must
be a minimum distance
of 420 mm between this
cabinet and the top of
700 mm. without hood
min. 650 mm. with hood
the hob.
min.
mm.
420
Min.
HOOD
Min. mm.
600
420
Min. mm.
This distance should be
increased to 700 mm if
the wall cabinets are
flammable (see figure).
Do not position blinds behind the cooker or less
than 200 mm away from its sides.
Any hoods must be installed in accordance with
the instructions listed in the relevant operating
manual.
Levelling
If it is necessary to level the
appliance, screw the
adjustable feet into the places
provided on each corner of the
base of the cooker (see
figure).
Once the appliance has been installed, the power
supply cable and the electrical socket must be
easily accessible.
The cable must not be bent or compressed.
The cable must be checked regularly and replaced
by authorised technicians only.
The manufacturer declines any liability should
these safety measures not be observed.
Gas connection
Connection to the gas network or to the gas cylinder
may be carried out using a flexible rubber or steel
hose, in accordance with current national legislation
and after making sure that the appliance is suited to the
type of gas with which it will be supplied (see the rating
sticker on the cover: if this is not the case see below).
When using liquid gas from a cylinder, install a pressure
regulator which complies with current national
regulations. To make connection easier, the gas
supply may be turned sideways*: reverse the
position of the hose holder with that of the cap and
replace the gasket supplied with the appliance.
Electrical connection
Install a standardised plug corresponding to the
load indicated on the appliance data plate (see
Technical data table).
The appliance must be directly connected to the
mains using an omnipolar switch with a minimum
contact opening of 3 mm installed between the
appliance and the mains. The switch must be
suitable for the charge indicated and must comply
with current electrical regulations (the earthing wire
must not be interrupted by the switch). The supply
cable must be positioned so that it does not come
into contact with temperatures higher than 50°C at
any point.
Before connecting the appliance to the power
supply, make sure that:
The appliance is earthed and the plug is compliant
with the law.
The socket can withstand the maximum power of
the appliance, which is indicated by the data
plate.
The voltage is in the range between the values
indicated on the data plate.
The socket is compatible with the plug of the
appliance. If the socket is incompatible with the
plug, ask an authorised technician to replace it.
Do not use extension cords or multiple sockets.
Make sure that the gas supply pressure is
consistent with the values indicated in the Table of
burner and nozzle specifications (see below). This
will ensure the safe operation and durability of your
appliance while maintaining efficient energy
consumption.
Gas connection using a flexible rubber hose
Make sure that the hose complies with current
national legislation. The internal diameter of the hose
must measure: 8 mm for a liquid gas supply;13 mm
for a methane gas supply.
Once the connection has been performed, make
sure that the hose:
Does not come into contact with any parts which
reach temperatures of over 50°C.
Is not subject to any pulling or twisting forces and
that it is not kinked or bent.
Does not come into contact with blades, sharp
corners or moving parts and that it is not
compressed.
Is easy to inspect along its whole length so that
its condition may be checked.
Is shorter than 1500 mm.
Fits firmly into place at both ends, where it will be
fixed using clamps which comply with current
regulations.
18
Page 19

If one or more of these conditions is not fulfilled or
if the cooker must be installed according to the
conditions listed for class 2 - subclass 1 appliances
(installed between two cupboards), the flexible steel
hose must be used instead (see below).
Connecting a flexible jointless stainless steel
pipe to a threaded attachment
Make sure that the hose and gaskets comply with
current national legislation.
To begin using the hose, remove the hose holder on
the appliance (the gas supply inlet on the appliance
is a cylindrical threaded 1/2 gas male attachment).
Perform the connection in such a way that the hose
length does not exceed a maximum of 2 metres,
making sure that the hose is not compressed and
does not come into contact with moving parts.
Checking the connection for leaks
Adjusting the hob burners minimum setting:
1. Turn the tap to the minimum position.
2. Remove the knob and adjust the regulatory
screw, which is positioned inside or next to the tap
pin, until the flame is small but steady.
If the appliance is connected to a liquid gas
supply, the regulatory screw must be fastened as
tightly as possible.
3. While the burner is alight, quickly change the
position of the knob from minimum to maximum and
vice versa several times, checking that the flame is
not extinguished.
GB
When the installation process is complete, check the
hose fittings for leaks using a soapy solution. Never
use a flame.
Adapting to different types of gas
It is possible to adapt the appliance to a type of gas
other than the default type (this is indicated on the
rating label on the cover).
Adapting the hob
Replacing the nozzles for the hob burners:
1. Remove the hob grids and slide the burners off
their seats.
2. Unscrew the nozzles using a 7 mm socket
spanner (see figure), and replace them with nozzles
suited to the new type of gas (see Burner and nozzle
specifications table).
3. Replace all the components by following the
above instructions in reverse.
The hob burners do not require primary air
adjustment.
After adjusting the appliance so it may be used
with a different type of gas, replace the old rating
label with a new one which corresponds to the new
type of gas (these labels are available from
Authorised Technical Assistance Centres).
Should the gas pressure used be different (or vary
slightly) from the recommended pressure, a suitable
pressure regulator must be fitted to the inlet hose in
accordance with current national regulations relating to
regulators for channelled gas.
19
Page 20

GB
Table of burner and nozzle specifications
Table 1 Liquid gas Natural gas
Flow*
BURNER
Diameter
(mm)
Thermal power
kW (H.s.*)
By-pass
1/100
Injector
1/100
Flow *
g/h
Injector
1/100
l/h
Nomin. Reduc. G30 G31 G20
C.
Rapid
Semi-rapid 75 1.90 0.4 30 70 138 136 106 181
B.
Auxiliary 55 1.00 0.3 27 50 73 71 71 95
A.
Triple Ring (Liquid Gas)
D.
Triple Ring (Natural gas) 130 3.40 1.5 133 324
D.
100 3.00 0.7 40 86 218 214 116 286
130 3.25 1.5 63 91 236 232
(mm)
Nominal
Supply pressure
Minimum
Maximum
(mm)
28-30
20
35
37
25
45
(mm)
* At 15°C and 1013 mbar - dry gas
** Propane P.C.S. = 50.37 MJ/kg
*** Butane P.C.S. = 49.47 MJ/kg
Natural P.C.S. = 37.78 MJ/m
3
TABLE OF CHARACTERISTICS
Oven dimensions
(HxWxD)
Volume lt. 56
Burners
Voltage and
frequency
ENERGY LABEL
32x43.5x40 cm
may be adapted for use with any
type of gas shown on the data
plate
see data plate
Directive 2002/40/EC on the label
of electric ovens. Standard EN
50304
Declared energy consumption for
Forced convection Class
heating mode: Gratin.
EC Directives: 2006/95/EEC dated
12.12.06 (Low Voltage) and
subsequent amendments 89/336/EEC dated 03/05/89
(Electromagnetic Compatibility)
and subsequent amendments 90/369/EEC dated 29/06/90 (Gas)
and subsequent amendments 93/68/EEC dated 22/07/93 and
subsequent amendments 2002/96/EC.
20
17
25
20
Page 21

Description
Bruciatore a gas
ausiliario
of the appliance
Overall view
Rapid gas burner
Bruciatore a gas
Auxiliary
gas burner
ausiliario
Hob grid
GB
Semi-rapid gas burner
Triple ring gas burner
Control panel
Control panel
Display
Hob BURNER
control knobs
Recommended rack
position icon
STOP
icon
THERMOSTAT
Preheating
indicator
DOOR LOCK
indicator
knob
TIMER
icon
SELECTOR
knob
FAST CLEAN
button
TIMER
knob
AUTOMATIC COOKING
MODE icons
END OF COOKING
icon
DURATION
icon
DISPLAY
TIME SETTING
button
TEMPERATURE and
TIME digits
CLOCK
icon
21
Page 22

Start-up and use
GB
Using the hob
Lighting the burners
For each BURNER knob there is a complete ring
showing the strength of the flame for the relevant
burner.
To light one of the burners on the hob:
1. Bring a flame or gas lighter close to the burner.
2. Press the BURNER knob and turn it in an
anticlockwise direction so that it is pointing to the
maximum flame setting -.
3. Adjust the intensity of the flame to the desired
level by turning the BURNER knob in an
anticlockwise direction. This may be the minimum
setting +, the maximum setting - or any position in
between the two.
If the appliance is fitted with
an electronic lighting device*
(see figure), press the
BURNER knob and turn it in
an anticlockwise direction,
towards the minimum flame
setting, until the burner is lit.
The burner might be
extinguished when the knob is released. If this
occurs, repeat the process, holding the knob down
for a longer period of time.
If the flame is accidentally extinguished, switch off
the burner and wait for at least 1 minute before
attempting to relight it.
If the appliance is equipped with a flame failure
safety device*, press and hold the BURNER knob
for approximately 2-3 seconds to keep the flame
alight and to activate the device.
Burner
Rapid (R)
Semi-rapid (S)
Auxiliary (A)
Triple.ring (TC)
To identify the type of burner, please refer to the
diagrams contained in the paragraph entitled
Burner and nozzle specifications.
Make sure the pans do not overlap the edges of
the hob while it is being used.
For models equipped with a reducer grid, the latter
must be used only for the auxiliary burner, when
pans with a diameter of less than 12 cm are used.
ø Cookware Diameter (cm)
24 - 26
16 - 22
10 - 14
24 - 26
Setting the clock
The clock may be set when the oven is switched
off or when it is switched on, provided that a the end
time of a cooking cycle has not been programmed
previously.
1. Press the
icon and the first two numerical digits on the display
start to flash.
2. Turn the TIMER KNOB towards + and - to
adjust the hour value.
3. Press the
digits on the DISPLAY begin to flash.
4. Turn the TIMER KNOB towards + and - to
adjust the minute value.
5. Press the
button several times until the
button again until the other two
button again to confirm.
To switch the burner off, turn the knob until it
reaches the stop position .
Practical advice on using the burners
For the burners to work in the most efficient way
possible and to save on the amount of gas
consumed, it is recommended that only pans which
have a lid and a flat base are used. They should
also be suited to the size of the burner.
Only available in certain models.
*
22
Setting the timer
This function does not interrupt cooking and does
not affect the oven; it is simply used to activate the
buzzer when the set amount of time has elapsed.
1. Press the
and three numerical digits on the display start to
flash.
2. Turn the TIMER KNOB towards + and - to
adjust the minute value.
3. Press the
The display will then show the time as it counts
down. When this period of time has elapsed the
buzzer will be activated.
button several times until the icon
button again to confirm.
Page 23

Using the oven
Before operating the product, remove all plastic
film from the sides of the appliance.
The first time you use your appliance, heat the
empty oven with its door closed at its maximum
temperature for at least half and hour. Ensure that
the room is well ventilated before switching the oven
off and opening the oven door. The appliance may
emit a slightly unpleasant odour caused by
protective substances used during the
manufacturing process burning away.
1. Select the desired cooking mode by turning the
SELECTOR knob.
2. The oven begins its preheating stage and the
preheating indicator lights up.
The temperature may be changed by turning the
THERMOSTAT knob
3. When the preheating indicator
and a buzzer sounds the preheating process is
complete: you may now place the food in the oven.
switches off
Cooling ventilation
GB
In order to cool down the external temperature of the oven,
a cooling fan blows a stream of air between the control
panel and the oven door. At the beginning of the FAST
CLEAN mode, the cooling fan operates at low
speed.
Once the cooking has been completed, the cooling fan
remains on until the oven has cooled down sufficiently.
Oven light
When the oven is not in operation, the lamp can be
switched on at any time by opening the oven door.
Manual cooking modes
All cooking modes have a default cooking
temperature which may be adjusted manually
between 40°C and 250°C as desired.
In the BARBECUE mode, the default power level
value is indicated as a percentage (%) And may
also be adjusted manually.
4. The DISPLAY will show the icon
indicates the recommended shelf level for the tray.
5. During cooking it is always possible to:
- Change the cooking mode by turning the
SELECTOR knob.
- Change the temperature by turning the
THERMOSTAT knob.
- set the cooking duration and the end cooking time
(see Cooking Modes)
- Stop cooking by turning the SELECTOR knob to
the 0 position.
6. The oven switches off automatically after two
hours: this default period of time is set for all
cooking modes for safety reasons.
The cooking time may be modified (see Cooking
Modes).
7. If a blackout occurs while the oven is already in
operation, an automatic system within the appliance
will reactivate the cooking mode from where it was
interrupted as long as the temperature has not
dropped below a certain level. Programmed cooking
modes which have not started will not be restored
and must be reprogrammed.
! There is no preheating stage for the BARBECUE mode.
! Never put objects directly on the bottom of the
oven; this will prevent the enamel coating from being
damaged.
, which
MULTILEVEL mode
All heating elements and the fan are activated. Since
the heat remains constant throughout the oven, the
air cooks and browns food in a uniform manner. A
maximum of two racks may be used at the same
time.
BARBECUE mode
The top heating element is activated. By turning the
THERMOSTAT knob, the different power levels
which may be set will appear on the DISPLAY; these
range between 5% and 100%. The high and direct
temperature of the grill is recommended for food which
requires a high surface temperature. Always cook in this
mode with the oven door closed.
GRATIN mode
The top heating element is activated and the fan
begins to operate. During part of the cycle the
circular heating element is also activated. This
combination of features increases the effectiveness
of the unidirectional thermal radiation provided by
the heating elements through forced circulation of
the air throughout the oven.
This helps prevent food from burning on the surface
and allows the heat to penetrate right into the food.
Always cook in this mode with the oven door closed.
! Always place cookware on the rack(s) provided.
23
Page 24

GB
LOW TEMPERATURE modes
This type of cooking can be used for proving,
defrosting, preparing yoghurt, heating dishes at the
required speed and slow cooking at low
temperatures. The temperature options are: 40, 65,
90 °C.
Spit roast (only available in certain models)
To operate the spit roast
function (see diagram)
proceed as follows:
1. Place the dripping pan in position 1.
2. Place the rotisserie support in position 3 and
insert the spit in the hole provided on the back
panel of the oven.
3. Start the rotisserie using the SELECTOR knob to
select mode
! When
door is opened.
mode is on, the rotisserie will stop if the
or ;
GRILL mode
Use this function to cook beef, pork and lamb. Place
the loaves inside the oven while it is still cold. The
dish may also be placed in a preheated oven.
PIZZA mode
Use this function to make pizza. Please see the
following chapter for the recipe and further details.
BREAD mode
Use this function to make bread. Please see the following
chapter for the recipe and further details.
GRILL mode
This function is ideal for cooking desserts which are
made using natural yeast, baking powder and
desserts which contain no yeast. Place the dish in
the oven while it is still cold. The dish may also be
placed in a preheated oven.
PIZZA mode
To obtain the best results, we recommend that you
carefully observe the instructions below:
Follow the recipe.
The weight of the dough should be between 500 g
and 700 g.
Lightly grease the dripping pan.
Automatic cooking modes
The temperature and cooking duration are preset values, guaranteeing a perfect result every time -
automatically. These values cannot be adjusted and
use the C.O.P.® (Programmed Optimal Cooking)
system. The cooking cycle stops automatically and
the oven indicates when the dish is cooked. You
may start cooking whether the oven has been
preheated or not; we recommend that you follow the
guidelines provided by the
on which shelf to place the tray.
When the cooking stage has been reached, the oven
buzzer sounds.
Do not open the oven door as this will disrupt the
cooking time and temperature.
icon when deciding
Recipe for PIZZA:
1 dripping pan on a low shelf level, hot or cold oven
Recipe for 3 pizzas weighing approximately 550 g: 1000 g
flour, 500 ml water, 20 g salt, 20 g sugar, 100 ml olive oil,
20 g fresh yeast (or 2 sachets of powder yeast)
Leavening at room temperature: 1 hour.
Place inside hot or cold oven.
Start the
BREAD mode
To obtain the best results, we recommend that you
carefully observe the instructions below:
Follow the recipe.
Do not exceed the maximum weight of the
dripping pan.
Remember to pour 100 ml of cold water into the
baking tray in position 5.
The dough must be left to rise at room temperature
for 1 1 ½ hours (depending on the room
temperature) or until the dough has doubled in
size.
PIZZA cooking mode.
24
Page 25

Recipe for BREAD:
1 Dripping pan holding 1000 g Max, lower level
2 Dripping pans each holding 1000 g Max, medium and
lower levels
Recipe for 1000 g of dough: 600 g flour, 360 g water, 11g
salt, 25 g fresh yeast (or 2 sachets of powder yeast)
Method:
Mix flour and salt in a large bowl.
Dilute yeast in lukewarm water (approximately 35
degrees).
Make a small well in the mound of flour.
Pour in water and yeast mixture.
Knead dough by stretching and folding it over
itself with the palm of your hand for 10 minutes
until it has a uniform consistency and is not too
sticky.
Form the dough into a ball shape, place it in a
large bowl and cover it with transparent plastic
wrap to prevent the surface of the dough from
drying out. Select the manual LOW
TEMPERATURE function on the oven and set the
temperature to 40°C. Place the bowl inside and
leave the dough to rise for approximately 1 hour
(the dough should double in volume).
Cut the dough into equal sized loaves.
Place them in the dripping pan on oven paper.
Cover the loaves with flour.
Make incisions on the loaves.
Pour 100 ml of cold distilled water onto the bottom of
the oven. For cleaning purposes, we recommend the
use of water and vinegar.
Place the loaves inside the oven while it is still cold.
Start the
Once baked, leave the loaves on one of the grill racks
until they have cooled completely.
BREAD cooking mode.
Programming cooking
A cooking mode must be selected before
programming can take place.
Programming the cooking duration
1. Press the
icon and the three digits on the DISPLAY begin to
flash.
2. Turn the TIMER KNOB towards + and - to
adjust the duration.
3. Press the
4. When the set time has elapsed, the text END
appears on the DISPLAY, the oven will stop cooking
and a buzzer sounds.
For example: it is 9:00 a.m. and a time of 1 hour
and 15 minutes is programmed. The programme
will stop automatically at 10:15 a.m.
button several times until the
button again to confirm;
Setting the end time for a cooking mode
A cooking duration must be set before the cooking
end time can be scheduled.
1. Follow steps 1 to 3 to set the duration as detailed
above.
2. Next, press the
the two digits on the DISPLAY begin to flash.
3. Turn the TIMER KNOB towards + and - to
adjust the hour value.
4. Press the
digits on the DISPLAY begin to flash.
5. Turn the TIMER KNOB towards + and - to
adjust the minute value.
6. Press the
7. When the set time has elapsed, the text END
appears on the DISPLAY, the oven will stop cooking
and a buzzer sounds.
For example: it is 9:00 a.m. and a time of 1 hour
and 15 minutes is programmed and the end time
is set to 12:30. The programme will start
automatically at 11:15:00 a.m.
Programming has been set when the
buttons are illuminated. The DISPLAY shows the
cooking end time and the cooking duration
alternately.
To cancel programming, turn the SELECTOR knob to
the 0 position.
button until the icon and
button again until the other two
button again to confirm;
and
Practical cooking advice
Do not place racks in position 1 and 5 during fanassisted cooking. This is because excessive direct
heat can burn temperature sensitive foods.
In the BARBECUE and GRATIN cooking modes,
particularly when using the rotisserie, place the
dripping pan in position 1 to collect cooking
residues (fat and/or grease).
MULTILEVEL
Use positions 2 and 4, placing the food which
requires more heat on 2.
Place the dripping pan on the bottom and the rack
on top.
GB
25
Page 26

GB
BARBECUE
Place the rack in position 3 or 4. Position the food
in the centre of the rack.
We recommend that the power level is set to
maximum. The top heating element is regulated
by a thermostat and may not always operate
constantly.
Oven cooking advice table
PIZZA
Use a light aluminium pizza pan. Place it on the
rack provided.
For a crispy crust, do not use the dripping pan as
it prevents the crust from forming by extending
the total cooking time.
If the pizza has a lot of toppings, we recommend
adding the mozzarella cheese on top of the pizza
halfway through the cooking process.
Cooking
modes
standard
Mul t i l evel * Pizza on 2 racks
Ba r becue* Mackerel
Gratin*
Low
temperature
Aut omati c
pi zza
Aut omati c
bread
Aut omati c
baked cakes
Aut omati c
roast
* The cooki ng times listed above are int ended as guidelines only and may be modi f i ed accordi ng to personal tastes. Ove n prehea ti n g times are set as st andard and may not be
modified manuall y.
Pi e s on two r ack s/ cakes on 2 racks
Spon ge cake on 2 racks (on the dr i ppi ng pan)
Roast chick en + potatoes
Lamb
Mackerel
Lasagne
Cr e am puff s on 2 racks
Bi sc ui t s on 2 racks
Che es e puf fs on 2 racks
Sav ou r y pi e s
Sol e and cuttlefish
Squi d and pr awn ke ba bs
Cod fillet
Grilled veget ables
Veal steak
Sausages
Hambu r g e r s
Toast ed sandwiches (or t oast )
Spi t- r oast chicken usi ng rotisserie spi t (where pr ese nt )
Spi t- r oast lamb usi ng rotisserie spit (where present )
Grilled chi cken
Cuttlefish
Spit - r oast chicken usi ng rotisserie spi t (where pr ese nt )
Spi t- r oast duck usi ng roti sserie spit (where present )
Roast veal or beef
Roast pork
Lamb
Def r ost i ng
Pr ov i n g
Di s h heat i ng
Pasteuris ation
Pi z z a (see recipe)
Focacci a (bread dou gh)
Bre ad (see recipe)
Cak e s made using l eavened dough
Roast s
Foods
Weight
(in kg)
1+1
1
1
1
1
0.7
0.7
0.7
0.5
0.8
0.7
4 or 5
4 or 6
1
1
1.5
1
1.5
1.5
1
1
1
2 or 3
1
1
1 2 2 No
1 2 or 3
1 2 or 3
Rack posi ti on
gui de r ails
2 and 4
2 and 4
2 and 4
1 and 2/ 3
2
1 or 2
2
2 and 4
2 and 4
2 and 4
1 and 3
4
4
4
4
3 or 4
4
4
4
4
-
2
2
-
2
2
2
2 or 3
2 or 3
2 or 3
2
2
sli di ng guide
ra ils
1 and 3
1 and 3
1 and 3
1 and 3
1
1
1
1 and 3
1 and 3
1 and 3
1 and 3
3
3
3
3
2 or 3
3
3
3
3
-
-
2
2
-
-
2
2
2
2
2
2
2
2
2
2 No
2 No
Prehea ti ng Recommended
Yes
Yes
Yes
Yes
Yes
Yes
Yes
Yes
Yes
Yes
Yes
No
No
No
No
No
No
No
No
No
No
No
No
No
No
No
No
No
No
No
No
No
No
No
No
temperature
(°C)
220- 230
180
170
200- 210
190- 200
180
190- 200
190
190
210
200
100%
100%
100%
100%
100%
100%
100%
100%
100%
100%
100%
210
200
210
210
210
210
210
-
-
-
-
-
-
- 55
- 35- 55
- 60- 80
Cooki ng dur at i on
(minutes)
20- 25
30- 35
20- 25
65- 75
45- 50
30- 35
35- 40
20- 25
10- 20
20- 25
20- 30
15- 20
10- 15
8- 10
10- 15
15- 20
15- 20
15- 20
10- 12
3-5
70- 80
70- 80
55- 60
30- 35
70- 80
60- 70
60- 75
70- 80
40- 45
-
60- 90
-
23- 33
23- 33
26
Page 27

Precautions and tips
This appliance has been designed and
manufactured in compliance with international safety
standards.
The following warnings are provided for safety
reasons and must be read carefully.
General safety
The appliance was designed for domestic use
inside the home and is not intended for
commercial or industrial use.
The appliance must not be installed outdoors,
even in covered areas. It is extremely dangerous
to leave the appliance exposed to rain and
storms.
Do not touch the appliance with bare feet or with
wet or damp hands and feet.
The appliance must be used by adults only for the
preparation of food, in accordance with the
instructions provided in this booklet.
The instruction booklet accompanies a class 1
(insulated) or class 2 - subclass 1 (recessed
between 2 cupboards) appliance.
Do not touch the heating elements or certain
parts of the oven door when the appliance is in
use; these parts become extremely hot. Keep
children well away from the app
Make sure that the power supply cables of other
electrical appliances do not come into contact
with the hot parts of the oven.
The openings used for the ventilation and
dispersion of heat must never be covered.
Always use oven gloves when placing cookware
in the oven or when removing it.
Do not use flammable liquids (alcohol, petrol,
etc...) near the appliance while it is in use.
Always make sure the knobs are in the position
when the appliance is not in use.
When unplugging the appliance, always pull the
plug from the mains socket; do not pull on the
cable.
Never perform any cleaning or maintenance work
without having disconnected the appliance from
the electricity mains.
If the appliance breaks down, under no
circumstances should you attempt to perform the
repairs yourself. Repairs carried out by
inexperienced persons may cause injury or further
malfunctioning of the appliance. Contact
Assistance.
Do not rest heavy objects on the open oven door.
liance.
The appliance should not be operated by people
(including children) with reduced physical,
sensory or mental capacities, by inexperienced
individuals or by anyone who is not familiar with
the product. These individuals should, at the very
least, be supervised by someone who assumes
responsibility for their safety or receive
preliminary instructions relating to the operation of
the appliance.
Do not let children play with the appliance.
Disposal
When disposing of packaging material: observe
local legislation so that the packaging may be
reused.
The European Directive 2002/96/EC relating to
Waste Electrical and Electronic Equipment
(WEEE) states that household appliances should
not be disposed of using the normal solid urban
waste cycle. Exhausted appliances should be
collected separately in order to optimise the cost
of re-using and recycling the materials inside the
machine, while preventing potential damage to
the atmosphere and to public health. The
crossed-out dustbin is marked on all products to
remind the owner of their obligations regarding
separated waste collection.
For further information relating to the correct
disposal of exhausted household appliances,
owners may contact the public service provided
or their local dealer.
Respecting and conserving the
environment
You can help to reduce the peak load of the
electricity supply network companies by using the
oven in the hours between late afternoon and the
early hours of the morning. The cooking mode
programming options, the delayed cooking
mode (see Cooking modes) and delayed
automatic cleaning mode (see Care and
Maintenance) in particular, enable the user to
organise their time efficiently.
Always keep the oven door closed when using the
BARBECUE and GRATIN modes: this will achieve
improved results while saving energy
(approximately 10%).
Check the door seals regularly and wipe them
clean to ensure they are free of debris so that
they adhere properly to the door, thus avoiding
heat dispersion.
GB
27
Page 28

Care and maintenance
GB
Switching the appliance off
Disconnect your appliance from the electricity
supply before carrying out any work on it.
Cleaning the appliance
Never use steam cleaners or pressure cleaners on
the appliance.
The stainless steel or enamel-coated external
parts and the rubber seals may be cleaned using
a sponge which has been soaked in lukewarm
water and neutral soap. Use specialised products
for the removal of stubborn stains. After cleaning,
rinse well and dry thoroughly. Do not use abrasive
powders or corrosive substances.
The hob grids, burner caps, flame spreader rings
and burners may be removed to make cleaning
easier; wash them in hot water and non-abrasive
detergent, making sure all burnt-on residue is
removed before drying them thoroughly.
Clean the terminal part of the flame failure safety
devices* frequently.
Inspecting the oven seals
Check the door seals around the oven regularly.
If the seals are damaged, please contact your
nearest Authorised After-sales Service Centre.
We recommend that the oven is not used until the
seals have been replaced.
Replacing the oven light bulb
To replace the
cavità
lampadina
guarnizione
coperchio
1. Remove the glass cover using a screwdriver.
2. Unscrew the light bulb and replace it with a
similar one: Wattage 15 W, cap E 14.
Replace the glass cover, making sure the seal is
positioned correctly (see diagram).
oven light bulb:
The inside of the oven should ideally be cleaned
after each use, while it is still lukewarm. Use hot
water and detergent, then rinse well and dry with
a soft cloth. Do not use abrasive products.
Clean the glass part of the oven door using a
sponge and a non-abrasive cleaning product,
then dry thoroughly with a soft cloth. Do not use
rough abrasive material or sharp metal scrapers
as these could scratch the surface and cause the
glass to crack.
The accessories can be washed like everyday
crockery, and are even dishwasher safe.
Gas tap maintenance
Over time, the valves may become jammed or
difficult to turn. If this occurs, the valve must be
replaced.
This procedure must be performed by a
qualified technician who has been authorised by
the manufacturer.
Only available in certain models.
*
28
Page 29

Automatic cleaning using the FAST
CLEAN function
Safety devices
GB
With the FAST CLEAN mode, the internal
temperature of the oven reaches 500°C. The
pyrolytic cycle is activated, burning away food and
grime residues. Dirt is literally incinerated.
Keep children away from the appliance during the
automatic cleaning cycle as surfaces may become
very hot. Particles may ignite inside the oven due to
the combustion process. There is no cause for
concern: this process is both normal and hazardfree.
Before initiating the FAST CLEAN mode:
Remove large or coarse food residues from the
inside of the oven using a damp sponge. Do not
use detergents.
Remove all accessories.
Do not place tea towels or pot holders over the
oven handle.
Turn the SELECTOR knob to the 0 position.
! If the oven is too hot, pyrolysis may not start. Wait
for the oven to cool down.
! The programme may only be started once the oven
door has been closed.
To activate the FAST CLEAN cycle press and hold
the
TIMER KNOB may be used to select the desired
cleaning level; there are three default time settings
which cannot be modified.
1. Economy (ECO): turn the knob towards -.
Duration 1 hour.
2. Normal (NOR): initial level. Duration 1 hour and 30
minutes.
3. Intensive (INT): turn the knob towards +.
Duration 2 hours.
4. Press the
An end time for the FAST CLEAN cycle (as for a
normal cooking cycle) may be programmed (see
Programming the automatic cleaning end time).
button for approximately 4 seconds. The
button to confirm.
The
that the oven door was automatically locked as
soon as the temperature reached a high value.
The
may be cancelled at any time by pressing the
button;
If a malfunction occurs, the heating elements will
be switched off.
Once the oven door has been locked, you cannot
change the duration and cycle end time settings.
Programming the automatic cleaning end time
1. Next, press the
the two digits on the DISPLAY begin to flash.
2. Turn the TIMER KNOB towards + and - to
adjust the hour value.
3. Press the
digits on the DISPLAY begin to flash.
4. Turn the TIMER KNOB towards + and - to
adjust the minute value.
5. Press the
6. When the set time has elapsed, the text END
appears on the display and a buzzer sounds.
For example: it is 9:00 a.m. and the Economy
(ECO) FAST CLEAN level has been selected, with
the default duration of 1 hour. 12:30 is scheduled
as the end time. The programme will start
automatically at 11:30 a.m.
Programming has been set when the
buttons are illuminated. The display shows the FAST
CLEAN end time and duration alternately.
Once the automatic cleaning cycle is over
You will have to wait until the temperature inside the
oven has cooled down sufficiently before you can
open the oven door. You will notice some white dust
deposits on the bottom and the sides of your oven;
remove these deposits with a damp sponge once
the oven has cooled down completely. Alternatively,
you can make use of the already heated oven, in
which case it is not necessary to remove the
deposits, they are completely harmless and will not
affect your food in any way.
icon on the display, when lit, indicates
icon indicates that the cleaning cycle
button until the icon and
button again until the other two
button again to confirm;
and
29
Page 30

Assistance
GB
Warning:
The appliance is fitted with an automatic diagnostic system which detects any malfunctions. Malfunctions are
displayed by messages of the following type: F followed by numbers.
Call for technical assistance should a malfunction occur.
Never use the services of an unauthorised technician.
Please have the following information to hand:
The type of problem encountered.
The appliance model (Mod.).
The serial number (S/N).
The latter two pieces of information can be found on the data plate located on the appliance.
30
Page 31

GB
31
Page 32

GB
02/2008 - 195067825.00
XEROX BUSINESS SERVICES
32
 Loading...