


FULL INSTRUCTIONS FOR INSTALLING AND OPERATING
YOUR HOTPOINT DOUBLE OVEN
MODEL
BD52
BD62

Before you operate your new Hotpoint Double Oven
Please read these instructions fully.
ENSURE THAT THE OVEN IS INSTALLED BY A QUALIFIED ELECTRICIAN FOLLOWING THE INSTRUCTIONS BELOW.
1.Your oven should not be located adjacent to a gas hob/heater or eye level grill as flames from the burners could cause damage to your oven.
2.For your own safety and to get the best results from your oven it is important to read through this Handbook before using your oven for the first time including the Always and Never on pages 8 and 9.
Electrical Requirements
●For your own safety, we recommend that your cooker is installed by a competent person – such as one who is registered with NICEIC (National Inspection Council for Electrical Installation Contracting). The cooker should be installed in accordance with the latest Edition of the IEE Regulations.
WARNINGS – INCORRECT INSTALLATION COULD AFFECT THE
SAFETY OF THE OVEN.
–THIS APPLIANCE MUST BE EARTHED.
–BEFORE CONNECTING OR INSTALLING THE OVEN THE ELECTRICITY SUPPLY MUST BE SWITCHED OFF.
●THE INSTALLER MUST check that the voltage shown on the rating plate corresponds with the house electricity supply.
●The oven must be supplied via a suitable double pole isolating switch, having a contact separation of at least 3 mm in all poles placed in a readily accessible position adjacent to the unit.
●The maximum loading for your oven is 5.3kW.
●If the oven is to be wired into a connector unit this may be positioned behind the oven provided the following requirements are met:
i)The connector unit must not project from the wall more than 25 mm.
ii)The top of the connector must not be more than 350 mm above the base of the oven recess.
●After unpacking the oven stand it on the packing base in order to avoid damage.
Electrical Connections
●Remove the terminal cover at the rear base of the oven. Pass the cable through the cable clamp and connect to the appropriate terminals provided. Allow sufficient cable so that the oven can be set down on the floor whilst still connected up. Tighten the screws on the cable clamp and replace the terminal cover. Make mains connections.
This appliance conforms to EN55014 regarding suppression of Radio and Television reception interference.
Where a double oven is used a 32 amp double pole control switch should be used to feed the unit using a suitable rated cable. We recommend that a minimum of 4mm2 PVC insulated twin and earth cable conforming to B.S. 6004.
●Where a hob is fitted adjacent to an oven then a 45 amp Double Pole control switch should be used to feed both units via separate suitably rated cables. We recommend that a minimum of 4mm2 PVC insulated twin and earth cable conforming to B.S. 6004.
WARNING: CHILDREN SHOULD NOT BE ALLOWED TO PLAY WITH THE APPLIANCE OR TAMPER WITH THE CONTROLS.
2
PLEASE READ THIS BOOKLET CAREFULLY.
Contents |
|
Page |
Before you operate your new Hotpoint Double Oven |
2 |
|
Electrical Requirements |
2 |
|
Installation Instructions |
4-7 |
|
For Your Safety - |
Always |
8 |
|
Never |
9 |
The main parts of your Double Oven |
10 |
|
The cooking systems in your Double Oven |
11 |
|
Before using your Oven for the first time |
12 |
|
Temperature Conversion Scale |
12 |
|
Controls |
|
13-14 |
The Automatic Oven Timer |
15-20 |
|
Grilling |
|
21-22 |
Top Oven - Conventional Cooking |
23 |
|
Top Oven Temperature Charts |
24-25 |
|
Main Oven - Fan Grilling |
26 |
|
Main Oven - Fan Grilling Roasting Chart |
27 |
|
Main Oven - Fan Only |
28 |
|
Main Oven - Conventional and Fan oven |
29 |
|
Main Oven - Fan Oven Cookery Notes |
30-33 |
|
The Slow Cook Setting |
34-35 |
|
Half Grill / Full Grill |
|
36 |
Menus |
|
37-43 |
Care and Cleaning |
|
44-46 |
If Something Goes Wrong |
47-48 |
|
Hotpoint Service Cover |
49 |
|
Key Contacts |
|
Back Cover |
Retention of this Instruction Book
This Instruction Book must be kept handy for reference as it contains important details on the safe and proper use of the appliance.
If you sell or pass the appliance to someone else, or move house and leave it behind, make sure this Book is also provided so the new owner can become familiar with the appliance and safety warnings.
If the Book is lost or damaged a copy may be obtained from General Domestic Appliances Ltd, Morley Way, Peterborough, PE2 9JB.
When first using the cooker ensure that the room is well ventilated (e.g. open a window or use an extractor fan) and that persons who may be sensitive to the odour avoid any fumes. It is suggested that any pets be removed from the room until the smell has ceased. This odour is due to temporary finish on oven liners and elements and also any moisture absorbed by the insulation.
3

Installation Instructions
Ensure that the electricity supply is turned off before installing your appliance.
IMPORTANT
DO NOT LIFT OVEN BY THE DOOR HANDLES.
This equipment is designed specifically for domestic purposes and Hotpoint Limited cannot accept responsibility if used for any other type of application.
All electrical installations must be carried out by a NICEIC registered installer.
WARNING: THIS APPLIANCE
MUST BE EARTHED.
1.General
The appliance is designed for mounting at a safe level into an open housing which must be secured to the backing wall.
2.Oven Unit Housing Cabinets
a.The oven unit housing cabinet dimensions must comply with Fig. 4. (See page 7.)
b.An air gap of 50 mm minimum must be provided at the rear of any top or bottom cupboards or shelves. (See Fig. 1 page
6.)
c.Ventilation must be unobstructed, ie. from adjacent cabinetry. This can be done by either raising the base of the cabinets using the adjusting feet (or spacers) or alternatively by providing a slot in the cabinet plinth to the dimensions shown overleaf.
d.The air gap at the rear allows the warmed air to pass out of the inner cabinet space, but where it is intended to fit
cupboards above the oven unit to ceiling height it is essential that the warmed air is exhausted through the front of the cabinet Fig. 1. (See page 6.)
e.If an oven unit is installed adjacent to a tall cabinet, steam escaping from the oven when the door is opened could condense on, and perhaps stain, the adjacent surface. To prevent permanent staining, the adjacent surface should be made of a material that is heat resistant and easy to clean. Adjacent tall cabinets should not be deeper than the oven housing cabinet.
IMPORTANT
It is essential that the lower cupboard is constructed in the manner illustrated see pages 6 and 7 ie. having side, back and roof panels so joined as to provide no apertures which could permit access to the oven unit when installed .
3.Final Installation
a.Using a spirit level, check that the housing cabinet is level from side to side and from front to back in its installed position.
b.Correct any unevenness by placing wooden packing under the bottom of the cabinet. Make sure that the cabinet rests firmly on the cabinet floor without rocking
c.Before the oven is fitted, the cabinet must be firmly secured to the backing wall for stability.
4
Installation Instructions
d.The oven unit should now be lifted (by 2 adults) into the cabinet and pushed fully home.
e.Finally the oven unit must be secured to the cabinet by means of the four pozi wash head screws, two through each side trim.
f.REMOVE ALL PACKING MATERIAL FROM THE GRILL AND OVEN INTERIOR.
List of Loose Items
4 x Pozi Wash Head No. 6 x 15mm screws.
5

6
Fig. 2
Ventilation Slot here if cabinet doesn't fit to ceiling
|
577mm |
||
Ventilation Slot |
exc |
. |
handle |
|
|
||
here if cabinet fits to ceiling
50mm Air Gap
887mm
Fig. 1
560mm
875mm
50mm Air Gap
Ventilation Slot 51mm x 457mm min. area
597mm
550mm
(cont'd) Instructions Installation
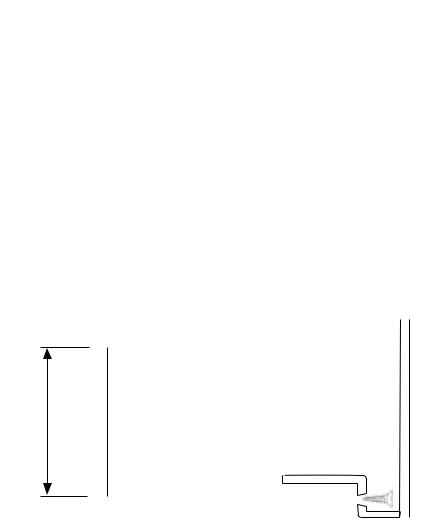
Fig. 4
560mm
560mm |
min |
max |
|
574mm |
|
and |
|
|
|
pipe |
|
|
|
min |
other |
|
|
|
projections |
|
|
excluding |
|
|
|
*550mm |
|
|
|
|
work |
|
|
|
* |
|
|
887mm 878mmif trimisto overlaptop edgeof shelf |
|
Vieweddownthroughcabinet |
Fig.3 |
OvenDoor |
|
|
No.6x15mm screws (4supplied) |
7
For Your Safety, Always ...
Please read through before operating your appliance.
ALWAYS Have your appliance installed by
a competent engineer or electrical contractor.
ALWAYS Ensure the appliance has been properly earthed.
ALWAYS Remove all transportation packing from inside the oven/grill before switching on for the first time.
ALWAYS Make sure you understand the controls prior to using them.
ALWAYS Keep children away from the oven at all times when oven/grilling as surfaces will get extremely hot.
ALWAYS Remember that the oven and utensils will be very hot when in use.
ALWAYS Take care when opening the door. Let the steam and hot air escape before removing the food.
ALWAYS Use dry quality oven gloves for removing hot food utensils from the oven/grill.
ALWAYS Select the correct shelf position before turning the oven or grill on.
ALWAYS Turn off the electricity supply at the wall switch before cleaning.
ALWAYS Ensure poultry is thoroughly defrosted before cooking well.
ALWAYS Check all controls on the appliance are switched off before retiring to bed or after use.
ALWAYS Keep ventilation slots clear of obstructions.
ALWAYS Reset the oven timer to Manual after completing an Automatic Cooking Programme.
ALWAYS Take care on warm days when using the oven for delayed automatic cooking as certain foods can spoil.
ALWAYS Use a thick cloth to protect your fingers when replacing the oven lamp.
ALWAYS Refer servicing to a qualified appliance service engineer.
ALWAYS Follow the guide lines for successful defrosting when using the fan only mode.
8
For Your Safety, Never ...
NEVER Leave children playing unsupervised where the oven is installed and in use.
NEVER Attempt to grill with the grill/oven oven door closed.
NEVER Allow children to sit or stand on any part of the appliance.
NEVER Store food stuffs in the same cabinet as the oven.
NEVER Store items above an oven that children may attempt to reach.
NEVER Operate the oven with the inner glass panel removed.
NEVER Remove the oven shelves when the oven is hot.
NEVER Use water to extinguish oil or fat fires.
NEVER Use the oven/grill as a space heater.
NEVER Cover oven interior and shelves with aluminium foil.
NEVER Heat up unopened food containers as pressure can build up causing the container to burst.
NEVER Attempt to clean the oven until the mains supply has been switched off and the oven is cool.
NEVER Defrost the meat and poultry by warming through in the oven.
NEVER Store any aerosols/ flammable liquids etc. in adjacent cabinetry.
NEVER Store anything which might catch fire in or near the oven.
NEVER Operate the grill when the ovens are set to cook automatically.
NEVER touch any heating elements inside the oven, the appliance becomes hot during use.
NEVER Use steam cleaners.
9

The main parts of your Double Oven
WARNING: DO NOT TOUCH THE GLASS DOORS WHEN THE OVEN IS IN USE AS THESE AREAS CAN BECOME HOT.
Top Oven |
|
Main Oven |
Temperature Control / |
|
Temperature |
Grill Select |
|
Control |
Top Oven |
Timer |
|
|
Main Oven |
|
|
||
Pilot |
|
|
|
Pilot |
|
|
|
|
|
|
|
Dual Grill
Control
Stay clean
Liner
Rod
Shelf
Oven
Light
Oven
Fan
Stay clean
Liner
Rating Plate
Inner Door
Glass
Multifunction
Selector
Grill
Element
Oven Light
Grill Pan /
Food Support
Top Oven
Door
Fan Grill
Element
Oven
Shelves
Main Oven
Door
NEVER line the shelves, floor or sides |
the oven or grill with aluminium foil as overheating |
and |
may result. |
|
|
10
The Cooking Systems in your Double Oven
1
2
3
Your new oven is equipped with three different cooking systems:
1.Conventional Heating (Top Oven) - with upper and lower heat. This system is
particularly suitable for roasting and baking on one shelf only.
2.Grilling (Top Oven) - Has a full width, fully controllable grill. The grill also has an economy setting which enables you to use just the left section.
NOTE: The oven door should be open when grilling.
(See page 21.)
3.Fan Cooking (Lower Oven) - the fan oven operates by constantly blowing heated air
from an element wrapped around the fan into the oven. This gives improved efficiency and, in general, enables the use of lower temperatures for cooking. It also means that there is less need to
be particular about shelf positions and that you can bake at more than one level simultaneously (Batch Baking).
It should be noted that at the end of a cooking period there may be a momentary puff of steam when the oven door is opened. This will disperse in a few seconds and is a perfectly normal characteristic of an oven with a good door seal.
11
Before Using the Oven for the First Time
Make sure the electricity supply is switched ON.
Please note that when the double oven is used for the first time a slight odour may be emitted due to the ‘burning off’ of any temporary finish on oven fittings and elements and the removal of moisture absorbed by the lagging. The odour will cease after a short period of use.
To remove the ‘new smell’, heat up the empty oven for 30 minutes keeping the door closed. Ensure
that the room is well ventilated (eg, open a window or door) and that persons who may be sensitive to the odour avoid any fumes. It is suggested that any pets be removed from the room until the new smell has ceased.
Turn the selector switch to fan oven function, then turn oven thermostat to MAX. Also turn Top Oven/Grill selector to MAX.
The oven temperature thermostat lights will come on as well as the interior light, oven fan, control panel illumination, and cooling fan.
Temperature Conversion Scale
The chart below gives details of comparisons of oven settings for gas conventional ovens and fan oven in degrees ˚F and ˚C
GAS |
CONVENTIONAL |
FAN |
|
MARK |
|
OVEN |
OVEN |
|
|
|
|
|
˚F |
˚C |
˚C |
|
|
|
|
1/2 |
250 |
120 |
100 |
1 |
275 |
140 |
120 |
2 |
300 |
150 |
130 |
3 |
325 |
160 |
140 |
4 |
350 |
180 |
160 |
5 |
375 |
190 |
170 |
6 |
400 |
200 |
180 |
7 |
425 |
220 |
200 |
8 |
450 |
230 |
210 |
9 |
475 |
240 |
220 |
|
|
|
|
12
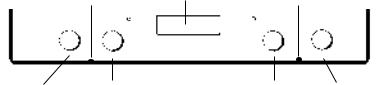
The Controls
Top Oven Pilot |
Timer |
Main Oven Pilot |
|
Dual Grill |
Top Oven |
Main Oven |
Multifunction |
|
Temperature Control / |
Temperature |
|||
Control |
Selector |
|||
Grill Selector |
Control |
|||
|
|
IMPORTANT
Before using your oven in the ordinary way, ALWAYS make sure that the timer has been set to MANUAL operation. Unless this is done, the main oven cannot
heat up. Before seeking assistance, make sure this is done (refer to oven timer operation).
Multifunction Selector
Rotate the control knob in either direction until the required function symbol appears in the control window. Many of the functions will also require the main oven thermostat to be set before the oven will heat up.
Main Oven Temperature Control
This is used in addition to the multifunction selector. This is used for the functions: fan oven, fan grill, half grill and full grill and conventional oven.
Turn the control clockwise to set the oven thermostat to the required temperature.
If the timer is set correctly and the selector switch set to a suitable function an indicator light will illuminate. This will remain on until the oven reaches the required temperature. This light will then cycle on and off as the thermostat maintains control of the oven temperature.
Top Oven Temperature Control
Turn the control clockwise to set the top oven thermostat to the required temperature. An indicator light will illuminate. This will remain on until the oven reaches the required temperature. This light will then cycle on and off as the thermostat maintains control of the oven thermostat.
Grill Control
The grill control is designed to provide variable heat control of either both grill elements on together or the single left-hand grill element only. Turn the top oven control clockwise past the temperature settings to the half grill or full grill settings, depending on which you require. To set the grill power, turn the grill control to any setting 1-6. After use always return the controls to their off position "O".
Cooling Fan
A gentle flow of air will be blown below the control panel when any control is used. In some instances this will continue after switching off. This helps to keep the control panel and knobs cool.
After use Always return the controls to their off ‘O’ position.
13

Multifunction Selector Switch
The Multifunction selector switch is used when operating the main oven. With the exception of the O position the main oven light will remain on when this selector switch is used.
Off
With the selector in this position the main oven will not heat up. The timer will still operate.
Fan Oven
The oven fan and a rear element are controlled when this function is selected.
Use the main oven thermostat control to set the required temperature.
Conventional Oven
Top and base elements are controlled when this function is selected.
Use the main oven thermostat to set the required temperature.
Half Grill
With this function selected only the left hand side of the grill will be on.
Use the oven thermostat control to set the required temperature.
Oven door must be open for grilling.
Full Grill
Both left and right hand grill elements will be on in this position.
Use the oven thermostat control to set the required temperature.
Oven door must be open for grilling.
Fan Grill
The oven fan and fan grill element are controlled when this function is selected.
Use the oven thermostat control to set the required temperature.
Oven door must be closed for fan grilling.
Fan Only
The oven fan will operate when this function is selected.
The oven thermostat control must be set in the off position.
Light Only
This function switches on the oven light only.
14
Oven Timer Operation
The oven timer offers you the following features:
1.Time of Day
2.Automatic Cooking
3.Minute Minder
Automatic Cooking
The main fan oven can be controlled automatically.
Guidance on automatic cooking
1.Select foods which will take the same time to cook.
2.Set the oven timer so that the food has just finished or is just about to finish cooking on your return to the oven. This will ensure the food has not cooled down and does not require reheating before serving.
3.Food should be as cold as possible when it goes into the oven, ideally straight from the refrigerator.
Frozen meat and poultry should be thawed thoroughly before it is put in the oven.
4.We advise that warm food should never be placed in the oven if there is to be a delay period. Stews prepared by frying the meat and vegetables should be cooked as soon as possible.
5.We advise dishes containing leftover cooked poultry or meat, for example Shepherds Pie, should not be cooked automatically if there is to be a delay period.
6.Stews and joints should be cooked by the long slow method, so
that the delay period is kept to a minimum.
7.On warm days, to prevent harmful bacterial growth in certain foods (ie poultry, joints, etc) the delayed start should be kept to a minimum.
8.Wine or beer may ferment and cream may curdle during the delay period, so it is best to add these ingredients just before serving.
9.Foods which discolour should be protected by coating in fat or tossing in water to which lemon juice has been added, prior to placing food in the oven.
10.Dishes containing liquid should not be filled too full to prevent
boiling over.
11.Food should be well sealed (but not airtight) in a container to prevent the loss of liquid during cooking. Aluminium foil gives a good seal.
12.Ensure food is cooked thoroughly before serving.
15
Oven Timer Operation
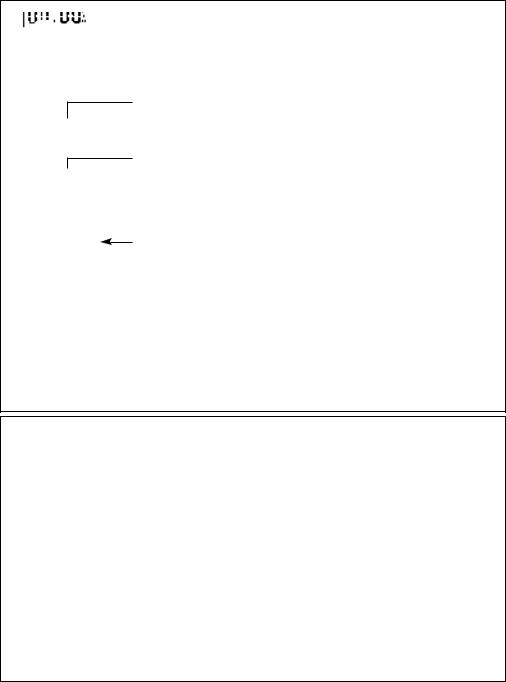
CLOCKFACE
 The timer incorporates a 24 hour clock.
Ensure the correct time of day is always set, before using you cooker. PLEASE NOTE THAT THE DISPLAY WILL DIM BETWEEN 22.00
HOURS AND 06.00 HOURS TO PREVENT GLARE.
However, should you operate the timer during these hours the display will return to normal brightness for a few seconds and then dim again.
SYMBOLS
 will light up when you select a Minute Minder Period and will remain lit for the period set. At the end of the Minute Minder Period, the timer will emit an audible tone for 2 minutes, the
 symbol will start to flash and will continue to flash until the Minute Minder function is cancelled.
 This “Cookpot” symbol will light up either:–
– When you press  the Cook Period Button and set a length of time for an Auto Cooking Programme. (It will go out again a few seconds after you release the timer buttons).
–During the actual Cook Period.
“AUTO” will light up:–
–When the timer is first turned on it will flash. (It will go out when a time of day is set.
–When an Auto Cooking Programme has been set.
The “Auto” symbol will flash at the end of an Auto Cooking programme to indicate that the programme has finished.
(When the “Auto” symbol is flashing, to return the oven to Manual operation, turn the oven controls off, ensure that the correct time of day is set, and press the “Manual” button twice – The “Auto” symbol will go out).
Note: If at any time the display shows a ‘KEY’ symbol, it is likely that the timer has been set incorrectly. OVEN COOKING IS NOT POSSIBLE. The ‘KEY’ symbol can be deleted and the cooker returned to manual operation by:
-Simultaneously pressing the Minute Minder and the Cook Period buttons for a period of approximately 8 seconds.
-Releasing the buttons and pressing the ‘+’ button.
TIMER FUNCTION BUTTONS
Minute Minder Here you can set a time period of up to 23 hours 59 minutes, that will count down. Button When it reaches zero, the timer will emit an audible tone.
For Example: If you set 20 minutes, the audible tone will occur 20 minutes later.
AUTO COOKING PROGRAMME
 Cook Period Button Cook Period is the actual length of time for which, the timer will switch the oven(s) on as part of an “Auto Cooking” programme.
(e.g. If you set 2 hours, the food will be cooked for 2 hours).
 End Time Button The time of day at which you want an “Auto Cooking” programme to end.
For Example: If you set a “Cook Period” for 2 hours, and “End Time” of 11:00. The timer will switch the oven(s) on at 9:00 and turn the oven(s) off at 11:00. You will hear a audible tone at 11:00, to indicate that the Auto Cooking Programme has finished.
Notes:
-When setting an Auto Cooking programme you will need to set the oven controls(s) to the required temperature(s) when you set the timer.
-If an Auto Cooking programme has been set the oven(s) will only operate during the pre-programmed time.
Manual Button Needs to be pressed to cancel an Auto Cooking programme and return the ovens(s) to Manual operation.
“+” and “–” Buttons Used to adjust the various timer function settings.
16
 Loading...