How it Works
Log In / Sign Up
Buy Points
How it Works
FAQ
Contact Us
Questions and Suggestions
Users
Hotpoint
Loading...
A
AV447
AV 52
AV 6
AV 61 SKD
AV 82
AV 82 X
AVD 10
AVD 109
AVD 10 S
AVD 10 X
AVD 12
AVD 129
AVD 12 X
AVD 130 X
AVD 169
AVD 8
AVD 88 S
AVD 8 X
AVF 10
AVF 108 S
AVF 12
AVF 149
AVF 8
AVL 105
AVL 105 A HT
AVL 105 X
AVL 120
AVL 120 X
AVL 125
2
AVL 125 X
AVL 130 X
AVL 135
AVL 140
AVL 140 X
AVL 145
AVL 16
AVL 160
AVL 169
AVL 61
AVL 62
AVL 82
AVL 84
AVL 85
AVL 85 S
AVL 85 X
AVL 89
AVL 95
AVM4160
AVSD 129
AVSF 120
AVSL 105
AVTF 129
AVTF 149
AVTL 104
AVTL 110
AVTL 149
AVTL 60
AVTL 82
AVTL 84
AVTL 89
AVTXF 149
AVTXL 120
AVTXL129
2
AVXD 10
AVXD 109
AVXD 129
2
AVXF 120
AVXF 129
AVXL 105
AVXL 110
AVXL 125
AVXL 14
AVXL 140
AVXL 169
AVXL 82
AVXL 88
AVXXF 129
AVXXL 105
AVXXL109
AW 120
AW 121
AW 122
AW 125 W
AW149NA
AWD 10
AWD 12
2
AWD 120 H.T.
AWD 121
AWD121NA
AWD 129
AWD 12 S
AWM108
AWM 1081 EU
AWM129
AWM 88
AX 100
AX 120
AXD 120
2
AXD 80
B
BC 231 I
Loading...
Loading...
Nothing found
AVSL 105
User Manual
60 pgs
2.88 Mb
0
Table of contents
Loading...
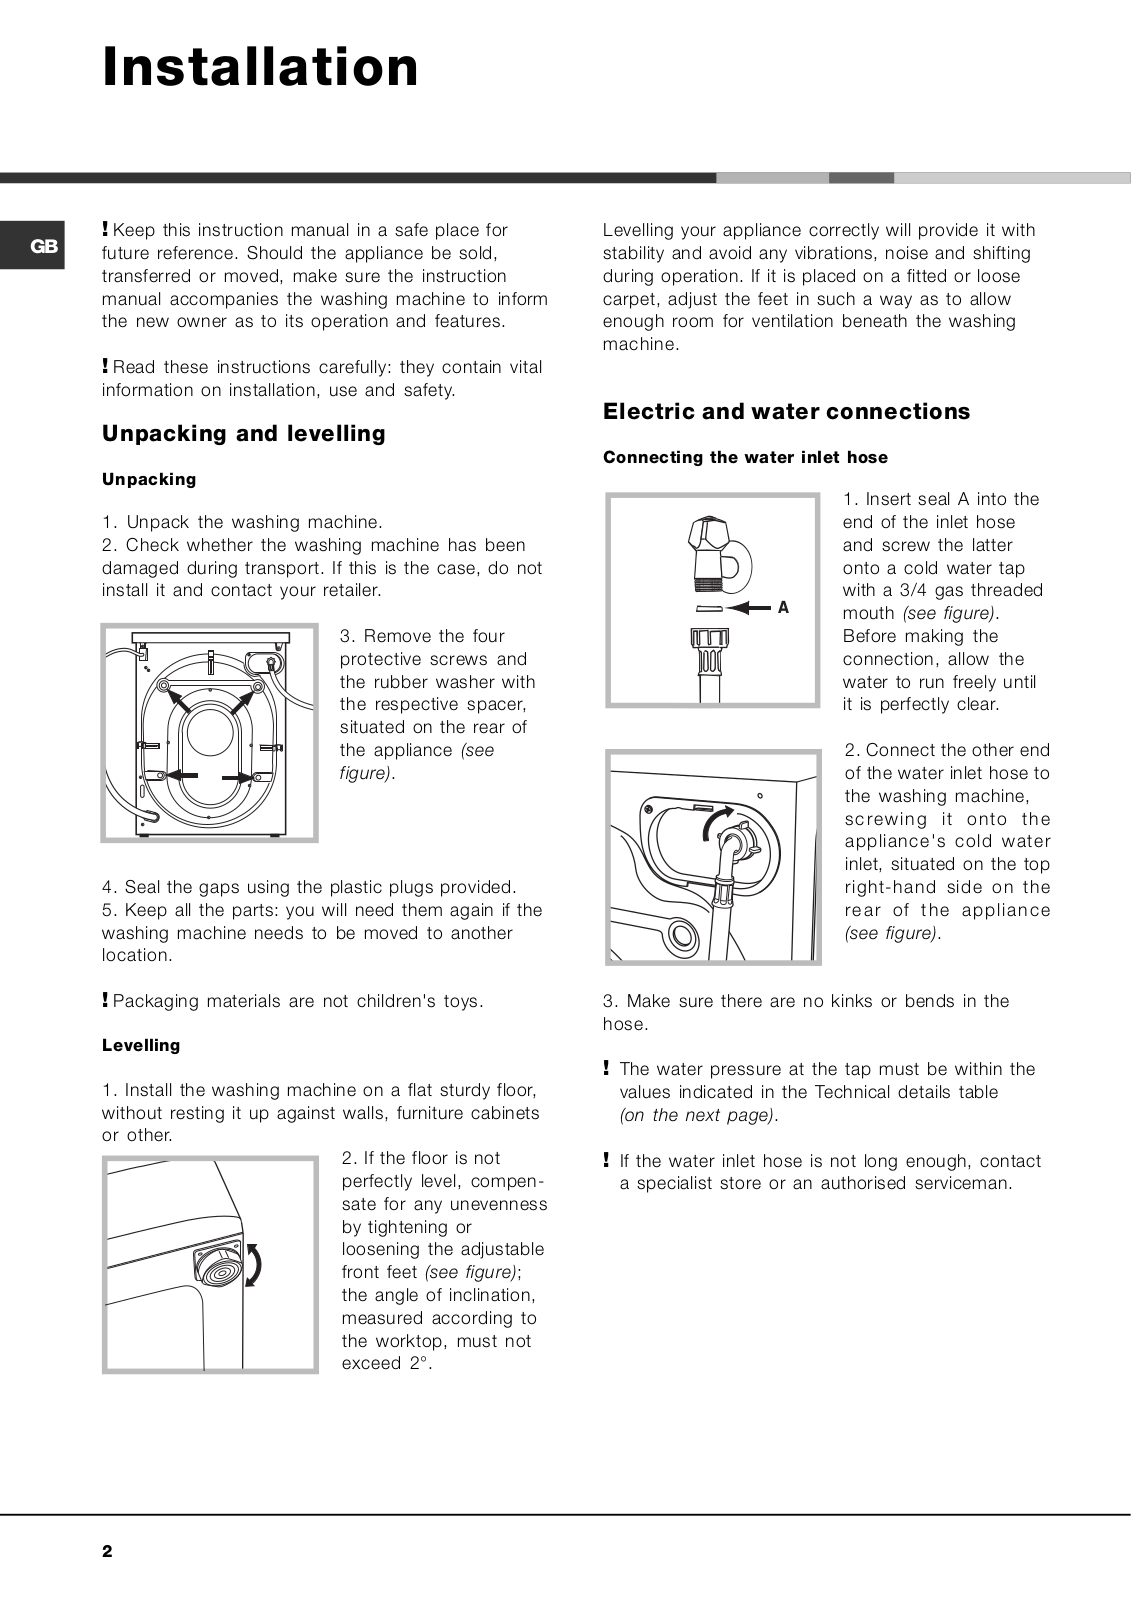
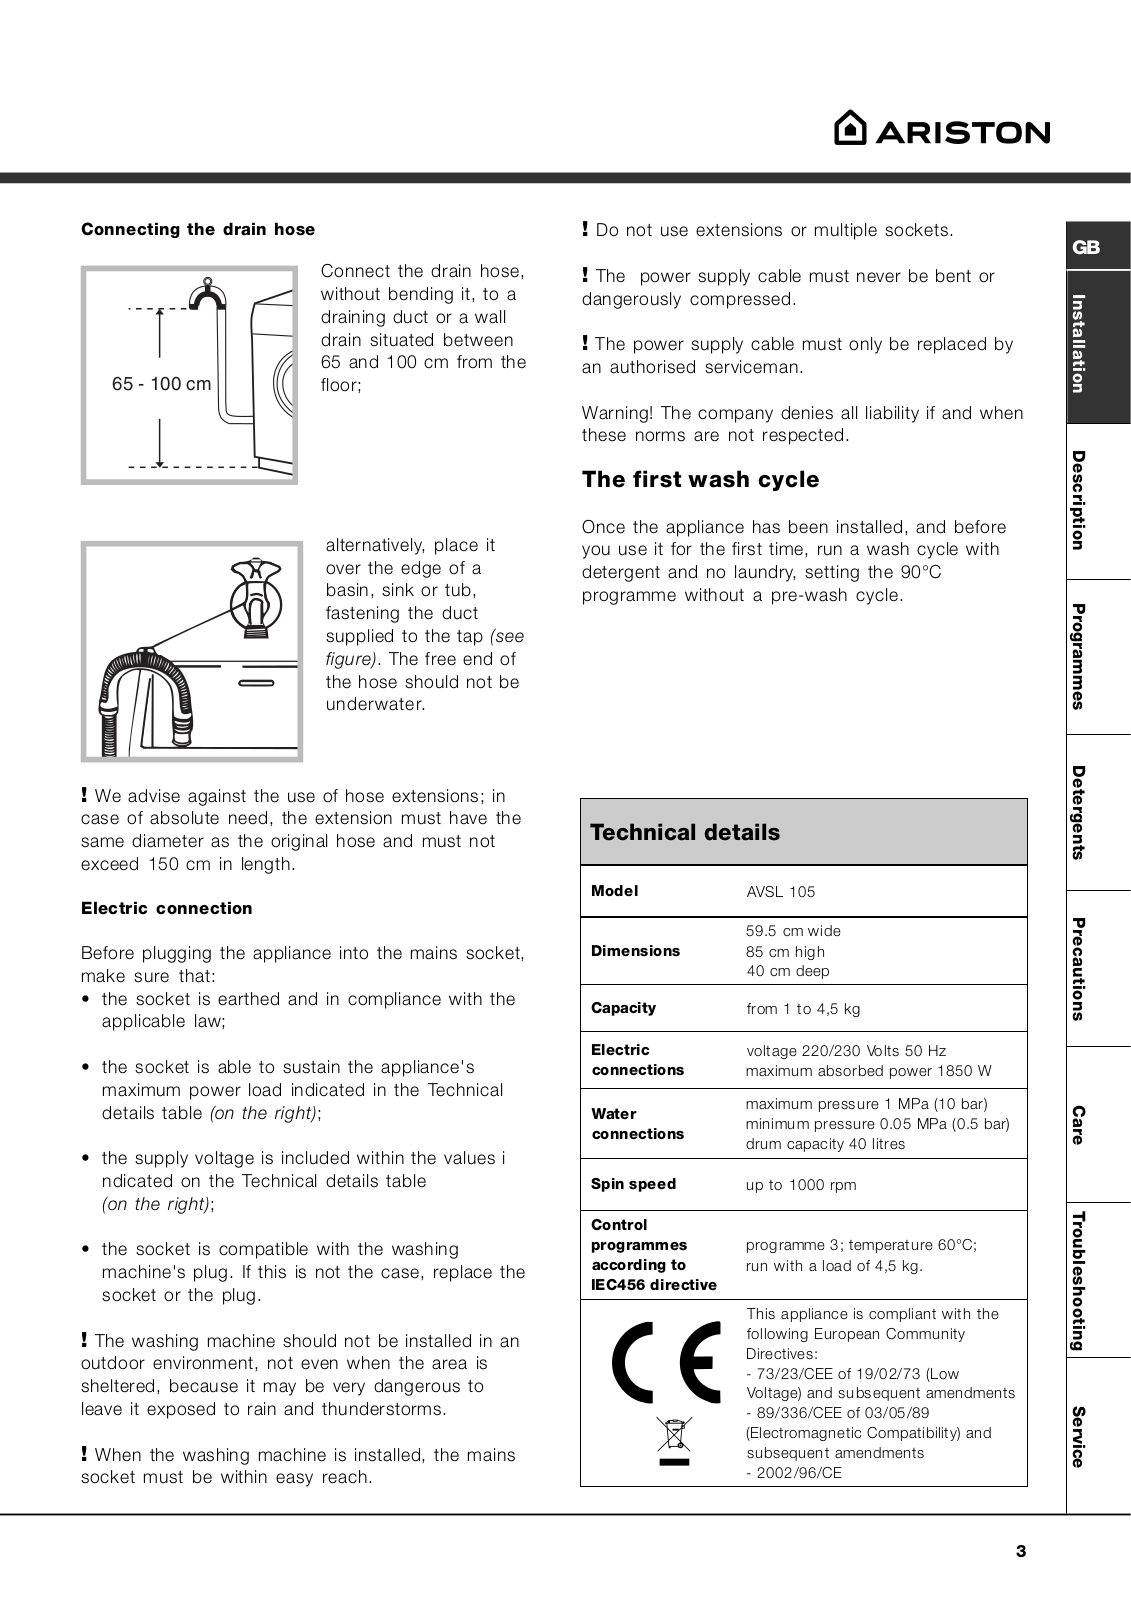
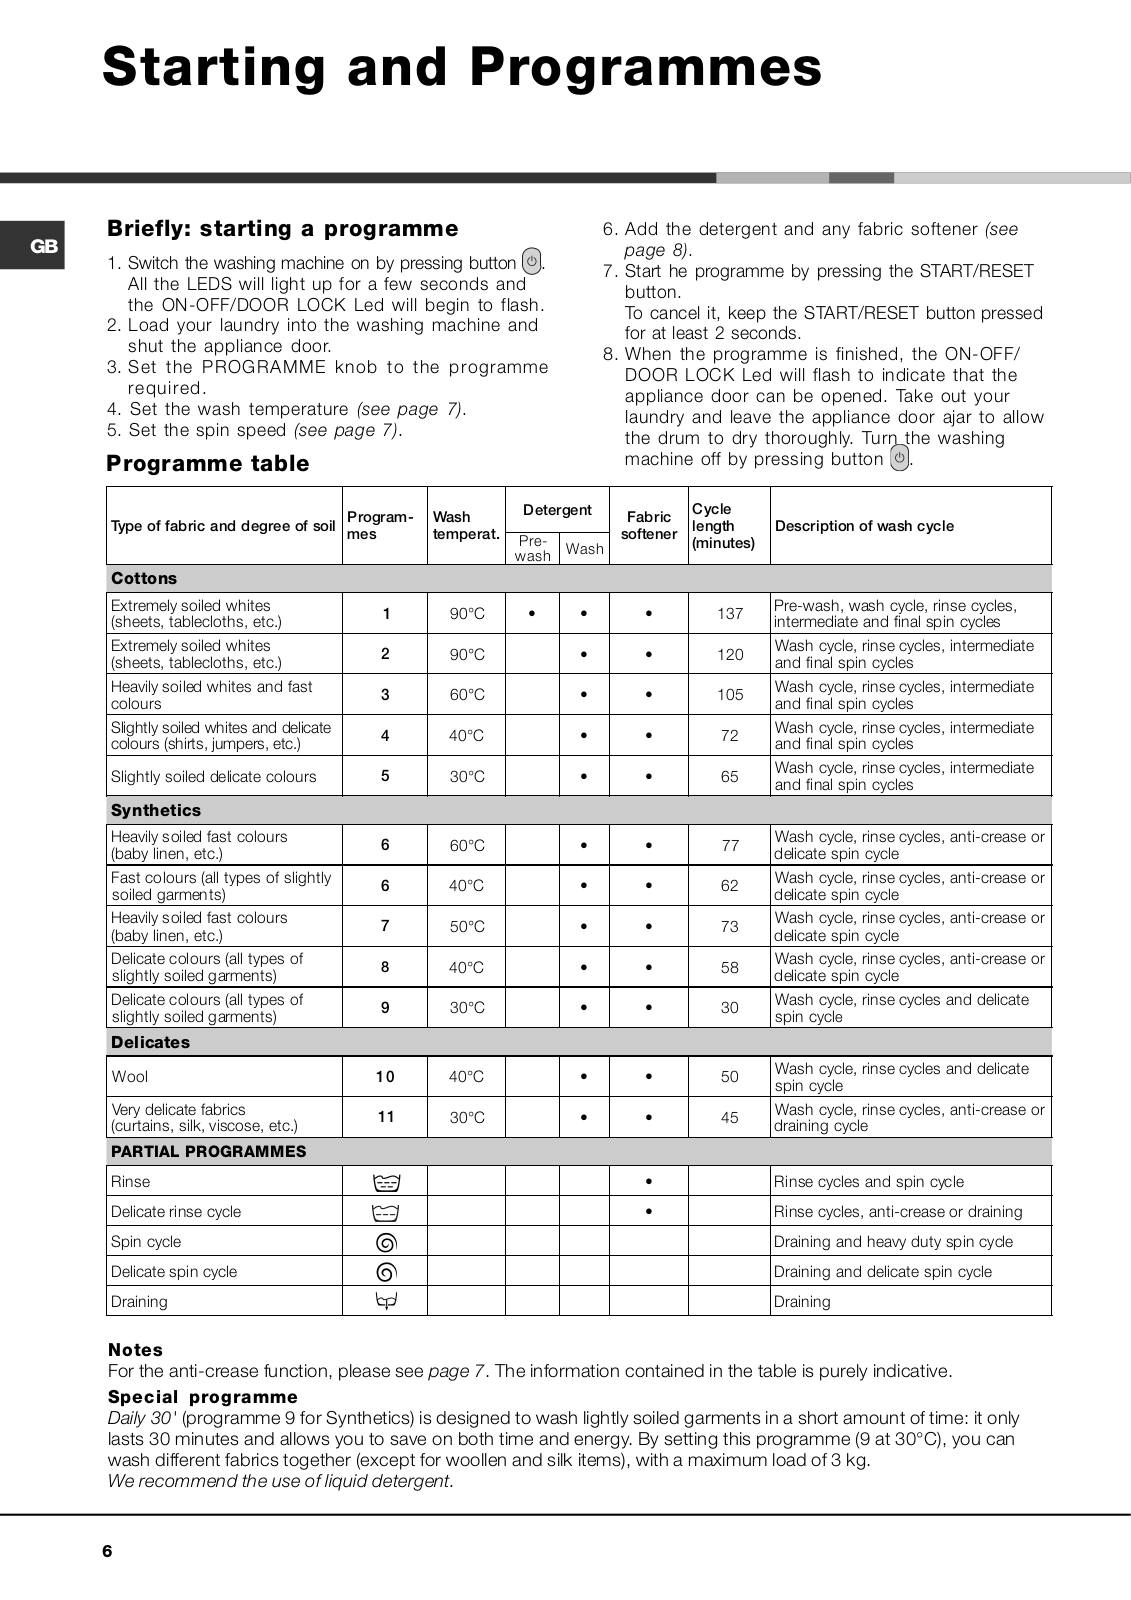
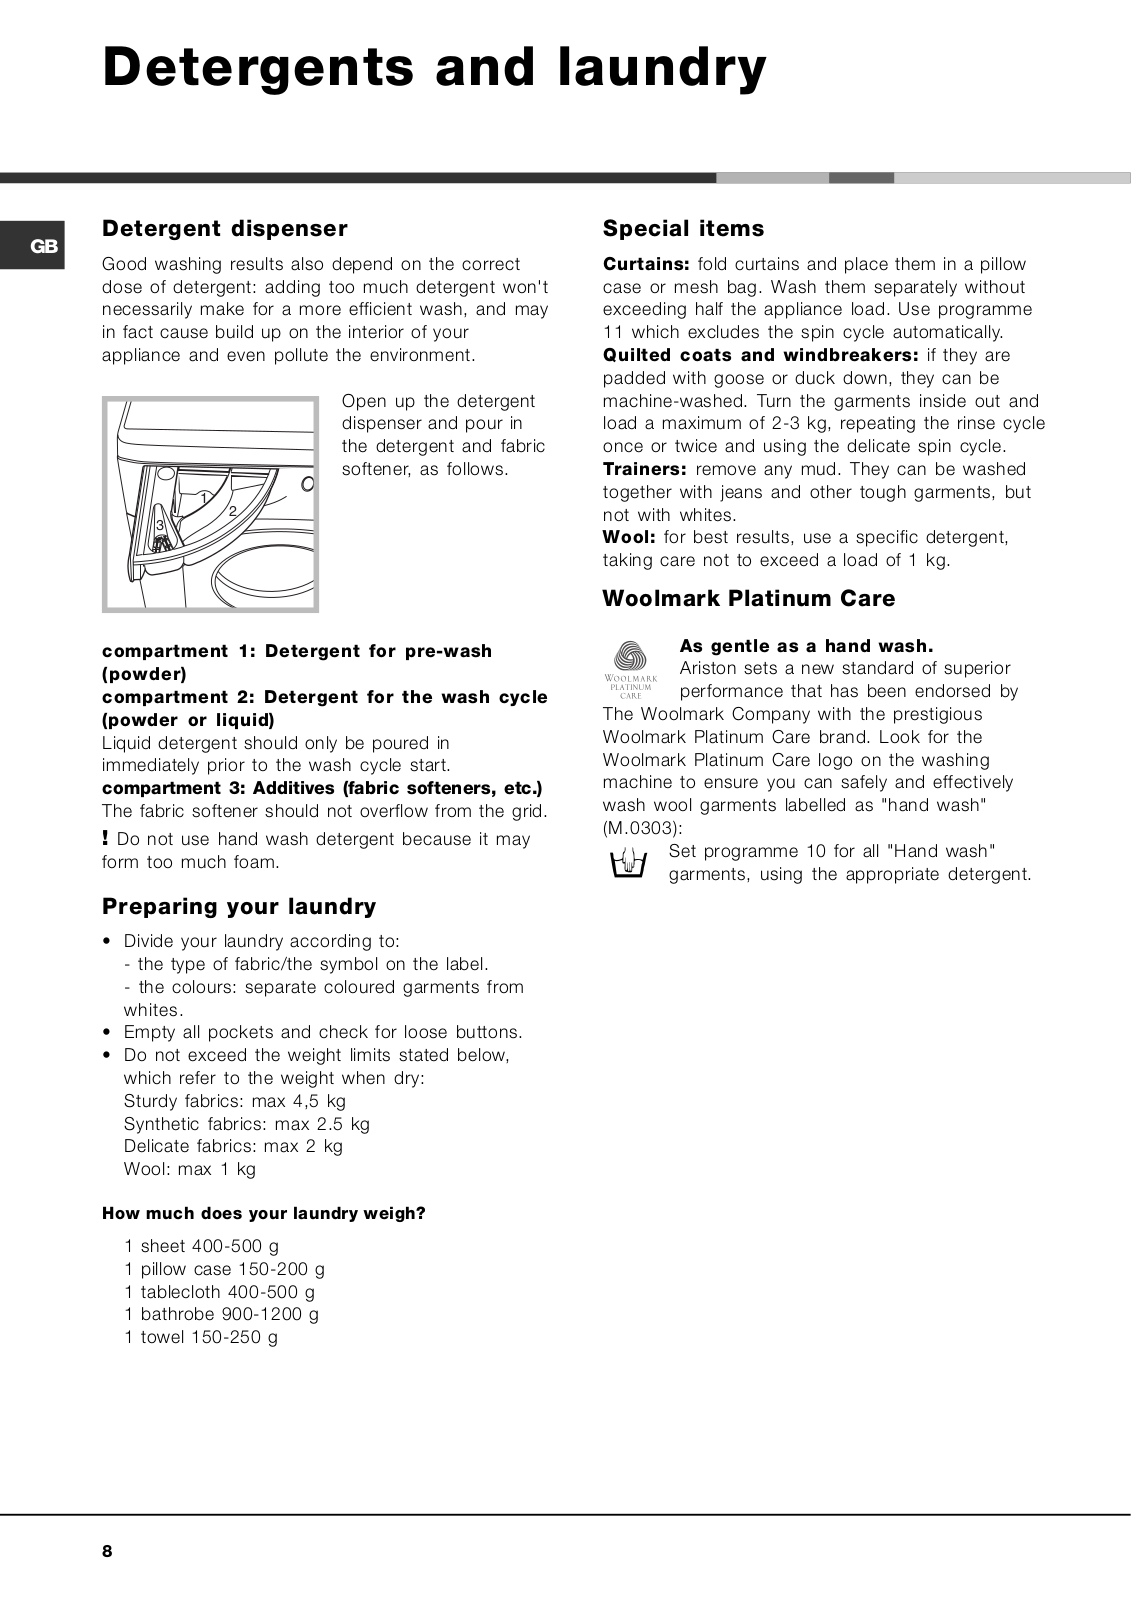
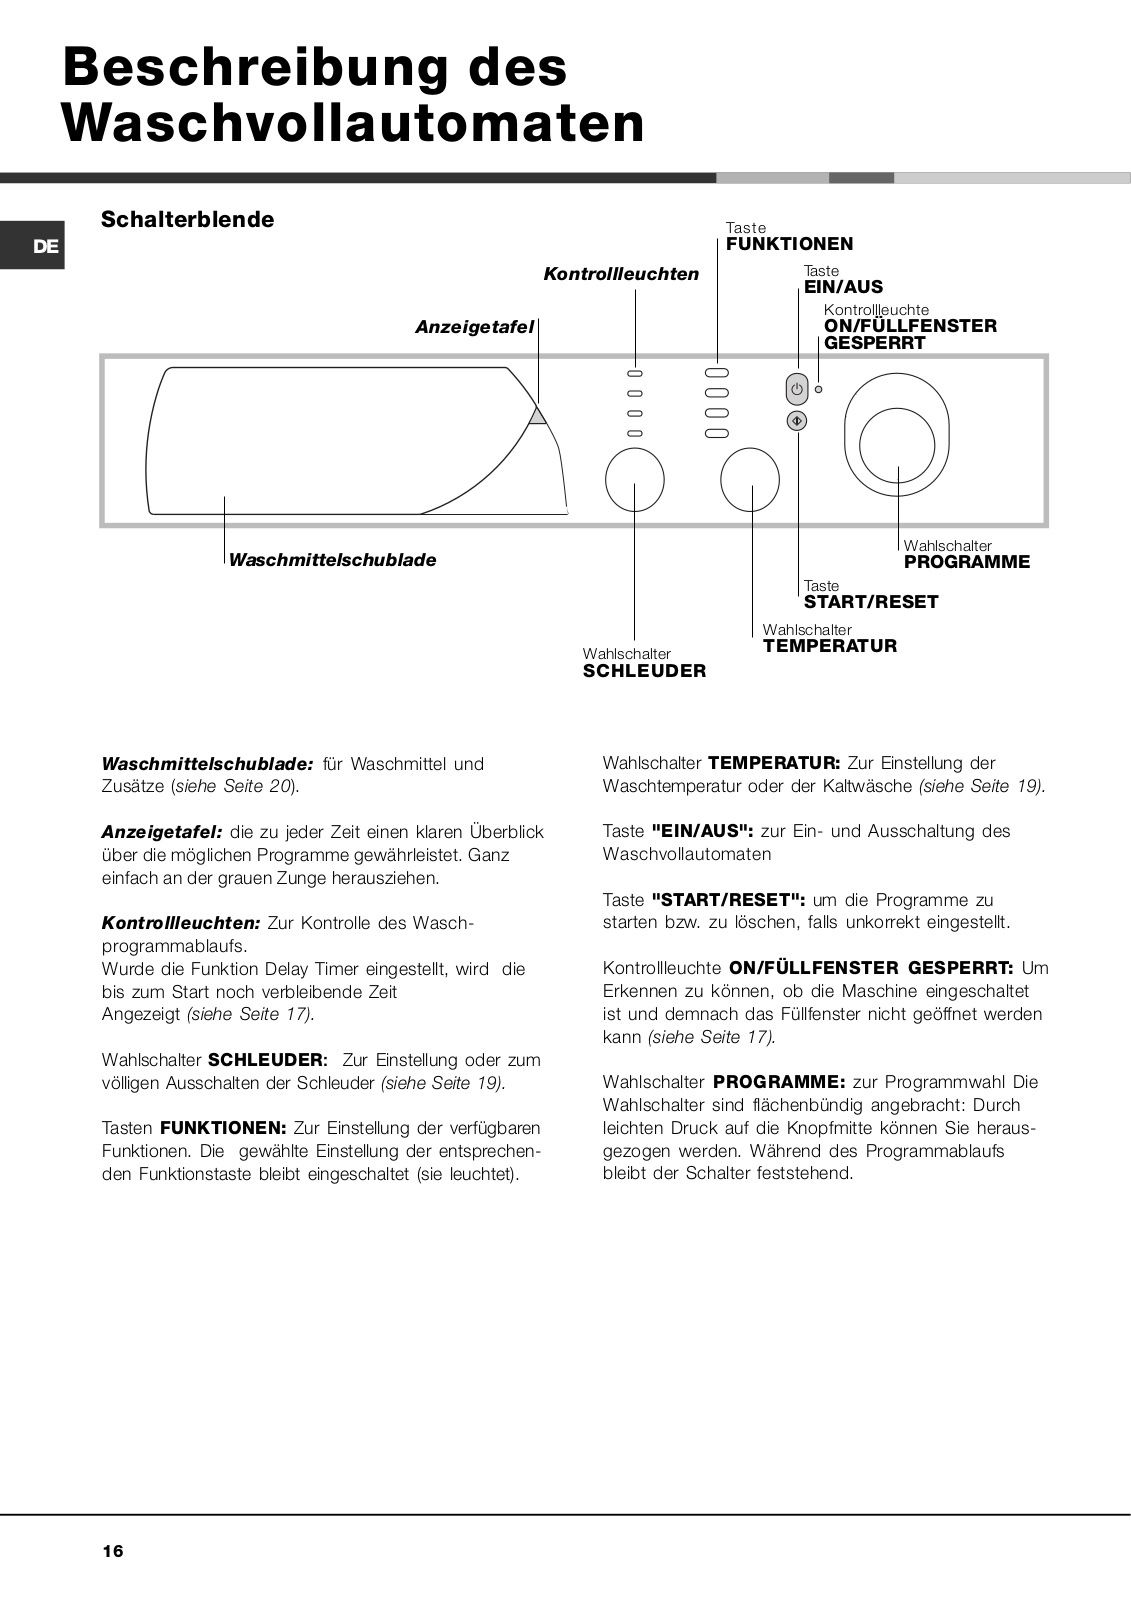
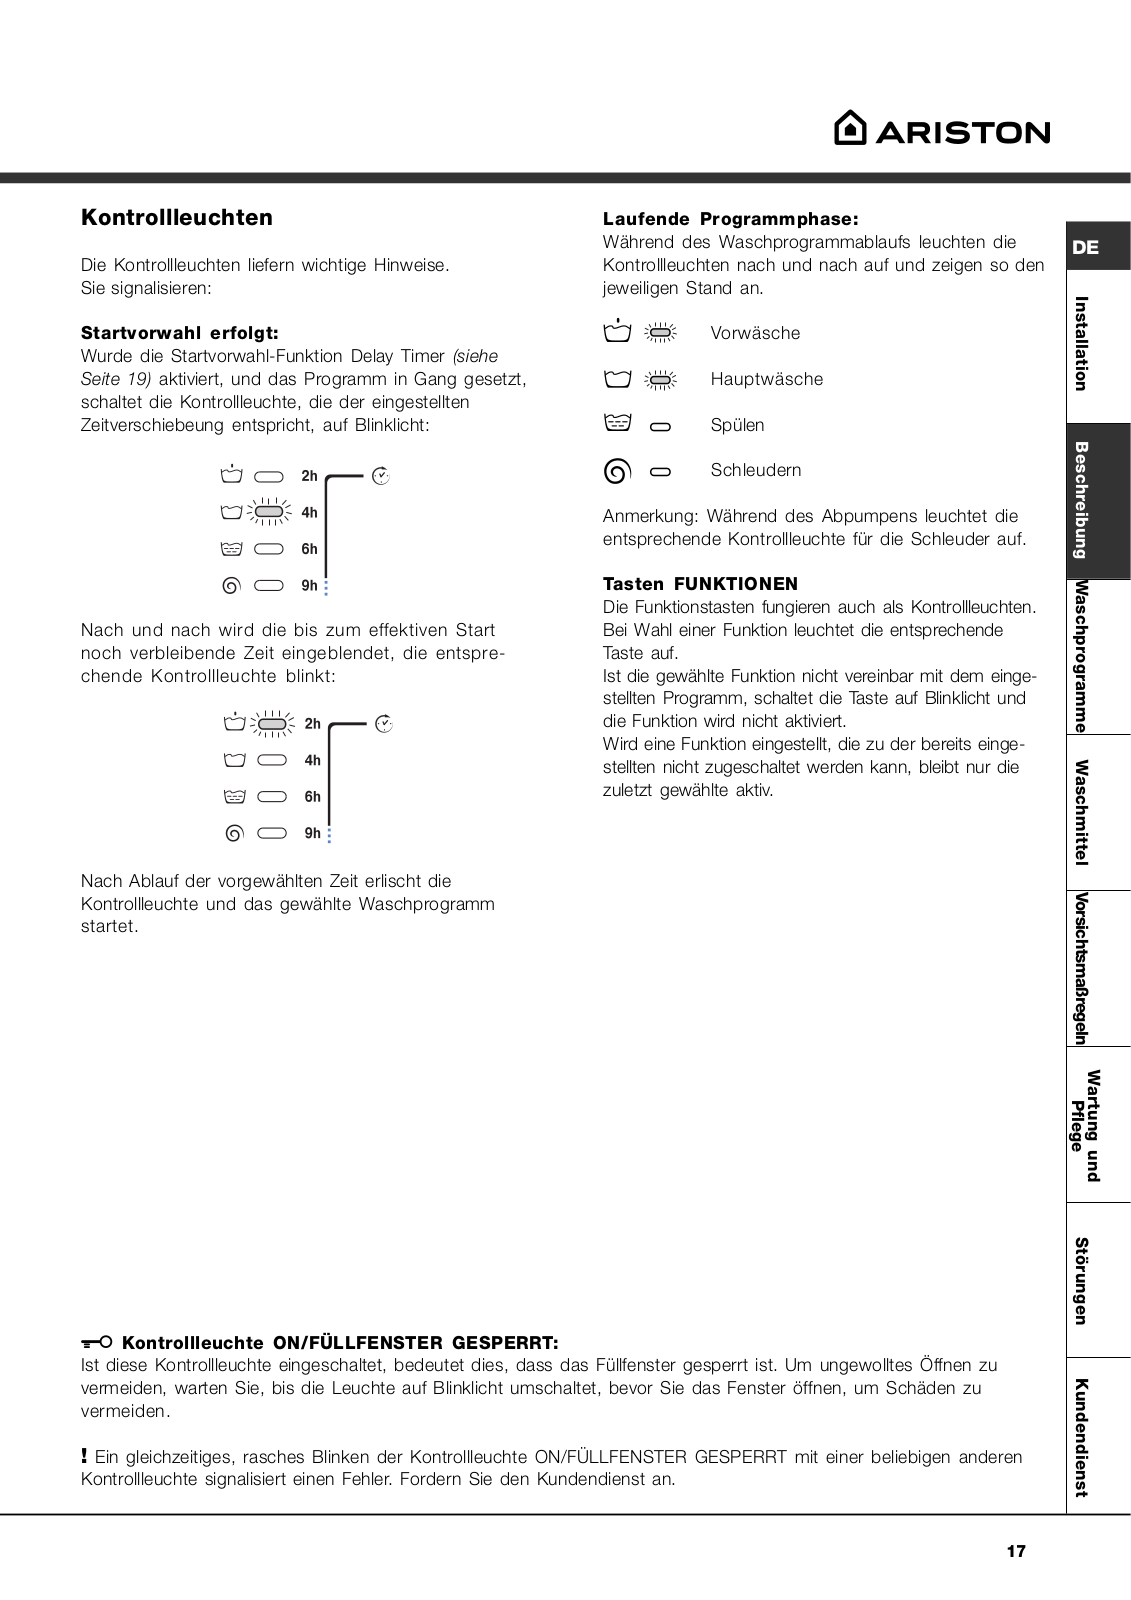
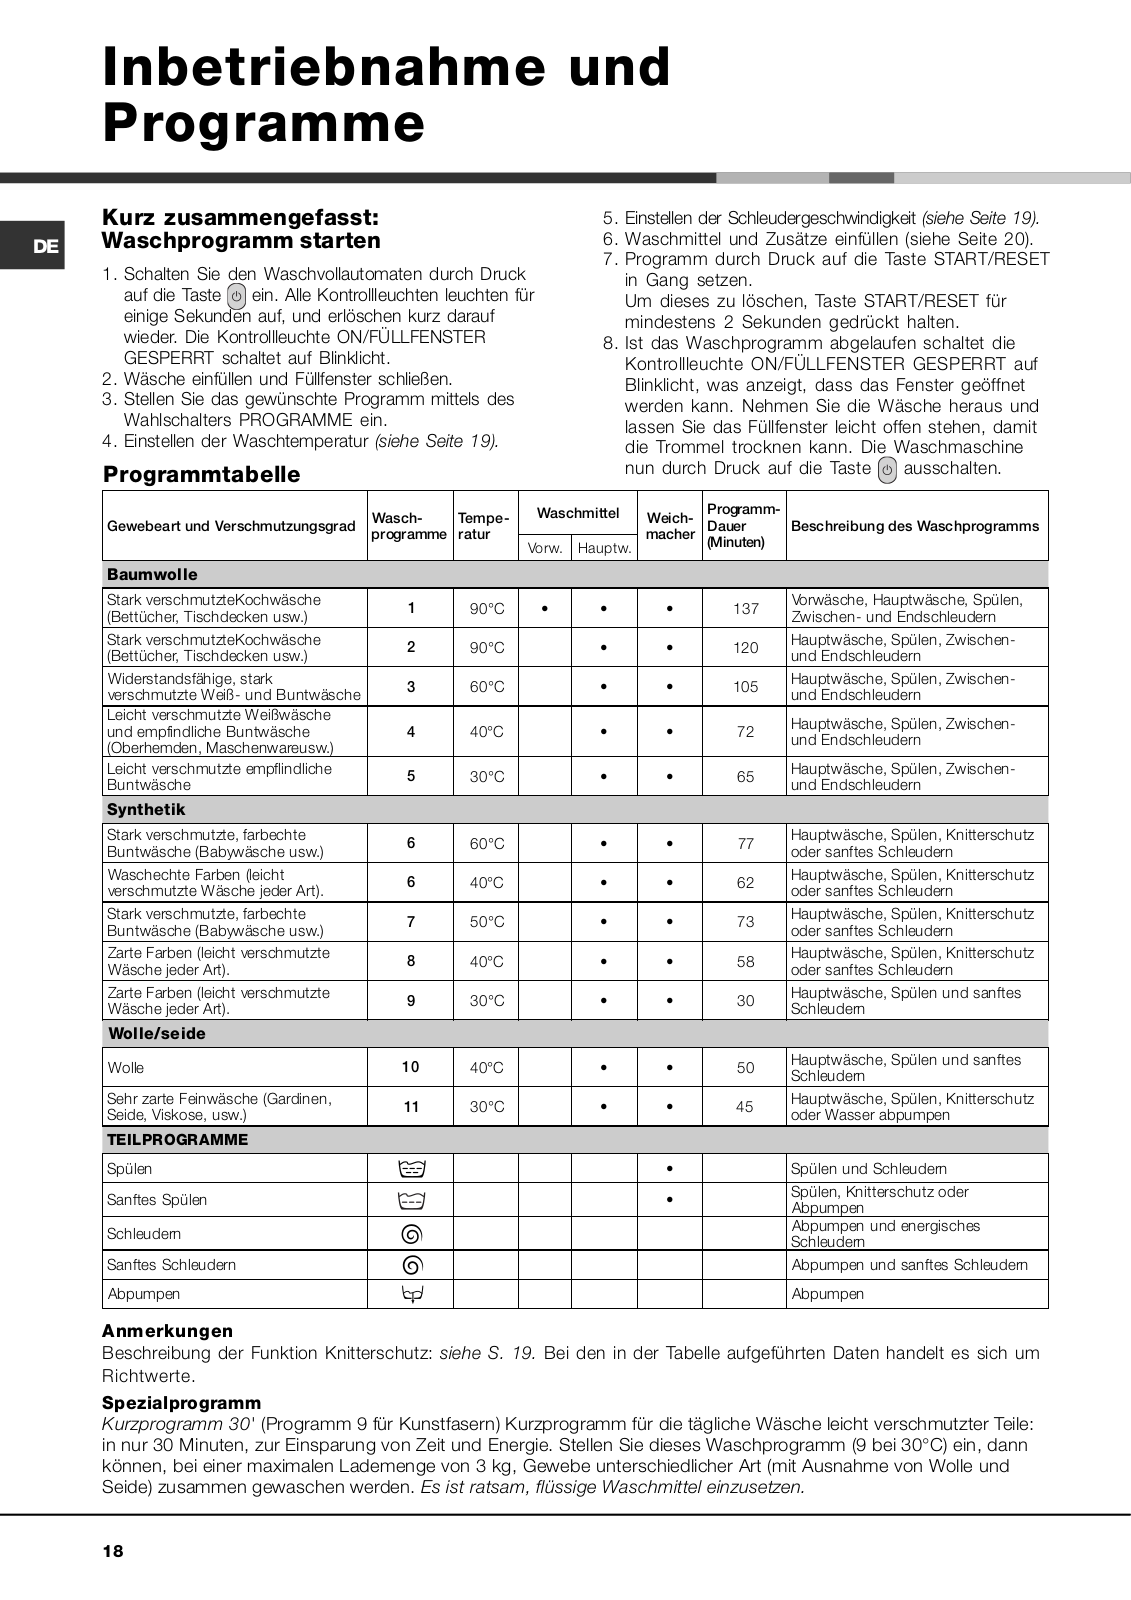
Hotpoint AVSL 105 User Manual
...
Hotpoint User Manual
Download
Specifications and Main Features
Frequently Asked Questions
User Manual
Download
Loading...
+
42
hidden pages
Unhide
You need points to download manuals.
1 point = 1 manual.
You can buy points or you can get point for every manual you upload.
Buy points
Upload your manuals
 Loading...