

Page 1

AT 50
ПдзгЯет егкбфЬуфбузт,
лейфпхсгЯбт кбй ухнфЮсзузт
Consigli per lavare meglio
The secrets
Instructions for
installation and use
Mode
dinstallation et demploi
Instrucciones para la
instalación y el uso
GB
F
E
GR
GB
of fabrics
How to get better results
Top loading
washing
machine
safe
and easy to use
Page 2

QuicQuic
Quic
QuicQuic
Here are the 12 topics explained in this manual. Read,
learn and have fun: you will discover many secret ways
to get a better wash, more easily and making your
washing machine last longer. And especially keeping
an eye on safety.
Installation and removal (p. 2) Installation and removal (p. 2)
1.
Installation and removal (p. 2)
Installation and removal (p. 2) Installation and removal (p. 2)
Installation, after delivery or transport, is the most important
operation for the correct functioning of your washing machine.
Always check:
1.1.
1. That the electric system complies with the law;
1.1.
2.2.
2. That the inlet and draining pipes are connected correctly;
2.2.
3.3.
3. That the washing machine is levelled properly: something
3.3.
worth checking for the life of your washing machine and the
quality of your wash;
4.4.
That the tub fastening screwsThat the tub fastening screws
4.
That the tub fastening screws (on the back of the appliance)
4.4.
That the tub fastening screwsThat the tub fastening screws
have been removedhave been removed
have been removed.
have been removedhave been removed
Safety for you and your children (p. 3)Safety for you and your children (p. 3)
2.
Safety for you and your children (p. 3)
Safety for you and your children (p. 3)Safety for you and your children (p. 3)
Here you will find the necessary guidelines for the safety of
your entire household. Because safety is very important indeed.
k Guidek Guide
k Guide
k Guidek Guide
Useful tips to avoid mistakes (p. 8)Useful tips to avoid mistakes (p. 8)
7.
Useful tips to avoid mistakes (p. 8)
Useful tips to avoid mistakes (p. 8)Useful tips to avoid mistakes (p. 8)
Years back, our grandmothers were the ones who gave us good
advice - and in those days synthetic fibres did not exist: washing
was easy. Today, your washing machine gives you helpful
advice.
What goes in your washing machine andWhat goes in your washing machine and
3.
What goes in your washing machine and
What goes in your washing machine andWhat goes in your washing machine and
how to start it (p. 4)how to start it (p. 4)
how to start it (p. 4)
how to start it (p. 4)how to start it (p. 4)
A correct distribution of your laundry is vital both to the successful
outcome of the wash and to the life of your appliance. Learn all
the tips and secrets to dividing your linen: colour, type of fabric
and tendency of creating fuzz are the most important criteria.
Understanding the control panel (p. 5)Understanding the control panel (p. 5)
4.
Understanding the control panel (p. 5)
Understanding the control panel (p. 5)Understanding the control panel (p. 5)
The control panel is very simple. It has only a few essential
buttons to help you choose any type of wash cycle, ranging
from the most energetic, capable of cleaning a mechanic’s
overalls, to the most delicate for wool. Familiarising with it will
help you get the best out of your wash, while spending less and
helping your washing machine last longer. It’s easy.
Guide to the wash programmes (p. 6)Guide to the wash programmes (p. 6)
5.
Guide to the wash programmes (p. 6)
Guide to the wash programmes (p. 6)Guide to the wash programmes (p. 6)
Herein is an easy table to help you choose the right programme,
temperature, detergents and possible additives. Choose the
right programme and you will get better results with your wash
while saving time, water and energy, day after day.
How to close the drum (p. 9)How to close the drum (p. 9)
8.
How to close the drum (p. 9)
How to close the drum (p. 9)How to close the drum (p. 9)
Open and shut the doors fully for a safe wash cycle.
The detergent dispenser (p. 10)The detergent dispenser (p. 10)
9.
The detergent dispenser (p. 10)
The detergent dispenser (p. 10)The detergent dispenser (p. 10)
How to use the detergent dispenser.
PrPr
obob
10.
Before calling a technician, read these pages: immediate
solutions may be found for a number of problems. If the problem
persists, call Ariston customer services and any failure will be
repaired as soon as possible.
11 .
Your washing machine is a true friend: with just a bit of care, it
will repay you with loyalty and devotion.
With the necessary upkeep, it will wash for years and years to
come.
lems and solutions (p.lems and solutions (p.
Pr
ob
lems and solutions (p.
PrPr
obob
lems and solutions (p.lems and solutions (p.
Care and maintenance (p.Care and maintenance (p.
Care and maintenance (p.
Care and maintenance (p.Care and maintenance (p.
11 and 12) 11 and 12)
11 and 12)
11 and 12) 11 and 12)
13) 13)
13)
13) 13)
Guide to understanding labels and symbols (p. 7-8) Guide to understanding labels and symbols (p. 7-8)
6.
Guide to understanding labels and symbols (p. 7-8)
Guide to understanding labels and symbols (p. 7-8) Guide to understanding labels and symbols (p. 7-8)
The international symbols on the labels of your garments are
easy to understand and equally important for the success of
your wash. The guide includes simple instructions to help you
choose the suitable wash programme, the right temperature,
wash cycles, ironing methods and specific symbols.
11
1 Instructions for installation and use
11
TT
ecec
hnical fhnical f
12.
T
ec
hnical f
TT
ecec
hnical fhnical f
Herein are the technical features of your washing machine:
model type number, electric and water specifications, size,
capacity, speed of the spin cycle and compliance with Italian
and European rules and regulations.
eatures (p.eatures (p.
eatures (p.
eatures (p.eatures (p.
14) 14)
14)
14) 14)
Page 3

Installation and removal
When theWhen the
When the
When theWhen the
appliance arrivesappliance arrives
appliance arrives
appliance arrivesappliance arrives
Whether new or just transported to a new house, installation is extremely
important for the correct functioning of your washing machine.
After removing the appliance
from its packaging, check that
it is intact. If in doubt, contact
a qualified technician
immediately.
machine is blocked, formachine is blocked, for
machine is blocked, for
machine is blocked, formachine is blocked, for
transportation, by fourtransportation, by four
transportation, by four
transportation, by fourtransportation, by four
screws and rubber washersscrews and rubber washers
screws and rubber washers
screws and rubber washersscrews and rubber washers
on the back panel.on the back panel.
on the back panel.
on the back panel.on the back panel.
Unblocking: removeUnblocking: remove
Unblocking: remove
Unblocking: removeUnblocking: remove
the 4 screws!the 4 screws!
the 4 screws!
the 4 screws!the 4 screws!
Before using the washing
machine,
screwsscrews
screws, remove the rubber
screwsscrews
washers with the relative
spacer (keeping all the parts)
and use the plastic tabs
provided to fill in the holes.
Warning:Warning:
Warning: should the screws
Warning:Warning:
be re-used, make sure you
fasten the shorter at the top.
LevellingLevelling
Levelling
LevellingLevelling
The washing machine must be
levelled appropriately in order to
guarantee its correct functioning.
TT
o leo le
vel the appliancevel the appliance
T
o le
vel the appliance
TT
o leo le
vel the appliancevel the appliance
must be adjustedmust be adjusted
must be adjusted; the angle of
must be adjustedmust be adjusted
inclination, measured according
to the worktop, must not exceed
2°. When placed on fitted carpet,
make sure the ventilation is not
obstructed within its surroundings.
The feet are adjustable.
The inside of theThe inside of the
The inside of the
The inside of theThe inside of the
remove theremove the
remove the
remove theremove the
,,
the f the f
eeteet
,
the f
eet
,,
the f the f
eeteet
Do not throw the blocking
screws and the spacers
away. In the event of a
removal, they can be used
to block the components
inside the appliance again
and so protect it during
transport.
Connection to the waterConnection to the water
Connection to the water
Connection to the waterConnection to the water
mainsmains
mains
mainsmains
Water pressure must range
within the values indicated on
the data plate on the rear of
your washing machine.
Connect the inlet hose
(situated unassembled inside
the drum) to a cold water tap
with a 3/4 gas threaded mouth.
If the water pipes are new or
left unused, run the water until
it is clear and free of debris.
Attach the hose to the
appliance, in line with the
appropriate water pipe inlet at
the top right.ù
Water hose inlet to be fitted to
the top right.
Connecting the drain hoseConnecting the drain hose
Connecting the drain hose
Connecting the drain hoseConnecting the drain hose
On the back of the appliance,
towards the top, you will find a
hook onto which you should
fasten the drain hose if
necessary. Insert the other end
in a wall draining duct or place
it on the edge of a sink or tub
avoiding excessive kinks and
bending.
at a height ranging from 60 toat a height ranging from 60 to
at a height ranging from 60 to
at a height ranging from 60 toat a height ranging from 60 to
100 cm.100 cm.
100 cm.
100 cm.100 cm.
In case it is necessary to fix the
end of the hose at a height
below 60 cm from the ground,
it must be fixed in the
appropriate hook placed on
the back panel as mentioned
above.
It should be placedIt should be placed
It should be placed
It should be placedIt should be placed
The hook to be used in case the
drain hose ends at a height
below 60 cm.
If the hose drains into a tub or
sink, apply the plastic guide
and tie it to the tap.
The guide for draining into tubs
and sinks.
The hose must neverThe hose must never
The hose must never
The hose must neverThe hose must never
remain immerremain immer
remain immer
remain immerremain immer
Extensions are inadvisable. In
case of absolute need, the
extension must have the same
diameter as the original hose
and must not exceed 150 cm
in length. In case of wall
draining pipes, their efficiency
must be checked by a qualified
technician. If the dwelling is on
one of the upper floors of a
building, there may be drain
trap problems causing the
washing machine to load and
unload water continuously.
In order to avoid such an
inconvenience, special antidrain trap valves are available
in shops.
sed in watersed in water
sed in water
sed in watersed in water
..
.
..
Electric connectionElectric connection
Electric connection
Electric connectionElectric connection
Before connecting the
appliance to the electric
socket, be sure that:
1) the electric socket is able
to sustain the appliance's
maximum power load
indicated on the data plate
and in compliance with the
law;
2) the supply voltage is
included within the values
indicated on the data
plate;
3) the socket is compatible
with the appliance's plug.
If not, do not use adapters,
but replace either the
socket or the plug;
4) electric household appliances must be equipped
with an "earthing" system,
5) that the machine is not
placed on top of the power
supply cable once the
connection has been
made.
Warning!
Any modifications made to the
factory settings or an irregular electric connection, any
electrical, mechanical or hydraulic modification whatsoever to the appliance shall
render the guarantee invalid
and shall relieve the manufacturer and retailer of any and
all liability.
Plastic bags, polystyrene
foam, screws and other
packaging parts are not
children's toys, and are
potentially dangerous.
Instructions for installation and use
22
2
22
Page 4

More and more important
YY
our safour saf
Y
our saf
YY
our safour saf
yy
our cour c
y
our c
yy
our cour c
hildrenhildren
hildren
hildrenhildren
ety and that ofety and that of
ety and that of
ety and that ofety and that of
Y our washing machine has been built in compliance
with the strictest international safety regulations.
T o protect you and all your family .
Read these indications and all
the information in this manual
carefully: they are an important
source, not only of numerous
useful tips, but also of vital
information on safety, use and
maintenance
.
1. In case of malfunctioning,1. In case of malfunctioning,
1. In case of malfunctioning,
1. In case of malfunctioning,1. In case of malfunctioning,
first unplug the appliancefirst unplug the appliance
first unplug the appliance
first unplug the appliancefirst unplug the appliance
from the wall socket andfrom the wall socket and
from the wall socket and
from the wall socket andfrom the wall socket and
turn off the water tapturn off the water tap
turn off the water tap; do
turn off the water tapturn off the water tap
not under any circumstances touch internal
parts in order to attempt
repairs. This will also
render the guarantee
invalid.
2.2.
The washing machineThe washing machine
2.
The washing machine
2.2.
The washing machineThe washing machine
should not be installed inshould not be installed in
should not be installed in
should not be installed inshould not be installed in
an outdoor environmentan outdoor environment
an outdoor environment,
an outdoor environmentan outdoor environment
not even when a roof
shelters the area, because
it may be very dangerous
to leave it exposed to rain
and thunderstorms.
3.3.
It must only be used byIt must only be used by
3.
It must only be used by
3.3.
It must only be used byIt must only be used by
adults adults
adults and exclusively for
adults adults
washing clothes following
the instructions provided in
this manual.
4.4.
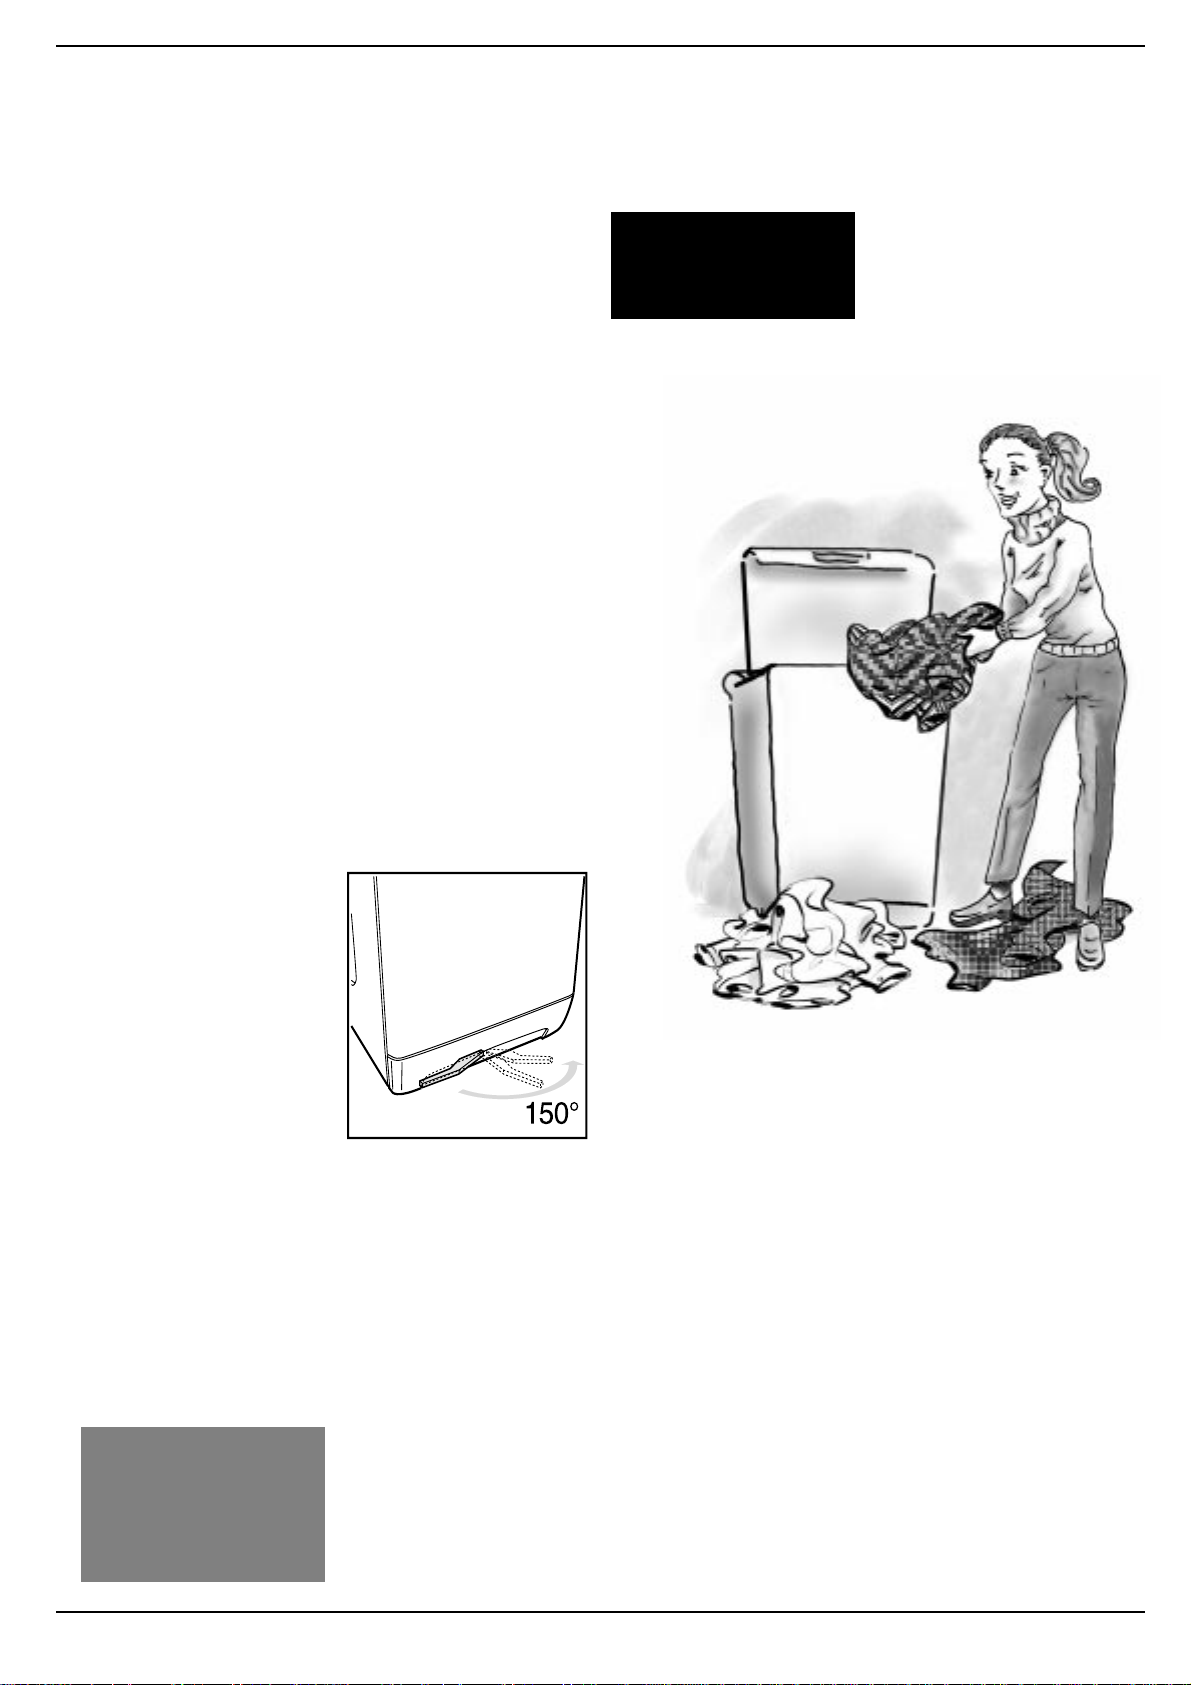
4. Should it have to be
4.4.
moved, pull the white
lever, situated on the left
beneath the base, and the
retractable wheels will
appear, thus allowing for
easy movement.
5.5.
5. Before loading the
5.5.
washing machine,
sure the drum is emptysure the drum is empty
sure the drum is empty.
sure the drum is emptysure the drum is empty
6.6.
Never touch the washingNever touch the washing
6.
Never touch the washing
6.6.
Never touch the washingNever touch the washing
machine when barefootmachine when barefoot
machine when barefoot
machine when barefootmachine when barefoot
"I only want an authorised
specialised technician with
Ariston original spare
parts!"
makemake
make
makemake
with wet or damp handswith wet or damp hands
or
with wet or damp hands
with wet or damp handswith wet or damp hands
or feetor feet
or feet.
or feetor feet
7.7.
Never use extensions orNever use extensions or
7.
Never use extensions or
7.7.
Never use extensions orNever use extensions or
multiple plugsmultiple plugs
multiple plugs, which are
multiple plugsmultiple plugs
particularly dangerous in
humid environments. The
power supply cable must
never be bent or dangerously compressed.
8.8.
Do not remove the filterDo not remove the filter
8.
Do not remove the filter
8.8.
Do not remove the filterDo not remove the filter
while the appliance is on.while the appliance is on.
while the appliance is on.
while the appliance is on.while the appliance is on.
Do not use hand washDo not use hand wash
Do not use hand wash
Do not use hand washDo not use hand wash
detergentdetergent
detergent because the
detergentdetergent
abundance of foam could
come out from the lid and
cause damage.
9.9.
Never pull on the plugNever pull on the plug
9.
Never pull on the plug or
9.9.
Never pull on the plugNever pull on the plug
the washing machine to
disconnect it from the wall
socket: it is extremely
dangerous.
10.10.
10.While the appliance is
10.10.
functioning,
the drain waterthe drain water
the drain water as it could
the drain waterthe drain water
reach very high temperatures.
children’s reachchildren’s reach
children’s reach.
children’s reachchildren’s reach
force the washingforce the washing
force the washing
force the washingforce the washing
machine doormachine door
machine door because this
machine doormachine door
could damage the safety
block on the opening,
which serves to protect
from accidental openings.
11.11.
This appliance is intendedThis appliance is intended
11.
This appliance is intended
11.11.
This appliance is intendedThis appliance is intended
for domestic use.for domestic use.
for domestic use.
for domestic use.for domestic use.
Industrial use (in hotels,
restaurants and laundries)
compromises its original
manufacturing characteristics and invalidates the
guarantee.
do not touchdo not touch
do not touch
do not touchdo not touch
Keep it out ofKeep it out of
Keep it out of
Keep it out ofKeep it out of
NeverNever
Never
NeverNever
How to change the power supply cableHow to change the power supply cable
How to change the power supply cable
How to change the power supply cableHow to change the power supply cable
The power supply cable is special and can be purchased exclusively from authorised
T echnical Service Centres.
T o replace it, do as follows:
1. Make sure that the washing
machine is switched off and unplugged.
Fig. 1
2. Remove the appliance base
and unscrew the 2 screws on
the bottom right-hand side, then
unscrew the 6 rear screws, on
the left-hand side, and remove
the side panel by tipping it
slightly outwards and pulling it
out. (fig. 1 and 2).
Fig. 2
3. Disconnect the electricity sup-
ply to the radio interference suppresser by removing the connector (fig. 3).
4. Unscrew the 2 outer filter fastening screws and, with the help
of a screwdriver (see fig. 4), release it from the back panel by
pulling upwards.
Fig. 3
5. Once you have positioned
the new power supply cable, reconnect the connector, making
sure the safety hook is securely
in place.
You must contact a qualified
professional to replace the
power supply cable. The same
must respect the applicable
norms in force.
Fig. 4
33
3 Instructions for installation and use
33
Page 5
M
What goes in yWhat goes in y
What goes in y
What goes in yWhat goes in y
Before washing, you can do a great deal for better results. Divide your garments according to fabric and colour.
Read the labels and follow their indications. Alternate small items with large ones.
Before washing.Before washing.
Before washing.
Before washing.Before washing.
Divide your washing according
to the type of fabric and colour
resistance: sturdy fabrics should
be separated from delicate
ones.
Light colours should be
separated from dark ones.
Empty all pockets (coins, paper ,
money and small objects) and
check the buttons. Mend
immediately or remove loose
buttons as they could fall off
during the wash cycle.
The labels say it all.The labels say it all.
The labels say it all.
The labels say it all.The labels say it all.
Always look at the labels: they
tell you everything about your
garment and how to wash it in
the best way possible.
The table on page 7 shows you
all the secrets of the symbols
found on labels. Their
indications are a valuable guide
to a better wash and to longer
lasting clothes.
Alternate small itemsAlternate small items
Alternate small items
Alternate small itemsAlternate small items
with large ones.with large ones.
with large ones.
with large ones.with large ones.
Unfold all your washing. Place
it loose inside the drum and
follow the indications as to the
recommended load quantity for
the different wash programmes.
Your clothes will come out
cleaner and with fewer creases.
Garments treated withGarments treated with
Garments treated with
Garments treated withGarments treated with
petrpetr
ol-based stain remool-based stain remo
petr
ol-based stain remo
petrpetr
ol-based stain remool-based stain remo
Do not place garments in your
washing machine that have
been treated with petrol, pure
alcohol, trichlorethylene etc.
until these products have
evaporated completely.
our washing macour washing mac
our washing mac
our washing macour washing mac
Dividing your garments
according to fabric and
colour is very important
for good results.
verver
..
ver
.
verver
..
hine?hine?
hine?
hine?hine?
How to start the applianceHow to start the appliance
How to start the appliance
How to start the applianceHow to start the appliance
Putting your appliance
in place and moving it.
If your washing machine is
equipped with a special set of
retractable wheels you can
easy move it. To lower the
wheels and thus move the
appliance effortlessly, just pull
the lever, situated on the lefthand side beneath the base.
Once the appliance is in the
required position, put the lever
back in place. The washing
machine is now firmly in place.
See figure, just for equipped
models.
After installing your new washing machine, start a
wash cycle (with the appliance empty) by setting
programme "1" at 60 degrees C.
Starting the washing machine
in the right way is important for
the quality of your wash, for
preventing problems and for
lengthening the life of your
appliance. After loading your
washing and pouring in the
For delicate garments:
For delicate garments:
protect underwear, tights
protect underwear, tights
and stockings, children's
and stockings, children's
socks and delicate items
socks and delicate items
by placing them in a
by placing them in a
canvas pouch
canvas pouch
detergent together with any
additives, always check that:
1. The appliance doors are firmly
shut.
2. The plug is inserted in the
socket.
3. The water tap is turned on.
4. button F is on the O position.
5. The set of retractable wheels
is stored away (i.e. the wheels
are not touching the floor).
Choose the desired programme
The programme is selected
according to the type of
garments that need to be
washed and how dirty these are.
To select the programme,
consult the table on page 6. Turn
knob A and set it to the number
corresponding to the desired
programme. Select the
temperature using knob B and,
if necessary, press the function
buttons (C-D-E); finally press the
ON-OFF button F (position I).
At the end of the wash cycle...
wait for approximately two
minutes.
Then turn the washing machine
off by pressing ON-OFF button
F (O position). You can now
open the washing machine
doors safely. After having
removed the freshly cleaned
washing, leave the doors open
or half-open so that the humidity
left inside can evaporate.
Always turn the water tap off.
Remember that, in the event
of a power failure, or should
the washing machine switch
itself off, the programme
selected will start up again
from where it was interrupted.
Instructions for installation and use
44
4
44
Page 6

Understanding the control panel
Here I'm in commandHere I'm in command
Here I'm in command
Here I'm in commandHere I'm in command
Making the right choice is important. And it's easy.
Programme selectorProgramme selector
Programme selector
Programme selectorProgramme selector
knobknob
knob
knobknob
Use this dial to select one of
the 16 wash programmes
availabale for all your laundry
requirements (see programme
table on page 6).
N.B. This knob must beN.B. This knob must be
N.B. This knob must be
N.B. This knob must beN.B. This knob must be
turned clockwise only andturned clockwise only and
turned clockwise only and
turned clockwise only andturned clockwise only and
when the machine is off.when the machine is off.
when the machine is off.
when the machine is off.when the machine is off.
TT
emperature contremperature contr
T
emperature contr
TT
emperature contremperature contr
It is used to set the wash
temperature indicated in the
programme table. 6). It also
allows you to reduce the
temperature recommended for
the selected programme, and
even to set a cold wash cycle
(snow symbol ).
Half loadHalf load
Half load
Half loadHalf load
This button reduces the
quantity of water used during
rinsing. We recommend the
use of this button with
programmes for Delicates and
Synthetics only and when the
drum does not contain a full
load; the quantity of detergent
should also be reduced.
ol knobol knob
ol knob
ol knobol knob
No spin buttonNo spin button
No spin button
No spin buttonNo spin button
It is used to exclude spinning.
Use it only for articles which are
difficult to iron and only with the
programmes for Synthetics and
Delicates.
Anti-creaseAnti-crease
Anti-crease
Anti-creaseAnti-crease
(Synthetics-delicates)(Synthetics-delicates)
(Synthetics-delicates)
(Synthetics-delicates)(Synthetics-delicates)
This button allows you to interrupt
a programme (on positionsymbol ) keeping the washing
soaking in water before the spin
cycle. It is a very useful button,
because it prevents delicate and
synthetic fabrics from creasing
(for example, when you cannot
take the washing out at the end
of the wash cycle, but only after a
few hours).
It can only be used in programmes for Synthetic fabrics ol
(Progr. 5-6-7).
WW
ARNING! ARNING!
W
ARNING! To conclude the
WW
ARNING! ARNING!
wash cycle and drain the water,
EE
press button
E
again.
EE
The knob
with your washing
machine's wash
programmes
ON-OFFON-OFF
ON-OFF
ON-OFFON-OFF
When button
washing machine is switched
on, when it is not the machine is
switched off.
TT
urning the macurning the mac
T
urning the mac
TT
urning the macurning the mac
not cancel the selectednot cancel the selected
not cancel the selected
not cancel the selectednot cancel the selected
programme.programme.
programme.
programme.programme.
FF
F is pressed, the
FF
hine off doeshine off does
hine off does
hine off doeshine off does
ON-OFF lampON-OFF lamp
ON-OFF lamp
ON-OFF lampON-OFF lamp
GG
Lamp
appliance is switched on and
awaiting a programme to be set.
A steady light means the
appliance has accepted the
selected programme.
G
flashes when the
GG
55
5 Instructions for installation and use
55
Page 7

What are you washing today?
A prA pr
A pr
A prA pr
Type of fabric and
degree of soil
COTTON
Exceptionally soiled whites
sheets, tablecloths, etc.)
(
Exceptionally soiled whites
(sheets, tablecloths, etc.)
Heavily so ile d whites and fast
colours
Slightly soil ed whi tes and delicate
(shirts, jumpers, etc.)
colours
Rinse cycles/Bleach
Spin cycle Draining and final spin cycle
Stop/Reset Interrupts/Cancels selected program me
SYNTHETICS
Heavily soiled fast colour
synthetics
Delicate colour synthetics
types of slightly soiled garments)
Delicate colour synthetics
types of slightly soiled garments)
Rinse cycles/Bleach
Fabric softener
Rinse hold Rinse hold for especially delicate
Spin cycle Draining and delicate spin cycle
Stop/Reset Interrupts/Cancels selected program me
DELICATES
Wool
Rinse cycles
Fabric softener
Spin cycle Draining and delicate spin cycle
Draining Draining
Stop/Reset Interrupts/Cancels selected program me
ogramme fogramme f
ogramme f
ogramme fogramme f
Programme
knob
Temper.
Knob
1Max°C
2Max°C
3 60°C
4 40°C
(baby linen, etc.)
(all
(all
5 60°C
6 50°C
7 40°C
8 40°C
or all seasonsor all seasons
or all seasons
or all seasonsor all seasons
Detergent for
pre-wash
Detergent for
wash
uuu
Fabric
softener
uu
uu
uu
uu
uu
uu
uu
u
u
u
u
u
Traditional
or delicate
bleach
Delicate/Tra-
Delicate/Tra-
Delicate/Tra-
Delicate/Tra-
Delicate
Delicate
Delicate
ditional
ditional
ditional
ditional
Cycle
length
(minutes)
155
145
115
100
90
80
70
60
Description of wash cycle
Pre-wash, Wash
temperature, rinses, intermediate
and final spin cycles
Heavy duty washes at high
temperature,
fina l s pin cycles
Normal wash cycle at 60°C, rinse
intermediate and final spin
cycles,
cycles
Wash cycle at 40°C, rinse cycles,
intermediate and final spin cycles
Rinse cycles, intermediate and final
spin cycles
Heavy duty wash cycle at 60°C
cycle, anti-crease or delicate spin cycle
Normal wash cycle at 50°C
cycles, anti-crease or delicate spin cycle
Delicate wash cycle at 40°C
cycles and delicate spin cycle
Rinse cycles, anti-crease or delicate
spin cycle
Rinse cycles with automatic introduction
of softener, anti-crease or delicate spin
cycle
garments
Wash cycle at 40°C,
delicate spin cycle
Rinse cycles, anti-crease or drainingo
inse cycles with automatic introduction
of softener, anti-crease or delicate spin
cycle
at high
rinse cycles, intermediate and
, rinse
, rinse
, rinse
rinse cycles and
The information contained in the table is purely indicative. It could in fact vary depending on the appliance model, the quantity and type of garments to
wash, the hardness and temperature of the mains water supply, as well as the temperature of the environment.
Instructions for installation and use
66
6
66
Page 8

UnderUnder
Under
UnderUnder
standing labels…standing labels…
standing labels…
standing labels…standing labels…
Learn the meaning of these symbols and you will get
better results, your garments will last longer and your
machine will repay you by washing better.
All over Europe, garment
labels contain messages
expressed in small yet
important symbols.
Understanding them is very
important if you want to get
better results and treat your
garments the way they
deserve to be treated.
These symbols are divided in
five different categories and
shapes:
wash cyclewash cycle
wash cycle
wash cyclewash cycle
bleaching bleaching
bleaching
bleaching bleaching
ironing ironing
ironing
ironing ironing
dry cleaningdry cleaning
dry cleaning
dry cleaningdry cleaning
and dryingand drying
and drying
and dryingand drying
.
,
,
,
Useful tips
Turn shirts inside out to get better
results and make them last longer .
Always empty pockets of their
contents.
Look at the label: it will always give
you useful advice.
Consult and learn the symbols in this table: they will help youConsult and learn the symbols in this table: they will help you
Consult and learn the symbols in this table: they will help you
Consult and learn the symbols in this table: they will help youConsult and learn the symbols in this table: they will help you
obtain a better wash,obtain a better wash,
obtain a better wash,
obtain a better wash,obtain a better wash,
performance out of your washing machine.performance out of your washing machine.
performance out of your washing machine.
performance out of your washing machine.performance out of your washing machine.
treat y treat y
treat y
treat y treat y
our cour c
our c
our cour c
lothes prlothes pr
lothes pr
lothes prlothes pr
operloperl
operl
operloperl
yy
,,
and g and g
y
,
and g
yy
,,
and g and g
et a betteret a better
et a better
et a betteret a better
Make sure you
select the right
temperature
Strong
Movement
Wash
cycle Bleaching Ironing Dry cleaning Drying
Delicate
Movement
Wash cycle
95°C
Wash cycle
60°C Do not bleach
Wash cycle
40°C
Wash cycle
30°C
Delicate
hand wash
Do not
wash in
water
Can be bleached
in c old water
Cl
Hot iron max
200°C
Warm iron
max 150°C
Cool iron
max 110°C
Do not iron
A
Dry cleaning with
all solvents
P
Dry cleaning with
perchloride ,
aviation gasoline,
pure alcohol, R111
and R113
F
Dry cleaning with
aviation gasoline,
pure alcohol and
R113
Do not dry clean
High
tem p.
Can be
tumble -dried
Do not
tumble dry
Lay flat to
dry
Hang to dry
non-spin
garments
Dry on
hangers
Mild
Temp.
dried
77
7 Instructions for installation and use
77
Page 9

… and the symbols for the various Ariston models:… and the symbols for the various Ariston models:
… and the symbols for the various Ariston models:
… and the symbols for the various Ariston models:… and the symbols for the various Ariston models:
ON
OFF
Start-reset
Temperature setting
Pre-wash Wash Max°
90° Wash
60° Wash
Delicate 40° Wash
60° Synthetics
50° Synthetics
Useful tips to aUseful tips to a
Useful tips to a
Useful tips to aUseful tips to a
General Rules:General Rules:
General Rules:
General Rules:General Rules:
- Cotton - Linen- Cotton - Linen
- Cotton - Linen. Fill the
- Cotton - Linen- Cotton - Linen
drum but do not overload
it.
- Synthetics- Synthetics
- Synthetics. Do not fill more
- Synthetics- Synthetics
than half the drum.
- Delicates and - Delicates and
- Delicates and
- Delicates and - Delicates and
not fill the drum more than
a third.
- Heavily soiled garments:- Heavily soiled garments:
- Heavily soiled garments:
- Heavily soiled garments:- Heavily soiled garments:
reduce the quantity.
- Persistent or special- Persistent or special
- Persistent or special
- Persistent or special- Persistent or special
stains.stains.
stains. Treat these before
stains.stains.
washing by rubbing the
toughest stains with a
special detergent, with
detergent paste or
specific stain removers
(see the inset on treating
special stains with stain
removers on page 9)
WW
W
WW
ool.ool.
ool.
ool.ool.
Do
40° Synthetics
Rinse
Rinse level /
Extra rinse
Fabric softener
Rinse hold Anti-crease
Spin cycle
Spin cycle variation
or no spin cycle
Water Draining
Never use your washingNever use your washing
Never use your washing
Never use your washingNever use your washing
machine to washmachine to wash
machine to wash... torn, fraying
machine to washmachine to wash
or non-hemmed linen. If it is
absolutely necessary , place it in
a bag for protection. Brightly
coloured linen with whites.
WW
atcatc
h the weight!h the weight!
W
atc
h the weight!
WW
atcatc
h the weight!h the weight!
For best results, do not exceed
the weight limits stated below
(figures show weight when dry):
--
Sturdy fabrics:Sturdy fabrics:
-
Sturdy fabrics:
--
Sturdy fabrics:Sturdy fabrics:
max 5 kg
--
Synthetic fabrics:Synthetic fabrics:
-
Synthetic fabrics:
--
Synthetic fabrics:Synthetic fabrics:
max 2.5 kg
--
Delicate fabrics:Delicate fabrics:
-
Delicate fabrics:
--
Delicate fabrics:Delicate fabrics:
max 2 kg
--
Pure virgin wool:Pure virgin wool:
-
Pure virgin wool:
--
Pure virgin wool:Pure virgin wool:
max 1 kg
TT
oo
wellingwelling
-
T
o
welling
TT
oo
wellingwelling
max 2.3 kg
vv
oid mistakesoid mistakes
v
oid mistakes
vv
oid mistakesoid mistakes
How much does it weigh?How much does it weigh?
How much does it weigh?
How much does it weigh?How much does it weigh?
1 sheet 1 sheet
1 sheet 400-500 gr.
1 sheet 1 sheet
1 pillow case 1 pillow case
1 pillow case 150-200 gr.
1 pillow case 1 pillow case
1 tablecloth 1 tablecloth
1 tablecloth 400-500 gr.
1 tablecloth 1 tablecloth
1 bathrobe 1 bathrobe
1 bathrobe 900-1,200 gr.
1 bathrobe 1 bathrobe
1 towel 1 towel
1 towel 150-500 gr.
1 towel 1 towel
Mix clothing of different Mix clothing of different
Mix clothing of different
Mix clothing of different Mix clothing of different
sizessizes
sizes with towelling:
sizessizes
bathrobes, towels, etc. This
way no “ball” will form during
the spin cycle and the
garments will stay balanced.
Coloured Coloured
Coloured
Coloured Coloured
ones and shirts last longer if
turned inside out before
washing.
Printed T-shirts and sweatshirts should always be ironed
inside out.
TT
-shir-shir
T
-shir
TT
-shir-shir
tsts
ts, printed
tsts
Wash cycle intensity
Wool
Hand wash
Delayed start
Daily wash at 30° in
30'
Easy iron
Stain removal
Half load
Silk and curtains
Salopette alert. Salopette alert.
Salopette alert.
Salopette alert. Salopette alert.
Very popular “salopette” type
overalls have straps with hooks
that can damage the drum of
your washing machine or other
garments during the wash. By
placing the hooks in the bib
pocket and fastening them with
safety pins, all risks are avoided.
Holidays: unplug theHolidays: unplug the
Holidays: unplug the
Holidays: unplug theHolidays: unplug the
appliance.appliance.
appliance.
appliance.appliance.
When you go on holiday, we
recommend that you unplug
your washing machine,
shutting off the water inlet tap
and leaving the door opened or
ajar. This way, both the drum and
the gasket will remain nice and
dry and unpleasant odours will
not develop inside the washing
machine.
HoHo
Ho
HoHo
w to wash almost anw to wash almost an
w to wash almost an
w to wash almost anw to wash almost an
Curtains.Curtains.
Curtains.
Curtains.Curtains.
Curtains tend to crease a
great deal. Here is a tip to
reduce creasing: fold the
curtains and place them in a
pillow case or mesh bag. Do
not load anything else, so
that the overall weight does
not exceed the half load.
ythingything
ything
ythingything
Quilted coats and wind-Quilted coats and wind-
Quilted coats and wind-
Quilted coats and wind-Quilted coats and wind-
cheaters.cheaters.
cheaters.
cheaters.cheaters.
You can wash quilted coats and
wind-cheaters, too, if they are
padded with goose or duck
down. Do not load more than 23 kg and never load 5 kg. Repeat
rinse once or twice using the
gentle spin.
TT
rainerrainer
rainer
rainerrainer
s.s.
s.
s.s.
T
TT
Once you have removed mud
and dirt from trainers, you
can wash them with jeans
and other tough garments.
Do not wash trainers with
whites.
WOOL CYCLE
For best results, use a specific
detergent, taking care not to
exceed a load of 1 kg.
Instructions for installation and use
88
8
88
Page 10

When detergents and water are not enough…
How to get rid of some special stainsHow to get rid of some special stains
How to get rid of some special stains
How to get rid of some special stainsHow to get rid of some special stains
- Red wine. Leave to soak with detergent, rinse and treat with acetic acid or citric acid, then rinse. Treat any residue with
bleach.
- Blood. Fresh stains should be treated immediately with cold water. In the event of dry blood stains, leave to soak overnight
with a special detergent and then rub with soapy water.
- Dry grease stains. Moisten with turpentine, dab the stains with your fingertips and a cotton cloth, after placing the
garment on a soft surface.
- Rust. Oxysalt (can be found in a chemists) hot molten, or a cold anti-rust product. Old stains may have already damaged
the fabric: risk of holes
- Mould stains Treat with bleach, rinse thoroughly (only white and coloured garments resistant to chlorine).
- Oil paint. Moisten with detergent petrol, dab the stains after placing the garment on top of a soft cloth, then treat
repeatedly with the detergent.
- Ink and biro. Dab with cotton soaked in methyl alcohol or alcohol at 90°.
- Tar. Dab with fresh butter, rub in turpentine then wash immediately.
- Wax. Scrape away, then run a hot iron between two sheets of absorbent paper. Then rub in cotton with turpentine or
methyl alcohol.
- Chewing gum. Rub in nail polish remover and wipe with a clean rag.
- Mould. Cotton and white linen should be placed in a solution of 5 parts water, one bleach and a spoon of vinegar, then
washed immediately. For other white fabrics, use hydrogen peroxide at 10 volumes and wash immediately.
- Lipstick. Dab with ether on wool or cotton. Use trichlorethylene for silk.
- Nail polish. Place a sheet of absorbent paper on the side of the stain, wet it with nail polish remover, shifting the garment
as the sheet gradually changes colour.
- Grass. Dab with a wad of cotton soaked in methyl alcohol.
For a safe wash cycle
HoHo
Ho
HoHo
Fig. 1
Fig. 1
Fig. 3
w to open and shut the drumw to open and shut the drum
w to open and shut the drum
w to open and shut the drumw to open and shut the drum
Fig. 2
Fig. 2
Fig. 4
A) OPENING (Fig. 1).A) OPENING (Fig. 1).
A) OPENING (Fig. 1). Lift the external lid and open it completely.
A) OPENING (Fig. 1).A) OPENING (Fig. 1).
B) Then open the drum using both hands as shown in Fig. 2:B) Then open the drum using both hands as shown in Fig. 2:
B) Then open the drum using both hands as shown in Fig. 2:
B) Then open the drum using both hands as shown in Fig. 2:B) Then open the drum using both hands as shown in Fig. 2:
- press the button indicated by the arrow in Fig. 2 lightly downwards,
with one hand firmly resting on the doors to prevent them from
suddenly opening and hurting your fingers;- therefore follow the
appliance doors along as these unhook and open easily.
C) LOC) LO
ADING ADING
THE THE
WW
C) LO
ADING
C) LOC) LO
ADING ADING
D) SHUTTING. (Fig. 4).D) SHUTTING. (Fig. 4).
D) SHUTTING. (Fig. 4).
D) SHUTTING. (Fig. 4).D) SHUTTING. (Fig. 4).
- close the drum fully by first shutting the front door followed by the
rear one;
- then ensure the hooks on the front door are perfectly housed
within the seat of the rear door;
- after the hooks have clicked into position, press both doors lightly
downwards to make sure they do not come loose;
- finally shut the external lid.
THE
THE THE
ASHING MAASHING MA
W
ASHING MA
WW
ASHING MAASHING MA
CHINE.CHINE.
CHINE.
CHINE.CHINE.
(Fig. (Fig.
(Fig.
(Fig. (Fig.
3). 3).
3).
3). 3).
99
9 Instructions for installation and use
99
Page 11
It's important for a good wash
The secrets of the deterThe secrets of the deter
The secrets of the deter
The secrets of the deterThe secrets of the deter
gg
ent dispenserent dispenser
g
ent dispenser
gg
ent dispenserent dispenser
The first secret: the detergent dispenser is in a handy position underneath the appliance door.
You should add detergent and
any additives following the
dosage recommended by the
manufacturers: generally, all
the indications you need are
on the box.
Doses vary Doses vary
Doses vary
Doses vary Doses vary
wash load, the waterwash load, the water
wash load, the water
wash load, the waterwash load, the water
hardness and how soiled thehardness and how soiled the
hardness and how soiled the
hardness and how soiled thehardness and how soiled the
washing is. Do not exceed.washing is. Do not exceed.
washing is. Do not exceed.
washing is. Do not exceed.washing is. Do not exceed.
More detergent does notMore detergent does not
More detergent does not
More detergent does notMore detergent does not
necessarily mean greaternecessarily mean greater
necessarily mean greater
necessarily mean greaternecessarily mean greater
wash efficiencwash efficienc
wash efficienc
wash efficiencwash efficienc
contrary…contrary…
contrary…
contrary…contrary…
Experience will help you select
the right dosage almost
automatically: it will become
your secret.
When pouring in the softener
in compartment
exceeding the “max” level
indicated.
The washing machine automatically adds the softener to
according toaccording to
according to
according toaccording to
yy
,,
on the on the
y
,
on the
yy
,,
on the on the
33
3, avoid
33
Cutting costs efficiently
FULL LOAD
The best way to save on energy, water, detergent and time is to use your washing machine,
washing a full recommended load.
A full load instead of two half loads allows you to SAVE up to 50% of energy.
USE LESS DETERGENT IF: you are washing few garments, the washing is only soiled
lightly, foam forms during washing or the water is not very hard, or soft even (please see
small table above with the degrees of water hardness). To find out how hard the water in
your area is, contact your local Water Works.
IS PRE-W ASHING STRICTL Y NECESSAR Y?
Only for extremely soiled garments.
Programming a wash WITHOUT pre-washing for lightly soiled or medium soiled garments
allows you to SAVE on detergent, time, water and between 5 and 15% of energy.
IS W ASHING WITH HOT WATER STRICTL Y NECESSAR Y?
Treating stains with a stain remover or soaking garments with dry stains in water before
washing can reduce the need to programme a wash using hot water.
Use a wash programme at 60° to SAVE up to 50% of energy.
BEFORE USING A DRYING CYCLE ...
Select a high speed spin cycle, where the spin speed can be adjusted, if the washing should
be dried in a tumble-dryer. A reduced water content in the washing allows you to SAVE
both time and energy in the drying programme.
the wash in each pro-gramme.
Liquid detergent is to beLiquid detergent is to be
Liquid detergent is to be
Liquid detergent is to beLiquid detergent is to be
poured in just a few secondspoured in just a few seconds
poured in just a few seconds
poured in just a few secondspoured in just a few seconds
before starting the washbefore starting the wash
before starting the wash
before starting the washbefore starting the wash
cycle.cycle.
cycle.
cycle.cycle.
Remember that liquid de-Remember that liquid de-
Remember that liquid de-
Remember that liquid de-Remember that liquid detergent is particularly sui-tergent is particularly sui-
tergent is particularly sui-
tergent is particularly sui-tergent is particularly suitable for wash cycles of up totable for wash cycles of up to
table for wash cycles of up to
table for wash cycles of up totable for wash cycles of up to
60 degrees and those not60 degrees and those not
60 degrees and those not
60 degrees and those not60 degrees and those not
requiring pre-washing.requiring pre-washing.
requiring pre-washing.
requiring pre-washing.requiring pre-washing.
Liquid or powder detergents
are sold together with special
containers that are to be placed
directly inside the washing
machine drum, according to
the instructions found on the
detergent box.
Never use hand wash
detergent, because it may form
too much foam, which could
damage the washing machine.
One last secret: when washing
with cold water, always reduce
the amount of detergent you
use: it dissolves less easily in
cold water than in hot water, so
part of it would be wasted.
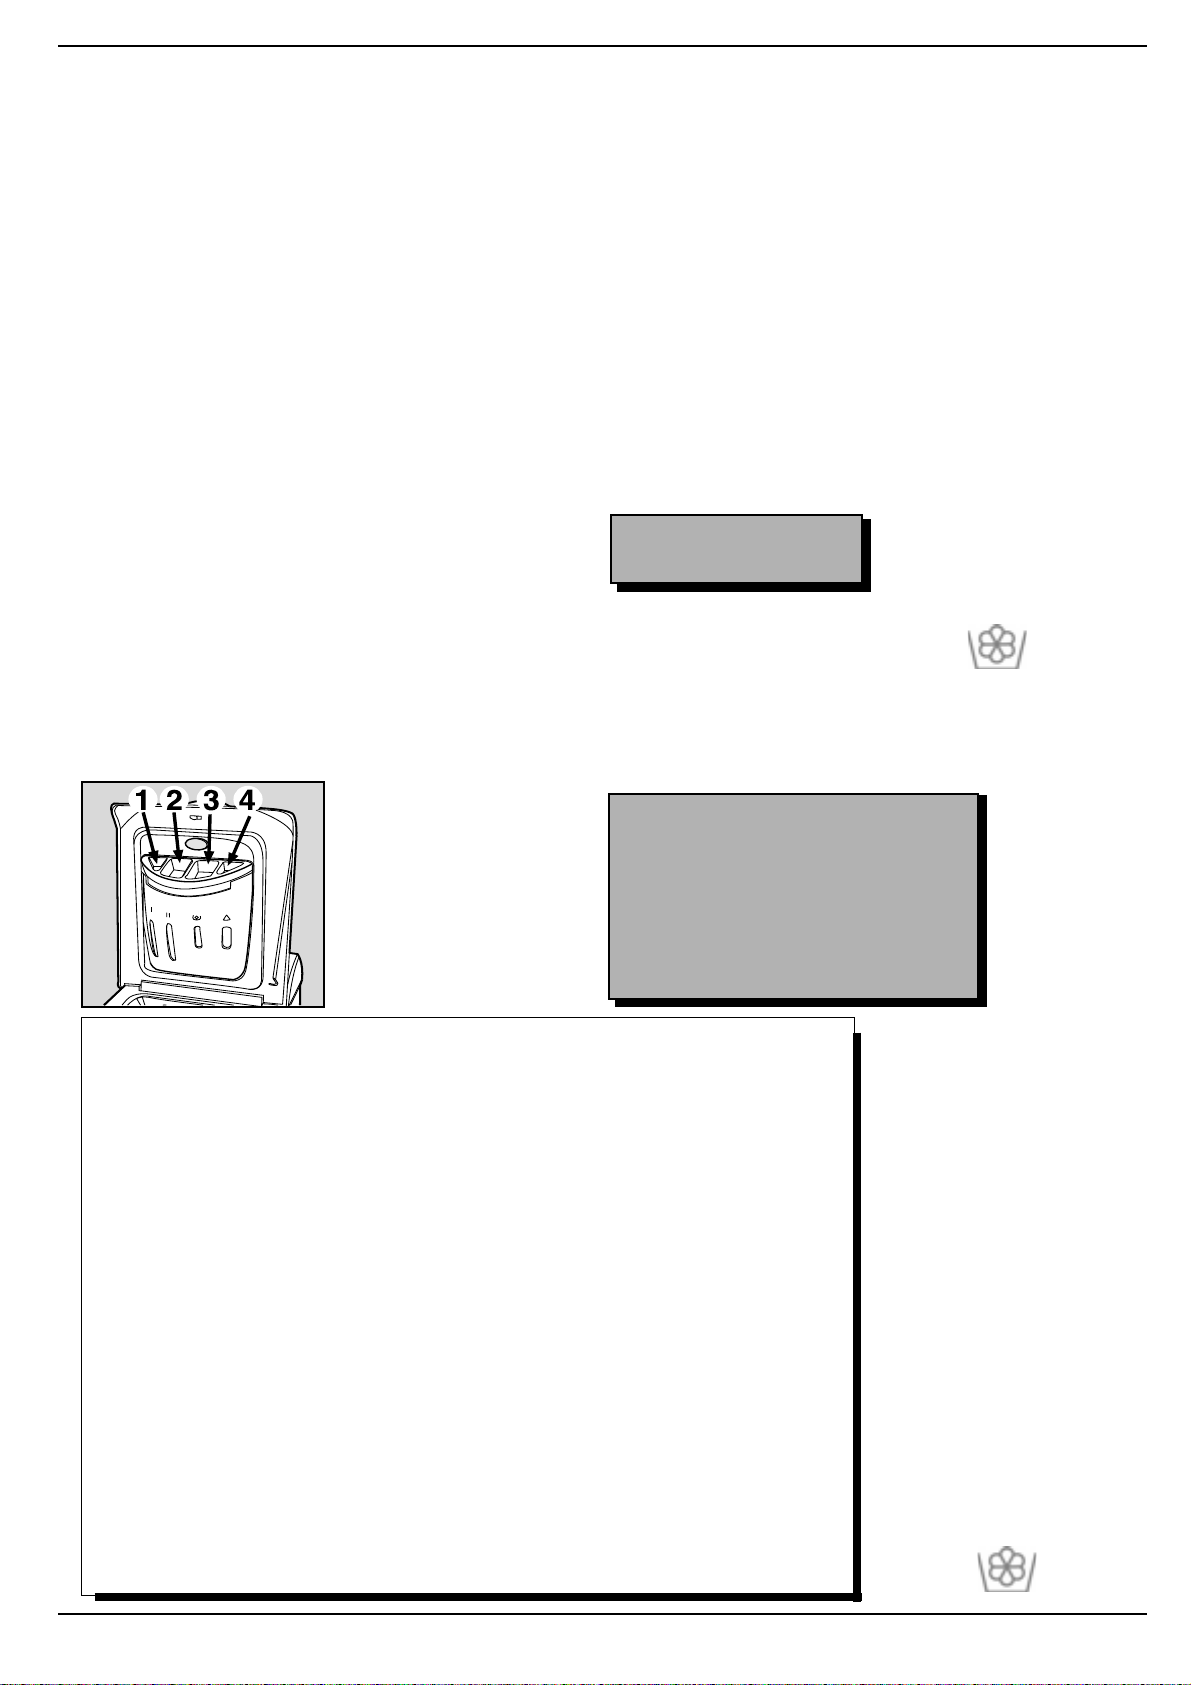
In compartment 1:
pre-wash (powder)pre-wash (powder)
pre-wash (powder)
pre-wash (powder)pre-wash (powder)
In compartment 2:
the wash cycle (powder and liquid)the wash cycle (powder and liquid)
the wash cycle (powder and liquid)
the wash cycle (powder and liquid)the wash cycle (powder and liquid)
In compartment 3:
In compartment 4:
Detergent forDetergent for
Detergent for
Detergent forDetergent for
Detergent forDetergent for
Detergent for
Detergent forDetergent for
Fabric softenerFabric softener
Fabric softener
Fabric softenerFabric softener
BleachBleach
Bleach
BleachBleach
A guide to running your
household appliances cheaply
while respecting the environment.
Pre-wash, bleach and fabricPre-wash, bleach and fabric
Pre-wash, bleach and fabric
Pre-wash, bleach and fabricPre-wash, bleach and fabric
softenersoftener
softener
softenersoftener
Should it be necessary to
bleach, set the special
programmes and pour the
bleach into compartment
of the detergent dispenser.
When you pour the bleach in,
take care not to exceed the
“max”“max”
“max” level indicated.
“max”“max”
The use of bleach excludesThe use of bleach excludes
The use of bleach excludes
The use of bleach excludesThe use of bleach excludes
the possibility of running athe possibility of running a
the possibility of running a
the possibility of running athe possibility of running a
pre-wash.pre-wash.
pre-wash.
pre-wash.pre-wash.
TT
raditional braditional b
T
raditional b
TT
raditional braditional b
be used on sturdy whitebe used on sturdy white
be used on sturdy white
be used on sturdy whitebe used on sturdy white
fabrics, whereas delicatefabrics, whereas delicate
fabrics, whereas delicate
fabrics, whereas delicatefabrics, whereas delicate
bleach can be used forbleach can be used for
bleach can be used for
bleach can be used forbleach can be used for
coloured fabrics andcoloured fabrics and
coloured fabrics and
coloured fabrics andcoloured fabrics and
synthetics.synthetics.
synthetics. You cannot
synthetics.synthetics.
bleach with the “Silk”
programme and with the
leacleac
leac
leacleac
h can onlh can onl
h can onl
h can onlh can onl
“Special Programmes” (see
page 6).
N.B.:N.B.:
N.B.:
N.B.:N.B.:
1) Concentrated bleach must1) Concentrated bleach must
1) Concentrated bleach must
1) Concentrated bleach must1) Concentrated bleach must
4 4
4
4 4
be diluted in all cases.be diluted in all cases.
be diluted in all cases.
be diluted in all cases.be diluted in all cases.
2) For concentrated2) For concentrated
2) For concentrated
2) For concentrated2) For concentrated
detergents (in powder ordetergents (in powder or
detergents (in powder or
detergents (in powder ordetergents (in powder or
liquid), use a programmeliquid), use a programme
liquid), use a programme
liquid), use a programmeliquid), use a programme
without pre-washing.without pre-washing.
without pre-washing.
without pre-washing.without pre-washing.
3) For detergents contained3) For detergents contained
3) For detergents contained
3) For detergents contained3) For detergents contained
in a ball or in tablets, do notin a ball or in tablets, do not
in a ball or in tablets, do not
in a ball or in tablets, do notin a ball or in tablets, do not
run a pre-wash.run a pre-wash.
run a pre-wash.
run a pre-wash.run a pre-wash.
yy
y
yy
Fabric Softener AdditionFabric Softener Addition
Fabric Softener Addition
Fabric Softener AdditionFabric Softener Addition
Fabric softener makes your
washing softer and decreases
the electrostatic load of synthetic
fibres.
Degrees of water hardness
Level -Feature German French
°dH °T.H
1 -
Soft
2 - Medium
3 - Hard
4 - Very hard
0- 7 0-15
8-14 16-25
15-21 26-37
more than
21
more than
the manufacturer's instructions.
The fabric softener is
automatically inserted into the
machine during the last rinse.
At the end of the wash
programme, some water will be
left in compartment 3. This is
used for the inlet of denser fabric
softeners into the machine, i.e.
to dilute the more concentrated
softeners.
Should more than a normal
amount of water remain in
compartment 3, this means the
emptying device is blocked,
thus interrupting the suction
effect of the device.
For cleaning instructions, see
page 13. Never pour fabric
softeners together with starch
into the dispenser, as the
overflow system could get
clogged.
37
Fabric softeners can be
used for towelling fabrics,
knitwear,
curtains, etc.
Pour the fabric
softener into
compartment 3
of the dispenser following
Instructions for installation and use
1010
10
1010
Page 12

Troubleshooting
BefBef
Bef
BefBef
Your washing machine could fail to work. In most cases, the problems arising can be easily solved without having to
call for a technician. Before calling for assistance, always check these points.
The washing machineThe washing machine
The washing machine
The washing machineThe washing machine
fails to start.fails to start.
fails to start.
fails to start.fails to start.
Is the plug correctly Is the plug correctly
Is the plug correctly
Is the plug correctly Is the plug correctly
inserted in the socket?inserted in the socket?
inserted in the socket? It
inserted in the socket?inserted in the socket?
could have been moved
whilst cleaning.
Is there electricity in the Is there electricity in the
Is there electricity in the
Is there electricity in the Is there electricity in the
house?house?
house?
house?house?
A circuit breaker could have
gone off, perhaps because
too many appliances are on
at the same time. Or
perhaps because of a
general power failure in
your entire area.
Is the appliance door shutIs the appliance door shut
Is the appliance door shut
Is the appliance door shutIs the appliance door shut
properly?properly?
properly?
properly?properly?
For safety reasons, the
ore calling,ore calling,
ore calling,
ore calling,ore calling,
washing machine cannot
work if the door is open or
not shut properly.
Is the ON/OFF button Is the ON/OFF button
Is the ON/OFF button
Is the ON/OFF button Is the ON/OFF button
pressed?pressed?
pressed?
pressed?pressed?
If it is, then a programmed
start has been set.
Is the programmed startIs the programmed start
Is the programmed start
Is the programmed startIs the programmed start
knob, on those modelsknob, on those models
knob, on those models
knob, on those modelsknob, on those models
concerned, in the correctconcerned, in the correct
concerned, in the correct
concerned, in the correctconcerned, in the correct
position?position?
position?
position?position?
Is the water tap turned on? Is the water tap turned on?
Is the water tap turned on?
Is the water tap turned on? Is the water tap turned on?
For safety reasons, if the
washing machine does not
load water, it cannot start a
wash cycle.
read the f read the f
read the f
read the f read the f
olloollo
ollo
olloollo
wingwing
wing
wingwing
RIGHT RIGHT
RIGHT
RIGHT RIGHT
T urning off the water
tap after each wash
limits the use of the
washing machine's
hydraulic system and
eliminate leakage
risks when no-one is
at home.
T ry to only leave the
appliance in use
unattended if the place
where it is located is
equipped with a floor
drain.
Always leave all
appliance doors ajar .
This will avoid the
formation of bad
odours.
Clean the appliance's
exteriors delicately.
T o clean the exteriors
and the rubber parts of
the appliance, always
use a cloth dipped in
lukewarm soapy water .
WRONG
Leave the washing machine
plugged in while cleaning.
Even during maintenance,
the appliance should always
be unplugged.
Use solvents and aggressive abrasives.
Never use solvents or
abrasives to clean the
external and rubber parts
of the washing machine.
Neglect the detergent
dispenser .
It is removable and can
easily be cleaned by leaving
it under running water .
Go on holiday without
thinking about it.
Before leaving, always
make sure that the washing
machine is unplugged and
that the water tap is turned
off.
?
The washing machineThe washing machine
The washing machine
The washing machineThe washing machine
fails to load waterfails to load water
fails to load water
fails to load waterfails to load water
..
.
..
Is the tap correctly Is the tap correctly
Is the tap correctly
Is the tap correctly Is the tap correctly
attached to the pipe?attached to the pipe?
attached to the pipe?
attached to the pipe?attached to the pipe?
Is there a water shortage?Is there a water shortage?
Is there a water shortage?
Is there a water shortage?Is there a water shortage?
There could be work in
progress in your building or
street.
Is there enough pressure?Is there enough pressure?
Is there enough pressure?
Is there enough pressure?Is there enough pressure?
The autoclave may be
malfunctioning.
Is the tap filter clean?Is the tap filter clean?
Is the tap filter clean? If the
Is the tap filter clean?Is the tap filter clean?
water is very calcareous, or
if work has recently been
carried out on the water
piping, the tap filter could be
clogged with particles and
debris.
Is the rubber hose bent?Is the rubber hose bent?
Is the rubber hose bent?
Is the rubber hose bent?Is the rubber hose bent?
The tract of the rubber hose
bringing water to the
washing machine must be
as straight as possible.
Make sure it is not
squashed or bent.
The washing machineThe washing machine
The washing machine
The washing machineThe washing machine
continuously loadscontinuously loads
continuously loads
continuously loadscontinuously loads
and unloads waterand unloads water
and unloads water
and unloads waterand unloads water
Is the drain hoseIs the drain hose
Is the drain hose
Is the drain hoseIs the drain hose
positioned too low?positioned too low?
positioned too low? It must
positioned too low?positioned too low?
be installed at a height
ranging from 60 to 100 cm.
Is the hose’Is the hose’
Is the hose’
Is the hose’Is the hose’
immersed in water?immersed in water?
immersed in water?
immersed in water?immersed in water?
Does the wall drainageDoes the wall drainage
Does the wall drainage
Does the wall drainageDoes the wall drainage
system have a breathersystem have a breather
system have a breather
system have a breathersystem have a breather
pipe? pipe?
pipe? If the problem
pipe? pipe?
persists even after these
checks, turn off the water
tap, switch the appliance off
and call for assistance.
If you live on an upper floor
of your building, there may
be a problem with your
..
.
..
s mouths mouth
s mouth
s mouths mouth
11 11
11 Instructions for installation and use
11 11
Page 13

The washing machineThe washing machine
The washing machine
The washing machineThe washing machine
does not drain or spin.does not drain or spin.
does not drain or spin.
does not drain or spin.does not drain or spin.
Does the selectedDoes the selected
Does the selected
Does the selectedDoes the selected
programme foresee waterprogramme foresee water
programme foresee water
programme foresee waterprogramme foresee water
draining?draining?
draining? Some wash
draining?draining?
cycles require enabling the
draining manually.
Has the Has the
Has the
Has the Has the
function - in thosefunction - in those
function - in those
function - in thosefunction - in those
appliances where it isappliances where it is
appliances where it is
appliances where it isappliances where it is
foreseen - been enabled?foreseen - been enabled?
foreseen - been enabled?
foreseen - been enabled?foreseen - been enabled?
This function requires
enabling the draining
manually.
Is the drain pump clogged?Is the drain pump clogged?
Is the drain pump clogged?
Is the drain pump clogged?Is the drain pump clogged?
To check it, turn off the tap,
unplug the washing
machine and follow the
instructions on page 14, or
call for technical assistance.
“Anti-crease”“Anti-crease”
“Anti-crease”
“Anti-crease”“Anti-crease”
Is the rubber hose bent?Is the rubber hose bent?
Is the rubber hose bent?
Is the rubber hose bent?Is the rubber hose bent?
The tract of the drain hose
must be as straight as
possible. Make sure it is not
squashed or bent.
Is the washing macIs the washing mac
Is the washing mac
Is the washing macIs the washing mac
drain duct clogged? drain duct clogged?
drain duct clogged? Is
drain duct clogged? drain duct clogged?
there an extension on the
drain hose? If so, is it
positioned incorrectly,
blocking the water flow?
hine’hine’
hine’
hine’hine’
ss
s
ss
Has it got enough roomHas it got enough room
Has it got enough room
Has it got enough roomHas it got enough room
around it?around it?
around it? The appliance
around it?around it?
should not be leaning
against any sanitary fixtures
and must have some free
space around it. If it is
placed on a fitted carpet
floor, ensure that there is
enough room for air to
circulate between the
appliance feet and the
carpet.
Always get
assistance from
authorised
technicians and
always insist on
original spare parts
The washing machineThe washing machine
The washing machine
The washing machineThe washing machine
vibrates too muchvibrates too much
vibrates too much
vibrates too muchvibrates too much
during the spin cycle.during the spin cycle.
during the spin cycle.
during the spin cycle.during the spin cycle.
Has the internal floatingHas the internal floating
Has the internal floating
Has the internal floatingHas the internal floating
unit been correctlyunit been correctly
unit been correctly
unit been correctlyunit been correctly
unblocked duringunblocked during
unblocked during
unblocked duringunblocked during
installation? installation?
installation? See page 2
installation? installation?
on installation procedures.
Has the washing machineHas the washing machine
Has the washing machine
Has the washing machineHas the washing machine
been levelled correctly?been levelled correctly?
been levelled correctly?
been levelled correctly?been levelled correctly?
The levelling of the
appliance should be
checked periodically. In
time, the appliance could
move imperceptibly. Adjust
the feet and check them
with a level.
The washing machineThe washing machine
The washing machine
The washing machineThe washing machine
leaks.leaks.
leaks.
leaks.leaks.
Is the metal ring of the inletIs the metal ring of the inlet
Is the metal ring of the inlet
Is the metal ring of the inletIs the metal ring of the inlet
hose properly attached?hose properly attached?
hose properly attached?
hose properly attached?hose properly attached?
Tur n off the tap, unplug the
appliance and try tightening
its attachment without
forcing it.
Is the detergent dispenserIs the detergent dispenser
Is the detergent dispenser
Is the detergent dispenserIs the detergent dispenser
obstructed? obstructed?
obstructed? Try extracting
obstructed? obstructed?
it and washing it under tap
water.
Is the drain hose wellIs the drain hose well
Is the drain hose well
Is the drain hose wellIs the drain hose well
attached?attached?
attached? Turn off the tap,
attached?attached?
unplug the appliance and
try tightening its attachment.
TT
oo moo m
ucuc
h fh f
T
oo m
TT
oo moo m
Is the detergent suitableIs the detergent suitable
Is the detergent suitable
Is the detergent suitableIs the detergent suitable
for washing-machinefor washing-machine
for washing-machine
for washing-machinefor washing-machine
use?use?
use? Make sure that it
use?use?
bears the definition "for
washing-machines" or
"hand and machine wash",
or the like.
Is the correct amountIs the correct amount
Is the correct amount
Is the correct amountIs the correct amount
being used?being used?
being used? An excessive
being used?being used?
amount of detergent,
besides producing too
much foam, does not
guarantee a more effective
wash, and causes scaling
in the internal parts of the
appliance.
If, despite all checks, the
washing machine fails to
function and the problem
persists, call your nearest
authorised Customer Service
Centre, providing the following
information:
--
the type of malfunctioningthe type of malfunctioning
-
the type of malfunctioning
--
the type of malfunctioningthe type of malfunctioning
--
the model type no.the model type no.
-
the model type no.
--
the model type no.the model type no.
(Model……. ) (Model……. )
(Model……. )
(Model……. ) (Model……. )
- the serial number (S/N ....)- the serial number (S/N ....)
- the serial number (S/N ....)
- the serial number (S/N ....)- the serial number (S/N ....)
These indications can be found
on the data plate situated on
the back of the washing
machine front base. (fig. 1)
uc
ucuc
h f
h fh f
oam.oam.
oam.
oam.oam.
Instructions for installation and use
1212
12
1212
Page 14

Easy Care and Maintenance
TT
reat it well and it'll be yreat it well and it'll be y
T
reat it well and it'll be y
TT
reat it well and it'll be yreat it well and it'll be y
Y our washing machine is a r eliable companion in life and on
friend ffriend f
friend f
friend ffriend f
oreore
ore
oreore
verver
ver
verver
the job. It is just as important for you to keep it in shape.
ourour
our
ourour
Your washing machine is
designed to last a lifetime
without any problems. A few
simple steps help keep it in
shape and last longer.
Firstly, you must turn off the
water tap after each wash:
the constant pressure of water
could warp a few of the
component parts.
In addition, by doing so, you
will avoid the risk of leaks when
no-one is at home.
If the water in your area is too
hard, use a deliming product
(water is hard if it often leaves
whitish stains around taps or
drains, especially of bath tubs.
For more accurate information
as to the type of water in your
system, call the local water
works or a local plumber).
Pockets must always be
emptied by removing even
coins, pins, badges and any
other hard object.
The washing machine exterior
should be cleaned with a cloth
dipped in lukewarm soapy
water.
It is important to wash
the detergent dispenser
regularly.
To prevent dried washing
powder from
accumulating, place the
dispenser under running
water for a few minutes.
Never exaggerate with
detergent doses.
Normal detergents already
contain deliming agents. Only
if the water is particularly hard,
that is, rich in lime content, do
we recommend the use of a
specific product at every wash.
A periodical wash cycle with a
dose of a deliming product,
without detergents or
washing, may prove useful.
Never use too much detergent
or additives because this
could cause an excess
amount of foam, scaling and
possible damage to the
component parts of your
washing machine.
HoHo
Ho
HoHo
Fig. 1
w to cw to c
w to c
w to cw to c
Disassembly:Disassembly:
Disassembly:
Disassembly:Disassembly:
Press lightly on the large button on the front of the detergent
dispenser and pull it upwards
(fig. 1).
lean the deterlean the deter
lean the deter
lean the deterlean the deter
Do not forget to empty all pockets:
small metallic objects can cause damage to your
washing machines drum during the spin cycle.
gg
ent dispenserent dispenser
g
ent dispenser
gg
ent dispenserent dispenser
Cleaning:Cleaning:
Cleaning:
Cleaning:Cleaning:
Then clean the dispenser under a tap (fig. 3) using an old toothbrush and, once the pair of siphons inserted in the top of compartments 1 and 2 (fig. 4) have been pulled out, check whether
the same are not clogged and then rinse them.
Fig. 2
Fig. 3
Reassembly:Reassembly:
Reassembly:
Reassembly:Reassembly:
Do not forget to reinsert the
pair of siphons into the special
housings and then to replace
the dispenser into its seat,
clicking it into place (fig. 4, 2
and 1).
Fig. 4
1313
13 Instructions for installation and use
1313
Page 15

When in need, check the pump and the rubber hose.When in need, check the pump and the rubber hose.
When in need, check the pump and the rubber hose.
When in need, check the pump and the rubber hose.When in need, check the pump and the rubber hose.
The washing machine comes equipped with a self-cleaning pump that does not require any cleaning or maintenance. Small objects
may accidentally fall into the pump: coins, hair clips, loose buttons and other small items. T o avoid possible damage, they are
withheld in an accessible pre-chamber , situated at the lower end of the pump.
To access this pre-chamber, just remove the panel covering the
bottom of the washing machine (fig. 1); then lift the cover rotating it
anti-clockwise (fig. 2) and check its contents accurately .
The rubber hose
Check the rubber hose at least once a year. If you see any cracks,
replace it immediately. When you use your washing machine, water
Fig. 1
pressure is very strong and a cracked hose could easily split open.
Fig. 1
Warning: make sure that the wash cycle has come to a full stop and unplug the appliance before removing the lid as well as before any
type of maintenance procedure. It is normal to find that a little water comes out after removing the lid. When replacing the panel, make
sure you insert the hooks situated at the bottom of the washing machine in the right slots before pushing it back against the appliance.
TT
ecec
T
TT
hnical fhnical f
ec
hnical f
ecec
hnical fhnical f
eatureseatures
eatures
eatureseatures
Fig. 2
Model
Dimensions
Capacity
Electric
connections
Water connections
Spin speed/min
Controlling
programmes in
accordance with
IEC Norm 4 56
The manufacturer reserves the right to make any modifications whatsoever, at any time and without notice, to the appliance or any of its accessories
that may be deemed necessary for technical or commercial requirements.
AT 50
wi dth cm 4 0
hei gh t cm 8 5
dep th cm 60
from 1 to 5 kg
voltage 230 Volts 50Hz
maximum absorbed power 2100 W
max imum pressure 1 Mpa (10 bar)
minimum pressure 0.0 5 Mpa (0.5 bar)
drum ca pac ity 42 litres
up to 500 r.p.m.
run with a load of 5.0 kg, programme 2, 60° C
This appliance conforms with the following European Community Directives:
- 73/23/EEC of 19/02/73 (Low Voltage) and subsequent modifications
- 89/336/EEC of 03/05/89 (Electromagnetic Compatibility) and subsequent modifications
Instructions for installation and use
14 14
14
14 14
Page 16

Merloni Elettrodomestici
Viale Aristide Merloni 47
60044 Fabriano
Italie
Tel +39 0732 6611
Fax +39 0732 662501
www.merloni.com
10/2002- 195 033 389 03 - Xerox Business Services Docutech
Page 17
AT 50
Les secrets
des tissus
Des conseils pour mieux laver
Mode
dinstallation et demploi
F
Lave-linge top loader
sûr
et facile à utiliser
Page 18

Guide rapide
Découvrez ci-dessous les 11 sujets qui seront développés
dans les pages de ce manuel. Lisez, apprenez, amusezvous: vous découvrirez un tas de petits secrets pour laver
mieux, avec moins defforts tout en augmentant la
longévité de votre lave-linge. Et surtout, en toute
sécurité .
1. Installation et déménagement (page 2)
Pour un bon fonctionnement du lave-linge, lopération la plus importante après sa livraison ou après un déménagement, est sans aucun
doute son installation. Vérifiez toujours:
1. si linstallation électrique est conforme.
2. si les tuyaux darrivée et de vidange de leau sont bien raccordés
correctement. Ne jamais utiliser des tuyaux usés.
3. si le lave-linge est bien de niveau. Cest important: pour la
longévité de votre lave-linge et pour la qualité de votre lavage.
4. que toutes les vis de fixation du tambour, situées à l'arrière
du lave-linge, ont bien été enlevées.
2. Sécurité pour vous et vos enfants (page 3)
Vous y trouverez tous les conseils indispensables à votre sécurité et à
celle de votre famille. Cest ce quil y a de plus important.
7. Conseils utiles pour ne pas vous tromper (page 8)
3. Comment charger votre lave-linge et le mettre
en service (page 4)
Triez correctement votre linge: cest une opération importante dont
la réussite de votre lessive dépend entièrement. Apprenez tous les
trucs et tous les secrets pour bien trier votre lessive: les couleurs, les
textiles, la tendance à produire des peluches, voilà quels sont les
critères les plus importants.
4. Bien maîtriser le bandeau de commandes
(page 5 - 6)
Le bandeau de commandes de votre lave-linge est très simple.
Quelques commandes essentielles pour choisir les types de lavage,
du plus énergique, pour laver une combinaison de mécanicien,
jusquau plus délicat pour le cachemire. Apprenez à vous en servir,
vous laverez mieux et prolongerez la durée de vie de votre lave-linge.
Cest facile.
Autrefois, on suivait les bons conseils de grand-mère - et les matières
synthétiques nexistaient pas: il était donc facile de laver. Aujourdhui,
cest votre lave-linge qui vous donne de bons conseils et vous permet
même de laver laine et cachemire aussi bien quune blanchisseuse.
8. Le tiroir à produits lessiviels (page 10)
Comment utiliser le tiroir à produits lessiviels et le bac à eau de Javel.
9. Problèmes et solutions (pages 11 et 12)
Avant dappeler un technicien, lisez ces pages: de nombreux problèmes
peuvent trouver une solution immédiate. Si vous narrivez pas à les
résoudre, appelez alors le numéro de votre SAV et en un rien de temps
la panne sera réparée.
5. Guide des programmes de lavage
(page 6)
Un tableau facile à consulter pour cerner dun seul coup doeil tous les
programmes, les températures, les produits lessiviels et additionnels.
Utilisez le bon et vous obtiendrez de meilleurs résultats en économisant
du temps, de leau et de lélectricité, jour après jour.
10. Soin et entretien (page 13)
Votre lave-linge estun ami: quelques petites attentions suffisent pour
quelle vous rende la pareille en fidélité et dévotion.
Chouchoutez-la, elle lavera pour vous pendant des années et des
années.
6. Guide pour comprendre les étiquettes et les
symboles Ariston (pages 7-8)
Les symboles reportés sur les étiquettes des vêtements sont très
faciles à comprendre et importants quant à la réussite du lavage. Ce
guide vous aidera à vous y retrouver parmi les températures
conseillées, les types de lavage et de repassage.
Mode dinstallation et demploi
1
11. Caractéristiques techniques (page 14)
Vous y trouverez les caractéristiques techniques de votre lave-linge:
sigle du modèle, spécifications électriques et hydrauliques,
dimensions, capacité, vitesse dessorage et conformité aux normes
et aux directives italiennes et européennes.
Page 19

Installation et déménagement
Quand votre lavelinge arrive
Que votre lave-linge soit neuf ou que vous veniez juste de
déménager, son bon fonctionnement dépend en grande partie
de son installation.
A
près avoir déballé l'appareil,
vérifiez s'il est en bon état. En cas de
doute, faites appel à un professionnel
du secteur. Pour permettre son
transport, l'in-térieur du lavelinge a été blo-qué à l'aide de
quatre vis et de caoutchoucs sur
le pan- neau arrière de la
machine.
Déblocage: enlever les
4 vis!
Avant de brancher votre lave-linge, enlevez les vis, le caoutchouc
et la cale (conservez bien toutes
ces pièces) et bouchez les trous
à l'aide des cache-trous en plastique fournis avec l'appareil.
Attention: en cas de réutilisation, les vis plus courtes doivent
être montées dessus.
Mise à niveau
Pour bien fonctionner, il est important
que votre lave-linge soit bien posé à
plat. Pour bien le niveler, il suffit
d'agir sur ses pieds; son angle
d'inclinaison , mesuré sur le plan de
travail, ne doit pas depasser 2°. Si
vous avez de la moquette,
attention à ce que la ventilation
ne soit pas bouchée au niveau de
la zone dappui.
Les pieds avant sont réglables
Conservez les vis de
blocage et les cales. En cas
de déménagement vous
pourrez vous en resservir
pour bloquer les pièces
internes du lave-linge et le
protéger ainsi contre les
chocs pendant son
transport.
Raccordement à la
prise d'eau
La pression de l'eau doit être
comprise entre les valeurs indiquées
sur la plaquette fixée à l'arrière de
l'appareil. Raccordez le tuyau
d'arrivée que vous trouvez, démonté,
à l'intérieur du tambour à une prise
d'eau froide à embout fileté 3/4 gaz.
Si les tuyauteries de l'eau sont neuves
ou inutilisées depuis longtemps,
faites couler l'eau jusqu'à ce qu'elle
soit limpide et sans impuretés avant
de raccorder. Raccordez le tuyau à
la machine, au niveau de la prise
d'eau prévue en haut, à droite.
Prise d'eau à monter en haut à
droite.
Raccordement du tuyau
de vidange
Un crochet situé à l'arrière de la
machine, en haut, vous permet
éventuellement de fixer le tuyau de
vidange. Introduisez l'autre extrémité
dans un conduit d'évacuation murale ou bien accrochez-le à l'évier ou à
la baignoire en évitant de l'écraser
ou de trop le plier. Il faut absolument
qu'il débouche entre 60 et 100 cm de
haut.
Si vous êtes obligé de fixer
l'extrémité à moins de 60 cm audessus du sol, il faut que vous fixiez
le tuyau au crochet susmentionné
prévu dans le panneau arrière de la
machine.
Le crochet à utiliser si le tuyau
débouche à moins de 60 cm de
haut.
Si le tuyau évacue dans la baignoire
ou dans le lavabo, appliquez le
support en plastique et attachez-le
au robinet.
Le guide pour le vindange en
baignoire ou lavabo.
Ne le laissez jamais
tremper dans l'eau.
L'utilisation de rallonges est
absolument déconseillée. Si vous ne
pouvez vraiment pas vous en passer,
il faut qu'elle ait le même diamètre
que le tuyau original et moins de
150 cm de long. En cas d'évacuation
murale, faites vérifier son efficacité
par un professionnel agréé. Si vous
habitez en étage dans un immeuble,
il peut y avoir des phénomènes de
siphonnement qui font que votre
lave-linge prend et évacue l'eau
continuellement.
Pour supprimer cet inconvé-nient ,
vous pouvez trouver dans le
commerce des valves spéciales antisiphonnement.
M
Branchement
électrique
Avant de brancher la machine à la
prise de courant, contrôlez que:
1) la prise de courant est conforme
aux normes et que sa charge
électrique est bien apte à
supporter la puissance maximum
de la machine figurant sur la
plaquette des caractéri-stiques;
2) la tension d'alimentation est bien
comprise entre les valeurs
figurant sur la plaquette des
caractéri-stiques;
3) la prise est bien compati- ble avec
la fiche de la machine. En
cas d'incompatibilité, n'utilisez
pas d'adaptateurs mais remplacez
la prise ou la fiche;
4) votre installation électrique dispose bien d'une "mise à la terre".
5) une fois la machine branchée,
elle ne s'appuie pas sur le câble
d'alimentation.
Attention !
Le constructeur et le vendeur déclinent
toute responsabilité et aucune garantie
ne sera due en cas de modification
apportée au raccordement prévu par
l'usine, de mauvais raccordement
électrique, de modification électrique,
mécanique ou hydraulique subis par
la machine.
Attention!
Nous déclinons toute
responsabilité en cas
de non respect des
normes énumérées ci-
dessus.
Ne laissez pas les
enfants jouer avec les
sachets plastique, le
polystyrène expansé,
les vis et les autres
éléments demballage,
ils pourraient être
dangereux.
Mode dinstallation et demploi
Page 20

Ce qui compte par dessus tout
Votre sécurité et celle de
votre lave-linge a été fabriqué selon les normes
vos enfants
Lisez attentivement ces conseils
ainsi que toutes les informations
contenues dans ce mode d’emploi:
ils vous fourniront no n seulement
des renseignements utiles mais
aussi des conseils importants sur
la sécurité, l’utilisation et
l’entretien.
1. Margherita ne doit pas
être installée dehors,
même à labri, car il est très
dangereux de la laisser
exposée à la pluie et aux
orages.
2. Elle ne doit être utilisée
que par des adultes et
exclusivement pour laver du
linge selon les instructions
reportées dans ce mode
demploi.
3. Deux ou trois personnes sont
nécessaires pour la
déplacer en faisant très
attention. Ne jamais la
déplacer seul car la
machine est très lourde
ou utilisez un engin de
manutention (diable).
4. Avant dintroduire votre
linge, contrôlez si le
tambour est bien vide.
5. Ne touchez jamais la
machine pieds nus ou bien
les mains ou les pieds
mouillés ou humides.
6. Nutilisez ni rallonges ni
prises multiples, dange-
reuses surtout dans des
endroits humides. Le câble
dalimentation ne doit être ni
plié ni écrasé.
7. Nouvrez pas le tiroir à
produits lessiviels pendant le fonctionnement
Jexige un professionnel
qualifié et agréé
et des pièces de rechange
originales garanties
Ariston!
internationales de sécurité les plus sévères. Pour
vous protéger ainsi que votre famille.
de la machine; nutilisez
jamais de lessive pour
lavage à la main sa mousse
abondante pourrait
endommager les parties
internes de la machine.
8. Ne tirez jamais sur le
câble ni sur le lave-linge
pour débrancher la fiche de
la prise murale: cest
extrêmement dangereux..
9. En cours de fonctionnement,
ne touchez pas à leau
évacuée, elle peut atteindre
des températures très
élevées. Gardez vos enfants
à bonne distance. Ne forcez
jamais pour ouvrir les
portes vous risqueriez
dendommager le mécanisme de sécurité prévu pour
prévenir les ouvertures
accidentelles.
10. En cas de panne, fermez
avant tout le robinet de
leau et débranchez la
fiche de la prise murale;
nessayez en aucun cas
daccéder aux mécanismes
internes pour la réparer.
11. Cet appareil est destiné
à un usage domestique.
Aucune garantie ne sera due
en cas dusage industriel
(Hôtels, Restaurants, Blanchisseries, etc.) qui en compromet les caractéristiques
de construction dorigine.
Comment changer le câble d'alimentationComment changer le câble d'alimentation
Comment changer le câble d'alimentation
Comment changer le câble d'alimentationComment changer le câble d'alimentation
Le câble d'alimentation est un
câble spécial qui n'est disponible qu'auprès des SA V autorisés.
Pour le remplacer, procédez comme
suit :
1. Contrôlez que le lave-linge
est bien éteint et que la fiche est
bien débranchée.
Fig. 1
3
Mode dinstallation et demploi
2. Déposez la base, dévissez
d'abord les 2 vis de droite en bas
puis les 6 vis de gauche à l'arrière, déposez le panneau latéral
en l'inclinant légèrement vers
vous pour le dégager. (fig. 1 et
2).
3. Sortez le connecteur pour déconnectez le filtre antiparasite
(fig. 3).
Fig. 2
4. Dévissez les 2 vis extérieures
qui fixent le filtre et, à l'aide d'un
tournevis (voir fig. 4), dégagezle du panneau arrière en le tirant
vers le haut.
5. Après avoir monté le nouveau
câble, raccordez le connecteur en
vérifiant que le crochet de sécurité tienne bien.
Fig. 3
Pour le remplacer, nous vous
conseillons de faire appel à un
spécialiste du secteur qui devra
respecter les normes applicables en l'espèce.
Fig. 4
Page 21

M
Que placer dans votre lave-
Quelques astuces pour mieux laver. Triez votre linge en tenant compte des
linge?
textiles et des couleurs. Attention aux étiquettes, suivez leurs indications.
Alternez les petites et les grandes pièces.
Avant de laver.
Triez votre linge selon le type de
tissu et la résistance des
couleurs: les tissus plus résistants
doivent être séparés des délicats.
Séparez les couleurs claires des
couleurs foncées.
Videz toutes les poches (pièces
de monnaie, papier, argent et
petits objets) et contrôlez les
boutons. Recousez tout de suite
les boutons ballants, vous
éviterez ainsi quils ne se
détachent en cours de lavage
.
Les étiquettes vous
disent tout ce quil faut.
Lisez toujours les étiquettes: vous
saurez tout sur vos vêtements et
sur leurs meilleures conditions de
lavage.
Page 7, nous vous dévoilerons
tous les secrets qui se cachent
derrière les symboles reportés sur
les étiquettes des vêtements.
Leurs indications sont précieuses,
elles vous aideront à conserver
la beauté de vos vêtements.
Démarrage de votre lave-linge
Mise en place, déplacementsMise en place, déplacements
Mise en place, déplacements.
Mise en place, déplacementsMise en place, déplacements
Si votre lave-linge est muni d'un
chariot spécial avec roues
rétractiles, vous pouvez le
déplacer facilement. Pour faire
descendre ce chariot et pouvoir
ainsi déplacer sans effort votre
lave-linge, vous devez tirer le
levier situé en bas à gauche, sous
la base. Une fois le lave-linge
déplacé, remettez-le dans la
position initiale. Le lave-linge est
ainsi solidement mis en place.
Voir figure. (Seulement pour les
modéles prevues)
Triez votre linge par
type de tissu et
couleur: vous
obtiendrez de
meilleurs résultats
Dès son installation, démarrez un cycle de lavage
en sélectionnant le programme "" à 60 degrés.
Une bonne mise en service de
votre lave-linge est primordiale
tant pour la qualité du lavage que
pour éviter des problèmes et
augmenter sa longévité. Après
avoir chargé le linge et dosé les
produits lessiviels, contrôlez
toujours si:
Chouchoutez votre
linge: placez vos
pièces de lingerie, vos
bas et vos vêtements
délicats dans un
sachet en toile pour
les protéger
1. Les portes sont bien fermées.
2. La fiche est bien branchée dans
la prise.
3. Le robinet de leau est ouvert.
4. La touche F est
position O ).
5. Le chariot des roues rétractiles
est dans la position de repos
(les roues ne sont pas en
contact avec le sol).
Choisissez un programme
Choisissez ce programme en
fonction du type de linge à laver.
Pour opérer ce choix, consultez
le tableau page 6. Tournez le
bouton A pour amener le
programme choisi en face du
repère, programmez la tempé-
dans la
(arrêt
rature à l'aide du bouton B, sinon
utilisez les touches C, D, et E ,
puis appuyez sur le bouton marche/arrêt F (position marche).
Une fois le lavage terminé...
Attendez que lindicateur
lumineux G séteigne: il faut
compter environ trois minutes.
Eteignez alors la machine en
appuyant sur la touche marchearrêt F (position arrêt).
Vous pouvez alors ouvrir les portes
en toute sécurité. Après avoir sorti
le linge, laissez les portes
ouvertes ou entrouvertes pour
que lhumidité à lintérieur puisse
sévaporer.
Fermez toujours le robinet de
leau.
Noubliez pas quen cas de
coupure de courant ou si vous
éteignez le lave-linge, le
programme sélectionné reste
mémorisé.
Mode dinstallation et demploi
4
Page 22

Maîtrise du panneau de commandes
Cest vous qui commandez
Choisir les bons programmes: cest important et cest facile.
Le SélecteurLe Sélecteur
Le Sélecteur
Le SélecteurLe Sélecteur
des programmes dedes programmes de
des programmes de
des programmes dedes programmes de
votre lave-lingevotre lave-linge
votre lave-linge
votre lave-lingevotre lave-linge
Bouton programmes et
départ différé
Il sert à sélectionner le programme
de lavage.
Ne tournez ce bouton que dans le
sens des aiguilles d'une montre.
Pour sélectionner les programmes,
amenez le symbole/numéro
correspondant au programme
désiré en face du repère.
Bouton température
Il sert à sélectionner la température
de lavage indiquée dans le tableau
des programmes (voir page 6). Il
vous permet aussi de réduire la
température conseillée pour le
programme sélectionné, jusquau
lavage à froid (symbole neige ).
Touche de demi-charge
Cette touche réduit la
consommation deau lors du
rinçage: Nous vous coseillons de
lutiliser quau cours des
programmes pour textiles
synthétiques et délicats et lorsque
la machine nest pas tout à fait
pleine. Noubliez pas de réduiire
la quantité de lessive
Bouton suppression
essorage
Il sert à supprimer lessorage
(sélectionnez le symbole
Arrêt cuve pleine Anti-froissement
(Synthétiques délicats)
Cette touche permet d’interrompre le programme (sur la
position-symbole flèche ) en
laissant le linge tremper avant
l’essorage. C’est une touche
précieuse car elle permet
d’éviter que les textiles délicats
et synthétiques ne se froissent
(par exemple, quand vous ne
pouvez pas sortir votre linge dès
la fin du lavage, mais seulement
au bout de quelques heures).
Ne l’utilisez que pour les
programmes spéciaux textiles
Synthétiques (Progr. 5-6-7).
AA
TTENTION !TTENTION !
A
TTENTION ! Pour terminer
AA
TTENTION !TTENTION !
le programme en faisant une
vidange, appuyez à nouveau
sur la touche
E.E.
E.
E.E.
) .
Marche-arrêt
Appuyez sur la touche F pour
allumer votre lave-linge,
relachez-la pour léteindre.
L'arrêt de la machine n'annule
pas le programme sélectionné.
Voyant marche-arrêt
Le voyant G clignote pour
signaler que la machine est
allumée et attend dêtre
programmée. Sa lumière fixe
indique que le programme
sélectionné est accepté.
Mode dinstallation et demploi
5
Page 23

M
Que laver, aujourdhui?
Des programmes pour toutes les saisons
Nature des tissus et
degré de salissure
COTON
Blancs extrêmement sales
(dra ps, nap pes, etc.)
Blancs extrêmement sales
(dra ps, nap pes, etc.)
Bla ncs et couleurs ré sistantes trè s
sale s
Bla ncs pe u sa les et co ulse urs
délicates (chem ises, pulls, e tc.)
Rinçage/Javel
Assoup lissa nt
Essorage Vid a nge et e sso ra ge fina l
Stop/Annu la t io n
TISSUS MÉLANGÉS
Syn thé tique s couleurs ré sistan tes trè s
sale s (lin ge de bébé, e tc.)
Synthétiques couleurs résistantes
asse z sa les (lin ge en toute ge nre
légèrement sales)
Synthétiques couleurs délicates
(linge en tout genre légèrement sale)
Rinçage/Javel
Assoup lissant
Arrêt cuve plein e - An ti-froissem en t Anti-f roiss em en t p our ling e
Essorag e Vid a nge et e sso ra ge délic at
Bouton
programm es
2Max°Cu u
3 60°C u u
440°Cu u
5 60°C u u
650°Cu u
740°Cu u
Bouton
température
Lessive
lavage
Assoupliss.
1Max°Cu u
u
u
u
u
Antitaches/
Javel
Dél./Trad.
Dél./Trad.
Dél./Trad.
Dél./Trad.
Délicate
Délicate
Dél./Trad.
Durée du
cycle
(minutes)
155
145
115
100
90
80
70
Description du cycle de lavage
Prélavage tiède, lavage à 90°C, rin çag es,
essorages intermédiaires et final
Lav age à 9 0°C, rinçages, essorages
intermédiaires et final
Lav a ge à 6 0 °C , rinçages, essora ge s
intermédiaires et final
Lav a ge à 40°C, rinç ag es, e ssora ge s
intermédiaires et final
Rinça ges, et e ssorages intermed iaire s et fin al
Rinça ges avec prélèveme nt de l'assouplissant
Interromp t/Annule le pro gramme
séle ctionné
Lavage à 6 0 °C, rin çag es, anti-froisse men t ou
essorage d élicat
Lav a ge à 5 0 °C, rin çag es, anti-froisse men t ou
essorage d élicat
Lav a ge à 40°C , rinçages et essorage délicat
Rinça ges, et essora ges intermediaires et final
Rinça ges avec prélèveme nt de l'assouplissant
pa rticulièr em en t dé lica t
Stop /An n ula tion
DÉLICAT
La i n e
Rin ça ges
Essorage
Vid a n g e
Stop /Annula tio n
840°Cu u
Interromp t/Annule le pro gramme
séle ctionné
Lav a ge à 40°C , rinçages et essorage délicat
60
Rin ça g e et e sso rage délicat
Vid a nge et e sso ra ge délic at
Vid a nge et e sso ra eg dé lica t
Interromp t/Annule le pro gramme
séle ctionné
Les données reportées dans le tableau sont fournies à titre indicatif, elles peuvent varier selon la quantité et le type de
linge, la température de l'eau d'alimentation et la température ambiante.
Mode dinstallation et demploi
6
Page 24

Sachez lire les étiquettes
et les symboles de lavage des differents
modèles top loader Ariston
Apprenez à lire ces symboles, vous laverez mieux,
votre linge durera plus longtemps et votre lave-linge
ne vous en servira que mieux.
Partout en Europe, les étiquettes
contiennent des messages sous
forme de petits mais très
importants symboles. Il est
primordial dapprendre à les
comprendre pour mieux laver et
traiter vos vêtements.
On compte cinq catégories de
sigles différents :
lavage
,
Javel ,
repassage ,
nettoyage à sec
et enfin
séchage
.
Conseils Utiles
Retournez les chemises, elles seront mieux
lavées et dureront plus longtemps.
Videz bien les poches.
Lisez les étiquettes: leurs conseils sont
précieux et utiles.
Dans le tambour, alternez grandes et petites
pièces de linge.
Lisez et mémorisez les symboles de ce tableau:
vous apprendrez à mieux laver et traiter votre linge et à augmenter
les performances de votre Ariston.
Attention à ne pas vous tromper
de température....
Action forte
Lavage
Lavage à
95°C
Lavage à
60°C
Lavage à
40°C
Lavage à
30°C
Lavage à
la ma in
Action
délicate
Traitement
Javel Repassage Nettoyage à sec Séchage
Temp.
élevée
Cl
Traitement
autorisé en eau
froide
Traitement
interdit
Repassa ge
fort max
200°C
Repassa ge
moyen max
150°C
A
Nettoya ge à sec
tous type s d e
solvants
P
Nettoya ge à sec au
perch lor., esse nce
d'aviation, alcool
pur, R111 et R113
autorisé en
sèche-linge
F
Nettoya ge à sec à
Repassa ge
max 110°C
Repassa ge
interdit
l'essence
d'aviation, alcool
pur et R113
Nettoyage à sec
interdit
non esso ré
Séchage sur
Temp.
modérée
Séchage
Séchage
interdit en
sèche-linge
Séchage à
plat
Séchage
suspen du
pour
vêtement
cintre
Mode dinstallation et demploi
7
Lavage
interdit
Page 25

M
Marche
Arrêt
Départ Annulation
Départ différé
Lavage Max°+
prélavage
Lavage 90°
Lavage 60°
Lavage 40°délicat
Synthétiques 60°
Synthétiques 50°
Synthétiques 40°
Rinçages
Niveau Rinçage/
Rinçage plus
Assouplissant
Anti-froissement arrêt cuve pleine
Essorage délicat
Variation ou
Suppres. essorage
Vidange
Intensité Lavage
Laine
Lavage à la main
Soie et rideaux
Lavage quotidien de
30’ à 30°
Repassage facile
Anti- taches
1/2 charge
Variation
Température
Quelques conseils pour ne pas vous tromper
Ne lavez jamais à la
machine... du linge non ourlé, ,
effiloché ou déchiré. Si vous
devez absolument le laver,
enfermez-le dans un sac. Du linge
aux couleurs vives avec du linge
blanc.
Attention au poids!
Pour obtenir dexcellents
résultats, ne dépassez jamais les
poids indiqués, se référant à la
capacité maximum de linge sec:
- Tissus résistants:
maximum 5 kg
- Textiles synthétiques:
maximum 2,3 kg
- Textiles délicats:
maximum 2 kg
- Pure laine vierge:
maximum 1 kg
- Tissu en éponge: max 2,3 kg
Mais combien pèsent-ils?
1 drap 400-500 g
1 taie doreiller 150-200 g
1 nappe 400-500 g
1 peignoir 900-1.200 g
1 serviette éponge 150-250 g
Les Tee-shirts couleur, les
imprimés et les chemises durent
plus longtemps si vous les lavez
à lenvers. Repassez toujours vos
Tee-shirts et vos sweats imprimés
sur lenvers.
Alarme salopettes.
Elles ont du succès ces
combinaisons genre salopette
mais leurs bretelles ont des
crochets qui peuvent
endommager le tambour ou les
autres vêtements. Pourquoi ne
pas les enfiler dans la poche de
la bavette et les fixer avec des
épingles à nourrice pour
supprimer tout danger!
Vacances: débranchez la
fiche.
Quand vous partez en vacances,
mieux vaut débrancher la fiche,
fermer le robinet darrivée de leau
et laisser le hublot entrouvert ou
ouvert. Ainsi, le tambour et le joint
resteront bien secs et vous
éviterez la formation de
mauvaises odeurs.
CYCLE LAINE
Pour obtenir de meilleurs
résultats, utilisez une
lessive spéciale laine et
ne lavez pas plus d'un
kilo de linge à la fois.
Comment laver presque tout
Les rideaux.
Ils ont tendance à beaucoup se
froisser. Nous vous conseillons:
de bien les plier et de les glisser
dans une taie doreiller ou dans
un sac genre filet. Lavez-les seuls
de manière à ce que leur poids
total ne dépasse pas une demicharge.
Doudounes et anoraks.
Les doudounes et les anoraks
aussi peuvent être lavés à la
machine sils sont en duvet doie
ou de canard. Ce qui compte cest
de ne pas dépasser une charge
de 2-3 kg maximum, de faire faire
deux ou trois rinçages de suite et
un essorage léger.
Chaussures de tennis.
Débarassez les chaussures de tennis de la boue et lavez-les avec
les jeans et les vêtements plus
résistants. Ne les lavez pas avec
du linge blanc.
Mode dinstallation et demploi
8
Page 26

Les produits lessiviels et l'eau ne suffisent pas...
Comment enlever certaines taches spéciales
-Vin rouge. Laissez tremper avec le produit lessiviel, rincez et traitez avec de l’acide acétique ou de l’acide
citrique, rincez à nouveau. Traitez les éventuels résidus à l’eau de Javel.
- Sang. Traitez les taches encore fraîches avec de l’eau froide. Si les taches sont sèches, laissez tremper toute une
nuit avec un produit lessiviel puis frottez avec de l’eau et du savon.
- Taches de graisse sèches. Posez le vêtement sur du mou, mouillez-le avec de la térébenthine, tamponnez les
taches avec la pointe des doigts et un chiffon en coton.
- Rouille. A vec de l’acide oxalique (trouvable en droguerie) dissous à chaud ou un produit antirouille à froid. Les
vieilles taches peuvent avoir déjà attaqué le tissu: risque de trous...
- Taches de moisissure. Traitez-les avec de l’eau de Javel, rincez bien (seulement pour linge blanc et couleurs
résistant au chlore).
- Couleurs à huile. Mouillez avec de l’essence détergente, tamponnez les taches après avoir disposé le vêtement
sur un chiffon mou, et traitez-les plusieurs fois avec le détergent.
- Encre et stylo à bille. Tamponnez avec du coton imbibé d’alcool méthylique ou d’alcool à 90°.
- Goudron. Tamponnez avec du beurre frais, passez de la térébenthine puis lavez immédiatement.
- Cire. Raclez puis repassez avec un fer bien chaud entre deux feuilles de papier buvard. Passez ensuite du coton
imbibé d’essence de térébenthine ou d’alcool méthylique.
- Chewing gum. Passez du solvant pour vernis à ongles puis un chiffon propre.
- Moisissure. Plongez le coton et le lin blanc dans une solution formée de 5 parties d’eau, une d’eau de Javel et
une cuillère à soupe de vinaigre, lavez aussitôt. Pour les autres tissus blancs, utilisez de l’eau oxygénée à 10
volumes puis lavez aussitôt.
- Rouge à lèvres. Tamponnez à l’éther les tissus de laine ou de coton. Pour la soie, utilisez du trichloréthylène.
- Vernis à ongles. Posez le tissu du côté de la tache contre une feuille de papier buvard, mouillez de solvant, en
déplaçant le vêtement au fur et à mesure que la feuille se colore.
- Herbe. T amponnez avec du coton imbibé d’alcool méthylique.
Pour un lavage en toute sécurité
Comment ouvrir et fermer le tambour
A) OUVREZ. (Fig. 1). Soulevez le Couvercle externe et
ouvrez-le complètement
B) Ouvrez ensuite les Portes du tambour à laide de
vos deux mains comme indiqué sur la Fig. 2):
- appuyez sur la touche indiquée par la flèche sur la Fig. 2)
et tout en appuyant légèrement vers le bas posez une
main pour éviter que les portes ne vous fassent mal aux
doigts en souvrant soudainement;
- accompagnez dans leur mouvements les portes qui se
décrocheront et souvriront facilement.
Fig. 1
Fig. 2
C) INTRODUISEZ LE LINGE. (Fig. 3).
D) FERMEZ. (Fig. 4).
- refermez bien le tambour en baissant dabord la porte
antérieure et posez ensuite la porte postérieure;
- faites attention à parfaitement positionner les crochets
de la porte antérieure dans leur siège dans la porte
postérieure;
- vous entendrez un clac qui confirmera la bonne
fixation;
appuyez alors légèrement vers le bas sur les deux
portes qui ne doivent pas se décrocher;
- fermez enfin le couvercle externe.
Fig. 3 Fig. 4
Mode dinstallation et demploi
9
Page 27

M
Important pour mieux laver
Le secret du tiroir à produits lessiviels
Son premier secret: c'est facile, il se trouve sous le couvercle.
Versez les produits lessiviels et
ladditif éventuel en ne
dépassant pas les doses
conseillées par le fabricant: lisez
les informations indi- quées sur
les paquets.
Les doses varient en
fonction de la charge, de la
dureté de leau et du degré
de salissure. Nayez pas la
main lourde. Un excès de
lessive ne signifie pas un
meilleur lavage, au contraire...
Lexpérience aidant, vous
apprendrez à doser les quantités
presque automati- que ment: ce
sera votre secret.
Quand vous versez lassouplissant dans le bac 3, attention
à ce quil ne dépasse pas le
niveau max. indiqué.
Le lave-linge prélève automatiquement lassouplissant lors
de chaque programme de lavage.
Versez la lessive liquide
quel-ques instants avant de
brancher votre machine.
Noubliez pas que la lessive
liquide est particulièrement
indiquée pour des lavages à
des températures allant
jusquà 60 degrés et pour les
programmes de lavage qui ne
prévoient pas de prélavage.
Vous trouverez dans le
commerce des lessives liquides
ou en poudre avec boule
doseuse à placer directement
dans le tambour, leur mode
demploi est indiqué sur le
paquet.
Nutilisez jamais de lessive pour
lavage à la main, leur excès de
mousse risquerait
dendommager votre lave-linge.
Encore un petit secret: quand
vous lavez à leau froide,
réduisez la quantité de lessive:
cette dernière sy dissout moins
bien que dans leau chaude et
serait en partie gaspillée.
Prélavage, Javel, assouplissant
Si vous voulez blanchir votre
linge sélectionnez les programmes correspondants et versez
le produit de blanchissage dans
le bac 4 du tiroir à produits
lessi- viels.
Quand vous versez le produit
de blanchissage, attention à ne
pas dépasser le niveau max.
indiqué.
Lutilisation de leau de
Javel exclut la possibilité
deffectuer un prélavage.
Nutilisez de leau de Javel
que pour les tissus blancs
résistants et des détachants
délicats pour les couleurs et
les synthétiques.
Supprimez le blanchissage
pour le pro- gramme Soie et
les Programmes Spéciaux (voir
page 6).
Degrés de dureté de l'eau
Niv .-Caractéristique Allemands Français
°dH °T.H
Bac 1:Bac 1:
Bac 1:
Bac 1:Bac 1:
(en poudre) (en poudre)
(en poudre)
(en poudre) (en poudre)
Bac 2:Bac 2:
Bac 2:
Bac 2:Bac 2:
Bac 3:Bac 3:
Bac 3:
Bac 3:Bac 3:
Bac 4: JavelBac 4: Javel
Bac 4: Javel
Bac 4: JavelBac 4: Javel
Des économies sur toute la ligne
CHARGE MAXIMUM
La meilleure façon déviter des gaspillages délectricité, deau, de lessive et de
temps, cest dutiliser votre lave-linge au maximum de la charge conseillée.
Mieux vaut une pleine charge que deux demies, vous pourrez ECONOMISER
jusquà 50% délectricité.
UN PRELAVAGE EST-IL VRAIMENT NECESSAIRE?
Uniquement en cas de linge vraiment sale.
Programmer un lavage SANS prélavage pour du linge peu sale ou
moyennement sale permet dECONOMISER sur la lessive, le temps, leau et
de 5 à 15% délectricité.
UN LAVAGE A LEAU CHAUDE EST-IL VRAIMENT NECESSAIRE?
Avant le lavage, traitez les taches avec un détacheur ou mettez a tremper le
linge taché dans leau, vous pourrez sélectionner un programme de lavage à
leau chaude à une température moins élevée.
Choisissez un programme de lavage à 60° pour ECONOMISER jusquà 50%
délectricité.
Lessive prélavageLessive prélavage
Lessive prélavage
Lessive prélavageLessive prélavage
Lessive lavage (enLessive lavage (en
Lessive lavage (en
Lessive lavage (enLessive lavage (en
poudre ou liquide)poudre ou liquide)
poudre ou liquide)
poudre ou liquide)poudre ou liquide)
AssouplissantAssouplissant
Assouplissant
AssouplissantAssouplissant
1 - Douce
2 - Moyenne
3 - Dure
4 - Très dure
0- 7 0-15
8-14 16-25
15-21 26-37
plus de 21 plus de 37
Guide pour un emploi
économique et écologique
des électroménagers
NB:
1) Diluez leau de Javel
concentrée.
2) Pour les lessives concentrées (en poudre ou liquides) utilisez un programme sans prélavage.
3) Pour les lessives
contenues dans des boules
ou des tablettes nutilisez
pas de prèlavage pas le
prélavage
A
jout dAssouplissant
Lassouplissant rend votre linge
plus souple et diminue la
charge électrostatique des
fibres
syn- thétiques.
Vous pouvez utiliser les assouplissants pour les tissus en
éponge, les tricots, les ri-deaux,
etc.
Versez lassouplissant
dans le bac 3
du tiroir à
produits
lessiviels selon
les indications
du fabricant.
Le lave-linge
prélève automa-tiquement
lassouplissant lors du dernier
rinçage. A la fin du programme
de lavage il reste dans le bac 3
un résidu deau. Cette eau sert
au prélèvement des
assouplissants très denses ou
à dissoudre les assou- plissants
concentrés.
Si dans le bac 3 il reste un peu
plus deau que dhabitude, cela
signifie que le dispositif de
vidange est bouché et empêche
leffet aspirant du dispositif.
Pour le nettoyer voir page 13.
Ne versez jamais dans le bac
assouplissant et amidon en
même temps, le système
antidébordement pourrait se
boucher.
AVANT DE SELECTIONNER UN PROGRAMME DE SECHAGE ...
Sélectionnez une vitesse dessorage très élevée pour éliminer le surplus deau
avant de lancer le programme de séchage. Vous ECONOMISEREZ du temps et
de lélectricité.
Mode dinstallation et demploi
10
Page 28

Problèmes et solutions
Avant de téléphoner, lisez ce qui suit
Il peut arriver que le lave-linge ne fonctionne pas bien. Il sagit très souvent de
problèmes faciles à résoudre sans laide dun technicien. Avant dappeler le SAV,
veuillez effectuer les contrôles suivants.
Le lave-linge ne
démarre pas.
La fiche est-elle bien
branchée dans la prise? Elle
pourrait avoir été déplacée en
faisant le ménage.
Y a-t-il du courant?
Le disjoncteur pourrait sêtre
déclenché parce quil y a trop
délectroménagers branchés en
même temps. Ou bien il peut y
avoir une panne de courant
dans votre quartier.
Le hublot est-il bien fermé?
Par sécurité, le lave-linge ne
fonctionne pas si le hublot est
ouvert ou mal fermé.
La touche Marche-arrêt estelle enfoncée?
Dans ce cas, un départ différé
a été programmé.
La touche Départ/Annulation
est-elle enfoncée?
Dans ce cas, un départ différé
a été programmé.
Le robinet de leau est-il
ouvert? Par sécurité, sil ny a
pas darrivée deau, le lavage
ne démarre pas.
?
A FAIRE
Fermer le robinet
après chaque
lavage.
Cela réduit lusure
de linstallation
hydraulique du
lave-linge et évite
le danger de fuites
quand il ny a
personne à la
maison.
Laisser toujours
les portes et le
couvercle
entrebaillés.
Pour éviter la
formation de
mauvaises odeurs.
Nettoyer
lextérieur avec
soin.
Pour nettoyer
lextérieur et les
parties en
caoutchouc,
utilisez toujours
un chiffon imbibé
deau et de savon.
A NE PAS FAIRE
Laisser la fiche
branchée pendant le
nettoyage du lavelinge.
Même pendant les
travaux dentretien, il
faut toujours
débrancher la fiche.
Utiliser des solvants et
des produits abrasifs
agressifs.
Ne jamais utiliser de
produits solvants ou
abrasifs pour nettoyer
lextérieur et les
parties en caoutchouc.
Négliger le tiroir à
produits lessiviels.
Il est amovible, pour le
laver il suffit de le
laisser un peu sous un
jet deau courante.
Partir en vacances
sans se soucier de lui.
Avant de partir, il faut
toujours contrôler si la
fiche est bien
débranchée et le
robinet de leau fermé.
Il ny a pas darrivée
deau.
Le tuyau est-il bien
raccordé au robinet?
Panne deau? Ny a-t-il pas des
travaux en cours dans votre
immeuble ou dans la rue?
La pression est-elle
suffisante? La moto-pompe
pourrait être en panne.
Le filtre du robinet est-il
propre? Si leau est très
calcaire, ou suite à des travaux
récents sur la canalisation
deau, le filtre pourrait être
bouché par des détritus.
Le tuyau en caoutchouc
nest-il pas plié? Le parcours
du tuyau en caoutchouc qui
amène leau au lave-linge doit
être le plus rectiligne possible.
Contrôlez sil nest pas écrasé
ou plié.
Le lave-linge prend
leau et vidange
continuellement.
Le tuyau est placé trop bas?
Il faut linstaller entre 60 et 100
cm de haut.
Lembouchure du tuyau est
plongée dans leau?
Lévacuation murale a-t-elle
un évent? Si après ces
vérifications, le problème persiste, fermez le robinet de leau,
éteignez la machine et appelez
le SAV.
Si vous habitez en étage, il
pourrait y avoir des
phénomènes de siphonnement.
Pour les résoudre, il faut monter
une soupape spéciale.
Mode dinstallation et demploi
11
Page 29

M
Est-ce que la machine est
coincée entre des meubles et
le mur? A moins que ce soit un
modèle à encastrer, votre lavelinge a besoin dosciller un peu
pendant lessorage. Prévoyez
quelques cm de libres tout
autour.
Votre lave-linge ne
vidange pas et
nessore pas.
Est-ce que le programme
choisi prévoit la vidange de
leau? Pour certains
programmes de lavage il faut
intervenir pour lancer la
vidange .
Est-ce que la fonction
Repassage facile - est
activé? Complétez le
programme en appuyant sur la
touche Sélection.
Est-ce que la pompe
dévacuation est bouchée?
Pour linspecter, fermez le
robinet, débranchez la fiche et
suivez les instructions fournies
page 12 ou bien appelez le SAV.
Le lave-linge a des
fuites.
Est-ce que la bague du tuyau
darrivée de leau est bien
vissée? Fermez le robinet,
débranchez la fiche et essayez
de la serrer sans forcer.
Est-ce que le tiroir à
produits lessiviels est
engorgé? Essayez de le sortir
et de le laver à leau courante.
Est-ce que le tuyau de
vidange nest pas bien fixé?
Fermez le robinet, débranchez
la fiche et essayez de mieux le
fixer.
Ne vous adressez jamais à des
techniciens non agréés et exigez
toujours lemploi de pièces détachées
originales.
Est-ce que le tuyau
dévacuation est plié? Le
parcours du tuyau doit être le
plus rectiligne possible.
Contrôlez sil nest pas écrasé
ou plié.
Est-ce que la conduite de
linstallation de vidange est
bouchée? Sil y a une rallonge,
est-ce quelle est bien montée
ou empêche-t-elle leau de
passer?
Votre lave-linge
vibre beaucoup en
phase dessorage.
Est-ce que le groupe
oscillant interne a bien été
débloqué lors de
linstallation? La page 2 est
consacrée à linstallation.
Est-ce que la machine est
bien de niveau? Contrôlez
régulièrement sa mise à
niveau. A la longue, le lavelinge pourrait sêtre légèrement
déplacé. Agissez sur les pieds
et contrôlez à laide dun
niveau.
Il y a un excès de
mousse.
Est-ce que vous utilisez bien
une lessive machine? Vérifiez
quil y ait bien linscription:
pour lave-linge ou bien main
et machine.
Est-ce que la quantité est
correcte? Un excès de lessive
produit plus de mousse mais
ne lave pas mieux tout en
produisant des incrustations à
lintérieur du lave-linge.
Si malgré tous ces contrôles, votre
lave-linge ne fonctionne pas et
linconvénient persiste, appelez le
SAV le plus proche de votre
domicile en précisant:
- le type de panne
- le sigle (Mod. ....)
- le numéro de série (S/N ....)
Vous trouverez tous ces
renseignements sur la plaquette
signalétique située à linterieur du
socle de votre lave-linge.
En cas de besoin, inspectez la pompe et le tuyau en caoutchouc.En cas de besoin, inspectez la pompe et le tuyau en caoutchouc.
En cas de besoin, inspectez la pompe et le tuyau en caoutchouc.
En cas de besoin, inspectez la pompe et le tuyau en caoutchouc.En cas de besoin, inspectez la pompe et le tuyau en caoutchouc.
Le lave-linge est équipé d'une pompe autonettoyante qui n'exige aucune opération de nettoyage et d'entretien. Il peut toutefois
arriver que de menus objets tombent par mégarde dans la pompe: des pièces de monnaie, des barrettes, des boutons etc. Pour éviter
qu'ils n'endommagent la machine, ils sont bloqués dans une préchambre accessible, située en bas de la pompe.
Pour accéder à cette préchambre, il suffit de démonter le panneau
situé en bas du lave-linge (fig. 1); enlevez ensuite le couvercle en le
faisant tourner dans le sens inverse des aiguilles d'une montre (fig.
2) et inspectez soigneusement l'intérieur.
Le tuyau en caoutchouc
Contrôlez le tuyau en caoutchouc au moins une fois par an.
Remplacez-le dès que vous remarquez des craquèlements et des
fissures qui pourraient entraîner des cassures.
Fig. 1
Attention: contrôlez que le cycle de lavage est bien terminé et débranchez la fiche avant d'enlever le couvercle et avant toute opération
d'entretien. Il est normal qu'un peu d'eau s'échappe quand vous enlevez le couvercle. Lorsque vous remontez le panneau extérieur,
attention à bien enfiler les crochets du bas dans les fentes avant de le pousser contre la machine.
Mode dinstallation et demploi
Fig. 2
12
Page 30

Soins et Entretien facile
Chouchoutez-le et il vous sera
Votre lave-linge est un vrai compagnon de vie et de travail.
toujours fidèle
Le garder en forme, cest important. Pour vous aussi.
Votre lave-linge est une machine
conçue pour durer longtemps sans
causer de problèmes. Quelques
astuces vous permettront de le
garder toujours en forme et
daugmenter sa longévité. En
premier lieu, fermez toujours le
robinet de leau après chaque
lavage: la pression continue de
leau peut provoquer lusure de
certains composants.
Vous éliminerez aussi tout danger
de fuites en votre absence.
Si votre eau est trop dure,
utilisez un produit anticalcaire (une eau dure laisse des
traces blanchâtres autour des
robinets ou bien au niveau des
bondes, notamment dans la
baignoire).
Si vous désirez avoir des
renseignements plus précis à
propos de leau de votre
installation, adressez-vous au
Service des eaux municipal ou
bien à un plombier.
Il faut toujours vider les
poches et enlever les objets
durs, les broches ou les pins
par exemple.
Lavez lextérieur du lave-linge
avec un chiffon, de leau tiède et
du savon.
Lavez
périodiquement le
tiroir à produits
lessiviels.
Pour éviter que des
incrustations ne se
forment, placez-le
sous un jet deau
courante.
Nayez pas la main
lourde.
Les lessives normales
contiennent déjà des produits
anticalcaires. Donc, najoutez à
votre lavage un produit
spécifique que si votre eau est
particulièrment dure, cest à dire
très riche en calcaire.
Il peut être utile, de temps en
temps, deffectuer un cycle de
lavage avec une dose de produit
anticalcaire, sans lessive et sans
linge.
Nayez pas la main lourde avec
les produits lessiviels, lexcès de
mousse pourrait causer de
incrustations et abîmer les
composants de votre machine.
Videz toujours les poches: les petits objets peuvent
endommager votre amie Margherita.
Comment nettoyer le tiroir à produits
lessiviels
DD
Démontage:
DD
Appuyez légèrement sur la
grosse touche située sur la
partie antérieure du tiroir à
produits lessiviels et tirez vers
le haut (fig. 1).
Fig. 1
Mode dinstallation et demploi
13
Nettoyage:
Nettoyez le tiroir sous le robinet (fig. 3) à l'aide par exemple d'une
vieille brosse à dents; tirez sur les deux petits siphons placés dans
la partie supérieure des bacs 1 et 2 (fig. 4), contrôlez qu'ils ne
soient pas bouchés et rincez-les.
Fig. 2
Fig. 3
Remontage:
N'oubliez pas de replacez les
deux petits siphons dans leurs
emplacements spéciaux et
remettez enfin le tiroir dans son
siège en le fixant (fig. 4, 2, 1).
Fig. 4
Page 31

Caractéristiques techniques
Modèle
Dimensions
Capacité
Connexions
électriqu es
Connexions
hydrauliques
Vitesse d'essorage
Programmes de
contrôle suivant
norme IEC 456
Le constructeur se réserve le droit d'apporter, à tout moment et sans aucun préavis, toutes les modifications, à la machine ou aux accessoires de
ses modèles, jugées nécessaires pour des exigences techniques et commerciales.
AT 50
la rg e ur c m 4 0
ha u te ur cm 8 5
profondeur cm 60
de 1 à 5 kg
tension à 230 Volt 50 Hz
puissance max. absorbée 2100 W
pression maximum 1 MPa (10 bar)
pression minimum 0,05 MPa (0,5 bar)
cap acité du ta mbour 42 litres
jusqu' à 5 0 0 tours p a r m in u re
programme 2; température 60°C; effectué pour une charge de 5,0 kg.
Cet appareil est conforme aux Directives Communautaires suivantes:
- 73/23/CEE du 19/02/73 (Basse Tension) et modifications successives
- 89/336/CEE du 03/05/89 (Compatibilité électromagnétique) et modifications successives
Mode dinstallation et demploi
14
Page 32

Merloni Elettrodomestici
Viale Aristide Merloni 47
60044 Fabriano
Italie
Tel +39 0732 6611
Fax +39 0732 662501
www.merloni.com
10/2002 - 195 033 389 03 - XEROX BUSINESS SERVICES - DOCUTECH
Page 33

Los secretos de
Consigli per lavare meglio
los tejidos
AT 50
Instrucciones para la
E
instalación y el uso
Ex
Consejos para lavar mejor
Lavadora con
carga superior
segura
y fácil de usar
Page 34

Guía rápidaGuía rápida
Guía rápida
Guía rápidaGuía rápida
Descubra aquí los 12 temas que se explican
en las páginas de este manual. Lea, aprenda
y diviértase: descubrirá tantos pequeños
secretos para lavar mejor, con menor
esfuerzo y haciendo durar más la lavadora.
Y sobre todo con mayor seguridad.
TT
1.
La instalación, después de la entrega o de una mudanza, es la
operación más importante para obtener un correcto funcionamiento
de la lavadora. Controle siempre:
1.1.
1. que la instalación eléctrica cumpla con las normas;
1.1.
2.2.
2. que los tubos de carga y descarga del agua estén
2.2.
3.3.
3. que la lavadora esté nivelada. V ale la pena por la dur ación de
3.3.
4.4.
4.
4.4.
2.
ransporranspor
T
ranspor
TT
ransporranspor
correctamente conectados;
la lavadora y por la calidad de su lavado;
Que se hayan quitado los tornillos de fijación de la cubaQue se hayan quitado los tornillos de fijación de la cuba
Que se hayan quitado los tornillos de fijación de la cuba
Que se hayan quitado los tornillos de fijación de la cubaQue se hayan quitado los tornillos de fijación de la cuba
ubicados en la parte posterior de la lavadora.
Seguridad para Ud. y para los niños (p. 3)Seguridad para Ud. y para los niños (p. 3)
Seguridad para Ud. y para los niños (p. 3)
Seguridad para Ud. y para los niños (p. 3)Seguridad para Ud. y para los niños (p. 3)
te e instalación (p.2)te e instalación (p.2)
te e instalación (p.2)
te e instalación (p.2)te e instalación (p.2)
Aquí encontrará consejos indispensables para su seguridad y la
de toda su familia. Porque esta es la cosa más importante para
Ud.
Qué puedo colocar en la lavadora y cómoQué puedo colocar en la lavadora y cómo
3.
Qué puedo colocar en la lavadora y cómo
Qué puedo colocar en la lavadora y cómoQué puedo colocar en la lavadora y cómo
ponerla en funcionamiento (p.4) ponerla en funcionamiento (p.4)
ponerla en funcionamiento (p.4)
ponerla en funcionamiento (p.4) ponerla en funcionamiento (p.4)
Separar correctamente la ropa es una operación importante, tanto para obtener un buen lavado como para garantizar la duración
de la lavadora. Aprenda todos los trucos y los secretos para separar la ropa: colores, tipo de tela y tendencia a producir pelusa
son los criterios más importantes.
Comprender el funcionamiento del panel deComprender el funcionamiento del panel de
4.
Comprender el funcionamiento del panel de
Comprender el funcionamiento del panel deComprender el funcionamiento del panel de
mandos (p. 5) mandos (p. 5)
mandos (p. 5)
mandos (p. 5) mandos (p. 5)
El panel de mandos es muy sencillo. Cuenta con pocos mandos
esenciales para obtener todo tipo de lavado , desde el más enérgico,
capaz de lavar la ropa de trabajo de un mecánico, hasta el más
delicado para la lana. Aprenda y lavará mejor , gastando menos y
haciendo durar más su lavadora. Es fácil.
Guía para los programas de lavado (p. 6)Guía para los programas de lavado (p. 6)
5.
Guía para los programas de lavado (p. 6)
Guía para los programas de lavado (p. 6)Guía para los programas de lavado (p. 6)
Una tabla fácil para seleccionar rápidamente los programas, las
temperaturas, los detergentes y eventuales aditivos. Use los más
adecuados y obtendrá un lavado mejor , ahorrando tiempo , agua y
energía, día tras día.
7.
Antes teníamos a las abuelas que daban buenos consejos y no
existían los tejidos sintéticos: clar amente así era fácil la var. Hoy
es su lavadora la que le da buenos consejos.
8.
Abra y cierre bien las puertas para un lavado seguro .
9.
Cómo utilizar la cubeta de detergentes.
10.
Antes de llamar al técnico, mire aquí: muchísimos problemas
pueden tener una solución inmediata. P ero si no logra resolve rlos,
llame al número de la asistencia Ariston y, en poco tiempo,
cualquier avería será reparada.
11.
Su lavadora es una amiga: bastan pocos y pequeños cuidados
para recompensarle con tanta fidelidad y dedicación.
Trátela cuidadosamente y lavará para Ud. durante años y años .
Consejos útiles para no equivConsejos útiles para no equiv
Consejos útiles para no equiv
Consejos útiles para no equivConsejos útiles para no equiv
Cómo cerrar el cesto (p.9)Cómo cerrar el cesto (p.9)
Cómo cerrar el cesto (p.9)
Cómo cerrar el cesto (p.9)Cómo cerrar el cesto (p.9)
La cubeta de detergentes (p.10)La cubeta de detergentes (p.10)
La cubeta de detergentes (p.10)
La cubeta de detergentes (p.10)La cubeta de detergentes (p.10)
Problemas y soluciones (p. 11 y 12)Problemas y soluciones (p. 11 y 12)
Problemas y soluciones (p. 11 y 12)
Problemas y soluciones (p. 11 y 12)Problemas y soluciones (p. 11 y 12)
Cuidados y mantenimiento (p.13)Cuidados y mantenimiento (p.13)
Cuidados y mantenimiento (p.13)
Cuidados y mantenimiento (p.13)Cuidados y mantenimiento (p.13)
ocarocar
ocar
ocarocar
se (p.8)se (p.8)
se (p.8)
se (p.8)se (p.8)
Guía para comprender las etiquetas y losGuía para comprender las etiquetas y los
6.
Guía para comprender las etiquetas y los
Guía para comprender las etiquetas y losGuía para comprender las etiquetas y los
símbolos (p.7-8) símbolos (p.7-8)
símbolos (p.7-8)
símbolos (p.7-8) símbolos (p.7-8)
Los símbolos internacionales contenidos en las etiquetas de las
prendas de vestir son de fácil comprensión y muy importantes
para el éxito del lavado. Aquí encontrará una guía sencilla para
interpretar correctamente los programas, las temperaturas
aconsejadas, los tipos de tratamiento, los modos de planchado y
los símbolos específicos Ariston.
11
Instrucciones para la instalación y el uso
1
11
12.
Aquí encontrará las características técnicas de su lavadora: sigla
del modelo, especificaciones eléctricas e hídricas, dimensiones,
capacidad, velocidad de centrifugación y cumplimiento con lo
establecido por las normas y directivas italianas y europeas.
Características técnicas (p.14)Características técnicas (p.14)
Características técnicas (p.14)
Características técnicas (p.14)Características técnicas (p.14)
Page 35

Transporte e instalación
Cuando llega la laCuando llega la la
Cuando llega la la
Cuando llega la laCuando llega la la
Ya sea en el caso de recibirla nueva o que haya sido recién trasladada
por mudanza, la instalación es un momento importantísimo para el
correcto funcionamiento de la lavadora.
Después de haber retirado el
embalaje controle la integridad de la máquina. En caso
de dudas, llame inmediatamente a un téc-nico califica-
Para efectuar el trans-Para efectuar el trans-
do.
Para efectuar el trans-
Para efectuar el trans-Para efectuar el trans-
porte, la parte interna de laporte, la parte interna de la
porte, la parte interna de la
porte, la parte interna de laporte, la parte interna de la
lavadora es bloqueada me-lavadora es bloqueada me-
lavadora es bloqueada me-
lavadora es bloqueada me-lavadora es bloqueada mediante cuatro tornillos y go-diante cuatro tornillos y go-
diante cuatro tornillos y go-
diante cuatro tornillos y go-diante cuatro tornillos y gomitas colocados en la partemitas colocados en la parte
mitas colocados en la parte
mitas colocados en la partemitas colocados en la parte
posteriorposterior
posterior
posteriorposterior
Operación de desmoldeo:Operación de desmoldeo:
Operación de desmoldeo:
Operación de desmoldeo:Operación de desmoldeo:
¡quite los 4 tornillos !¡quite los 4 tornillos !
¡quite los 4 tornillos !
¡quite los 4 tornillos !¡quite los 4 tornillos !
Antes de poner en funcionamiento la lavadora es
necesario retirar los tornillos
y las gomitas con el respectivo
separador (conserve todas
estas piezas); los
correspondientes agujeros
deben ser cerrados con los
tapones de plástico que se
suministran con el equipo.
Atención:Atención:
Atención: si vuelve a utilizar los
Atención:Atención:
tornillos más cortos, se deben
colocar arriba..
NivelaciónNivelación
Nivelación
NivelaciónNivelación
Para un correcto funcionamiento
de la lavadora es importante que
esté bien nivelada.
la nivelación basta operar sobrela nivelación basta operar sobre
la nivelación basta operar sobre
la nivelación basta operar sobrela nivelación basta operar sobre
los pies de la máquina;los pies de la máquina;
los pies de la máquina; el ángulo
los pies de la máquina;los pies de la máquina;
de inclinación, medido en el plano de trabajo, no debe superar los
Los pies son regulables.
..
.
..
Para efectuarPara efectuar
Para efectuar
Para efectuarPara efectuar
Conserve los tornillos de
bloqueo y los separadores.
En caso de mudanza le
serán útiles para bloquear
nuevamente las partes
internas de la lavadora, la
que de este modo quedará
protegida contra golpes
durante el transporte.
2°. En caso de instalación sobre
una alfombra, controle que no
quede obstruida la ventilación en
la superficie de apoyo.
Conexión a la toma de aguaConexión a la toma de agua
Conexión a la toma de agua
Conexión a la toma de aguaConexión a la toma de agua
La presión hídrica debe estar
comprendida entre los valores
indicados en la placa situada
en la parte posterior. Conecte
el tubo de carga (se encuentra
desmontado dentro del cesto)
a una toma de agua fría con
salida roscada de 3/4 gas.
Si la tubería de agua es nueva
o ha permanecido inactiva,
antes de efectuar la conexión
haga correr el agua hasta verificar que salga límpida y sin
impurezas. Conecte el tubo a
la máquina en
correspondencia con la
respectiva toma de agua, arriba
a la derecha.
Toma de agua que se debe
instalar arriba a la derecha.
Conexión del tubo deConexión del tubo de
Conexión del tubo de
Conexión del tubo deConexión del tubo de
descargadescarga
descarga
descargadescarga
En la parte superior y posterior
de la máquina, hay un gancho
al cual eventualmente fijar el
tubo de descarga. Conecte el
otro extremo a un conducto de
descarga de pared o apóyelo
en el lavamanos o en la bañera,
evitando estrangulamientos y
curvaturas excesivas.
portante que termine a una al-portante que termine a una al-
portante que termine a una al-
portante que termine a una al-portante que termine a una altura entre 60 y 100 cm.tura entre 60 y 100 cm.
tura entre 60 y 100 cm.
tura entre 60 y 100 cm.tura entre 60 y 100 cm.
Cuando sea indispensable fijar
el extremo del tubo a una altura con respecto al piso, inferior
a 60 cm, dicho tubo se debe
vv
v
vv
Es im- Es im-
Es im-
Es im- Es im-
adoraadora
adora
adoraadora
Gancho para utilizar si el tubo
de descarga termina a menos
de 60 cm de altura.
Si el tubo descarga en la
bañera o en el lavamanos,
aplique la respectiva guía de
plástico y fíjelo al grifo.
Guía para la descarga en bañeras
y lavamanos.
El tubo no debe permanecerEl tubo no debe permanecer
El tubo no debe permanecer
El tubo no debe permanecerEl tubo no debe permanecer
nunca sumergido en el agua.nunca sumergido en el agua.
nunca sumergido en el agua.
nunca sumergido en el agua.nunca sumergido en el agua.
No es aconsejable emplear
tubos de prolongación. En caso
de que sea absolutamente
indispensable, la prolongación
debe tener el mismo diámetro
del tubo original y no debe superar los 150 cm. de longitud. En
caso de descarga de pared,
haga controlar su eficacia por
un técnico habilitado. Si la
vivienda se encuentra en uno de
los últimos pisos de un edificio,
es posible que se verifiquen
fenómenos de sifonaje, en cuyo
caso la lavadora carga y
descarga agua de modo continuo.
Para eliminar este incon veniente se encuentran disponibles en
comercio válvulas especiales
que permiten evitar el sifonaje.
Conexión eléctricaConexión eléctrica
Conexión eléctrica
Conexión eléctricaConexión eléctrica
Antes de conectar la máquina
a la toma eléctrica verifique
que:
1) la toma eléctrica esté en
condiciones de soportar la
carga máxima de potencia
de la máquina indicada en
la placa de características
y que cumpla con lo
establecido por las normas
legales;
2) la tensión de alimentación
esté comprendida dentro de
los valores indicados en la
placa de características;
3) la toma sea compatible con
el enchufe de la máquina.
En caso contrario no utilice
adaptadores y, en cambio,
sustituya la toma o el
enchufe;
4) las instalaciones eléctricas
domésticas deben estar
provistas de "puesta a
tierra".
5) finalizada la conexión, la
máquina no esté apoyada
sobre el cable de
alimentación;
6) el aparato debe estar
ubicado de modo tal, que el
enchufe sea accesible.
¡Advertencia!
Cualquier modificación realizada al enchufe de fábrica o una ir
regular conexión eléctrica,
cualquier tipo de modificación
eléctrica, mecánica o hidráulica
de la máquina hará prescribir
la garantía y eximirá al fabricante y al vendedor de toda responsabilidad.
Bolsas de plástico,
poliestireno expandido,
tornillos y otros
elementos del embalaje
no son juguetes para los
niños ya que constituyen
fuentes potenciales de
peligro.
Instrucciones para la instalación y el uso
22
2
22
Page 36

Es cada vez más importante
Seguridad para Ud. ySeguridad para Ud. y
Seguridad para Ud. y
Seguridad para Ud. ySeguridad para Ud. y
Su lavadora se fabrica según las más severas
para sus niñospara sus niños
para sus niños
para sus niñospara sus niños
normas internacionales de seguridad. Para
protegerlo a Ud. y a su familia.
Lea atentamente estas
advertencias y toda la información contenida en este manual;
es importante ya que además
de numerosas indica-ciones
útiles, proporciona importante información sobre la seguridad, uso y mantenimiento.
1. En caso de avería, antes 1. En caso de avería, antes
1. En caso de avería, antes
1. En caso de avería, antes 1. En caso de avería, antes
que nada desconecte elque nada desconecte el
que nada desconecte el
que nada desconecte elque nada desconecte el
enchufe delenchufe del
enchufe del
enchufe delenchufe del
tomacorriente y cierre eltomacorriente y cierre el
tomacorriente y cierre el
tomacorriente y cierre eltomacorriente y cierre el
grifo de agua; grifo de agua;
grifo de agua; en ningún
grifo de agua; grifo de agua;
caso intervenga en los
mecanismos internos para
repararlos.
hace prescribir loshace prescribir los
hace prescribir los
hace prescribir loshace prescribir los
términos de la garantía.términos de la garantía.
términos de la garantía.
términos de la garantía.términos de la garantía.
22
..
La lavadora no se debeLa lavadora no se debe
2
.
La lavadora no se debe
22
..
La lavadora no se debeLa lavadora no se debe
instalar al aire libre,instalar al aire libre,
instalar al aire libre, ni
instalar al aire libre,instalar al aire libre,
siquiera si el lugar está
cubierto con un cobertizo ya
que es muy peligroso dejarla
expuesta a la lluvia y a las
tormentas.
3.3.
Debe ser utilizada sólo porDebe ser utilizada sólo por
3.
Debe ser utilizada sólo por
3.3.
Debe ser utilizada sólo porDebe ser utilizada sólo por
adultos adultos
adultos y exclusivamente
adultos adultos
para lavar la ropa según las
instrucciones contenidas en
este manual.
Esto también Esto también
Esto también
Esto también Esto también
4.4.
4. Si debe ser desplazada,
4.4.
tire la palanca blanca,
ubicada a la izquierda y
abajo, debajo del zócalo,
que hará descender el
carro de ruedas retráctiles
y permitirá un fácil
movimiento.
5.5.
5. Antes de introducir la ropa
5.5.
controle que el cesto estécontrole que el cesto esté
controle que el cesto esté
controle que el cesto estécontrole que el cesto esté
vacío.vacío.
vacío.
vacío.vacío.
6.6.
No toque la máquina conNo toque la máquina con
6.
No toque la máquina con
6.6.
No toque la máquina conNo toque la máquina con
los pies desnudos los pies desnudos
los pies desnudos o bien
los pies desnudos los pies desnudos
con las manos o los piescon las manos o los pies
con las manos o los pies
con las manos o los piescon las manos o los pies
mojados o húmedos.mojados o húmedos.
mojados o húmedos.
mojados o húmedos.mojados o húmedos.
¡Quiero sólo un técnico
especializado y
autorizado con repuestos
originales garantizados
Ariston !
7.7.
No use alargadores niNo use alargadores ni
7.
No use alargadores ni
7.7.
No use alargadores niNo use alargadores ni
múltiples,múltiples,
múltiples, son peligrosos
múltiples,múltiples,
sobre todo en ambientes
húmedos. El cable de
alimentación no debe sufrir
dobladuras ni compresiones
peligrosas.
8.8.
No extraiga el filtroNo extraiga el filtro
8.
No extraiga el filtro
8.8.
No extraiga el filtroNo extraiga el filtro
mientras la máquina estámientras la máquina está
mientras la máquina está
mientras la máquina estámientras la máquina está
en funcionamiento.en funcionamiento.
en funcionamiento.
en funcionamiento.en funcionamiento.
No use detergente para el No use detergente para el
No use detergente para el
No use detergente para el No use detergente para el
lavado a mano lavado a mano
lavado a mano ya que la
lavado a mano lavado a mano
abundante espuma
producida podría salir por la
tapa y provocar daños.
9.9.
No tire nunca el cable No tire nunca el cable
9.
No tire nunca el cable ni la
9.9.
No tire nunca el cable No tire nunca el cable
lavadora para desconectar el
enchufe del tomacorriente;
es muy peligroso.
10.10.
10. Durante el funcionamiento de
10.10.
la lavadora
agua que se descargaagua que se descarga
agua que se descarga ya
agua que se descargaagua que se descarga
que puede alcanzar
temperaturas elevadas.
Mantenga alejados a losMantenga alejados a los
Mantenga alejados a los
Mantenga alejados a losMantenga alejados a los
niños. No fuerce nunca laniños. No fuerce nunca la
niños. No fuerce nunca la
niños. No fuerce nunca laniños. No fuerce nunca la
puerta puerta
puerta ya que podría dañar
puerta puerta
el mecanismo de seguridad
que se encuentra en la apertura cuya función es proteger
contra aperturas accidentales.
11
11
..
Esta máquina está destina-Esta máquina está destina-
1
1
.
Esta máquina está destina-
11
11
..
Esta máquina está destina-Esta máquina está destina-
da a uso doméstico.da a uso doméstico.
da a uso doméstico.
da a uso doméstico.da a uso doméstico.
El uso industrial (
restaurantes, lavanderías
perjudica sus características originales de fábrica y hace prescribir la
garantía.
no toque elno toque el
no toque el
no toque elno toque el
hoteles,
)
Cómo cambiar el cable de alimentaciónCómo cambiar el cable de alimentación
Cómo cambiar el cable de alimentación
Cómo cambiar el cable de alimentaciónCómo cambiar el cable de alimentación
El cable de alimentación es
especial y puede ser adquirido
exclusivamente en los Centros
de Asistencia Técnica
autorizados.
Para sustituir este cable se debe proceder de la siguiente forma:
1. Controle que la lavadora esté
apagada y el enchufe esté
desconectado.
Fig. 1
2. Extraiga el zócalo y
desenrosque los 2 tornillos
ubicados abajo a su derecha,
luego desenrosque los 6
tornillos posteriores, en este
caso, a su izquierda y quite el
panel lateral inclinándolo
ligeramente hacia afuera. (fig 1
y 2).
Fig. 2
3. Desconecte de la fuente de
electricidad el filtro
antiperturbación extrayendo el
conector (fig. 3).
4. Desenrosque los 2 tornillos
externos de fijación del filtro y,
con la ayuda de un
destornillador (ver la fig. 4),
desengánchelo de la parte
posterior tirando hacia arriba.
Fig. 3
5. Una vez colocado el nuevo
cable, vuelva a conectar el
conector verificando que el cierre
del gancho de seguridad sea
estanco.
Para la sustitución llame
siempre a personal calificado
que debe respetar las normas
vigentes.
Fig. 4
33
Instrucciones para la instalación y el uso
3
33
Page 37

¿Qué se puede introducir¿Qué se puede introducir
¿Qué se puede introducir
¿Qué se puede introducir¿Qué se puede introducir
en la lavadora?en la lavadora?
en la lavadora?
en la lavadora?en la lavadora?
Antes de lavar, puede hacer mucho para obtener un mejor lavado. Separe las prendas según tejido y
colores. Mire las etiquetas y respete las indicaciones. Alterne prendas pequeñas y grandes.
Antes de laAntes de la
Antes de la
Antes de laAntes de la
Separe la ropa según el tipo de
tejido y la resistencia de los
colores: los tejidos delicados y
los tejidos resistentes deben ser
lavados por separado .
Los colores claros deben ser
separados de los oscuros.
Vacíe todos los bolsillos
(retirando monedas, papel,
billetes y pequeños objetos) y
controle los botones. Fije o quite
los botones que se puedan
desprender, ya que podrían
hacerlo durante el lavado.
Las etiquetas dicen todo.Las etiquetas dicen todo.
Las etiquetas dicen todo.
Las etiquetas dicen todo.Las etiquetas dicen todo.
Mire siempre las etiquetas: le
dicen todo acerca de la prenda
de vestir y de cómo lavarla de
la mejor manera.
En la página 7 encontrará todas
las explicaciones de los
Cómo hacer funcionar la máquinaCómo hacer funcionar la máquina
Cómo hacer funcionar la máquina
Cómo hacer funcionar la máquinaCómo hacer funcionar la máquina
Instalación, desplazamientos.Instalación, desplazamientos.
Instalación, desplazamientos.
Instalación, desplazamientos.Instalación, desplazamientos.
Si su lavadora està dotada de
un carro especial con ruedas
retráctiles, se facilitarà su
desplazamiento. Para hacer
descender este carro y poder
moverla sin esfuerzo, es
necesario tirar la palanca,
situada abajo a la izquierda,
debajo del zócalo. Finalizado el
desplazamiento es necesario
devolverla a su posición inicial.
A partir de ese momento, la
máquina está sólidamente
colocada. Véase la figura.
Apenas instalada la máquina, efectúe un ciclo de
lavado con la lavadora vacía, seleccionando el
programa "1" a 60 grados C.
Poner en marcha correctamente la lavadora es importante ya sea por la calidad del
lavado como para prevenir
problemas y para aumentar la
duración de la lavadora.
Para las prendas más
delicadas: introduzca la
ropa interior, medias
femeninas, medias de
niños y otras prendas
delicadas en una bolsa
de tela para protegerlas.
vv
arar
..
v
ar
.
vv
arar
..
símbolos que contienen las
etiquetas de las prendas de
vestir. Sus indicaciones son
muy importantes para lavar
mejor y hacer durar aún más
las prendas.
Alterne prendasAlterne prendas
Alterne prendas
Alterne prendasAlterne prendas
pequeñas y grandes.pequeñas y grandes.
pequeñas y grandes.
pequeñas y grandes.pequeñas y grandes.
Despliegue las prendas de vestir .
Introdúzcalas en el cesto sin
apretar y respete las cantidades
de carga aconsejadas para los
distintos programas. Obtendrá
un mejor lavado y menos
arrugado.
Prendas desmanchadasPrendas desmanchadas
Prendas desmanchadas
Prendas desmanchadasPrendas desmanchadas
con bencina.con bencina.
con bencina.
con bencina.con bencina.
No ponga en la máquina prendas
desmanchadas con bencina,
alcohol, tricloroetileno, etc. antes
de que dichos productos se
hayan e vaporado .
(Sòlo para los modelos
previstos)
Después de haber cargado la
ropa, vertido el detergente y
los eventuales aditivos,
controle siempre que:
1.1.
Las puertas estén bienLas puertas estén bien
1.
Las puertas estén bien
1.1.
Las puertas estén bienLas puertas estén bien
cerradas.cerradas.
cerradas.
cerradas.cerradas.
2.2.
2. El enchufe esté conectado en
2.2.
la toma.
3.3.
3. El grifo de agua esté abierto.
3.3.
4.4.
4. el botón
4.4.
posición
5. 5.
5. El carro de ruedas retráctiles
5. 5.
esté en la posición de reposo
(ruedas que no están en
contacto con el piso).
FF
F esté en la
FF
OO
O).
OO
Separe las prendas según
el tipo de tela y el color,
es importante para
obtener buenos
resultados
Elegir el programaElegir el programa
Elegir el programa
Elegir el programaElegir el programa
El programa se elige de
acuerdo al tipo de prendas que
se deben lavar y a la suciedad
de las mismas. Para elegir el
programa, consulte la tabla de
la página 6. Gire la perilla
hasta alcanzar el número del
programa deseado. Seleccione
AA
pagadopagado
A
pagado
AA
pagadopagado
BB
B
BB
C, DC, D
C, D
C, DC, D
la temperatura con la perilla
y, si es necesario, presione los
botones de las funciones (
E E
y
E); por último presione el
E E
EE
botón de
FF
F (posi-ción
FF
Al concluir el lavado ...Al concluir el lavado ...
Al concluir el lavado ...
Al concluir el lavado ...Al concluir el lavado ...
Espere dos minutos aproximadamente.
Luego apague la lavadora
presionando el botón de
ncendido-ncendido-
E
ncendido-
EE
ncendido-ncendido-
II
I).
II
encendido-apagado
OO
O). A partir de ese momento
OO
puede abrir con seguridad la
puerta. Después de haber
retirado la ropa recién lavada,
AA
A
AA
deje siempre la puerta abierta
o semiabierta, para que la
humedad que queda en el
,,
,
,,
interior pueda evaporarse.
Cierre siempre el grifo del agua.
Recuerde que si se inter-Recuerde que si se inter-
Recuerde que si se inter-
Recuerde que si se inter-Recuerde que si se interrumpe la alimentación eléc-rumpe la alimentación eléc-
rumpe la alimentación eléc-
rumpe la alimentación eléc-rumpe la alimentación eléctrica o se apaga la lavadora,trica o se apaga la lavadora,
trica o se apaga la lavadora,
trica o se apaga la lavadora,trica o se apaga la lavadora,
el programa seleccionadoel programa seleccionado
el programa seleccionado
el programa seleccionadoel programa seleccionado
recomenzará en el punto enrecomenzará en el punto en
recomenzará en el punto en
recomenzará en el punto enrecomenzará en el punto en
el cual fue interrumpido.el cual fue interrumpido.
el cual fue interrumpido.
el cual fue interrumpido.el cual fue interrumpido.
FF
F (posición
FF
Instrucciones para la instalación y el uso
44
4
44
Page 38

Comprender el funcionamiento del panel de mandos
Aquí manda Ud.Aquí manda Ud.
Aquí manda Ud.
Aquí manda Ud.Aquí manda Ud.
Elegir los programas adecuados es importante. Y es fácil.
Perilla de programasPerilla de programas
Perilla de programas
Perilla de programasPerilla de programas
Sirve para seleccionar el
programa de lavado.
Gire esta perilla exclusivaGire esta perilla exclusiva
Gire esta perilla exclusiva
Gire esta perilla exclusivaGire esta perilla exclusiva
mente en sentido horario y conmente en sentido horario y con
mente en sentido horario y con
mente en sentido horario y conmente en sentido horario y con
la máquina apagada.la máquina apagada.
la máquina apagada.
la máquina apagada.la máquina apagada.
Para seleccionar un programa
de lavado, debe hacer coincidir
el índice ubicado en la perilla,
con el símbolo/número
correspondiente al programa
deseado. Para mayor información consulte las páginas 4 y 6.
Perilla de la temperaturaPerilla de la temperatura
Perilla de la temperatura
Perilla de la temperaturaPerilla de la temperatura
Permite seleccionar la temperatura de lavado indicada en
la tabla de los programas (véase pág. 6). Además, si lo desea, le permite reducir la temperatura aconsejada para el
programa seleccionado, hasta
el lavado en frío ( simbolo nieve ).
Botón de media cargaBotón de media carga
Botón de media carga
Botón de media cargaBotón de media carga
Este botón reduce el consumo de agua durante los
enjuagues. Le aconsejamos
utilizarlo exclusivamente en
los programas sintéticos y
delicados cuando la lavadora
no se llena completamente
y disminuyendo oportunamente la cantidad de detergente.
--
-
--
Botón inhabilitación deBotón inhabilitación de
Botón inhabilitación de
Botón inhabilitación deBotón inhabilitación de
centrifugadocentrifugado
centrifugado
centrifugadocentrifugado
Permite excluir el centrifugado
(seleccionando el botón con el
símbolo ) antes del programa
seleccionado. Se utiliza
cuando se lavan prendas
difíciles de planchar (sinteticos
y delicados).
Antiarrugas (Sintéticos-Antiarrugas (Sintéticos-
Antiarrugas (Sintéticos-
Antiarrugas (Sintéticos-Antiarrugas (Sintéticosdelicados )delicados )
delicados )
delicados )delicados )
Este botón permite interrumpir el
programa (en la posicion/
símbolo ) manteniendo la ropa
en remojo en el agua antes de la
centrifugación. Se trata de un
botón muy importante ya que evita que los tejidos delicados y
aquéllos sintéticos se arruguen
(por ejemplo cuando no es
posible extraer la ropa al término
del lavado sino sólo después de
algunas horas).
Debe utilizarse única y exclusivamente en los programas dedicados a los tejidos sintéticos
(Progr. 5-6-7).
¡A¡A
TENCIÓN! TENCIÓN!
¡A
TENCIÓN! Para hacer que el
¡A¡A
TENCIÓN! TENCIÓN!
programa concluya descargando
el agua, vuelva a presionar el
EE
botón
E.
EE
Encendido-apagadoEncendido-apagado
Encendido-apagado
Encendido-apagadoEncendido-apagado
(On-Off)(On-Off)
(On-Off)
(On-Off)(On-Off)
FF
Con el botón
lavadora permanece encendida y cuando este botón no está
presionado la lavadora está
apagada.
El apagado de la máquina noEl apagado de la máquina no
El apagado de la máquina no
El apagado de la máquina noEl apagado de la máquina no
anula el programa seleccio-anula el programa seleccio-
anula el programa seleccio-
anula el programa seleccio-anula el programa seleccionado.nado.
nado.
nado.nado.
F
presionado la
FF
La perilla
con los programas de su
lavadora
Luz indicadora de funcio-Luz indicadora de funcio-
Luz indicadora de funcio-
Luz indicadora de funcio-Luz indicadora de funcionamiento encendido-namiento encendido-
namiento encendido-
namiento encendido-namiento encendidoapagadoapagado
apagado
apagadoapagado
El testigo
máquina está encendida a la
espera de que se predisponga
un programa. La luz fija indica
la aceptación del programa seleccionado.
GG
G centellea cuando la
GG
Instrucciones para la instalación y el uso
55
5
55
Page 39

¿Qué desea lavar hoy?
Los programas para todasLos programas para todas
Los programas para todas
Los programas para todasLos programas para todas
las estacioneslas estaciones
las estaciones
las estacioneslas estaciones
Tipos de telas y de
suciedad
Perilla de
programas
Perilla de
la temp.
De terg en te
para
prelavado
Detergente para
el lavado
Suavizan-teBlanquea-
dor
tradicional
o delicado
Duración
del ciclo
(minutos)
Descripción del ciclo de
lavado
ALGODÓN
Ropa blanca excepcionalmente sucia
(sábanas, manteles, etc.)
Ropa blanca muy sucia (sábanas,
manteles, etc.)
Ropa blanca y de color, resistente
muy sucia
Ropa blanca poco sucia y colores
delicados (camisas, camisetas, etc.)
Enjuagues/Blanqueador
Suavizante
Centrifugado Descarga y centrifugado final
Stop/Reset Interrumpe/Anula el programa
1Max°C
2Max°C
360°C
440°C
uuu
uu
uu
uu
u
u
Delicado/Tr-
Delicado/Tr-
Delicado/Tr-
Delicado/Tr-
adic
adic
adic
adic
Prelavado, lavado a alta
155
temperatura,
centrifugados intermedios y final
Lavado enérgico a temperatura
145
elevada
intermedios y final
Lavado normal a 60°C
115
centrifugados intermedios y final
Lavado delicado a 40 °C
100
centrifugados intermedios y final
Enjuagues, centrifugados intermedios
y final
Risciacqui con prelievo
dell'ammorbidente, antipiega o
centrifuga delicata
seleccionado
enjuagues,
, enjuagues, centrifugados
, enjuagues,
, enjuagues,
SINTÉTICOS
Sintéticos con colores resistentes muy
sucios (ropa para recién nacidos, etc.)
Sintéticos con colores delicados (ropa
de todo tipo ligeramente sucia)
Sintéticos con colores delicados (ropa
de todo tipo ligeramente sucia)
Enjuagues/Blanqueador
Suavizante
Stop con agua Stop con agua para prendas
Centrifugado Descarga y centrifugado delicado
Stop/Reset Interrumpe/Anula el programa
560°C
650°C
740°C
uu
uu
uu
u
u
Delicado
Delicado
Delicado
Lavado enérgico a 60°C
90
antiarrugas o centrifugado delicado
Lavado normal a 50°C
80
antiarrugas o centrifugado delicado
Lavado delicado a 40°C
70
y centrifugado delicado
Enjuagues con toma del suavizante,
antiarrugas o centrifugado delicado
Risciacqui con prelievo
dell'ammorbidente, antipiega o
centrifuga delicata
particularmente delicadas
seleccionado
, enjuagues,
, enjuagues,
, enjuagues
DELICADOS
Lana
Enjuagues
Suavizante
Centrifugado Descarga y centrifugado delicadoa
Descarga Descarga
Stop/Reset Interrumpe/Anula el programa
840°C
uu
u
u
Lavado a 40 °C
60
centrifugado delicado
Enjuagues, antiarrugas o descarga
Risciacqui con prelievo
dell'ammorbidente, antipiega o
centrifuga delicata
seleccionado
, enjuagues y
Los datos que aparecen en la tabla tienen un valor de carácter general, ya que pueden variar según la cantidad y tipo
de ropa, la temperatura del agua de red y la temperatura del ambiente.
Instrucciones para la instalación y el uso
66
6
66
Page 40

Comprender las etiquetas y los
símbolos de las lavadoras con
carga superior Ariston:
Aprenda el significado de estos símbolos y lavará mejor, sus prendas durarán
más y su lavadora recompensará su atención lavando mejor.
En toda Europa cada etiqueta
contiene un mensaje
representado por pequeños
pero importantes símbolos.
Aprender a comprenderlos es
fundamental para lavar mejor y
tratar sus propias prendas de
vestir de la manera adecuada.
Se dividen en cinco
categorías, representadas por diferentes formas:
Consejos Útiles
Coloque las camisas del revés para lavarlas mejor y
hacerlas durar más.
Retire siempre los objetos de los bolsillos.
lavado lavado
lavado
lavado lavado
blanqueo blanqueo
blanqueo
blanqueo blanqueo
planchado planchado
planchado
planchado planchado
limpieza limpieza
limpieza
limpieza limpieza
en seco en seco
en seco
en seco en seco
secado secado
secado
secado secado
Mire las etiquetas: le dan indicaciones útiles e importantes.
En el cesto, alterne prendas grandes con prendas pequeñas.
Consulte y aprenda los significados de los símbolos de estaConsulte y aprenda los significados de los símbolos de esta
Consulte y aprenda los significados de los símbolos de esta
Consulte y aprenda los significados de los símbolos de estaConsulte y aprenda los significados de los símbolos de esta
tabtab
la:la:
le a le a
tab
la:
tabtab
la:la:
hacer rendir más su lavadora.hacer rendir más su lavadora.
hacer rendir más su lavadora.
hacer rendir más su lavadora.hacer rendir más su lavadora.
Acción
fuert e
yudarán a layudarán a la
le a
yudarán a la
le a le a
yudarán a layudarán a la
Lavado Blanqueo Planchado Limpieza en seco Secado
Lavado a
95 °C
Lavado a
60 °C No blanquear
Lavado a
40 °C Planchado
Lavado a
30 °C
Lavado
delicado a
mano
vv
ar mejorar mejor
v
ar mejor
vv
ar mejorar mejor
Acción
delicada
,,
a tratar mejor sus prendas y a a tratar mejor sus prendas y a
,
a tratar mejor sus prendas y a
,,
a tratar mejor sus prendas y a a tratar mejor sus prendas y a
c
l
Se puede
blanquear en agua
fría
Planchado
fuerte máx.
200 °C
Planchado
mediano máx.
150 °C
máx. 110 °C
No planchar No limpiar en seco
A
Limpieza en seco
con todo tipo de
solvente
P
Limpieza en seco
con percloro, aero
gasolina, alcohol
puro, R111 y R113
F
Limpieza en seco
con aero gasolina,
alcohol puro y R113
Tenga cuidado de no
equivocarse con la
temperatura....
Temp.
alta
Secables en
máquina
secarropa
No secable en
máquina
secarropa
Secar
extendido
Secar colgada
prenda no
centrifugada
Secar en
colgadores
Temp.
moderada
No lavar en
agua
77
7
77
Instrucciones para la instalación y el uso
Page 41

On - Encendido
Off - Apagado
Comienzo inicializaciónreactivación
Comienzo retrasado
Prelavado Lavado Max°
Lavado a 90°
Lavado a 60°
Lavado a
40°delicado
Sintéticos a 60°
Sintéticos a 40°
Enjuague
Nivel de enjuagues/
Enjuague Extra
Suavizante
Stop con agua Antiarrugas
Centrifugado
Variación o eliminación
del centrifugado
Descarga de agua
Lana
Lavado a mano
Seda y cortinas
Lavado diario a 30°
en 30'
Plancha fácil
Spécial
taches
Antimanchas
1/2 carga
Regulación de la
temperatura
Sintéticos a 50°
Consejos útiles para no equivConsejos útiles para no equiv
Consejos útiles para no equiv
Consejos útiles para no equivConsejos útiles para no equiv
Reglas Generales: Reglas Generales:
Reglas Generales:
Reglas Generales: Reglas Generales:
- Algodón, Lino. - Algodón, Lino.
- Algodón, Lino. Llene el ce
- Algodón, Lino. - Algodón, Lino.
sto pero no lo recargue.
- Sintéticos. - Sintéticos.
- Sintéticos. No llene más de
- Sintéticos. - Sintéticos.
la mitad del cesto.
- Delicados y Lana. - Delicados y Lana.
- Delicados y Lana. No llene
- Delicados y Lana. - Delicados y Lana.
más de un tercio del cesto.
- Ropa muy sucia:- Ropa muy sucia:
- Ropa muy sucia:
- Ropa muy sucia:- Ropa muy sucia:
reduzca las cantidades.
- Manchas persistentes o- Manchas persistentes o
- Manchas persistentes o
- Manchas persistentes o- Manchas persistentes o
especiales. especiales.
especiales.
especiales. especiales.
Trátelas antes del lavado
refregando los puntos
particularmente sucios con
un detergente especial, con
pasta detergente o con
quitamanchas especiales
(véase el cuadro sobre el
tratamiento de las manchas
especiales con quitamanchas
en la pág.9)
No lave nunca en lavadora...No lave nunca en lavadora...
No lave nunca en lavadora...
No lave nunca en lavadora...No lave nunca en lavadora...
ropa sin dobladillos, deshilachada
o rota. Si es necesario lavarla,
enciérrela en una bolsa. La ropa
de colores fuertes junto con la
blanca.
¡T¡T
enga cuidado con el peso!enga cuidado con el peso!
¡T
enga cuidado con el peso!
¡T¡T
enga cuidado con el peso!enga cuidado con el peso!
Para obtener los mejores
resultados, no supere los pesos
indicados correspondientes a la
carga máxima de ropa seca:
--
TT
ejidos resistentes:ejidos resistentes:
-
T
ejidos resistentes:
--
TT
ejidos resistentes:ejidos resistentes:
máx. 5 kg
--
-
T ejidos sintéticos:
--
máx. 2,5 kg
--
-
T ejidos delicados:
--
máx. 2 kg
--
Pura lana virgen:Pura lana virgen:
-
Pura lana virgen:
--
Pura lana virgen:Pura lana virgen:
máx.1 kg
--
TT
ejido de fejido de f
-
T
ejido de f
--
TT
ejido de fejido de f
máx. 2 ,3 kg
elpaelpa
elpa
elpaelpa
Intensidad de Lavado
¿Cuánto pesan?¿Cuánto pesan?
¿Cuánto pesan?
¿Cuánto pesan?¿Cuánto pesan?
1 sábana 400-500 gr.
1 funda 150-200 gr.
1 mantel 400-500 gr.
1 salida de baño 900-1.200 gr.
1 toalla 150-500 gr .
Mezcle prendas de Mezcle prendas de
Mezcle prendas de
Mezcle prendas de Mezcle prendas de
distintos tamaños distintos tamaños
distintos tamaños con los
distintos tamaños distintos tamaños
tejidos de felpa: salidas de
baño, toallas, etc. Evitará así
la formación de la "pelota"
durante el centrifugado y el
desequilibrio.
Las remeras de colorLas remeras de color
Las remeras de color
Las remeras de colorLas remeras de color
estampadas y las camisas,
duran más si se lavan del revés.
Las remeras y los buzos
estampados deben plancharse
siempre del revés.
Alarma ropa de trabajoAlarma ropa de trabajo
Alarma ropa de trabajo
Alarma ropa de trabajoAlarma ropa de trabajo
Los difundidos mamelucos tipo
ocarocar
ocar
ocarocar
sese
se
sese
"salopette" tienen tirantes con
ganchos que pueden dañar al
cesto o a las otras prendas durante el lavado. Si introduce los
ganchos en el bolsillo de la
pechera y los fija con alfileres de
gancho eliminará todo peligro.
VV
acaciones:acaciones:
V
acaciones:
VV
acaciones:acaciones:
enchufe.enchufe.
enchufe.
enchufe.enchufe.
Antes de partir de vacaciones es
aconsejable desconectar el
enchufe, cerrar el grifo de entrada
de agua y dejar abierta o
entreabierta la puerta.
,,
,
las
,,
Procediendo de esta manera, el
cesto y la junta permanecerán
bien secos y en el interior no se
producirán olores
desagradables.
..
.
..
desconectar el desconectar el
desconectar el
desconectar el desconectar el
Cómo lavar casi todo
Las cortinas.
Tienden a arrugarse mucho.
Para limitar este efecto, he aquí
un consejo: dóblelas bien e introdúzcalas en una funda de
almohada o en una bolsa de red.
Lávelas por separado, de manera que el peso total no supere media carga. No olvides utilizar el programa específico 11
que comprende de modo automático la exclusión de la
centrifugación.
CICLO LANA
Para obtener los mejores
resultados utilice un detergente
específico, teniendo cuidado de
no superar 1 kg. de carga.
Plumones acolchados y
anoraks.
Si el relleno de los plumones acolchados y de los anoraks, es de
pluma de ganso o de pato, también pueden ser lavados en lavadora. Lo importante es no com-
pletar una carga de 5 kg.
Instrucciones para la instalación y el uso
Zapatillas.
Las zapatillas se deben limpiar
primero para quitarles el fango y
pueden lavarse junto con los vaqueros y las prendas más resistentes. No las lave junto con ropa
blanca.
8 8
8
8 8
Page 42

Cuando los detergentes y el agua no bastan...
Cómo eliminar algunas manchasCómo eliminar algunas manchas
Cómo eliminar algunas manchas
Cómo eliminar algunas manchasCómo eliminar algunas manchas
especialesespeciales
especiales
especialesespeciales
-Vino rojo. Deje en remojo con detergente, enjuague y trate con ácido acético o ácido cítrico, luego enjuague. Trate eventuales
residuos con blanqueador.
- Sangre. Las manchas todavía frescas se deben tratar con agua fría. En caso de manchas ya secas, déjelas en remojo durante una
noche con un detergente especial y luego refréguelas en agua y jabón.
- Manchas secas de grasa. Humedezca con trementina, realice una suave presión sobre las manchas con la punta de los dedos y
un paño de algodón, después de haber apoyado la prenda sobre una superficie blanda.
- Herrumbre. Trate con sal oxálica (se encuentra en droguerías) disuelta en caliente, o un producto antiherrumbre en frío. Las
manchas viejas pueden haber ya atacado el tejido: se corre el riesgo de tener que tirar la prenda...
- Manchas de moho. Trátelas con blanqueador , enjuague bien (sólo para prendas blancas y de color resistentes al cloro).
- Pintura al óleo. Humedezca con bencina detergente, presione suavemente sobre las manchas después de haber colocado la
prenda sobre un paño suave, luego trátelas más veces con el detergente.
- Tinta y bolígrafo. Aplique algodón embebido en alcohol metílico o alcohol de 90°.
- Alquitrán. Aplique mantequilla fresca, pase trementina y luego lave de inmediato.
- Cera. Raspe y posteriormente pase con la plancha muy caliente entre dos hojas de papel absorbente. A continuación pase un
algodón con aguarrás o alcohol metílico.
- Goma de mascar . Pase el solvente para esmalte de uñas y luego un trapo limpio.
- Moho. Algodón y lino blanco deben ser sumergidos en una solución de cinco partes de agua, una de blanqueador y una cucharada
de vinagre y luego lave de inmediato. Para otras telas blancas, use agua oxigenada de 10 volúmenes y luego lave inmediatamente.
- Lápiz de labios. Aplique éter si el tejido es lana o algodón. Para la seda use trielina.
- Esmalte de uñas. Coloque el tejido por la parte de la mancha sobre una hoja de papel absorbente y moje con el solvente
desplazando la prenda a medida que la hoja se va coloreando.
- Hierba. Aplique un algodón embebido en alcohol metílico.
Para un lavado seguro
Cómo abrir y cerrar el cestoCómo abrir y cerrar el cesto
Cómo abrir y cerrar el cesto
Cómo abrir y cerrar el cestoCómo abrir y cerrar el cesto
A) APERTURA (Fig. 1) A) APERTURA (Fig. 1)
A) APERTURA (Fig. 1) Levante la tapa externa y ábrala
A) APERTURA (Fig. 1) A) APERTURA (Fig. 1)
completamente
B) Abra luego el cesto usando ambas manos, como se B) Abra luego el cesto usando ambas manos, como se
B) Abra luego el cesto usando ambas manos, como se
B) Abra luego el cesto usando ambas manos, como se B) Abra luego el cesto usando ambas manos, como se
indica en la Fig. 2: indica en la Fig. 2:
indica en la Fig. 2:
indica en la Fig. 2: indica en la Fig. 2:
- -
- presione el botón indicado por la flecha en la Fig. y,
- -
ejerciendo una leve presión hacia abajo, mantenga apoyada
una mano, para evitar que las puertas se abran
repentinamente haciendo mal a los dedos;
- -
- luego acompañe las puertitas que se desengancharán y se
- -
abrirán fácilmente.
Fig. 1
Fig. 3 Fig. 4
Fig. 2
C) INTRODUCCIÓN DE LA ROP A (Fig. 3)
D) CIERRE (Fig. 4) D) CIERRE (Fig. 4)
D) CIERRE (Fig. 4)
D) CIERRE (Fig. 4) D) CIERRE (Fig. 4)
- -
- cierre bien el cesto bajando primero la puerta delantera y
- -
apoyando luego la posterior;
- -
- luego verifique que los ganchos de la puerta delantera
- -
estén perfectamente alojados en la sede de la puerta po sterior;
- -
- después de haber escuchado el "clac" correspondiente al
- -
enganche, ejerza una leve presión hacia abajo sobre
ambas puertas que no se deben desenganchar;
- -
- por último cierre la tapa externa.
- -
99
Instrucciones para la instalación y el uso
9
99
Page 43

Importante para lavar mejor
El secreto de la cubeta de detergenteEl secreto de la cubeta de detergente
El secreto de la cubeta de detergente
El secreto de la cubeta de detergenteEl secreto de la cubeta de detergente
El primer secreto: la cubeta de detergente está cómodamente colocada bajo la puerta.
Debe verter el detergente y el
eventual aditivo respetando las
dosis indicadas por los
fabricantes: en general
encontrará toda la información
en el envase.
Las dosis varían en función deLas dosis varían en función de
Las dosis varían en función de
Las dosis varían en función deLas dosis varían en función de
la carga de ropa, de la durezala carga de ropa, de la dureza
la carga de ropa, de la dureza
la carga de ropa, de la durezala carga de ropa, de la dureza
del agua y del grado de sudel agua y del grado de su
del agua y del grado de su
del agua y del grado de sudel agua y del grado de su
ciedad. No se exceda. Más deciedad. No se exceda. Más de
ciedad. No se exceda. Más de
ciedad. No se exceda. Más deciedad. No se exceda. Más de
tergente no produce más efitergente no produce más efi
tergente no produce más efi
tergente no produce más efitergente no produce más efi
cacia lavadora, al contrario...cacia lavadora, al contrario...
cacia lavadora, al contrario...
cacia lavadora, al contrario...cacia lavadora, al contrario...
Con la experiencia, aprenderá
a dosificar las cantidades de
manera casi automática: se
convertirán en su secreto.
Cuando vierta el suavizante en
el compartimiento
cuidado de no superar el nivel
"max" indicado.
La lavadora retira automáticamente el suavizante en cada
33
3, tenga
33
programa de lavado.
El detergente líquido debe serEl detergente líquido debe ser
El detergente líquido debe ser
El detergente líquido debe serEl detergente líquido debe ser
vertido sólo pocos instantesvertido sólo pocos instantes
vertido sólo pocos instantes
vertido sólo pocos instantesvertido sólo pocos instantes
antes de poner en funcionaantes de poner en funciona
antes de poner en funciona
antes de poner en funcionaantes de poner en funciona
miento la máquina.miento la máquina.
miento la máquina.
miento la máquina.miento la máquina.
Recuerde que el detergenteRecuerde que el detergente
Recuerde que el detergente
Recuerde que el detergenteRecuerde que el detergente
líquido es particularmentelíquido es particularmente
líquido es particularmente
líquido es particularmentelíquido es particularmente
aconsejado para lavados conaconsejado para lavados con
aconsejado para lavados con
aconsejado para lavados conaconsejado para lavados con
temperatura de hasta 60temperatura de hasta 60
temperatura de hasta 60
temperatura de hasta 60temperatura de hasta 60
grados y para los programasgrados y para los programas
grados y para los programas
grados y para los programasgrados y para los programas
--
-
-de lavado que no incluyan lade lavado que no incluyan la
de lavado que no incluyan la
de lavado que no incluyan lade lavado que no incluyan la
--
-
-fase de prelavado.fase de prelavado.
fase de prelavado.
fase de prelavado.fase de prelavado.
--
-
--
Están disponibles en el
comercio detergentes líquidos o
en polvo con contenedores
especiales que deben ser introucidos directamente en el cesto,
respetando las instrucciones
escritas en el envase.
No utilice nunca detergentes para lavado a mano ya que forman
demasiada espuma potencialmente dañina para la lavadora.
Un último secreto: al lavar con
agua fría, reduzca siempre la
cantidad de detergente; en el
agua fría se disuelve menos que
en el agua caliente y por lo tanto, en parte se perdería.
En el compartimiento 1
para prelavado (polvere) para prelavado (polvere)
para prelavado (polvere)
para prelavado (polvere) para prelavado (polvere)
En el compartimiento 2
per lavado (polvere e liquido) per lavado (polvere e liquido)
per lavado (polvere e liquido)
per lavado (polvere e liquido) per lavado (polvere e liquido)
En el compartimiento 3
En el compartimiento 4
: Detergente: Detergente
: Detergente
: Detergente: Detergente
: Detergnte: Detergnte
: Detergnte
: Detergnte: Detergnte
: Suavizante: Suavizante
: Suavizante
: Suavizante: Suavizante
: Blanqueador: Blanqueador
: Blanqueador
: Blanqueador: Blanqueador
Prelavado, blanqueado, suavizantePrelavado, blanqueado, suavizante
Prelavado, blanqueado, suavizante
Prelavado, blanqueado, suavizantePrelavado, blanqueado, suavizante
Cuando sea necesario
--
-
--
blanquear, seleccione los
programas especiales e
introduzca el blanqueador en
el compartimiento
cubeta de detergente.
Al verter el blanqueador, tenga cuidado de no superar el
"máx.""máx."
nivel
"máx." indicado.
"máx.""máx."
El uso del blanqueadorEl uso del blanqueador
El uso del blanqueador
El uso del blanqueadorEl uso del blanqueador
excluye la posibilidad deexcluye la posibilidad de
excluye la posibilidad de
excluye la posibilidad deexcluye la posibilidad de
efectuar el prelavado.efectuar el prelavado.
efectuar el prelavado.
efectuar el prelavado.efectuar el prelavado.
El blanqueador tradicionalEl blanqueador tradicional
El blanqueador tradicional
El blanqueador tradicionalEl blanqueador tradicional
debe utilizarse exclusivadebe utilizarse exclusiva
debe utilizarse exclusiva
debe utilizarse exclusivadebe utilizarse exclusiva
mente para las telas resimente para las telas resi
mente para las telas resi
mente para las telas resimente para las telas resi
stentes blancas, mientrasstentes blancas, mientras
stentes blancas, mientras
stentes blancas, mientrasstentes blancas, mientras
que el delicado debe utilique el delicado debe utili
que el delicado debe utili
que el delicado debe utilique el delicado debe utili
zarse para la ropa dezarse para la ropa de
zarse para la ropa de
zarse para la ropa dezarse para la ropa de
color y paracolor y para
color y para
color y paracolor y para
"Seda" ni con los "Programas
Especiales" (véase pág.6).
sintéticos.sintéticos.
sintéticos.
sintéticos.sintéticos.
Grados de dureza del agua
Dur .- Caracter .
1 - Dulce
2 - Media
3 - Dura
4 - Muy dura
Una guía para un uso
Mayor ahorro
económico y ecológico
de los electrodomésticos
CARGA MÁXIMA
La mejor manera para no derrochar energía, agua, detergente y tiempo es utilizar la lavadora
con la carga máxima aconsejada.
Una carga completa en lugar de dos medias cargas permite AHORRAR hasta el 50% de
energía.
USE MENOS DETERGENTE SI: lava poca ropa, la ropa está poco sucia, se forma espuma
durante el lavado o el agua no es muy dura, o dulce (véase la tabla anterior con los grados
de dureza del agua). Para conocer la dureza del agua, infórmese en la Oficina correspondiente
de su Municipio.
¿EL PRELA V ADO ES EFECTIV AMENTE NECESARIO?
Sólo para ropa que esté verdaderamente sucia.
Programar un lavado SIN prelavado para ropa poco sucia o medianamente sucia permite
AHORRAR detergente, tiempo, agua y entre el 5 y el 15% de energía.
¿EL LA V ADO CON AGUA CALIENTE ES VERDADERAMENTE NECESARIO?
Tratar las manchas con un quitamanchas o sumergir las manchas secas en agua antes del
lavado permite disminuir la necesidad de programar un lavado con agua caliente.
Utilice un programa de lavado a 60° para AHORRAR hasta el 50% de energía.
ANTES DE UTILIZAR UN PROGRAMA DE SECADO ...
Si la ropa se debe secar en un secarropas, seleccione una alta velocidad de centrifugado,
cuando exista un regulador de velocidad,. Un bajo contenido de agua en la ropa permite
AHORRAR tiempo y energía en el programa de secado.
Nota:Nota:
Nota:
Nota:Nota:
1) El blanqueador concentra-1) El blanqueador concentra-
1) El blanqueador concentra-
1) El blanqueador concentra-1) El blanqueador concentrado se debe diluirdo se debe diluir
do se debe diluir
do se debe diluirdo se debe diluir
2) Con los detergentes2) Con los detergentes
2) Con los detergentes
44
4 de la
44
2) Con los detergentes2) Con los detergentes
concentrados (en polvo oconcentrados (en polvo o
concentrados (en polvo o
concentrados (en polvo oconcentrados (en polvo o
líquidos) use un programalíquidos) use un programa
líquidos) use un programa
líquidos) use un programalíquidos) use un programa
sin prelavado.sin prelavado.
sin prelavado.
sin prelavado.sin prelavado.
3) Para los detergentes en3) Para los detergentes en
3) Para los detergentes en
3) Para los detergentes en3) Para los detergentes en
tabletas o contenidos en unatabletas o contenidos en una
tabletas o contenidos en una
tabletas o contenidos en unatabletas o contenidos en una
bolita, no utilice el prelavado.bolita, no utilice el prelavado.
bolita, no utilice el prelavado.
bolita, no utilice el prelavado.bolita, no utilice el prelavado.
--
-
--
--
-
--
--
-
--
Agregado de SuavizanteAgregado de Suavizante
Agregado de Suavizante
Agregado de SuavizanteAgregado de Suavizante
El suavizante vuelve más suave
la ropa y disminuye la carga
electrostática de las fibras
sintéticas.
Alemanes Franceses
°dH °T.H
0- 7 0-15
8-14 16-25
15-21 26-37
+ di 21 + di 37
nes de los fabricantes.
El suavizante se introduce
automáticamente en la
máquina durante el último
enjuague. Al finalizar el
programa de lavado, en el
compartimiento 3 permanece
una cantidad residual de agua.
La función de la misma es la
introducción de suavizantes
muy densos o diluir a aquellos
concentrados.
Si en el compartimiento 3
quedara más agua de la normal, esto significa que el
dispositivo de vaciamiento está
tapado, interrumpiendo así el
efecto aspirante del dispositivo.
Para la limpieza, véase la
pág.13. No vierta nunca
suavizantes y almidón juntos en
el compartimiento, ya que
podría producirse un
atascamiento del sistema de
desbordamiento.
..
.
..
Los suavizantes se pueden
utilizar para
tejidos de felpa,
géneros de
punto, cortinas,
etc. Vierta el
suavizante en
el compartimiento 3 de la
cubeta según
las indicacio-
Instrucciones para la instalación y el uso
1010
10
1010
Page 44

Problemas y soluciones
Antes de telefAntes de telef
Antes de telef
Antes de telefAntes de telef
Puede suceder que la lavadora no funcione. En muchos casos se trata de problemas que pueden ser resueltos con
facilidad sin necesidad de llamar al técnico. Antes de telefonear al Servicio de asistencia controle siempre los
siguientes puntos.
La lavadora no se enciende.La lavadora no se enciende.
La lavadora no se enciende.
La lavadora no se enciende.La lavadora no se enciende.
¿El enchufe está bien¿El enchufe está bien
¿El enchufe está bien
¿El enchufe está bien¿El enchufe está bien
conectado en la toma?conectado en la toma?
conectado en la toma?
conectado en la toma?conectado en la toma?
Haciendo la limpieza se
podría haber movido.
¿Hay corriente en la casa?¿Hay corriente en la casa?
¿Hay corriente en la casa?
¿Hay corriente en la casa?¿Hay corriente en la casa?
Podría haber intervenido el
interruptor automático de
seguridad porque, por
ejemplo, hay demasiados
electrodomésticos
encendidos. La causa
también puede ser una
interrupción general de la
energía eléctrica en su
zona.
¿La puerta está bien¿La puerta está bien
¿La puerta está bien
¿La puerta está bien¿La puerta está bien
cerrada?cerrada?
cerrada?
cerrada?cerrada?
Por motivos de seguridad la
lavadora no puede funcionar
si la puerta está abierta o mal
cerrada.
¿El botón de Encendido/¿El botón de Encendido/
¿El botón de Encendido/
¿El botón de Encendido/¿El botón de Encendido/
Apagado está presionado?Apagado está presionado?
Apagado está presionado?
Apagado está presionado?Apagado está presionado?
En caso afirmativo, significa
que ha sido seleccionado un
comienzo programado.
La perilla para el comienzoLa perilla para el comienzo
La perilla para el comienzo
La perilla para el comienzoLa perilla para el comienzo
programado, en losprogramado, en los
programado, en los
programado, en losprogramado, en los
modelos en que está previ-modelos en que está previ-
modelos en que está previ-
modelos en que está previ-modelos en que está prevista, ¿se encuentra en lasta, ¿se encuentra en la
sta, ¿se encuentra en la
sta, ¿se encuentra en lasta, ¿se encuentra en la
posición correcta?posición correcta?
posición correcta?
posición correcta?posición correcta?
¿El grifo de agua está¿El grifo de agua está
¿El grifo de agua está
¿El grifo de agua está¿El grifo de agua está
abierto?abierto?
abierto? Por motivos de
abierto?abierto?
seguridad, si la lavadora no
carga agua, no puede
comenzar con el lavado.
onearonear
onear
onearonear
,,
lea aquí lea aquí
,
lea aquí
,,
lea aquí lea aquí
CORRECTO CORRECTO
CORRECTO
CORRECTO CORRECTO
Cerrar el grifo después
de cada lavado limita el
desgaste del sistema
hidráulico de la
lavadora y elimina el
peligro de pérdidas
cuando no hay nadie en
casa.
No controle el
funcionamiento de la
lavadora sólo si el lugar
donde está colocada está
dotado de una descarga
en el piso (pozo).
Deje siempre las
puertas semicerradas.
De este modo no se
producen malos olores.
Limpie delicadamente
la parte externa.
Para limpiar la parte
externa y las piezas de
goma de la lavadora, use
siempre un paño
embebido en agua tibia
y jabón. tiepida e
sapone.
INCORRECTO
?
Dejar conectado el enchufe
mientras limpia la lavadora.
También se debe desconectar
el enchufe antes de ejecutar
tareas de mantenimiento.
Usar solventes y abrasivos
agresivos.
No use nunca productos
solventes o abrasivos para
limpiar la parte externa y las
piezas de goma de la lavadora.
Descuidar la cubeta de
detergente.
Puede ser extraída y para
lavarla basta dejarla un poco
de tiempo bajo el agua
corriente.
Irse de vacaciones sin pensar
en la lavadora.
Antes de partir de vacaciones,
controle siempre que el
enchufe esté desconectado y
el grifo del agua cerrado.
La lavadora no cargaLa lavadora no carga
La lavadora no carga
La lavadora no cargaLa lavadora no carga
aguaagua
agua
aguaagua
¿El tubo está¿El tubo está
¿El tubo está
¿El tubo está¿El tubo está
correctamente conectadocorrectamente conectado
correctamente conectado
correctamente conectadocorrectamente conectado
al grifo?al grifo?
al grifo?
al grifo?al grifo?
¿Falta agua? ¿Falta agua?
¿Falta agua? Podrían estar
¿Falta agua? ¿Falta agua?
efectuándose trabajos en el
edificio o en la calle.
¿Hay suficiente presión?¿Hay suficiente presión?
¿Hay suficiente presión?
¿Hay suficiente presión?¿Hay suficiente presión?
Podría existir una avería en
el autoclave.
¿El filtro del grifo está¿El filtro del grifo está
¿El filtro del grifo está
¿El filtro del grifo está¿El filtro del grifo está
limpio?limpio?
limpio? Si el agua contiene
limpio?limpio?
mucho material calcáreo o
bien si recientemente han
sido efectuados trabajos en
el acueducto, el filtro del grifo
podría estar obstruido por
fragmentos o residuos.
¿El tubo de goma está¿El tubo de goma está
¿El tubo de goma está
¿El tubo de goma está¿El tubo de goma está
plegado? plegado?
plegado? El recorrido del
plegado? plegado?
tubo de goma que lleva el
agua a la lavadora debe ser
lo más rectilíneo posible.
Controle que no esté
aplastado ni doblado.
La lavadora carga yLa lavadora carga y
La lavadora carga y
La lavadora carga yLa lavadora carga y
descarga agua dedescarga agua de
descarga agua de
descarga agua dedescarga agua de
modo continuomodo continuo
modo continuo
modo continuomodo continuo
¿El tubo está ubicado¿El tubo está ubicado
¿El tubo está ubicado
¿El tubo está ubicado¿El tubo está ubicado
demasiado bajo?demasiado bajo?
demasiado bajo? Debe ser
demasiado bajo?demasiado bajo?
instalado a una altura
comprendida entre 60 y 100
cm.
¿La boca del tubo está¿La boca del tubo está
¿La boca del tubo está
¿La boca del tubo está¿La boca del tubo está
sumergida en el agua?sumergida en el agua?
sumergida en el agua?
sumergida en el agua?sumergida en el agua?
¿La descarga de pared¿La descarga de pared
¿La descarga de pared
¿La descarga de pared¿La descarga de pared
posee un respiradero? posee un respiradero?
posee un respiradero? Si
posee un respiradero? posee un respiradero?
después de estas
verificaciones el problema
no se resuelve, cierre el grifo
de agua, apague la lavadora
y llame a la asistencia
técnica.
Si vive en un piso alto, podría
haberse verificado un
fenómeno de sifonaje.
Para resolverlo debe
instalarse una válvula
específica.
1111
11
Instrucciones para la instalación y el uso
1111
Page 45

¿El tubo de descarga está¿El tubo de descarga está
¿El tubo de descarga está
¿El tubo de descarga está¿El tubo de descarga está
plegado? plegado?
plegado? El recorrido del
plegado? plegado?
tubo de descarga debe ser
lo más rectilíneo posible.
Controle que no esté
aplastado ni doblado.
¿Los tubos de la¿Los tubos de la
¿Los tubos de la
¿Los tubos de la¿Los tubos de la
instalación de descargainstalación de descarga
instalación de descarga
instalación de descargainstalación de descarga
están obstruidos? están obstruidos?
están obstruidos? ¿La
están obstruidos? están obstruidos?
La lavadora noLa lavadora no
La lavadora no
La lavadora noLa lavadora no
descarga o nodescarga o no
descarga o no
descarga o nodescarga o no
centrifuga.centrifuga.
centrifuga.
centrifuga.centrifuga.
¿El programa elegido prevé¿El programa elegido prevé
¿El programa elegido prevé
¿El programa elegido prevé¿El programa elegido prevé
la descarga de agua?la descarga de agua?
la descarga de agua? Con
la descarga de agua?la descarga de agua?
algunos programas de
lavado es necesario
accionar la descarga manualmente.
La función "Antiarrugas" -La función "Antiarrugas" -
La función "Antiarrugas" -
La función "Antiarrugas" -La función "Antiarrugas" en las lavadoras dondeen las lavadoras donde
en las lavadoras donde
en las lavadoras dondeen las lavadoras donde
está prevista - ¿se puedeestá prevista - ¿se puede
está prevista - ¿se puede
está prevista - ¿se puedeestá prevista - ¿se puede
utilizar?utilizar?
utilizar? Esta función
utilizar?utilizar?
requiere accionar la
descarga manualmente.
¿La bomba de descarga¿La bomba de descarga
¿La bomba de descarga
¿La bomba de descarga¿La bomba de descarga
está obturada? está obturada?
está obturada? Para
está obturada? está obturada?
inspeccionarla, cierre el
grifo, desconecte el enchufe
y siga las instrucciones de
la página 12, o bien, llame a
la Asistencia técnica.
No recurra nunca a
técnicos no
autorizados y
rechace siempre la
instalación de
repuestos no
originales.
Efectuar una inspección a la bomba y al tubo de goma cuando haga falta.Efectuar una inspección a la bomba y al tubo de goma cuando haga falta.
Efectuar una inspección a la bomba y al tubo de goma cuando haga falta.
Efectuar una inspección a la bomba y al tubo de goma cuando haga falta.Efectuar una inspección a la bomba y al tubo de goma cuando haga falta.
eventual prolongación del
tubo de descarga es
irregular e impide el paso
del agua?
La lavadora vibraLa lavadora vibra
La lavadora vibra
La lavadora vibraLa lavadora vibra
mucho durante lamucho durante la
mucho durante la
mucho durante lamucho durante la
centrifugación.centrifugación.
centrifugación.
centrifugación.centrifugación.
¿El grupo oscilante inter-¿El grupo oscilante inter-
¿El grupo oscilante inter-
¿El grupo oscilante inter-¿El grupo oscilante interno, en el momento de lano, en el momento de la
no, en el momento de la
no, en el momento de lano, en el momento de la
instalación, fueinstalación, fue
instalación, fue
instalación, fueinstalación, fue
desbloqueadodesbloqueado
desbloqueado
desbloqueadodesbloqueado
correctamente? correctamente?
correctamente? Véase la
correctamente? correctamente?
pagina 2 dedicada a la
instalación.
¿La lavadora está bien¿La lavadora está bien
¿La lavadora está bien
¿La lavadora está bien¿La lavadora está bien
nivelada? nivelada?
nivelada? La nivelación del
nivelada? nivelada?
aparato se debe controlar
periódicamente. Con el
pasar del tiempo, la
lavadora podría haberse
desplazado lenta e
imperceptiblemente. Opere
con sus pies, controlando
con un nivel.
¿Hay espacio a su¿Hay espacio a su
¿Hay espacio a su
¿Hay espacio a su¿Hay espacio a su
alrededor?alrededor?
alrededor? Es oportuno
alrededor?alrededor?
que la máquina no esté
apoyada en sanitarios y tenga un poco de espacio a su
alrededor. Si está instalada
sobre un piso alfombrado
verifique que, entre los pies
de apoyo y el piso, haya
circulación de aire.
La lavadora pierdeLa lavadora pierde
La lavadora pierde
La lavadora pierdeLa lavadora pierde
agua.agua.
agua.
agua.agua.
¿La abrazadera del tubo de¿La abrazadera del tubo de
¿La abrazadera del tubo de
¿La abrazadera del tubo de¿La abrazadera del tubo de
caga está bien atornillada?caga está bien atornillada?
caga está bien atornillada?
caga está bien atornillada?caga está bien atornillada?
Cierre el grifo, desconecte
el enchufe y pruebe a
apretarla sin forzar.
¿La cubeta de detergente¿La cubeta de detergente
¿La cubeta de detergente
¿La cubeta de detergente¿La cubeta de detergente
está tapada? está tapada?
está tapada? Pruebe a
está tapada? está tapada?
extraerla y lavarla bajo el
agua corriente.
¿El tubo de descarga no¿El tubo de descarga no
¿El tubo de descarga no
¿El tubo de descarga no¿El tubo de descarga no
está bien fijado?está bien fijado?
está bien fijado? Cierre el
está bien fijado?está bien fijado?
grifo, desconecte el enchufe
y pruebe a fijarlo mejor.
Se forma demasiadaSe forma demasiada
Se forma demasiada
Se forma demasiadaSe forma demasiada
espuma.espuma.
espuma.
espuma.espuma.
¿El detergente es¿El detergente es
¿El detergente es
¿El detergente es¿El detergente es
adecuado para el uso en laadecuado para el uso en la
adecuado para el uso en la
adecuado para el uso en laadecuado para el uso en la
lavadora? lavadora?
lavadora? Verifique que
lavadora? lavadora?
contenga la definición "para
lavadora" o "a mano y en
lavadora", o algo similar.
¿La cantidad de detergen-¿La cantidad de detergen-
¿La cantidad de detergen-
¿La cantidad de detergen-¿La cantidad de detergente es adecuada? te es adecuada?
te es adecuada? Un exceso
te es adecuada? te es adecuada?
de detergente, además de
producir demasiada
espuma, no lava más
eficazmente y contribuye a
producir incrustaciones en
las partes internas de la
lavadora.
Si, no obstante todos los
controles, la lavadora no
funciona y el inconveniente
detectado continúa
manifestándose, llame al Centro de Asistencia autorizado
más próximo, comunicando la
siguiente información:
--
el tipo de averíael tipo de avería
-
el tipo de avería
--
el tipo de averíael tipo de avería
--
la sigla del modelo (Mod...)la sigla del modelo (Mod...)
-
la sigla del modelo (Mod...)
--
la sigla del modelo (Mod...)la sigla del modelo (Mod...)
- el número de serie (S/N ....)- el número de serie (S/N ....)
- el número de serie (S/N ....)
- el número de serie (S/N ....)- el número de serie (S/N ....)
Esta información la encontrará
en la placa que está fijada en
la parte posterior del zócalo
(fig. 1).
La lavadora está provista de una bomba autolimpiante que no requiere operaciones de limpieza ni mantenimiento. Pero puede
suceder que pequeños objetos caigan accidentalmente en la bomba: monedas, broches, botones sueltos y otros objetos pequeños.
Para evitar daños, estos objetos son detenidos en una pre-cámara accesible, situada en la parte inferior de la bomba.
Para acceder a esta pre-cámara basta retirar el panel de cobertura
ubicado en la parte inferior de la lavadora (fig. 1); luego retirar la
tapa girándola en sentido antihorario (fig. 2) e inspeccionar
cuidadosamente el interior.
El tubo de goma
Controle el tubo de goma al menos una vez al año. Si presenta grietas
o rajaduras debe ser sustituido de inmediato ya que durante los lavados
debe soportar fuertes presiones que podrían provocar roturas
repentinas.
Fig. 1
Fig. 2
Atención: controle que el ciclo de lavado haya concluido y desconecte el enchufe antes de retirar la tapa y antes de efectuar
cualquier operación de mantenimiento. Es normal que al retirar la tapa se produzca una pequeña pérdida de agua. Al volver a
colocar el panel de cobertura, controle que los ganchos situados en la parte inferior se introduzcan en las respectivas ranuras,
antes de empujarlo contra la máquina.
Instrucciones para la instalación y el uso
1212
12
1212
Page 46

Cuidado y Mantenimiento fácil
TT
rátela bien y será siempre surátela bien y será siempre su
T
rátela bien y será siempre su
TT
rátela bien y será siempre surátela bien y será siempre su
Su lavadora es una confiable compañera de vida y de trabajo.
amigaamiga
amiga
amigaamiga
Mantenerla en forma es importante. T ambién para Ud.
Su lavadora está proyectada
para durar muchos años sin
problemas. Algunas
intervenciones muy simples
ayudan a mantenerla en forma y a prolongar su duración.
Ante todo debe cerrarAnte todo debe cerrar
Ante todo debe cerrar
Ante todo debe cerrarAnte todo debe cerrar
siempre el grifo de aguasiempre el grifo de agua
siempre el grifo de agua
siempre el grifo de aguasiempre el grifo de agua
después de cada lavadodespués de cada lavado
después de cada lavado; la
después de cada lavadodespués de cada lavado
presión continua del agua
puede desgastar algunos
componentes.
Además, de esta manera se
elimina el peligro de pérdidas
cuando no hay nadie en casa.
Si el agua de su zona esSi el agua de su zona es
Si el agua de su zona es
Si el agua de su zona esSi el agua de su zona es
demasiado dura, use undemasiado dura, use un
demasiado dura, use un
demasiado dura, use undemasiado dura, use un
producto anticalcáreo producto anticalcáreo
producto anticalcáreo (el
producto anticalcáreo producto anticalcáreo
agua es dura si deja fácilmente
marcas blanquecinas en torno a los grifos o bien en torno
a las descargas,
especialmente en la bañera.
Para obtener información más
precisa sobre el tipo de agua
de su instalación puede
dirigirse al Acueducto local o
bien a un plomero de la zona).
Es necesario vaciar siempre
los bolsillos de las prendas,
retirando también monedas,
alfileres, distintivos y cualquier
otro objeto duro.
La parte externa de la
lavadora debe ser lavada con
un paño embebido en agua tibia y jabón.
Es importante lavar
periódicamente la cubeta
extraíble de detergente.
Para prevenir
incrustaciones basta
ponerla un corto tiempo
bajo el grifo de agua
corriente.
No exagere nunca conNo exagere nunca con
No exagere nunca con
No exagere nunca conNo exagere nunca con
las dosis delas dosis de
las dosis de
las dosis delas dosis de
detergente.detergente.
detergente.
detergente.detergente.
El detergente normal contiene
ya productos anticalcáreos.
Sólo si el agua es
particularmente dura, o sea,
muy rica en calcio, le
aconsejamos utilizar un
producto específico al efectuar
cada lavado.
Puede ser conveniente
efectuar, de vez en cuando, un
ciclo de lavado con una dosis
de producto anticalcáreo, sin
detergente y sin ropa.
No utilice ningún detergente o
aditivo en dosis excesivas ya
que podrían producir excesiva
espuma, con consiguientes
incrustaciones y posibles
daños a los componentes de
su lavadora.
¡Vacíe siempre los bolsillos:
aún los objetos metálicos pequeños, durante el
centrifugado, pueden dañar gravemente el cesto de su
lavadora!
Cómo limpiar la cubeta de detergenteCómo limpiar la cubeta de detergente
Cómo limpiar la cubeta de detergente
Cómo limpiar la cubeta de detergenteCómo limpiar la cubeta de detergente
Desmontaje:Desmontaje:
Desmontaje:
Desmontaje:Desmontaje:
Ejerza una ligera presión sobre
el botón grande en la parte
delantera de la cubeta de
detergente y tírelo hacia arriba
(fig. 1).
Fig. 1
Instrucciones para la instalación y el uso
1313
13
1313
Limpieza:Limpieza:
Limpieza:
Limpieza:Limpieza:
Limpie luego la cubeta bajo el grifo (fig.3) utilizando un viejo
cepillo de dientes y, una vez extraído el par de sifones ubicados
en la parte superior de los compartimientos 1 y 2 (fig. 4), controle
que los mismos no estén obstruidos y enjuáguelos.
Fig. 2
Fig. 3
Reinstalación:Reinstalación:
Reinstalación:
Reinstalación:Reinstalación:
No olvide volver a introducir el
par de sifones en sus
correspondientes alojamientos y por último volver a colocar la cubeta en su lugar,
enganchándola (fig. 4, 2, 1).
Fig. 4
Page 47

CaracterísticasCaracterísticas
Características
CaracterísticasCaracterísticas
Modelo
técnicastécnicas
técnicas
técnicastécnicas
Dimensiones
Capa cida d
Conexiones
eléctrica s
Conexiones hídricas
Velocidad de
centrifugación/min.
Programas de
control según la
norma IEC 456
El fabricante se reserva el derecho de aportar, en cualquier momento y sin previo aviso al público, cualquier modificación considerada necesaria
para la máquina o para los accesorios de sus modelos, debido a exigencias técnicas y comerciales.
An cho cm 4 0
Al tur a cm 8 5
Profundidad cm 60
de 1 a 5 kg
Tensión 230 voltios 50 Hz
potencia máxima absorbida 2100 W
Presión máxima 1 MPa (10 bar)
presión mínima 0,05 MPa (0,5 bar)
capacidad del cesto 42 litros
Ha sta
realizado con 5,0 kg. de carga, programa 2 a 60°
Esta máquina cumple con lo establecido por las siguientes Directivas Comunitarias:
- 73/23/CEE del 19/02/73 (Baja Tensión) y sucesivas modificaciones
- 89/336/CEE del 03/05/89 (Compatibilidad Electromagnética) y sucesivas modificaciones
AT 50
500
Instrucciones para la instalación y el uso
1414
14
1414
Page 48

Merloni Elettrodomestici
Viale Aristide Merloni 47
60044 Fabriano
Italie
Tel +39 0732 6611
Fax +39 0732 662501
www.merloni.com
Instrucciones para la instalación y el uso
10/2002 - 195 033 389 03 - XEROX BUSINESS SERVICES - DOCUTECH
Page 49

AT 50
ПдзгЯет егкбфЬуфбузт,
лейфпхсгЯбт кбй ухнфЮсзузт
GR
РлхнфЮсйп спэчщн
Page 50

ГсЮгпспт пдзгьт
Бнбкблэшфе едю фб 12 иЭмбфб рпх ереозгпэнфбй уфйт
уелЯдет фпх егчейсйдЯпх бхфпэ. ДйбвЬуфе, мЬиефе,
дйбукедЬуфе: иб бнбкблэшефе рпллЬ мйксЬ мхуфйкЬ гйб
нб рлЭнефе кблэфесб, ме лйгьфесп кьрп кбй фп рлхнфЮсйь
убт иб гЯней Эфуй мбкспвйьфесп. Кбй вЭвбйб чщсЯт нб
рбсбвлЭрефбй з буцЬлейб.
1.
ЕгкбфЬуфбуз кбй мефбцпсЬ (уел. 2)
З егкбфЬуфбуз, мефЬ фзн рбсЬдпуз Ю фз мефбцпсЬ, еЯнбй з рйп
узмбнфйкЮ есгбуЯб гйб фзн кблЮ лейфпхсгЯб фпх рлхнфзсЯпх спэчщн.
Нб елЭгчефе рЬнфб:
1. Бн з злекфсйкЮ егкбфЬуфбуз фзсеЯ фйт рспдйбгсбцЭт.
2. Бн пй ущлЮнет брпчЭфехузт фпх неспэ ухндЭпнфбй ущуфЬ.
3. Бн фп рлхнфЮсйп еЯнбй псйжпнфйщмЭнп. БоЯжей фпн кьрп:
гйб фзн мбкспвйьфзфб фпх рлхнфзсЯпх кбй гйб фзн рпйьфзфб
фзт рлэузт.
4. Нб Эчпхн бцбйсеиеЯ пй вЯдет фпх кЬдпх, рпх всЯукпнфбй
уфзн рлЬфз фпх рлхнфзсЯпх.
2.
БуцЬлейб гйб еубт кбй фб рбйдйЬ (уел. 3)
Едю иб всеЯфе чсЮуймет ухмвпхлЭт гйб фзн буцЬлейб фз дйкЮ убт кбй
фзт пйкпгенеЯбт убт. Дйьфй з буцЬлейб гйб фз Philco еЯнбй фп рйп
узмбнфйкь рсЬгмб.
3.
Фй мрбЯней уфп рлхнфЮсйп кбй рют нб фп иЭуефе
уе лейфпхсгЯб (уел. 4)
Фп нб оечщсЯуефе ущуфЬ фб спэчб гйб рлэуймп еЯнбй мйб узмбнфйкЮ
дйбдйкбуЯб фьуп гйб фзн Эквбуз фзт рлхузт ьуп кбй гйб фз мбкспвйьфзфб
фпх рлхнфзсЯпх. МЬиефе ьлб фб фсхк кбй фб мхуфйкЬ гйб нб оечщсЯжефе
фб Ьрлхфб: чсюмбфб, еЯдпт хцЬумбфпт, ехбйуизуЯб уе чнпэдйбумб,
брпфелпэн фб рйп узмбнфйкЬ ксйфЮсйб.
7.
ЧсЮуймет ухмвпхлЭт гйб нб мзн кЬнефе лЬиз
(óåë. 8)
КЬрпфе Юфбн пй гйбгйЬдет рпх едЯнбн кблЭт ухмвпхлЭт - кбй ден хрЮсчбн
фб ухниефйкЬ хцЬумбфб: Эфуй фп рлэуймп Юфбн еэкплп. УЮмесб фп
рлхнфЮсйп спэчщн убт дЯней рпллЭт кблЭт ухмвпхлЭт.
8.
Рщт клеЯней п кЬдпт (уел. 9)
БнпЯгефе кбй клеЯнефе кблЬ фб рпсфЬкйб гйб Энб буцблЭт рлэуймп.
9.
З иЮкз фщн брпссхрбнфйкюн (уел. 10)
4.
Кбфбньзуз фпх рЯнбкб енфплюн (уел. 5)
П рЯнбкбт енфплюн фпх рлхнфзсЯпх спэчщн еЯнбй рплэ брльт. ЛЯгет
брбсбЯфзфет енфплЭт гйб нб брпцбуЯуефе кЬие фэрп рлхуЯмбфпт, брь
фпн рйп Энфпнп, йкбнь нб рлэней фз цьсмб еньт мзчбнйкпэ, мЭчсй
екеЯнпн, фпн брбль, гйб фп cachemire. ЕопйкейщиеЯфе мбжЯ фпх кбй иб
рлЭнефе кблэфесб опдеэпнфбт лйгьфесп кбй кЬнпнфбт нб бнфЭоей
ресйууьфесп фп рлхнфЮсйь убт. ЕЯнбй еэкплп.
5.
Пдзгьт уфб рспгсЬммбфпт рлхуЯмбфпт (уел. 6)
¸нбт еэкплпт рЯнбкбт гйб нб брпцбуЯуефе ме мйб мбфйЬ рпйп рсьгсбммб,
рпйб иесмпксбуЯб, брпссхрбнфйкь кбй рсьуиефп гйб фз
рлхуз.ЧсзуймпрпйЮуфе фп рйп ущуфь кбй иб Эчефе кблэфесз рлхуз,
кесдЯжпнфбт чсьнп, несь кбй енЭсгейб, мЭсб ме фз мЭсб.
6.
Пдзгьт кбфбньзузт ефйкефюн кбй ухмвьлщн
(óåë. 7-8)
Фб дйеинЮ ухмвплб рпх хрЬсчпхн уфйт ефйкЭфет фщн спэчщн еЯнбй
ехкплпньзфб кбй рплэ узмбнфйкЬ гйб Энб кбль рлэуймп. Едю иб всеЯфе
Энбн еэкплп ереозгзмбфйкь пдзгь ,гйб кбфбллзлет иесмпксбуйет
,фсьрпхт рлхуЯмбфпт кбй уйдесюмбфпт кбй ейдйкЬ уэмвплб фзт Ariston.
Рщт чсзуймпрпйеЯфбй з иЮкз фпх брпссхрбнфйкпэ.
10.
Рсйн кблЭуефе фпн фечнйкь кпйфЬофе едю: рпллЬ рспвлЮмбфб мрпспэн
нб Эчпхн мйб Ьмеуз лэуз. Бн кбфьрйн ден мрпсеЯфе нб ерйлэуефе фп
рсьвлзмб фзлецщнЮуфе уфзн фечнйкЮ хрпуфЮсйоз Ariston кбй уэнфпмб
кЬие влЬвз иб брпкбфбуфбиеЯ.
11.
Фп рлхнфЮсйь убт еЯнбй Энбт цЯлпт: бскеЯ нб фпх дюуефе лЯгз узмбуЯб
гйб нб убт фзн бнфбрпдюуей ме бцпуЯщуз кбй хрбкпЮ. ЦспнфЯуфе фп ме
рспихмЯб кбй иб рлЭней гйб чсьнйб кбй чсьнйб.
12.
Едю иб всеЯфе фб фечнйкЬ чбсбкфзсйуфйкЬ фпх рлхнфзсЯпх убт: фэрпт
фпх мпнфЭлпх, ейдйкЬ чбсбкфзсйуфйкЬ, фбчэфзфб уфхшЯмбфпт уэмцщнб
ме фйт еллзнйкЭт кбй ехсщрбъкЭт рспдйбгсбцЭт.
РспвлЮмбфб кбй лэуейт (уел. 11- 12)
ЦспнфЯдб кбй ухнфЮсзуз (уел. 12-13)
ФечнйкЬ чбсбкфзсйуфйкЬ (уел. 14)
ПдзгЯет егкбфЬуфбузт, лейфпхсгЯбт кбй ухнфЮсзузт
1
Page 51

ЕгкбфЬуфбуз кбй
фпрпиЭфзуз
ЕЯфе рськейфбй гйб кбйнпэсгйп еЯфе гйб мефбцпсЬ брь Энб урЯфй уе
Ьллп, з егкбфЬуфбуз еЯнбй мйб узмбнфйкЮ уфйгмЮ гйб фзн кблЮ
лейфпхсгЯб фпх рлхнфзсЯпх.
Бцпэ бцбйсЭуефе фз ухукехбуЯб
вевбйщиеЯфе гйб фзн бкесбйьфзфб
фзт ухукехЮт. Уе ресЯрфщуз
бмцйвплЯбт, кЬлеуе бмЭущт Энбн
ейдйкехмЭнп фечнйкь. Ôï
еущфесйкь фпх рлхнфзсЯпх
мрлпкЬсефбй, гйб фз мефбцпсЬ,
ме фЭууесйт вЯдет кбй
лбуфйчЬкйб уфзн рлЬфз.
БрбуцЬлйуз: вгЬлфе фйт
4вЯдет !
Рсйн иЭуейт уе лейфпхсгЯб фп
рлхнфЮсйп, бцбЯсеуе фйт вЯдет,
фб лбуфйчЬкйб ме фз учефйкЮ
дйЬфбоз брьуфбузт (цэлбое ьлб
фб кпммЬфйб) кбй клеЯуе фйт прЭт
ме фб рлбуфйкЬ рюмбфб рпх убт
рбсЭчпнфбй.
РспупчЮ: уе ресЯрфщуз
ербнбчсзуймпрпЯзузт пй рйп
кпнфЭт вЯдет рсЭрей нб
мпнфбсйуфпэн ерЬнщ.
ПсйжпнфЯщуз
Гйб фзн кблЮ лейфпхсгЯб фпх
рлхнфзсЯпх еЯнбй узмбнфйкь нб
еЯнбй псйжпнфйщмЭнп. Ãéá íá
рсбгмбфпрпйЮуефе фзн
псйжпнфЯщуз бскеЯ нб схимЯуефе
фб мрспуфйнЬ рпдбсЬкйб. Ç
гщнЯб клЯузт, мефсзмЭнз уфзн
ерйцЬнейб есгбуЯбт, ден рсЭрей нб
оереснЬей фйт 2°. Уе ресЯрфщуз
Фб рпдбсЬкйб еЯнбй схимйжьменб.
ДйбфзсеЯуфе фйт вЯдет
мрлпкбсЯумбфпт кбй фб
уфпйчеЯб фпхт. Уе ресЯрфщуз
мефбкьмйузт иб убт
чсейбуфпэн гйб нб мрлпкЬсефе
ек нЭпх фб еущфесйкЬ мЭсз
фпх рлхнфзсЯпх юуфе нб фб
рспуфбфеэефбй брь
чфхрЮмбфб кбфЬ фз мефбцпсЬ.
мпкЭфбт вевбйщиеЯфе ьфй ден
рбсемрпдЯжефбй п бесйумьт уфз
ресйпчЮ уфЮсйозт.
Уэндеуз уфзн рбспчЮ неспэ
З рЯеуз неспэ рсЭрей нб
кхмбЯнефбй мефбоэ фщн фймюн рпх
бнбгсЬцпнфбй уфзн фбмрелЯфуб
рпх всЯукефбй брь рЯущ. УхндЭуфе
фп ущлЮнб рбспчЮт (всЯукефбй
оемпнфбсйумЭнпт уфп еущфесйкь
фпх кЬдпх) уе мйб рбспчЮ ксэпх
неспэ ме дйбкпрфз 3/4
рбсемвбллпнфбт фз лбуфйчЭнйб
спдЭллб ме фп цЯлфсп.
Бн з ущлЮнщуз фпх неспэ еЯнбй
нЭб Ю рбсЭмейне бненесгЮ рсйн фз
уэндеуз бцЮуфе нб фсЭоей несь
мЭчсйт ьфпх гЯней дйбхгЭт кбй
чщсЯт бкбибсуЯет. УхндЭуфе фп
ущлЮнб уфп мзчЬнзмб брЭнбнфй
брь фзн рбспчЮ неспэ ерЬнщ
деойЬ.
РбспчЮ неспэ рЬнщ деойЬ.
Уэндеуз фпх ущлЮнб
брпчЭфехузт
ЕрЬнщ, рЯущ брь фп мзчЬнзмб,
хрЬсчей Энбт гЬнфжпт уфпн прпЯп
уфесеюнефбй ухнЮищт п ущлЮнбт
еккспЮт. ЕйуЬгефе фп Ьллп Ьксп уе
Энбн бгщгь Ю бкпхмрЮуфе фп уфп
нйрфЮсб Ю уфз мрбнйЭсб
брпцеэгпнфбт фп учзмбфйумь
дйрлщмЬфщн кбй хресвплйкюн
кбмрхлюн. ЕЯнбй узмбнфйкь нб
фелейюней уе Энб эшпт мефбоэ 60
кбй 100 cm.
Уфзн ресЯрфщуз рпх еЯнбй бнбгкбЯп
нб уфесеюуефе фп Ьксп фпх ущлЮнб
уе Энб эшпт брь фп рЬфщмб
чбмзльфесп брь 60 cm еЯнбй
брбсбЯфзфп п ущлЮнбт нб
уфесеюнефбй уфпн бнфЯуфпйчп гЬфжп
рпх всЯукефбй уфп рЬнщ мЭспт фзт
рлЬфзт.
П гЬнфжпт рпх иб чсзуймпрпйЮуефе
бн п ущлЮнбт фелейюней уе эшпт
мйксьфесп фщн 60 cm.
Бн п ущлЮнбт екксеей уфз мрбнйЭсб
Ю уфп нйрфЮсб, ецбсмьуфе фпн
рлбуфйкь пдзгь кбй дЭуфе фпн уфз
всэуз.
П пдзгьт гйб мрбнйЭсет кбй
нйрфЮсет.
Ден рсЭрей рпфЭ нб рбсбмЭней
вхийумЭнпт уфп несь.
РсЭрей нб брпцеэгпнфбй ущлЮнет
рспЭкфбузт. Уфзн ресЯрфщуз рпх
еЯнбй брплэфщт брбсбЯфзфп, з
рспЭкфбуз рсЭрей нб Эчей фзн Ядйб
дйЬмефсп фпх бсчйкпэ ущлЮнб кбй
ден рсЭрей нб оереснЬей фб 150 cm.
Уе ресЯрфщузт еккспЮт мЭущ фпх
фпЯчпх, вевбйщиеЯфе гйб фзн
брпфелеумбфйкьфзфЬ фпх мЭущ еньт
еопхуйпдпфзмЭнпх фечнйкпэ. Бн з
кбфпйкЯб всЯукефбй уфпхт
фелехфбЯпхт псьцпхт фзт
пйкпдпмЮт, мрпсеЯ нб дйбрйуфщипэн
рспвлЮмбфб Ьнфлзузт прьфе фп
рлхнфЮсйп вЬжей кбй вгЬжей несь
ухнечют .
Гйб нб бнфймефщрЯуефе фп рсьвлзмб
бхфь дйбфЯиенфбй уфзн бгпсЬ ейдйкЭт
бнфлЯет Ьнфлзузт.
ЗлекфсйкЮ уэндеуз
Рсйн ухндЭуефе фп мзчЬнзмб уфзн
злекфсйкЮ рсЯжб вевбйщиеЯфе ьфй:
1) з злекфсйкЮ рсЯжб еЯнбй йкбнЮ
нб хрпуфеЯ фп мЭгйуфп цпсфЯп
йучэпт фпх мзчбнЮмбфпт рпх
бнбцЭсефбй уфзн фбмрелЯфуб
чбсбкфзсйуфйкюн кбй нб еЯнбй
уэмцщнб ме фп ньмп.
2) з фЬуз фспцпдпуЯбт нб
кхмбЯнефбй уфйт фймЭт рпх
бнбцЭсей з фбмрелЯфуб
чбскфзсйуфйкюн
3) з рсЯжб нб еЯнбй ухмвбфЮ ме фп
кблюдйп фпх мзчбнЮмбфпт. Уе
бнфЯиефз ресЯрфщуз мз
чсзуймпрпйеЯфе рспубсмпуфйкЬ
бллЬ нб бнфйкбфбуфЮуефе фзн
рсЯжб Ю фп кблюдйп.
4) пй пйкйбкЭт злекфсйкЭт
егкбфбуфЬуейт рсЭрей нб еЯнбй
ецпдйбумЭнет ме геЯщуз
5) бцпэ плпклзсщиеЯ з уэндеуз
фп мзчЬнзмб ден рсЭрей нб
бкпхмрЬей уфп сехмбфплЮрфз
6) з ухукехЮ рсЭрей нб фпрпиефзиеЯ
Эфуй юуфе фп вхумб нб еЯнбй
рспувЬуймп.
РспейдпрпЯзуз!
ПрпйбдЮрпфе фспрпрпЯзуз фзт
уэндеузт рпх Эчей дйбмпсцщиеЯ
брь фп есгпуфЬуйп Ю мз кбнпнйкЮ
злекфсйкЮ, мзчбнйкЮ Ю
хдсбхлйкЮ уэндеуз фпх
мзчбнЮмбфпт рспкблеЯ фзн
Экрфщуз фзт еггэзузт кбй
брбллЬууей фпн кбфбукебхуфЮ
кбй фпн рщлзфЮ брь ендечьменет
ехиэнет.
РлбуфйкЭт убкпэлет,
рплхуфесйнет, кбсцйЬ
кбй фб хрьлпйрб
уфпйчеЯб фзт
ухукехбуЯбт ден еЯнбй
рбйчнЯдйб гйб рбйдйЬ
ецьупн брпфелпэн
дхнбфЭт рзгЭт
кйндэнпх.
ПдзгЯет егкбфЬуфбузт, лейфпхсгЯбт кбй ухнфЮсзузт
2
Page 52

ЕЯнбй плпЭнб рйп узмбнфйкь
УзмбнфйкЭт рлзспцпсЯет
Фп РлхнфЮсйп спэчщн кбфбукехЬуфзке
кбй ухмвпхлет
уэмцщнб ме фйт рлЭпн бхуфзсЭт дйеинеЯт
рспдйбгсбцЭт буцблеЯбт. Гйб фз дйкЮ убт
рспуфбуЯб кбй фзт пйкпгенеЯбтубт.
ДйбвЬуфе рспуекфйкЬ фйт
ухмвпхлЭт бхфЭт кбй ьлет фйт
рлзспцпсЯет рпх ресйЭчпнфбй уфп
егчейсЯдйп бхфь: еЯнбй узмбнфйкь
гйбфЯ, екфьт фщн рплхЬсйимщн
чсЮуймщн рлзспцпсйюн, рбсЭчпхн
узмбнфйкЭт рлзспцпсЯет гйб фзн
буцЬлейб, чсЮуз кбй ухнфЮсзуз
1. Уе ресЯрфщуз влЬвзт,
клеЯуфе рсюфб бр ьлб фз
всэуз неспэ кбй вгЬлфе фп
брь фзн рсЯжб. Уе кбммйЬ
ресЯрфщуз мзн еремвбЯнефе
уфпхт еущфесйкпэт
мзчбнйумпэт гйб нб
рспурбиЮуефе нб фп
ерйукехЬуефе. КЬфй фЭфпйп иб
бкэсщне фзн еггэзуз.
2. Фп РлхнфЮсйп спэчщн ден
егкбиЯуфбфбй уе еощфесйкь
чюсп, бкьмз кй бн п чюспт
рспуфбфеэефбй брь мйб укерЮ,
дйьфй еЯнбй йдйбЯфесб
ерйкЯндхнп нб фп бцЮнпхме
екфеиеймЭнп уфз вспчЮ кбй
уфзн кбкпкбйсЯб.
3. РсЭрей нб чсзуймпрпйеЯфбй
мьнп брь енЮлйкет êáé
брпклейуфйкЬ гйб фп рлэуймп
фщн спэчщн уэмцщнб ме фйт
гсбрфЭт пдзгЯет фпх
егчейсйдЯпх бхфпэ.
.
4. Бн чсейбуфеЯ нб мефбкйнзиеЯ,
фсбвЮофе фпн лехкь мпчль,
бсйуфесЬ кЬфщ брь фз вЬуз.
¸фуй, иб кбфЭвей фп фсьлеы
фщн фспчюн кбй иб
мефбкйнзиеЯ еэкплб.
5. Рсйн ейуЬгефе фб спэчб нб
елЭгчефе бн п кЬдпт еЯнбй
Ьдейпт.
6. Мзн бггЯжефе фп мзчЬнзмб
ме гхмнЬ рьдйб Ю ме
всегмЭнб чЭсйб Ю рьдйб.
ИЭлщ фечнйкь ейдйкехмЭнп кбй
еопхуйпдпфзмЭнп ме бхиенфйкЬ
бнфбллбкфйкЬ Ariston !
7. Мз чсзуймпрпйеЯфе
рспекфЬуейт кбй рплэрсйжб,
ерйкЯндхнб кхсЯщт уе
ресйвЬллпн ме хгсбуЯб. Фп
кблюдйп фспцпдпуЯбт ден
рсЭрей нб фублбкюней Ю нб
ухмрйЭжефбй ерйкЯндхнб.
8. Мз вгЬжефе фп цЯлфсп ьуп
фп мзчЬнзмб еЯнбй уе
лейфпхсгЯб.
Мз чсзуймпрпйеЯфе
брпссхрбнфйкь гйб рлэуймп
уфп чЭсй гйбфЯ п Ьципнпт бцсьт
фпх иб мрпспэуе нб
кбфбуфсЭшей фб еущфесйкЬ
мЭсз.
9. Мз фсбвЬфе рпфЭ фп кблюдйп
пэфе фп рлхнфЮсйп гйб нб фп
вгЬлефе брь фзн рсЯжб: еЯнбй
рплэ ерйкЯндхнп.
10. КбфЬ фз лейфпхсгЯб фпх
рлхнфзсЯпх мзн бггЯжефе фп
несь еккспЮт гйбфЯ мрпсеЯ нб
еЯнбй рплэ жеуфь. КсбфЬфе фб
рбйдйЬ мбксйЬ. Мз жпсЯжефе
фзн рьсфб рпфЭ гйбфЯ иб
кбфбуфсбцеЯ п мзчбнйумьт
буцблеЯбт рпх всЯукефбй уфп
Ьнпйгмб кбй рпх укпрьт фпх
еЯнбй нб рспуфбфеэей брь
фхчбЯб бнпЯгмбфб.
11.Фп мзчЬнзмб бхфь
рсппсЯжефбй гйб пйкйбкЮ
чсЮуз. З вйпмзчбнйкЮ фпх
чсЮуз (оенпдпчеЯб,
еуфйбфьсйб, кбибсйуфЮсйб)
еЯнбй ерйжЮмйб гйб фб
кбфбукехбуфйкЬ фпх
чбсбкфзсйуфйкЬ кбй бкхсюней
фзн еггэзуз.
Ðùò бллЬжпхме ôï кблюдйп фспцпдпуЯбт
Фп кблюдйп фспцпдпуЯбт
еЯнбй ейдйкь кбй мрпсеЯфе нб
фп бгпсЬуефе брпклейуфйкЬ
уфб еопхуйпдпфзмЭнб
КЭнфсб ФечнйкЮт
ХрпуфЮсйозт .
Гйб нб фп бнфйкбфбуфЮуефе
рсЭрей нб енесгЮуефе щт еоЮт:
1. ВевбйщиеЯфе ьфй фп
рлхнфЮсйп еЯнбй увзуфь кбй
з рсЯжб брпухндедемЭнз.
2. БцбйсЭуфе фз вЬуз кбй
оевйдюуфе фйт 2 вЯдет рпх
всЯукпнфбй кЬфщ уфб деойЬ
убт, кбфьрйн оевйдюуфе фйт 6
рЯущ вЯдет, бхфЮ фз цпсЬ уфб
бсйуфесЬ убт кбй бцбйсЭуфе
фп рлехсйкь рЬнел клЯнпнфЬт
фп рспт фб Эощ кбй фсбвюнфбт
фп. (ейк 1 e 2).
3. БрпухндЭуфе злекфсйкЬ фп
цЯлфсп зчпмьнщузт
фсбвюнфбт фпн уэндеумп (ейк.
3).
4. Оевйдюуфе фйт 2 еощфесйкЭт
вЯдет уфесЭщузт фпх цЯлфспх
кбй, хрпвпзипэменпй брь Энб
кбфубвЯдй (влЭре ейк. 4),
брпухндЭуфе фп брь фзн
рлЬфз фсбвюнфбт фп рспт фб
рЬнщ.
5. Бцпэ бнфйкбфбуфбиеЯ фп
нЭп кблюдйп, ухндЭуфе обнЬ
фп уэндеумп бцпэ
вевбйщиеЯфе ьфй п гЬнфжпт
буцблеЯбт “ксбфЬей” кблЬ.
Гйб фзн бнфйкбфЬуфбуз
рсЭрей нб брехихниеЯфе
прщудЮрпфе уе
ейдйкехмЭнп рспущрйкь
рпх иб ецбсмьуей фпхт
йучэпнфет кбнпнйумпэт.
ПдзгЯет егкбфЬуфбузт, лейфпхсгЯбт кбй ухнфЮсзузт
3
Åéê. 3 Åéê. 4Åéê. 2Åéê. 1
Page 53

Фй мрбЯней уфп рлхнфЮсйп
Рсйн рлэнефе, мрпсеЯфе нб кЬнефе бскефЬ рсЬгмбфб гйб нб рлэнефе кблэфесб. ОечщсЯуфе фб спэчб бнЬлпгб ме фп
эцбумб кбй фб чсюмбфб. УхмвпхлехфеЯфе фйт ефйкЭфет кбй бкплпхиЮуфе фйт хрпдеЯоейт. Нб енбллЬууефе мйксЬ ме
мегЬлб спэчб.
Рсйн фп рлэуймп.
ОечщсЯуфе фб спэчб бнЬлпгб ме
фпн фэрп фпх хцЬумбфпт кбй фзн
бниекфйкьфзфб фщн чсщмЬфщн: фб
бниекфйкЬ хцЬумбфб мрбЯнпхн
оечщсйуфЬ брь фб ехбЯуизфб.
Фб бнпйчфЬ чсюмбфб мрбЯнпхн
оечщсйуфЬ брь фб укпэсб.
БдейЬуфе ьлет фйт фуЭрет (кЭсмбфб,
чбсфйЬ, чсЮмбфб кбй
мйкспбнфйкеЯменб) кбй елЭгофе фб
кпхмрйЬ. Нб ерйдйпсиюнефе бмЭущт
Ю нб бцбйсеЯфе фб озлщмЭнб кпхмрйЬ
дйьфй иб мрпспэубн нб вгпхн кбфЬ
фп рлэуймп.
Пй ефйкЭфет убт лЭне фб
рЬнфб.
КпйфЬфе рЬнфб фйт ефйкЭфет: убт лЭне
фб рЬнфб гйб фб спэчб кбй рщт
рлЭнпнфбй ме фпн кблэфесп фсьрп.
Уфз уелЯдб 7 всЯукпнфбй ьлб фб
мхуфйкЬ фщн ухмвьлщн рпх
бнбцЭспнфбй уфйт ефйкЭфет фщн
спэчщн. Пй ендеЯоейт фпхт еЯнбй
рплэфймет гйб нб рлЭнефе кблэфесб
кбй нб дйбфзсзипэн ерй мбксьн фб
спэчб.
Нб енбллЬууефе мйксЬ ме
мегЬлб спэчб
Оедйрлюнефе фб спэчб. Нб фб
вЬжефе уфпн кЬдп ьчй ухмрйеумЭнб
кбй нб фзсеЯфе фйт рпуьфзфет
цпсфЯщн рпх рспвлЭрпнфбй гйб фб
дйЬцпсб рспгсЬммбфб. Иб Эчефе
мйб кбибсьфесз мрпхгЬдб кбй
лйгьфесп фублбкщмЭнб спэчб.
Спэчб ресбумЭнб ме венжЯнз гйб
оелЭкйбумб. Мз вЬжефе уфп
мзчЬнзмб спэчб оелекйбумЭнб ме
венжЯнз, пйньрнехмб, фсйелЯнз, клр.
рбсЬ мьнп бцпэ бхфЬ фб рспъьнфб
еобфмйуипэн.
Рщт фЯиефбй уе
ЧщсЯуфе фб спэчб
бнЬлпгб ме фп эцбумб
кбй фп чсюмб, еЯнбй
узмбнфйкь гйб нб Эчефе
кблЬ брпфелЭумбфб
.
лейфпхсгЯб фп мзчЬнзмб
ФпрпиЭфзуз, мефбфпрЯуейт.
Бн фп рлхнфЮсйь убт дйбиЭфей Энб
ейдйкь фсьлеы ме фспчпэт рпх
мбжеэпнфбй, иб дйехкплхниеЯфе
уфз мефбфьрйуз. Гйб нб кбфЭвей
фп фсьлеы бхфь кбй гйб фз
мефбкЯнзуз чщсЯт дхукплЯб,
рсЭрей нб фсбвЮоефе фп мпчль,
рпх всЯукефбй кЬфщ бсйуфесЬ,
кЬфщ брь фз вЬуз. Бцпэ
плпклзсюуефе фз мефбкЯнзуз
обнбцЭсфе фпн уфзн бсчйкЮ фпх
иЭуз. Уфп узмеЯп бхфь, фп
мзчЬнзмб еЯнбй уфбиесЬ
фпрпиефзмЭнп. ВлЭре ейкьнб.
(Мьнп гйб фб рспвлерьменб
мпнфЭлб)
Мьлйт фп егкбфбуфЮуефе, кЬнфе Энбн кэклп
рлхуЯмбфпт иЭфпнфбт фп рсьгсбммб 1 уфпхт 60° C.
З еккЯнзуз фпх рлхнфзсЯпх спэчщн
ме фп ущуфь фсьрп еЯнбй рплэ
узмбнфйкЮ фьуп гйб фзн рпйьфзфб
фпх рлхуЯмбфпт ьуп кбй гйб фзн
брпцхгЮ рспвлзмЬфщн кбй фзн
Гйб фб рйп ехбЯуизфб спэчб:
клеЯуфе фб еуюспхчб, фйт
гхнбйкеЯет кЬлфует, фб
рбйдйкЬ кблфуЬкйб кбй фб
ехбЯуизфб спэчб уе Энб
óÜêï ãéá íá ôá
рспуфбфеэуефе
мегблэфесз дйЬскейб жщЮт фпх
рлхнфзсЯпх. Бцпэ вЬлефе фб
спэчб, фп брпссхрбнфйкь кбй фб
ендечьменб рсьуиефб нб елЭгчефе
рЬнфб бн:
1.З рьсфб еЯнбй рЬнфб кблЬ
клейуфЮ.
2. Фп кблюдйп мрЮке уфзн рсЯжб.
3. З всэуз фпх неспэ еЯнбй бнпйчфЮ.
4. Фп рлЮкфсп F еЯнбй уфз иЭуз O).
5. Фп фсьлеы ме фпхт фспчпэт
еЯнбй уфз иЭуз бнЬрбхлбт (фспчпЯ
ьчй уе ербцЮ ме фп дЬредп).
ДйблЭофе фп рсьгсбммб
Фп рсьгсбммб ерйлЭгефбй ме вЬуз
фпн фэрп фщн спэчщн гйб рлэуймп.
Гйб нб дйблЭоефе фп рсьгсбммб,
ухмвпхлехфеЯфе фпн рЯнбкб фзт
уелЯдбт 6 кбй кбфьрйн:
1) УфсЭшфе фпн ерйлпгЭб A мЭчсй нб
цфЬуей уфпн бсйимь фпх ерйихмзфпэ
рспгсЬммбфпт
2) ЕрйлЭофе фзн иесмпксбуЯб ме фпн
ерйлпгЭб B
3) рбфЮуфе фп кпхмрЯ фщн
лейфпхсгйюн (C, D, E)
4) ФЭлпт, рбфЮуфе фп кпхмрЯ ON-
OFF F (èÝóç I).
Уфп фЭлпт фпх рлхуЯмбфпт...
РесймЭнефе ресЯрпх дэплерфЬ.
Кбфьрйн увЮуфе фп рлхнфЮсйп
рбфюнфбт фп кпхмрЯ фпх ON-OFF
F (èÝóç O). Уфп узмеЯп бхфь
мрпсеЯфе нб бнпЯоефе ме буцЬлейб
фзн рьсфб. Бцпэ бцбйсЭуефе фб
спэчб рпх мьлйт рлэизкбн,
бцЮнефе рЬнфб бнпйчфЮ Ю
мйуЬнпйчфз фз рьсфб юуфе з хгсбуЯб
рпх рбсЭмейне уфп еущфесйкь нб
мрпсеЯ нб еобфмйуиеЯ. КлеЯнефе
рЬнфб фз всэуз фпх неспэ
ИхмзиеЯфе ьфй уе ресЯрфщуз
брпхуЯбт фспцпдпуЯбт Ю
увзуЯмбфпт фпх рлхнфзсЯпх, фп
ерйлегЭн рсьгсбммб иб
обнбоекйнЮуей брь фп узмеЯп
рпх дйбкьрзке.
ПдзгЯет егкбфЬуфбузт, лейфпхсгЯбт кбй ухнфЮсзузт
4
Page 54

РЯнбкбт елЭгчпх
ЕрйлпгЭбт рспгсбммЬфщн кбй .
Чсзуймеэей гйб фзн ерйлпгЮ фпх
рспгсЬммбфпт рлхуЯмбфпт.
УфсЭшфе фпн ерйлпгЭб бхфьн мьнп
деойьуфспцб.
Гйб нб ерйлЭоефе фб рспгсЬммбфб
рсЭрей нб кЬнефе нб ухмрЭуей п
деЯкфзт рпх всЯукефбй уфпн ерйлпгЭб
ме фп уэмвплп/бсйимь бнфЯуфпйчп ме
фп ерйихмзфь рсьгсбммб.
ЕрйлпгЭбт иесмпксбуЯбт
Чсзуймеэей гйб нб иЭфпхме фзн
ендейкнхьменз иесмпксбуЯб
рлхуЯмбфпт брь фпн рЯнбкб
рспгсбммЬфщн (влЭре уел. 6). Убт
ерйфсЭрей бкьмз , бн иЭлефе, нб
мейюнефе фзн рспфейньменз
иесмпксбуЯб гйб фп ерйлегЭн
рсьгсбммб, мЭчсй фп рлэуймп ме
ксэп несь (уэмвплп чйпнйпэ ).
Мйуь цпсфЯп
Фп кпхмрЯ бхфь мейюней фзн
кбфбнЬлщуз неспэ уфб
оевгЬлмбфб. Ухнйуфпэме нб фп
чсзуймпрпйеЯфе брпклейуфйкЬ
уфб рспгсЬммбфб 5, 6, 7 кбй 8
ьфбн фп рлхнфЮсйп ден еЯнбй
фелеЯщт гемЬфп, мейюнпнфбт
бнфЯуфпйчб фзн рпуьфзфб фпх
брпссхрбнфйкпэ.
КпхмрЯ брпклейумпэ уфхшЯмбфпт
Чсзуймеэей гйб нб брпклеЯей фп
уфэшймп (ерйлЭгпнфбт фп уэмвплп
) .
П ерйлпгЭбт
ме фб рспгсЬммбфб фпх
рлхнфзсЯпх убт
ДйбфЮсзуз уфп несь
Фп кпхмрЯ бхфь ерйфсЭрей фзн
дйбкпрЮ фпх рспгсЬммбфпт (уфп
уэмвплп ) дйбфзсюнфбт фз
мрпхгЬдб уфп несь рсйн фз
цхгпкЭнфсзуз. ЕЯнбй Энб кпхмрЯ
рплэ чсЮуймп дйьфй рспуфбфеэей
фб ехбЯуизфб кбй ухниефйкЬ
хцЬумбфб брь фп мЬжемб/
оечеЯлщмб (гйб рбсЬдейгмб ьфбн
ден мрпсеЯфе нб вгЬлефе фз
мрпхгЬдб уфп фЭлпт фпх
рлхуЯмбфпт бллЬ мьнп мефЬ
месйкЭт юсет).
ЧсзуймпрпйеЯфбй брпклейуфйкЬ уе
рспгсЬммбфб ейдйкЬ гйб
ухниефйкЬ.
РСПУПЧЗ! Рсйн бнпЯоефе фзн
рьсфб рсЭрей нб бдейЬуефе фп несь
цЭспнфбт фпн ерйлпгЭб A уфп
уэмвплп . Бн, бнфЯиефб,
ерйихмеЯфе нб ухнечЯуефе ме фз
цхгпкЭнфсзуз, бскеЯ нб рбфЮуефе
ек нЭпх фп кпхмрЯ E.
(рспгсЬммбфб 5, 6, 7).
¸нбсоз-рбэуз (On-Off)
¼фбн фп кпхмрЯ F еЯнбй рбфзмЭнп,
фп рлхнфЮсйп еЯнбй бнбммЭнп,
ьфбн ден еЯнбй рбфзмЭнп еЯнбй
увзуфь.
Фп увЮуймп фпх мзчбнЮмбфпт
ден бкхсюней фп ерйлегЭн
рсьгсбммб.
Ендейкфйкь цщфЬкй
бнбммЭнп-увзуфь
Фп ендейкфйкь цщфЬкй G бнбммЭнп
деЯчней ьфй фп мзчЬнзмб
фспцпдпфеЯфбй ме сеэмб.
ПдзгЯет егкбфЬуфбузт, лейфпхсгЯбт кбй ухнфЮсзузт
5
Page 55

РЯнбкбт рспгсбммЬфщн
òÜéìùñâéáêíù÷ýïñçäßÅ
ropsolledeitussetied
тбЭгплйрÅ
-ммбсгпñð
íùôÜ
тбЭгплйрÅ
-áскпмсеè
òáßó
-íáðõññïðÁ
üêéô
òçóõëðüñð
-íáðõññïðÁ
üêéô
тпфбмЯухлр
-êáëáÌ
üêéô
ькйфнбкхеË
-áéóïäáñáð
üëáðáÞüê
-йексЬйД
õïôá
хплкэк
)Ьфрел(
ÁÑÅKÁÂÌÁÂ
áíÝìùñåëáñефЯбйдйÜêõåË
áíÝìùñåëáñефЯбйдйÜêõåË
Üôóéôáìùñ÷éáêÜêõåË
)).рлк,блзфнЬмпжерáсф,бйньфнеу(
)).рлк,блзфнЬмпжерáсф,бйньфнеу(
1C°xaM
2C°xaM
3C°06
uuu
uu
uu
/üëáðÁ
/üëáðÁ
áíÝìùñåëýëïðÜêéôêåèíá
éáêáíÝìùñåëïãßëÜêõåË
4C°04
uu
/üëáðÁ
áôáìþñ÷áôçèóßáõå
).рлк,тежэплрм,буймЬкхпð(
ькйфнбкхеЛ/бфбмлЬгвеО
ïìéøýôÓ ïìéøýôóькйлефéáêáìубйед¢
teseR/potS
ÁKÉÔÅÈÍÕÓ
Üôóéôáìùñ÷ÜêéôåèíõÓ
5C°06
uu
u
/üëáðÁ
üëáðÁ 09,C°06тхпфуькйфзгсенепмйуэлР
áíÝìùñåëýëïð,Üêéôêåèíá
.ðëê,íþöåñâбчхпсþóå()
áôçèóßáõååìÜêéôåèíõÓ
áôáìþñ÷
)бнЭмщñåëÜñöáëåíùðýô
áôçèóßáõååìÜêéôåèíõÓ
áôáìþñ÷
áíÝìùñåëÜñöáëåíùðýô )
ькйфнбкхеЛ/бфбмлЬгвеО
ькйфкблбÌ
üñåíåìpotS á÷ýïñáéãïäÜêíïôóüñåíåìpotS
ïìéøýôÓ ïìéøýôóüëáðáéáêáìубйед¢
teseR/potS
ÁÔÇÈÓÉÁÕÅ
áнйллЬÌ
бфбмлЬгвеÎ
ькйфкблбÌ
ïìéøýôÓ ïìéøýôóüëáðáéáêáìубйед¢
áìубйед¢ áìубйед¢
teseR/potS нЭгелйрепфйенюñõêÁ/éåôðькбйД
6C°04
íùôíùëüá÷õïñüñðóá(
7C°03
íùôíùëüá÷õïñüñðóá(
8C°04
uu
uu
u
u
uu
u
u
üëáðÁ 08,C°05тхпфупмйуэлрькйнпнбK
üëáðÁÞüñåíïôóçóçñЮфбйд,бфбмлЬгвеО
551
541ÞëçøõåóькйфзгсенепмйуэлÐ
.óïäáñáÐ
511,C°06тхпфупмйуэлрькйнпнбK
.óïäáñáÐ
001,C°04тхпфупмйуэлрüëáðÁ
.óïäáñáÐ
.óïäáñáÐ
07,C°03тхпфупмйуэлрüëáðÁ
06 бфбмлЬгвео,C°04тхпфуïìéóýëÐ
õïëêýêõïôÞöáñãéñåÐ
òïôáìßóõëð
çóõëðüñÐ
, Þëçøõåóпмйуэлр
ькйлефйбк
ькйлефйбк
ькйлефйбк
бммбсгьср
ïìéøýôóüëáðá
ïìéøýôóüëáðá
ïìéøýôóüëáðá
бммбсгьср
áìубйедЬ
áììáñãüñð
,бфбмлЬгвео,бЯубñêïìñåè
ькйлефйбкáóемЬйднебфбмЯшõôó
,бфбмлЬгвео,бЯубñêïìñåè
ькйлефйбкáóемЬйднебфбмЯшõôó
áуемЬйднебфбмЯшхфу,бфбмлЬгвео
áуемЬйднебфбмЯшхфу,бфбмлЬгвео
áуемЬйднебфбмЯшхфу,бфбмлЬгвеÎ
нЭгелйрепфйенюсхкБ/йефрькбйД
ÞüñåíïôóçóзсЮфбйд,бфбмлЬгвео
ÞüñåíïôóçóзсЮфбйд,бфбмлЬгвео
ïìéøýôóüëáðáéáêбфбмлЬгвео
,эпкйфкблбмõïôçøÞëåìбфбмлЬгвеÎ
ìéøýôóьлбрбÞьсенпфузузсЮфбйдп
áôçèуЯбхеáñефЯбйдй
нЭгелйрепфйенюсхкБ/йефрькбйД
ïìéøýôóüëáðáéáê
ÞüñåíïôóçóзсЮфбйд,бфбмлЬгвеÎ
,эпкйфкблбмõïôçøÞëåìбфбмлЬгвеÎ
ìéøýôóьлбрбÞьсенпфузузсЮфбйдп
Фб уфпйчеЯб рпх бнбцЭспнфбй уфпн рЯнбкб еЯнбй ендейкфйкЬ, мрпспэн нб бллЬжпхн бнЬлпгб ме фзн рпуьфзфб кбй фп еЯдпт фзт мрпхгЬдбт, фз сэимйуз фпх
ерйлпгЭб C кбй фз иесмпксбуЯб фпх неспэ эдсехузт кбй фз иесмпксбуЯб фпх ресйвЬллпнфпт.
ПдзгЯет егкбфЬуфбузт, лейфпхсгЯбт кбй ухнфЮсзузт
6
Page 56

ЕреоЮгзуз ефйкефюн...
Уе ьлз фзн Ехсюрз кЬие ефйкЭфб
ресйЭчей Энб мЮнхмб, ме мйксЬ
бллЬ узмбнфйкЬ уэмвплб. Фп нб
мЬиефе нб фб кбфблбвбЯнефе еЯнбй
узмбнфйкь гйб нб рлЭнефе
кблэфесб кбй нб мефбчейсЯжеуфе фб
спэчб фзт гкбснфбсьмрбт убт
ме ущуфь фсьрп.
Дйбйспэнфбй уе рЭнфе кбфзгпсЯет,
екрспущрпэменет брь
дйбцпсефйкЬ учЮмбфб
рлэуймп
лехкбнфйкь
уйдЭсщмб
:
,
,
,
уфегнь кбиЬсйумб ,
уфЭгнщмб
.
ЧсЮуймет ухмвпхлЭт
ГхсЯуфе фб рпхкЬмйуб гйб нб фб
рлЭнефе кблэфесб кбй иб бнфЭопхн
ресйууьфесп.
Нб бцбйсеЯфе рЬнфб фб
бнфйкеЯменб брь фйт фуЭрет убт.
КпйфЬжефе фйт ефйкЭфет: убт дЯнпхн
хрпдеЯоейт.
УхмвпхлехфеЯфе кбй мЬиефе фб уэмвплб фпх рЯнбкб бхфпэ:
иб убт впзиЮупхн нб рлЭнефе кблэфесб, нб мефбчейсЯжеуфе кблэфесб фб
спэчб убт, нб кЬнефе рйп брпфелеумбфйкь фп дйкь убт РлхнфЮсйп спэчщн.
РспуЭофе мз
мресдЭшефе фйт
иесмпксбуЯет....
omisvulPhsnakvueLamwrvediS
hsvarD
hnotnve
esomisvulP
C°59
hsvarD
vhlapa
c
l
ienviganvieropM
ovurkeshsnakvuel
voren
amwrvediS
onotnve xam
C°002
vongetS
amsirvaqakamwngvetS
A
amsirvaqakvongetS
"uot"uolvoem
"etvulaid
-mreQ
.rko
vhlhyu
esienvwngetS
airvhtwngets
.rkomreQ
airtvem
P
amsirvaqakvongetS
,vokirwlcrepuem
amwrvediS
esomisvulP
C°06
etenviakuelhM
oirtvem
xam C°051
kamuenpvoniovoraqa ,
111R iak 311R
,hnviznebvhraqak
ienvwngetsneD
airvhtwngetses
F
amsirvaqakvongetS
esomisvulP
C°04
esomisvulP
C°03
omisvulP
otsvolapa
rvec i
amwrvediS xam
C°011
hM
kamuenpvoniovoraqa ,
iak 11R3
etenvwredis
,hnviznebvhraqakem
vongetsicvO
amsirvaqak
otetsvwngetS
onvemwlpa
ienvwngetS
anveonvemsamerk
neduopocvuor
vietsopuiecve
hshrtnvekoguf
esetsvwngetS
"ertsvamerk
etenvelphM
vorenes
ПдзгЯет егкбфЬуфбузт, лейфпхсгЯбт кбй ухнфЮсзузт
7
Page 57

...кбй фб уэмвплб фщн дйбцьсщн мпнфЭлщн Ariston:
On - ¢нбммб
Off - УвЮуймп
Ендейкфйкь
цщфЬкйOn-Off
ЕрйлпгЭбт
иесмпксбуЯбт
РспгсЬммбфб :
ОевгЬлмбфб
ДйбфЮсзуз уфп
несь
Мблбкфйкь
Уфэшймп
Брпклейумьт уфхшЯмбфпт
¢дейбумб
Рсьрлхуз
БцбЯсеуз
лекЭдщн
Extra оЭвгблмб
рсьрлхузт
+ Енесгзфйкь
рлэуймп уфпхт 90°
Енесгзфйкь рлэуймп уфпхт 90°
Енесгзфйкь рлэуймп уфпхт
60°
ухниефйкЬ 60°
ухниефйкЬ 50°
ухниефйкЬ 40°
Брбль рлэуймп
Кбизмесйнь рлэуймп
уфпхт 30° уе 30
рспгсбммбфйумЭнз
еккЯнзуз
МЬллйнб/
Рлэуймп уфп чЭсй
Рлэуймп уе ксэп несь
1/2 цпсфЯп
Еэкплп уйдЭсщмб
¸нфпнп рлэуймп/
брбль
Silk curtains
ЧсЮуймет ухмвпхлЭт гйб фзн брпцхгЮ лбиюн
ГенйкпЯ Кбньнет:
- ВбмвбкесЬ-ЛйнЬ. ГемЯжефе фпн
кЬдп бллЬ мзн фпн рбсбгемЯжефе.
- УхниефйкЬ. ГемЯжефе ьчй рЬнщ
брь фп мйуь фпх кЬдпх.
- ЕхбЯуизфб кбй МЬллйнб.
ГемЯжефе ьчй рЬнщ брь фп Энб фсЯфп
фпх кЬдпх.
- ЛехкЬ рплэ лесщмЭнб:
мейюуфе фзн рпуьфзфб.
- ЛекЭдет бниекфйкпЯ Ю ейдйкпЯ.
РесЬуфе фпхт рсйн фп рлэуймп
ме ейдйкь брпссхрбнфйкь, ме ксЭмб
брпссхрбнфйкЮ Ю ме ейдйкЬ
оелекйбуфйкЬ, фсЯвпнфбт фб узмеЯб
рпх еЯнбй рплэ лесщмЭнб, (влЭре
рлбЯуйп гйб фзн бнфймефюрйуз
ейдйкюн лекЭдщн ме
бнфйлекйбуфйкЬ уфз уелЯдб 9)
Мзн рлЭнефе рпфЭ уфп
рлхнфЮсйп... спэчб чщсЯт
уфсйцюмбфб, оецфйумЭнб Ю учйумЭнб.
Бн чсейбуфеЯ нб фб рлэнефе, вЬлфе
фб уе Энб уЬкп. Спэчб ме Энфпнб
чсюмбфб мбжЯ ме лехкЬ.
РспупчЮ уфп вЬспт!
Гйб кблэфесб брпфелЭумбфб, мзн
оереснЬфе фб ендейкнхьменб вЬсз
рпх бнбцЭспнфбй уфп мЭгйуфп
цпсфЯп уфегнюн спэчщн:
- ХцЬумбфб бниекфйкЬ:
мЭгйуфп 5 kg
- ХцЬумбфб ухниефйкЬ:
мЭгйуфп 2,5 kg
- ХцЬумбфб ехбЯуизфб:
мЭгйуфп 2 kg
- Бгнь рбсиЭнп мбллЯ:
мЭгйуфп 1 kg
- РефуЭфет
мЭгйуфп 2 ,3 kg
Рьуп жхгЯжпхн;
1 уенфьнй 400-500 gr.
1 мбойлбспиЮкз 150-200 gr.
1 фсбрежпмЬнфзлп 400-500 gr.
1 мрпхснпэжй 900-1.200 gr.
1 рефуЭфб 150-500 gr.
Нб бнбкбфеэефе спэчб ме
дйбцпсефйкЬ мегЭиз
рефуефЭ хцЬумбфб: мрпхснпэжйб,
рефуЭфет, клр. Иб брпцехчиеЯ п
учзмбфйумьт мрЬлбт уфп
уфэшймп кбй з брюлейб
йупсспрЯбт.
Фб чсщмбфйуфЬ T-shirt , фб
уфбмрбсйумЭнб кбй фб рпхкЬмйуб
дйбскпэн ресйууьфесп бн
рлЭнпнфбй брь фзн бнЬрпдз.
Фб T-shirt кбй фб уфбмрбсйуфЬ
мрлпхжЬкйб уйдесюнпнфбй рЬнфб
брь фзн бнЬрпдз.
РспупчЮ уфйт цьсмет.
Пй дйбдедпмЭнет цьсмет
(ублпрЭфет) Эчпхн фйсЬнфет ме
клйрт рпх мрпсеЯ нб рспоенЮупхн
ìå ôá
жзмйЬ уфпн кЬдп Ю уе Ьллб спэчб
кбфЬ фп рлэуймп. Бн вЬлефе фб
клйрт фщн фйсбнфюн уфйт фуЭрет
фпх уфЮипхт кбй фб уфесеюуефе ме
рбсбмЬнет брпклеЯефе кЬие
кЯндхнп.
ДйбкпрЭт: вгЬлфе фп брь фз
рсЯжб.
¼фбн рЬфе дйбкпрЭт, еЯнбй
буцблЭт нб фп вгЬжефе брь фзн
рсЯжб,нб клеЯнефе фз всэуз
ейуьдпх неспэ кбй нб бцЮнефе
бнпйчфЮ Ю мйуьклейуфз фз рьсфб.
КЬнпнфбт Эфуй, п кЬдпт кбй з
лбуфйчйЭнйб ерЭндхуЮ фпх иб
рбсбмеЯнпхн уфегнЬ кбй уфп
еущфесйкь де иб бнбрфхчиеЯ
дхупумЯб.
КХКЛПУ МБЛЛЙНЩН
Гйб кблэфесб брпфелЭумбфб
чсзуймпрпйеЯуфе Энб ейдйкь
брпссхрбнфйкь рспуЭчпнфбт фп
вЬспт фщн спэчщн нб мзн
оереснЬ фп
1 kg.
Рщт нб рлЭнефе учедьн фб рЬнфб
Пй кпхсфЯнет.
¸чпхн фзн фЬуз нб фублбкюнпнфбй
рплэ. Гйб нб ресйпсйуфеЯ фп
цбйньменп бхфь: дйрлюуфе фйт
кблЬ кбй вЬлфе фйтуе мйб
мбойлбспиЮкз Ю уе Энб дЯчфх. Нб
фйт рлэнефе мьнет фпхт Эфуй юуфе
фп ухнплйкь вЬспт нб мзн
оереснЬей фп мйуь цпсфЯп.
ФжЬкеф ме ерЭндхуз брь
рпэрпхлп кбй мрпхцЬн.
Кбй фб фжЬкеф ме ерЭндхуз брь
рпэрпхлп кбй фб мрпхцЬн, бн з
ерЭндхуз еЯнбй брь чЮнб Ю рЬрйб,
мрпспэн нб рлЭнпнфбй уфп
рлхнфЮсйп. Фп узмбнфйкь еЯнбй нб
мзн фп гемЯжефе ме цпсфЯп 5 kg. бллЬ
фп рплэ 2-3 kg. ербнблбмвЬнпнфбт
фп оЭвгблмб мйб Ю дхп цпсЭт
чсзуймпрпйюнфбт фйт чбмзлЭт
уфспцЭт уфхшЯмбфпт.
ПдзгЯет егкбфЬуфбузт, лейфпхсгЯбт кбй ухнфЮсзузт
БилзфйкЬ рбрпэфуйб.
Фб билзфйкЬ рбрпэфуйб рсЭрей
рсюфб нб Эчпхн кбибсйуиеЯ брь
лЬурет кбй мрпспэн нб рлхипэн
бкьмз кбй мбжЯ ме фб jeans кбй ме
спэчб бниекфйкЬ. Мзн фб
рлЭнефе мбжЯ ме фб бурсьспхчб.
8
Page 58

¼фбн фб брпссхрбнфйкЬ кбй фп несь ден ербскпэн...
Рщт бнфймефщрЯжпнфбй псйумЭнпй ейдйкпЯ
лекЭдет
-Кьккйнп ксбуЯ. БцЮуфе нб мпхлйЬуей ме брпссхрбнфйкь, оевгЬлефе кбй ресЬуфе ме пойкь поэ Ю кйфсйкь поэ, кбфьрйн оевгЬлфе.
РесЬуфе ендечьменб хрплеЯммбфб ме члщсЯнз.
- Áßìá. Пй цсЭукйпй бкьмб лекЭдет рсЭрей нб ресбуфпэн ме ксэп несь. Уе ресЯрфщуз Юдз уфегнюн лекЭдщн, бцЮуфе нб мпхлйЬуей гйб
мйб нэчфб ме Энб ейдйкь брпссхрбнфйкь кбй кбфьрйн фсЯшфе фп ме несь кбй убрпэнй.
- УфегнпЯ лекЭдет лЯрпхт. ВсЭофе ме нЭцфй, ресЬуфе фпхт лекЭдет ме фйт Ьксет фщн дбкфэлщн кбй ме Энб вбмвбкесь рбнЯ, бцпэ
бкпхмрЮуефе фп спэчп уе мйб брблЮ ерйцЬнейб.
- УкпхсйЬ. Поблйкь Ьлбт (фп всЯукефе уфб цбсмбкеЯб) дйблхмЭнп ме жеуфь несь, Ю Энб рспъьн кбфЬ фзт укпхсйЬт ме ксэп несь. РблйпЯ
лекЭдет мрпсеЯ нб Эчпхн Юдз рспувЬллей фп эцбумб: кЯндхнпт фсхрЮмбфпт фпх хцЬумбфпт...
- ЛекЭдет мпэчлбт. РесЬуфе фпхт ме члщсЯнз, оевгЬлфе кблЬ (мьнп гйб лехкЬ кбй чсщмбфйуфЬ бниекфйкЬ уфп члюсйп).
- Елбйпчсюмбфб. ВсЭофе ме кбибсйуфйкЮ венжЯнз, ресЬуфе уфпхт лекЭдет бцпэ рспзгпхмЭнщт фбкфпрпйЮубфе фп спэчп уе Энб мблбкь
рбнЯ, кбфьрйн ресЬуфе фп рпллЭт цпсЭт ме фп брпссхрбнфйкь.
- МелЬнй кбй мелЬнй урь уфхль. РесЬуфе фп ме вбмвЬкй рпфйумЭнп ме меихлйкЮ блкпьлз Ю пйньрнехмб 90°.
- КбфсЬмй. РесЬуфе фп ме цсЭукп впэфхсп, мефЬ ме нЭцфй кбй кбфьрйн рлэнфе фп бмЭущт.
- Êåñß. Оэуфе кбй мефЬ ресЬуфе фп ме фп уЯдесп кблЬ жеуфбмЭнп бцпэ фп Эчефе кблэшей ме дэп цэллб брпсспцзфйкпэ чбсфйпэ. МефЬ
ресЬуфе фп ме вбмвЬкй рпфйумЭнп ме нЭцфй Ю меихлйкЮ блкпьлз.
- ФуЯчлб. РесЬуфе фпн дйблэфз фпх умЬлфпх гйб нэчйб кбй кбфьрйн Энб кбибсь рбнЯ.
- Мпэчлб. ВбмвбкесЬ кбй лйнЬ мрбЯнпхн уе Энб дйЬлхмб 5 месюн неспэ, Энб члщсЯнзт кбй Энб кпхфблЬкй оэдй, кбфьрйн рлэнфе фб
бмЭущт. Гйб фб Ьллб бурсьспхчб, похженЭ уе 10 ьгкпхт кбй кбфьрйн фб рлЭнефе бмЭущт.
- Ксбгйьн. РесЬуфе фп ме бйиЭсб бн фп эцбумб еЯнбй мЬллйнп Ю вбмвбкесь. Гйб фб мефбощфЬ чсзуймпрпйЮуфе фсйелЯнз.
- ВеснЯкй нхчйюн. ФпрпиефеЯуфе фп спэчп брь фп рлехсь фпх лекЭ уе Энб цэллп брпсспцзфйкпэ чбсфйпэ, всЭофе ме фпн дйблэфз,
мефбкйнюнфбт фп спэчп ме фп рпх чсщмбфЯжефбй фп цэллп.
- ×ëüç. РесЬуфе фп ме вбмвЬкй рпфйумЭнп ме пйньрнехмб.
Гйб Энб буцблЭт рлэуймп
Рщт бнпЯгей кбй клеЯней п кЬдпт
A) БНПЙГМБ. (Ейк. 1). Бнбузкюуфе фп еощфесйкь кбрЬкй кбй бнпЯофе
фелеЯщт
B) БнпЯофе ухнерют фпн кЬдп чсзуймпрпйюнфбт кбй фб дэп чЭсйб
ьрщт цбЯнефбй брь фзн Ейк. 2):
- рйЭуфе фп кпхмрЯ рпх деЯчней фп вЭлпт фзт Ейк. 2) кбй еобукюнфбт
мйб елбцсЬ рЯеуз рспт фб кЬфщ, ксбфЮуфе бкпхмрйумЭнп фп Энб
чЭсй, юуфе ме фп брьфпмп Ьнпйгмб фзт рьсфбт нб мзн чфхрЮупхн фб
дЬчфхлб
- ухнпдЭшфе кбфьрйн фйт рьсфет рпх брбуцблЯжпнфбй кбй бнпЯгпхн
еэкплб.
Åéê. 1
Åéê. 2
C) ЕЙУБГЩГЗ СПХЧЩН. (Ейк. 3)
D) КЛЕЙУЙМП. (Ейк. 4)
- клеЯуфе кблЬ фпн кЬдп чбмзлюнпнфбт рсюфб фзн рсьуийб рьсфб кбй
брпиЭфпнфбт кбфьрйн фзн рЯущ
- вевбйщиеЯфе кбфьрйн ьфй пй гЬнфжпй фзт рсьуийбт рьсфбт еЯнбй Ьшпгб
фпрпиефзмЭнпй уфзн Эдсб фзт рЯущ рьсфбт
- бцпэ бкпэуефе фп клбк фпх кпхмрюмбфпт, еобукЮуфе мйб елбцсЬ
рЯеуз рспт фб кЬфщ уе бмцьфесет фйт рьсфет рпх ден рсЭрей нб
брбуцблйуфпэн
- фЭлпт, клеЯуфе фп еощфесйкь кбрЬкй.
Åéê. 3 Åéê. 4
ПдзгЯет егкбфЬуфбузт, лейфпхсгЯбт кбй ухнфЮсзузт
9
Page 59

УзмбнфйкЭт ухмвпхлЭт гйб кблэфесп рлэуймп
ИЮкз брпссхрбнфйкпэ
Фп рсюфп мхуфйкь: з иЮкз фщн брпссхрбнфйкюн еЯнбй фпрпиефзмЭнз кЬфщ брь фзн рьсфб.
РсЭрей нб вЬлефе фб брпссхрбнфйкЬ
кбй фп ендечьменп рсьуиефп
фзсюнфбт фйт дьуейт рпх
рспфеЯнпнфбй брп фпн
кбфбукехбуфЮ: генйкЬ всЯукефе ьлет
фйт рлзспцпсЯет уфз ухукехбуЯб. Ïé
дьуейт бллЬжпхн уе учЭуз ме фзн
рпуьфзфб фзт мрпхгЬдбт, фз
уклзсьфзфб фпх неспэ кбй фп
вбимь всщмйЬт. Мзн
хресвЬлефе. Ресйууьфесп
брпссхрбнфйкь ден узмбЯней
кблэфесп рлэуймп, бнфЯиефб...
Ме фзн реЯсб иб мЬиефе нб
уфбимЯжефе фз дьуз учедьн
бхфьмбфб: иб гЯней фп мхуфйкь убт.
¼фбн вЬжефе фп мблбкфйкь уфп
дйбмЭсйумб 3 нб цспнфЯжефе бхфь нб
мзн оереснЬей фз мЭгйуфз
ендейкнхьменз уфЬимз.
Фп рлхнфЮсйп еЯнбй уе иЭуз нб
рбЯсней бхфьмбфб фп мблбкфйкь уе
кЬие рсьгсбммб рлхуЯмбфпт.
КблЮ дйбчеЯсйуз кбфбнЬлщузт
МЕГЙУФП ЦПСФЙП
П кблэфеспт фсьрпт гйб нб мз урбфблЬфбй енЭсгейб, несь, брпссхрбнфйкь кбй чсьнпт еЯнбй екеЯнпт фзт
чсЮузт фпх рлхнфзсЯпх ме фз мЭгйуфз рспфейньменз рпуьфзфб спэчщн.
¸нб мЭгйуфп цпсфЯп бнфЯ гйб дхп мйуЬ цпсфЯб ерйфсЭрей фзн ЕОПЙКПНПМЗУЗ мЭчсй 50% енЭсгейбт
Фп хгсь брпссхрбнфйкь мрбЯней
мьнп месйкЭт уфйгмЭт рсйн фзн
еккЯнзуз фпх мзчбнЮмбфпт.
ИхмзиеЯфе ьфй фп хгсь
брпссхрбнфйкь еЯнбй йдйбЯфесб
кбфЬллзлп гйб рлхуЯмбфб ме
иесмпксбуЯет мЭчсй 60 вбимпэт
кбй гйб фб рспгсЬммбфб рлэузт
рпх ден рспвлЭрпхн фз цЬуз фзт
рсьрлхузт.
Рщлпэнфбй уфзн бгпсЬ хгсЬ
брпссхрбнфйкЬ Ю уе укьнз ме
ейдйкЭт межпэсет рпх
фпрпиефпэнфбй кбф ехиеЯбн мЭуб
уфпн кЬдп, уэмцщнб ме фйт пдзгЯет
рпх еЯнбй гсбммЭнет уфз
ухукехбуЯб.
Мз чсзуймпрпйеЯфе рпфЭ
брпссхрбнфйкЬ гйб рлэуймп уфп
чЭсй, дйьфй рбсЬгпхн рплэ бцсь,
рпх мрпсеЯ нб рспоенЮуей жзмйЬ уфп
рлхнфЮсйп.
¸нб фелехфбЯп мхуфйкь: ьфбн
рлЭнефе ме ксэп несь, нб мейюнефе
рЬнфб фзн рпуьфзфб фпх
брпссхрбнфйкпэ: уфп ксэп несь
дйблэефбй лйгьфесп бр ьфй уфп
жеуфь несь кбй ухнерют Энб мЭспт
иб рЮгбйне чбмЭнп.
Óôç èÝóç 1: Брпссхрбнфйкь
рсьрлхузт (укьнз)
Óôç èÝóç 2: Брпссхрбнфйкь
рлхуЯмбфпт (укьнз кбй
хгсь)
Óôç èÝóç 3: Мблбкфйкь
Óôç èÝóç 4: Лехкбнфйкь
Пдзгьт гйб пйкпнпмйкЮ кбй
пйкплпгйкЮ чсЮуз фщн пйкйбкюн
злекфсйкюн ухукехюн
Рсьрлхуз, леэкбнуз, мблбкфйкь
¼фбн чсейЬжефбй нб лехкЬнефе
иЭуфе фб кбфЬллзлб рспгсЬммбфб
кбй вЬлфе фз члщсЯнз уфп
дйбмЭсйумб 4 фзт иЮкзт
брпссхрбнфйкюн.
¼фбн вЬжефе фп лехкбнфйкь,
рспуЭофе нб мзн оересЬуефе рпфЭ
фз уфЬимз max рпх цбЯнефбй.
З чсЮуз лехкбнфйкпэ
брпклеЯей фз дхнбфьфзфб
екфЭлеузт фзт рсьрлхузт.
Фп рбсбдпуйбкь лехкбнфйкь
чсзуймпрпйеЯфбй брпклейуфйкЬ
гйб бниекфйкЬ лехкЬ хцЬумбфб,
еню фп брбль чсзуймпрпйеЯфбй
гйб чсщмбфйуфЬ кбй ухниефйкЬ
хцЬумбфб. Ден мрпсеЯфе нб
екфелЭуефе фз леэкбнуз ме фп
рсьгсбммб МефбощфЬ кбй ме фб
ЕйдйкЬ РспгсЬммбфб (влЭре
уел.6).
ВбимпЯ уклзсьфзфбт фпх неспэ
ЕрЯр.-Чбсбкфзсйуф. ГесмбнйкпЯ ГбллйкпЯ
1 - Глхкь 0- 7 0-15
2 - МЭфсйп 8-14 16-25
3 - Уклзсь 15-21 26-37
4 - Рплэ уклзсь + 21 + 37
ЧСЗУЙМПРПЙЗУФЕ ЛЙГПФЕСП БРПССХРБНФЙКП БН : рлЭнефе лЯгб спэчб, фб спэчб
еЯнбй лЯгп всюмйкб, рбсЬгефбй бцсьт кбфЬ фп рлэуймп Ю фп несь еЯнбй лЯгп уклзсь (влЭре
рЯнбкб, рбсбрЬнщ, ме фпхт вбимпэт уклзсьфзфбт фпх неспэ). Гйб нб гнщсЯуефе фз уклзсьфзфб
фпх неспэ рлзспцпсзиеЯфе брь фп ГсбцеЯп ¾дсехузт фпх ДЮмпх убт.
З РСПРЛХУЗ ЕЙНБЙ БРБСБЙФЗФЗ;
Мьнп гйб спэчб рплэ всюмйкб.
РспгсбммбфЯжпнфбт Энб рлэуймп ЧЩСЙУ рсьрлхуз гйб спэчб лЯгп Ю бскефЬ всюмйкб ерйфсЭрей фзн
ЕОПЙКПНПМЗУЗ брпссхрбнфйкпэ, чсьнпх, неспэ кбй мефбоэ 5 кбй 15% енЭсгейбт
ФП РЛХУЙМП МЕ ЖЕУФП НЕСП ЕЙНБЙ БЛЗИЕЙБ БРБСБЙФЗФП;
Реснюнфбт фпхт лекЭдет ме Энб кбибсйуфйкь Ю вЬжпнфбт фп спэчп ме фпхт лекЭдет уфегнпэт уе несь
рсйн фп рлэуймп ерйфсЭрей фз меЯщуз бнЬгкзт рспгсбммбфйумпэ рлхуЯмбфпт ме жеуфь несь.
ЧсзуймпрпйЮуфе Энб рсьгсбммб рлхуЯмбфпт уфпхт 60° гйб ЕОПЙКПНПМЗУЗ мЭчсй кбй 50%
енЭсгейбт
РСЙН ЧСЗУЙМПРПЙЗУЕФЕ ЕНБ РСПГСБММБ УФЕГНЩМБФПУ ...
ЕрйлЭофе мйб Ьллз фбчэфзфб уфхшЯмбфпт бн з мрпхгЬдб рсЭрей нб уфегнюуей уе уфегнщфЮсйп. З
ресйпсйумЭнз ресйекфйкьфзфб уе несь ерйфсЭрей фзн ЕОПЙКПНПМЗУЗ чсьнпх кбй енЭсгейбт уфп
рсьгсбммб уфегнюмбфпт
.
.
.
УзмеЯщуз:
1) З ухмрхкнщмЭнз члщсЯнз
рсЭрей нб дйблэефбй
прщудЮрпфе.
2) Гйб ухмрхкнщмЭнб
брпссхрбнфйкЬ (уе укьнз Ю
хгсЬ) чсзуймпрпйЮуфе Энб
рсьгсбммб чщсЯт
рсьрлхуз.
3) Гйб фб брпссхрбнфйкЬ рпх
ресйЭчпнфбй уе мрблЯфуб Ю уе
рлбкЯдйп мз чсзуймпрпйеЯфе
фзн рсьрлхуз.
РспуиЮкз Мблбкфйкпэ
Фп мблбкфйкь кбийуфЬ брблЬ фб
спэчб кбй мейюней фп
злекфспуфбфйкь цпсфЯп фщн
ухниефйкюн.
°dH °T.H
лекбнЯфубт уэмцщнб ме фйт
хрпдеЯоейт фщн рбсбукехбуфюн.
Фп мблбкфйкь дйпчефеэефбй
бхфьмбфб уфп мзчЬнзмб кбфЬ фп
фелехфбЯп оЭвгблмб. Уфп фЭлпт фпх
рспгсЬммбфпт рлэузт уфп
.
дйбмЭсйумб 3 рбсбмЭней хрьлейммб
неспэ. Бхфь чсзуймеэей гйб фзн
дйпчЭфехуз рплэ рхкнюн
мблбкфйкюн, дзлбдЮ гйб фзн
бсбЯщуЮ фпхт.
Бн уфп дйбмЭсйумб 3 рбсбмеЯней
ресйууьфесп брь фп кбнпнйкь несь,
узмбЯней ьфй з дйЬфбоз еккЭнщузт
еЯнбй впхлщмЭнз, дйбкьрфпнфбт
Эфуй фзн брпсспцзфйкЮ лейфпхсгЯб
фзт ухукехЮт.
Гйб фпн кбибсйумь влЭре уелЯдб 13.
Мз вЬжефе рпфЭ мбжЯ мблбкфйкЬ кбй
Ьмхлб уфп дйбмЭсйумб дйьфй иб
мрпспэуе нб впхлюуей фп уэуфзмб
хресчеЯлйузт.
Фб мблбкфйкЬ
мрпспэн нб
чсзуймпрпйзипэн
гйб хцЬумбфб
рефуефЭ,
кпхсфЯнет,
мЬллйнб, клр.
ВЬлфе фп
мблбкфйкь уфз
иЮкз 3 ôçò
ПдзгЯет егкбфЬуфбузт, лейфпхсгЯбт кбй ухнфЮсзузт
10
Page 60

РспвлЮмбфб кбй лэуейт
Рсйн ерйкпйнщнЮуефе ме фп Service
МрпсеЯ нб ухмвеЯ нб мз лейфпхсгеЯ фп рлхнфЮсйп. Уе рпллЭт ресйрфюуейт рськейфбй гйб рспвлЮмбфб рпх
лэнпнфбй еэкплб чщсЯт нб чсейбуфеЯ нб кблЭуефе фпн фечнйкь. Рсйн фзлецщнЮуефе уфзн фечнйкЮ хрпуфЮсйоз,
елЭгчефе рЬнфб фб узмеЯб бхфЬ.
Фп рлхнфЮсйп ден
оекйнЬей.
Фп кблюдйп еЯнбй кблЬ
фпрпиефзмЭнп уфз рсЯжб;
КЬнпнфбт кбибсйьфзфб иб
мрпспэуе нб мефбкйнзиеЯ.
ХрЬсчей сеэмб уфп урЯфй;
МрпсеЯ нб Эреуез буцЬлейб,
Яущт ерейдЮ лейфпхсгпэн рпллЭт
злекфсйкЭт ухукехЭт фбхфьчспнб.
¹ нб хрЬсчей генйкЮ дйбкпрЮ
сеэмбфпт уфз ресйпчЮ убт.
З рьсфб еЯкбй кблЬ клейумЭнз;
Гйб льгпхт буцблеЯбт, фп
рлхнфЮсйп ден мрпсеЯ нб
лейфпхсгЮуей бн з рьсфб еЯнбй
бнпйчфЮ Ю ьчй кблЬ клейумЭнз.
Фп рлЮкфсп On/Off еЯнбй
рбфзмЭнп;
Бн нбй, фЭизке мйб
рспгсбммбфйумЭнз еккЯнзуз.
П ерйлпгЭбт гйб фзн
рспгсбммбфйумЭнз еккЯнзуз,
уфб мпнфЭлб ьрпх хрЬсчей,
всЯукефбй уфз ущуфЮ иЭуз;
З всэуз неспэ еЯнбй бнпйчфЮ; Ãéá
льгпхт буцблеЯбт, бн фп рлхнфЮсйп
ден цпсфюней несь ден мрпсеЯ нб
оекйнЮуей фп рлэуймп.
?
УЩУФП
Нб клеЯнефе фз всэуз
мефЬ брь кЬие рлэуймп.
РесйпсЯжей фз ципсЬ фзт
хдсбхлйкЮт
егкбфЬуфбузт фпх
рлхнфзсЯпх кбй брпупвеЯ
фпн кЯндхнп брщлейюн
ьфбн ден еЯнбй кбнеЯт уфп
урЯфй.
Иб мрпспэубфе нб
чсзуймпрпйЮуефе фп
рлхнфЮсйп чщсЯт
ерйфЮсзуз мьнп бн п
чюспт ьрпх еЯнбй
егкбфеуфзмЭнп дйбиЭфей
брпчЭфехуз дбрЭдпх
(цсеЬфйп).
Нб бцЮнефе рЬнфб
мйуЬнпйчфет фйт рьсфет.
Ме фпн фсьрп бхфь ден
рбсЬгефбй дхупумЯб.
Нб кбибсЯжефе брблЬ фп
еощфесйкь фпх.
Гйб фпн кбибсйумь фпх
еощфесйкЬ кбй фщн
лбуфйчЭнйщн фмзмЬфщн
фпх рлхнфзсЯпх,
ЧсзуймпрпйЮуфе рЬнфб
Энб рбнЯ всегмЭнп ме
члйбсь несь кбй убрпэнй.
ЛБИПУ
Нб фп бцЮнефе уфз рсЯжб еню
кбибсЯжефе фп рлхнфЮсйп.
Бкьмз кбй уе есгбуЯет
ухнфЮсзузт рсЭрей нб вгбЯней
рЬнфб брь фзн рсЯжб.
Нб чсзуймпрпйеЯфе дйблэфет
кбй чзмйкЬ мЭуб.
Мз чсзуймпрпйеЯфе рпфЭ
дйблхфйкЬ Ю брпохуфйкЬ
рспъьнфб гйб нб кбибсЯуефе фп
Эощ мЭспт кбй фб лбуфйчЭнйб
мЭсз фпх рлхнфзсЯпх.
Нб рбсбмелеЯфе фп ухсфбсЬкй
брпссхрбнфйкюн.
ЕЯнбй брпурюменп кбй гйб нб
фп рлэнефе бскеЯ нб фп
бцЮуефе лЯгп кЬфщ брь
фсечпэменп несь.
Нб цеэгефе гйб дйбкпрЭт чщсЯт
нб елЭгчефе рЬнфб бн фп
кблюдйп еЯнбй вгблмЭнп брь фз
рсЯжб кбй з всэуз неспэ
клейуфЮ.
Фп рлхнфЮсйп ден
вЬжей несь.
П ущлЮнбт еЯнбй кблЬ
ухндедемЭнпт уфз всэуз;
ДйбкпрЮ неспэ; ºущт всЯукпнфбй
уе еоЭлйоз есгбуЯет уфз
рплхкбфпйкЯб Ю уфп дсьмп.
З рЯеуз еЯнбй бскефЮ; Иб
мрпспэуе нб хрЬсчей мйб влЬвз
уфзн бнфлЯб.
Фп цЯлфсп фзт всэузт еЯнбй
кбибсь; Бн фп несь еЯнбй рплэ
вбсэ, Ю бн рсьуцбфб Эгйнбн
есгбуЯет уфп дЯкфхп эдсехузт, фп
цЯлфсп фзт всэузт иб мрпспэуе
нб еЯнбй впхлщмЭнп брь
кпммбфЬкйб кбй кбфбкЬийб.
П лбуфйчЭнйпт ущлЮнбт еЯнбй
дйрлщмЭнпт; З дйбдспмЮ фпх
лбуфйчЭнпх ущлЮнб рпх цЭсей фп
несь уфп рлхнфЮсйп рсЭрей нб еЯнбй
кбфЬ фп дхнбфьн ехиэгсбммз. Нб
елЭгчефе нб мзн еЯнбй дйрлщмЭнпт
Ю рйеумЭнпт.
Фп рлхнфЮсйп вЬжей кбй
вгЬжей несь ухнечют.
П ущлЮнбт Эчей фпрпиефзиеЯ
рплэ чбмзлЬ; РсЭрей нб
фпрпиефзиеЯ уе Энб эшпт мефбоэ
60 кбй 100 cm.
Фп уфьмйп фпх ущлЮнб
всЯукефбй мЭуб уфп несь;
З брпчЭфехуз уфпн фпЯчп Эчей
прЮ еобесйумпэ; Áí ìåôÜ áðü
фпхт елЭгчпхт бхфпэт фп
рсьвлзмб ден лэнефбй, клеЯуе фз
всэуз неспэ, увЮуфе фп
рлхнфЮсйп кбй кблЭуфе фзн
фечнйкЮ хрпуфЮсйоз.
Бн кбфпйкеЯфе уе Энбн ьспцп
шзлЬ, иб мрпспэубн нб
рбсбфзсзипэн цбйньменб
хрпрЯеузт.
Гйб нб фб бнфймефщрЯуефе
брбйфеЯфбй нб егкбфбуфЮуефе мйб
кбфЬллзлз бнфлЯб.
ПдзгЯет егкбфЬуфбузт, лейфпхсгЯбт кбй ухнфЮсзузт
11
Page 61

бнербЯуизфб. СхимЯуфе фб
рпдбсЬкйб елЭгчпнфбт ме Энб
блцЬдй.
ДйбиЭфей ехсхчщсЯб; ЕЯнбй
укьрймп фп мзчЬнзмб нб мзн
бкпхмрЬей уе еЯдз хгйейнЮт
кбй нб дйбиЭфей кЬрпйб
ехсхчщсЯб гэсщ фпх. Бн еЯнбй
фпрпиефзмЭнп уе дЬредп ме
мпкЭфб вевбйщиеЯфе ьфй
мефбоэ фщн рпдйюн уфЮсйозт
кбй фпх дбрЭдпх мрпсеЯ нб
кхклпцпсеЯ п бЭсбт.
Фп рлхнфЮсйп чЬней
несЬ.
Фп сбкьс фпх ущлЮнб
фспцпдпуЯбт еЯнбй кблЬ
вйдщмЭнп; КлеЯуфе фз всэуз,
вгЬлфе фп брь фзн рсЯжб кбй
дпкймЬуфе нб фп уцЯоефе чщсЯт
нб фп жпсЯуефе.
З иЮкз брпссхрбнфйкюн
еЯнбй впхлщмЭнз; ДпкймЬуфе
нб фз вгЬлефе кбй нб фзн
рлэнефе кЬфщ брь фсечпэменп
несь.
Фп рлхнфЮсйп ден
еккенюней фп несь
кбй ден уфэвей.
Фп ерйлегЭн рсьгсбммб
рспвлЭрей фзн еккспЮ фпх
неспэ; Mе псйумЭнб
рспгсЬммбфб рлхуЯмбфпт
чсейЬжефбй нб енесгпрпйЮуефе
чейспкЯнзфб фзн еккспЮ.
З лейфпхсгЯб ЧщсЯт
фублЬкщмб" - уфб
рлхнфЮсйб рпх рспвлЭрефбй
- еЯнбй енесгЮ; З лейфпхсгЯб
бхфЮ брбйфеЯ фз чейспкЯнзфз
енесгпрпЯзуз фзт еккспЮт.
З бнфлЯб еккспЮт еЯнбй
впхлщмЭнз; Ãéá íá ôçí
ерйиещсЮуефе, клеЯуфе фз
всэуз, вгЬлфе фп брь фзн рсЯжб
кбй бкплпхиеЯуфе фйт пдзгЯет
Мзн брехиэнеуфе
ðïôÝ óå ìç
еопхуйпдпфзмЭнпхт
фечнйкпэт кбй нб
бснеЯуфе рЬнфб фзн
егкбфЬуфбуз мз
бхиенфйкюн
бнфбллбкфйкюн
фзт уелЯдбт 12,Ю кблЭуфе фзн
фечнйкЮ хрпуфЮсйоз.
П ущлЮнбт еккЭнщузт еЯнбй
дйрлщмЭнпт; З дйбдспмЮ фпх
ущлЮнб рсЭрей нб еЯнбй кбфЬ фп
дхнбфьн ехиэгсбммз. ЕлЭгофе
нб мзн еЯнбй еЯнбй дйрлщмЭнпт
Ю рйеумЭнпт.
Пй ущлзнюуейт фзт
егкбфЬуфбузт еЯнбй
впхлщмЭнет; З ендечьменз
рспЭкфбуз фпх ущлЮнб еЯнбй
бнюмблз кбй рбсемрпдЯжей фп
рЭсбумб фпх неспэ.
Фп рлхнфЮсйп
дпнеЯфбй Энфпнб кбфЬ
фп уфэшймп.
З еущфесйкЮ рблльменз
мпнЬдб, кбфЬ фзн
егкбфЬуфбуз
бремрлпкбсЯуфзке ущуфЬ;
ВлЭре фз уелЯдб 2 учефйкЬ ме
фзн егкбфЬуфбуз.
Фп рлхнфЮсйп еЯнбй кблЬ
псйжпнфйщмЭнп; З псйжпнфЯщуз
фзт ухукехЮт рсЭрей нб
елЭгчефбй ресйпдйкЬ. Ме фпн
кбйсь фп рлхнфЮсйп иб
мрпспэуе нб мефбкйнзиеЯ
¸легчпт уфзн бнфлЯб неспэ кбй кбибсйумьт цЯлфспх.
П ущлЮнбт еккЭнщузт ден
еЯнбй кблЬ уфесещмЭнпт;
КлеЯуфе фз всэуз, вгЬлфе фпн
брь фзн рсЯжб кбй дпкймЬуфе нб
фпн уфесеюуефе кблэфесб.
УчзмбфЯжефбй рплэт
бцсьт.
Фп брпссхрбнфйкь еЯнбй
кбфЬллзлп гйб чсЮуз уфп
рлхнфЮсйп; ВевбйщиеЯфе ьфй
хрЬсчей з Эндейоз гйб
рлхнфЮсйп Ю гйб рлэуймп уфп
чЭсй кбй гйб рлхнфЮсйп, Ю кЬфй
рбсьмпйп.
З рпуьфзфб еЯнбй з ущуфЮ;
Хресвплйкь брпссхрбнфйкь екфьт
фпх ьфй иб рбсЬгей рплэ бцсь, ден
рлЭней кблэфесб кбй ухмвЬллей уфз
рбсбгщгЮ кспхуфюн уфб
еущфесйкЬ мЭсз фпх рлхнфзсЯпх.
Бн, рбсЬ фпхт ьлпхт елЭгчпхт, фп
рлхнфЮсйп ден лейфпхсгеЯ кбй фп
дйбрйуфщиЭн рсьвлзмб ухнечЯжей нб
хцЯуфбфбй кблЭуфе фп рлзуйЭуфесп
еопхуйпдпфзмЭнп КЭнфсп ФечнйкЮт
ХрпуфЮсйозт, бнбцЭспнфбт фйт еоЮт
рлзспцпсЯет:
- фэрпт влЬвзт
- фзн Эндейоз (МпнфЭлп........... )
- фпн бсйимь уейсЬт (S/N .........)
Tзн рлзспцпсЯб бхфЮ фзн всЯукейт
уфзн фбмрелЯфуб рпх хрЬсчей уфп
рЯущ мЭспт фзт вЬузт. (ейк. 1)
Фп РлхнфЮсйп спэчщн еЯнбй ецпдйбумЭнп ме мйб бнфлЯб бхфпкбибсйжьменз рпх ден чсейЬжефбй кбибсйумь кбй ухнфЮсзуз. МрпсеЯ
ьмщт нб ухмвеЯ нб рЭупхн мйкспбнфйкеЯменб уфзн бнфлЯб: кЭсмбфб, кбсцЯфует, кпхмрйЬ озлщмЭнб кбй Ьллб мйкспрсЬгмбфб. Гйб
фзн брпцхгЮ жзмйюн, егклщвЯжпнфбй уе Энб рспиЬлбмп рспувЬуймп, рпх всЯкефбй уфп кЬфщ мЭспт фзт бнфлЯбт
Гйб нб Эчефе рсьувбуз уфпн рспиЬлбмп бхфьн бскеЯ нб
мефбкйнЮуефе фп рспуфбфехфйкь кЬллхмб рпх всЯукефбй уфп кЬфщ
мЭспт фпх рлхнфзсЯпх (ейкьнб 1). Кбфьрйн бцбйсЭуфе фп кЬлхммб
уфсЭцпнфЬт фп бсйуфесьуфспцб (ейкьнб 2) кбй ерйиещсЮуфе
Fig. 1
рспуекфйкЬ фп еущфесйкь
ЦЯлфсo кбибсйумпэ
Íá елЭгчефе фп цЯлфсп кбибсйумпэ фпхлЬчйуфпн мйб цпсЬ фп чсьнп. Фп
бнфйкбийуфЬфе бмЭущт бн рбспхуйЬжей учйумЭт кбй укбуЯмбфб дйьфй кбфЬ
фб рлхуЯмбфб рсЭрей нб хрпуфеЯ дхнбфЭт рйЭуейт рпх иб мрпспэубн нб
рспкблЭупхн обцнйкЬ урбуЯмбфб
.
.
Åéê. 1
РспупчЮ: вевбйщиеЯфе ьфй п кэклпт рлхуЯмбфпт фелеЯщуе кбй вгЬлфе фп брь фзн рсЯжб рсйн бнпЯоефе фп кЬлхммб кбй рсйн брь
прпйбдЮрпфе есгбуЯб ухнфЮсзузт. ЕЯнбй цхуйкь мефЬ фзн бцбЯсеуз фпх кблэммбфпт нб вгей мйб мйксЮ рпуьфзфб неспэ.
ОбнбмпнфЬспнфбт фп рЬнел кЬлхшзт, вевбйщиеЯфе ьфй мрбЯнпхн пй гЬнфжпй рпх всЯукпнфбй уфп кЬфщ мЭспт уфйт бнфЯуфпйчет еупчЭт
рсйн фп урсюоефе уфп мзчЬнзмб
.
.
Åéê. 2
ПдзгЯет егкбфЬуфбузт, лейфпхсгЯбт кбй ухнфЮсзузт
12
Page 62

Еэкплз ЦспнфЯдб кбй УхнфЮсзуз
Кбибсйумьт кбй ухнфЮсзуз
Фп рлхнфЮсйь убт еЯнбй Энбт бойьрйуфпт уэнфспцпт уфз жщЮ кбй уфзн есгбуЯб.
ЕЯнбй узмбнфйкь нб фп дйбфзсеЯфе уе кблЮ кбфЬуфбуз. Кбй гйб убт.
Фп рлхнфЮсйь убт учедйЬуфзке гйб
нб дйбскЭуей рпллЬ чсьнйб чщсЯт
рспвлЮмбфб.
МесйкЭт брлЭт цспнфЯдет впзипэн
нб фп дйбфзсеЯфе уе кблЮ кбфЬуфбуз
кбй нб рбсбфеЯней фз жщЮ фпх бкьмб
ресйууьфесп. Рсйн бр ьлб, рсЭрей
нб клеЯнефе рЬнфб фз всэуз
ейуьдпх фпх неспэ мефЬ брь кЬие
рлэуз: з ухнечЮт рЯеуз фпх неспэ
мрпсеЯ нб циеЯсей псйумЭнб
еобсфЮмбфб.
Бкьмз, ме фпн фсьрп бхфь
брпклеЯефе фпн кЯндхнп дйбсспюн
ьфбн уфп урЯфй ден всЯукефбй кбнеЯт.
Бн фп несь фзт ресйпчЮт убт еЯнбй
рплэ уклзсь, чсзуймпрпйЮуфе Энб
бцблбфйкь рспъьн (фп несь еЯнбй
уклзсь бн бцЮней еэкплб лехкпэт
лекЭдет гэсщ брь фйт всэует Ю гэсщ
брь фпхт ущлЮнет еккспЮт, ейдйкЬ
уфз мрбнйЭсб. Гйб рйп бксйвеЯт
рлзспцпсЯет гйб фпн фэрп фпх неспэ
фзт егкбфЬуфбуЮт убт, мрпсеЯфе нб
брехихниеЯфе уфзн фпрйкЮ ЕфбйсЯб
ХдЬфщн Ю уе Энбн хдсбхлйкь фзт
ресйпчЮт).
РсЭрей нб бдейЬжефе рЬнфб фйт
фуЭрет, бцбйсюнфбт бкьмз кбй фйт
кбсцЯфует, кпнкЬсдет кбй
прпйпдЮрпфе уклзсь бнфйкеЯменп.
Фп еощфесйкь мЭспт фпх рлхнфзсЯпх
рлЭнефбй ме Энб рбнЯ всегмЭнп ме
члйбсь несь кбй убрпэнй.
ЕЯнбй узмбнфйкь нб
кбибсЯжефе ухчнЬ фзн
брпурюменз иЮкз фпх
брпссхрбнфйкпэ.
Гйб нб брпцехчиеЯ п
учзмбфйумьт блЬфщн
бскеЯ нб фзн ксбфЬфе гйб
лЯгп кЬфщ брь фз всэуз.
Мзн хресвЬлефе ме фйт
дьуейт
брпссхрбнфйкпэ.
Фп кбнпнйкь брпссхрбнфйкь
ресйЭчей Юдз рспъьнфб
бцблЬфщузт. Мьнп бн фп несь
еЯнбй йдйбЯфесб уклзсь, дзлбдЮ
рплэ рлпэуйп уе бувЭуфйп, убт
ухмвпхлеэпхме нб
чсзуймпрпйеЯфе уе кЬие рлэуймп
Энб ейдйкь рспъьн.
КЬие фьуп Яущт еЯнбй чсЮуймпт
Энб кэклпт рлхуЯмбфпт ме мйб
дьуз рспъьнфпт бцблЬфщузт,
чщсЯт брпссхрбнфйкь кбй чщсЯт
спэчб.
Мз чсзуймпрпйеЯфе кбнЭнб
брпссхрбнфйкь Ю рсьуиефп уе
хресвплйкЭт дьуейт гйбфЯ иб
мрпспэубн нб рспкблЭупхн мйб
хресвплйкЮ рбсбгщгЮ бцспэ, ме
рбсбгщгЮ блЬфщн кбй дхнбфюн
жзмйюн уфб еобсфЮмбфб фпх
рлхнфзсЯпх убт.
БдейЬжефе рЬнфб фйт фуЭрет:
фб мефбллйкЬ мйкспбнфйкеЯменб уфп уфэшймп мрпспэн нб
рспоенЮупхн жзмйЬ уфпн кЬдп фпх рлхнфзсЯпх убт!
Рщт кбибсЯжефбй з иЮкз брпссхрбнфйкпэ
Брпухнбсмпльгзуз:
ЕобукЮуфе мйб елбцсЬ рЯеуз
уфп мегЬлп кпхмрЯ уфп
рсьуийп мЭспт фзт иЮкзт
брпссхрбнфйкпэ кбй фсбвЮофе
фзн рспт фб рЬнщ (ейк. 1).
Åéê. 1
ПдзгЯет егкбфЬуфбузт, лейфпхсгЯбт кбй ухнфЮсзузт
13
Кбибсйумьт:
Кбфьрйн, кбибсЯуфе фз иЮкз кЬфщ брь фз всэуз (ейк. 3)
чсзуймпрпйюнфбт мйб пдпнфьвпхсфуб кбй, бцпэ фсбвЮоефе фп
жехгЬсй фщн уйцпнЯщн рпх еЯнбй вблмЭнб уфп ерЬнщ мЭспт фщн
дйбмесйумЬфщн 1 кбй 2 (ейк. 4), елЭгофе бн фб Ядйб еЯнбй впхлщмЭнб
кбй оерлэнефЭ фб.
Åéê. 2
Åéê. 3
Ербнбухнбсмпльгзуз:
Мзн оечнЬфе нб ербнейуЬгефе фп
жехгЬсй фщн уйцпнЯщн уфйт
бнфЯуфпйчет Эдсет кбй, фЭлпт, нб
обнбвЬлефе фз иЮкз уфзн Эдсб
фзт ецбсмьжпнфЬт фз (ейк. 4, 2,
1).
Åéê. 4
Page 63

ФечнйкЬ чбсбкфзсйуфйкЬ
MoнфЭлп
ДйбуфЬуейт рлЬфпт cm 40
Чщсзфйкьфзфб áðü 1Ýùò 5 kg
ЗлекфсйкЭт
ухндЭуейт
УхндЭуейт неспэ мЭгйуфз рЯеуз 1 MPa (10 bar)
Фбчэфзфб
уфхшЯмбфпт/min.
РспгсЬммбфб
елЭгчпх уэмцщнб
ме фпн кбнпнйумь
IEC 456
П кбфбукехбуфЮт дйбфзсеЯ фп дйкбЯщмб нб ерйцЭсей, прпйбдЮрпфе уфйгмЮ кбй чщсЯт рспейдпрпЯзуз, прпйбдЮрпфе фспрпрпЯзуз уфп мзчЬнзмб Ю уфб
боеупхЬс фщн мпнфЭлщн фпх, рпх иещсеЯ бнбгкбЯб гйб фечнйкЭт кбй емрпсйкЭт бнЬгкет.
эшпт cm 85
вЬипт cm 60
фЬуз 230 Volt 50 Hz
мЭгйуфз брпсспцпэменз йучэт 2100 W
елЬчйуфз рЯеуз 0,05 MPa (0,5 bar)
чщсзфйкьфзфб фпх кЬдпх 42 лЯфсб
МЭчсй
ме 5,0 kg цпсфЯпх, рсьгсбммб 3 уе 60°
З ухукехЮ бхфЮ еЯнбй уэмцщнз ме фйт бкьлпхиет KпйнпфйкЭт ПдзгЯет:
- 73/23/CEE фзт 19/02/73 (ЧбмзлЮ ФЬуз) кбй мефбгенЭуфесет фспрпрпйЮуейт
- 89/336/CEE фзт 03/05/89 (ЗлекфспмбгнзфйкЮ Ухмвбфьфзфб) кбй мефбгенЭуфесет фспрпрпйЮуейe
500 уфспцЭт
AT 50
ПдзгЯет егкбфЬуфбузт, лейфпхсгЯбт кбй ухнфЮсзузт
14
Page 64

Merloni Elettrodomestici
Viale Aristide Merloni 47
60044 Fabriano
Italie
Tel +39 0732 6611
Fax +39 0732 662501
www.merloni.com
10/2002 - 195 033 389 03 - XEROX BUSINESS SERVICES - DOCUTECH
 Loading...