

Page 1
642 TEC IX/HA
Русскии
Руководство по эксплуатации
ВАРОЧНАЯ ПАНЕЛЬ
Содержание
Руководство по эксплуатации,1
Предупреждения,3
Сервисное обслуживание,4
Описание изделия,5
Установка,17
Включение и эксплуатация,21
Предосторожности и рекомендации,21
Техническое обслуживание и уход,22
Неисправности и методы их устранения,22
English
Operating Instructions
HOB
Contents
Operating Instructions,1
Warnings,2
Assistance,4
Description of the appliance,5
Installation,6
Start-up and use,9
Precautions and tips,9
Maintenance and care,10
Troubleshooting,10
Français
Mode d’emploi
TABLE DE CUISSON
Sommaire
Қазақша
Пайдалану нұсқаулығы
ПЛИТА
Мазмұны
Пайдалану нұсқаулығы,1
Ескертулер,3
Көмек,4
Құрылғы сипаттамасы,5
Орнату,24
Қосу және пайдалану,28
Сақтандырулар мен кеңестер,28
Жөндеу және күтім,29
Ақаулықтарды жою,29
Mode d’emploi,1
Avertissements,2
Assistance,4
Description de l’appareil,5
Installation,11
Mise en marche et utilisation,15
Précautions et conseils,15
Nettoyage et entretien,16
Anomalies et remèdes,16
Page 2
Warnings
WARNING: The appliance and its accessible parts
become hot during use. Care should be taken to
avoid touching heating elements. Children less than 8
years of age shall be kept away unless continuously
supervised. This appliance can be used by children
aged from 8 years and above and persons with
reduced physical, sensory or mental capabilities or
lack of experience and knowledge if they have been
given supervision or instruction concerning use of the
appliance in a safe way and understand the hazards
involved. Children shall not play with the appliance.
Cleaning and user maintenance shall not be made
by children without supervision.
WARNING: Unattended cooking on a hob with fat or
oil can be dangerous and may result in re. NEVER
try to extinguish a re with water, but switch off the
appliance and then cover ame e.g. with a lid or a
re blanket.
WARNING: Danger of re: do not store items on the
cooking surfaces.
Never use steam cleaners or pressure cleaners on
the appliance.
Avertissements
ATTENTION : Cet appareil ainsi que ses parties
accessibles deviennent très chauds pendant leur
fonctionnement. Il faut faire attention à ne pas toucher
les éléments chauffants. Ne pas faire approcher les
enfants de moins de 8 ans à moins qu’ils ne soient
sous surveillance constante. Le présent appareil peut
être utilisé par des enfants de plus de 8 ans et par
des personnes présentant des capacités physiques,
sensorielles ou mentales réduites ou n’ayant pas
l’expérience ou les connaissances indispensables,
à condition qu’ils soient sous bonne surveillance ou
qu’ils aient reçu les instructions nécessaires pour une
utilisation de l’appareil en toute sécurité et à condition
qu’ils se rendent compte des dangers encourus. Les
enfants ne doivent pas jouer avec l’appareil. Les
opérations de nettoyage et d’entretien ne doivent
pas être effectuées par des enfants non surveillés.
ATTENTION : Laisser un récipient de cuisson avec
de l’huile ou de la graisse sur un foyer est dangereux
et risque d’entraîner un incendie. Il ne faut JAMAIS
essayer d’éteindre une flamme ou un incendie
avec de l’eau ! Il faut éteindre l’appareil et couvrir la
amme avec un couvercle, par exemple, ou avec
une couverture anti-feu.
Remove any liquid from the lid before opening it. Do
not close the glass cover (if present) when the gas
burners or electric hotplates are still hot.
The appliance is not intended to be operated by
means of an external timer or separate remote
control system.
CAUTION: the use of inappropriate hob guards can
cause accidents.
2
ATTENTION : Risque d’incendie: ne pas laisser
d’objets sur les surfaces de cuisson.
Ne jamais nettoyer l’appareil avec des nettoyeurs
vapeur ou haute pression.
Essuyer tout liquide pouvant se trouver sur le
couvercle avant de l’ouvrir. Ne pas abaisser le
couvercle en verre (s’il y en a un) tant que les brûleurs
gaz ou la plaque électrique sont chauds.
Cet appareil ne peut pas être allumé au moyen
d’un temporisateur extérieur ou d’un système de
commande à distance séparé.
ATTENTION : l’utilisation de protections de table
inappropriées peut causer des incendies.
Page 3
Предупреждения
Ескертулер
ВНИМАНИЕ: Данное изделие и его доступные
комплектующие сильно нагреваются в процессе
эксплуатации. Будьте осторожны и не касайтесь
нагревательных элементов. Не разрешайте
детям младше 8 лет приближаться к изделию
без контроля. Данное изделие может быть
использовано детьми старше 8 лет и лицами с
ограниченными физическими, сенсорными или
умственными способностями или без опыта и
знания о правилах использования изделия при
условии надлежащего контроля или обучения
безопасному использованию изделия с учетом
соответствующих рисков. Не разрешайте
детям играть с изделием. Не разрешайте детям
осуществлять чистку и уход за изделием без
контроля взрослых.
ЕСКЕРТУ: Құрылғы мен оның қол жететін
бөліктері жұмыс кезінде қызуы мүмкін. Қыздыру
элементтеріне тимеуге назар аударыңыз. 8-ге
толмаған балаларға үздіксіз бақылау болмаса,
құрылғыдан аулақ ұстау керек. Бұл құрылғыны
қауіпсіз түрде қолдану бойынша кеңес не нұсқау
берілген және ықтимал қауіп-қатерлерді түсінетін
жағдайда, оны 8-ге толған балалар мен дене,
сезіну немесе ой қабілеті төмен немесе тәжірибесі
мен білімі жеткіліксіз адамдар қолдана алады.
Балаларға құрылғымен ойнауға болмайды.
Балаларға бақылаусыз құрылғыны тазалауға
және оған қызмет көрсетуге болмайды.
ЕСКЕРТУ: Плитада майға тамақ пісірген кезде
бақылап тұрмау қауіпті болуы және өрт шығуға
әкелуі мүмкін.
Өртті ЕШҚАШАН сумен өшіруші болмаңыз, оның
орнына құрылғыны өшіріп, жалынды жабыңыз,
мысалы қақпақпен немесе өртенбейтін матамен.
ЕСКЕРТУ: Өрт қаупі бар: пісіру беттерінде
заттарды сақтамаңыз.
Никогда не используйте паровые чистящие
агрегаты или агрегаты под высоким давлением
для чистки изделия.
Удалите жидкость из крышки перед открытием.
Не закрывать стеклянную крышку (если имеется)
с газовыми горелками или электрическая плита
еще горячая.
ВНИМАНИЕ: Использование несоответствующих
план защиты может привести к несчастным
случаям.
Автоматты түрде тазарту кезінде құрылғының
беті ыстық болатындықтан балаларды одан алыс
жерде ұстаңыз.
Металл заттарды (пышақтар, қасықтар, таба
қақпақтары, т.б.) конфоркаға қоймаңыз, себебі
олар қызып кетуі мүмкін.
Құрылғы сыртқы таймермен немесе бөлек
қашықтан басқару жүйесімен басқарылуға
арналмаған.
АБАЙ БОЛЫҢЫЗ: сәйкес келмейтін
конфоркалардың қорғану құралдарын пайдалану
жазатайым оқиғаларға себеп болуы мүмкін.
3
Page 4
Assistance
Communicating:
• Type of trouble
• Appliance model (Mod.)
• Serial number (S/N)
This information is found on the data plate located on the appliance and/or
on the packaging.
Assistance
Indiquez-lui :
• le type d’anomalie
• le modèle de votre appareil (Mod.)
• son numéro de série (S/N)
Ces informations gurent sur la plaquette signalétique apposée sur votre
appareil et/ou sur son emballage.
Сервисное обслуживание
Перед тем как обратиться в Центр Технического Обслуживания:
• тип неисправности;
• модель изделия (Мод.)
• номер тех. паспорта (серииныи №)
Эти данные вы наидете на паспортнои табличке, расположеннои на
изделии.
Көмек
Байланыс ақпараты:
• туындаған проблема түрі.
• құрылғының моделі (Мод.).
• сериялық нөмірі (С/н).
Бұл ақпарат құрылғыда орнатылған деректеме кестесінде немесе
орамадан табылуы мүмкін.
4
Page 5
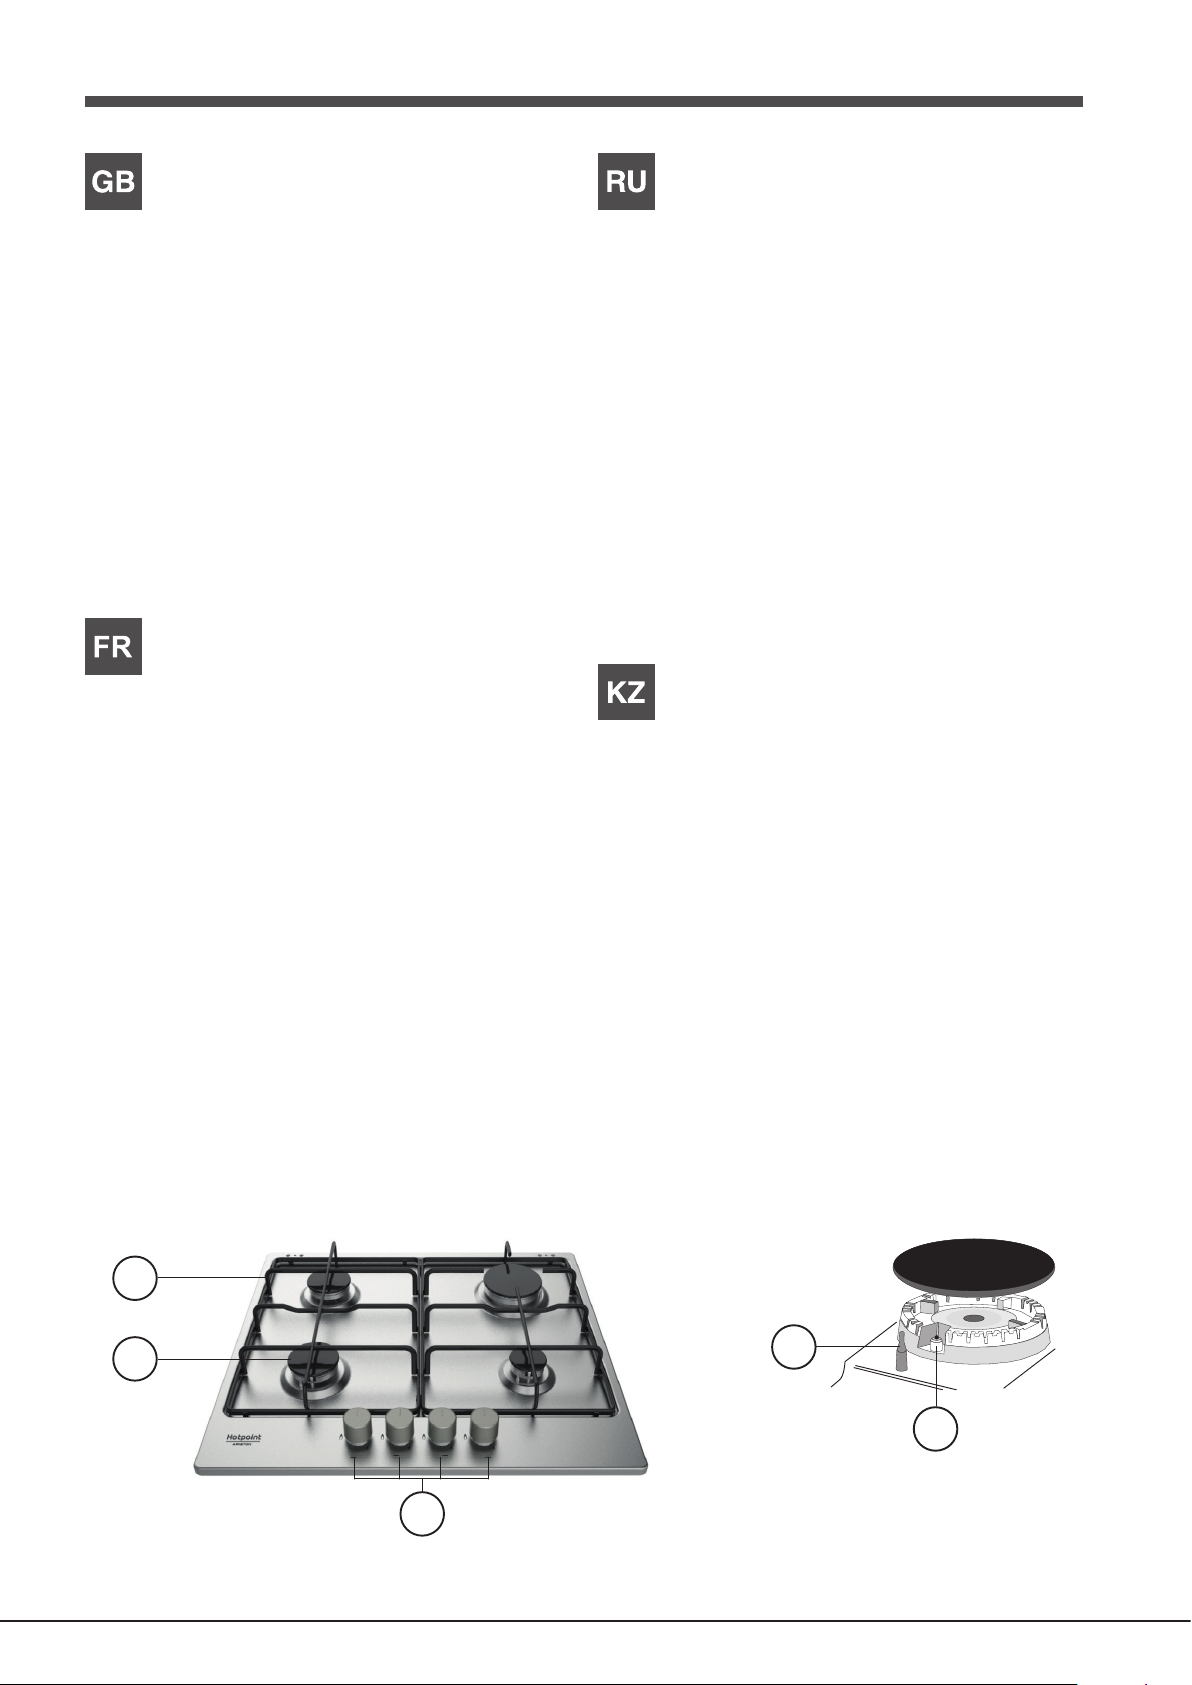
Description of the appliance
5
2
1
3
Описание изделия
Overall view
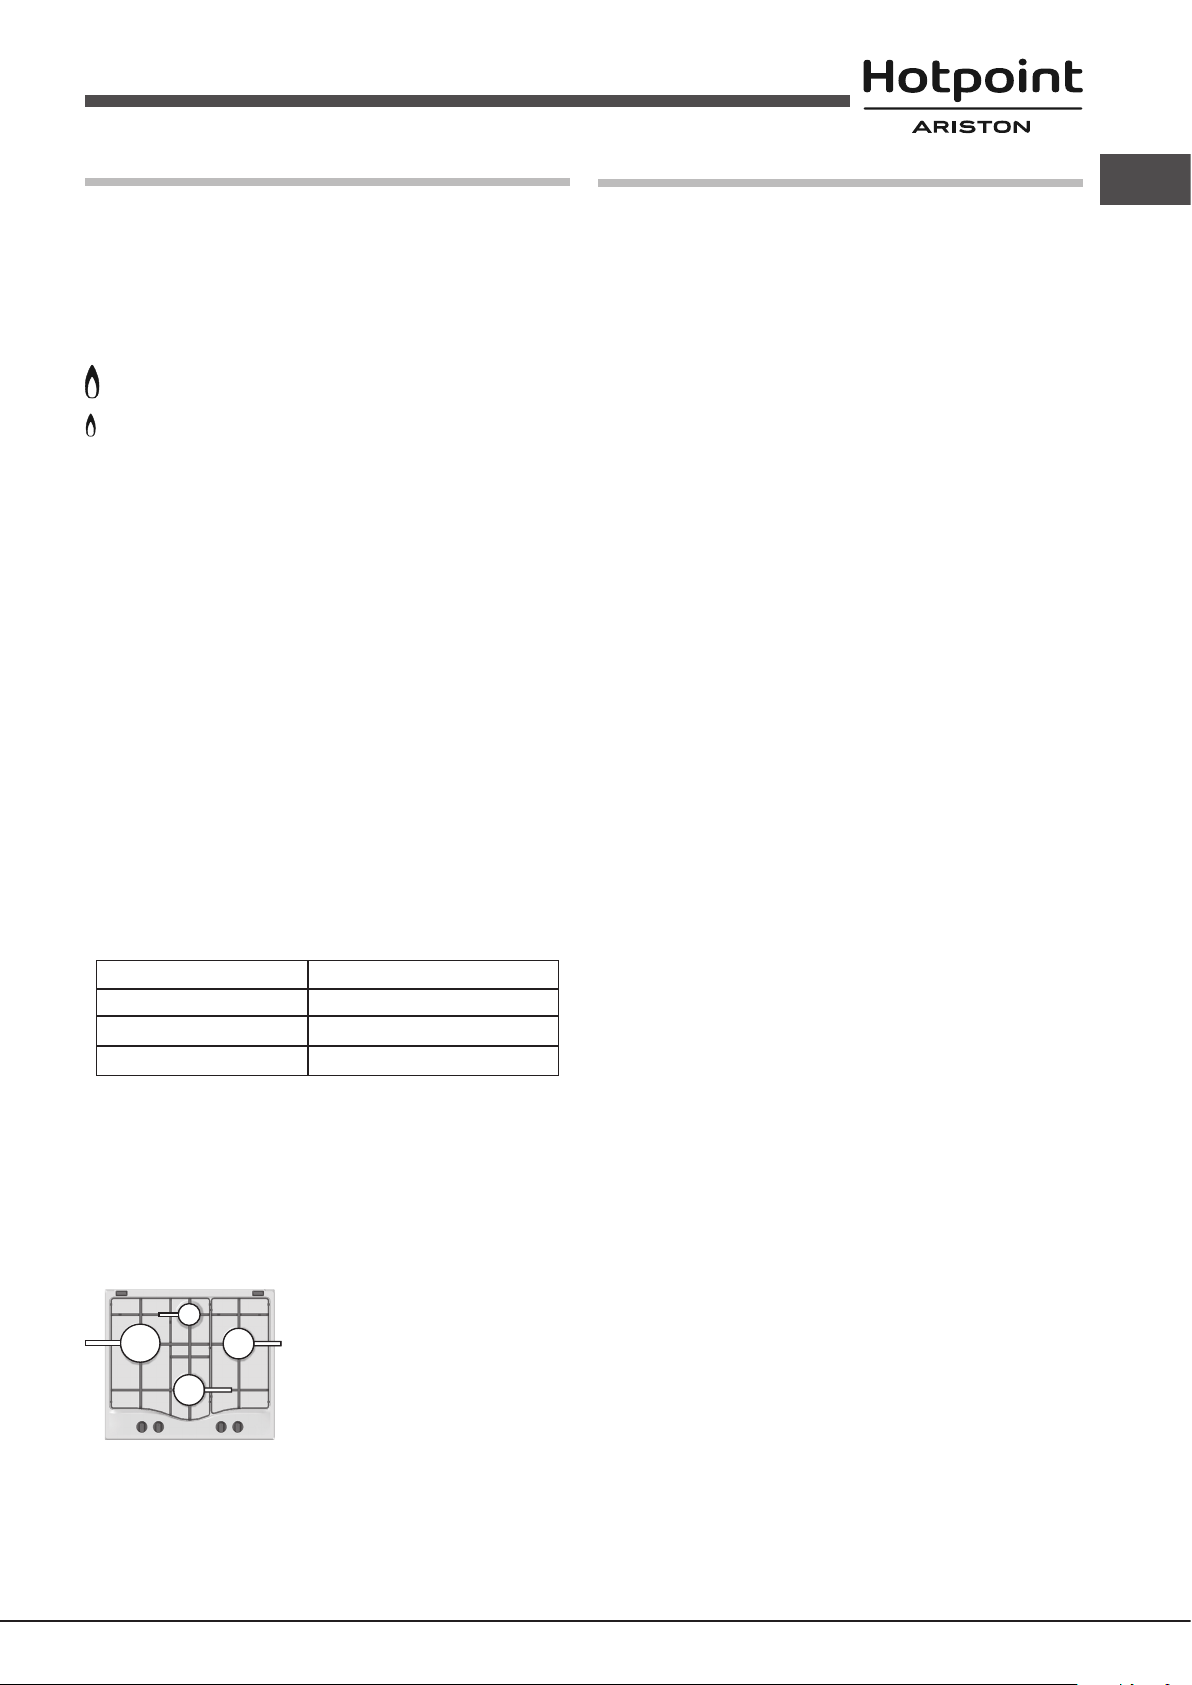
1. Support Grid for COOKWARE
2. GAS BURNERS
3. Control Knobs for GAS BURNERS
4. Ignition for GAS BURNERS
5. SAFETY DEVICES
• GAS BURNERS differ in size and power. Use the diameter of the cookware
to choose the most appropriate burner to cook with.
• Control Knobs for GAS BURNERS for ame adjustment.
• GAS BURNER IGNITION enables a specic burner to be lit automatically.
• SAFETY DEVICE stops the gas flow if the flame is accidentally
extinguished.
Description de l’appareil
Vue d’ensemble
1. Grilles support de CASSEROLES
2. BRÛLEURS À GAZ
3. Manettes de commande des BRÛLEURS GAZ
4. Bougie d’allumage des BRÛLEURS GAZ
5. DISPOSITIF DE SÉCURITÉ
• BRÛLEURS GAZ ils ont plusieurs dimensions et puissances. Choisissez
celui qui correspond le mieux au diamètre de votre casserole.
• Manettes de commande des BRÛLEURS GAZ pour le réglage de la
amme.
• La bougie d’allumage des BRÛLEURS GAZ permet l’allumage
automatique du brûleur sélectionné.
• DISPOSITIF DE SÉCURITÉ en cas d’extinction accidentelle de la amme,
coupez immédiatement l’arrivée du gaz.
Общии вид
1. Опорные решетки для КАСТРЮЛЬ И СКОВОРОД
2. ГАЗОВЫЕ КОНФОРКИ
3. Регуляторы ГАЗОВЫХ КОНФОРОК
4. Свеча зажигания ГАЗОВЫХ ГОРЕЛОК
5. ЗАЩИТНОЕ УСТРОЙСТВО
• ГАЗОВЫЕ КОНФОРКИ имеют разную мощность и размер. Выберите
конфорку, наиболее соответствующую диаметру используемой
посуды.
• Регуляторы ГАЗОВЫХ КОНФОРОК служат для регуляции пламени.
• Свеча ЗАЖИГАНИЯ ГАЗОВЫХ КОНФОРОК для автоматического
зажигания нужной конфорки.
• УСТРОЙСТВО БЕЗОПАСНОСТИ при случайном гашении пламени
перекрывает подачу газа.
Құрылғы сипаттамасы
Жалпы шолу
1. ЫДЫСТАРҒА арналған тіреуіш тор
2. ГАЗ КОНФОРКАЛАРЫ
3. ГАЗ КОНФОРКАЛАРЫН реттеу тұтқасы
4. ГАЗ ЖАНАРҒЫЛАРЫН тұтандыру оттығы
5. ҚОРҒАНЫС ҚҰРАЛЫ
• ГАЗ КОНФОРКАЛАРЫ өлшемі мен қуатына қарай әртүрлі болады.
Тамақ пісіру үшін тиісті оттықты ыдыстың диаметріне қарай таңдаңыз.
• ОТТЫҚТАРДЫ басқару тұтқалары жалынның өлшемін реттейді.
• ГАЗ ОТТЫҒЫНЫҢ ТҰТАТУ ҚҰРАЛЫ белгілі бір оттықты автоматты
түрде жандыруға мүмкіндік береді.
• ҚАУІПСІЗДІК ҚҰРЫЛҒЫСЫ жалын байқаусыз өшірілсе, газ ағынын
тоқтатады.
4
5
Page 6
Installation
Top 20 mm
Top 30-50 mm
GB
! Before operating your new appliance please read this instruction booklet
carefully. It contains important information for safe use, installation and care
of the appliance.
! Please keep these operating instructions for future reference. Pass them on
to possible new owners of the appliance.
Positioning
! Keep packaging material out of the reach of children. It can become a choking
or suffocation hazard (see Precautions and tips).
! The appliance must be installed by a qualied professional according to the
instructions provided. Incorrect installation may cause harm to people and
animals or may damage property.
! This unit may be installed and used only in permanently ventilated rooms
in accordance with current national regulations. The following requirements
must be observed:
• The room must be equipped with an air extraction system that expels
any combustion fumes. This may consist of a hood or an electric fan that
automatically starts each time the appliance is switched on.
Fitting the appliance
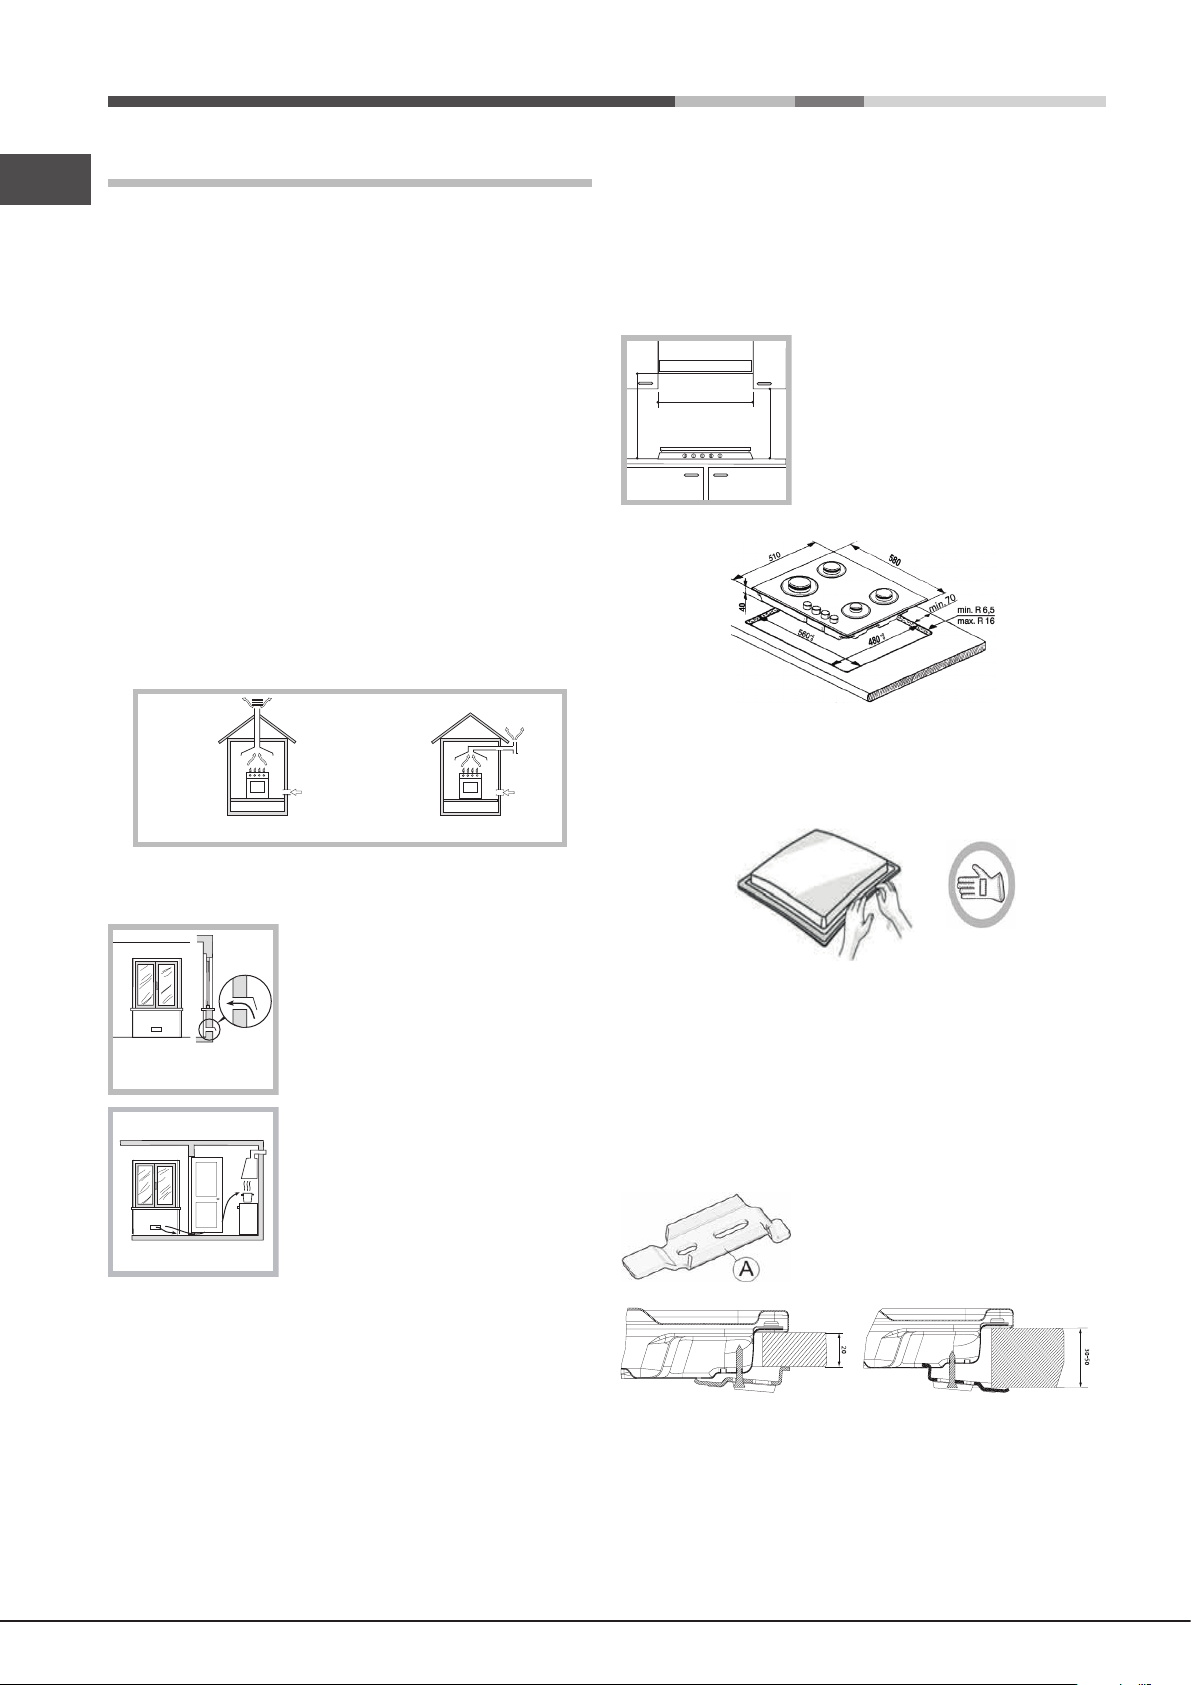
The following precautions must be taken when installing the hob:
• Kitchen cabinets adjacent to the appliance and taller than the top of the
hob must be at least 200 mm from the edge of the hob.
• Hoods must be installed according to their relative installation instruction
manuals and at a minimum distance of 650 mm from the hob (see gure).
• Place the wall cabinets adjacent to the hood at a minimum height of 420
mm from the hob (see gure).
If the hob is installed beneath a wall cabinet,
the latter must be situated at a minimum of 700
600mm min.
650mm min.
mm above the hob.
420mm min.
• The installation cavity should have the dimensions indicated in the gure.
NOTE: In case of installation of a hood above the hob, please refer to the
hood instructions for the correct distance.
In a chimney stack or branched flue.
(exclusively for cooking appliances)
Directly to
the Outside
• The room must also allow proper air circulation, as air is needed for
combustion to occur normally. The ow of air must not be less than 2 m3/h
per kW of installed power.
The air circulation system may take air directly
from the outside by means of a pipe with an
inner cross section of at least 100 cm
2
; the
opening must not be vulnerable to any type
Examples of
ventilation holes
for comburant air.
Adjacent
Room
A
Room to be
Vented
of blockages.
The system can also provide the air needed for
combustion indirectly, i.e. from adjacent rooms
tted with air circulation tubes as described
above. However, these rooms must not be
communal rooms, bedrooms or rooms that
may present a re hazard.
Enlarging the ventilation slot
between window and floor.
• Intensive and prolonged use of the appliance may necessitate
supplemental ventilation, e.g. opening a window or increasing the power
of the air intake system (if present).
• Liquid petroleum gas sinks to the oor as it is heavier than air. Therefore,
rooms containing LPG cylinders must also be equipped with vents to allow
gas to escape in the event of a leak. As a result LPG cylinders, whether
partially or completely full, must not be installed or stored in rooms or
storage areas that are below ground level (cellars, etc.). It is advisable to
keep only the cylinder being used in the room, positioned so that it is not
subject to heat produced by external sources (ovens, replaces, stoves,
etc. ) which could raise the temperature of the cylinder above 50°C.
• After having cleaned the perimeter surface, apply the supplied gasket to
the hob as shown in the gure.
Position the hob in the worktop opening made respecting the dimensions
indicated in the Instruction.
NOTE: the power supply cable must be long enough to permit its upward
extraction.
To secure the hob, use the brackets (A) provided with it. Fit the brackets into the
relevant bores shown by the arrow and fasten them by means of their screws
in accordance with the thickness of the worktop (see the following gures).
• Where the hob is not installed over a built-in oven, a wooden panel must
be installed as insulation. This must be placed at a minimum distance of
20 mm from the lower part of the hob.
6
Page 7
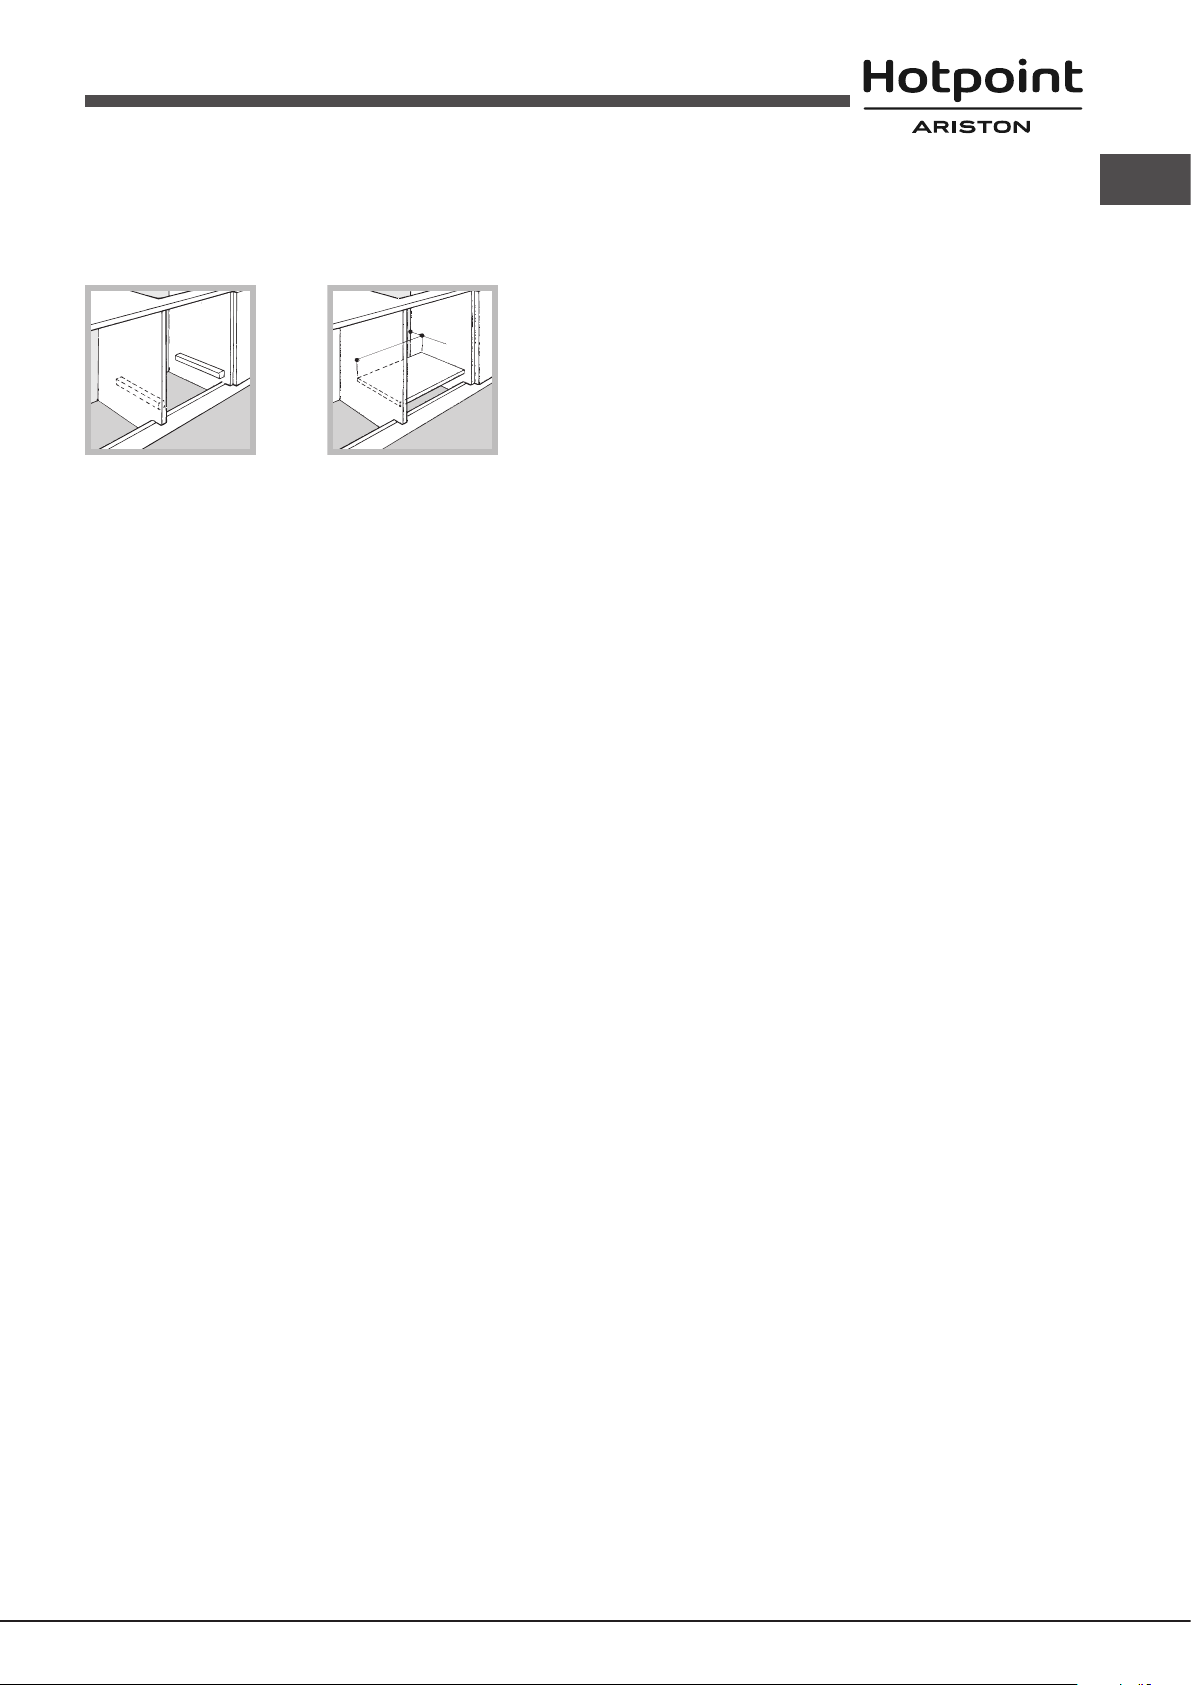
Ventilation
To ensure adequate ventilation, the back panel of the cabinet must be
removed. It is advisable to install the oven so that it rests on two strips of
wood, or on a completely at surface with an opening of at least 45 x 560
mm (see diagrams).
45 mm.
560 mm.
Gas connection
The appliance should be connected to the main gas supply or to a gas
cylinder in compliance with current national regulations. Before carrying out
the connection, make sure the cooker is compatible with the gas supply you
wish to use. If this is not the case, follow the instructions indicated in the
paragraph “Adapting to different types of gas.”
When using liquid gas from a cylinder, install a pressure regulator which
complies with current national regulations.
! Check that the pressure of the gas supply is consistent with the values
indicated in Table 1 (“Burner and nozzle specications”). This will ensure the
safe operation and longevity of your appliance while maintaining efcient
energy consumption.
GB
! The hob can only be installed above built-in ovens with a cooling ventilation
system.
Electrical connection
Hobs equipped with a three-pole power supply cable are designed to operate
with alternating current at the voltage and frequency indicated on the data
plate (this is located on the lower part of the appliance). The earth wire in the
cable has a green and yellow cover. If the appliance is to be installed above
a built-in electric oven, the electrical connection of the hob and the oven must
be carried out separately, both for electrical safety purposes and to make
extracting the oven easier.
Connecting the supply cable to the mains
Install a standardised plug corresponding to the load indicated on the data
plate.
The appliance must be directly connected to the mains using an omnipolar
circuit-breaker with a minimum contact opening of 3 mm installed between
the appliance and the mains.
The circuit-breaker must be suitable for the charge indicated and must comply
with current electrical regulations (the earthing wire must not be interrupted
by the circuit-breaker). The supply cable must not come into contact with
surfaces with temperatures higher than 50°C.
! The installer must ensure that the correct electrical connection has been
made and that it is compliant with safety regulations.
Before connecting to the power supply, make sure that:
• the appliance is earthed and the plug is compliant with the law.
• the socket can withstand the maximum power of the appliance, which is
indicated on the data plate.
• the voltage is in the range between the values indicated on the data plate.
• the socket is compatible with the plug of the appliance. If the socket is
incompatible with the plug, ask an authorised technician to replace it. Do
not use extension cords or multiple sockets.
! Once the appliance has been installed, the power supply cable and the
electrical socket must be easily accessible.
! The cable must not be bent or compressed.
Attention! Before connection remove a transport plug from the connecting
hole of the cooker gas pipeline
Connection with a rigid pipe (copper or steel)
! Connection to the gas system must be carried out in such a way as not to
place any strain of any kind on the appliance.
There is an adjustable L-shaped pipe tting on the appliance supply ramp
and this is tted with a seal in order to prevent leaks. The seal must always
be replaced after rotating the pipe tting (seal provided with appliance). The
gas supply pipe tting is a threaded 1/2 gas cylindrical male attachment.
Connecting a flexible jointless stainless steel pipe to a threaded
attachment
The gas supply pipe tting is a threaded 1/2 gas cylindrical male attachment.
These pipes must be installed so that they are never longer than 2000 mm
when fully extended. Once connection has been carried out, make sure that
the exible metal pipe does not touch any moving parts and is not compressed.
! Only use pipes and seals that comply with current national regulations.
Checking the tightness of the connection
! When the installation process is complete, check the pipe ttings for leaks
using a soapy solution. Never use a ame.
Adapting to different types of gas
To adapt the hob to a different type of gas other than default type (indicated
on the rating plate at the base of the hob or on the packaging), the burner
nozzles should be replaced as follows:
1. Remove the hob grids and slide the burners off their seats.
2. Unscrew the nozzles using a socket spanner of the appropriate size, and
replace them with nozzles for the new type of gas (see table 1 “Burner
and nozzle characteristics”).
3. Reassemble the parts following the above procedure in the reverse order.
4. Once this procedure is nished, replace the old rating sticker with one
indicating the new type of gas used. Sticker are available from any of our
Service Centres.
• Adjusting the burners’ primary air
Does not require adjusting.
! The cable must be checked regularly and replaced by authorised technicians
only (see Assistance).
! The manufacturer declines any liability should these safety measures not
be observed.
7
Page 8
• Setting the burners to minimum
GB
1. Turn the tap to the low ame position;
2. Remove the knob and adjust the adjustment
screw, which is positioned in or next to the tap
pin, until the ame is small but steady.
3. Having adjusted the ame to the required low setting, while the burner is
alight, quickly change the position of the knob from minimum to maximum
and vice versa several times, checking that the ame does not go out.
4. Some appliances have a safety device (thermocouple) tted. If the device
fails to work when the burners are set to the low ame setting, increase
this low ame setting using the adjusting screw.
5. Once the adjustment has been made, replace the seals on the by-passes
using sealing wax or a similar substance.
! If the appliance is connected to liquid gas, the regulation screw must be
fastened as tightly as possible.
! Once this procedure is nished, replace the old rating sticker with one
indicating the new type of gas used. Stickers are available from any of our
Service Centres.
! Should the gas pressure used be different (or vary slightly) from the
recommended pressure, a suitable pressure regulator must be tted to the
inlet pipe (in order to comply with current national regulations).
DATA PLATE
Electrical
connections
see data plate
ECODESIGN
This appliance conforms to the EU Regulation no. 66/2014
implementing Directive 2009/125/EC.
standard EN 30-2-1
Burner and nozzle specications
Refer to the injector table of you Country
8
Page 9
Start-up and use
Rapid (R)
Semi Rapid (S)
Auxiliary (A)
Ø Cookware Diameter (cm)
24 - 26
16 - 22
8 - 14
Burner
Precautions and tips
GB
! The position of the corresponding gas burner is shown on every knob.
Gas burners
Each burner can be adjusted to one of the following settings using the
corresponding control knob:
● Off
To light one of the burners, hold a lit match or lighter near the burner and, at
the same time, press down and turn the corresponding knob anti-clockwise
to the maximum setting.
Since the burner is tted with a safety device, the knob should be pressed
for approximately 2-3 seconds to allow the automatic device keeping the
ame alight to heat up.
Models are equipped with an ignition button incorporated into the control
knob. If this is the case, the ignitor is present, but not the button. To light a
burner, simply press the corresponding knob all the way in and then turn it
in the counter-clockwise direction to the “High” setting, keeping it pressed
in until the burner lights.
! If a ame is accidentally extinguished, turn off the control knob and wait for
at least 1 minute before trying to relight it.
Practical advice on using the burners
To ensure the burners operate efciently:
• Use appropriate cookware for each burner (see table) so that the ames
• Always use cookware with a at base and a cover.
• When the contents of the pan reach boiling point, turn the knob to minimum.
To identify the type of burner, refer to the designs in the section entitled, “Burner
and Nozzle Specications”.
• For maximum stability, always make sure that the pan supports are
• Pan handles should be positioned in line with one of the support bars on
• Pan handle should be positioned so not to protrude beyond the front edge
greatest stability.
Maximum
Minimum
do not extend beyond the bottom of the cookware.
correctly tted and that each pan is placed centrally over the burner.
the pan support grid.
of the hob.
The more variable aspect in terms of pan
stability can often be the pan itself, (or
the positioning of that pan during use).
Well balanced pans, with at bases that
are placed centrally over the burner,
with the pan handles aligned with one
of the support ngers obviously offer the
! This appliance has been designed and manufactured in compliance with
international safety standards. The following warnings are provided for safety
reasons and must be read carefully.
General safety
• This is a class 3 built-in appliance.
• Gas appliances require regular air exchange to maintain efcient
operation. When installing the hob, follow the instructions provided
in the paragraph on “Positioning” the appliance.
• These instructions are only valid for the countries whose symbols
appear in the manual and on the serial number plate.
• The appliance was designed for domestic use inside the home and is not
intended for commercial or industrial use.
• The appliance must not be installed outdoors, even in covered areas. It is
extremely dangerous to leave the appliance exposed to rain and storms.
• Do not touch the appliance with bare feet or with wet or damp hands and
feet.
• The appliance must be used by adults only for the preparation of food,
in accordance with the instructions outlined in this booklet. Any other
use of the appliance (e.g. for heating the room) constitutes improper
use and is dangerous. The manufacturer may not be held liable for
any damage resulting from improper, incorrect and unreasonable
use of the appliance.
• Ensure that the power supply cables of other electrical appliances do not
come into contact with the hot parts of the oven.
• The openings used for ventilation and dispersion of heat must never be
covered.
• Always make sure the knobs are in the “●”/“○” position when the appliance
is not in use.
• When unplugging the appliance always pull the plug from the mains socket,
do not pull on the cable.
• Never carry out any cleaning or maintenance work without having detached
the plug from the mains.
• In case of malfunction, under no circumstances should you attempt to repair
the appliance yourself. Repairs carried out by inexperienced persons may
cause injury or further malfunctioning of the appliance. Contact a Service
Centre (see Assistance).
• Do not close the glass cover (if present) when the gas burners or electric
hotplates are still hot.
• The appliance should not be operated by people (including children)
with reduced physical, sensory or mental capacities, by inexperienced
individuals or by anyone who is not familiar with the product. These
individuals should, at the very least, be supervised by someone who
assumes responsibility for their safety or receive preliminary instructions
relating to the operation of the appliance.
• Do not let children play with the appliance.
• The appliance is not intended to be operated by means of an external
timer or separate remote-control system.
Disposal
• When disposing of packaging material: observe local legislation so that
the packaging may be reused.
• The European Directive 2012/19/EU on Waste Electrical and Electronic
Equipment (WEEE), requires that old household electrical appliances must
not be disposed of in the normal unsorted municipal waste stream. Old
appliances must be collected separately in order to optimise the recovery
and recycling of the materials they contain and reduce the impact on
human health and the environment.The crossed out “wheeled bin” symbol
on the product reminds you of your obligation, that when you dispose of
the appliance it must be separately collected.
9
Page 10
Consumers should contact their local authority or retailer for information
GB
concerning the correct disposal of their old appliance.
Troubleshooting
Respecting and conserving the environment
• Cook your food in closed pots or pans with well-tting lids and use as little
water as possible. Cooking with the lid off will greatly increase energy
consumption.
• Use purely at pots and pans.
• If you are cooking something that takes a long time, it’s worth using a
pressure cooker, which is twice as fast and saves a third of the energy.
Maintenance and care
Switching the appliance off
Disconnect your appliance from the electricity supply before carrying out
any work on it.
Cleaning the hob surface
• All the enamelled and glass parts should be cleaned with warm water and
neutral solution.
• Stainless steel surfaces may be stained by calcareous water or aggressive
detergents if left in contact for too long. Any food spills (water, sauce, coffee,
etc.) should be wiped away before they dry.
• Clean with warm water and neutral detergent, and then dry with a soft
cloth or chamois. Remove baked-on dirt with specic cleaners for stainless
steel surfaces.
• Clean stainless steel only with soft cloth or sponge.
• Do not use abrasive or corrosive products, chlorine-based cleaners or pan
scourers.
• Do not use steam cleaning appliances.
• Do not use ammable products.
• Do not leave acid or alkaline substances, such as vinegar, mustard, salt,
sugar or lemon juice on the hob.
It may happen that the appliance does not function properly or at all. Before
calling the service centre for assistance, check if anything can be done. First,
check to see that there are no interruptions in the gas and electrical supplies,
and, in particular, that the gas valves for the mains are open.
The burner does not light or the ame is not even around the burner.
Check whether:
• The gas holes on the burner are clogged.
• All the movable parts that make up the burner are mounted correctly.
• There are draughts near the appliance.
The ame dies in models with a safety device.
Check to make sure that:
• You pressed the knob all the way in.
• You keep the knob pressed in long enough to activate the safety device.
• The gas holes are not blocked in the area corresponding to the safety
device.
The burner does not remain lit when set to minimum.
Check to make sure that:
• The gas holes are not blocked.
• There are no draughts near the appliance.
• The minimum setting has been adjusted properly.
The cookware is unstable.
Check to make sure that:
• The bottom of the cookware is perfectly at.
• The cookware is positioned correctly at the centre of the burner.
• The pan support grids have been positioned correctly.
Cleaning the hob parts
• Clean the enamelled and glass parts only with soft cloth or sponge.
• Grids, burner caps and burners can be removed to be cleaned.
• Clean them by hand with warm water and non-abrasive detergent,
removing any food residues and checking that none of the burner openings
is clogged.
• Rinse and dry.
• Ret burners and burner caps correctly in the respective housings.
• When replacing the grids, make sure that the panstand area is aligned
with the burner.
• Models equipped with electrical ignition plugs and safety device require
thorough cleaning of the plug end in order to ensure correct operation.
Check these items frequently, and if necessary, clean them with a damp
cloth. Any baked-on food should be removed with a toothpick or needle.
! To avoid damaging the electric ignition device, do not use it when the
burners are not in their housing.
Gas tap maintenance
Over time, the taps may become jammed or difcult to turn. If this happens,
the tap must be replaced.
! This procedure must be performed by a qualied technician authorised
by the manufacturer.
10
Page 11

Installation
! Conservez ce mode d’emploi pour pouvoir le consulter à tout moment.
En cas de vente, de cession ou de déménagement, veillez à ce qu’il suive
l’appareil pour informer le nouveau propriétaire sur son fonctionnement et lui
fournir les conseils correspondants.
! Lisez attentivement les instructions : elles contiennent des conseils
importants sur l’installation, l’utilisation et la sécurité de votre appareil
Conditions réglementaires d’installation
Le raccordement gaz devra être fait par un technicien qui assurera la bonne
alimentation en gaz et le meilleur réglage de la combustion des brûleurs. Ces
opérations d’installation, quoique simples, sont délicates et primordiales pour
que votre table de cuisson vous rende le meilleur service. L’installation doit
être effectuée conformément aux textes réglementaires et règles de l’art en
vigueur et règlement sanitaire départemental.
Positionnement
! Les emballages ne sont pas des jouets pour enfants, il faut les mettre au
rebut en respectant la réglementation sur le tri sélectif des déchets (voir
Précautions et conseils).
! L’installation doit être effectuée par un professionnel du secteur
ou une aération plus efcace, en augmentant la puissance d’aspiration
mécanique si déjà prédisposée.
• Les gaz de pétrole liquéfiés, plus lourds que l’air, se déposent et
stagnent vers le bas. Les locaux qui contiennent donc des bouteilles de
G.P.L doivent prévoir des ouvertures vers l’extérieur an de permettre
l’évacuation du gaz par le bas en cas de fuites accidentelles. Les bouteilles
de GPL, qu’elles soient vides ou partiellement pleines, ne devront donc
pas être installées ou entreposées dans des locaux qui se trouvent au
dessous du niveau du sol (caves etc.). Il est opportun de n’entreposer dans
le local que la bouteille que vous êtes en train d’utiliser, placée de façon
à ne pas être sujette à l’action directe de sources de chaleur (fours, feux
de bois, poêles etc.) qui peuvent atteindre des températures dépassant
50°C.
Encastrement
Pour une installation correcte de la table de cuisson, il faut se conformer aux
instructions suivantes :
• Les meubles jouxtant la table, dont la hauteur dépasse celle du plan de
cuisson, doivent être placés à au moins 200 mm du bord du plan.
• Les hottes doivent être installées conformément aux instructions reportées
dans leur notice d’installation et à au moins 650 mm de distance (voir
gure).
• Les éléments hauts jouxtant la hotte doivent être placés à au moins 420
mm de distance du plan de travail (voir gure).
conformément aux instructions du fabricant. Une mauvaise installation peut
causer des dommages à des personnes, des animaux ou des biens.
! Cet appareil peut être installé et fonctionner seulement dans des locaux qui
sont aérés en permanence, selon les Normes Nationales en vigueur.
650mm min.
Il faut observer les conditions suivantes:
• La pièce doit prévoir un système d’évacuation vers l’extérieur des fumées
de combustion, réalisé au moyen d’une hotte ou par ventilateur électrique
qui entre automatiquement en fonction dès que l’on allume l’appareil.
• La cavité d’installation doit avoir les dimensions indiquées dans la gure.
600mm min.
FR
En cas d’installation de la table de cuisson sous
un élément haut, ce dernier devra être monté à
au moins 700 mm de distance du plan.
420mm min.
En cas de cheminée ou conduit de fumée ramifié
(réservé aux appareils de cuisson)
Directement
à l'externe
• La pièce doit prévoir un système qui consent un apport d’air nécessaire
à une régulière combustion. Le ux d’air nécessaire à la combustion ne
doit pas être inférieur à 2 m3/h par kW de puissance installée.
Le système peut être réalisé en prélevant
l’air directement de l’extérieur du bâtiment au
moyen d’un conduit d’au moins100 cm
2
de
section utile qui ne risque pas d’être bouché
A
Exemples d'ouverture
de ventilation
pour l'air comburant
Local
adjacent
Local à
ventiler
accidentellement.
Ou, de manière indirecte depuis des locaux
adjacents et équipés d’un conduit de ventilation
avec l’extérieur comme susmentionné; ces
locaux ne doivent pas être des parties
communes du bâtiment, des chambres à
coucher ou des locaux à risque d’incendie.
Agrandissement de la fissure
entre la porte et le sol
• Une utilisation intensive et prolongée de l’appareil peut nécessiter d’une
aération supplémentaire, comme par exemple l’ouverture d’une fenêtre
REMARQUE: En cas d’installation d’une hotte au-dessus de la table de
cuisson, veuillez vous référer au manuel d’utilisation de la hotte qui spécie
les distances adéquates.
• Après avoir nettoyé le pourtour de la table de cuisson, appliquez le joint
fourni comme illustré sur la gure.
Installez la table de cuisson dans l’ouverture du plan de cuisson dont les
dimensions correspondent à celles gurant dans le mode d’emploi.
REMARQUE: le cordon d’alimentation doit être sufsamment long pour
permettre son extraction par le haut.
Pour xer la table de cuisson, utilisez les attaches (A) fournies. Introduisez les
attaches dans les orices prévus à cet effet (indiqués par la èche) et xez-les
à l’aide des vis en fonction de l’épaisseur de la table de cuisson (voir gures
suivantes).
11
Page 12

FR
Top 20 mm
Top 30-50 mm
! Après installation de l’appareil, le câble électrique et la prise de courant
doivent être facilement accessibles
! Le câble ne doit être ni plié ni excessivement écrasé.
! Il doit être contrôlé périodiquement et ne peut être remplacé que par un
technicien agréé (voir Assistance).
• Si la table n’est pas installée au-dessus d’un four à encastrer, il faut monter
un panneau d’isolation en bois. Il faut le monter à au moins 20 mm de
distance du bord inférieur de la table.
Aération
Pour garantir une bonne aération, la cavité d’encastrement doit être dépourvue
de paroi arrière. Il est conseillé d’installer le four de manière à ce qu’il repose
sur deux cales en bois ou bien sur un plan d’appui continu qui ait une découpe
d’au moins 45 x 560 mm (voir gures).
45 mm.
560 mm.
! La table ne peut être installée qu’au-dessus de fours encastrables équipés
de ventilation de refroidissement.
Raccordement électrique
Les tables munies d’un cordon d’alimentation tripolaire, sont prévues pour un
fonctionnement à courant alternatif à la tension et à la fréquence d’alimentation
indiquées sur la plaquette des caractéristiques (placée sous la table de
cuisson). Le conducteur de terre du câble est jaune/vert. En cas d’installation
au-dessus d’un four à encastrer, la connexion électrique de la table et celle
du four doivent être effectuées séparément, pour des questions de sécurité
électrique mais aussi pour simplier, au besoin, l’extraction du four.
Branchement du câble d’alimentation au réseau électrique
Montez sur le câble une prise normalisée adaptée à la charge indiquée sur
l’étiquette des caractéristiques.
En cas de raccordement direct au réseau, il faut intercaler entre l’appareil
et le réseau un interrupteur à coupure omnipolaire ayant au moins 3 mm
d’écartement entre les contacts, dimensionné à la charge et conforme aux
normes en vigueur (le l de terre ne doit pas être interrompu par l’interrupteur).
Le câble d’alimentation ne doit atteindre, en aucun point, des températures
dépassant de 50°C la température ambiante.
! L’installateur est responsable du bon raccordement électrique de l’appareil
et du respect des normes de sécurité.
Avant de procéder au branchement, assurez-vous que :
• la prise est bien munie d’une terre conforme à la loi;
• la prise est bien apte à supporter la puissance maximale de l’appareil,
indiquée sur la plaquette signalétique;
• la tension d’alimentation est bien comprise entre les valeurs indiquées sur
la plaquette signalétique;
• la prise est bien compatible avec la che de l’appareil. Si ce n’est pas le
cas, remplacez la prise ou la che, n’utilisez ni rallonges ni prises multiples.
! Nous déclinons toute responsabilité en cas de non respect des normes
énumérées ci-dessus.
Raccordement gaz
Raccorder l’appareil à la bouteille ou à la canalisation du gaz conformément
aux normes en vigueur, uniquement après avoir vérié que l’appareil est
bien réglé pour le type de gaz d’alimentation utilisé. Dans le cas contraire,
effectuer les opérations décrites au paragraphe “Adaptation aux différents
types de gaz”. Pour l’alimentation en gaz liquide, utiliser des régulateurs de
pression conformes aux Normes en vigueur.
! Pour un fonctionnement en toute sécurité, pour l’emploi correct de l’énergie et
une plus longue durée de vie de l’appareil, vérier si la pression d’alimentation
respecte bien les valeurs indiquées dans le tableau 1 “Caractéristiques des
brûleurs et des injecteurs”.
Attention! Avant le branchement, retirez le bouchon pour le transport sur la
prise du tube du gaz du plan de cuisson.
Raccordement par tuyau rigide (cuivre ou acier)
! Le raccordement à l’installation de gaz doit être effectué de manière à ce
que l’appareil ne subisse aucun type de contrainte.
La rampe d’alimentation de l’appareil est munie d’un raccord en “L” orientable
dont l’étanchéité est assurée par un joint. S’il vous faut inverser le raccord, vous
devez obligatoirement remplacer le joint d’étanchéité (fourni avec l’appareil).
Le raccord d’entrée du gaz à l’appareil est leté 1/2 gaz mâle cylindrique.
Raccordement par tuyau exible en acier inox, à paroi continue avec
raccords letés
Le raccord d’entrée du gaz à l’appareil est leté 1/2 gaz mâle cylindrique.
La mise en œuvre de ces tuyaux doit être effectuée de façon à ce que, même
au maximum de leur extension, ils ne dépassent pas 2000 mm de long. Après
raccordement, assurez-vous que le tuyau métallique exible ne touche pas
à des parties mobiles et n’est pas écrasé.
! N’utilisez que des tuyaux conformes et des joints d’étanchéité conformes
aux textes réglementaires applicables dans le pays.
Vérication de l’étanchéité
! Une fois l’installation terminée, vérier l’étanchéité de tous les raccords en
utilisant une solution savonneuse et jamais une amme.
Adaptation aux différents types de gaz
Pour adapter la table à un type de gaz autre que celui pour lequel elle a été
prévue (indiqué sur l’étiquette xée sous la table ou sur l’emballage), il faut
changer les injecteurs des brûleurs en procédant comme suit :
1. Enlevez les grilles du plan de cuisson et sortez les brûleurs de leur
logement.
2. Dévissez les injecteurs à l’aide d’une clé à tube de taille appropriée et
remplacez-les par les injecteurs adaptés au nouveau type de gaz (voir
tableau 1 “Caractéristiques des brûleurs et des injecteurs”).
3. Remontez les différentes parties en effectuant les opérations dans le sens
inverse.
12
Page 13

4. En n d’opération remplacez la vieille étiquette par celle correspondant
au nouveau gaz utilisé, disponible dans nos Services Après-vente.
• Réglage de l’air primaire des brûleurs
Les brûleurs ne nécessitent d’aucun réglage de l’air primaire.
• Réglage minimum
1. Placez le robinet sur la position de minima;
2. Déposez la manette et tournez la vis de réglage positionnée à l’intérieur
ou sur le côté de la tige du robinet jusqu’à ce que vous obteniez une petite
amme régulière;
3. Une fois obtenu le débit minimal souhaité, allumez le brûleur et tournez
brusquement la manette de la position de ralenti à la position d’ouverture
maximale et vice versa à plusieurs reprises. Vériez ainsi qu’il n’y ait pas
extinction du brûleur.
4. En cas de mauvais fonctionnement du dispositif de sécurité gaz
(thermocouple) équipant certains appareils, quand les brûleurs sont au
minima, augmentez leur débit en agissant sur la vis de réglage.
FR
5. Après avoir procédé à ce réglage, reposez les scellés sur les by-pass en
utilisant de la cire ou autre matériau équivalent.
! En cas de gaz liquides, il faut visser à fond la vis de réglage.
! En n d’opération remplacez la vieille étiquette par celle correspondant au
nouveau gaz utilisé, disponible dans nos Services Après-vente.
! Si la pression du gaz utilisé est différente (ou variable) par rapport à la
pression prévue, il faut installer, sur la tuyauterie d’entrée un régulateur de
pression approprié (conformément aux textes réglementaires applicables
dans le pays).
PLAQUETTE SIGNALETIQUE
Raccordements
électriques
voir plaquette signalétique
ÉCOCONCEPTION
Cet appareil est conforme aux Règlement n°66/2014 de l'UE
intégrant la Directive 2009/125/EC.
Norme EN 30-2-1
13
Page 14

FR
ALIMEN
Caractéristiques des brûleurs et des injecteurs
Tableau 1
Type de gaz
Type de brûleur
utilisé
GAZ NATUREL
(Méthane)
G20
GAZ DE PETROLE
LIQUEFIE
(Butane)
G30
GAZ DE PETROLE
LIQUEFIE
(Propane)
Type de gaz utilisé
G20 20 mbar 1R - 2S -1A 7.30 695 l/h 9.52
G30 28-30 mbar 1R - 2S -1A 7.30 531 g/h 30.94
G31 37 mbar 1R - 2S -1A 7.30 521 g/h 23.80
G31
Rapide
Semi Rapide
Auxiliaire
Rapide
Semi Rapide
Auxiliaire
Rapide
Semi Rapide
Auxiliaire
Configuration du modèle
4
BRÛLEURS
Marque de
l'injecteur
115Y
95Z
72X
85
63
50
85
63
50
Puissance
thermique
nominale
kW
3.00
1.65
1.00
3.00
1.65
1.00
3.00
1.65
1.00
Puissance thermique
nominale
(kW)
Consommation
nominale
286 l/h
157 l/h
95 l/h
214 g/h
120 g/h
71 g/h
218 g/h
118 g/h
73 g/h
Consommation
totale nominale
Puissance
thermique
réduite
kW
0.60
0.35
0.30
0.60
0.35
0.30
0.60
0.35
0.30
CATÉGORIE II2E+3+
Pression du gaz
mbar
17 20 25
20 28-30 35
25 37 45
Air nécessaire (m
combustion de 1 m de gaz
.xam.mon.nim
3
)
à la
3
TATION ELECTRIQUE
S
S
R
A
: 220-240V~ 50/60Hz 0,6W
642 TEC IX/HA
14
Page 15

Mise en marche et utilisation
Rapide (R)
Semi Rapide (S)
Auxiliaire (A)
24 - 26
16 - 24
8 - 14
Brûleurs Ø Diamètre de récipients (cm)
Précautions et conseils
FR
! La position du brûleur gaz ou correspondante est indiquée sur chaque
manette.
Brûleurs à gaz
Chaque manette permet de régler le brûleur sélectionné comme suit :
● Eteint
Maximum
Minimum
Pour allumer un brûleur, approchez une amme ou un allume-gaz, appuyez à
fond et tournez la manette correspondante dans le sens inverse des aiguilles
d’une montre pour sélectionner la position de puissance maximale.
Sur les modèles équipés d’un dispositif de sécurité gaz, appuyez pendant
au moins 2-3 secondes de suite sur la manette pour permettre au dispositif
de se réchauffer.
Modèles sont équipés d’un allumage intégré à l’intérieur de la manette.
Pour allumer le brûleur choisi, appuyez d’abord à fond sur la manette
correspondante et tournez-la ensuite dans le sens contraire des aiguilles
d’une montre jusqu’à la position puissance maximum, continuez à appuyer
jusqu’à ce qu’il y ait allumage.
! En cas d’extinction accidentelle des ammes du brûleur, tournez la manette
jusqu’à l’arrêt et attendez au moins 1 minute avant de tenter de rallumer.
Pour éteindre le brûleur tournez la manette dans le sens des aiguilles d’une
montre pour la ramener en face du symbole “●”.
Conseils pratiques pour l’utilisation des brûleurs
Pour obtenir un meilleur rendement, n’oubliez pas :
• D’utiliser des récipients appropriés à chaque brûleur (voir tableau) pour
éviter que les ammes ne dépassent de sous les casseroles.
• De toujours utiliser des casseroles à fond plat et avec couvercle.
• De tourner la manette dans la position minimum au moment de l’ébullition.
Pour distinguer le type de brûleur reportez-vous aux dessins gurant dans le
paragraphe “Caractéristiques des brûleurs et des injecteurs”.
• Pour un maximum de stabilité, assurez-vous systématiquement que les
supports de la poêle soient bien xés et que chaque poêle soit centrée
sur son brûleur.
• Les poignées des poêles doivent être alignées avec les barres de support.
• Les poignées des poêles doivent être positionnées de façon à ne pas
dépasser de l’avant de la cuisinière.
L’aspect le plus variable en termes
de stabilité des casseroles peut
être la casserole elle-même (ou son
positionnement durant son utilisation). Des
casseroles correctement équilibrées, avec
des fonds plats, centrées sur le brûleur,
avec les poignées positionnées en ligne
avec l’un des fers de la grille offrent bien sûr le maximum de stabilité.
! Cet appareil a été conçu et fabriqué conformément aux normes
internationales de sécurité. Ces conseils sont fournis pour des raisons de
sécurité et doivent être lus attentivement.
Sécurité générale
• Ce mode d’emploi concerne un appareil à encastrer classe 3.
• Pour bien fonctionner, les appareils à gaz ont besoin d’un apport d’air
régulier. Il est important de vérier lors de leur installation, que tous
les points indiqués dans le paragraphe relatif à leur “Positionnement”
soient respectés.
• Les instructions fournies ne sont applicables qu’aux pays dont
les symboles sont reportés dans la notice et sur la plaquette
d’immatriculation.
• Cet appareil a été conçu pour un usage familial, de type non
professionnel.
• Cet appareil ne doit pas être installé en extérieur, même dans un endroit
abrité, il est en effet très dangereux de le laisser exposé à la pluie et aux
orages.
• Ne touchez pas à l’appareil si vous êtes pieds nus ou si vous avez les
mains ou les pieds mouillés ou humides.
• Cet appareil qui sert à cuire des aliments ne doit être utilisé que
par des adultes conformément aux instructions du mode d’emploi.
Toute autre utilisation (comme par exemple le chauffage d’une
pièce) est impropre et donc dangereux. Le fabricant décline toute
responsabilité en cas de dommages provoqués par un usage
impropre ou erroné.
• Les orices ou les fentes d’aération ou d’évacuation de la chaleur ne
doivent pas être bouchés
• Contrôlez toujours que les manettes sont bien dans la position “●”/“○”
quand l’appareil n’est pas utilisé.
• Ne tirez surtout pas sur le câble pour débrancher la che de la prise de
courant.
• N’effectuez aucune opération de nettoyage ou d’entretien sans avoir
auparavant débranché la che de la prise de courant.
• En cas de panne, n’essayez en aucun cas d’accéder aux mécanismes
internes pour tenter de réparer l’appareil. Contactez le service d’Assistance
(voir Assistance).
• N’abaissez pas le couvercle en verre (s’il y en a un) tant que les brûleurs
gaz ou la plaque électrique sont chauds.
• Cet appareil n’est pas prévu pour être utilisé par des personnes (y
compris les enfants) dont les capacités physiques, sensorielles ou
mentales sont réduites, ou des personnes dénuées d’expérience ou de
connaissance, sauf si elles ont pu bénécier, par l’intermédiaire d’une
personne responsable de leur sécurité, d’une surveillance ou d’instructions
préalables concernant d’utilisation de l’appareil.
• S’assurer que les enfants ne jouent pas avec l’appareil.
• Le dispositif n’est pas destiné à être mis en œuvre par une minuterie
externe ou un système de télécommande séparée.
Mise au rebut
• Mise au rebut du matériel d’emballage : conformez-vous aux
réglementations locales, les emballages pourront ainsi être recyclés.
• La Directive Européenne 2012/19/EU sur les Déchets des Equipements
Electriques et Electroniques (DEEE), exige que les appareils ménagers
usagés ne soient pas jetés dans le ux normal des déchets municipaux.
Les appareils usagés doivent être collectés séparément an d’optimiser le
taux de récupération et le recyclage des matériaux qui les composent et
réduire l’impact sur la santé humaine et l’environnement. Le symbole de
la ‘‘poubelle barrée’’ est apposée sur tous les produits pour rappeler les
obligations de collecte séparée. Les consommateurs devront contacter
15
Page 16

FR
les autorités locales ou leur revendeur concernant la démarche à suivre
pour l’enlèvement de leur vieil appareil.
Economies et respect de l’environnement
• Faites cuire vos aliments dans des casseroles ou des poêles à couvercle
et utilisez le moins d’eau possible. Faire cuire les aliments dans des
casseroles ouvertes augmente considérablement la consommation
d’énergie.
• Utilisez exclusivement des casseroles et poêles à fond plat.
• Si vous cuisinez un aliment qui nécessite beaucoup de temps, il est
préférable d’utiliser un autocuiseur qui est deux fois plus rapide et
économise un tiers de l’énergie.
Entretien robinets gaz
Il peut arriver qu’au bout d’un certain temps, un robinet se bloque ou tourne
difcilement. Il faut alors le remplacer.
! Cette opération doit être effectuée par un technicien agréé par le fabricant.
Anomalies et remèdes
Il peut arriver que l’appareil ne fonctionne pas ou ne fonctionne pas très bien.
Avant d’appeler le service après-vente, voyons ensemble que faire. Vériez
avant tout s’il n’y a pas de coupure de gaz ou de courant, et si les robinets
du gaz en amont de l’appareil sont bien ouverts.
Nettoyage et entretien
Mise hors tension
Avant toute opération de nettoyage ou d’entretien coupez l’alimentation
électrique de l’appareil.
Nettoyage de la surface de la table de cuisson
• Nettoyez les parties émaillées et en verre à l’eau chaude en utilisant un
peu de détergent neutre.
• Si les surfaces en acier inoxydable restent trop longtemps en contact avec
de l’eau calcaire ou des détergents corrosifs, des taches risquent de se
former. Eliminez tout débordement de liquide (eau, sauce, café, etc.) avant
qu’il ne sèche.
• Nettoyez à l’eau chaude en utilisant un détergent neutre, puis essuyez à
l’aide d’un chiffon doux ou d’une peau de chamois. Eliminez les résidus
carbonisés à l’aide d’un produit de nettoyage spécial pour surfaces en
acier inoxydable.
• Nettoyez l’inox uniquement avec un chiffon doux ou une éponge.
• N’utilisez en aucun cas de produits abrasifs ou corrosifs, de produits
chlorés ou de tampons à récurer.
• N’utilisez pas d’appareils de nettoyage à la vapeur.
• N’utilisez pas de produits inammables.
• Essuyez immédiatement les substances acides ou alcalines, telles que
vinaigre, moutarde, sel, sucre ou jus de citron, qui se sont déposées sur
la table de cuisson.
Nettoyage des elements de la table de cuisson
• Nettoyez les parties émaillées et en verre uniquement avec un chiffon
doux ou une éponge.
• Les grilles, les chapeaux des brûleurs et les brûleurs peuvent être retirés
pour être nettoyés.
• Lavez-les à la main, à l’eau chaude en utilisant un détergent non abrasif.
Veillez à éliminer soigneusement tous les résidus d’aliments et assurez-
vous qu’aucune des ouvertures des brûleurs n’est obstruée.
• Rincez et séchez.
• Réinstallez les brûleurs et les chapeaux des brûleurs dans leurs logements
respectifs.
• Au moment de réinstaller les grilles, assurez-vous que celles-ci sont
alignées par rapport au brûleur.
• Sur les modèles équipés de bougies d’allumage électriques et de dispositif
de sécurité, veillez à nettoyer soigneusement l’extrémité de la bougie
pour garantir son bon fonctionnement. Vériez régulièrement l’état de
ces éléments et nettoyezles à l’aide d’un chiffon humide, si nécessaire.
Eliminez tout résidu d’aliment à l’aide d’un cure-dent ou d’une aiguille.
Le brûleur ne s’allume pas ou la amme n’est pas uniforme.
Avez-vous contrôlé si :
• les orices de sortie du gaz ne sont pas par hasard bouchés.
• les pièces amovibles composant le brûleur sont bien montées
correctement.
• il y a des courants d’air dans les environs du plan de cuisson
La amme s’éteint dans les versions équipées de sécurité de amme.
Avez-vous contrôlé si :
• vous avez bien appuyé à fond sur la manette.
• vous avez bien appuyé à fond sur la manette pendant un laps de temps
sufsant pour permettre l’activation du dispositif de sécurité.
• les orices de sortie du gaz situés en face du dispositif de sécurité ne sont
pas par hasard bouchés.
Le brûleur s’éteint quand il est réglé sur la position de minimum.
Avez-vous contrôlé si :
• les orices de sortie du gaz ne sont pas par hasard bouchés
• il y a des courants d’air dans les environs du plan de cuisson
• les minima n’ont pas bien été réglés.
Les casseroles sont instables.
Avez-vous contrôlé si :
• le fond de la casserole est parfaitement plat
• la casserole est bien placée au centre du brûleur
• la position des grilles n’a pas par hasard été inversée.
! Pour ne pas endommager le dispositif d’allumage électrique, actionnezle uniquement lorsque les brûleurs ont été remis en place.
16
Page 17

Установка
! Важно сохранить данное руководство для его последующих
консультации. В случае продажи, передачи изделия или при переезде
на новое место жительства необходимо проверить, чтобы руководство
оставалось вместе с изделием, для того чтобы его новыи владелец
мог ознакомиться с правилами эксплуатации и с соответствующими
предупреждениями.
! Внимательно прочитайте инструкции: в них содержатся важные
сведения об установке, эксплуатации и безопасности изделия.
Расположение
! Не разрешайте детям играть с упаковочными материалами.
Упаковочные материалы должны быть уничтожены в соответствии
с правилами раздельного сбора мусора (см. Предосторожности и
рекомендации).
! Монтаж изделия производится в соответствии с данными инструкциями
квалифицированными специалистами. Неправильный монтаж изделия
может стать причиной повреждения имущества и причинить ущерб
людям и домашним животным.
! Данное изделие может быть установлено и использоваться только в
помещениях с постоянной вентиляциеи в соответствии с положениями
действующих Нормативов. Необходимо соблюдать следующие
требования:
• В помещении должна быть предусмотрена система дымоудаления
в атмосферу, выполненная в виде вытяжного зонта или
электровентилятора, автоматически включающихся каждый раз,
когда включается изделие.
• Сжиженный газ пропан-бутан тяжелее воздуха и следовательно
застаивается внизу. По этой причине помещения, в которых
установлены баллоны с СНГ (сжиженным натуральным газом)
должны иметь вентиляционные отверстия внизу, сообщающиеся с
улицеи, для удаления возможных утечек газа. Поэтому баллоны с СПГ
должны быть опорожнены или оставаться частично заполненными;
они не должны размещаться или храниться в подземных помещениях
и хранилищах (подвалах, и т.д.). Следует держать в помещении только
один рабочий баллон, расположенный таким образом, чтобы он не
подвергался прямому воздействию источников тепла (печеи, каминов
и т.д.), которые могут привести к нагреву баллона свыше 50°C.
Встроенный монтаж
Для правильного монтажа варочной панели необходимо соблюдать
следующие меры предосторожности:
• Кухонные элементы, расположенные рядом с кухонной плитой,
высота которых превышает уровень варочной панели, должны
находиться на расстояние не менее 200 мм от края варочной панели.
• Bытяжка должна быть установлена в соответствии с руководством
по эксплуатации вытяжки и в любом случае на высоте не менее 650
мм от кухонного топа (см. рисунок).
• Pасположите навесные шкафы, прилегающие к вытяжке, на высоте
не менее 420 мм от рабочей поверхности кухни (см. рисунок).
Если варочная панель устанавливается
под навесным шкафом, последнии должен
600mm min.
располагаться на высоте не менее 700 мм
от кухонного топа.
650mm min.
420mm min.
• Полость установка должна иметь размеры указаны на рисунке.
RU
B камин или в дымоход с медным покрытием
(для кухонных устpойств для приготовления пищи)
Нeпосредствeннo
в aтмосфepy
• В помещении должна быть предусмотрена система, обеспечивающая
достаточный приток воздуха для надлежащего горения. Расход
воздуха, необходимого для горения, должен быть не менее 2 м3/час
на кВт установленной мощности.
Приток воздуха может обеспечиваться
непосредственно снаружи здания через
воздуховод полезным сечением не менее
100 см2 и диаметром, исключающим
A
Пpимepы вeнтиляциoнных
отвepстий для притокa
вoздyхa для гоpeния
Cмeжное
помещение
Вентилируемое
помещение
возможность случаиного засорения.
Или же воздухозабор может
осуществляться из смежных помещении,
оснащенных вентиляционным отверстием,
сообщающимся с улицеи, как описано
выше, при условии, что это не общие зоны
здания, пожароопасные помещения и не
Увеличение зазора
между дверъю и полом
спальни.
• Интенсивное и длительное использование устройства может
потребовать дополнительной вентиляции, например, открытие окна
или более эффективная вентиляция с повышением механической
мощности вытяжки, если она уже существует.
ПРИМЕЧАНИЕ: В случае установки вытяжки над варочной панелью
необходимо соблюдать размеры, указанные в руководстве для вытяжки.
• Очистите поверхность варочной панели по всему периметру и
проложите вдоль него входящую в комплект поставки прокладку, как
показано на рисунке.
Установите варочную панель в выемку в столешнице, вырезанную по
размерам, указанным в Руководстве.
ПРИМЕЧАНИЕ: Длина сетевого шнура должна быть достаточной для
того, чтобы панель можно было снять через верх.
Для крепления варочной панели используйте скобы (A), входящие в
комплект поставки. Вставьте скобы в соответствующие отверстия (они
обозначены стрелкой) и закрепите их винтами в соответствии с толщиной
столешницы (см. рисунки ниже).
17
Page 18

RU
Top 20 mm
Top 30-50 mm
• Если варочная панель не устанавливается сверху встроенного
духового шкафа, необходимо вставить деревянную панель в качестве
изоляции. Эта панель должна быть установлена на расстоянии не
менее 20 мм от нижнеи части варочнои панели.
Вентиляция
Для обеспечения надлежащеи вентиляции необходимо снять заднюю
панель ниши кухонного элемента. Рекомендуется установить духовой
шкаф на два деревянных бруска или на сплошное основание с
отверстием диаметром не менее 45х560 мм (см чертежи).
45 mm.
560 mm.
! Варочная панель может быть установлена только над встраиваемыми
духовыми шкафами с охладительной вентиляцией.
Электрическое подключение
Варочные панели, оснащенные трехполярным сетевым кабелем,
рассчитаны на функционирование с переменным током с напряжением
и частотой электропитания, указанными на паспортной табличке
(расположенной снизу варочной панели). Провод заземления сетевого
кабеля имеет желто-зеленый цвет. В случае установки варочной
панели сверху духового шкафа, встроенного в кухонный элемент,
электрическое подсоединение варочной панели и духового шкафа
должно выполняться раздельно по причинам безопасности, а так же
для легкого съема духового шкафа.
Подсоединение сетевого шнура изделия к сети электропитания
Установите на сетевой кабель нормализованную штепсельную вилку,
расчитанную на нагрузку, указанную на паспортной табличке. В случае
прямого подключения к сети электропитания между изделием и сетью
необходимо установить многополюсный выключатель с минимальным
расстоянием между контактами 3 мм, расчитанный на данную нагрузку
и соответствующии действующим нормативам (выключатель не
должен размыкать провод заземления). Сетевой кабель должен быть
расположен таким образом, чтобы ни в одной точке его температура не
превышала температуру помещения более чем на 50°C.
! Электромонтер несет ответственность за правильное подключение
изделия к электрической сети и за соблюдение правил безопасности.
Перед подключением изделия к сети электропитания проверьте
следующее:
• розетка должна быть соединена с заземлением и соответствовать
нормативам;
• сетевая розетка должна быть рассчитана на максимальную
потребляемую мощность изделия, указанную в таблице технических
характеристик;
• напряжение и частота тока сети должны соответствовать
электрическим данным изделия;
• сетевая розетка должна быть совместима со штепсельной вилкой
изделия. В противном случае замените розетку или вилку; не
используите удлинители или тройники.
! Изделие должно быть установлено таким образом, чтобы электрический
провод и сетевая розетка были легко доступны.
! Электрический провод изделия не должен быть согнут или сжат.
! Регулярно проверяйте состояние кабеля электропитания и в случае
необходимости получите его замену только уполномоченным техникам
(см. Техническое обслуживание).
! Производитель не несет ответственности за последствия несоблюдения
перечисленных выше требовании.
Подсоединение к газопроводу
Данное изделие может быть установлено и использоваться только в
помещениях с постоянной вентиляцией в соответствии с положениями
действующих Нормативов, только после проверки соответствия изделия
типу газа, к которому он подсоединяется. В случае несоответствия
выполнить операции, описанные в параграфе “Настройка на различные
типы газа”. В случае использования сжиженного газа из баллона
использовать регуляторы давления, соответствующие нормативами и
их последующим поправкам.
! Для надежного функционирования, рационального использования
энергии и более длительного срока службы электрического изделия
проверьте, чтобы давление подачи газа соответствовало значениям,
указанным в таблице 1 “Характеристики газовых горелок и форсунок”.
Внимание!: Перед подсоединением снимите транспортировочную
заглушку с трубопровода газовой плиты.
Подсоединение при помощи твердой трубки (медной или стальной)
! Подсоединение к газопроводу не должно оказывать каких-либо нагрузок
на изделие.
На патрубке подачи газа в изделия имеется вращающееся колено “L”
с уплотнительной прокладкой. При необходимости повернуть колено
обязательно замените уплотнительную прокладку (прилагающейся
к изделию). Патрубок подачи газа в изделие имеет цилиндрическую
наружную резьбу 1/2 газ.
Подсоединение при помощи гибкой трубки из нержавеющеи стали
со сплошными стенками с резьбовыми соединениями.
Патрубок подачи газа в изделие имеет цилиндрическую наружную
резьбу 1/2 газ.
Подсоединение таких шлангов должно производиться таким образом,
чтобы их длина при максимальном растяжении не превышала 2000 мм.
По завершении подсоединения проверьте, чтобы металлическии гибкии
шланг не касался подвижных частей или не был сжат.
Использовать исключительно трубки, соответствующие Нормативу,
и уплотнительные прокладки, соответствующие действующим
государственным нормативам.
18
Page 19

Проверка уплотнения
! По завершении подсоединения проверьте прочность уплотнения всех
патрубков при помощи мыльного раствора, но никогда не пламенем.
Подготовка к различным типам газа
Для переоснащения варочнои панели для газа, отличающемуся от газа,
на который варочная панель расчитана изначально (указан на этикетке
на верхней части варочной панелй или на упаковке), необходимо
заменить форсунки конфорок следующим образом:
1. Cнимите с варочной панели опорные решетки и выньте конфорки из
своих гнезд.
2. Oтвинтите форсунки при помощи торцевого ключа соответствующего
размера и замените их на форсунки, расчитанные на новыи тип газа
(смотрите таблицу 1 “Характеристики конфорок и форсунок”).
3. Восстановить детали на свои места, выполняя операции в обратном
порядке.
4. По завершении операции замените старую этикетку тарирования на
новую, соответствующую новому типу используемого газа. Этикетку
можно заказать в наших Центрах Технического Обслуживания.
• Регуляция первичного воздуха конфорок
Конфорки не нуждаются в какой-либо регуляции первичного воздуха.
• Регуляция минимального пламени
1. Поверните рукоятку-регулятор в положение минимального пламени.
2. Снимите рукоятку и поверните
регуляционный винт, расположенный
внутри или рядом со стержнем крана,
вплоть до получения стабильного малого
пламени.
RU
3. Проверьте, чтобы при резком повороте рукоятки из положения
максимального пламени на минимальное, конфорки не гасли.
4. В изделиях, оснащенных защитным устройством (термопарой), в
случае неисправности этого устройства при минимальном пламени
конфорок увеличьте расход газа минимального пламени при помощи
регуляционного винта.
5. По завершении регуляции восстановите сургучные или подобные
пломбы на обводном газопроводе.
! В случае использования сжиженного газа регуляционный винт должен
быть завинчен до упора..
! По завершении операции замените старую этикетку тарирования на
новую, соответствующую новому типу используемого газа. Этикетку
можно заказать в наших Центрах Технического Обслуживания.
! Если давление используемого газа отличается от предусмотренного
давления (или варьирует), необходимо установить на питающем
газопроводе соответствующии регулятор давления (в солaсно
действующим Нормативам).
19
Page 20

RU
Характеристики конфорок и форсунок
ЭЛЕКТРОПИТАНИЕ:
Таблица 1
КАТЕГОРИЯ II2H3+
Тип
используемого
Тип горелки
Маркировка
инжекторов
газа
ПРИРОДНЫЙ ГАЗ
(метан)
G20
СЖИЖЕННЫЙ
НЕФТЯНОЙ ГАЗ
(бутан)
G30
СЖИЖЕННЫЙ
НЕФТЯНОЙ ГАЗ
(пропан)
Тип используемого
G20 20 мбар 1R - 2S -1A 7.30 695 л/час 9.52
G30 28-30 мбар 1R - 2S -1A 7.30 531 g/h 30.94
G31 37 мбар 1R - 2S -1A 7.30 521 g/h 23.80
G31
газа
Большая
Средняя
Малая
Большая
Средняя
Малая
Большая
Средняя
Малая
Конфигурация модели
4 ГОРЕЛКИ
220-240В~ 50/60Гц 0,6
115Y
95Z
72X
85
63
50
85
63
50
Номинальная тепловая
Номинальная
мощность kW
Вт
тепловая
мощность
кВт
3.00
1.65
1.00
3.00
1.65
1.00
3.00
1.65
1.00
Номинальный
расход
286 л/час
157 л/час
95 л/час
218 г/час
120 г/час
73 г/час
214 г/час
118 г/час
71 г/час
Общий номинальный
расход газа
Пониженная
Давление газа
тепловая
нагрузка
кВт
0.60
0.35
0.30
0.60
0.35
0.30
0.60
0.35
0.30
Воздух (м³), необходимый для
сгорания 1 м³ газа
17 20 25
20 28-30 35
25 37 45
мбар
.скам.нимон.ним
S
S
642 TEC IX/HA
R
A
20
Page 21

Включение и эксплуатация
! На каждом регуляторе показано положение газовой конфорки, которой
данная рукоятка управляет.
Газовые конфорки
При помощи соответствующего регулятор можно выбрать один из
следующих режимов конфорки:
● Выключено
Наиболее изменчивой характеристикой
кастрюли с точки зрения стабильности
часто может быть сама кастрюля (или ее
размещение во время использования).
Хорошо сбалансированные кастрюли,
с плоским днищем, с ручками,
расположенными линейно с одним из
ребер решетки, гарантируют максимальную стабильность.
RU
Максимальная мощность
Минимальная мощность
Для зажигания одной из конфорок поднесите к ней зажженную спичку
или зажигалку, нажмите до упора и поверните против часовой стрелки
соответствующую рукоятку в положение максимального пламени.
В моделях, оснащенных защитным устройством, необходимо держать
рукоятку конфорки нажатой примерно 2-3 секунды до тех пор, пока
не нагреется устройство, автоматически поддерживающее горение
пламени. Mодели оснащены устройством зажигания, встроенным внутри
рукоятки. В этом случае варочная панель оснащена свечой зажигания,
а не кнопкой. Для включения нужной конфорки достаточно нажать до
упора соответствующую рукоятку и повернуть ее против часовой стрелки
в положение максимального пламени, удерживая ее нажатой вплоть до
зажигания пламени.
! При случайном гашении пламени конфорки поверните рукоятку
управления в положение выключено и попытаитесь вновь зажечь
конфорку только по прошествии 1 минуты.
Для выключения конфорки поверните рукоятку по часовой стрелке
вплоть до гашения пламени (положение, обозначенное символом “●”).
Практические советы по эксплуатации газовых
горелок
Для максимальной отдачи изделия следует помнить:
• Для каждой конфорки используите подходящую посуду (смотри
таблицу) с тем, чтобы пламя конфорки не выходило из-под дна
посуды.
• Всегда используите посуду с плоским дном и с крышкой.
• В момент закипания поверните рукоятку в положение малого
пламени.
Конфорка
Быстрая (Большая)(R)
Средняя (S)
Малая (A)
Для определения типа конфорки смотрите рисунки в параграфе
“Характеристики конфорок и форсунок”.
• Для гарантии максимальной стабильности убедитесь, что варочные
емкости установлены правильно и что каждая емкость находится
строго в центре горелки.
• Убедитесь, что рукоятки варочных емкостей совмещены с одним из
опорных стержней держателя емкости.
• Расположите рукоятки варочных емкостей так, чтобы они не
выступали за передний край варочной панели.
Ø Диаметр кастрюли (см)
24 - 26
16 - 22
8 - 14
Предосторожности и рекомендации
! Изделие спроектировано и изготовлено в соответствии с
международными нормативами по безопасности. Необходимо
внимательно прочитать настоящие предупреждения, составленные в
целях вашей безопасности.
Общие требования к безопасности
• Данное устройство является встраиваемым бытовым
электроприбором класса 3.
• Для исправного функционирования газовых устройств
необходимо отрегулировать воздухообмен. Проверьте, чтобы
при установке этих устройств соблюдались требования,
описанные в параграфе “Расположение”.
• Инструкции относятся только к странам, обозначения которых
приведены в руководстве и на паспортной табличке изделия.
• Данное изделие предназначается для непрофессионального
использования в домашних условиях.
• Запрещается устанавливать изделие на улице, даже под навесом,
так как воздействие на него дождя и грозы является чрезвычаино
опасным.
• Не прикасайтесь к изделию влажными руками, босиком или с мокрыми
ногами.
• Изделие предназначено для приготовления пищевых
продуктов, может быть использовано только взрослыми
лицами в соответствии с инструкциями, приведенными
в данном техническом руководстве. Любое другое его
использование (например: отопление помещения) считается
ненадлежащим и следовательно опасным. Производитель
не несет ответственности за возможный ущерб, вызванный
ненадлежащим, неправильным и неразумным использованием
изделия.
• Следите, чтобы сетевые шнуры других бытовых электроприборов не
прикасались к горячим частям духового шкафа.
• Не закрывайте вентиляционные решетки и отверстия рассеивания
тепла.
• Всегда проверяите, чтобы регуляторы находились в положении “●”/“○”
, когда изделие не используется.
• Не тяните за сетевой кабель для отсоединения вилки изделия из
сетевой розетки, возьмитесь за вилку рукой.
• Перед началом чистки или технического обслуживания изделия
всегда вынимайте штепсельную вилку из сетевой розетки.
• В случае неисправности категорически запрещается открывать
внутренние механизмы изделия с целью их самостоятельного
ремонта. Обращаитесь в Центр Сервисного обслуживания (см.
Техобслуживание).
• Не закрывайте стеклянную крышку варочной панели (если она
имеется), если газовые или электрические конфорки еще горячие.
21
Page 22

• Не допускается эксплуатация изделия лицами с ограниченными
RU
физическими, сенсориальными или умственными способностями
(включая детей), неопытными лицами или лицами, необученными
обращению с изделием без контроля со стороны лица, ответственного
за их безопасность или после надлежащего обучения обращению с
изделием.
• Не разрешайте детям играть с бытовым электроприбором.
• Изделие не рассчитано на влючение посредством внешнего
синхронизатора или отдельной системы дистанционного
управления
Утилизация
• Уничтожение упаковочных материалов: соблюдайте местные
нормативы с целью повторного использования упаковочных
материалов.
• Согласно Европейской Директиве 2012/19/EU касательно утилизации
электронных и электрических электроприборов электроприборы
не должны выбрасываться вместе с обычным городским мусором.
Выведенные из строя приборы должны собираться отдельно
для оптимизации их утилизации и рекуперации составляющих
их материалов, а также для безопасности окружающеи среды и
здоровья. Символ зачеркнутая мусорная корзинка, имеющиися на
всех приборах, служит напоминанием об их отдельной утилизации.
Для получения дополнительной информации о правильной
утилизации бытовой техники, владельцы должны связаться со своим
местным властям или продавцу.
Экономия электроэнергии и охрана окружающей
среды
• Храните продукты в закрытых горшках или кастрюлях с плотно
закрывающимися крышками и используйте минимальное количество
воды. В случае приготовления без крышки будет иметь место
потребление значительного количества энергии.
• Используйте горшки и кастрюли с совершенно плоским дном.
• В случае приготовления блюда в течение длительного времени
следует использовать скороварку, которая готовит в два раза быстрее
и позволяет сберечь треть энергии.
Транспортировка и хранение.
• Bарочные панели должны перевозиться в оригинальной упаковке в
горизонтальном положении.
• Во время транспортировки и хранения защищать варочные панели
от атмосферного воздействия и механических повреждений.
• Панель должна храниться в упакованном виде в не отапливаемом
помещении при температуре от минус 50°С до плюс 40°С.
• Мойте панель теплой водой с добавлением нейтрального моющего
средства, затем протирайте ее мягкой тряпкой или замшей.
Пригоревшие загрязнения удаляйте специальными средствами для
чистки поверхностей из нержавеющей стали.
• Чистите поверхности из нержавеющей стали только мягкой тряпкой
или губкой.
• Не пользуйтесь абразивными и коррозионными средствами,
чистящими средствами на основе хлора или металлическими
мочалками для чистки сковород.
• Не пользуйтесь пароочистителями.
• Не пользуйтесь горючими веществами.
• Не оставляйте на варочной панели следов кислых или щелочных
веществ, таких как уксус, горчица, соль, сахар, лимонный сок и т.п.
Чистка компонентов варочной панели
• Чистите эмалированные и стеклянные детали только мягкой тряпкой
или губкой.
• Решетки, крышки горелок и сами горелки перед чисткой можно снять.
• Вымойте их вручную теплой водой с неабразивным моющим
средством. При этом тщательно удалите все остатки пищи и
убедитесь в том, что ни одно отверстие горелок не осталось
засоренным.
• Промойте под проточной водой и тщательно высушите.
• Правильно вставьте горелки и крышки горелок в соответствующие
гнезда.
• При установке решеток на место проследите за тем, чтобы они были
правильно выставлены относительно горелок.
• Для обеспечения нормальной работы варочных панелей, снабженных
свечами электророзжига и предохранительными устройствами,
требуется особая тщательность при очистке концов свечей. Следует
часто проверять состояние этих деталей и, если нужно, чистить их
влажной тканью. Пригоревшие остатки пищи следует удалять с
помощью зубочистки или иглы.
! Во избежание повреждения устройства электророзжига не
пользуйтесь им, когда горелки вынуты из своих гнезд.
Уход за рукоятками газовой варочной панели
Со временем рукоятки варочной панели могут заблокироваться или
вращаться с трудом, поэтому потребуется произвести их внутреннюю
чистку и замену всей рукоятки.
! Данная операция должна выполняться техником, уполномоченным
производителем.
Техническое обслуживание и уход
Обесточивание изделия
Перед началом какой-либо операции по обслуживанию или чистке
отсоедините изделие от сети электропитания.
Чистка поверхности варочной панели
• Все эмалированные и стеклянные детали следует промывать теплой
водой с добавлением нейтрального моющего средства.
• После продолжительного контакта с водой, в которой содержится
известь, или с едкими моющими средствами на поверхностях из
нержавеющей стали могут остаться пятна. Все попадающие на
варочную панель брызги (воды, соусов, кофе и т.д.) следует удалять
до того, как они высохнут.
22
Неисправности и методы их
устранения
Может случиться, что варочная панель не работает или работает плохо.
Перед обращением в сервисный центр давайте посмотрим, что вы
можете сделать сами. Во-первых, убедитесь, что нет разрывов в энергои газоснабжении, и, в частности, что газовые краны панели открыты.
Конфорка не загорается или пламя не однородно.
Убедитесь, что:
• Форсунки газовой конфорки засорились.
• Все движущиеся части конфорки установлены правильно
• Рядом с варочной панелью нет сквозняков.
Page 23

В моделях варочной панели, оснащенных защитным устройством,
конфорка загорается и сразу гаснет.
Убедитесь, что:
• Вы до упора нажали ручку.
• Вы до упора нажали ручку в течение достаточного времени, чтобы
активировать устройство безопасности.
• Отверстия выхода газа в точке нахождения предохранительного
устройства не заблокированы.
Конфорка в положении минимума не будет гореть.
Убедитесь, что:
• Отверстия выхода газа не засорены.
• Рядом с варочной панелью нет сквозняков.
• Регулировка минимального значения неправильная.
Нестабильные кастрюли
Убедитесь, что:
• Дно кастрюли идеально ровное.
• Кастрюля должна быть установлена по центру газовои или
электрическои конфорки.
• Опорные решетки на варочной панели установлены неправильно.
RU
23
Page 24

Орнату
Top 20 mm
Top 30-50 mm
KZ
! Жаңа құрылғыны іске қоспас бұрын нұсқаулық кітапшасын мұқият оқып
шығыңыз. Мұнда құрылғыны қауіпсіз қолдану, орнату және оны күту
туралы маңызды ақпараттар қамтылған.
! Келешекте анықтама ретінде қарау үшін пайдалану нұсқаулығын сақтап
қойыңыз. Оны құрылғының кез келген жаңа иесіне беріңіз.
Орналастыру
! Орау материалдарын балалардың қолы жетпейтін жерде сақтаңыз.
Тыныс тарылу немесе тұншығып қалу қаупін туғызуы мүмкін
("Сақтандырулар мен кеңестер" бөлімін қараңыз).
! Құрылғыны нұсқауларға сәйкес арнайы біліктілігі бар маман орнатуға
тиіс. Құрылғы дұрыс орнатылмаған жағдайда, адамдар мен жануарлар
өміріне қауіп төндіруі немесе мүлікті зақымдауы мүмкін.
! Бұл құрылғы ағымдағы ұлттық ережелерге сәйкес тұрақты желдетілген
бөлмелерде ғана орнатылуы және пайдаланылуы тиіс. Келесі талаптар
сақталуы тиіс:
• Бөлме кез келген түтіндерді айдап шығарып жіберетін ауаны тартып
алу жүйесімен жабдықталуы тиіс. Ол құрылғы қосылған кезде
автоматты түрде қосылатын электр желдеткіштен немесе қалқадан
тұруы мүмкін.
жоғары температураға дейін ысытып жіберуі мүмкін сыртқы қайнар
көздері (пештер, каминдер және т.б.) шығаратын қызудан аулақ
орналастырып, сақтаған абзал.
Құрылғыны орнату
Плитаны орнатқан кезде төмендегі сақтық шаралар орындалуы тиіс:
• Құрылғы маңында тұрған және плитаның үстіңгі жағына қарағанда
биік ас үйі шкафтары плитаның шетінен кем дегенде 200 мм-ге алыс
орналасуы тиіс.
• Қалқалар тиісті орнату нұсқаулықтарына сәйкес және плитадан кем
дегенде 650 мм ара қашықтықта орнатылуы тиіс (суретті қараңыз).
• Қалқаның маңында тұратын қабырғаға ілінетін шкафтар плитадан
кем дегенде 420 мм биіктікте орналастырылуы тиіс (суретті қараңыз).
Плита қабырғаға ілінетін шкафтың астында
орнатылатын болса, сол шкаф плитадан
600 мм мин.
кем дегенде 700 мм ара қашықтықта
орналасуы тиіс.
650 мм мин.
420 мм мин.
• Орнату қуысы өлшемдері суретте көрсетілген болуы тиіс.
Мұрша құбырында немесе айыр түтіндікте.
(тек тағам дайындау құрылғылары үшін)
Тікелей
далаға
• Жану процесі қалыпты түрде өтуі үшін ауа керек болғандықтан
бөлмеде тиісті ауа айналымы болуы керек. Ауаның ағымы орнатылған
қуаттың әр кВт бірлігіне 2 м3/сағ мәнінен аз болмауы тиіс.
Ауа айналымы жүйесіне, ішкі диаметрі
кем дегенде 100 см2 болатын түтік арқылы
ауаны тікелей даладан алуына болады;
тесігі кез келген бөгетпен бітеліп қалуға
A
Жануға арналған
ауаның желдету
тесіктерінің мысалдары.
Жапсарлас
бөлме
Желдетілетін
бөлме
бейім болмауы тиіс.
Сондай-ақ, жүйе жануға қажетті ауаны
жанама жолмен қамтамасыз ете алады,
яғни жоғарыда сипатталған ауа айналымы
түтіктерімен жабдықталған жапсарлас
бөлмелерден. Дегенмен, бұл бөлмелер
Терезе мен еден арасындағы
желдету саңылауын кеңейту.
ортақ бөлме, жататын бөлме немесе өрт
қаупі бар бөлмелер болмауы тиіс.
• Құрылғыны қарқынды және ұзақ пайдалану үшін қосымша желдету
қажет болуы мүмкін, мысалы, терезені ашу немесе тиімділігі көбірек
әдіспен – механикалық ауа кіргізу жүйесінің (бар болса) қуатын
арттыру арқылы.
• Сығылған газ ауадан ауыр болғандықтан еденге түседі. Сондықтан,
сығылған газ баллондары тұратын бөлмелер газдың шығуы
жағдайында, ол бөлмеден шығып кетуі үшін вентиляциялық
тесіктермен жабдықталуы тиіс. Сол себепті, сығылған газ баллондары,
жартылай немесе толық болса да, жер деңгейінен төмен бөлмелерде
не сақтау аумақтарында (төле және т.б.) орнатылмауы немесе
сақталмауы тиіс. Тек пайдаланылуда болған баллонды, оны 50°C-тан
24
ЕСКЕРТУ: Қақпақты плитаның үстіне орнатқан жағдайда қақпақ
нұсқаулығынан дұрыс қашықтықты қараңыз.
• Бетті тазалап болғаннан кейін ұсынылған тығыздатқышты плитаға
суретте көрсетілгендей жағыңыз.
Плитаны нұсқаулықта көрсетілген өлшемдерге сәйкес жасалған жұмыс
бетіндегі саңылауға орнатыңыз.
ЕСКЕРТПЕ: қуатпен қамту сымы оның жоғары тартылуын мүмкін
ететіндей ұзын болуы тиіс.
Плитаны бекіту үшін, онымен берге берілген кронштейнді (A) пайдаланыңыз.
Кронштейндерді тілшелермен көрсетілген сәйкес ойықтарға орнатыңыз
және жұмыс бетінің қалңыдығына сәйкес берілген бұрандаларды
пайдаланып бекемдеңіз (келесі суреттерді қараңыз).
Page 25

• Плита ендірілген пеш үстіне орнатылмаған жағдайда, оқшаулау үшін
ағаш тақтаны орнату қажет. Оны плитаның астыңғы жағынан кем
дегенде 20 мм ара қашықтықта орналастыру керек.
Желдету
Тиісті желдетудің орнатылғанын тексеру үшін шкафтың артқы қабырғасын
алып тастау қажет. Пешті екі ағаш тақтайға немесе кемінде 45 x 560 мм
ашық тұрған тегіс жерде орналастыру ұсынылады (сызбаны қараңыз).
45 mm.
560 mm.
! Пісіру панелі қоса орнатылатын салқындататын желдеткіші бар духовка
шкафының үстіне қойылады.
Токқа жалғау
Үш ұялы электр кабелі бар плиталар құрылғыда орналасқан негізгі деректер
кестесінде көрсетілген айнымалы ток кернеуімен және жиілікпен жұмыс
істеу үшін жасақталған (ол құрылғының төменгі жағында орналасқан).
Кабельдегі жерге тұйықтау сымы жасыл және сары қапқа оралған. Құрылғы
ендірілген электр пеш үстіне орнатылатын болса, қауіпсіздік себептеріне
сәйкес және пешті алу оңай болуы үшін плитаны және пешті токқа жалғау
бөлек жасалуы керек.
Электр кабелін желіге қосу
Деректер кестесінде көрсетілген жүктемеге сәйкес стандартты
айырғышты орнатыңыз.
Құрылғы тікелей электр желісіне құрылғы мен электр желісі арасында
орнатылған 3 мм ашық кішкене байланыс бар бірнеше каналды
айырып-қосқыш арқылы қосылуы қажет. Айырып-қосқыш көрсетілген
жүктемеге лайықты және ағымдағы ток реттеуіне сәйкес болуы қажет
(жерге қосылған сым айырып-қосқыштан ажыратылмауы тиіс). Электр
кабелін температурасы 50°C-тан жоғары болатын жерден өтпейтіндей
етіп орналастыру қажет.
! Өндіруші жоғарыда аталған ережелер сақталмаған жағдайда барлық
жауапкершіліктен босатылады.
Газды жалғау
Құрылғыны газ жеткізу жүйесіне немесе газ баллонына ағымдағы ұлттық
заңнамаларға сәйкес жалғау қажет. Жалғауды іске асырмас бұрын,
пеш пайдаланғыңыз келетін газ жеткізу жүйесімен сыйысымды екеніне
көз жеткізіңіз. Сыйысымды болмаса, "Газ түрлеріне сәйкестендіру"
параграфындағы нұсқауларды орындаңыз.
Баллоннан сұйық газды пайдаланғанда, ағымдағы ұлттық заңнамаларға
сәйкес келетін қысым реттегішін орнатыңыз.
! Газ беру қысымы 1-кестеде ("Оттық пен форсункалар сипаттары")
көрсетілген мәндерге сәйкес келетінін тексеріңіз. Бұл құрылғының қауіпсіз
жұмыс істеуін және ұзаққа төзуін қамтамасыз ете отырып, қуаттың тиімді
жұмсалуына мүмкіндік береді.
Назар аударыңыз!: Қоспас бұрын газ плитасының құбырынан
тасымалдағыш бітеуішін алыңыз.
Қатты түтік арқылы жалғау (мыс немесе болат)
! Газ жеткізу жүйесіне жалғауды кез келген құрылғыға еш жүк түспейтін
түрде іске асыру керек.
Құрылғының жабдықтары жинағында реттелмелі L-пішініндегі түтік фитингі
бар және оның газдың шығып кетуінің алдын алатын тығыны бар. Түтік
фитингін әр бұраған кезде тығынды орнына қою керек (тығын құрылғымен
бірге беріледі). Газ жеткізу жүйесінің түтік фитингі – 1/2 оймасы сыртта
орналасқан цилиндр түріндегі жалғау.
Майысқақ буынсыз тот баспайтын болаттан жасалған түтікті
оймасы бар жалғауға қосу
Газ жеткізу жүйесінің түтік фитингі – 1/2 оймасы сыртта орналасқан
цилиндр түріндегі жалғау.
Бұл түтіктер толығымен созылғанда 2000 мм-ден аспайтындай
орнатылуы тиіс. Жалғау іске асырылғаннан кейін майысқақ металдан
жасалған түтік ешбір қозғалатын бөлшектерге тиіп тұрмағанына және
оны ешнәрсе қысып тұрмағанына көз жеткізіңіз.
! Тек ағымдағы ұлттық заңнамаларға сәйкес келетін түтіктер мен
тығындарды ғана пайдаланыңыз.
KZ
! Орнатушы дұрыс ток байланысын орнатқанына және оның қауіпсіздік
ережелеріне сәйкес екендігіне сенімді болуы қажет.
Бұйымды электр тоғына қосар алдында мыналарды тексеріп алыңыз:
• pозетка жерге тұйықталып, нормативтерге сәйкес жалғануы керек
• желі розеткасы бұйымның паспортына көрсетілген максималдық қуат
қабылдау күшіне есептелуі тиіс;
• желідегі тоқтың кернеуі мен жиілігі бұйымның электр мәліметтеріне
сәйкес болуы керек;
• желілік розетка бұйымның штепсельді вилкасына сәйкес келуі
керек. Кері жағдайда, розетканы немесе вилканы ауыстырыңыз; тоқ
ұзартқыштар мен көп көзді тоқ көздерін қолданбаңыздар.
! Бұйым желі шнуры мен желі розеткасы қолжетімді жерде тұратындай
болып орналасуы керек.
! Бұйымның желі шнуры майысуына немесе бүктеліп тұруына болмайды.
! Күн сайын желі шнурын тексеріп тұрыңыз және қажет болған жағдайда
оны тек уәкілетті техник мамандарға ғана ауыстыртыңыз (Техникалық
қызмет көрсетуді қара).
Жалғаудың мықтылығын тексеру
! Орнату аяқталғаннан кейін, сабынды сумен түтік фитингтерінде
тесіктердің бар не жоқ екенін тексеріңіз. Ешқашанда алауды қолданушы
болмаңыз.
Газ түрлеріне сәйкестендіру
Плитаны әдепкі газ түрінен (плитаның астыңғы жағында орналасқан
техникалық деректер тақтасында немесе орамада көрсетілген) басқа
түрге сәйкестендіру үшін оттық форсункаларын төменде көрсетілгендей
ауыстыру қажет:
1. Плита торларын алып, оттықтарды тіректерінен сырғытып шығарыңыз.
2. Форсункаларды тиісті мөлшерін гайка кілтімен босатып, шығарып
алыңыз да, газдың басқа түріне арналған форсункалармен
алмастырыңыз ("Оттық пен форсункалардың сипаттары" 1-кестесін
қараңыз).
3. Жоғарыдағы рәсімді керісінше орындау арқылы бөлшектерді қайта
құрастырыңыз.
4. Бұл рәсім аяқталғаннан кейін, ескі техникалық деректер жапсырмасын
енді пайдаланылатын газ түрін көрсететін жапсырмамен
алмастырыңыз. Жапсырманы біздің кез келген Қызмет көрсету
орталығымыздан алуға болады.
25
Page 26

• Оттықтардың бастапқы ауасын реттеу
KZ
Реттеуді қажет етпейді.
• Оттықтарды ең аз мәнге орнату
1. Тұтқаны әлсіз жалын позициясына бұрыңыз;
2. Тұтқаны шешіп алып, тұтқа шегесінің
ішінде немесе оның жанында орналасқан
реттеу бұрандасын жалын кіші бірақ тұрақты
болғанша реттеңіз.
3. Жалынды қажетті төмен параметрге реттегеннен кейін, оттық жанып
тұрғанда тұтқа позициясын бірнеше мәрте ең төменгіден ең жоғарыға
және қарама-қарсы жылдам ауыстырып, жалын өшіп қалмайтынын
тексеріңіз.
4. Кейбір құрылғыларда қауіпсіз құралымен (терможұппен) жабдықталған.
Оттықтар әлсіз жалын параметріне орнатылғанда құрылғы жұмыс
істемесе, осы әлсіз жалын параметрін реттеу бұрандасының
көмегімен арттырыңыз.
5. Реттеу жасалғаннан кейін айналып өту клапандарындағы тығындарды
сургучпен немесе оған ұқсас затпен қайтадан жабу қажет.
! Құрылғы сұйық газға жалғанған болса, реттеу бұрандасы мүмкін
болғанша мықты бекітілуі керек.
! Бұл рәсім аяқталғаннан кейін, ескі техникалық деректер жапсырмасын
енді пайдаланылатын газ түрін көрсететін жапсырмамен алмастырыңыз.
Жапсырмаларды біздің кез келген Қызмет көрсету орталығымыздан
алуға болады.
! Қолданылған газ қысымы ұсынылған қысымнан өзгеше (немесе
сәл өзгеше) болса, кіріс құбырға тиісті қысым реттегіші бекітілуі керек
(ағымдағы ұлттық ережелерге сәйкес).
26
Page 27

ЭЛ
Оттық пен форсункалардың сипаттары
1-кесте
II2H3+
KZ
САНАТЫ
Пайдаланылатын
газ түрі
ТАБИҒИ ГАЗ
(
метан
)
G20
СҰЙЫТЫЛҒАН
МҰНАЙ ГАЗЫ
(
бутан
)
G30
СҰЙЫТЫЛҒАН
МҰНАЙ ГАЗЫ
(Пропан)
Пайдаланылатын
G31
газ түрі
G20 20
мбар
1R - 2S -1A 7.30 695 л/
G30 28-30
G31 37
мбар
1R - 2S -1A 7.30 531 г/
мбар
1R - 2S -1A 7.30 521 г/
Конфорка
түрі
Жылдам
Жартылай жылдам
Қосымша
Жылдам
Жартылай жылдам
Қосымша
Жылдам
Жартылай жылдам
Қосымша
Үлгі конфигурациясы
4
КОНФОРКА
Инжектор
таңбалануы
Жылылық
ағынының
номиналды
жылдамдығы
кВт
115Y
95Z
72X
85
63
50
85
63
50
3.00
1.65
1.00
3.00
1.65
1.00
3.00
1.65
1.00
Жылылық ағынының
номиналды жылдамдығы
кВт
Номиналды
тұтынылуы
286
л/сағ
157 л/
сағ
95 л/
сағ
218 г/
сағ
120 г/
сағ
73 г/
сағ
г/сағ
214
118 г/
сағ
71 г/
сағ
Жалпы номиналды
тұтыну
Азайтылған
жылу
сыйымдылығы
кВт
мин
0.60
0.35
0.30
0.60
0.35
0.30
0.60
0.35
0.30
сағ
9.52
сағ
30.94
сағ
23.80
17 20 25
20 28-30 35
25 37 45
1 м³ жанатын газ үшін қажет
ауа (м³)
Газ қысымы
мбар
.
оpт
.
макс
.
ЕКТРМЕН ҚАМТУ
S
S
: 220-240В~ 50/60Гц 0,6
R
A
642 TEC IX/HA
Вт
27
Page 28

Қосу және пайдалану
Ø ыдыс табанының диаметрі (см)
Жылдам (R)
Жартылай жылдам (S)
Қосымша (A)
24 - 26
16 - 22
8 - 14
Оттық
KZ
Сақтандырулар мен кеңестер
! Тиісті газ оттығының орны әрбір тұтқада көрсетілген.
Газ оттықтары
Әрбір оттықты тиісті басқару тұтқасының көмегімен төмендегі
параметрлердің біріне реттеуге болады:
● Өшірулі
Ең жоғары
Ең төмен
Оттықтардың бірін жандыру үшін жанып тұрған сіріңкені немесе шақпақты
оттыққа жақындатып, дәл сол уақытта тиісті тұтқаны сағат тіліне қарсы
бағытта ең жоғары параметрге басып, бұрыңыз.
Оттық қауіпсіздік құралымен жабдықталғандықтан жалынды жандырып
тұратын автоматты құралдың қызуы үшін тұтқаны шамамен 2-3 секунд
басып тұру қажет. Mодельдер тұтандыру түймесімен, қоса берілген
реттегіш-тұтқамен жабдықталған. Бұл жағдайда тұтату оттықтары
болады, бірақ жеке түйме емес. Керекті конфорканы тұтандыру үшін
тиісті тұтқаны барынша басып сағат тіліне қарсы керекті тұтқаны басып
максималдық жалын болғанша бұрау керек.
! Жалын байқаусыз өшірілсе, басқару тұтқасын өшіріңіз де, оны қайтадан
жақпас бұрын кем дегенде 1 минут күтіңіз.
Оттықты өшіру үшін тұтқаны сағат тілі бағытында тоқтағанша бұрыңыз
("●" позициясына жеткенше).
Оттықтарды пайдалану бойынша кеңестер
Оттықтардың тиімді жұмыс істеуін қамтамасыз ету үшін:
• Ә конфорка үшін тиісті ыдысты пайдаланыңыз, ыдыстың түбі
конфорка жанарғысына сәйкес келуі керек (кестені қара).
• Табаны тегіс және қақпағы бар ыдысты пайдаланыңыз.
• Қайнаған жағдайда, тұтқаны оттың аз келетін жағына қарай бұраңыз.
Конфорка түрлерін анықтау үшін “Конфоркалар мен форсункалар”
параграфындағы суреттерді қараңыз.
• Максималды тұрақтылық үшін, таба түпқоймалары әрқашан дұрыс
түрде бекітілгеніне және әрбір таба жанарғының үстінен ортаға
орналастырылғанына көз жеткізіңіз
• Таба тұтқалары таба тұғырындағы тіреу өзектерінің біріне сәйкес
орналастырылуы керек.
• Таба тұтқасы плитаның алдыңғы шетінен шығып кетпейтіндей етіп
орналастырылуы керек.
тураланған, жақсы теңгерілген түпқоймалар ең жоғары тұрақтылықты
сөзсіз қамтамасыз етеді.
28
Түпқойма тұрақтылығының
көзқарасынан айнымалылығы жоғары
аспектіге әдетте түпқойманың өзі
жатады (немесе қолдану барысында сол
түпқойманың орналасуы). Тегіс негіздері
жанарғы үстінен қойылған, түпқойма
тұтқалары тіреуіш штифтілерінің бірімен
! Бұл құрылғы халықаралық қауіпсіздік стандарттарына сай жасақталып,
дайындалған. Төмендегі ескертулер қауіпсіздік ережелерін ескерту
мақсатында берілген және оны мұқият оқып шығу қажет.
Жалпы қауіпсіздік
• Бұл құрылғы 3-сынып ендірілген құрылғы болып табылады.
• Газ құрылғылары тиімді жұмыс істеуі үшін тұрақты ауа алмасуын
қажет етеді. Плитаны орнату кезінде құрылғы "Орналастыру"
параграфында берілген нұсқауларды орындаңыз.
• Бұл нұсқаулар тек нұсқаулық пен сериялық нөмір тілімшесінде
таңбалары көрсетілген елдер үшін жарамды.
• Құрылғы үйде қолдануға арналған, оны коммерциялық немесе
өндірістік тұрғыда қолдануға болмайды.
• Жабық жер болса да, құрылғыны сыртта қолданбау қажет. Құрылғыны
қорғаусыз жаңбыр мен боранда қалдыру аса қауіпті.
• Құрылғыны жылжытқанда немесе орналастырғанда пештің бүйіріндегі
тұтқаларды пайдаланыңыз.
• Құрылғыны жалаң аяқ немесе ылғал не дымқыл қолмен, аяқпен
түртпеңіз.
• Құрылғыны кітапшада берілген нұсқауларға сай, тек ересек
адамдар ғана тағам дайындау мақсатында пайдалануы тиіс.
Құрылғыны басқа түрде пайдалану (мысалы, бөлмені жылыту
үшін) дұрыс емес әрі қауіпті. Өндіруші құрылғыны тиісті, дұрыс
және саналы түрде пайдаланбау нәтижесінде пайда болған кез
келген зақымға жауапты болмайды.
• Басқа электр құрылғыларына арналған электр кабельдері пештің ыстық
бөліктеріне жақындамайтынын тексеріңіз.
• Желдету және ыстықты салқындатуға арналған ашық жерлерді
ешқашан жаппау керек.
• Құрылғыны қолданбаған кезде тұтқалардың "●"/"○" күйінде тұрғанын
тексеріңіз.
• Құрылғыны өшіргенде штепсельдік ұшты желі розеткасынан әрдайым
ажыратыңыз, кабельден тартып суырмаңыз.
• Штепсель айырын электр желісінен ажыратпастан тазалау немесе күтім
көрсету жұмыстарын ешқашан жасамаңыз.
• Егер құрылғы істен шыққан болса, ешбір жағдайда жөндеу жұмысын
өзіңіз жасамаңыз. Тәжірибесіз адам тарапынан жасалған жөндеу
жұмыстарынан құрылғының істен шығуы немесе жарамсыз болып қалуы
мүмкін. Қызмет көрсету орталығымен байланысыңыз («Көмек» бөлімін
қараңыз).
• Газ оттықтары немесе электр конфоркалар әлі ыстық болғанда шыны
қақпақты (бар болса) жаппаңыз.
• Құрылғыны физикалық, сезімталдық және психикалық қабілеттері
төмен адамдар (балалар да кіреді), тәжірибесіз немесе өнімнен
хабары жоқ кез келген адамның қолданбауы тиіс. Мұндай адамдарға,
кем дегенде, қауіпсіздіктерін қамтамасыз ететін біреулер жетекші
болуы керек немесе құрылғының жұмысына қатысты кіріспе
нұсқаулары берілуі тиіс.
• Балаларға құрылғымен ойнауға рұқсат етпеңіз.
• Құрылғы сыртқы таймермен немесе бөлек қашықтан басқару
жүйесімен басқарылуға арналмаған.
Жою
• Орауыш материалды жойған кезде: орауышты қайта пайдалануға
болатындай етіп жергілікті заңнаманы ұстаныңыз.
• Жарамсыз электрлік және электрондық жабдық бойынша (WEEE)
2002/19/EU Еуропалық директивасы ескі тұрмыстық құрылғыларды
қалыпты сұрыпталмаған тұрмыстық қоқыс құбырына жоюды талап
етеді. Ескі құрылғылар ішіндегі материалдардың қалпына келтірілуін
және қайта өңделуін оңтайландыру және адам денсаулығы мен
Page 29

қоршаған ортағы әсерін азауту үшін ескі құрылғыларды бөлек жинау
ұсынылады. Өнімдегі үсті сызылған «қоқыс себеті» белгісі құрылғыны
жойған кезде бөлек жинау қажеттілігі туралы ескертеді.
Тұтынушылар өзінің ескі құрылғыларын жою туралы мәліметтер алу
үшін жергілікті үкіметке не делдалға хабарласуы керек.
Қоршаған ортаны сақтау және қорғау
• Азық-түлікті жабық құмыраларды немесе қақпағы тығыз жабылатын
кастрөлдерде сақтаңыз және суды аз қолданыңыз. Қақпақсыз
дайындаған жағдайда, энергия көп жұмсалатын болады.
• Түбі тегіс құмыралар мен кастрөлдерді пайдаланыңыз.
• Асты ұзақ уақыт бойы дайындаған жағдайда, екі есе жылдам
дайындайтын және үштен бір энергия қуатын үнемдейтін жылдам
қайнатқышты қолданыңыз.
• Электрлік оталдыру қосқыштары және қауіпсіздік құрылғысымен
жабдықталған үлгілер тиісінше жұмыс істеуі үшін, тұтқаларының
шеттері толығымен тазалануы тиіс. Бұл элементтерді жиі тексеріңіз
және қажет болса, дымқыл матамен тазалаңыз. Кез келген қатып
қалған тағамдар тіс тазартқыш немесе иненің көмегімен тазалануы
тиіс.
! Электрлік оталдыру құрылғысының зақымдалуын болдырмау
үшін оны конфоркалар орындарына орнатылмаған жағдайда
пайдаланбаңыз.
Газ шүмегіне техникалық қызмет көрсету
Уақыт өте, шүмектер тығыздануы немесе оларды бұру қиындауы мүмкін.
Бұл жағдай орын алса, шүмекті ауыстыру қажет.
KZ
Тасымалдау және сақтау.
• Пісіргіш панельдерін түпнұсқа орауыш ішінде көлденең күйде
тасымалдау керек.
• Тасымалдау және сақтау кезінде пісіргіш панельдерін атмосфералық
әсерлерден және механикалық зақымдалудан қорғаңыз.
• Панельді жылытылмаған бөлмеде минус 50°С және плюс 40°С
температура аралығында орауыш ішінде сақтау керек.
Жөндеу және күтім
Құрылғыны өшіру
Кез келген бір жұмысты бастамастан бұрын құрылғыны тоқтан
ажыратыңыз.
Конфорка бетін тазалау
• Барлық эмаль жағылған және әйнек бөліктер жылы су және
нейтралды тазалағыш затпен тазалануы тиіс.
• Тат баспайтын болат беттер тым ұзаққа жанасып қалса, әкті су
немесе қатты тазалағыш заттармен кірленуі мүмкін. Кез келген тағам
қалдықтары (су, тұздық, кофе, т.б.) құрғатылуына дейін тазалануы
тиіс.
• Жылы су және нейтрал тазалағыш затпен тазалаңыз және кейін
жұмсақ матамен немесе күдерімен құрғатыңыз. Қатып қалған кірді
тат баспайтын болат беттерге арналған тазалағыштармен тазалаңыз.
• Tат баспайтын болатты тек жұмсақ мата немесе сүлгімен тазалаңыз.
• Қатты немесе күйдіргіш өнімдерді, хлор негізіндегі тазалағыштарды
немесе металл ысқыштарды пайдаланбаңыз.
• Бу тазалағыштар құралдарды пайдаланбаңыз.
• Жанғыш өнімдерді пайдаланбаңыз.
• Сірке суы, қыша, тұз немесе лимон шырыны сияқты қышқылды
немесе сілтілі заттарды плитада қалдырмаңыз.
Конфорка бөліктерін тазалау
• Торталар, конфорка қақпақтары және конфоркалар тазалану үшін
алынуы мүмкін.
• Оларды кез келген тағам қалдықтарын алып, конфорка
саңылауларының бітелмегенін тексере отырып қолыңызбен жылы
суды және ысқыш емес тазалағышты пайдаланып тазартыңыз.
• Шаю және құрғату.
• Конфоркалар мен конфорка қақпақтарын тиісінше сәйкес орындарына
қайта орнатыңыз.
• Торларды ауыстыру кезінде табақтар орнатылатын аймақ
конфоркамен сәйкестендірілгеніне көз жеткізіңіз.
! Бұл рәсімді өндіруші өкілет берген білікті маман орындауы тиіс
Ақаулықтарды жою
Пісіргіш панель жұмыс істемей қалып не нашар істеуі мүмкін. Қызмет
көрсету орталығына хабарласу алдында өзіңіз орындай алатын
әрекеттерді қарастырайық. Алдымен, энергия мен газбен жабдықтау
жүйесінде ажыраулардың жоқ, әсіресе панельдің газ шүмектері ашық
екендігіне көз жеткізіңіз.
Жанарғы жанбайды немесе жалын әркелкі.
Төмендегілерге көз жеткізіңіз:
• Жанарғының газ шығару саңылаулары бітелмеген.
• Жанарғының барлық жылжымалы бөлшектері дұрыс орнатылған.
• Панельдің жанында өтпе жел жоқ.
Қауіпсіздік құрылғысы бар нұсқаларда жалын өшеді.
Төмендегілерге көз жеткізіңіз:
• Тұтқаны шегіне дейін бастыңыз.
• Тұтқаны қауіпсіздік құрылғысын белсендіру үшін жеткілікті уақыт ішінде
шегіне дейін бастыңыз.
• Сақтандырғыш орналасқан жердегі газ шығару саңылаулары
бұғатталмаған.
Жанарғы минималды күйде жанбайды.
Төмендегілерге көз жеткізіңіз:
• Газ шығару саңылаулары бітелмеген.
• Панельдің жанында өтпе жел жоқ.
• Минималды мән реттеуі қате.
Ыдыстар тұрақсыз.
Төмендегілерге көз жеткізіңіз:
• Ыдыстың түбі толығымен тегіс.
• Ыдыс жанарғыда не электрлік плитада ортаға келтірілген.
• Торлар аударылмаған.
29
Page 30

KZ
30
Page 31

KZ
31
Page 32

KZ
Indesit Company S.p.A.
V
60044 Fabriano (AN)
www.hotpoint.eu
195146270.00
06/2016 - XEROX FABRIANO
iale Aristide Merloni,47
32
 Loading...