


GUI TAR/ BASS MU LTI- EFFEC TS PR OCE SSOR
&
USB A UDI O INTER FACE
OWNER’S MANUAL
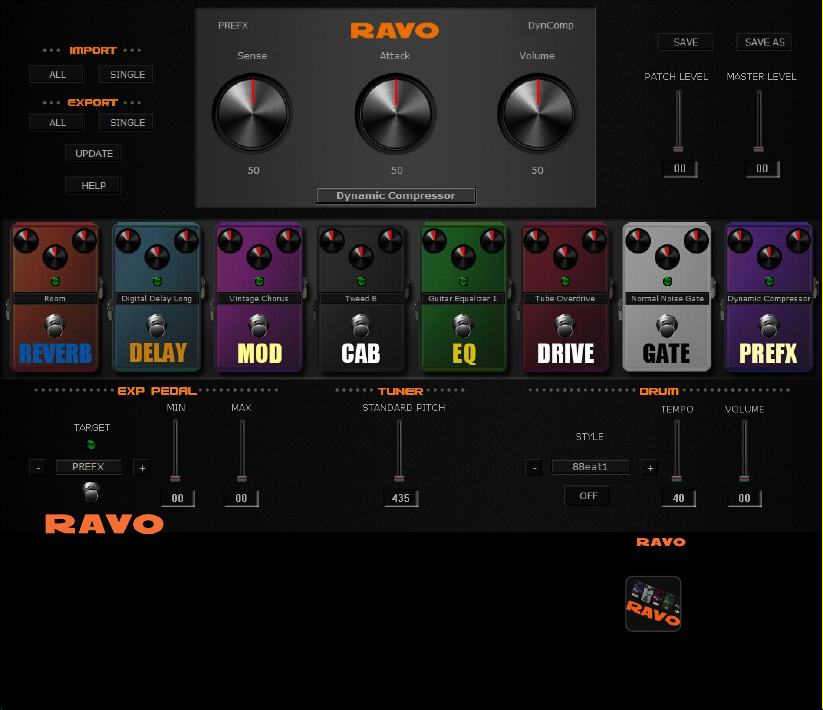
Tonebank
RAVO Tonebank is a free tone editor software designed for
RAVO*. It has a friendly, easy-to-use graphical user interface
and all edits will be transferred in real time. You can use the
RAVO Tonebank software for editing, importing/exporting
and sharing your own patches. Connect your RAVO to your
computer with a USB cable (sold separately), open the RAVO
Tonebank software, and ROCK!
You can download Tonebank here:
www.hotoneaudio.com/support
*Note: RAVO Tonebank is now only compatible with PC.

OWNER’S MANUAL
Thank you for purchasing a HOTONE product. Please read this manual
carefully to learn about all functions of the RAVO.
CONTE NTS
Precautions
Usage Precautions
Definitions
Panel lntroduction
Connections
Beginner’s Guide
How To Play
Bypass/Mute/Tuner Function
Loop Function
Drum Module
3
6
7
9
12
13
13
15
18
22
1

CONTENTS
Advanced Operations
Edit Your Own Sound
Store
Factory Reset
Pre-Patch-Select Function
Using Expression Pedal
Expression Pedal Calibration
Using Audio Interface Function
Effect Types And Parameters
Effect Types List
Patch List
Drum Rhythm List
Troubleshooting
Specifications
2
24
24
29
31
32
34
38
43
44
45
88
98
108
110

Precautions
Please observe the following precaution tips to ensure safe use of this unit.
Power Considerations
Since power consumption of this unit is high, we recommend the use of an AC adapter.
If you use batteries, please use alkaline batteries.
AC Adapter Operation
• Always use a DC9V center negative 500mA AC adapter. Use of an adapter other than that
specified could damage the unit or cause malfunction and pose a safety hazard.
• Always connect the AC adapter to an AC outlet that supplies the rated voltage required by
the adapter.
• When disconnecting the AC adapter from an AC outlet, always pull the adapter itself.
• During lightning storms or when not using the unit for an extended period, disconnect the
AC adapter from the AC outlet.
Battery Operation
• Use 4 conventional 1.5V AAA batteries (or nickel metal hydride batteries).
• Carefully read the safety indications on the batteries before use.
• When not using the unit for an extended period, remove the batteries from the unit.
• If battery leakage should occur, thoroughly wipe the battery holder and the battery
terminals to remove battery fluid.
• Close the battery holder cover when using the RAVO.
3

Environment Considerations
Avoid using the unit in any of the following conditions that could cause malfunction:
• Extremely hot or cold places
• Near heaters and other heat sources
• Sandy or dusty places
• Places that are extremely humid or exposed to splashing water
• Places with lots of vibrations
Handling
• Never put objects filled with liquids, such as vases, on the unit since this could
cause electric shock.
• Never place candles and other burning objects on top of the RAVO. Doing so could cause
a fire.
• The RAVO is a precision instrumental device. Do not apply excessive force to the switches
and other controls, exposing the unit to strong impacts, including applying excessive force,
dropping it or bumping it, which could cause it to break.
• Do not put foreign objects, including coins and wires, or liquids, including water, soft drinks
and alcohol, into the RAVO.
4

Connecting cables and input and output jacks
Please always turn OFF the power to the unit and all other equipment before connecting or
disconnecting any cables. Also make sure to disconnect all connection cables and the AC
adapter before moving the unit.
Alterations
Never open the case or attempt to modify the product in any way since this can result in
damage to the unit. HOTONE Corporation will not assume responsibility for any damage
to the unit caused by alterations.
Volume
Do not use the RAVO at a loud volume for a long time since this could cause hearing
impairment.
5

Usage Precautions
Electrical interference with other equipment
In consideration of safety, the RAVO has been designed to provide maximum protection
against the emission of electromagnetic radiation from the device and to minimize external
electromagnetic interference. However, equipment that is very susceptible to interference
or that emits powerful electromagnetic waves should not be placed near the RAVO, as
interference could occur. In such a case, place the RAVO and the other equipment sufficiently
far apart.
With any type of digital control device, the RAVO included, electromagnetic interference could
cause malfunction and could corrupt or destroy data. Please use caution.
Cleaning
Use a soft cloth to clean the panels if they become dirty. If necessary, slightly moisten the
cloth. Never use cleansers, wax, or solvents such as paint thinner, benzene or alcohol.
Malfunction
If the unit should malfunction, disconnect the AC adapter and turn the power OFF immediately.
Then, disconnect all other connected cables.
Prepare information including the model name, serial number, specific symptoms related to
the malfunction, your name, address and telephone number and contact the store where you
bought the unit, or contact HOTONE support.
Please keep this manual in a convenient place for future reference.
6

Definitions
● Module
As shown in Panel Introduction section (→P9), you can use up to 8 effect units
simultaneously. Each of these units is called a “module”.
● Effect type
Among the modules, some allow different effect types to be activated. For example, when “ ”
using the MOD module you can choose one of several modulation effect types, including
chorus, flanger, tremolo, and so on.
● Parameter
Variables that determine the application of an effect are called “parameters”. If we imagine
each module as a separate effect pedal, then each parameter would be a knob on that pedal.
● Patch
The ON/OFF status of each module and the parameter settings are stored in units called
“patches”. Use patches to recall and save effects.
7

● Bank
A set of 10 patches is called a “bank”. This unit has a total of 20 banks, including user banks
A–J, which can be edited and saved and preset banks 0–9, which can only be recalled.
● Mode
Each operation status of the RAVO is called a “mode”. Depending on the currently selected
mode, the functions of keys and knobs change. The modes include the play mode in which
you choose a patch and play your instrument, the rhythm mode in which you can play back a
rhythm pattern, the edit mode in which you can create and change patches, and the store
mode in which you can save patches.
8
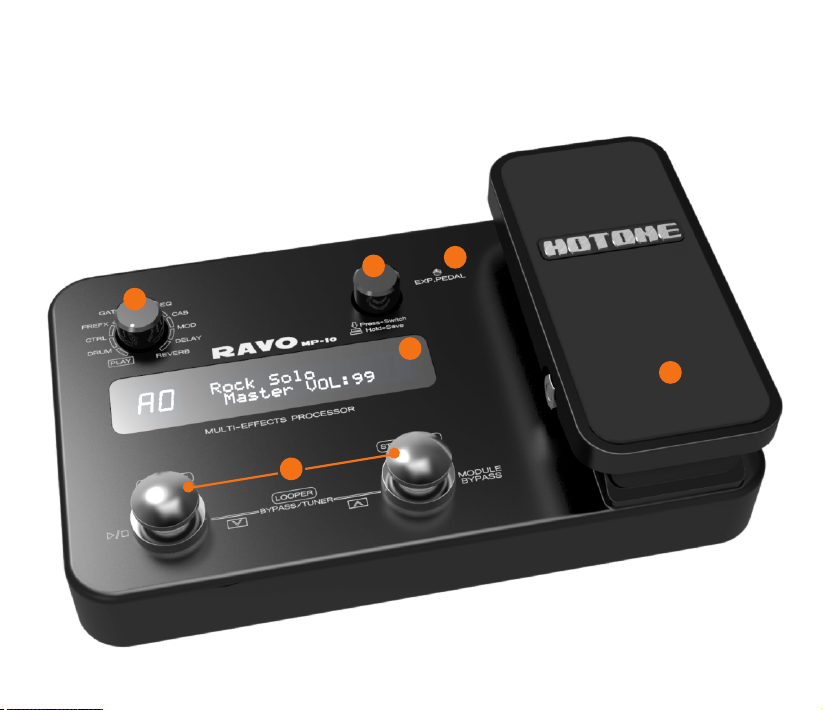
Panel Introduction
Top View
2
1
5
3
4
6
9

Rear View
7
8
14
1
Module Selector: Switches between every function module. In patch edit mode, this knob
selects the module/parameter for operation.
2
VALUE knob (with enter button): Dial the knob for setting master level, or changing parameter
values. Press the button to switch effect type, ensure storing, etc.
3
EXP.PEDAL LED: Indicates the status of Expression Pedal.
4
LED Display: Shows bank and patch numbers, setting values, and other information for
operating.
[▼]/[▲] Footswitches: Selects patches, controls the tuner, start/stop drum rhythm, start/
5
stop/record phrases and other functions.
10
9 10
11
12
13

6
Expression Pedal: Adjusts volume or some effect parameters.
7
AUX IN Jack: 1/8” (3.5mm) stereo input audio jack, you can connect a CD player, MP3
Player or other devices for jamming, practicing, etc.
8
PHONES Jack: 1/8” (3.5mm) stereo output audio jack, for connecting headphones.
9
INPUT Jack: 1/4” mono audio jack, for connecting guitar.
10
OUTPUT Jack: 1/4” stereo audio jack, for connecting guitar amplifier. You can use a mono
cable to output the signal to an amplifier, or use a Y cable to output the signal to two amplifiers.
11
USB Jack: For connecting to a computer, then RAVO becomes a USB audio interface.
12
Power switch: For switching ON/OFF status.
NOTE: For using USB bus power, you should slide the switch to OFF position to get this unit powered.
DC 9V Jack: For power supply, use a 9-volt DC regulated by AC adapter, 500mA (plug
13
polarity is positive on the barrel and negative in the center).
14
Battery Holder: For installing batteries (AAA x 4).
11
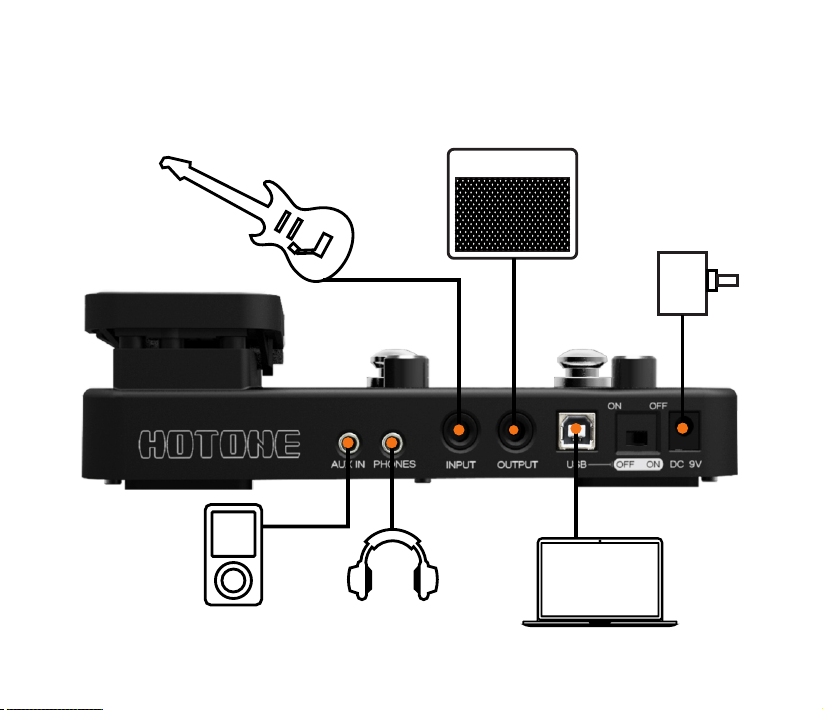
Connections
12
Beginner’s Guide
How To Play
1. Turn the power on
Minimize the volume of the amp.
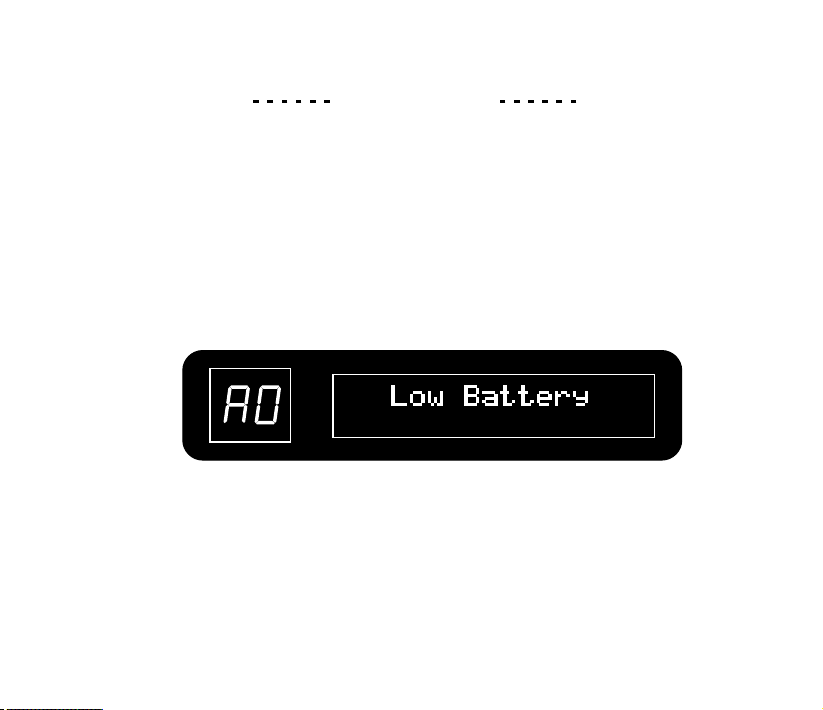
● Using batteries
1. Turn the unit over and open the battery holder on the bottom.
2. Insert 4 AAA batteries into the battery holder.
3. Close the cover.
When the remaining charge is low, “Low Battery” appears on the display and flash.
4.Plug the guitar cable into the INPUT jack will turn the device on.
● Using an AC adapter
Connect the included AC adapter, and slide the power switch to ON position.
Note: Be sure to use the included HOTONE AC adapter ONLY.
● Using USB bus power
Connect the USB jack to computer by USB cable, and slide the power switch to OFF position.
13
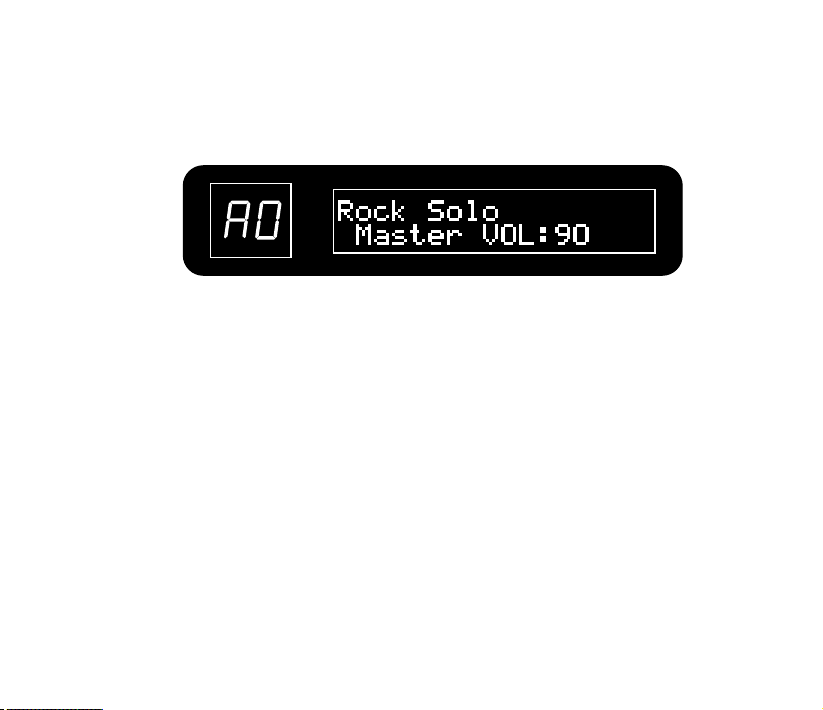
2. Set the unit to play mode
Turn the module selector to “PLAY”, LED (on the left side) shows the patch number; LCD
(on the right side) shows the patch name and master volume.
When in play mode:
Turn the VALUE knob to adjust Master Volume.
Push the VALUE button to start/stop Drum playback.
3. Select a patch
The LED display will show the information of current bank and patch number. Step on [▼]/[▲]
footswitches to change patches (Hold one footswitch to switch patches quickly).
Pressing [▲] footswitch time and again (or holding [▲] footswitch for fast switching) cycles
through patches in the order A0 A9...J0 J9, 00 09...90 99, A0. Pressing or holding [▼]
footswitch will switch patches in the opposite order.
Note:
Using pre-patch-select mode(→P32), you can jump directly to a patch that is far from the current patch.
~ ~ ~ ~
14
4. Adjust the patch volume
Turn the module selector to CTRL and use VALUE knob to adjust patch volume. The range
of volume is 00 99.
~
Bypass/Mute/Tuner Function
1. Set the unit to play mode
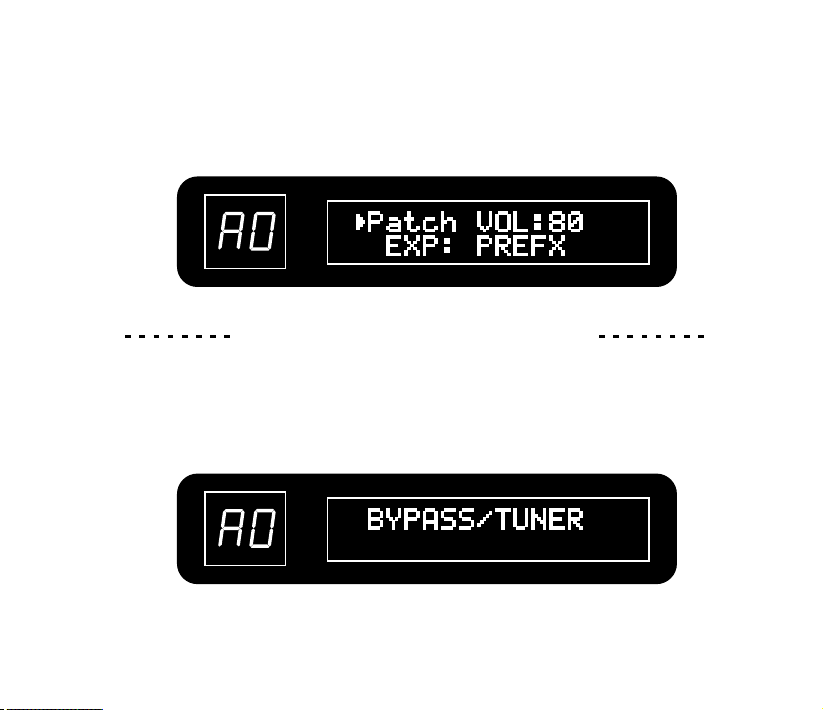
2. Set the unit to bypass/mute
Press both [▼]/[▲] footswitches at the same time.
● To set the unit to bypass
After “BYPASS/TUNER” appears on the screen, release the switches within one second.
15
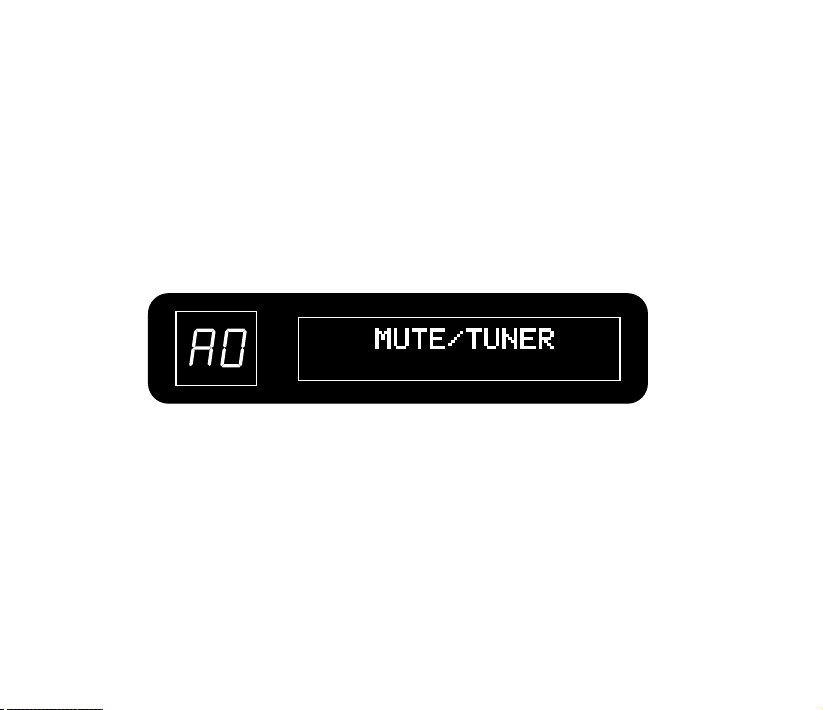
● To set the unit to mute
After “BYPASS/TUNER” disappears and “MUTE TUNER” appears on the screen, release the
switches within one second.
Note:
• If you continue to press both [▼]/[▲] footswitches for more than 2 seconds, the looper becomes active(→P18).
• You cannot set the unit to bypass/mute from edit mode.
• When you press both [▼]/[▲] footswitches at the same time, the footswitch that is momentarily pressed first could
change the tone in some cases. Please avoid making sound when pressing the switches.
16
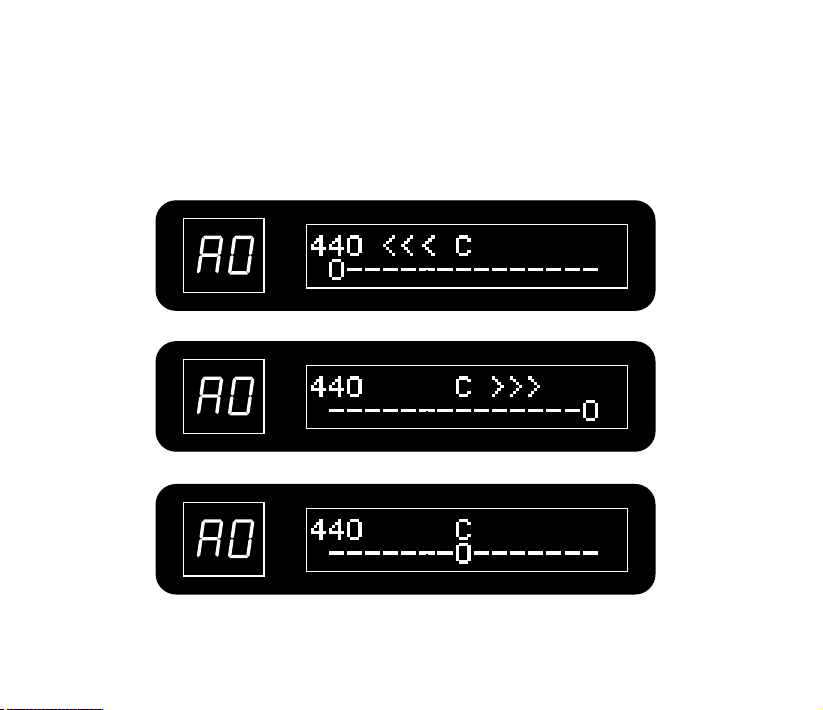
3. Tune the guitar
The note name appears on screen, and the pitch accuracy is indicated by the symbols below.
Low(flat)
High(sharp)
Intune
17
4. Change the frequency of the tuner’s standard pitch.
Turn the VALUE knob to set the standard pitch of middle A from 435 445 Hz (Default: 440 Hz).
~
5. Return to play mode
Press either [▼]/[▲] footswitch.
Looper Function
You can use the looper function to record some phrases for practicing, jamming, etc. The
maximum recording time of the looper is 30 seconds.
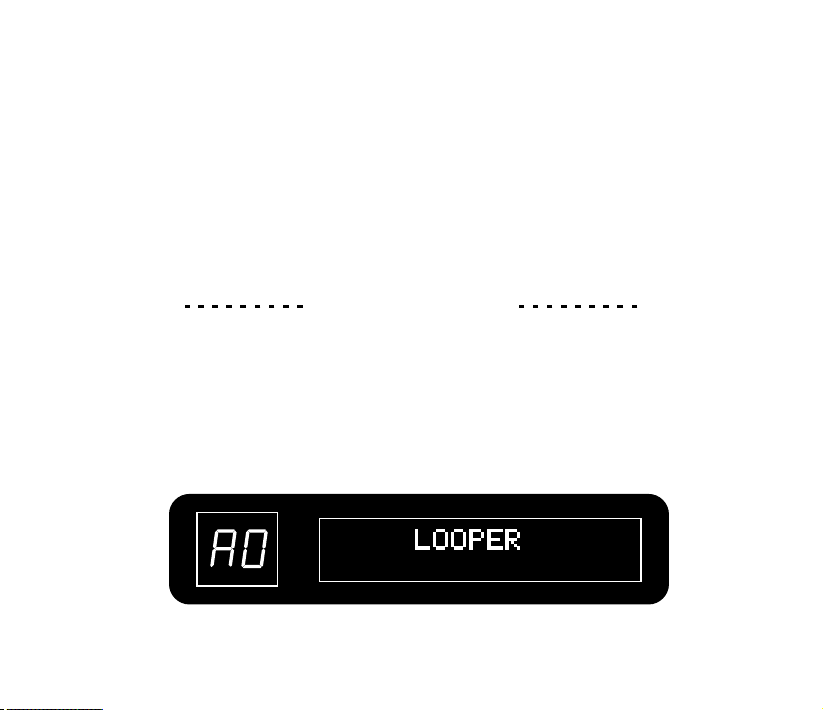
1. Activate the looper
In play mode, press and hold both [▼]/[▲] footswitches until “LOOPER” appears on the screen.
18
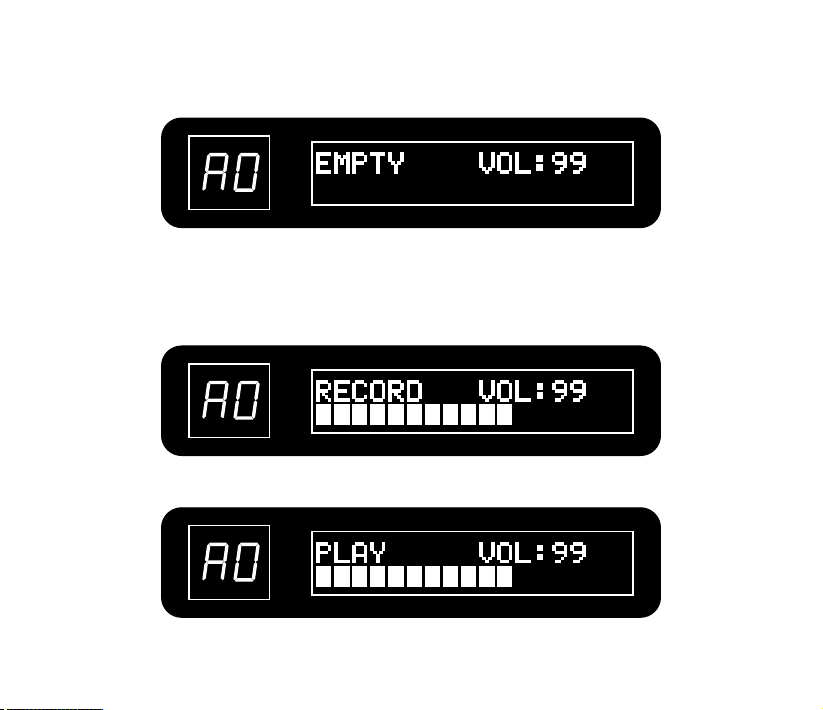
After 2 seconds, LCD becomes to display:
2. Record a phrase and play it back
Press the [▼] footswitch, and play the phrase that you want to record.
“RECORD” appears on the display and recording starts.
Press [▼] footswitch again to set the loop end and start playback.
19
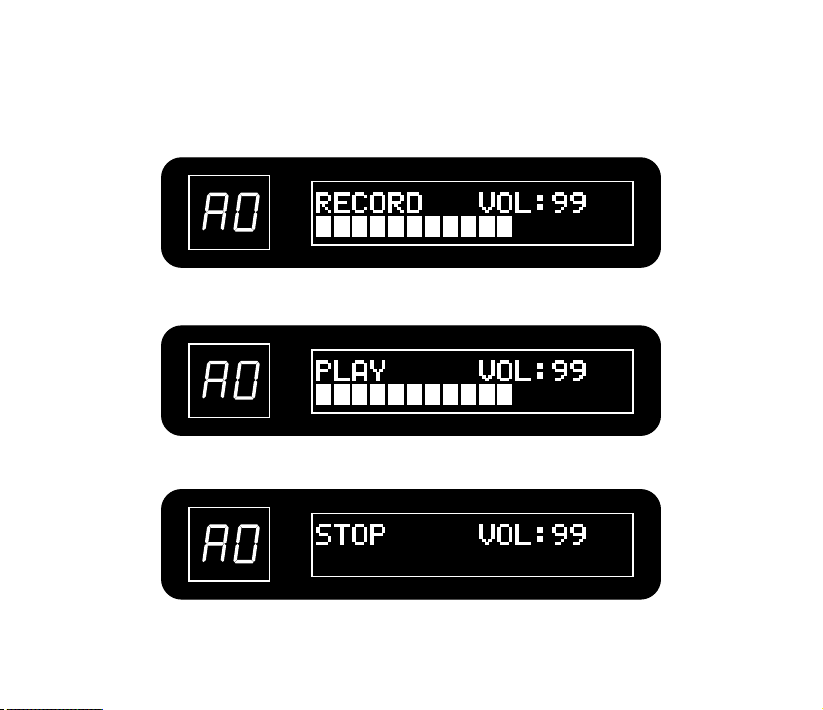
3. Overdub a phrase
During loop playback, press the [▼] footswitch and overdubbing starts.
To end overdubbing, press the [▼] footswitch again (“PLAY” appears on the display).
To stop loop playback, press the [▲] footswitch (“STOP” appears on the display).
To start loop playback again, press the [▼] footswitch.
20
4. Adjust the loop volume
Turn VALUE knob to adjust the loop volume in looper mode.
Note:
•When in looper mode, the effects can still be edited, but you cannot change the patch.
•When in looper mode, push VALUE button to start/stop drum playback.
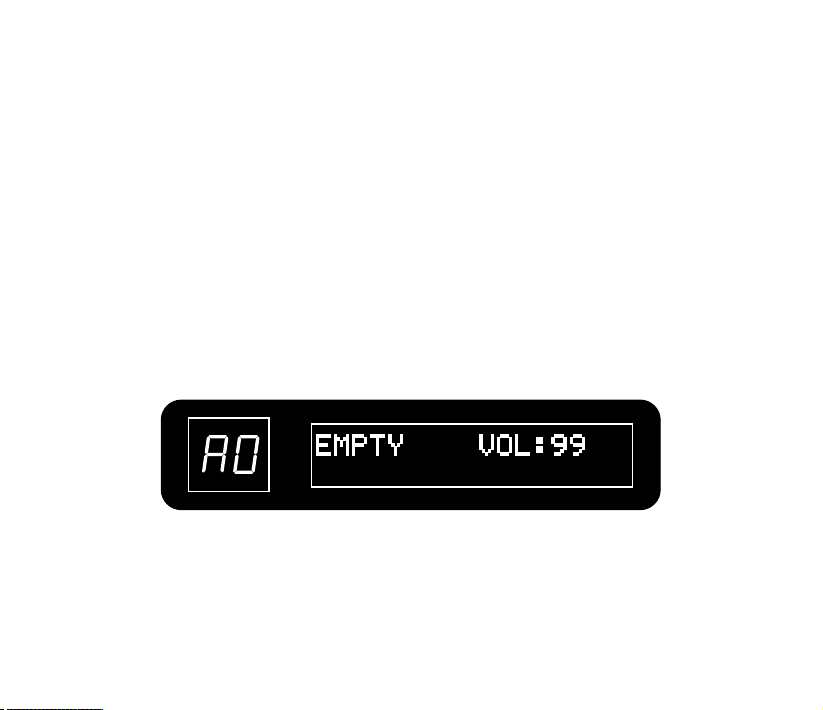
5. Erase the phrase
Press and hold the [▲] footswitch to erase the recorded phrase.
After erasing operation is done, LCD displays “EMPTY”.
6. Return to play mode
PRESS both [▼]/[▲] footswitches.
21

Drum Module (Drum Machine)
1. Active drum machine
Turn the module selector to DRUM module.
2. Start/stop drum playback
In Play and Looper mode, press VALUE button to start/stop drum playback.
In DRUM module, press either [▼]/[▲] footswitch to start/stop drum playback.
In Edit mode, press [▼] footswitch to start/stop drum playback.
3. Select the style of drum rhythm
Turn VALUE knob to change styles.
22
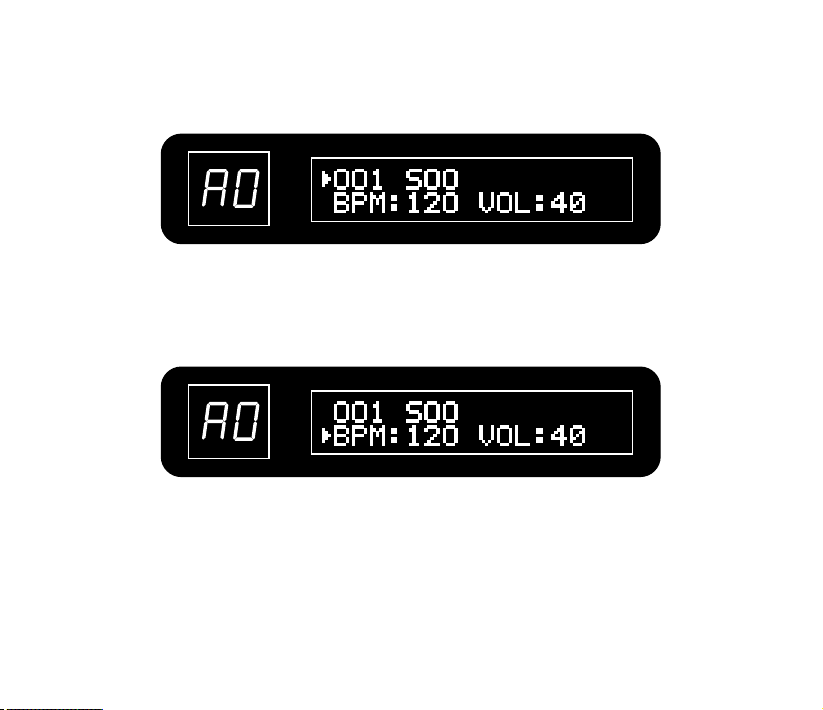
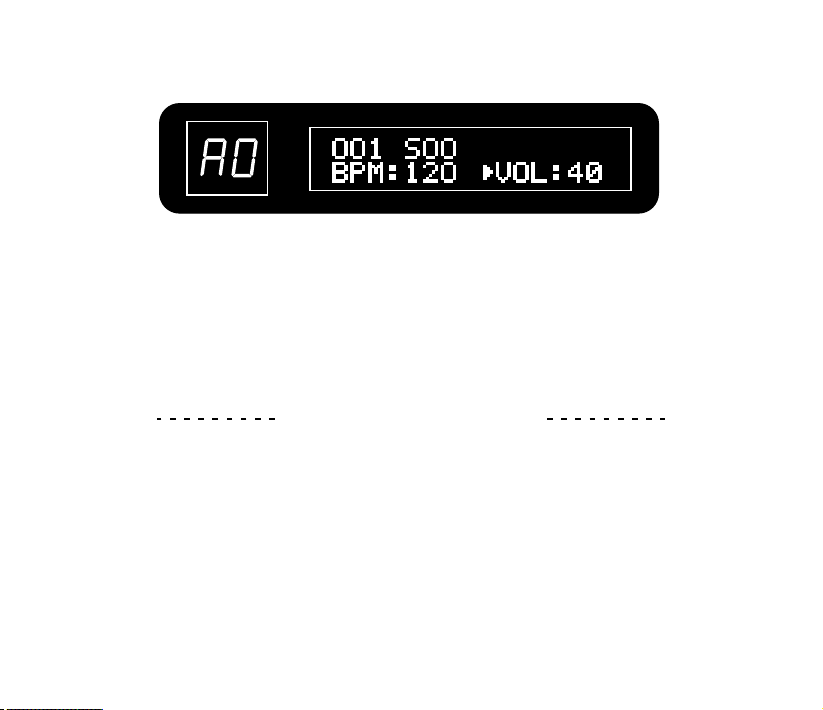
4. Adjust the tempo (BPM, Beats Per Minute)
Press VALUE button to move the target parameter to BPM, then turn VALUE knob to set the
BPM. Tempo can be set in a range from 040–250 BPM (beats per minute).
5. Adjust the drum volume
Press VALUE button to move the target parameter to VOL, then turn VALUE knob to set the
volume. Drum volume can be set in a range from 00 99.
~
23
Note:
When in LOOPER mode, drum rhythm can be recorded in the loop data at the first recording, when recording is finished
and turn to playback, the drum function will become unavailable unless the loop data is erased.
Advanced Operations
Edit Your Own Sound
1. Select a patch to edit
Step on [▼]/[▲] footswitches to choose a patch (Hold one footswitch for quick switch).
2. Select a module to edit
Turn the module selector to the module you want to edit.
24
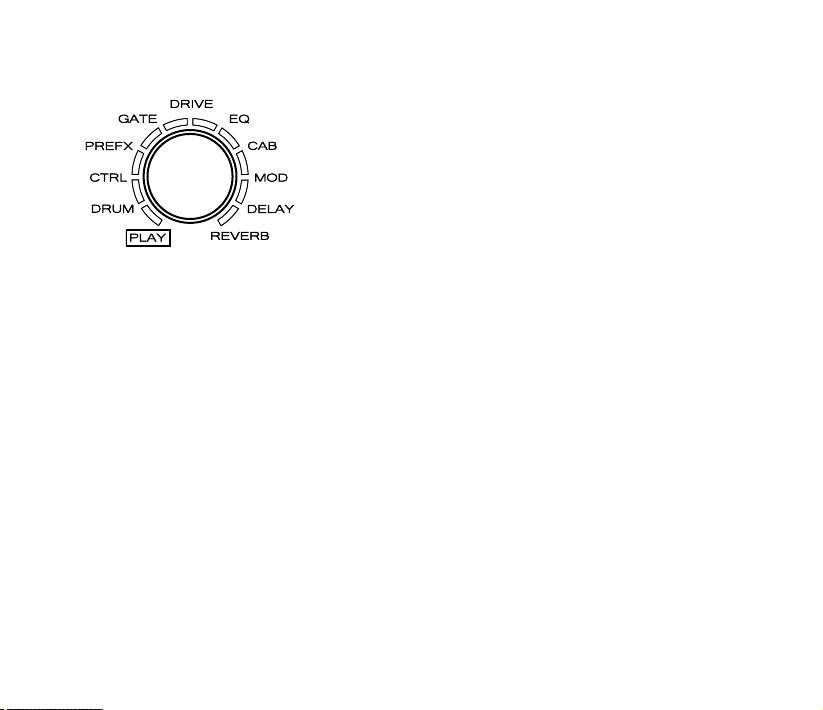
This activates edit mode, the available
setting options are listed below:
01. PREFX
02. GATE
03. DRIVE
04. EQ
05. CAB
06. MOD
07. DELAY
08. REVERB
For more module details,please check Effect Types and Parameters section(→P44).
3. Change the effect type
Turn VALUE knob to change the effect type.
The screen display will change according to the effect type.
E.g.: DynComp -> ProComp
25
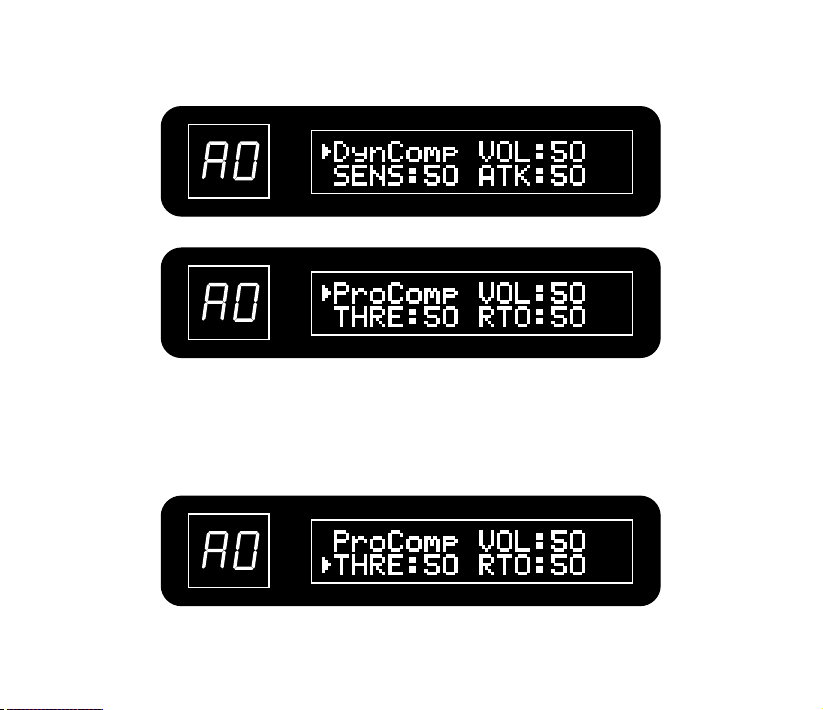
4. Adjust the parameters
Press VALUE button to move the target object between effect types and 3 parameters, turn
VALUE knob to adjust the parameter.
26
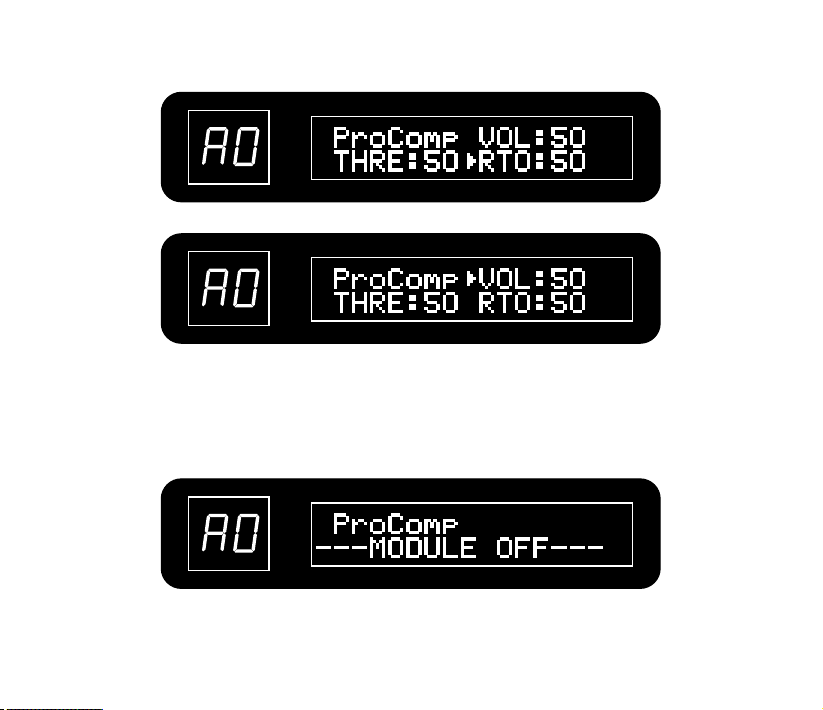
5. Turn a module ON/OFF
Press [▲] footswitch to turn an effect/module on/off.
When a module is set to off, the screen will display “MODULE OFF”.
Note: DRUM and CTRL are not effect modules, cannot be turned OFF.
27
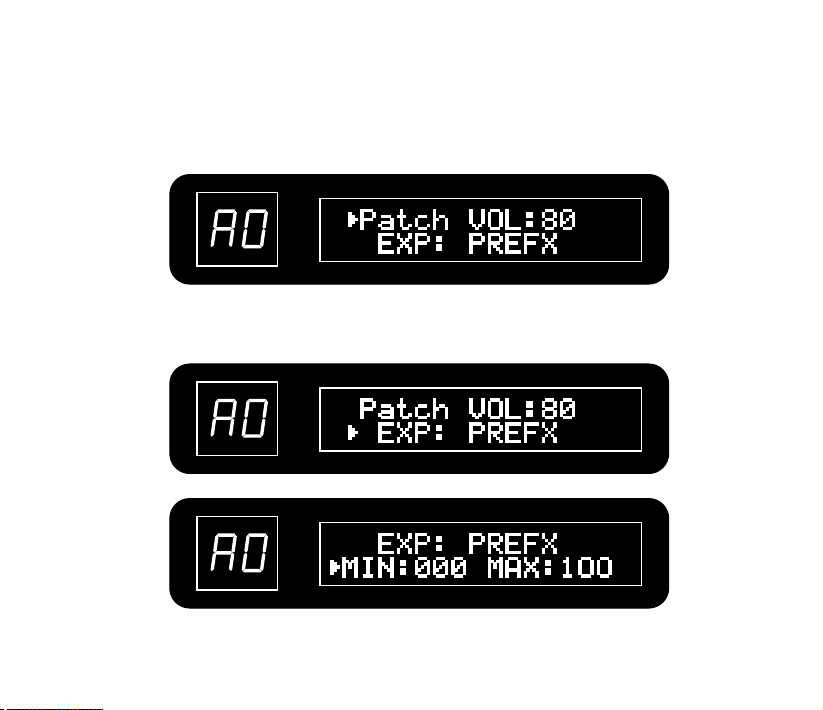
6. Adjust the patch volume and set up the EXP pedal
Turn the module selector to CTRL and use VALUE knob to adjust patch volume, range is 00 99.
Press VALUE button to move the target object between Patch VOL, EXP, and MIN/MAX, use
VALUE knob to adjust the parameter.
28
~
 Loading...