

Hotone Binary IR Owner's Manual
DE SI GN I NS PI RAT IO N
Binary IR Cab Owner's Manual

DES IGN IN SPI RATIO N
Congratulations on your new Hotone Binary pedal! You have just added some serious power to your pedalboard.
The Binary series lets loose versatile pro effects in compact cases. A dual-DSP powered platform and CDCM modeling system
ensure a realistic playing experience, dual-footswitch design and variable I/Os make it easy to use, and an OLED screen offers
clear, detailed display.
Binary IR Cab is an Impulse Response based cabinet simulator delivering precise legendary vintage/modern guitar/bass cab sounds
along with CDCM powered legendary studio microphone/power amp simulations.
Welcome
DES IGN IN SPI RATIO N
✪ Grown out of next-gen XTOMP technology
✪ Compact, easy-to-use dual footswitch IR cabinet simulator pedal
✪ Advanced CDCM modeling system ensures realistic playing experience
✪ Dual DSP-powered platform ensures high sound quality
✪ 24-bit A/D/A conversion, up to 110dB S/N ratio
✪ 100 legendary cab models
✪ 10 CDCM based legendary studio microphone simulations
✪ Detailed mic position (X, Y, Z) and room simulations
✪ 8 CDCM based power amp simulations with presence control
rd
✪ Supports 3 party IR files
✪ USB jack for firmware upgrading, loading/managing IRs with free PC/Mac software
✪ Aux in and headphone output for practicing and jamming
✪ 100 Presets
✪ Built-in OLED screen with clear display
✪ 5 transparent knobs with LEDs
✪ 9V DC power supply
Features
DES IGN IN SPI RATIO N
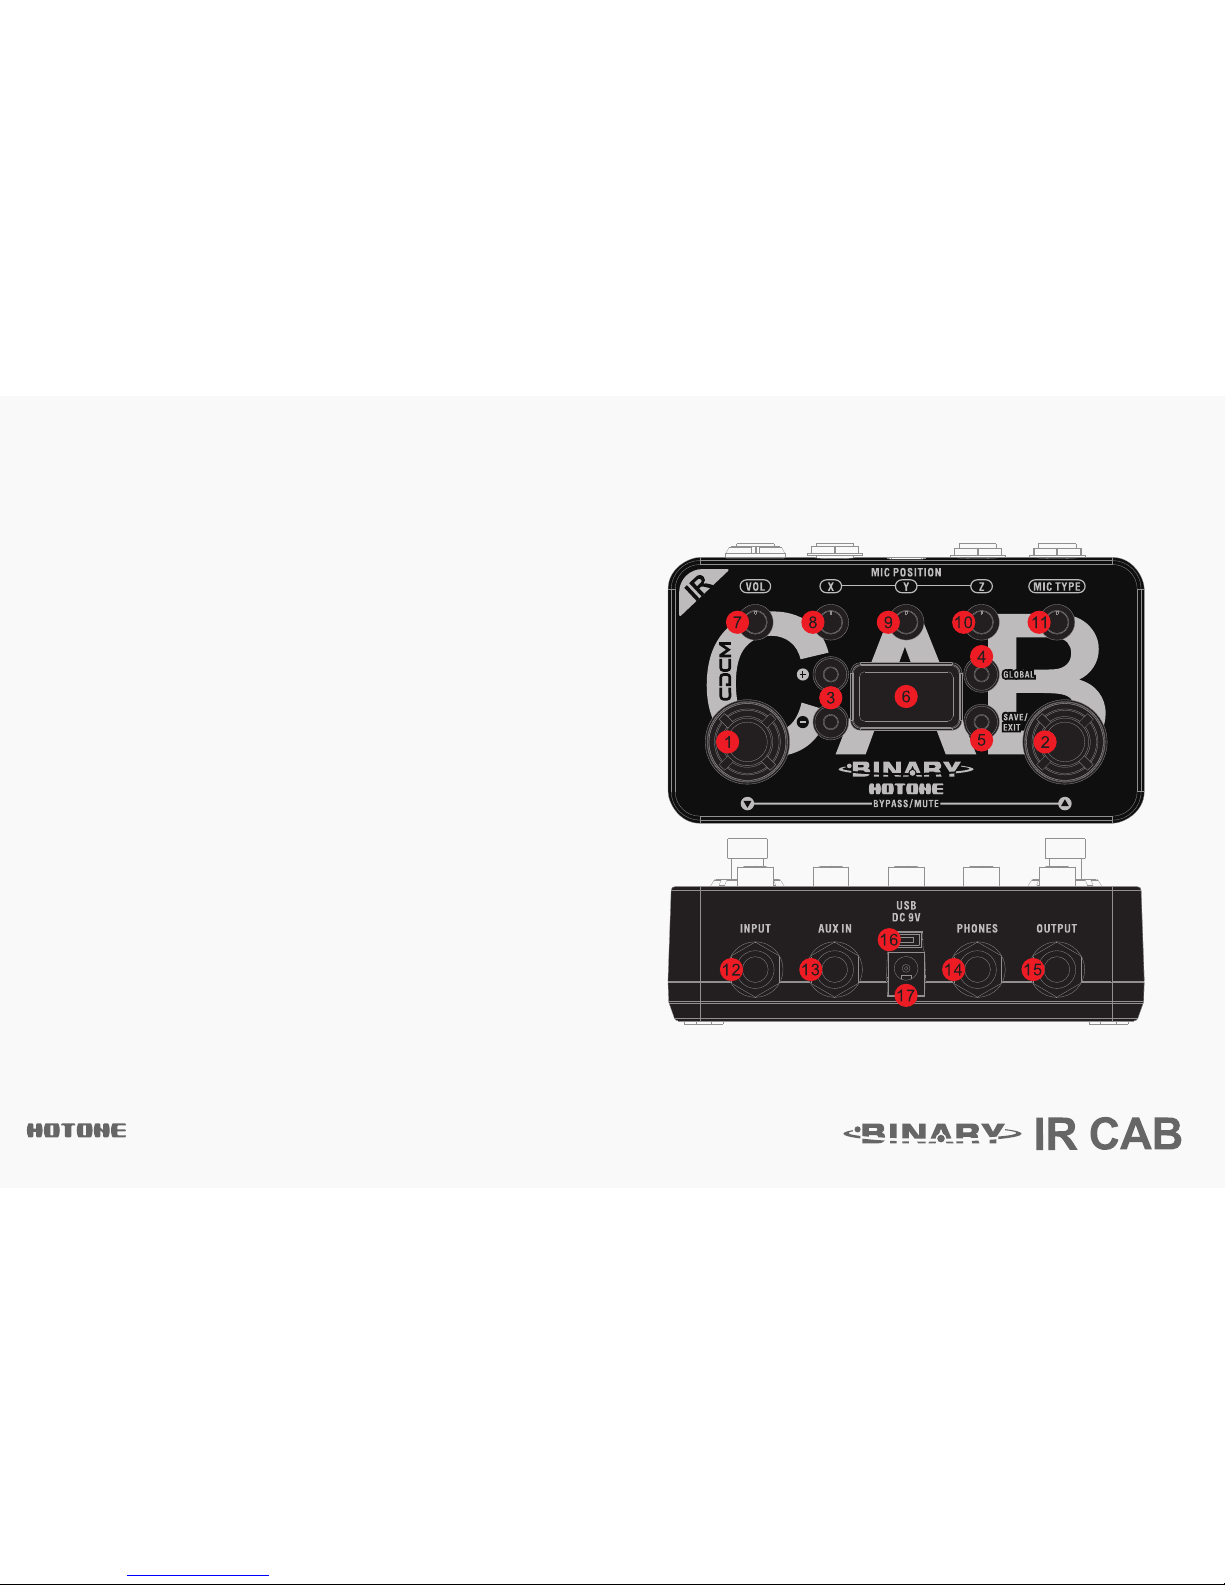
1-2. ▽/△: For selecting presets, bypass/mute, and other parameters.
3. +/- buttons: For selecting effects and adjusting parameters.
4. GLOBAL: For power amp and room control settings.
5. SAVE/EXIT button: For saving or canceling parameter changes.
6. OLED screen: Shows bank/patch numbers, setting values and other operation info.
7. VOL: Controls effect output level.
8-10. MIC POSITION X/Y/Z: Controls the mic position simulations.
11. MIC POSITION: Selects (or turns off) different microphone simulations.
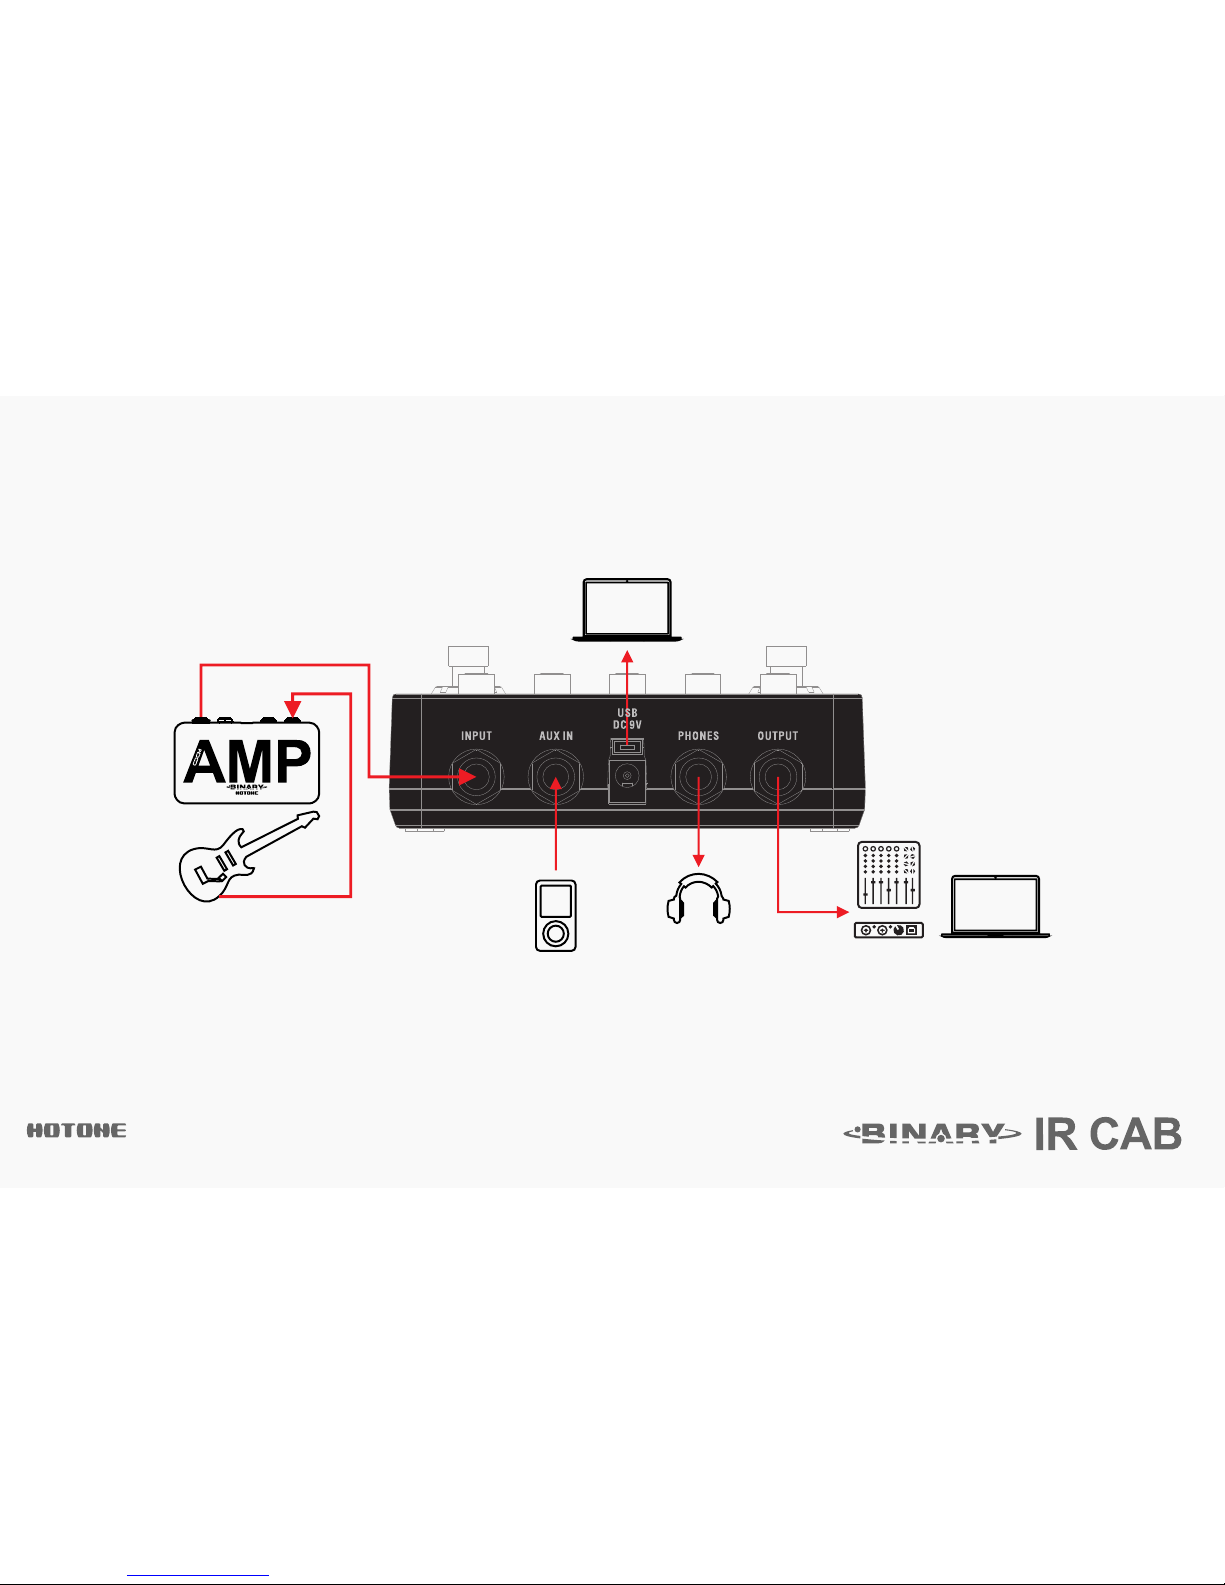
12. INPUT: 1/4” (6.35mm) mono jack, for plugging in instruments or other effects.
13. AUX: 1/4” (6.35mm) stereo jack, for plugging in audio players.
Note: You can hear only left channel signal when using along with OUTPUT jack.
14. PHONES: 1/4” (6.35mm) stereo jack, for connecting headphones.
15. OUTPUT: 1/4” (6.35mm) mono jack, for connecting to audio interfaces, mixers or
other effects.
16. USB jack: Mini USB jack, for effects editing, firmware updates, and factory reset.
17. DC 9V: Plug in your power supply here (DC 9V, center negative).
Panel Introduction
DES IGN IN SPI RATIO N
Note: TURN ON FIRST, TURN OFF LAST. Always mute the mixer/audio interface before plugging or unplugging power jacks, cables, etc. When you're
using a mixer or an audio interface, please adjust the onboard knobs carefully to avoid signal clipping.
Connections
DES IGN IN SPI RATIO N
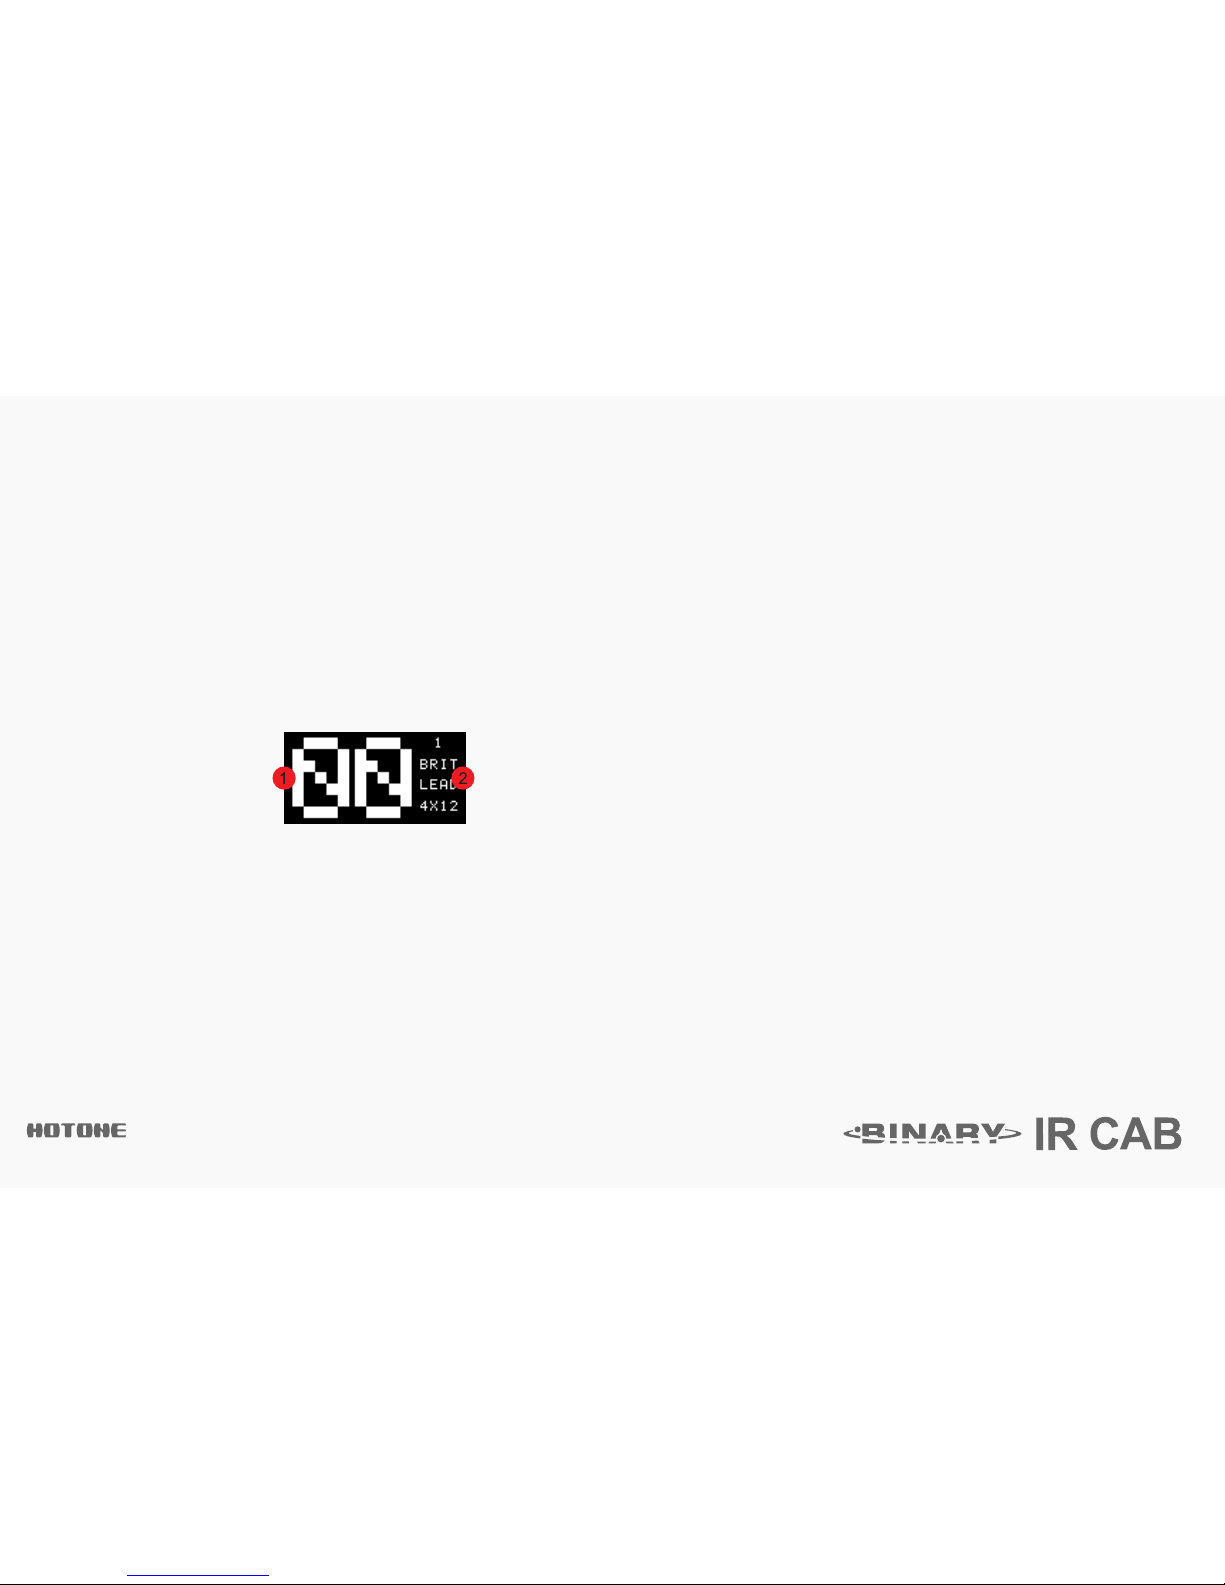
Display
Plugging in your power supply will turn on the device. The main display will come up as shown below:
1 - Current bank/patch number
2 - Indicates the cab model you’re using in current patch
 Loading...