

Page 1

2010 Chevy Camaro
P/N# 38109
2010 Camaro ½” Strut Spacers
Installation Instructions
Thank you for your purchase of this Hotchkis Performance product. Your strut spacer set was
designed with the performance and durability you’ve come to expect from Hotchkis
Performance.
Note: Please read the entire installation instructions before starting. Having the right tools
will ensure a smooth install process.
Strut Spacer Installed
1. Jack the front of the car up and place the car on jack stands. Remove the
front wheels.
Hotchkis Performance LLC. 1
Page 2
T
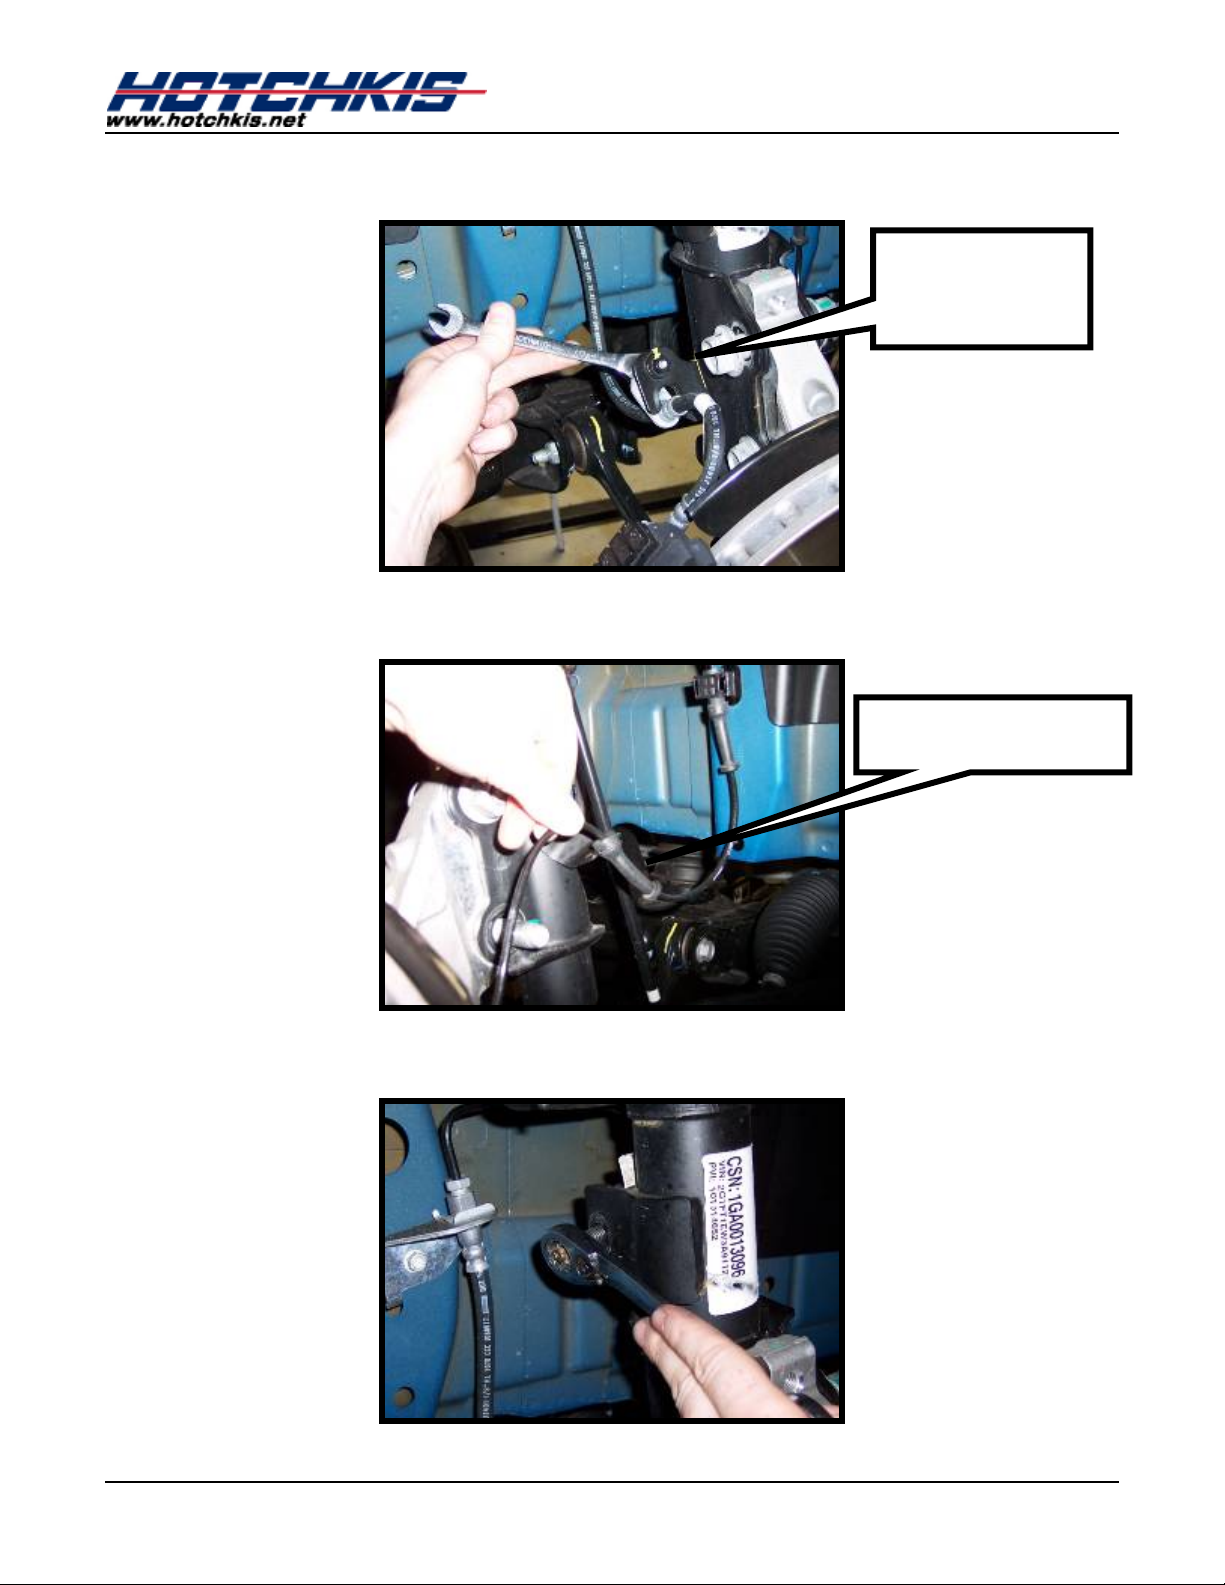
2. Remove the brake line bracket.
2010 Chevy Camaro
BRAKE LINE
3. Remove the ABS line from the bracket.
BRACKE
ABS BRACKET
4. Unbolt the sway bar link and remove.
Hotchkis Performance LLC. 2
Page 3

S
5. Loosen the nut on top of the strut underneath the hood.
NOTE: Do not completely remove the nut. Loosen until it can be later removed by hand.
This will make it easiest to remove the strut.
6. Remove the bolts that hold the spindle to the strut.
2010 Chevy Camaro
SPINDLE BOLT
7. Now while supporting the strut with one hand, remove the nut on top and
lower the strut.
Hotchkis Performance LLC. 3
Page 4

2010 Chevy Camaro
8. Using a spring compressor, compress the spring and remove the upper spring
cup nut.
NOTE: Use caution when working with a spring compressor!
Hotchkis Performance LLC. 4
Page 5

2010 Chevy Camaro
9. Remove the strut hat. There is a rubber isolator liner originally installed
between the strut hat and the spring. Reuse this liner and install it onto the
bottom side of the new spacer. Reinstall the strut hat on top of the spacer.
11. Repeat steps 1-8 in reverse order to reinstall the strut assembly. It is a good
idea to apply anti-seize compound on the strut shaft threads when
reinstalling the strut shaft nut. (MagnaCharged SS shown with strut spacers
installed)
Hotchkis Performance LLC. 5
 Loading...