

Page 1
1104 64-72 GM A-Body/ 1108 70-81 GM F-Body
1104 - Tubular Lower A-Arms 64-72 GM A-Body
1108 - Tubular Lower A-Arms 70-81 GM F-Body
Thank you for your purchase from our new line of A-Body parts.
Please call us at (877) 4NO - ROLL if you have any questions
regarding the service or installation of your Hotchkis products.
Visit us online @ www.hotchkis.net
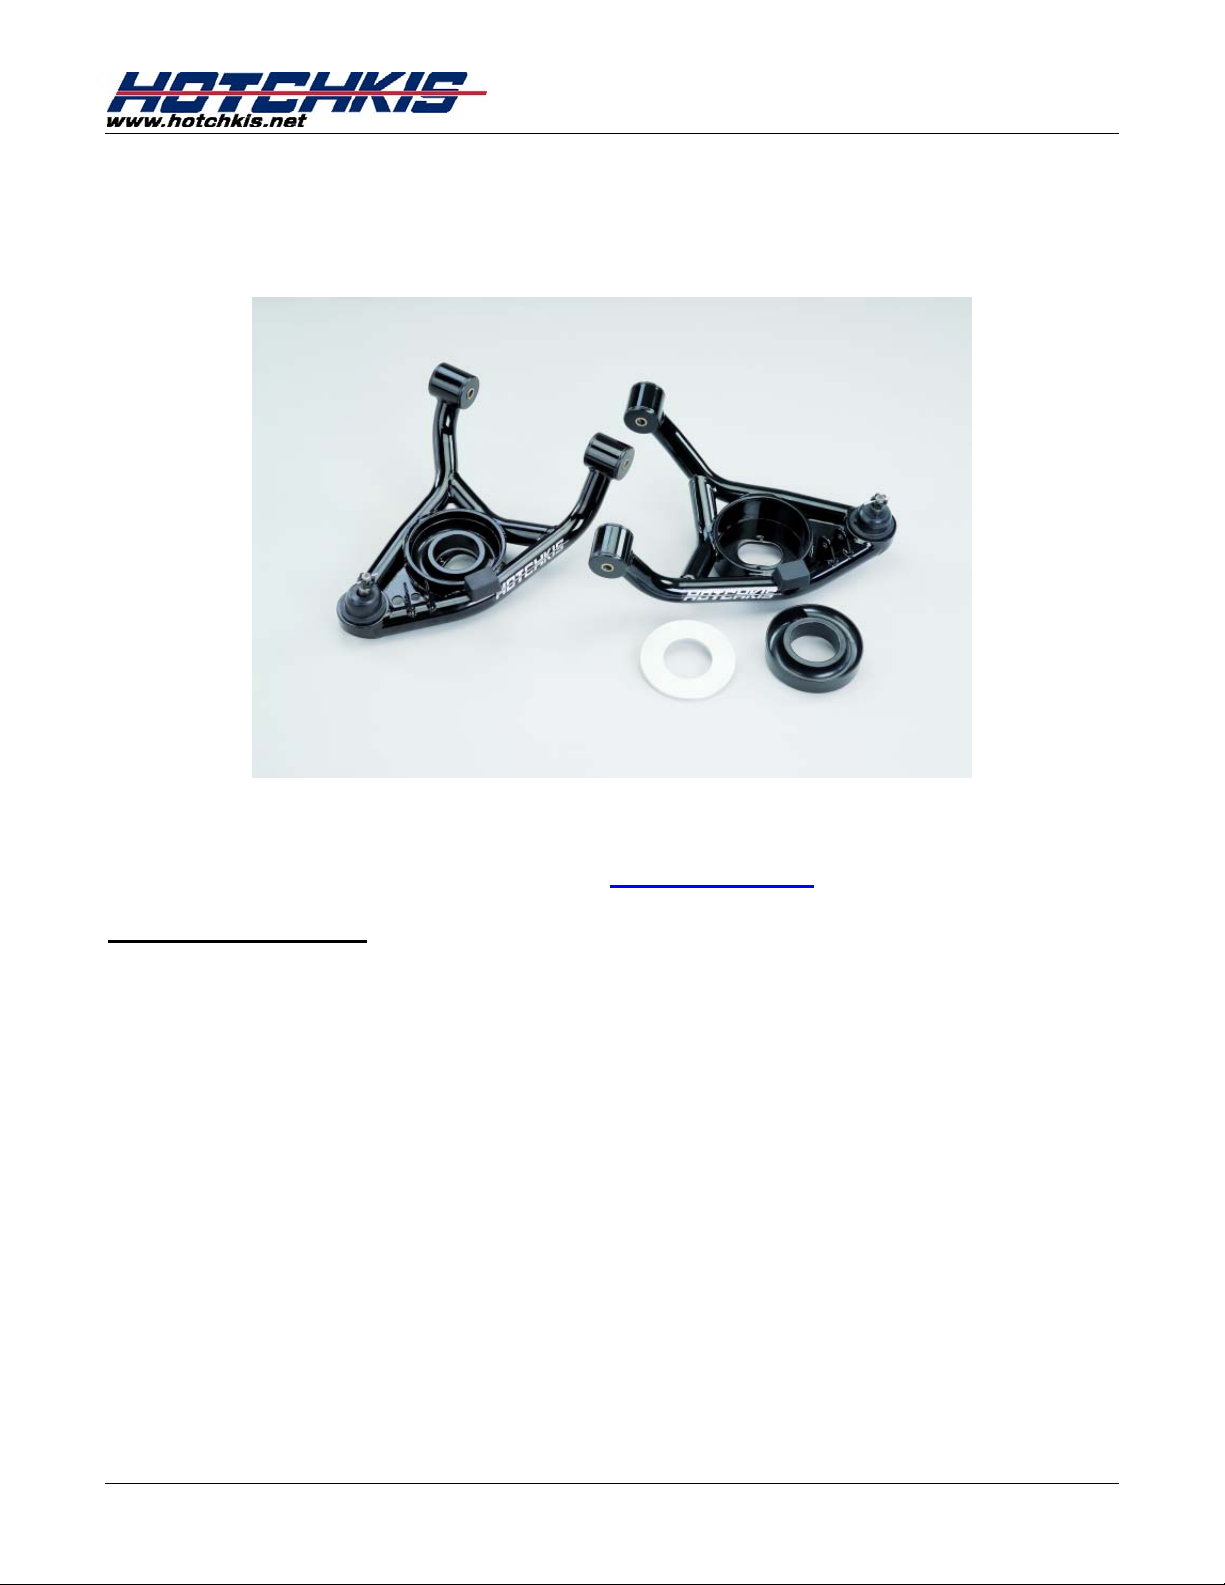
Tubular Lower A-Arms:
Your new Hotchkis tubular lower A-Arms are stronger and more aesthetically pleasing than the
original OEM control arms. They are equipped with durable Delrin bushings that are designed
to rotate independently of the arm and inner sleeve, which dramatically increases the bearing
surface and ensures longer bearing life. Since you’re getting rid of the stock rubber bushings
in place of the stiff Delrin bushings, handling and steering response is dramatically enhanced.
Your Hotchkis A-Arms also have polyurethane spring pockets, which can be shimmed up or
down allowing for 1” of ride height adjustment. These A-Arms are compatible with stock or
aftermarket coils (such as our 2” lowering springs kit # 1900
Block,
1916 64-66 Big Block, 1917 67-72 Big Block ).
Your Hotchkis A-Arms are 100% bolt-on. If you have not done so already, we suggest using
our Tubular Upper A-Arm Package (Kit #1103 A-Body or #1106 F-Body) in conjunction with
the lowers to maximize your vehicle’s handling and response.
64-66 Small Block, 1901 67-72 Small
Hotchkis Performance LLC. 1
Page 2
Notes:
Although your Hotchkis A-Arm was designed for stock or aftermarket coils, the
installation with aftermarket coils is dramatically easier than the OEM coils. This is due
to the much longer free length of the OEM coils compared to most aftermarket coils.
Before You Start:
Please read the entire manual before starting. Most pictures shown are of the driver
side a-arm. Please perform the same procedure for the passenger side.
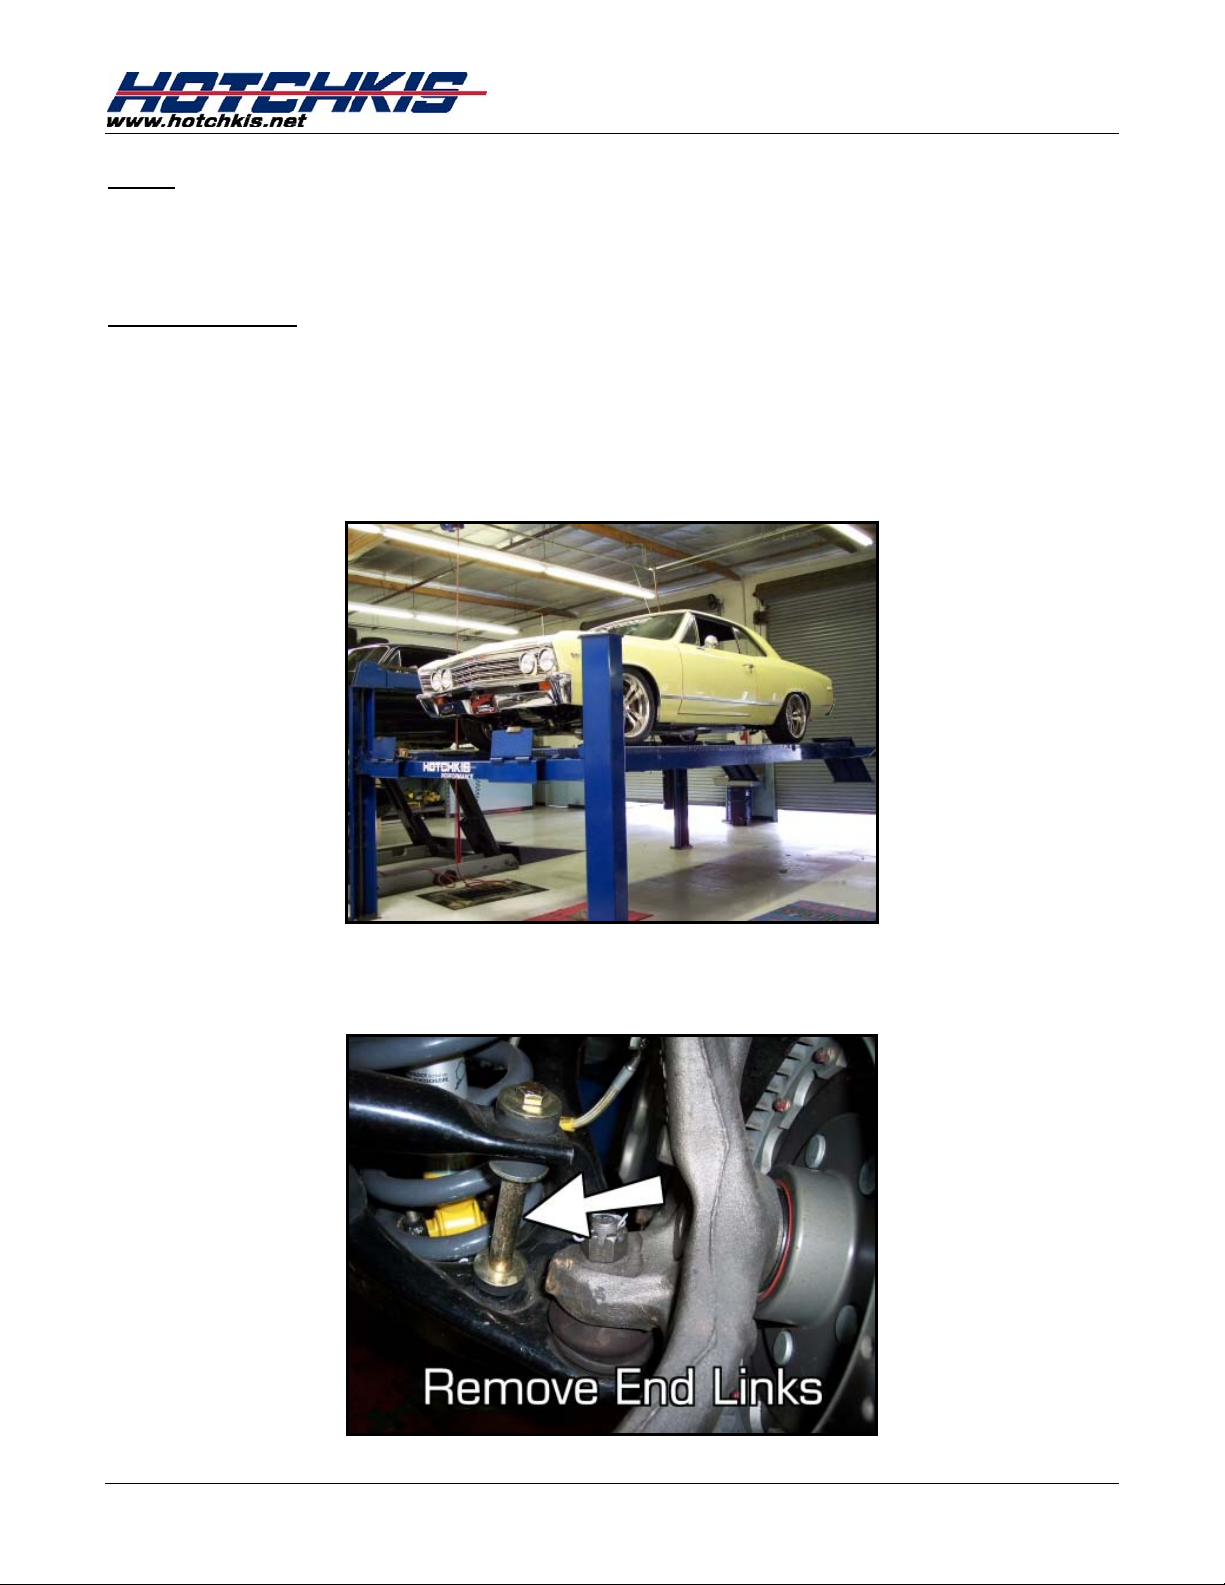
1. Raise Vehicle
Raise the vehicle and put it up on jack stands. You may also use a 2-post or 4-post lift.
1104 64-72 GM A-Body/ 1108 70-81 GM F-Body
2. Remove the Front Sway Bar End links
Disconnect the sway bar form each lower A-Arm by removing the sway bar end links.
Hotchkis Performance LLC. 2
Page 3
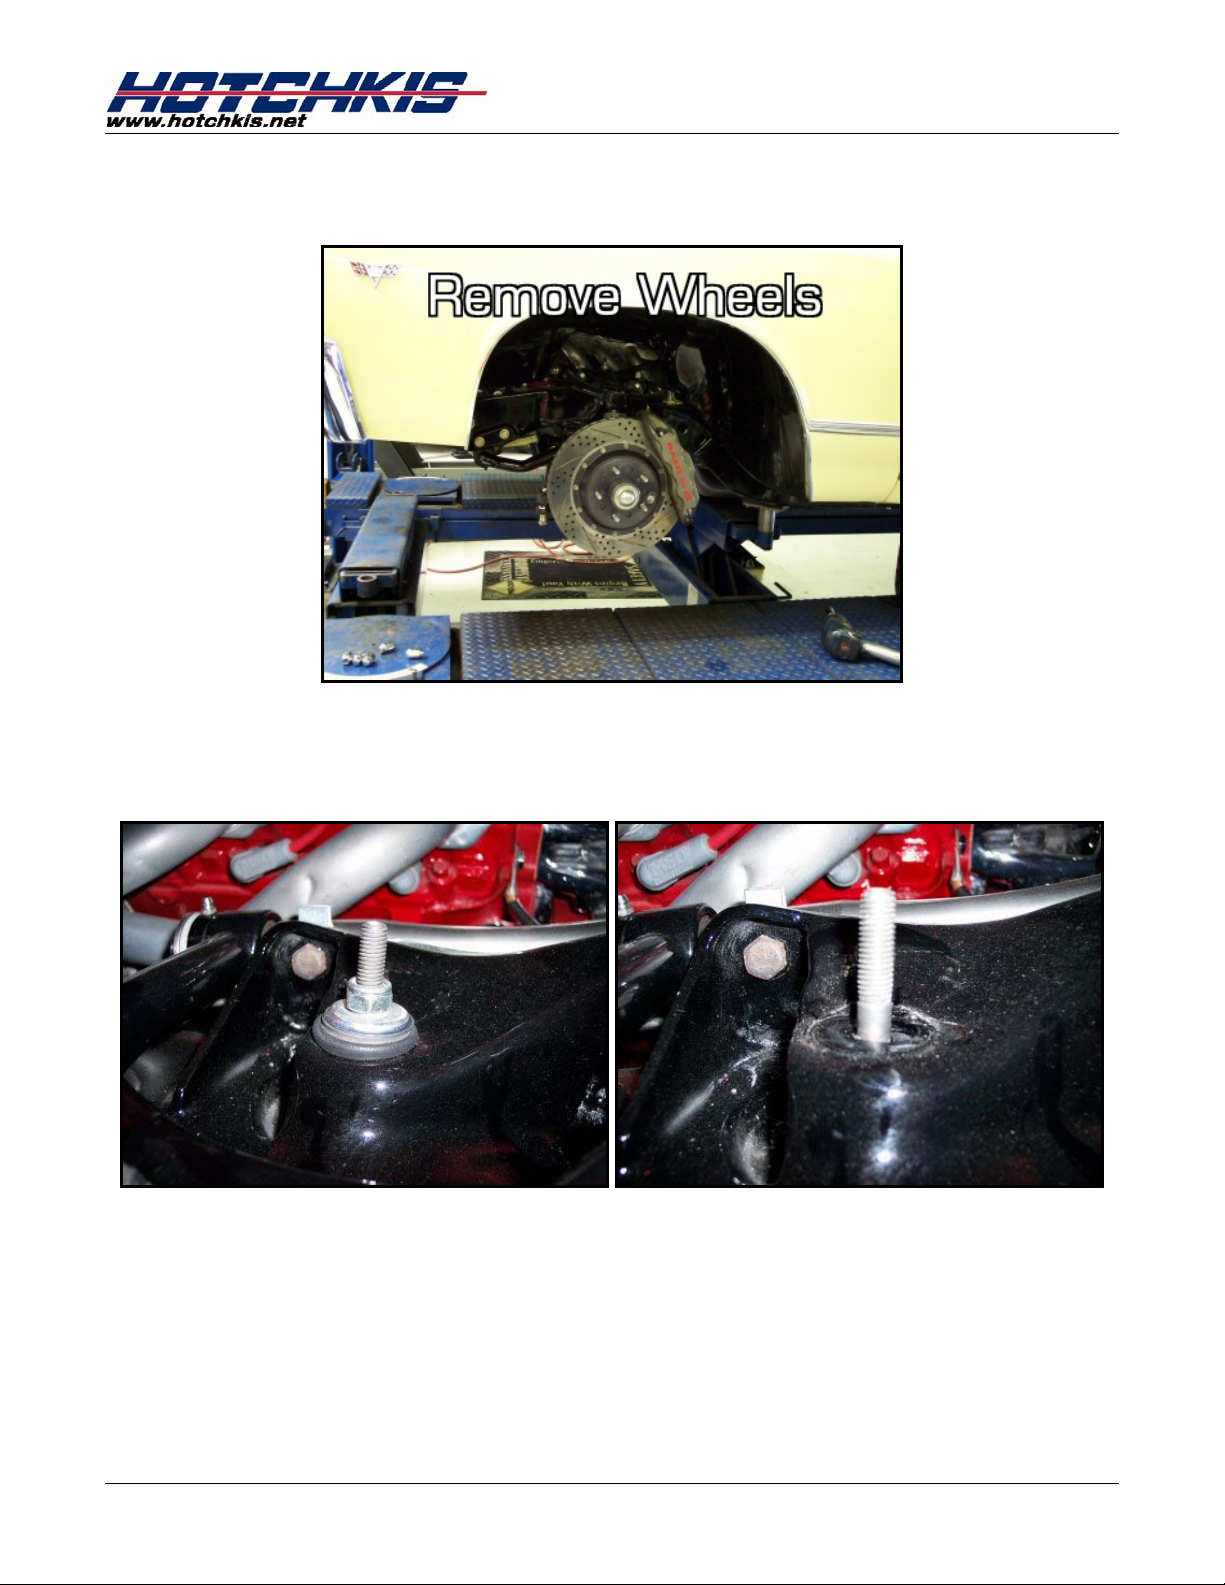
3. Remove the wheels
Remove both front wheels
4. Undo the Top Shock Mount
Using a combination of wrenches and/or allen keys and remove the top shock mounting
nut. Save all shock bushings and hardware for reinstallation.
1104 64-72 GM A-Body/ 1108 70-81 GM F-Body
Hotchkis Performance LLC. 3
Page 4
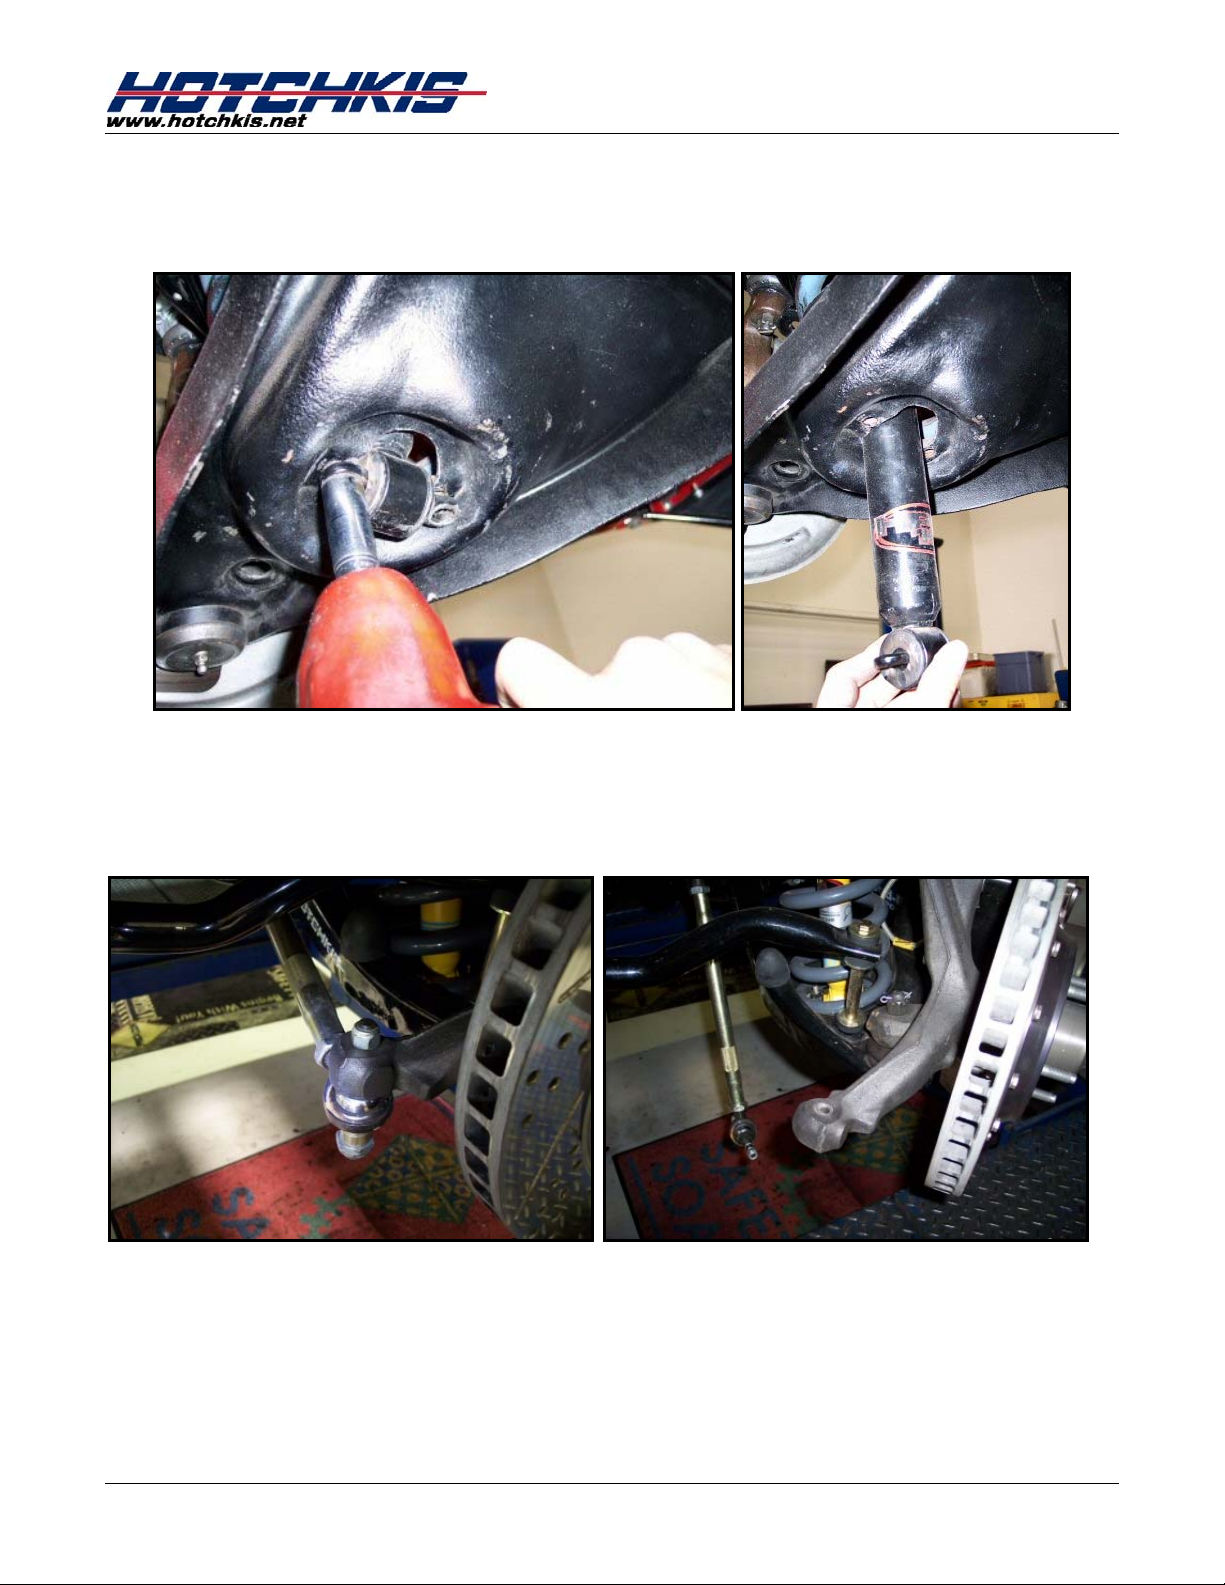
5. Undo the Bottom Shock Mount
Remove the 2 bolts that secure the bottom shock mount and remove the shock from the
vehicle. Keep all bushings and hardware for reinstallation.
1104 64-72 GM A-Body/ 1108 70-81 GM F-Body
6. Disconnect the Outer Steering Tie Rod Ends
Locate the outer tie rod end and remove the cotter pin using a pair of dikes. Use a
11/16” wrench to unfasten the tie rod end castle nut. Hit the steering arm with a
hammer to knock the tapered stud out. Allow the tie rod to hang down.
Hotchkis Performance LLC. 4
Page 5

7. Loosen Lower Ball Joint Nut
Locate the lower ball joint nut near the outboard end of the a-arm and remove the cotter
pin using a pair of dikes. Use a 7/8” wrench to loosen the castle nut. Do not completely
remove this nut! Leave 3 or 4 threads left on the nut.
1104 64-72 GM A-Body/ 1108 70-81 GM F-Body
8. Break Loose the Lower Ball Joint Stud
Using your trusty hammer, hit the spindle until the stud pops loose. The castle nut is
there to keep the spring from launching the lower a-arm down.
Hotchkis Performance LLC. 5
Page 6

1104 64-72 GM A-Body/ 1108 70-81 GM F-Body
9. Loosen Inboard A-Arm Bolts
Loosen but do not remove the 2 inboard a-arm bolts.
10. Disconnecting the Lower Ball Joint Completely
Place a jack underneath the lower a-arm you are working on and jack the arm up until
you start to see the ball joint castle nut start to move up. Remove the ball joint castle
nut.
Hotchkis Performance LLC. 6
Page 7

1104 64-72 GM A-Body/ 1108 70-81 GM F-Body
11. Relieving Tension on the Spring
Slowly lower the jack to relieve the tension in the spring. If you are removing OEM
springs, you must be extra careful since this type of longer spring has more pre-load.
12. Remove the spring
Once you have lowered the a-arm as far as possible, carefully remove the spring.
13. Remove Stock Lower A-Arm
Fully remove the 2 inboard bolts and remove the stock a-arms.
Hotchkis Performance LLC. 7
Page 8

1104 64-72 GM A-Body/ 1108 70-81 GM F-Body
14. Install Pad Spacer and Lower Spring Isolator
• 64-72 GM A-BODIES (1104)
• 74-81 PONTIAC FIREBIRD (1108)
Install the 1/4" spacer and the lower spring Isolator onto the Hotchkis a-arm. At this
time, do not worry about the index clocking of the isolator. With the ¼” spacer, there is
no ride height changes from stock. In some cases, it is necessary to raise or lower the
driver or passenger side to getting uniform ride height. If you need to lower or raise the
vehicle you can order 1/8” spacers (P/N#11990014) or more 1/4" spacers
(P/N#11980014) from Hotchkis directly.
Possible Combinations:
No Spacer = 1/2” Lower than Stock Arm
1/8” Spacer = 1/4”” Lower than Stock Arm
1/4” Spacer = Same as Stock Arm (Default Setting)
1/4” + 1/8” Spacer = 1/4” Higher than Stock Arm
1/4” + 1/4”Spacer = 1/2” Higher than Stock Arm
Hotchkis Performance LLC. 8
Page 9

1104 64-72 GM A-Body/ 1108 70-81 GM F-Body
• 70-81 CHEVY CAMARO (1108)
Do not install the 1/4" spacer. Just install the lower spring Isolator onto the Hotchkis aarm. At this time, do not worry about the index clocking of the isolator. In some cases,
it is necessary to raise the driver or passenger side to getting uniform ride height. If you
need to raise the vehicle you can order 1/8” spacers (P/N#11990014) or the 1/4"
spacers (P/N#11980014) from Hotchkis directly. Your kit comes with two 1/4” spacers.
Possible Combinations:
No Spacer = Same as Stock Arm (Default Setting)
1/8” Spacer = 1/4” Higher than Stock Arm
1/4” Spacer = 1/2” Higher than Stock Arm
1/4” + 1/8” Spacer = 3/4” Higher than Stock Arm
1/4” + 1/4” Spacer = 1” Higher than Stock Arm
15. Reinstall the Hotchkis A-Arm
Install the a-arm in the same manner as removal. Start with the inboard bolts to the
subframe. Fully tighten the inboard bolts at this time.
Hotchkis Performance LLC. 9
Page 10

16. Indexing the Spring (Mock Up)
With the a-arm hanging down, grab the coil spring and place the up into the upper
pocket. Some car models will need to be clocked at a certain angle to match up with
the index. Use some “white out” and mark the frame and the coil to give you a guide
when you are ready to install it for real. If your car does not have the upper indexing,
then you can skip this step.
1104 64-72 GM A-Body/ 1108 70-81 GM F-Body
17. Install the Spring
Rotate the a-arm up and place a jack underneath. Place the spring up into the upper
pocket and index it using your white out guide. Clock the a-arm isolator so the end of
the coil matches up with the index of the isolator. Slowly jack the arm up while pushing
the bottom half of the spring inboard into the isolator pocket. This step will be easy with
aftermarket lowering springs and difficult with OEM stock springs. For OEM stock
springs, you may need to use a series of pry bars to pop the bottom end into the pocket.
Hotchkis Performance LLC. 10
Page 11

1104 64-72 GM A-Body/ 1108 70-81 GM F-Body
Once the bottom is popped in, line up the lower ball joint stud with the bottom of the
spindle. Continue to jack the a-arm up and insert the ball joint stud into the spindle.
Once the stud is in all the way, install the supplied castle nut. Fully tighten this nut and
install the new cotter pin. Once the castle nut is fully fastened, you may release the jack
and relieve the pressure on the a-arm.
Hotchkis Performance LLC. 11
Page 12

18. Reinstall the Steering Tie Rod
Reinstall the steering tie rod in the same manner as removal. Don’t forget to install the
cotter pin.
19. Reinstall the Shock
Reinstall the shocks in the same manner as removal.
1104 64-72 GM A-Body/ 1108 70-81 GM F-Body
Hotchkis Performance LLC. 12
Page 13

21. Install the Sway Bar End links
Attach sway bar to the control arm with the included end links.
1104 64-72 GM A-Body/ 1108 70-81 GM F-Body
Note: 1104 shown
22. Reinstall the Wheels
Reinstall the wheels and lower the vehicle. You are finished with the Lower a-arm
installation!
Hotchkis Performance LLC. 13
Page 14

1104 64-72 GM A-Body/ 1108 70-81 GM F-Body
Hotchkis Performance LLC
Return Policy & Limited Warranty
Effective January 1, 2009 all Hotchkis products must be registered to qualify for warranty at
www.hotchkis.net
the original purchase date.
Return Policy
We want you to be completely satisfied with your Hotchkis Performance product. For products, presenting signs
of shipping damage please contact the freight carrier immediately. All our products are guaranteed to be free
from manufacturer’s defects. If your order arrives with a manufacture defect, please contact our Customer
Service Department at (562) 907-7757. You will be assigned a Returned Goods Authorization Number (RGA).
The package you return must show the RGA on the outside of the package, include the original invoice and be
shipped prepaid to our facility. The product has to be unused and in its original packaging materials. Exchanges
or refunds made after 30 days will be subject to a 20% restocking charge. If you purchased your Hotchkis
Performance product from an authorized dealer, you are still covered by this return policy. All returns
however, should be made to your dealer, not to Hotchkis Performance directly.
Limited Warranty
Hotchkis Performance offers a Limited Warranty against defects in materials and workman sh i p of its products.
This Warranty only applies to the original retail purchaser who retains ownership of the vehicle on which the
product was originally installed. If the product is determined to be defective, Hotchkis Performance will repair,
replace or refund the purchase price of the defective product at Hotchkis Performance's sole discretion, which
shall fully satisfy and discharge any and all warranty claims. Any repaired or replaced product will be returned to
the sender excluding the cost of freight. Products must be registered to qualify for warranty at
www.hotchkis.net or via the mail-in warranty card, included with the product, within 30 days of the
original purchase date.
Exclusions from Warranty
Items offered but not manufactured by Hotchkis Performance are warranted according to the manufacturer's
terms and are not covered by this limited warranty. Hotchkis Performance shall not be responsible for any labor,
removal, installation, re-installation or maintenance costs. This warranty does not cover the cosmetic finish or
plating of any product or any normal wear and tear to any product including, but not limited to bushings, brackets,
end-links, hardware, steering components, shocks or springs. In addition, this warranty does not apply to any
products that have been:
Improperly installed or installed by someone other than a qualified, licensed auto mechanic
experienced in the installation and removal of suspension products;
Improperly serviced, misused, or modified, altered or subjected to abuse, negligence, accident or
collision;
Installed in any vehicle that has been modified;
Installed on any vehicle that has carried loads in excess of automobile manufacturer suggested
weight limits; or
Installed on any vehicle that has been subject to abnormal or excessive use, including rallying,
racing, or racing-type activities or off-road use.
Limitation of Warranty
This limited warranty is the entire and only warranty for the products and may not be modified or supplemented by
any other person or company in any form. Any description of the products, by anyone, is for the sole purpose of
identifying them and is not part of the basis of the bargain, and does not constitute a warranty that the products
will conform to that description. The statements of any salesperson do not constitute part of this limited warranty
and cannot be relied upon as a warranty.
or via the mail-in warranty card, included with the product, within 30 days of
Hotchkis Performance LLC. 14
Page 15

1104 64-72 GM A-Body/ 1108 70-81 GM F-Body
THERE ARE NO WARRANTIES, EXPRESSED OR IMPLIED, INCLUDING ANY IMPLIED WARRANTIES OF
MERCHANTABILITY OR FITNESS FOR A PARTICULAR PURPOSE, WHICH EXTEND BEYOND THE
DESCRIPTION ON THE FACE HEREOF. ANY IMPLIED WARRANTIES ARE DISCLAIMED TO THE FULLEST
EXTENT PERMITTED BY LAW. THIS WARRANTY DOES NOT COVER CONSEQUENTIAL DAMAGES, LOSS
OF TIME OR REVENUES, INCONVENIENCE, LOSS OF USE OF THE VEHICLE, DAMAGE TO THE VEHICLE
OR COMPONENTS OF THE VEHICLE, ANY OTHER TYPE OF CONSEQUENTIAL DAMAGES, OR OTHER
INCIDENTAL OR INDIRECT DAMAGES. HOTCHKIS’ MAXIMUM LIABILITY UNDER THIS WARRANTY
SHALL IN NO EVENT EXCEED THE PURCHASE PRICE OF THE PRODUCT.
limitations on how long an implied warranty lasts or the exclusion or limitation of incidental or consequential
damages and in such states the above limitations or exclusions may not apply. This limited warranty gives the
purchaser specific legal rights and the purchaser may have other rights that may vary from state to state.
Technical Information
Hotchkis Performance makes every effort to ensure that you are provided with the most accurate and up-to-date
technical information. However, all technical information is approximate and may vary upon application. Additional
suspension components may be needed in some applications, depending upon the make, model, engine and
chassis of the vehicle. Hotchkis Performance is not responsible for any consequ ences resulting from
manufacturer’s technical mid-year changes. Hotchkis Performance product s sh ould only be installed by a
qualified, licensed auto mechanic experienced in the installation of such products.
Warranty Claim Procedure:
The answer to ALL the following questions should be YES before making a warranty claim:
Some states do not allow
Did you register the product at www.hotchkis.net or via the mail-in warranty card within 30 days of
purchase?
Is the product appropriate to your application?
Did you carefully and thoroughly read the instructions provided along with the product?
Do you have the original invoice or sales receipt?
Are you the original purchaser?
Was the product properly installed by a qualified, licensed auto mechanic?
Has the product been installed on the original vehicle on which it was installed at all times?
Is the product unmodified and clean?
Is the reason for return a legitimate product defect?
If the answer to all these questions is YES, please contact our Customer Service Department at (562) 907-7757.
You will be given a Returned Goods Authorization Number (RGA) valid for 60 days. You will also be asked to ship
the product prepaid to our facility. All shipments MUST be (i) prepaid, (ii) include the original invoice or sales
receipt, (iii) show the RGA on the outside of the package and (iv) include your name, address, make and model of
the vehicle, and a brief description of the claimed defect, including the circumstances under which the defect
occurred. If the warranty claim is deemed valid then Hotchkis will estimate shipping costs to return the repaired or
replacement part and contact you for payment. Hotchkis’s Limited warranty requires that any repaired or replaced
product will be returned to the sender excluding the cost of freight. Warranty related inquires should be sent to
the following address:
HOTCHKIS PERFORMANCE, LLC
C/O CUSTOMER SERVICE
12035 BURKE ST. SUITE 13
SANTA FE SPRINGS, CA 90670
Hotchkis Performance will not accept product returns without the RGA number, receipt and the information
described above. C.O.D. or collect shipments will be refused. Once the returns are received at Hotchkis
Performance, we will evaluate the products, verify the sales receipt, and investigate the warranty claim. Any
repaired or replaced product will be returned to the sender.
Effective January 1, 2009. This return policy and limited warranty supersedes all previous policy and
warranty statements. Policies and warranties are subject to change without notice. Hotchkis Performance
is not responsible for printing errors.
Hotchkis Performance LLC. 15
 Loading...