

Page 1
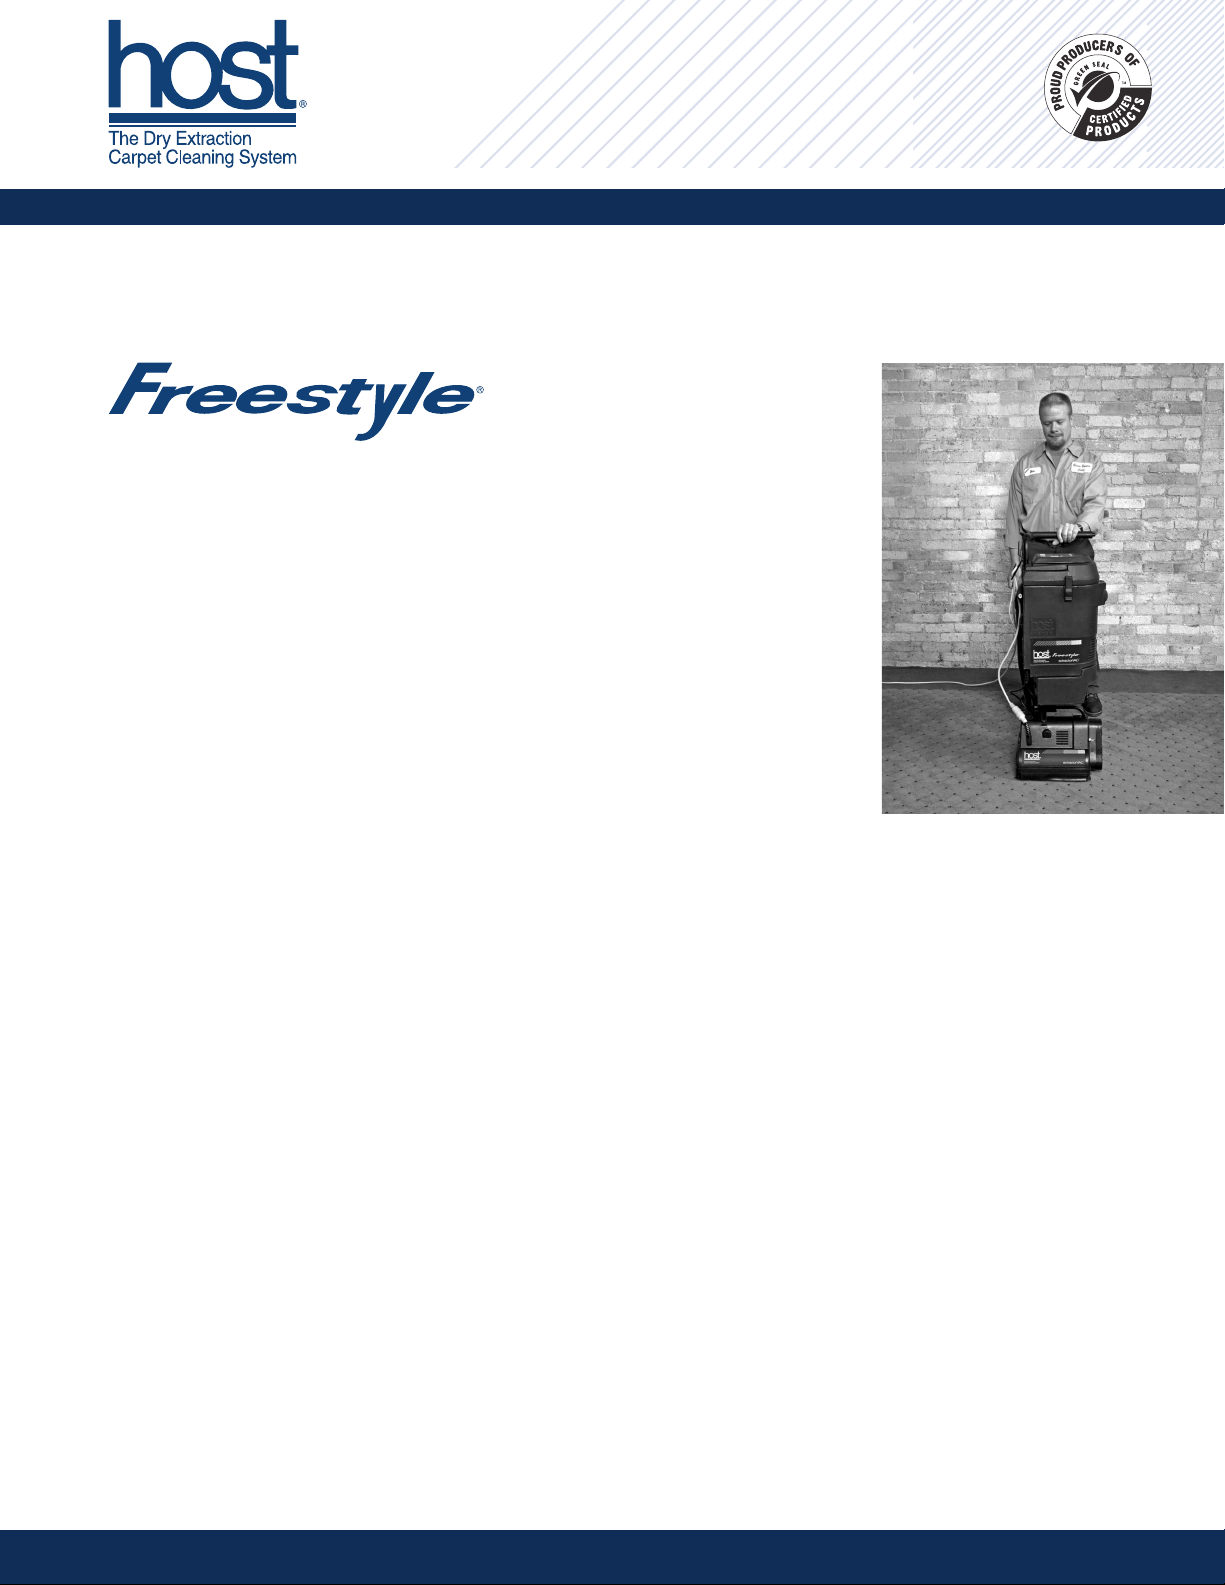
Freestyle®extractorVAC®Safety & Maintenance Instructions
Read all instructions before using this machine.
Safety Instructions
When using electrical equipment, basic precautions
should always be followed, including the following:
Warning—to reduce the risk of fire, electric shock, or injury:
1. Do not leave machine when plugged in. Unplug from outlet when not in use and before servicing.
2. Do not use outdoors or on wet surfaces.
3. Do not allow to be used as a toy. Close attention is necessary when used by or near children.
4. Use only as described in manufacturer’s Instruction Manual. Use only manufacturer’s
recommended attachments.
5. Inspect cord for damage before each use. Do not use with damaged cord or plug. If machine
is not working as it should, has been dropped, damaged, left outdoors, or dropped into water,
return it to the manufacturer or authorized repair center.
6. Do not pull or carry by cord, use cord as a handle, close a door on cord, or pull cord around
sharp edges or corners. Do not run machine over cord. Keep cord away from heated surfaces.
7. Do not unplug by pulling on cord. To unplug, grasp the plug not the cord.
8. Do not handle plug or machine with wet hands.
9. Do not put any object into openings. Do not use with any opening blocked; keep free of dust,
lint, hair, and anything that may reduce air flow.
10. Keep hair, loose clothing, fingers, and all parts of body away from openings and moving parts.
11. Turn off all controls before unplugging.
12. Use extra care when cleaning on stairs.
13. Do not use to pick up flammable or combustible liquids such as gasoline or use in areas
where they may be present.
14. Do not use to pick up anything that is burning or smoking, such as cigarettes, matches,
or hot ashes.
15. Do not use to pick up health-endangering dust such as asbestos.
16. Do not use as a wet vacuum.
17. Do not use without filters in place.
18. Connect to a properly grounded outlet only. See Grounding Instructions.
19. This machine is to be used with HOST® carpet cleaning products only. Use of other cleaning
products may damage this machine.
Save these instructions.
Page 2
Grounding Instructions
This machine must be grounded. If it should malfunction or break
own, grounding provides a path of least resistance for electric
d
current to reduce the risk of electric shock. This machine is
equipped with a cord having an equipment-grounding conductor
and grounding plug. The plug must be inserted into an appropriate
outlet that is properly installed and grounded in accordance with
ll local codes and ordinances.
a
WARNING: Improper connection of the equipment-grounding
conductor can result in the risk of electric shock. Check with a
qualified electrician or service person if you are in doubt as to
whether the outlet is properly grounded. Do not modify the plug
provided with the machine. If it will not fit the outlet, have a
proper outlet installed by a qualified electrician.
This machine is for use on a nominal 120 volt circuit, and has a
grounded plug that looks like the plug illustrated in Diagram A.
A temporary adapter that looks like the adapter illustrated in
Diagram B may be used to connect this plug to a 2-pole
receptacle as shown in Diagram C if a properly grounded outlet
Machine Assembly
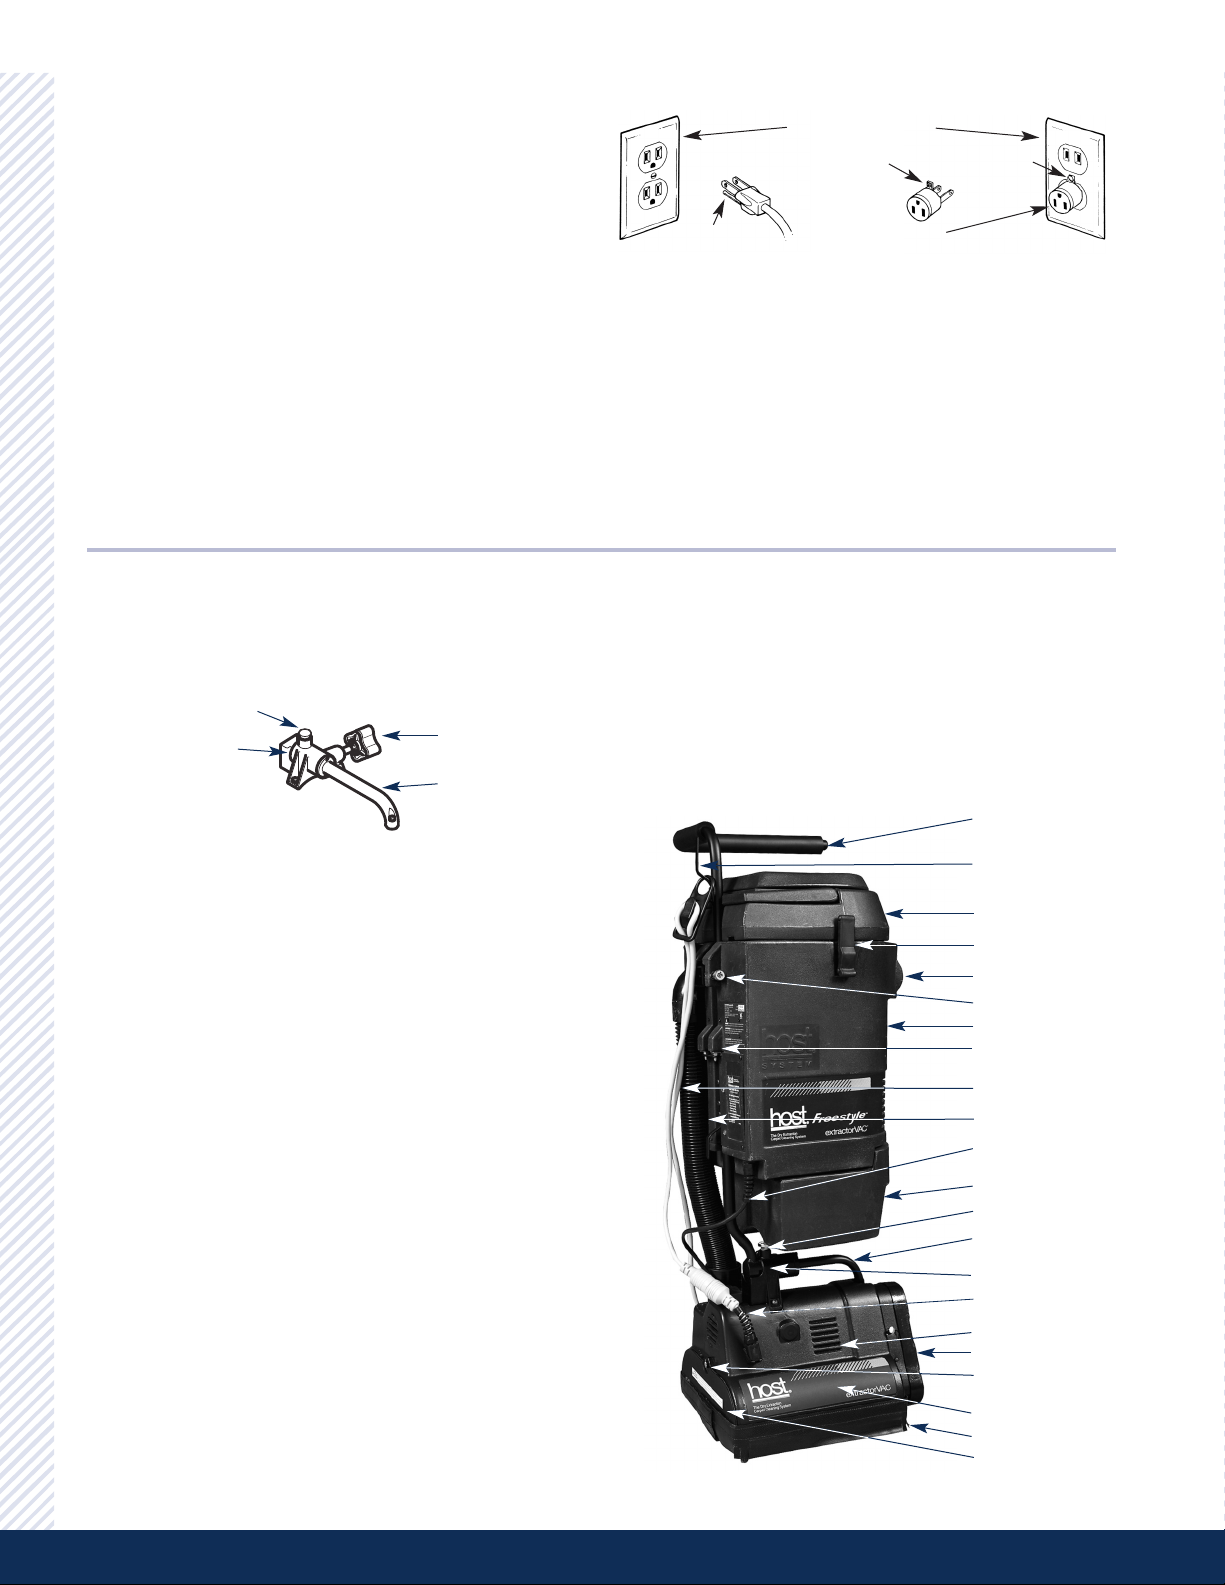
Handle Assembly
1. Lift and turn the handle release knob on top of the lifting
handle 1⁄4 turn.
Handle release knob
Handle socket
Handle locking knob
Lifting handle
GROUNDED OUTLET BOXES
GROUNDING PIN
A)
(
TAB FOR
GROUNDING
SCREW
ADAPTER
(B)
METAL
SCREW
C)
(
is not available. The temporary adapter should be used only until
a properly grounded outlet can be installed by a qualified
electrician. The green colored rigid ear, lug, or the like extending
from the adapter as illustrated in Diagram B, must be connected
to a permanent ground outlet box cover. Whenever the adapter is
used, it must be held in place by a metal screw as shown in
Diagram C.
Note: In Canada, the use of a temporary adapter is not permitted
by the Canadian Electrical Code.
Breaking in New Brushes
Standard (white) and firm (zebra) brushes need to be broken in
before using for the first time.
1. Remove the Freestyle from the caddy.
2. Place the Freestyle on a smooth concrete surface and run for
15 minutes.
2. With the operating handle parallel to the floor, insert the
handle into the handle socket. Unscrew handle locking knob
completely.
3. Turn the handle release knob until it drops into place. You’ll
hear a click when it does. If the knob does not click into
place, push on handle shaft to insert fully.
4. Rotate operating handle to upright position. Tighten handle
locking knob completely for stationary use. To use the
operating handle free swinging, do not tighten locking knob.
5. Attach the yellow base power cord to the pigtail twist lock on
the front of the machine base.
Attaching the Vacuum Pod to the Handle
1. Pull and turn the lock release pin on the vacuum pod 1⁄4 turn
so it is in the release position.
2. With two hands, grasp the vacuum pod and lower it onto the
handle bracket so the lower pins fit through the holes in the
handle bracket. The lock release pin will drop in place.
3. Turn lock release pin 1 ⁄4 turn until it locks in position.
4. Insert the vacuum hose into the machine base. Plug the
black vacuum pod power cord into the vacuum power
cord receptacle located on the top of the machine base.
Operating handle
Cord clip
Filter housing
Filter housing latch
Switch control panel
Lock release pin
Vacuum pod
Handle bracket for
vacuum pod
Yellow base power cord
Vacuum hose
Black vacuum pod
power cord
Bagless hopper
Handle release knob
Lifting handle
Handle socket
Pigtail twist lock
for power cord
Motor vents
Gear case cover
Spring lock button for
brush guard/end cover
Hood
®
Velcro
skirt
Brush guard/end cover
Page 3
Machine Assembly, cont’d.
Removing the Handle From the Freestyle
1. Unwind the yellow base power cord from the handle.
2. Unplug the black vacuum pod power cord from the machine
base. Pull the vacuum hose out of the machine base.
3. Pull the lock release pin on the vacuum pod out and turn 1⁄4
turn to unlock. Lift the vacuum pod off the handle and upper
lock brackets.
4. Unscrew handle locking knob completely. Lower the handle
to a 90° angle (parallel to the floor).
5. Lift and turn the handle release knob on top of the lifting handle
1⁄4 turn to unlock.
6. Slide the handle straight out to the side.
Machine Maintenance
Follow these guidelines for routine maintenance on your Freestyle
to obtain optimal performance of both the HOST equipment and
cleaning system.
even want to clean the filters outside
of the building. For best results, use
a tank vacuum to clean the filters.
Note: You may want to have extra
filters on hand so you do not have to
eave the area to clean the filters. Just
l
replace the dirty filters with clean
filters and continue cleaning. Then
you can clean the dirty filters later.
atch the rectangular notch on
M
the lower primary filter (burnt
range) with the filter housing.
o
5. Replace the filters. The filters are
designed so they can only be
replaced in the correct order. The
lower primary filter is burnt orange.
The upper secondary filter is black.
6. Lift the filter housing lid and swing it
back into place. Be sure it is centered
properly and that all the filters are
lined up in the correct order. Fasten
he upper secondary filter
T
(black) fits on the primary filter.
the latches.
If after cleaning the filters, the filter light continues to come on,
see Using/Cleaning the 3-Piece Fine Particle Filter or HEPA-type
Filter and Loss of Suction Power.
Emptying the Bagless Hopper
The Freestyle has a hopper, rather than a bag, for fast, easy
dumping. Check the bagless hopper and empty as needed to
prevent overloading. Always empty the bagless hopper before
storing the Freestyle.
Overloading of the hopper will cause rapid filter clogging as
well as HOST Dry Carpet Cleaner to accumulate on the inner
cone assembly. See Cleaning the Interior of the Freestyle, #3.
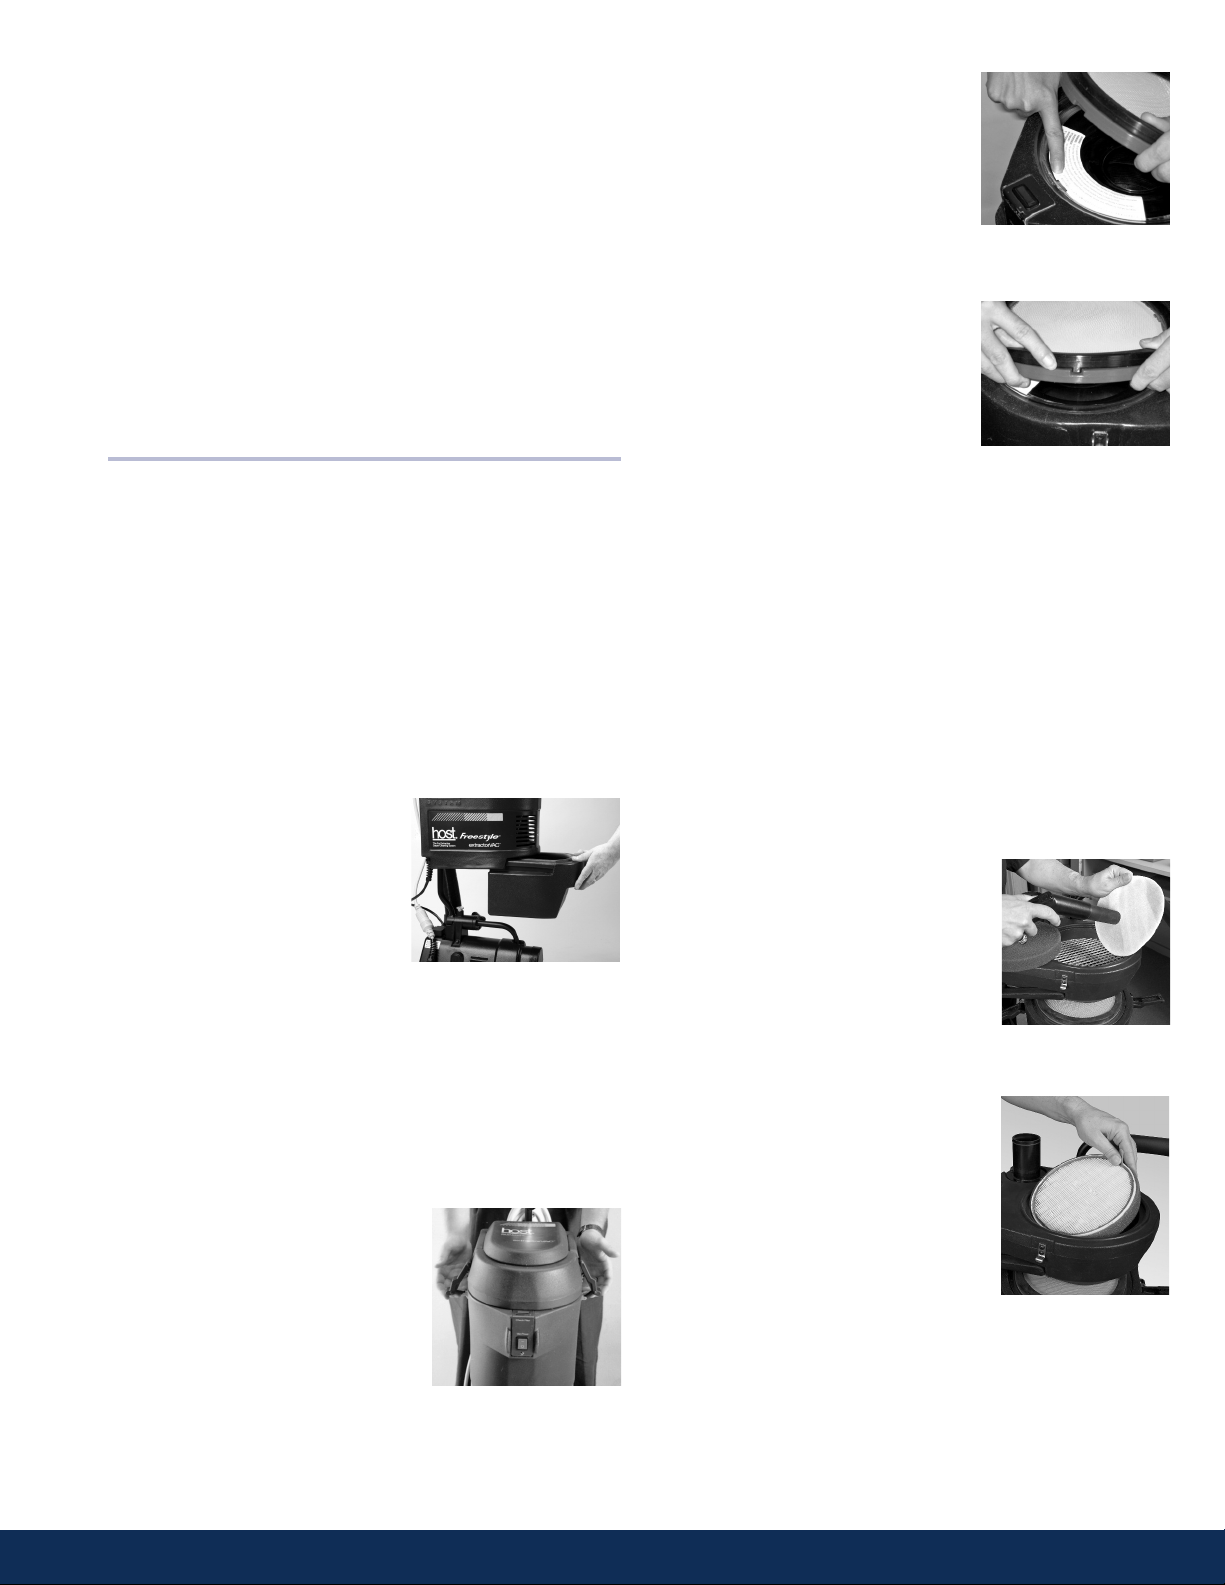
1. Place one hand against the side of
the Freestyle and pull out the
hopper with the other hand. Empty
the bagless hopper.
2. After emptying, push the hopper
firmly back into the hopper guides
until it stops. The hopper must be
completely closed (sealed) to
maintain full vacuum power and to
Push hopper firmly into hopper
guides to insure a snug seal.
prevent premature filter clogging.
Each time you dump the hopper, it’s a good idea to check the
filters. You must clean the filters when the filter light comes on.
Note: When cleaning with HOST SJ, the filter light will come on
more frequently and you will have to clean the filters more often.
Cleaning Primary & Secondary Filters
When the Filter Light Comes On
1. Turn the Freestyle off.
2. Unlatch the filter housing.
3. Lift the filter housing lid up and swing
it to one side. (If needed, lift it all the
way off.)
4. The Freestyle filters are designed to
capture fine dust particles. If you are
cleaning in healthcare environments
Unlatch the filter housing
or other areas where IAQ is a concern,
do not remove and clean the filters in the room being cleaned.
Take the Freestyle out of the room and clean the filters. You may
Using/Cleaning the 3-Piece Fine Particle Filter
or HEPA-type Filter
You cannot use these filters together. Use either the 3-piece
Fine Particle filter OR the HEPA-type filter. To check these
filters, unlatch and take the filter housing lid completely off and
turn it over.
3-Piece Fine Particle Filter
The 3-piece fine particle filter should be cleaned frequently, daily
under high use conditions, weekly if used less. For best results,
vacuum filters with a tank vacuum at the end of each day.
1. Remove the foam and felt filters and
screen from the filter housing lid. Inspect
the filters for soil. If they are soiled,
vacuum both sides of each filter.
2. Replace the filters in this order: screen,
felt filter, foam filter. The foam filter has
a snug fit and will hold the felt filter and
screen in place.
HEPA-type Filter
HEPA-type filters are not cleanable and
must be replaced when dirty. The HEPA-
type filter should be replaced frequently in
high use conditions. Here’s a quick and
easy way to check the HEPA-type filter:
1. Pull on the small tab to remove the filter.
2. Hold filter up to a strong light. If you
can see light through the filter, it’s still
usable. If not, replace with a new HEPAtype filter (available from your HOST
Distributor).
Insert the HEPA-type filter
in the lid with the small tab
facing you.
3. Insert the filter in the lid, with tab facing you, and replace the
filter housing lid. Be sure it is centered properly and that all the
filters are lined up. Fasten the latches.
Note: To avoid damage to the HEPA-type filter, always empty
the bagless hopper before storing the Freestyle.
Page 4
Machine Maintenance, cont’d.
Replacing Belts
1. Disconnect Freestyle from power.
2. Remove the Velcro skirt from machine base.
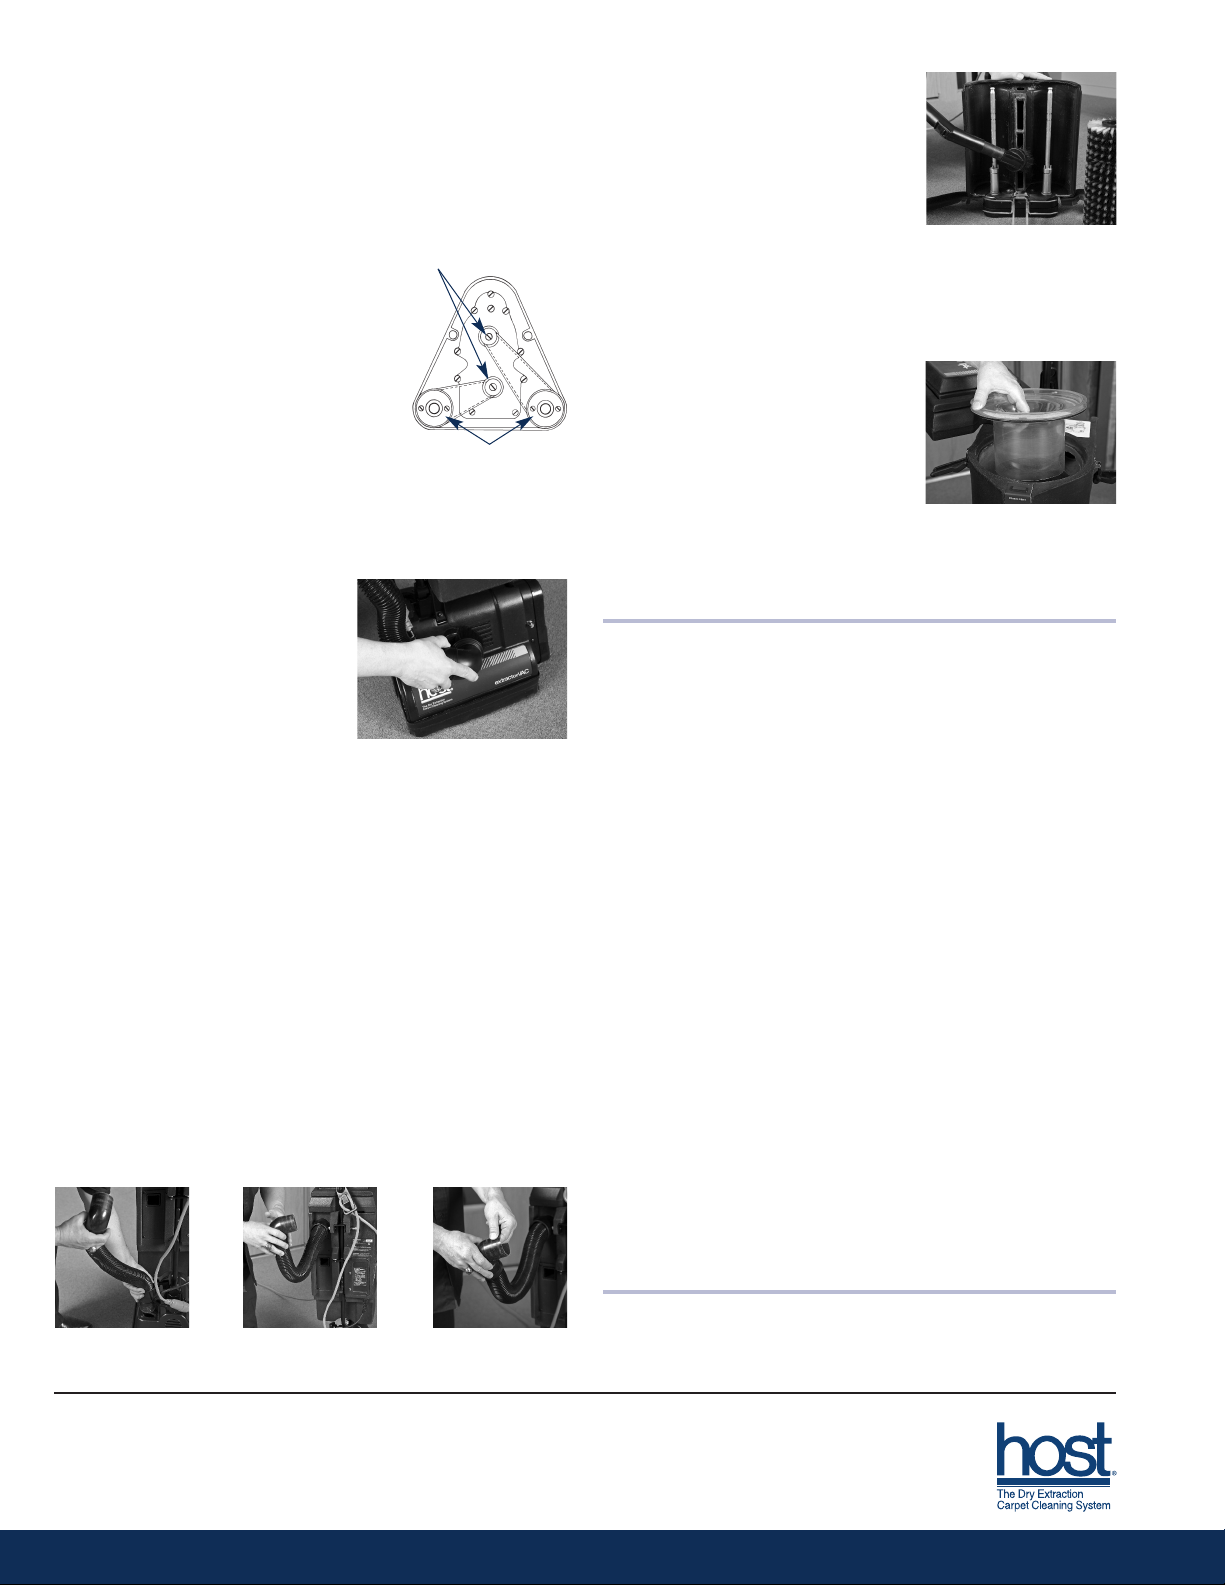
3. Remove gear case cover by removing
the 5 screws.
4. Remove the screw in center of small
pulley and slide out pulley cap.
5. Remove the 2 screws on large pulley
and lift off flange.
6. Cut damaged belt with scissors and
remove it.
7. Put new belt onto small pulley first
and work it onto the large pulley by
turning the cleaning brushes by hand.
8. Replace pulley cap, flange, screws,
gear case cover and Velcro skirt.
Cleaning the Motor Vents
It’s important that the motor vents
on the machine hood are kept free
of any buildup. Failure to keep these
vents clean could cause the
Freestyle to overheat.
Remove the vacuum hose from the
Freestyle base and vacuum the motor
vents after each use.
Cleaning & Rotating Brushes
Refer to the separate HOST System Instruction Manual to clean
and rotate machine brushes.
Small pulley cap
& screw for cap
Large pulley flange
&
screws for flange
Vacuum the motor vents with the
vacuum hose.
2. Check the vacuum shoe between the
cleaning brushes on the underside of
the Freestyle for buildup. With a tank
acuum, remove any material
v
clogging the shoe.
. Check under the separator assembly
3
and in the vacuum cone for buildup.
Buildup will occur more frequently
if you have not emptied the bagless
Remove any HOST and buildup
rom the vacuum shoe.
f
hopper as often as needed.
a. With bagless hopper in place, unlatch the top of the machine,
swing the filter housing to the side and remove the filters.
b. Lift out the separator assembly and
wipe the underside of the separator
assembly and the inside of the
vacuum cone with a clean, dry
cloth. If there is a thick
accumulation on the cone, use a
damp cloth to loosen the soil. The
emove the separator assembly
loosened soil will drop into the
bagless hopper.
R
to clean the vacuum cone.
c. Replace the separator assembly and push down firmly until it
seals tightly.
Troubleshooting
Loss of Suction Power
1. Clean and/or replace filters.
2. Adjust the Velcro skirt height. The lower edge of the Velcro skirt
should just brush the carpet surface. Starting in the middle of the
brush guard/end cover, line up the slits on the Velcro skirt with
the corners of the Freestyle.
Also refer to Cleaning the Interior of the Freestyle.
Cleaning the Interior of the Freestyle
Make cleaning the interior of the Freestyle part of your daily
routine maintenance.
If Freestyle Does Not Run
1. Disconnect Freestyle from power.
2. Make sure that the yellow base power cord is properly secured
to the pigtail twist lock on the front of the machine base.
1. Check the vacuum hose for clogs.
3. Check the wall plug, yellow base power cord and plug for
a. Unplug both ends of the vacuum hose and check for any
breaks.
buildup of HOST or dirt.
4. Check that you have not blown a fuse.
b. If buildup exists, plug straight end of the vacuum hose into
the vacuum connection.
5. Plug the Freestyle in. If it doesn’t run, be sure you have turned
the motor switch on. If the switch is on and it still doesn’t run,
c. Turn the vacuum motor on and loosen buildup from the
vacuum hose elbow.
it should be returned to the manufacturer or authorized repair
center. Contact your HOST Distributor.
The electrical cords on the Freestyle have been designed to give
the proper power to the motor through both the gauge and length
of the cord. Do not use an extension cord. The grounding plug at
the end of the cord should NOT be removed.
HOST, Freestyle, extractorVAC and PREP are registered trademarks of Racine Industries, Inc., Racine, Wisconsin USA.
© 2005, 2010
Racine Industries, Inc. % (800) 558-9439
1405 Sixteenth Street % (262) 637-4491
P.O. Box 1648 FAX (262) 637-0558
Racine, WI 53401 USA www.hostdry.com
M30577(D)
 Loading...