

horsch 500 (2003), 500i (2003) Owner's Manual
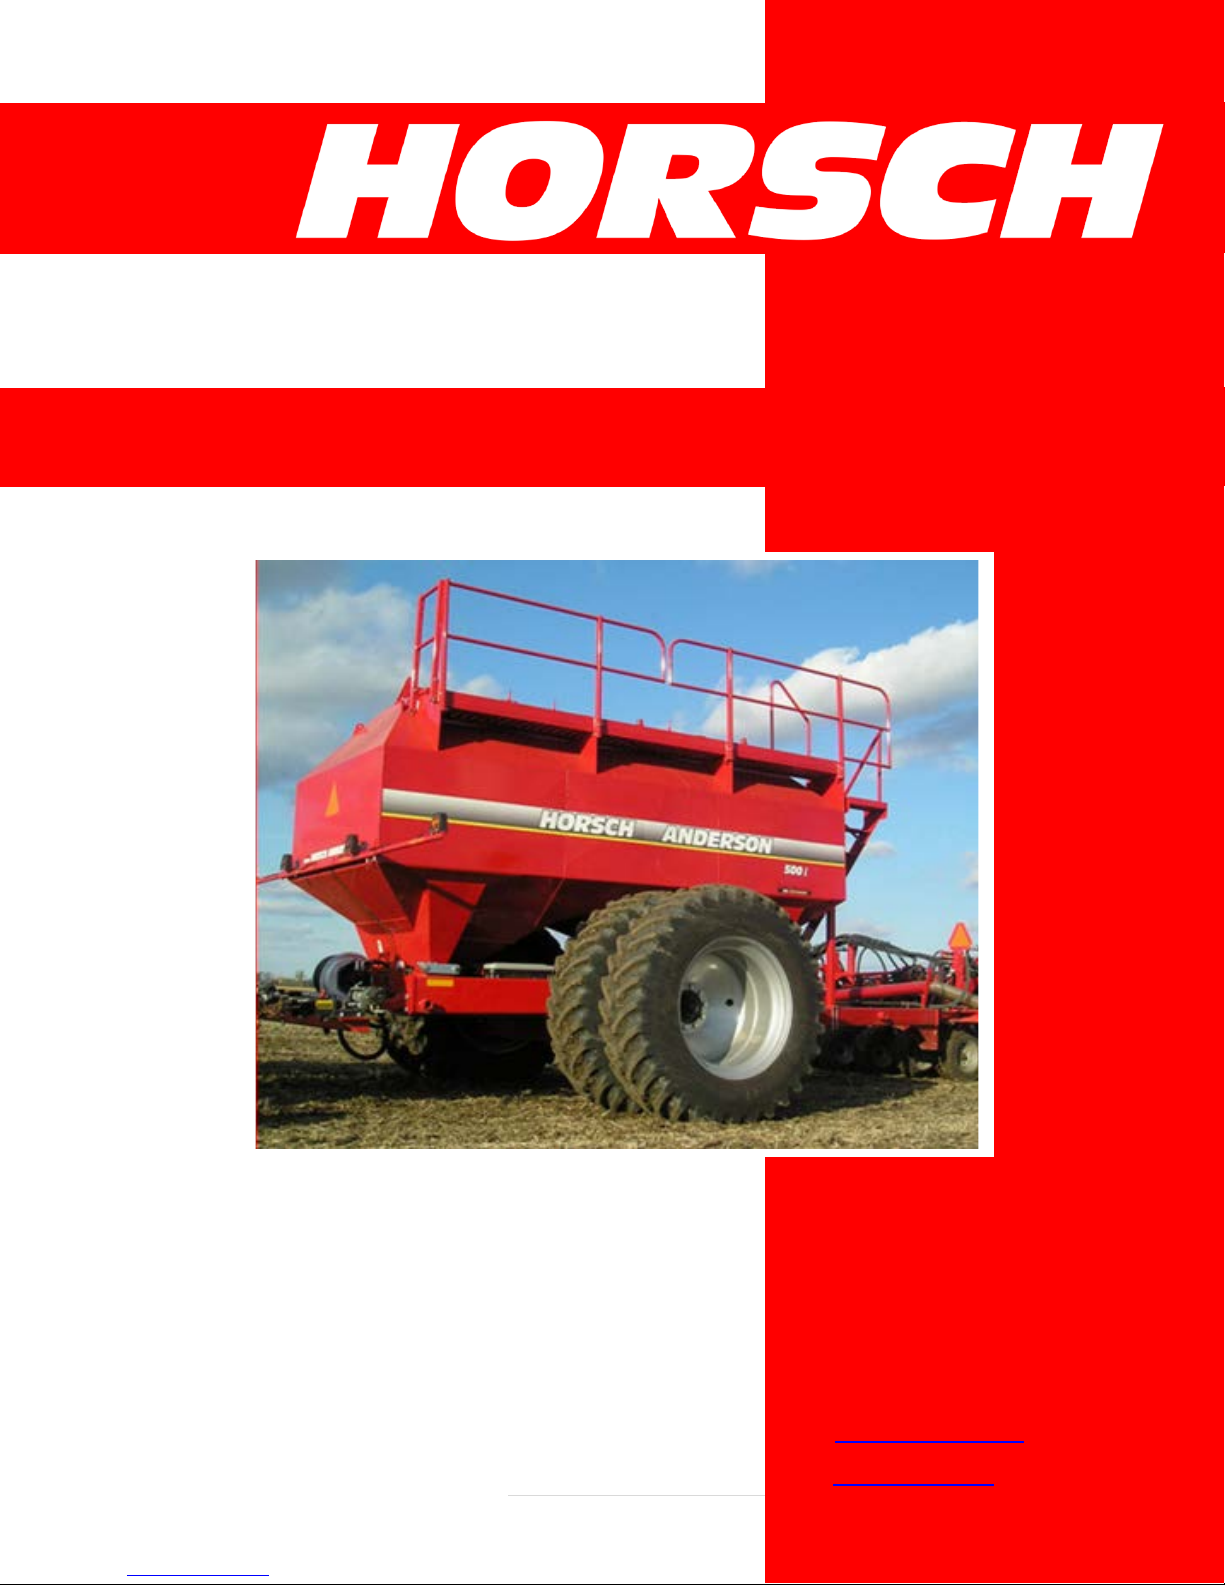
Commodity Cart Owner’s Manual
HORSCH, LLC
Web: www.horsch.com
2013
500/500i
Serial Numbers:
200 Knutson St.
CC500 SN Earlier – 210050013020
Mapleton, ND 58059
Telephone: (701) 532-1000
Fax: (701) 532-1101
Email: info.us@horsch.com
1 | Page

2 | Page

3 | Page

Contents
Introduction .................................................................................................................................................... 8
Machine Registration ...................................................................................................................................... 8
Warranty Guidelines ....................................................................................................................................... 9
Machine Registration Form: Customer Copy ................................................................................................ 11
Machine Registration Form: Dealer Copy ..................................................................................................... 13
Machine Registration Form: HORSCH’s Copy ............................................................................................... 15
Delivery Form: DEALERS’s Copy .................................................................................................................... 17
Product Specification .................................................................................................................................... 18
In These Operating Instructions .................................................................................................................... 19
Authorized Operators ............................................................................................................................... 19
Protective Clothing ................................................................................................................................... 19
Safety ............................................................................................................................................................ 20
Understand Safety Symbols ...................................................................................................................... 20
Safety Symbols on the Machine: .............................................................................................................. 20
Operational Safety .................................................................................................................................... 21
Road Traffic & Transport Safety .................................................................................................................... 24
Accident Prevention .................................................................................................................................. 25
Changing Implements ............................................................................................................................... 25
In Operation .............................................................................................................................................. 25
Extracting Stuck Machine Safety & Guidelines ......................................................................................... 26
Service and Maintenance.......................................................................................................................... 26
Installation .................................................................................................................................................... 27
Connecting Hydraulics to Tractor ................................................................................................................. 28
Configuration and Mode of Operation ......................................................................................................... 29
Transportation & Installation ........................................................................................................................ 30
Transportation .......................................................................................................................................... 30
Attaching the Air Seeder ........................................................................................................................... 30
Connecting the Hydraulic System ............................................................................................................. 30
Connect the Road Lighting System ........................................................................................................... 31
Technical Data ............................................................................................................................................... 32
Typical Wiring Solutions ............................................................................................................................... 33
Configuration and Mode of Operation .......................................................................................................... 34
4 | Page

Cart Fill Lid Adjustment ............................................................................................................................ 36
Checking Lids for Leaks ........................................................................................................................... 36
Pneumatic System .................................................................................................................................... 37
Hydraulic Fan ............................................................................................................................................ 38
Air System................................................................................................................................................. 40
Half Width Module ................................................................................................................................... 41
Metering Unit ........................................................................................................................................... 42
Rotors for Various Grain Types .................................................................................................................. 43
Roller Seed Rate Charts ............................................................................................................................. 44
Roller Replacement .................................................................................................................................. 47
Roller for Seeding Small Seeds ............................................................................................................... 48
Drill Manager ................................................................................................................................................ 50
Adjustment of Application Rates ............................................................................................................. 56
Procedure for showing amps for each motor. .......................................................................................... 56
Forward Speed ......................................................................................................................................... 57
Fan Speed ................................................................................................................................................. 58
Distance Check Mode: ............................................................................................................................. 61
“Calibration” Mode .................................................................................................................................. 62
Seed Calibration: ...................................................................................................................................... 63
Seed Check Mode .................................................................................................................................... 64
Calibration Test, Direct Entry ..................................................................................................................... 68
Assembly Information .............................................................................................................................. 71
Alarm Signals ............................................................................................................................................ 72
Fault Alarms .............................................................................................................................................. 72
Filling Auger .................................................................................................................................................. 73
Scale System ................................................................................................................................................. 75
Rear Towing Hitch ........................................................................................................................................ 76
Rear Torpedo Towing Hitch ......................................................................................................................... 77
Maintenance ................................................................................................................................................. 78
Hitch Adjustment & Maintenance ............................................................................................................ 81
Maintenance Schedule ................................................................................................................................. 83
Troubleshooting ............................................................................................................................................ 86
Service & Information ................................................................................................................................... 87
5 | Page

Metric Bolt & Screw Torque Values .......................................................................................................... 87
Unified Bolt & Screw Torque Values ......................................................................................................... 88
Metric Conversions ................................................................................................................................... 89
Troubleshooting ............................................................................................................................................ 90
Drill Manager ............................................................................................................................................ 90
Pneumatic System ..................................................................................................................................... 90
Seed Transfer ............................................................................................................................................ 90
Metering System ....................................................................................................................................... 91
Smart Alarm Functions & Information ...................................................................................................... 94
Notes: ............................................................................................................................................................ 97
6 | Page

7 | Page

Introduction
Safety is YOUR responsibility!
READ AND UNDERSTAND THIS MANUAL BEFORE YOU OPERATE THIS MACHINE.
Learn how to operate and service your machine correctly. Failure to do so could result in personal injury
and/or equipment and property damage. HORSCH will not accept any responsibility for any damage or
malfunctions resulting from failure to comply with the Operator’s Manual.
If the information found in this manual is not completely understood or if there are any questions,
contact HORSCH Customer Service.
HORSCH cares about your safety! This machine is designed to provide maximum possible safety; but no
machine design can prevent operator error or carelessness.
The Operator’s Manual provides instructions for the safe operation and maintenance of this machine.
Make sure the machine is in good operation condition.
Check service schedule in book.
This manual should be considered a permanent part of your machine and should remain with the
machine if you no longer own it.
Right hand and left hand are determined by facing the direction of forward travel respectively.
HORSCH reserves the right to alter illustrations as well as technical data and weights contained in this
manual at any time without notice.
This data is the property of HORSCH. All use and/or reproduction not specifically authorized by HORSCH
are prohibited.
All information, illustrations and specifications in this manual are based on the latest information
available at the time of publication. The right is reserved to make changes at any time without notice.
Some illustrations may show optional equipment. Illustrations may show shields, guards, etc., opened or
removed. All shields, guards, etc. must be in place during operation.
Machine Registration
Please complete the Machine Registration Form on the next few pages and return to HORSCH. Accurately
record all the numbers to help in tracing the machine. Your dealer needs these numbers when you order
parts. NO WARRANTY CLAIMS WILL BE ACCEPTED IF THIS MACHINE REGISTRATION IS NOT RETURNED.
The warranty period begins on the date of delivery.
8 | Page

Warranty Guidelines
1. The period of warranty for material defects relating to HORSCH products will be 12
months. In the case of written deviations from the statutory provisions, these
agreements shall apply.
They shall become effective upon delivery of the machine to the end customer. All wear
item parts are excluded from the warranty. These parts include but are not limited to disc
blades and Rollflex packer tongues.
2. Warranty claims must be submitted to the HORSCH Customer Service Department in
Andover, SD via your dealer. It is only possible to process claims which have been
completed correctly and submitted no later than four weeks after the damage occurred.
3. In the case of deliveries made under the warranty which are subject to the return of the
old parts, the warranty claim, together with the old parts, must be returned to HORSCH
within 4 weeks after the damage occurred.
4. In the case of deliveries made under the warranty, which are not subject to the return of
the old parts, these parts must be kept for the purpose of further decisions for a period
of four weeks after receipt of the warranty claim.
5. Warranty repairs to be carried out by outside companies, or repairs which are expected
to take more than 2 working hours, must be approved in advance with HORSCH
Customer Service Department.
HORSCH, LLC
200 Knutson St.
Mapleton, ND 58059 USA
www.horsch.com
For other related warranty items such as tire warranty issues, contact your nearest dealer.
A complete list of dealers can be found at the following web sites.
Firestone Tires - http://www.firestoneag.com/default-eng.aspx or 1-800-435-4437.
Titan Tires - http://www.titan-intl.com/ or 1-800-USA-BEAR.
9 | Page

10 | Page

Machine Registration Form: Customer Copy
No Warranty Claims will be accepted if this Machine Registration Form is not returned!
To:
HORSCH, LLC
200 Knutson St. Tel: 701-532-1000 Email: service.us@horsch.com
Mapleton, ND 58059 Fax: 701-532-1101
Machine Product & Model: _________ ___ ______________ New Machine Final Sale – Initial use
Customer’s Machine – Transfer
Serial Number: ___________________________________ Demonstration Machine – Initial use
Sold Date: _______________________________________
In Service Date: Est. Acres: ____________________
Operating Instructions:
I hereby confirm receipt of the Owner’s Manual and Parts Catalog for the above mentioned machine.
I have been instructed and inform ed by a HORSCH factor y trained Service Techn ician / author ized Dealer
representative in the operation and functions of the machine, as well as in the safety requirements.
________________________________________________
Name of the Service Technician / Dealer representative
Dealer Customer
Name: ______________________________ Name: _______________________________________
Address: ____________________________ Address: _____________________________________
City/State/Zip: ________________________ City/State/Zip: _________________________________
County: _____________________________ County: ______________________________________
Tel: ________________________________ Tel: _________________________________________
Fax: ________________________________ Fax: ________________________________________
E-mail: ______________________________ E-mail: ______________________________________
Customer No: _________________________ Customer No: _________________________________
I am aware that a W arranty Claim wil l only be valid if, af ter the receipt of the mac hine, this form has been
fully completed, signed and returned to HORSCH, LLC.
______________________________________ ______________________________________
Place, Date Customer’s Signature
NOTE: After Signing, remove and/or copy this page. Keep signed delivery checklist in machine file at the dealership.
11 | Page

12 | Page

Machine Registration Form: Dealer Copy
No Warranty Claims will be accepted if this Machine Registration Form is not returned!
To:
HORSCH, LLC
200 Knutson St. Tel: 701-532-1000 Email: service.us@horsch.com
Mapleton, ND 58059 Fax: 701-532-1101
Machine Product & Model: _________ ___ ______________ New Machine Final Sale – Initial use
Customer’s Machine – Transfer
Serial Number: ___________________________________ Demonstration Machine – Initial use
Sold Date: _______________________________________
In Service Date: Est. Acres: ____________________
Operating Instructions:
I hereby confirm receipt of the Owner’s Manual and Parts Catalog for the above mentioned machine.
I have been instructed and inform ed by a HORSCH factor y trained Service Techn ician / author ized Dea ler
representative in the operation and functions of the machine, as well as in the safety requirements.
________________________________________________
Name of the Service Technician / Dealer representative
Dealer Customer
Name: ______________________________ Name: _______________________________________
Address: ____________________________ Address: _____________________________________
City/State/Zip: ________________________ City/State/Zip: _________________________________
County: _____________________________ County: ______________________________________
Tel: ________________________________ Tel: _________________________________________
Fax: ________________________________ Fax: ________________________________________
E-mail: ______________________________ E-mail: ______________________________________
Customer No: _________________________ Customer No: _________________________________
I am aware that a W arranty Claim wil l only be valid if, after the rec eipt of the m achine, this f orm has been
fully completed, signed and returned to HORSCH, LLC.
______________________________________ ______________________________________
Place, Date Customer’s Signature
NOTE: After Signing, remove and/or copy this page. Keep signed delivery checklist in machine file at the dealership.
13 | Page

14 | Page

Machine Registration Form: HORSCH’s Copy
No Warranty Claims will be accepted if this Machine Registration Form is not returned!
To:
HORSCH, LLC
200 Knutson St. Tel: 701-532-1000 Email: service.us@horsch.com
Mapleton, ND 58059 Fax: 701-532-1101
Machine Product & Model: _________ ___ ______________ New Machine Final Sale – Initial use
Customer’s Machine – Transfer
Serial Number: ___________________________________ Demonstration Machine – Initial use
Sold Date: _______________________________________
In Service Date: Est. Acres: ____________________
Operating Instructions:
I hereby confirm receipt of the Owner’s Manual and Parts Catalog for the above mentioned machine.
I have been instructed and inform ed by a HORSCH factor y trained Service Techn ician / author ized Dea ler
representative in the operation and functions of the machine, as well as in the safety requirements.
________________________________________________
Name of the Service Technician / Dealer representative
Dealer Customer
Name: ______________________________ Name: _______________________________________
Address: ____________________________ Address: _____________________________________
City/State/Zip: ________________________ City/State/Zip: _________________________________
County: _____________________________ County: ______________________________________
Tel: ________________________________ Tel: _________________________________________
Fax: ________________________________ Fax: ________________________________________
E-mail: ______________________________ E-mail: ______________________________________
Customer No: _________________________ Customer No: _________________________________
I am aware that a W arranty Claim wil l only be valid if, after the rec eipt of the m achine, this f orm has been
fully completed, signed and returned to HORSCH, LLC.
______________________________________ ______________________________________
Place, Date Customer’s Signature
NOTE: After Signing, remove and/or copy this page. Keep signed delivery checklist in machine file at the dealership.
15 | Page

16 | Page

Delivery Form: DEALERS’s Copy
At the time the machine is delivered, the following checklist is a reminder of information which
should be conveyed directly to the customer. Check off each item as it is fully explained to
customer.
[ ] Make the customer aware of all safety precautions that must be exercised while using this
machine. Point out all Warning and Caution safety labels/decals on the machine.
[ ] Point out the location of the Serial Number Tag (product identification numbers), for future
reference of the machine.
[ ] Give the Operator’s Manual to the customer. Encourage customer to read the manual in its
entirety.
[ ] Explain all operating adjustments.
[ ] Review recommended procedures for attaching and detaching machine from tractor.
[ ] Make the customer aware of all safety precautions that must be observed when transporting the
machine in field and on public roads.
[ ] When the machine is transported on a road or highway at night, or during the day, accessory
lighting and devices should be used for adequate warning to operators of other vehicles. In this
regard, tell the customer to check local governmental regulations. The machine should be
equipped with road lighting and slow moving vehicle sign.
[ ] Explain to the customer that the life expectancy of this or any other machine depends on regular
lubrication as directed in the Operator’s Manual. Follow all maintenance and lubrication
schedules for the machine.
[ ] Discuss with the customer the use of proper tools and equipment for service of the machine.
[ ] Have customer record Serial Number(s) in the Product Specification section.
[ ] To the best of my knowledge, this machine has been delivered ready for field use and the
customer has been fully informed as to proper operation and care.
Signed: ................................................................................. (Customer)
Signed: ................................................................................. (Dealer Representative)
Date: .....................................................................................
17 | Page

Product Specification
Each machine manufactured and assembled is serialized and provided a number for tracking purposes.
There is a model number, which is the category for product family of the machine, and there is a serial
number.
The serial number may also be known as, or part of, a Product Identification Number. This number is a
formulated number which details the machines build information for tracking purposes and easy
identification later during time of service, maintenance and replacement part ordering. The Serial
number, along with Model number of the machine, can be found on the Serial Number Tag.
HORSCH LLC has placed a Serial Number Tag (reference picture below) on the machine with the above
mentioned information. It is located on the main frame cross member tube directly behind the front
hitch, just off center towards the left hand side of each machine.
Record the Model and Serial number of the machine below. Retain this page for customer use only! For
future reference, the information will be used whenever the machine is being serviced, for ordering
replacement parts or when requesting information for the machine such as replacement Owner’s Manual
or a Parts Catalog. Be sure to provide both, the model number and serial number, when contacting your
dealer, for better assistance and quicker support of your machine.
Date of Purchase: ___________________________
Dealer Information:
Name: ______________________________
Address: _____________________________
Phone: _______________________________
HORSCH LLC Serial Number Tag
18 | Page

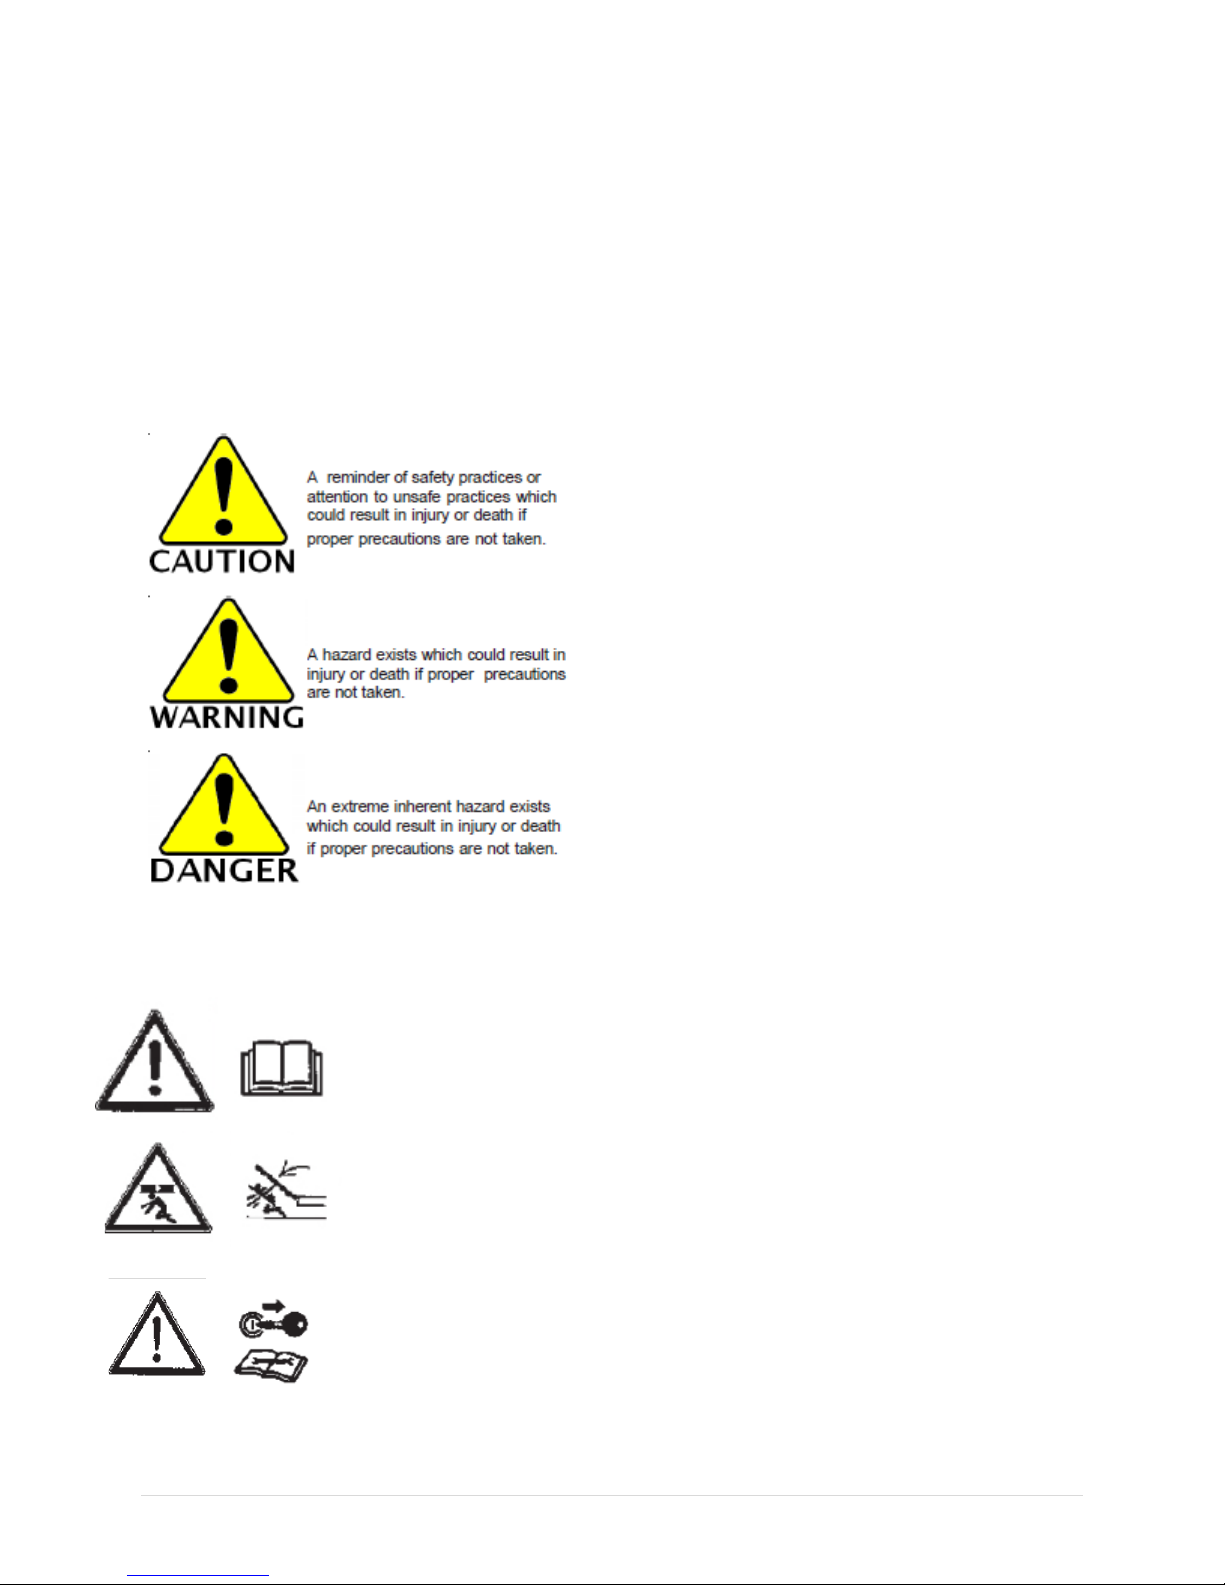
In These Operating Instructions
The operating instructions distinguish between three different types of warning and safety instructions.
The following graphic symbols are used:
It is important that all the safety instructions contained in these operating instructions and all the
warning signs on the machine are read thoroughly and understood prior to operation of the machine.
Ensure that the warning signs are legible and replace any signs that are missing or damaged.
These instructions must be followed in order to prevent accidents. Inform other users of the warnings
and safety instructions and the location of this Owner’s Operators Manual.
Do not carry out any operations which may affect the safe use of the machine.
Authorized Operators
Only those persons who have been authorized and instructed by the operator may operate the Machine.
Operators must be at least 16 years of age.
The operator must hold a valid driving license. They are responsible for third parties in the operating
area.
The person in charge must:
Make the operating instructions available to the operator.
•
Ensure that the operator has read and understood the operating instructions.
•
The operating instructions are a component part of the machine.
Protective Clothing
For operation and maintenance of this machine, you will need:
Snug fitting clothing; no loose articles or strings.
•
• Safety gloves and goggles to protect against dirt and sharp edged machine parts.
Important instructions!
If there is a risk of injury!
If there is a risk to life and limb!
19 | Page
Safety
Information Regarding Safety
The following warnings and safety instructions apply to all sections in these operating instructions.
Carefully read all safety messages in this manual and on the machine safety decals. Keep safety decals in
good condition. Replace missing or damaged safety decals. Be sure new equipment components and
repair parts include the current safety decals.
Understand Safety Symbols
Safety Symbols on the Machine:
Read and adhere to the operating instructions before starting up the
machine!
Stay clear of swinging area of retractable and extendible machine parts!
Switch the engine off and pull out the key before starting maintenance and repair
work!
20 | Page
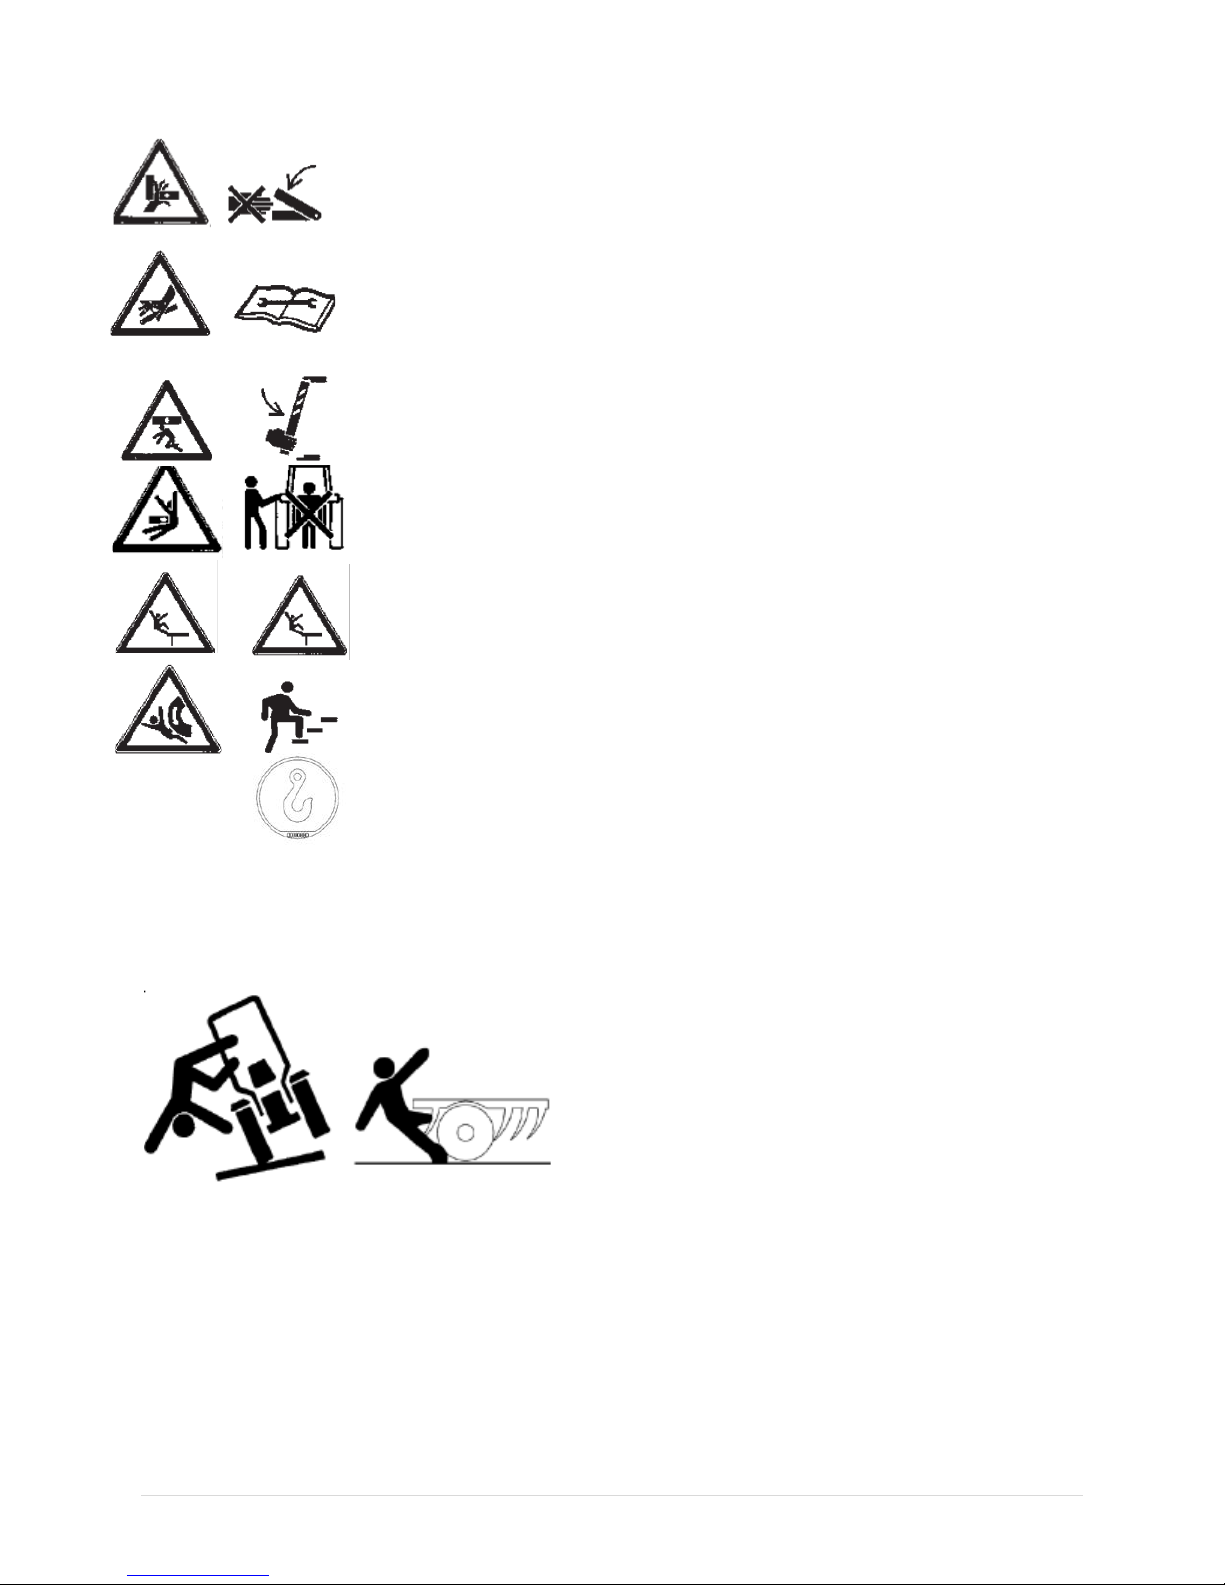
Never reach into areas where there is a risk of crushing, as long as parts could
still be moving!
Watch out for fluids spraying out under high pressure, follow the operating
instructions!
It is only permitted to remain in the danger zone if the safety support is in place!
When hitching up the drill and when operating the hydraulic system, no persons
should be between the machines!
No passengers are allowed to ride on the machine!
Do not climb on rotatable parts. Use mounting steps provided for this purpose!
Lifting hook; attach lifting tackle (chains, ropes, etc.) here when performing
loading work!
Operational Safety
The machine must only be put into operation after receiving instructions by employees of the authorized
dealer or a HORSCH employee. The Machine Registration Form is required to be completed and returned
to HORSCH.
Do not make field adjustments while machine is in motion.
Do not enter seed tank of cart unless another person is present and hydraulic hoses are disconnected
from tractor.
Operate machine from the tractor seat only.
Keep hands and fingers away from hinge area when positioning fill auger. Lock auger in storage position
before operating in field.
Clear area around machine before raising or lowering machine or wings.
Stop tractor on level ground when raising or lowering machine or wings.
Do not operate with wings raised. To improve stability, travel through the field with the wings unfolded.
Fold wings to transport position just before leaving the field and entering a roadway.
Do not operate close to the edge of a ditch, creek, gully or steep embankment.
21 | Page

Avoid holes, ditches and obstructions which may cause tractor, cart or seeding tool to roll over, especially
on hillsides.
Avoid sharp turns on hillsides.
Slow down when turning or traveling over rough ground, and when turning on inclines.
Shut off tractor and shift to ‘Park’ or set brakes when leaving tractor. Remove key when leaving tractor
unattended.
Stay Clear of Air Hoses
Stay clear of hoses when air seeder fan is running. Seed or fertilizer blowing out at high speed can cause
eye and other personal injuries. Never attempt to clear blockage from air hoses or seeding tool boots
while fan is running.
Use a Signal Person
Use a signal person to direct movement of the tractor/seed cart, seeding tool combination whenever the
tractor operator’s view is obstructed.
Designate one individual as the Signal Person. Always have signal person stand in clear view. Be sure
signal person stays a safe distance away from the machine when it is moving.
Prior to starting tractor, discuss hand signals and what each signal means to avoid misunderstandings and
confusion which could result in a serious injury or fatal accident.
Keep all bystanders away whenever the machine is moved.
Do not stand between cart and implement while machines are in motion.
22 | Page
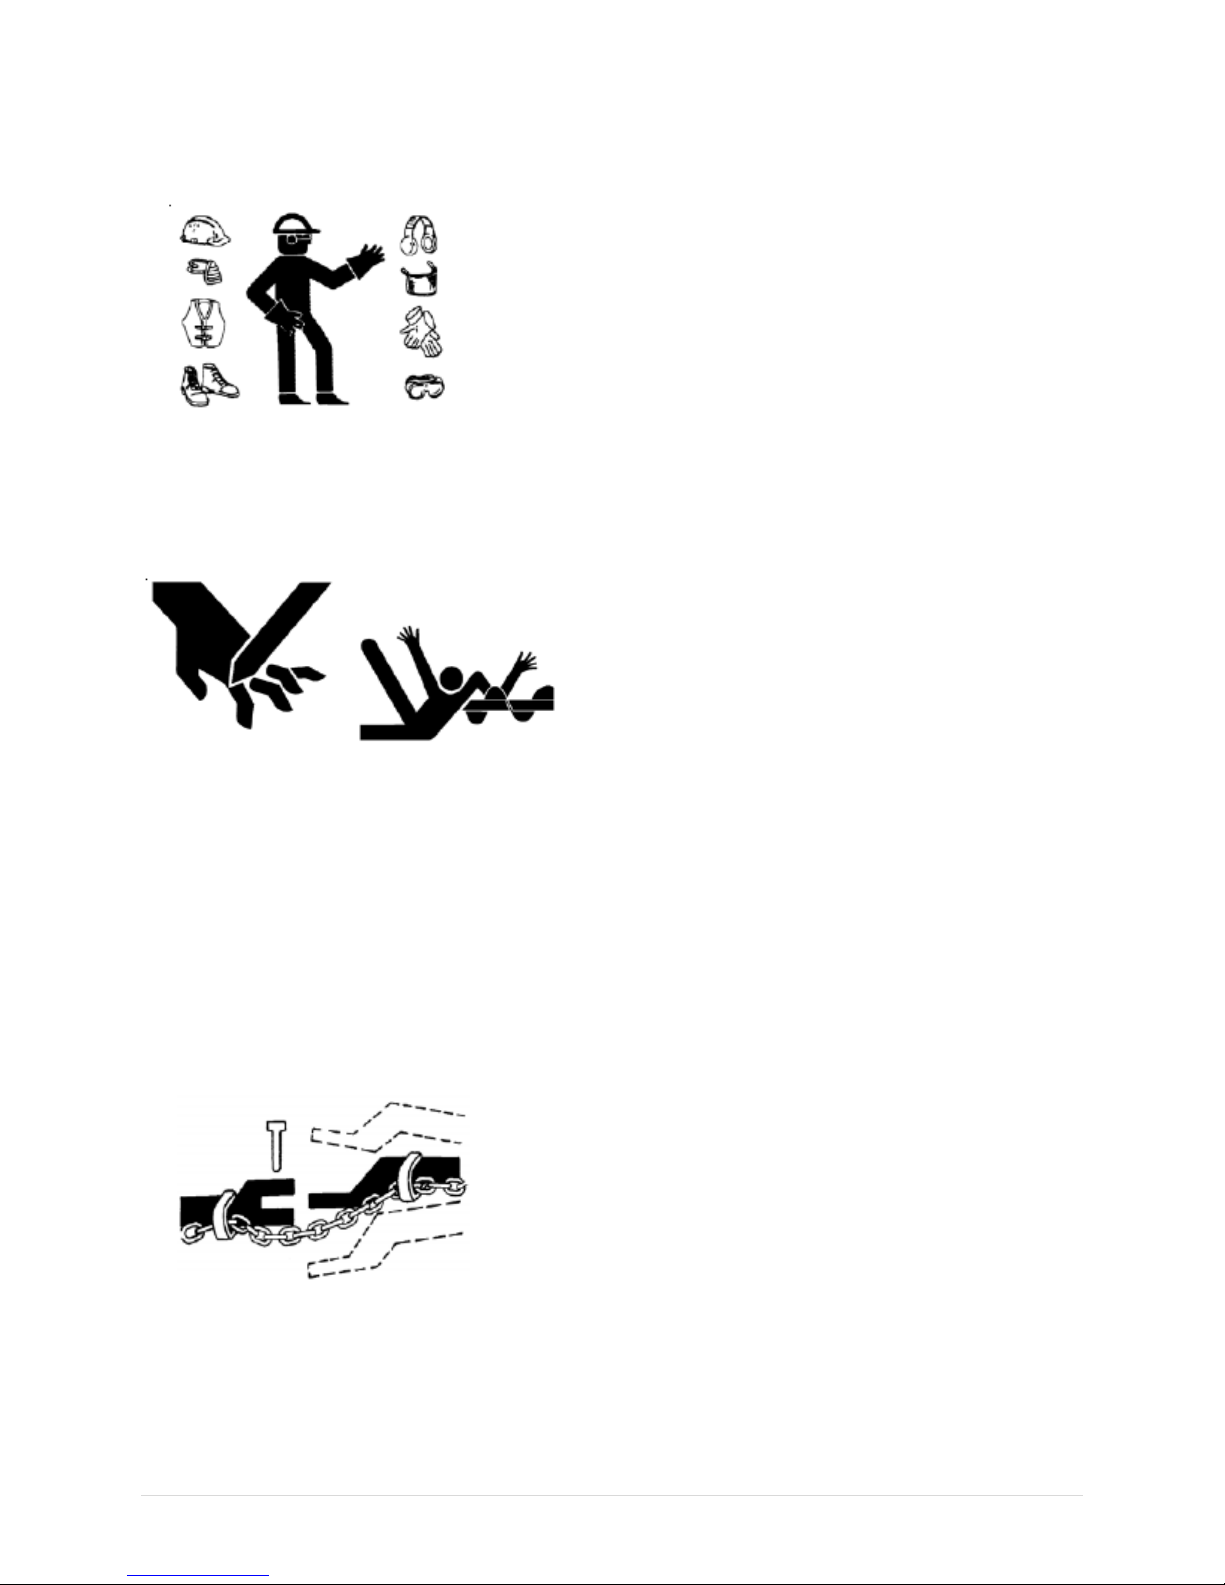
Wear Protective Clothing
Wear close fitting clothing and safety equipment appropriate to the job.
Operating equipment safely requires the full attention of the operator. Do not wear radio or music
headphones while operating machine. This can impair the hearing of the operator and distract them
from their surroundings which could lead to an accident.
Do not operate commodity cart without safety shields in place.
Rotating parts can crush or dismember, causing death or personal injury.
To avoid serious injury or death from entanglement, do not allow person(s) or clothing to be near auger
when it is in motion.
Keep auger hopper screen in place.
Shut off tractor and disconnect hydraulic hoses before removing shields for adjustment or service.
Use a Safety Chain
A safety chain will help control drawn equipment should it accidentally separate from the drawbar. A
safety chain of the proper strength rating is provided with the machine as standard equipment.
Using the appropriate adapter parts, attach the chain to the tractor drawbar support or other specified
anchor location. Provide only enough slack in the chain to permit turning.
23 | Page
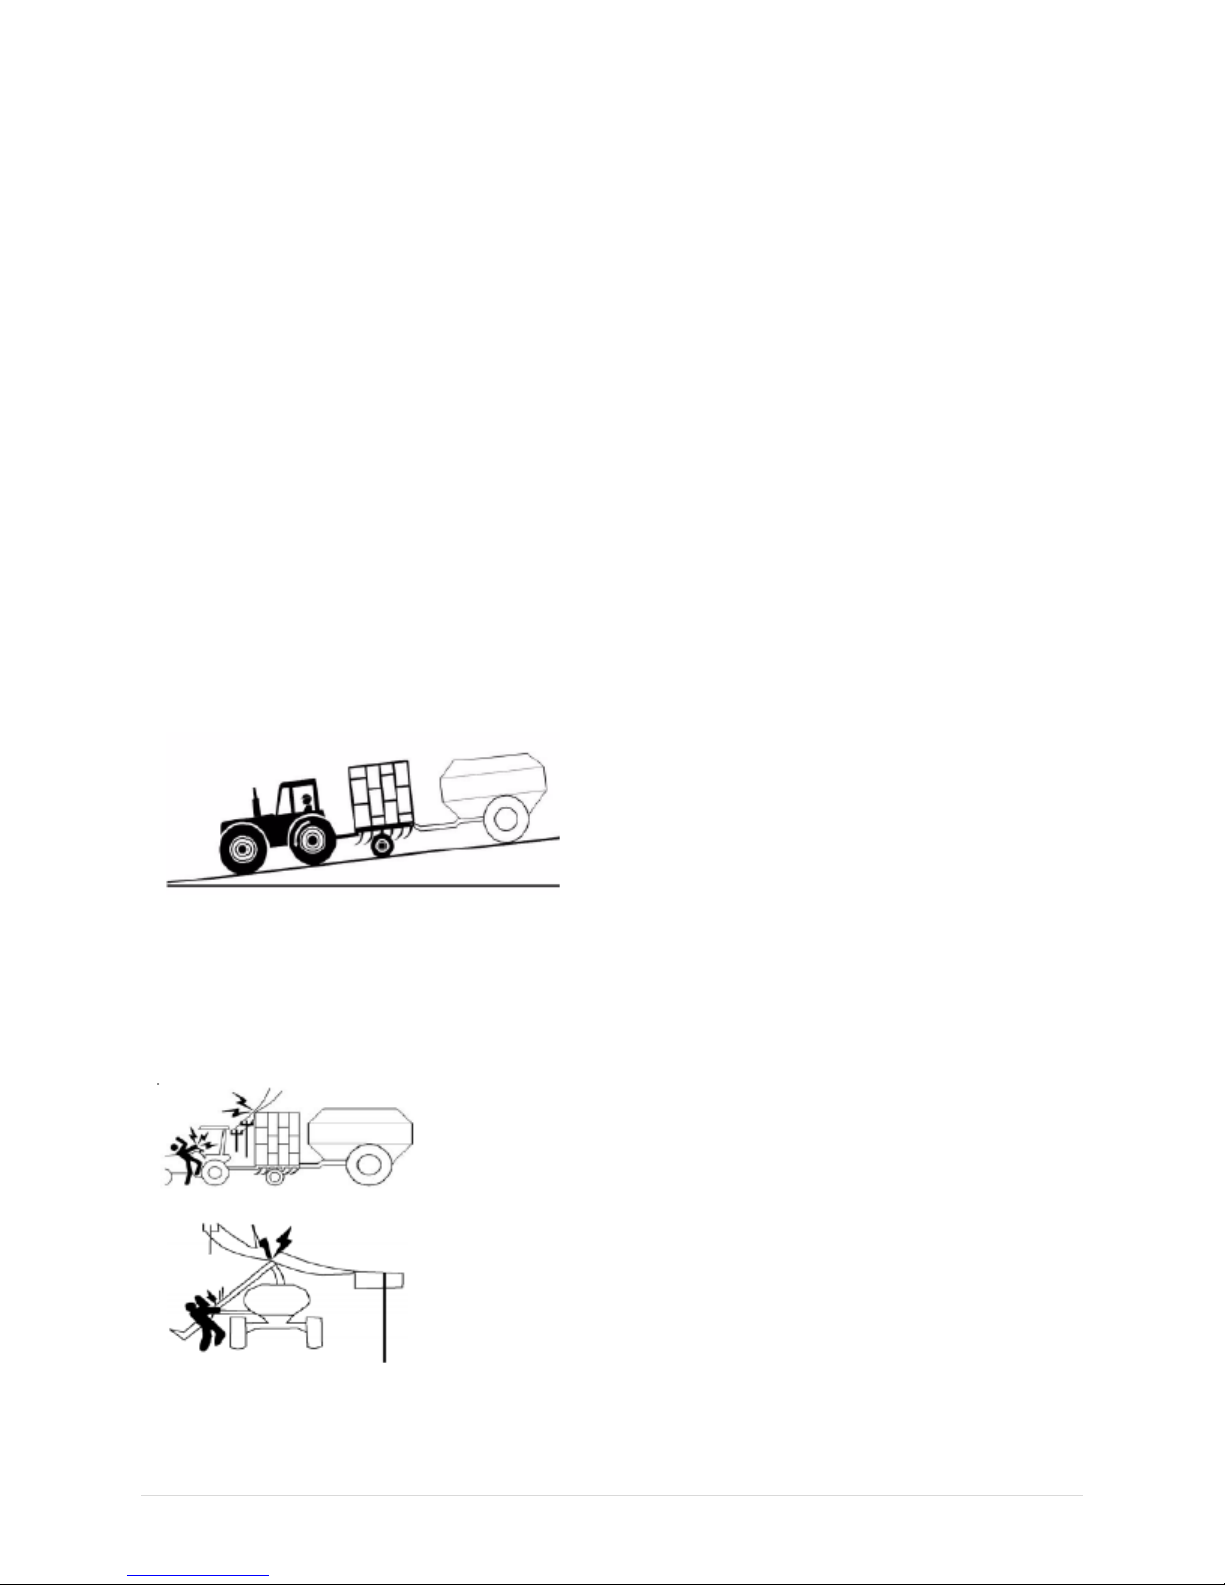
Road Traffic & Transport Safety
The valid road traffic regulations are to be observed when travelling on public roads, paths and areas.
Do not exceed the maximum permissible transportation widths and heights and install road lighting
equipment, warnings and safety covers where necessary.
Do not exceed the permissible axle loads, tire carrying capacities and total weights, in order to ensure
sufficient steering and braking capabilities. Handling is affected by the implement connected. It is
important to take into account the large overhang and the centrifugal mass of the implement, particularly
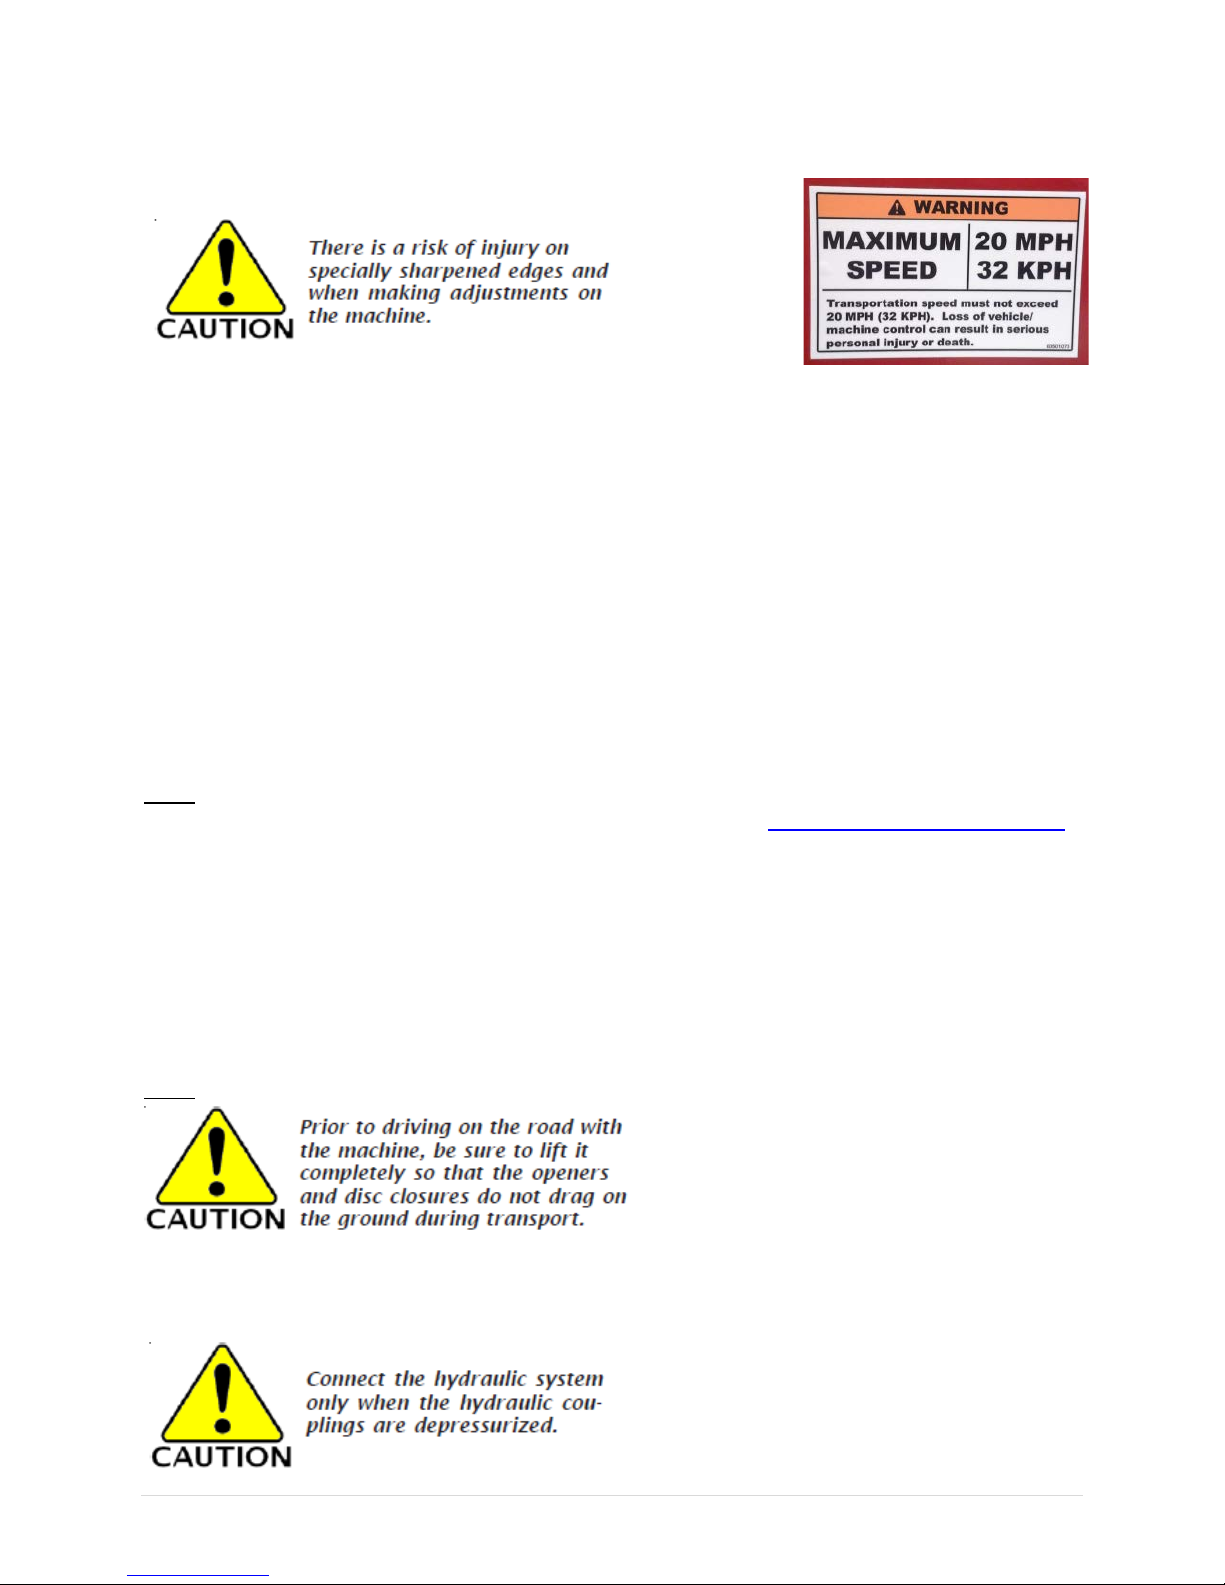
when cornering. DO NOT EXCEED A MAXIMUM SPEED OF 20 MPH DURING TRANSPORTATION. LOSS
OF VEHICLE/MACHINE CONTROL CAN RESULT IN SERIOUS PERSONAL INJURY OR DEATH!
The whole machine is to be cleaned of soil that has been collected before travel on public roads.
Passengers are strictly forbidden to ride on the machine.
Always travel at a reasonable and safe speed. Never exceed 20 mph.
Never transport with any tank more than half full.
Never transport with fan running.
Shift the tractor in to a lower gear when transporting down steep slopes or hills. Latch the tractor brakes
together. Stop slowly.
Avoid steep slopes. Some slopes may exceed tractor braking capability. Use engine braking to reduce
speed when possible.
Keep away from overhead power lines. Serious injury or death may result. Proceed cautiously under
overhead power lines and around utility poles. Know the transport height of your machine.
Do not position auger when near electrical lines.
24 | Page

Electrocution can occur without direct contact with overhead electric lines.
Always fold wings fully. If wing fold cylinders are removed, chain wings together to prevent accidental
lowering.
Do not transport with an underweight tractor. Transport only with a properly sized tractor.
Refer to ‘Calculating Minimum Tractor Weight for Safe Transport’.
Use Safety Lights and Devices
Prevent collisions between other road users, slow moving tractors with attachments or towed equipment
and self-propelled machine on public roads. Frequently check for traffic from the rear, especially in turns,
and use turn signal lights.
Use headlights, flashing warning lights, and turn signals day and night. Follow local regulations for
equipment lighting and marking. Keep lighting and marking visible and in good working order. Replace
or repair lighting and marking that had been damaged or lost.
Keep reflective material and Slow Moving Vehicle signs clean and visible.
Accident Prevention
In addition to the operating instructions, it is important to observe the accident prevention regulations
specified by agricultural trade associations!
Changing Implements
• Secure the machine against unintended and accidental rolling!
• Secure lifted frame parts, under which you will be working, with suitable supports!
• Caution! Danger of injury caused by protruding parts (tines, discs)!
• Do not use the packer or other rotating parts when climbing onto the machine. These could start to
rotate and you could fall and be seriously injured.
In Operation
• Check the area around the machine (for children!) before setting off and starting operation of the
machine. Ensure sufficient visibility!
• Stay clear of the operating range of hydraulically operated parts.
• Passengers are not allowed to ride on the machine during operation!
• Do not stand on the machine when it is in operation.
• The prescribed protective equipment that may have been supplied with the machine is not to be
removed.
25 | Page

Extracting Stuck Machine Safety & Guidelines
Follow proper hooking and towing recommendations below for extracting stuck machines. If damage is
incurred to a machine during extraction due to improper procedure, any applicable warranties may be
void!
• Avoid wet, water logged and muddy ground conditions so as not to get stuck.
• Assess the situation around the stuck machine before attempting extraction.
• Know when to call a professional for assistance in towing, lifting and extraction.
• Use properly rated equipment – larger tractor/truck, tow ropes/straps, clevises, chains, cables,
etc.
• Practice proper hooking and pulling techniques. Know where proper hooking points are at on a
machine so as not to damage the machine.
Do not hook or pull the machine from the transport axle or rear torpedo hitch (if
equipped). Attach to a tie down location or the main frame. Do not pull the
machine sideways. Pull in a straight line as much as possible.
• Pull force should not exceed normal operating conditions.
• Be aware of overhead power lines to avoid risk of serious damage and/or personal injury.
• Be aware of ditches or rocks to avoid tipping hazards of equipment.
• All bystanders are at risk of serious injury and must stand clear of extraction area for their own
personal safety.
• Inspect machinery after recovery. Make any necessary repairs before putting the machine back
into service.
Service and Maintenance
• Ensure that regular tests and inspections are always carried out to schedule, as specified in the
operating instructions.
• Prior to performing maintenance and servicing work, ensure that the machine is positioned on firm,
level ground and that it is properly secured against rolling away.
• Prior to working on the electrical system, disconnect it from the electric power supply.
• Retighten screwed connections which had been loosened during servicing and maintenance work.
• For further Service and maintenance information see other sections in this manual; Maintenance
Service & Information.
Do not wash new machines with a steam-jet or high-pressure cleaner. The paint takes
approximately 3 months to cure and could thus be damaged if this time has not yet
expired.
&
26 | Page

Installation
Instruction of the operator and initial installation of the machine are done by an authorized dealer or
HORSCH representative.
The machine can be released for operation only after instruction by our service technician or authorized
distributor has been completed and the operating instructions have been read and understood.
When carrying out installation and maintenance work there is a higher risk of injury.
It is important that you familiarize yourself with the machine and read this Owner’s Manual before
operating the machine.
The instructions in respect of initial installation should also be followed if the machine has not been used
(stored) for a longer period of time. Dismantle the removable parts supplied with the machine.
• Check all important screw connections.
• Grease all zerks.
• Check air pressure in tires.
• Prepare connection for the lighting equipment.
• Check all hydraulic connections and hoses for correct attachment and proper functioning.
• Ensure that any deficiencies are remedied immediately.
Hydraulic Functions
When handling the machine, ensure that nobody is in the danger zone.
The hydraulic functions are controlled at tractor hydraulic controls from inside the cab.
Safety Measures in Case of Injury from Oil
Eyes: Should any oil be splashed into your eyes, rinse with water for 15 minutes. If the eye is still
irritated, contact a doctor immediately.
If Oil is Ingested: If oil is swallowed, it is important not to induce vomiting. Contact a doctor
immediately.
Skin Irritation caused by Oil: In case of prolonged skin contact, wash off the oil with soap and water.
Oil Spills: Use either sand or a suitable granular absorbent to soak up any spilled oil. Dispose of the oil
contamination absorbent in the proper manner.
Oil Fires: Never use water to extinguish an oil fire. The oil will float on water causing the fire to spread.
Burning oil-lubricant must be extinguished using a carbon dioxide power or foam extinguisher. Always
wear respiratory equipment when dealing with fires of this type.
Waste Oil Disposal: Oil-contaminated waste and used oil must be disposed of in accordance with current
legislation. Check with your local hazardous waste management coordinator. Waste oils must be
collected and disposed of with local regulations. Never pour used oil in to a sewage system or drains or
on to the ground.
27 | Page

Connecting Hydraulics to Tractor
28 | Page
Configuration and Mode of Operation
Description
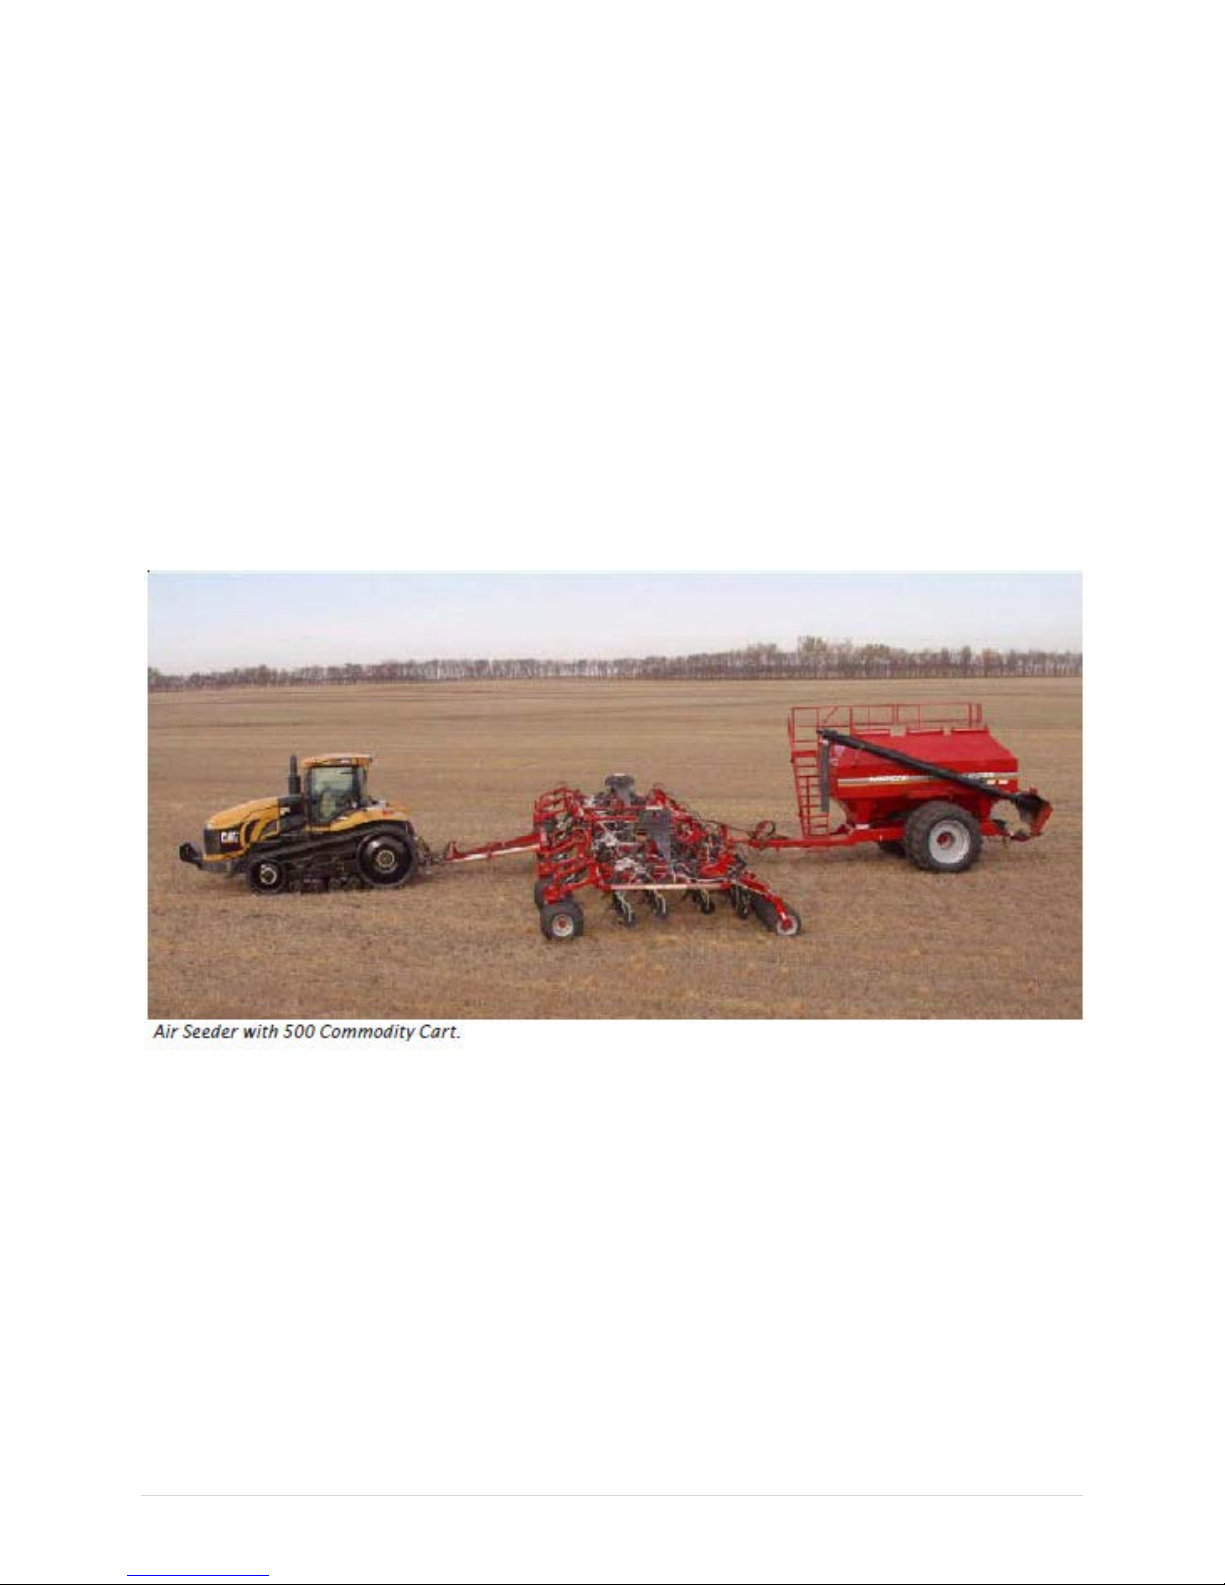
The Panther 60-15 and 40-15 Air Seeder is usually used with a seed wagon after minimal cultivation.
Triple Shoot Openers are used together with a fertilizer seed wagon. Here it is possible to apply the
fertilizer accurately using an electronically controlled device, which enables it to be placed below the
seed during sowing.
The specified amount of seed/liquid fertilizer can be discharged at speed according to the drill
management system settings in the ECU (Electronic Control Unit) in the tractor.
Depending upon the seed cart type, the 60-15 and 40-15 planting system can be operated in front of or
behind, hitched up to the back of the seed wagon. The picture below illustrates the air seeder in front of
the seed wagon.
The Panther air seeder can be used to seed all seeds with a grain size of between 0.040” – 0.39”.
Grain: Wheat, barley, oats, rye, sorghum.
Large Seeds: Peas, beans, soybeans, sunflowers.
Small Seeds: Grass, clover, alfalfa, rapeseed.
IMPORTANT! When transporting on public roads, the seed cart must be empty. With the seed cart
hitched to the rear of the air seeder, central packer tires can fail due to increased weight transferred from
a loaded/partially loaded seed cart.
29 | Page
Transportation & Installation
Front Hitch decal
Transportation
The air seeder may only be towed when the cart hopper is empty.
The maximum speed is 20 mph.
• Hitch the air seeder to the tractor.
• Connect the hydraulic system.
• Fold the wings of the frame and secure.
• Connect the lighting equipment.
• Raise the jack when the machine is lifted and locked and move the jack to its transport position.
• Slide spacers on the lifting cylinders and lower the machine.
• Pay attention to the height and width of the machine during transportation.
Attaching the Air Seeder
The air seeder can be hitched up to the rear of a seed wagon or directly to the tractor.
CAUTION! When hitching up the machine, ensure that nobody is between the tractor and the machine.
NOTE: When close to the machine, avoid sharp edges which can cause injury.
1. Hitch the seeder and the seed wagon to the tractor. See also Hitch Adjustment & Maintenance.
2. Connect the ISO Bus System.
3. Connect the Hydraulic System.
4. Connect the lighting equipment.
5. Raise the front jack in to the transport position. If the machine is equipped with a rear jack,
repeat.
6. Fold the side sections of the planting system frame and secure with lock pins, cylinder stops or
blocks.
Drive only with an empty seed wagon if possible. Transport is not recommended with the tank over half
full.
NOTE: The maximum suggested transport speed is 16 mph, 10 mph if the tank is full.
Connecting the Hydraulic System
30 | Page
 Loading...