


NDR User Guide
0
4 Channel Network Disk Recorder
User Guide

NDR User Guide
1
Before started: .......................................................................................................................... 3
1. NDR-Main Screen: ............................................................................................................. 4
1.1 Channel Display: .............................................................................................................. 4
1.2 Recording Channel Selection: .......................................................................................... 5
1.3 Right Click Functions ........................................................................................................ 5
1.4 Pause ............................................................................................................................... 6
1.5 Settings ............................................................................................................................ 6
1.5.1 Schedule Recording .................................................................................................. 6
1.5.2 Motion Detection ..................................................................................................... 7
1.5.3 Camera Rename ....................................................................................................... 7
1.5.4 Camera Setting ......................................................................................................... 8
1.5.5 Audio on/off ............................................................................................................. 9
1.5.6 PPPoE Setting ........................................................................................................... 9
1.5.7 DDNS Setting .......................................................................................................... 10
1.5.8 Email Setting ........................................................................................................... 10
1.5.9 Cloud Service ......................................................................................................... 11
1.5.10 Time Setting .......................................................................................................... 12
1.5.11 Language Setting ................................................................................................... 12
1.5.12 Network Setting .................................................................................................... 12
1.5.13 Firmware Upgrade ................................................................................................ 13
1.5.14 Disk Format ........................................................................................................... 13
1.5.15 Account setting ..................................................................................................... 14
1.6 Playback ......................................................................................................................... 14
1.7 IP Camera Selection ....................................................................................................... 16
1.7.1 DHCP ON ................................................................................................................. 16
1.7.2 DHCP OFF ................................................................................................................ 16
1.8 Log ................................................................................................................................. 17
1.9 Information .................................................................................................................... 18
Important Notes: ..................................................................................................................... 19

NDR User Guide
2
Hardware Specification
Video output: HDMI x1
USB: 1port on front for USB Flash drive
2ports in rear for Mouse or Keyboard
LAN and WAN: 4LAN Port and 1WAN Port
Support HDD: 2.5”/3.5” HDD up to 3TB
Power supply: DC 12V/3A @100~240V/AC input
Operating Temperature: 5
o
C to 40oC
Storage Operating Temperature: -25
o
C to 50oC
IP Camera Operating Temperature: 0
o
C to 40oC
Relative Humidity: 5% to 95% non-condensing
Maximum Operating distance: 100M
Software Specification
Channel Number Support: 4 channels
Compression Format: H.264
Decoding Throughput and Resolution: 1280 x 800 @ 20~30fps, 720P
Snapshot Supported
Sectional Video Clip per User’s discretion
Playback: Event timeline
Motion Detect and Schedule Recording Supported
Firmware Upgrade: Support through USB Drive
iPhone / iPad and Android Phone App Available
Package Contents
NDR400 * 1
IP CAMERA and bracket stand * 4
LAN + DC Cable (20M) * 2
LAN + DC Cable (10M) * 2
User manual * 1
Quick Installation Guide
Power adapter * 2
Power splitter * 1
Mouse * 1
HDMI Cable * 1
Screw Pack * 1

NDR User Guide
3
Before started:
Which Networking Environment suits you?
There are two methods to make your NDR working
(1) DHCP OFF
If you do not have any network environment in the place that you
plan to install NDR, this option may apply.
You will need to install all LAN cables from end to end. Connect all
LAN cables to each IP cameras and LAN ports on NDR. Then, NDR will
configure everything for you.
(2) DHCP ON (For advance user only)
If you do have network environment in your area, please make sure
you have DHCP server which is assigning IP address to each devices.
You can connect LAN cable to NDR’s WAN port, and then connect the
other side to router to get IP address.
For IP camera installation, you can install them to wherever inside the
LAN. Please note that NDR and IP cameras have to stay in the same
network segment. Otherwise, they will be unable to find each other.

NDR User Guide
4
1. NDR-Main Screen:
Starting NDR, system will automatically detect the IP Camera, and
then display on the screen. Before that, click any button on the screen
(except info and log), system will be request to enter the account and
password. The default username is admin and password is admin. You
will still be able to see function buttons at bottom. There are Channel
displaying, Recording channel select, Pause, Set up, Playback, IP camera
select, Log and info.
Note:
On the bottom of those icons, there is the space that will show HDD
status such as No HDD, HDD Not Formatted, and HDD Available: %
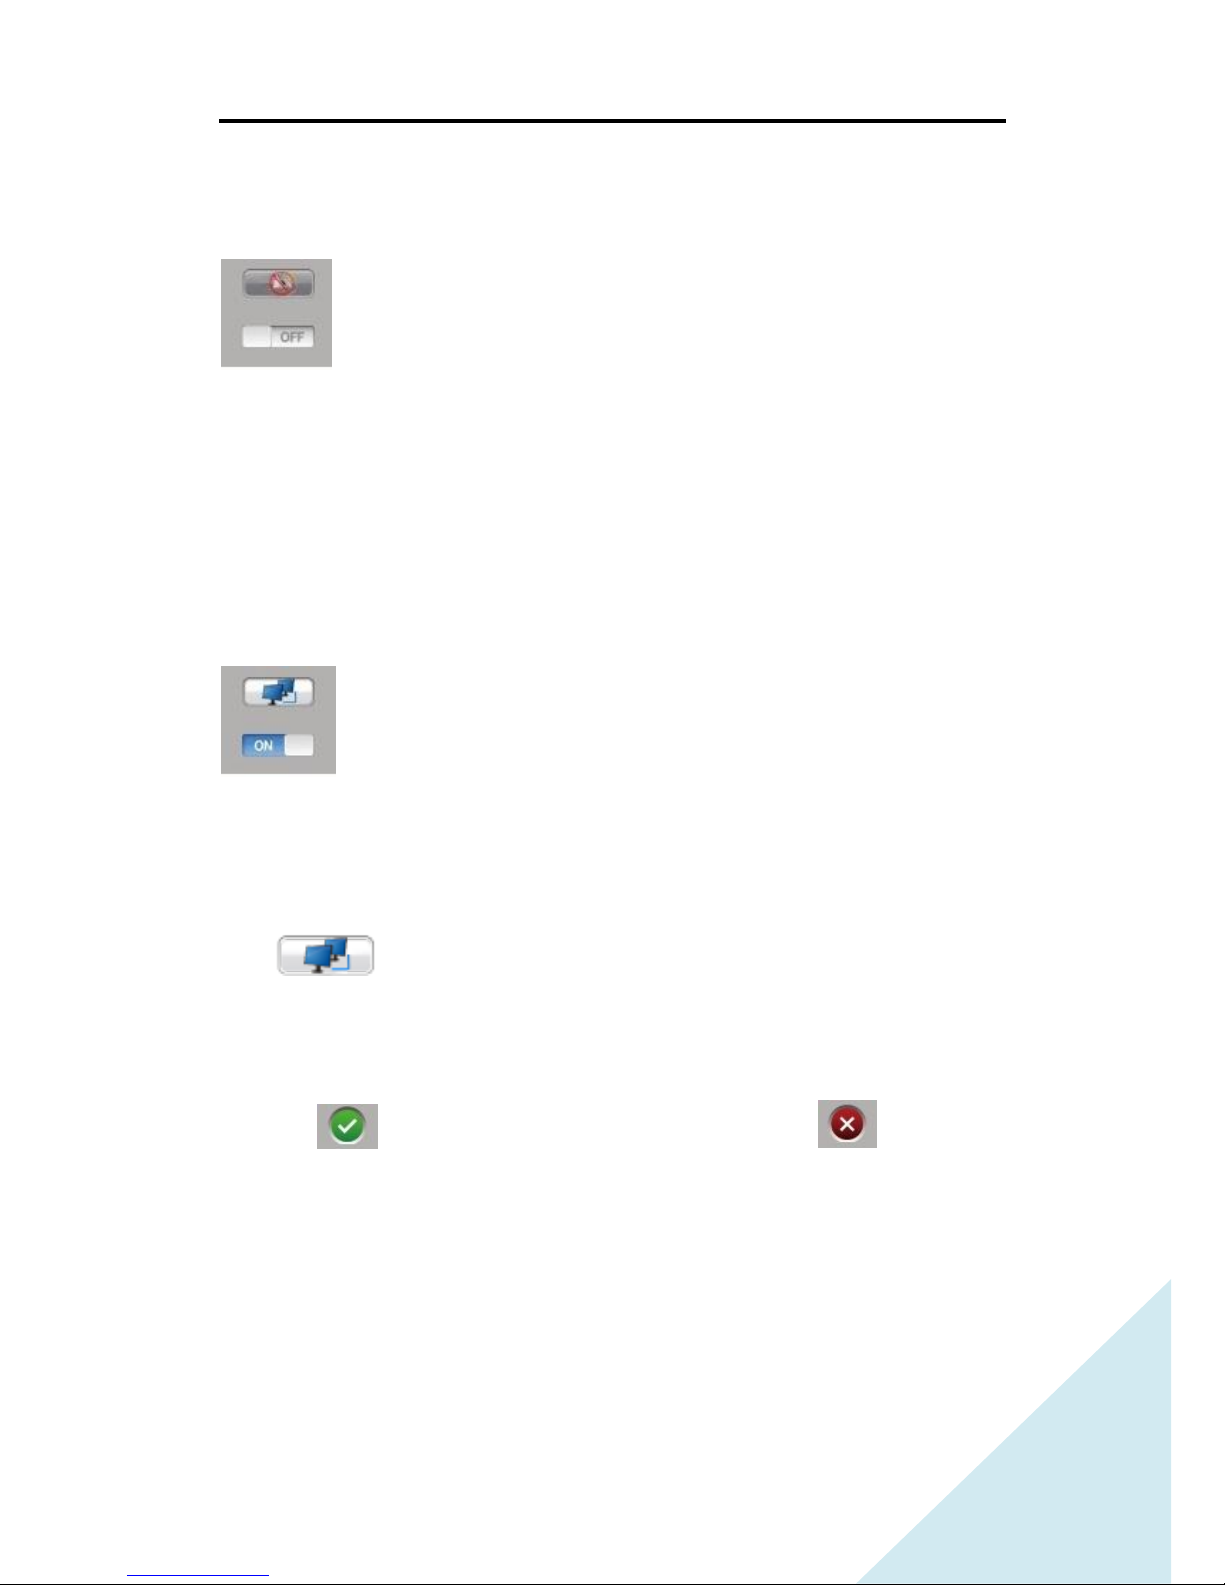
1.1 Channel Display:
In channel display, click the button on the left corner to show the
channel that you want to see. Then press 1-4 to show each IP camera in
full screen or press for multiplexer to show all channels.
Note:
(1) When select the number 1 to 4 channel, the color will become gray.
(2) When select the 4-channel, the button will have a blue “rectangle”

NDR User Guide
5
1.2 Recording Channel Selection:
Select the channel for recording by press 1-4 buttons, or select “Ch All”
button for recording all channels.
Note:
When click the button for recording a channel, the color of button will
change to blue such as from to .
1.3 Right Click Functions
Choose a channel, then right click on mouse, there will pop out a
window contain REC, AUDIO, PTZ, Logout, Restart and Shutdown.
REC: Enable or Disable recording to a channel. It’s same function of
section 1.2.
Audio: If you want to hear the live sound of channel, enable this function.
Click again to disable.
PTZ: For certain of IP Cameras, you will be able to control Pan, Tile and
Zoom functions to the channel.
Logout: Log out from administrator.
Restart: Click on this, NDR will restart.
Shutdown: If you want to shutdown NDR, please click on this function.

NDR User Guide
6
1.4 Pause
By using Pause button, stop the screen’s image.
Note:
When press Pause button, if the recording function is operating, the
screen will be stopped and the recording is still operating.
1.5 Settings
Click the set up button, it will show the detail of settings.
1.5.1 Schedule Recording
This is to setup what day and time that you would like to record. You can
set the particular day and time to record or record for 24 hour a day and
7 days a week.
Click for starting set up the recording schedule. There will
show a new window. The column is for Monday to Sunday and the row is
for 24Hr.
Note:
(1) Click Mon for selecting 24hr on Monday. Click 1 for selecting all week.

NDR User Guide
7
(2) Click Date name/Hour for selecting all.
1.5.2 Motion Detection
This function is to enable regional entrance when anything enters; the
recording function will be started automatically.
Click then select a channel to draw a rectangle in red color.
Red rectangle and will show up on the screen once touch off.
Note:
Right click to cancel the red rectangle on the screen during setting.
Select on/off to enable or disable motion detection.
When start detecting, choose recording or not.
Note:
Only when the select is on, the recording button can be used.
1.5.3 Camera Rename
The factory default name for each IP camera is IP address. You can
rename it to the name you prefer to each camera. Click this button then

NDR User Guide
8
select the IP camera. You can modify the name from the IP camera list.
(From the IP address to the name that user prefer)
Note:
1. Leaving whitespace in the column is not acceptable.
2. If there is nothing entered in the column, the system will use IP
address instead.
3. System only accepts maximum 25 characters including whitespace or
". (period)"
1.5.4 Camera Setting
Click this button then click the screen that you want to adjust the video.
You can change the settings of Brightness, contrast, sharpness, color
saturation, vertical and horizontal to each IP camera. The screen will
change immediately. The number range is from -5 to 5, then move the
bar for changing the number.
Note:
(1) When close the setting window, the setting will be confirmed.
(2) Click then the setting will be saved, and Click then
cancels all the setting and exit.
NDR User Guide
9
1.5.5 Audio on/off
Setting the audio on/off for recording with the sound or not.
When select the audio on, and then right click at the screen, it will show
a context menu that user can play the sound from this IP camera.
Note:
When user change the setting of audio on/off, the system will reload
1.5.6 PPPoE Setting
The PPPoE (Point-to-Point Protocol over Ethernet) is a network protocol
for encapsulating Point-to-Point frames inside Ethernet frames. It is used
mainly with DSL services where individual users connect to the DSL
modem over Ethernet.
Click , there will show a new window that about the setting of
Account and Password for PPPoE. Fill out the information, and then
PPPoE can be used. Press the on/off button, for using PPPoE or not.
Note:
(1) Click then the setting will be done, and Click then
cancels all the setting and exit.
(2) Please contact your local ISP for PPPoE account and password if this is
not familiar to you.

NDR User Guide
10
1.5.7 DDNS Setting
Dynamic DNS is a method/protocol/network service that provides the
capability for a networked device, such as a router or computer system
using the Internet Protocol Suite, to notify a Domain Name Server (DNS)
to change, in real time, the active DNS configuration of its configured
hostnames, addresses or other information.
You may visit www.dyndns.com to apply your own DDNS account.
Click , there will show a new window that about the settings of
DDNS Account, Password, and Domain Name. Press the on/off button to
enable or disable DDNS.
Note:
(1) Click then the setting will be done, Click then cancel all
the setting and exit.
(2) You may visit www.dyndns.com to apply a new account for DDNS
service. NDR currently only supports DynDns.
1.5.8 Email Setting
When NDR detects an alert and SMTP function is on, then NDR will send
a warning mail with snapshot to you and show you who/how/what
touched off the alert event.
Click , there will show a new window that about the settings of
Account, Password, Server, Port, To, and Name. Press the on/off button

NDR User Guide
11
to enable or disable SMTP service. When you fill in all necessary
information, you may click “send test mail” for testing the SMTP.
Note:
Click then the setting will be saved.
Click then cancel all the setting and exit.
Before using this function, please make all the network setting is finished
or contented with internet.
1.5.9 Cloud Service
This Cloud Service is to simplify the setting of DDNS and Port Mapping.
You will no longer need to set up DDNS or Port Mapping individually.
Once you provide a device name to it, it will connect to Internet
Automatically. The name with domain name will be the web address for
you to access. For example: Name: awesome. So the web address will be
“awesome.my-ndr.net”.
Click , you will see a new window pop out and there will need
you to input a “Name” for it; then press to save the setting or
to cancel. Press On / OFF button to enable or disable “Cloud
Service”.
After input a name and also enable this function, you will be able to find
your NDR around the world by typing name.my-ndr.net
Note:
(1) Please make sure your Router support UPnP/NAT function. Without
UPnP/NAT, this could service cannot work properly.
(2) If your router does not support UPnP/NAT, you have to set up the port
mapping manually to following ports.

NDR User Guide
12
TCP 8888, TCP 5541, TCP 5542, TCP 5543 and TCP 5544
(3) If you have firewall, please allow outgoing connection to the port of
TCP 5366
(4) It is not acceptable if you are using same name on two or more NDR
devices. A message will pop out if the name already exists. Change to
something else if you see messages.
1.5.10 Time Setting
Here is to set the time and time zone for NDR. Surveillance with correct
date and time is very important once it becomes evidence.
Click the small clock to show the time setting menu. Then select the time
zone and adjust the correct time for your correct area/country.
Note:
When click the setting will be saved, and the system will restart
the image program.
Click then cancel all the setting.
1.5.11 Language Setting
Here is for you to set up your preference languages. Click on it and
choose the language you preferred.
1.5.12 Network Setting

NDR User Guide
13
Setup IP address for NDR to join your network environment or get on
Internet. If you have DHCP server in your network environment, please
set it as DHCP Auto. If you do not have DHCP server in your network
environment, please switch to Manual IP Setting mode and input correct
IP address, Net mask, Gateway, Preferred DNS server and Alternate DNS
server. Then click on Yes or No button to enable or disable.
Note:
(1) When using DHCP, all columns will be locked.
(2) Key-in IP address, only allow numerals.
(3) Click then the setting will be done, Click then cancel all
the setting and exit.
1.5.13 Firmware Upgrade
This function will be used when newer version of firmware is officially
released.
Click updating button , there will show a window about
plugging the USB drive with updating file. Then confirm YES or No.
If yes, the system will be rebooted. There will show the updating process
on the screen. When done the upgrading, it will show the information
about upgrading successful or fail.
Note:
(1) Please store the firmware file in the root of USB drive.
(2) No matter the firmware update successful or fail, you will need to
switch off the power and on again to reboot NDR manually.
1.5.14 Disk Format

NDR User Guide
14
Disk formatting is the process of preparing a hard disk drive for data
storage. Click this format button to format HDD. It will show a
confirmation window to warning and confirm this action.
Note:
(1) Format HDD, all the data will be lost.
(2) When the HDD capacity is 90% used, the system will over-write the
oldest file to keep recording.
(3) If HDD format type is not EXT3, the system will ask you to format your
HDD. Otherwise, NDR will not work properly.
1.5.15 Account setting
Click this button for modify the username and password. The default
username is admin, and the password is admin.
The password needs to be confirmed twice.
Note: For security protection, please log out the system in main page by
clicking on the right button of mouse and select Log-out to log-out.
1.6 Playback
Play recorded files from HDD.
Click this button to play the recorded files. There will show a selection
list on the left-hand side for date, and IP camera list on right-hand side.
Then pick a file on the bottom which divides by record time. The detail
descriptions of function are as following:

NDR User Guide
15
Click to go back to select file window
Click to play video
Click to backward the video for 30 seconds
Click to forward the video for 30 seconds
Click to set A spot for the beginning of range
Click to set B spot for the ending of range
Click to cut a picture from the recording video as snapshot
Click to retrieve video from setting A to B spots to USB port
Click to play video frame by frame
Click to exit from playback
Note: when playing video, the Exit bottom will switch to Stop; Play
bottom will switch to Pause. Ex: to and to .

NDR User Guide
16
1.7 IP Camera Selection
1.7.1 DHCP ON
This setting is for the user who would like to connect IP cameras directly
to NDR. Mostly, this method is suitable for the user who do not have
network environment.
When start NDR400, system will automatically detect the IP cameras,
and then display on the screen. User can change the IP camera sequence
and add/delete the IP camera from the display list.
There will show two lists. One list shows the IP camera that installed in
local area network; the other display list on right-hand side shows the IP
camera that you select to display on your screen.
Note: When click then the setting will be saved, and the system
will reload.
Click then cancel all the setting.
1.7.2 DHCP OFF
If you install IP cameras on your LAN environment (Not connect IP
cameras directly to NDR), this method may apply. Please make sure you
have DHCP server on your LAN; and IP cameras need to stay in the same
network segment.
When begin, NDR400 will automatically search IP cameras where you
install on LAN. You will be able to see all IP cameras to be listed in the
window on the left; the other display list on right-hand side shows the IP
camera that you select to display on your screen.
Note: When click then the setting will be saved, and the system

NDR User Guide
17
will reload.
Click then cancel all the setting.
1.8 Log
Log provides the list of history. It includes system record, events of login,
service records, motion, rec, remote access and video lost.
Dmseg: This message is to show the record of system. Mostly, this
message is for engineer to identify errors.
Login: This list will be recorded about the user account logo in, out, login
failure and password modification.
Messages: Here is to record what services you activated or deactivated
and when to activate or deactivate.
Motion: This list is about when IP CAMERA detects a new event and
when the event had finished.
Rec: When starting or stopping recording by user manually, there will be
a list about the operation history. When motion detection enables the
recording function, but stop recording by user manually, the system will
record this event in the list.
Remote: This is to show you what time and what IP address log in from
Internet.
Video-lost: when the IP CAMERA video is lost or get the signal back,
system will record this in the log.
Note: The latest information will be showed on the top of the list.

NDR User Guide
18
1.9 Information
Click the info button to show the system information such as Model
name, Resolution, Network, MAC Address, IP address, Subnet mask,
Default gateway, Preferred DNS server, Alternate DNS server, PPPoE,
DDNS, Email and account Name, Mail, Cloud Service and Name, IP
Address, Time zone and Time.

NDR User Guide
19
Important Notes:
1. NDR-400 only recognizes the format type of HDD is Ext 3. HDD
formatting will be initialized if the installed HDD is not pre-formatted
to EXT3.
2. The SMTP requires a mail server for sending the warning mail to
user’s mail address.
3. When the screen shows , it means this channel is playing the
sound from the IP CAMERA, also recording the sound.
When the screen shows , it means stop recording due to video lost.
4. The recording file is divided into one hour a file.
5. The record file will be saved in AVI file.
6. Pull out the HDD while NDR is operating will caused the recording
function stopped and a message shows “Hard Disk Not Detected”.
When HDD is well installed to NDR, there will a message show “Hard
Disk Usage %” within 15 seconds.
7. When insert a storage device such as USB flash drive, user will be able
to capture some information from NDR such as video, picture, log’s
information. If there is no any storage device inserted, capture
function, log file saving and video file saving will not be available.
 Loading...