

Page 1
NEW
DIMENSION
Custom-GradeTM Dies
Zip Spindle™ provides
precise adjustment
and positive lock-down
New and
Improved
Zip Spindle
TM
Headed
Decapping
Pin
™
Page 2

BEFORE USING DIES
Before using your new dies, disassemble and carefully clean
the inside surface of the sizing and seating dies (and the
expander die if a three-die set.) A rust preventive oil is applied
at the factory to protect the dies during shipping and must be
removed before reloading. Any commercial solvent or cleaner
(like our ONE SHOT Gun Cleaner and Dry Lube) will suffi ce.
Inspect all cartridge cases and discard those with cracks,
splits and other visible defects. Wipe cases clean with a soft
cloth to remove grit and other foreign matter which may
scratch the die. Before sizing, lubricate the cases with one of
the case lubes available from Hornady (ONE SHOT Case Lube
or UNIQUE, a hard paste.) No matter the method of lubrication,
all rifl e cases must be lubricated (Hornady’s Titanium Nitride
three-die sets are lube-free.) We don’t recommend the use of
oil-type lubes; they may contaminate the powder inside the case.
Little or no lube on rifl e cases will result in a stuck case.
Over-lubrication will cause dents in the shoulder, damaging
appearance. (If you do get a case stuck in a die, we can remove
the case without damaging the die and return it to you. Please
send the die to our Customer Service Department with $4 for
postage & handling charges.)
Page 3

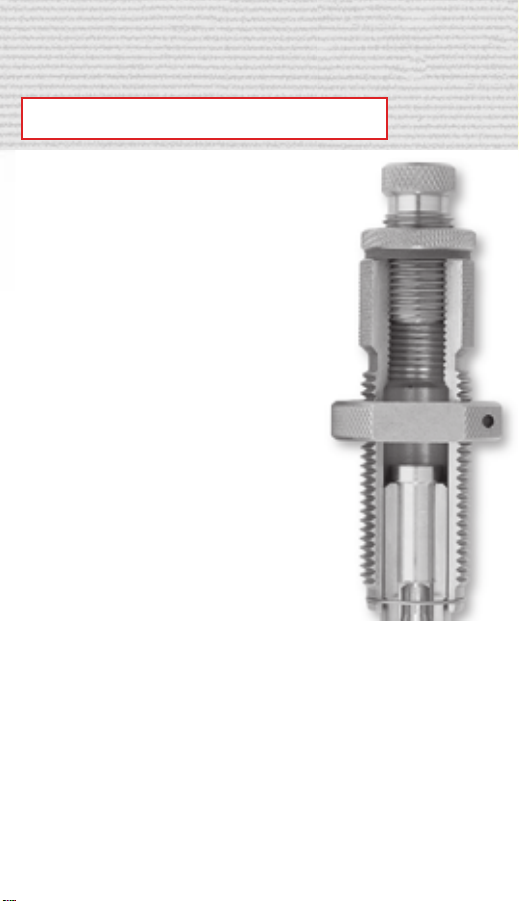
ADJUSTING THE SIZE DIE
To adjust the expander/decap assembly:
1. Loosen the spindle lock.
2. Adjust the spindle so approximately 3/16"
of the decap pin is below the end of the die
(SEE PHOTO.)
(NOTE: The new Zip Spindle is lightly threaded to
provide a positive no-slip lock. In its free state, the Zip Spindle can
be pulled up and down to make quick adjustments, or can be
threaded for more precise adjustments.)
3. Make sure the threads on the spindle and collet are engaged
and tighten the spindle lock until the spindle no longer rotates.
4. Verify that the decap pin is only extended 3/16" below die.
(Note: The new Hornady Zip Spindle comes with an easily replaceable
headed decap pin. If during use or adjustment, the pin breaks, an
extra decap pin has been provided. Remove the spindle assembly, unthread the expander/retainer, remove the decap pin head, and replace
with the new decap pin.)
To adjust the full-length size die, follow these steps:
1. Raise the press ram to highest position without camming over.
2. Thread the full-length die into the press until the base touches
the shell holder head.
3. Tighten the lock ring against the press and tighten the set
screw with the allen wrench.
(Note: Firearm action types and chamber dimensions vary causing
excess headspace. To eliminate the headspace, adjust the full-length
die upward.)
3/16"
Page 4
ADJUSTING THE SEATING DIE
Hornady bullet seating dies feature a fl oating
in-line sleeve designed to minimize bullet
run-out (misalignment caused by a canted
bullet.) The cartridge neck and bullet are
aligned in the fl oating sleeve prior to
seating the bullet for in-line, precise bullet
seating.
These universal seating dies are manufactured by caliber (.224, .243, .308, .358,
etc...) and not by specifi c cartridge
(222 Remington, 240 Weatherby Magnum,
30-30 Winchester, 35 Whelen, etc...)
Prior to seating, make sure the steel
seating stem is positioned in the alignment
sleeve (see die parts list.) Also, make sure
the cases are chamfered before seating.
When properly adjusted, Hornady’s seating
die may appear as though it’s not threaded
far enough into the press (they are adjusted
for long or short cases). Don’t be alarmed. As few as
three threads need be screwed into the die for precise
and accurate reloading.
(Note: As with all seating dies, when seating lubricated lead bullets,
lubricant will build-up within the die causing variations in seating.
Clean and inspect as needed.)
Page 5

SEATING WITHOUT A CRIMP
1 Insert a sized case into the shell holder and lower the handle
and back out the seater adjustment screw. If you have the
seater adjustment screw too low to start, you may run out
of adjustment.
2 Thread the seating die into the press until you feel
resistance. At that point, the crimp ring has come in contact
with the mouth of the case.
3 Back the die out of the press one turn to prevent the case
from being crimped
the handle and return the ram to its starting position.
4 Insert a bullet in the case mouth - lower the handle so
the cartridge and bullet enter the alignment sleeve. Upon
completion of the stroke, the bullet should be barely seated
in the case.
5 Adjust the seater adjustment screw down in small
increments, each time operating the handle until the bullet
is seated to the desired length. At the completion of each
stroke, inspect the cartridge for the correct overall length.
—
tighten the die body lock ring. Raise
Page 6

SEATING WITH A CRIMP
To begin, refer to the procedure for SEATING WITHOUT A
CRIMP. Follow the procedure throughout, however, DO NOT
TIGHTEN THE DIE BODY LOCK RING.
1 Once you’ve reached the preferred seating depth for the
bullet, back out the seater adjustment screw a few turns.
2 Raise the ram, with the cartridge, to the top of the stroke.
3 Thread the seater die body into the press until it meets
resistance (again, at that point, the mouth of the case has
met resistance with the crimper.)
4 Thread the seater die body into the press in small increments
(one-sixteenth turns) each time operating the handle. At the
completion of each stroke, inspect the cartridge for the
proper crimp.
5 Once you’ve reached the desired crimp (with the cartridge
still in the die), tighten the die body lock ring. Then, while
holding down the handle, thread the seater adjustment screw
downward until it contacts the bullet.
(NOTE: On presses with a cam-over action, back out the adjusting
screw 1/8 to 1/4 of a turn to allow for cam-over.)
6 Raise the handle and remove the cartridge. Check the lock
ring to make sure it’s still tight. Try another case with a
bullet. If the desired seating depth and crimp are
attained, then you can begin seating and crimping in one
operation. If not, make the needed minor adjustments.
(NOTE: For uniform crimps, cases must all be trimmed to a
uniform length.)
Page 7

NECKING UP
The elliptical shape of the expander allows the reloader to
expand the mouth of the case as well as “neck up” from one
caliber to a larger caliber without the use of a tapered expander.
The expander is tapered at the top as well as the bottom to
“neck up” in stages. For example, you can use Hornady’s 25
caliber and 30 caliber expanders to neck up from a 22 caliber to
30 caliber.
ADJUSTING THE EXPANDER DIE
(Three-die sets only)
The expander assembly is designed to put a slight “bell” or fl are
on the case mouth. For uniform fl aring, trim all case to their
proper length.
To adjust the expander die body, raise th
press ram to its full height with a case i
the shell holder. Thread the expander die
into the press until the expander touches
the case mouth. Raise the handle and sc
down the die in small increments (each
inspecting the mouth) until the mouth o
case has been fl ared just enough to sea
bullet. Tighten the die body lock ring and set screw. Keep in
mind that an excessive fl are can eventually shorten case life,
and may keep the case from properly entering the seating die.
Page 8

DIE SET
PARTS LIST
Key Description Part No.
A Zip Spindle Lock 398731
B Size Die Body *
C Zip Spindle 398567
D Headed Decap Pin 390222
E Expander *
Decap Retainer
F Seater Adjustment 044100
Screw
G Seater Lock Nut 044800
H Washer 398067
*Caliber specific part numbers are assigned to these items.
Key Description Part No.
I Seater Die Body *
J Retaining Ring 396430
K Seating Stem *
L Alignment Sleeve *
M Expander Die Body *
(3 Die only)
N Lock Ring Screw 390200
O Sure-Loc Lock Ring 044000
P Allen Wrench 390656
Page 9

PRODUCT WARRANTY
WARRANTY: Hornady product warranty extends to the
original purchaser of the reloading dies. Hornady product
warranty does not apply to commercial reloaders.
WARRANTY COVERAGE: Hornady reloading dies are
warranted against defective materials and workmanship.
Hornady NEW DIMENSION dies are guaranteed not to
break or wear out from normal use. THIS WARRANTY IS
VOID IF THE PRODUCT (1) has been damaged by accident
or unreasonable use, neglect, improper service or other
causes not arising out of defects in material or workmanship, or (2) has been altered or repairs have been made
or attempted by other than authorized factory personnel,
or (3) is used commercially or (4) has been altered or
defaced in any way. Reloading dies will be either replaced
or reconditioned (at Hornady’s discretion) when product is
returned prepaid, to: HORNADY WARRANTY REPAIR
SERVICE, 3625 OLD POTASH HIGHWAY, GRAND ISLAND, NE
68803. The replacement will continue the warranty of the
original product, or ninety days, whichever is longer.
Page 10

ACCESSORIES
MicroJust
The economical way to achieve optimum bullet seating
depth for benchrest accuracy and consistency. Simply
replace the standard seating depth adjustment stem on
your New Dimension Custom Grade Dies with the MicroJust
Seating stem. Allows you to precisely set bullet seating
depth in .001" increments.
No. 044090
™
L-N-L Die and Conversion Bushings
Simply insert a Hornady conversion bushing into
your RCBS® Rock Chucker or other reloading
press using a 1¼-12 thread, and you’re ready
to start using the Lock-N-Load System. It’s the
easiest way to get the most out of your reloading
press. These bushings let you take advantage
of Hornady’s Lock-N-Load technology even if you
own a competitor’s reloading press. The Lock-NLoad Conversion kit includes three die bushings
and one conversion bushing.
L-N-L Press Conversion Bushing No. 044095
(2-pk.) L-N-L Die Bushings No. 044094
(3-pk.) L-N-L Die Bushings No. 044093
(10-pk.) L-N-L Die Bushings No. 044096
L-N-L Conversion Kit No. 044099
Page 11

HORNADY WARRANTY REGISTRATION
Please return in envelope within 20 days of purchase.
Name ___________________________________________
Address __________________________________________
City ____________________________________________
State ________________________ Zip _______________
email ___________________________________________
Item Purchased ____________________________________
Serial No. ________________________________________
Dealer Name ______________________________________
City ____________________________________________
State ________________________ Zip _______________
Send to:
Hornady Manufacturing
P.O. Box 1848 • Grand Island, NE 68802-1848
Page 12

P.O. Box 1848 • Grand Island, NE 68802-1848
(308) 382-1390 •
5/05 780140
www.hornady.com
 Loading...