

Page 1
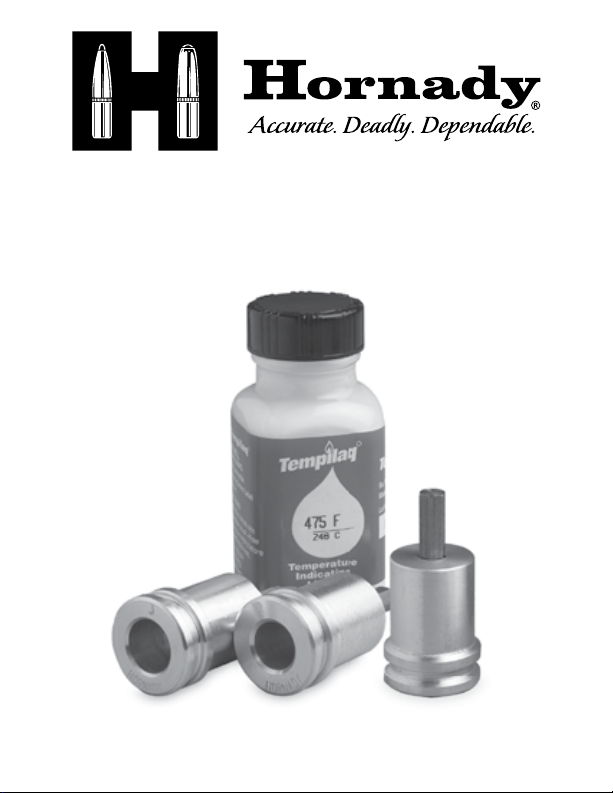
Case Neck
Annealing Kit
PRODUCT INSTRUCTIONS
Page 2

Reloading is an enjoyable and rewarding hobby that is easily conducted with
safety. Carelessness or negligence can make any hobby hazardous. All Hornady
reloading tools and supplies are designed with the user’s safety in mind. However,
since Hornady Mfg. Co. has no control over the manner in which products or
components are used in the reloading operation, we cannot assume any liability
for damage which may result from the use of the products or the information given
herein. It is the responsibility of you, the user, to follow generally accepted safety
practices.
GENERAL
Use all reloading tools and supplies as the manufacturer recommends.
Study the instructions carefully and become thoroughly familiar with the
operation of tools and supplies. Observe good housekeeping in the reloading
area. Keep all tools and supplies neat, clean and orderly. Promptly clean
all primer and powder spills. Know your components. Study manufacturer’s
manuals to properly identify all components and use them according to their
recommendations. Perform all tasks relative to reloading only when you can
give it your complete attention. Do not perform these activities when you are
ill or fatigued. Develop a routine to avoid mistakes and avoid haste. Always
wear eye protection. You assume reasonable risk during reloading-related
tasks and doing so without safety glasses is adding an unnecessary risk.
Use only laboratory tested and approved reloading and component data
and reloading procedures. We highly recommend the Hornady Handbook of
Cartridge Reloading as your source for current information.
Page 3

CASE ANNEALING
Never apply heat to any loaded cartridge or primed case. Always verify that
all cases you intend to anneal are empty and unprimed. Do not assume
an indented primer is spent. It could have been a misfire. When heated
sufficiently, such primer will detonate, ejecting the cup with dangerous
force. Examine all cases to be annealed. Discard any case with cracks
or splits, enlarged primer pockets, serious dents, corrosion, or excessive
thinning between the body and the web. Do not anneal cases within one inch
of the case head. Annealing in this area removes necessary strength and
hardness required for cartridge performance and shooter safety. Never use
any case suspected of case head annealing crush and discard any such case
immediately.
EQUIPMENT NEEDED
• Power screwdriver or variable speed electric drill (1/4" hex drive).
• Propane torch 1/2" or 5/8" diameter tip preferred.
• Flat and stable work area of sufficient size, free of flammable objects
and supplies.
• Large bench vise (optional for clamping the propane torch).
• Largemouth container (such as a three pound coffee can) with sufficient
water to completely immerse all annealed cases.
• Sufficient light to allow observation of color change in temperature
sensing material.
• Safety glasses.
• Heat resistant gloves.
Page 4

BENEFITS OF CASE NECK ANNEALING
When case necks become work hardened and brittle due to repeated firing and
resizing, annealing effectively extends case life. Within any batch of fired cases,
variations in neck hardness will be found. This variation in hardness contributes
to variations in bullet pull. Proper annealing reduces this variation and improves
the uniformity of bullet pull, which can improve accuracy. When creating wildcat
cartridges by necking up or necking down various cases, neck and shoulder
annealing greatly eases the case conversion process and reduces losses from
neck splitting or folding.
Hornady offers this tool kit complete with three basic tool components.
One fits small rifle cases like the .222 and the .223 caliber cases; one fits
medium rifle cases like the .243, .308 and 30-06 family; and one fits the
H&H magnum family. Before proceeding, ensure that you have the correct
tool for the case type you intend to anneal. Insert the head end of a test case
in the tool. The case should freely enter the tool without excessive side play.
Further, the case should enter the tool so that a minimum of 1/2” length of
case body is hidden within the aluminum housing. Cases shorter than 1” from
base to shoulder must be annealed by other means. Once you have chosen
the correct tool, proceed with the following instructions.
Page 5

Case is too small in
diameter for the holder.
Case fits freely and is the
Case is too short for
the holder.
correct height.
Page 6

ANNEALING PROCESS
1. Clean excessive debris from empty cases using a vibratory tumbler and
cleaning media (Hornday offers these tools). Clean cases are easier
to inspect and they heat more consistently and show change in the
temperature sensing material more clearly.
2. Visually inspect all cases. Verify that no case contains any of the following:
Primer cup, powder, debris of any kind, obvious defects, split neck, excessive
thinning near web-to-body juncture.
3. Use propane torch fitted with medium sized tip, on suitable work area flat,
stable, and free of flammable materials or air currents. (Clamping the
propane bottle loosely into a bench vise prevents the torch from tipping
over.)
4. Position a large can that is about 1/2 full of water near the torch so it is
convenient to dump annealed cases from tool into water.
5. Install Hornady Case Neck Annealing Tool in electric screw driver or drill.
If you are using a drill, securely tighten the chuck and adjust the speed
to about 200 RPMs, which is near the slowest adjustment speed of most
drills.
6. Apply the temperature
indicating paste to case body
at a point about 1/4” below
case shoulder, and mark all
cases. (See photo A.)
7. Light torch, adjust valve to
produce a visible medium
length blue flame and rotate
torch so that flame is pointed
in a convenient direction.
A
Page 7

8. Insert marked, empty case in tool. Start power driver (if using a hand drill, it is
most convenient to lock the drill in the ON position).
9. Bring spinning case into flame. Locate
middle of case neck in center of flame,
near end of bright blue inner cone. Always
locate flame on neck area only. NEVER
APPLY FLAME DIRECTLY TO CASE BODY OR
MARKING MATERIAL. AVOID CENTERING
FLAME NEAR CASE SHOULDER.
(See photo B.)
10. As case spins and heats, observe condition
of temperature sensing material. When that material melts the case neck,
it has been sufficiently annealed. FURTHER ANNEALING ONLY SOFTENS
THE CASE SHOULDER WHICH CAN REDUCE ACCURACY AND CASE LIFE.
11. Immediately and quickly dump case into water by moving and inverting power
driver so that case falls out of Hornady tool and into water container. (Avoid
tipping the torch and avoid getting the power cord near the flame or hot torch
tip.) RAPID COOLING DOES NOT IMPROVE ANNEALING. IT IS NEEDED TO
PREVENT ANNEALING HEAT FROM MIGRATING TO THE CASE HEAD. NEVER
USE ANY CASE WHERE CASE HEAD ANNEALING MIGHT HAVE OCCURRED.
12. Insert another case in Hornady tool and repeat process. For maximum uniformity,
continue until all cases in that batch are annealed.
13. It is worthwhile to tumble all cases after annealing. This dries and
removes heat-generated scale and further cleans cases.
B
Page 8

P.O. Box 1848 • Grand Island, NE 68802-1848
(308) 382-1390 •
#398128
www.hornady.com
 Loading...