

Horizont hotshock ABN5, hotshock ABN5,10892,farmer ABN4,10891 Instruction Manual
OriginalbEtriEbsanlEitung
DE
Elektrozaungerät
instructiOn manual
En
Electric Fencer
nOticE D‘utilisatiOn
Fr
Électricateur de clôture
instrucciOnEs DE sErviciO
Es
Valla eléctrica
manual DE instruçõEs
Pt
Cerca Eléctrica
istruziOni PEr l’usO
it
Apparecchio per recinti elettrici
návOD na Obsluhu
sK
pre napájacie zariadenie elektrickej ohradyohrady
brugsanvisning
DK
El-hegnsapparat
bEDiEningshanDlEiDing
nl
Schrikdraadinstallatie
85400B- 06/17
hotshock ABN5
tyPE 10892
horizont group gmbh
Animal Care
Postfach 15 69
34483 Korbach
Homberger Weg 4
34497 Korbach
Germany
farmer ABN4
tyPE 10891
Telefon: +49 (0) 56 31 / 5 65
Telefax: +49 (0) 56 31 / 5 65 - 1 20
-
6
agrar@horizont.com
www.horizont.com
-
1 00
Originalbetriebsanleitung farmer ABN4 & hotshock ABN5
DE
in Verbindung mit den Errichtungs- und Sicherheitshinweisen für
Elektrozaungeräte SECURA ANIMAL oder SECURA SECURITY
(www.horizont.com/securaanimal oder
www.horizont.com/securasecurity)
Das Weidezaungerät muss vor jedem Eingriff ausgeschaltet werden!
MONTAGE UND ANSCHLUSS:
Das Gerät an einer möglichst feuchten Stelle aufstellen. Der mitgelieferte
U-Erdstab/Aufstellungspfahl 14498 oder der optionale 1m-Erdungsstab
(Längsstab) 14041-1 muss an einer feuchten Stelle möglichst tief in den
Boden eingeschlagen und mit einem hochspannungsfestem Anschlusskabel
(z.B. 90150) mit der schwarzen Erdklemme (
) des Gerätes verbunden
werden (S.37 / FIG.7). Die hochspannungsfeste Zaunleitung (z.B. 90676U)
an die rote Klemme mit den Blitzzeichen (
) anschließen. Das Gerät ist
nur bei ordnungsgemäßer Montage gegen Feuchtigkeit geschützt. Setzen
Sie das Gerät auf den U-Erdstab auf und betrieben Sie dieses nicht auf dem
Boden liegend. Das Gerät an einem nicht feuergefährdeten Ort aufstellen.
INBETRIEBNAHME:
1
Das Gerät mit Drucktastenschalter (S.38 /
) einschalten - nach einigen
Sekunden leuchtet eine LED im Rhythmus der Impulse auf. Das Gerät gibt
Impulse an den Zaun ab. Leuchtet die LED nicht auf, ist entweder die 9Volt
Batterie oder der 12 Volt Akku leer. Es kann sich hierbei auch um einen
Defekt im Gerät oder am 230 Volt Netzadapter handeln.
FARMER ABN4:
Die eingebaute Stromsparschaltung ist selbstregelnd und führt zu einem
geringen Stromverbrauch bei einer guten Zaunisolation.
INBETRIEBNAHME MIT OPTIONALER 9 VOLT TROCKEN-BATTERIE
(S.35/FIG.3,4 & S.36/FIG.6):
(nur Alkaline Batterien verwenden)
Öffnen Sie das Gehäuse und setzen Sie die 9 Volt Batterie ein. Schließen
Sie dann das Gerät an die 9V Batterie an (rot + / schwarz -), dabei auf die
richtige Polung achten.
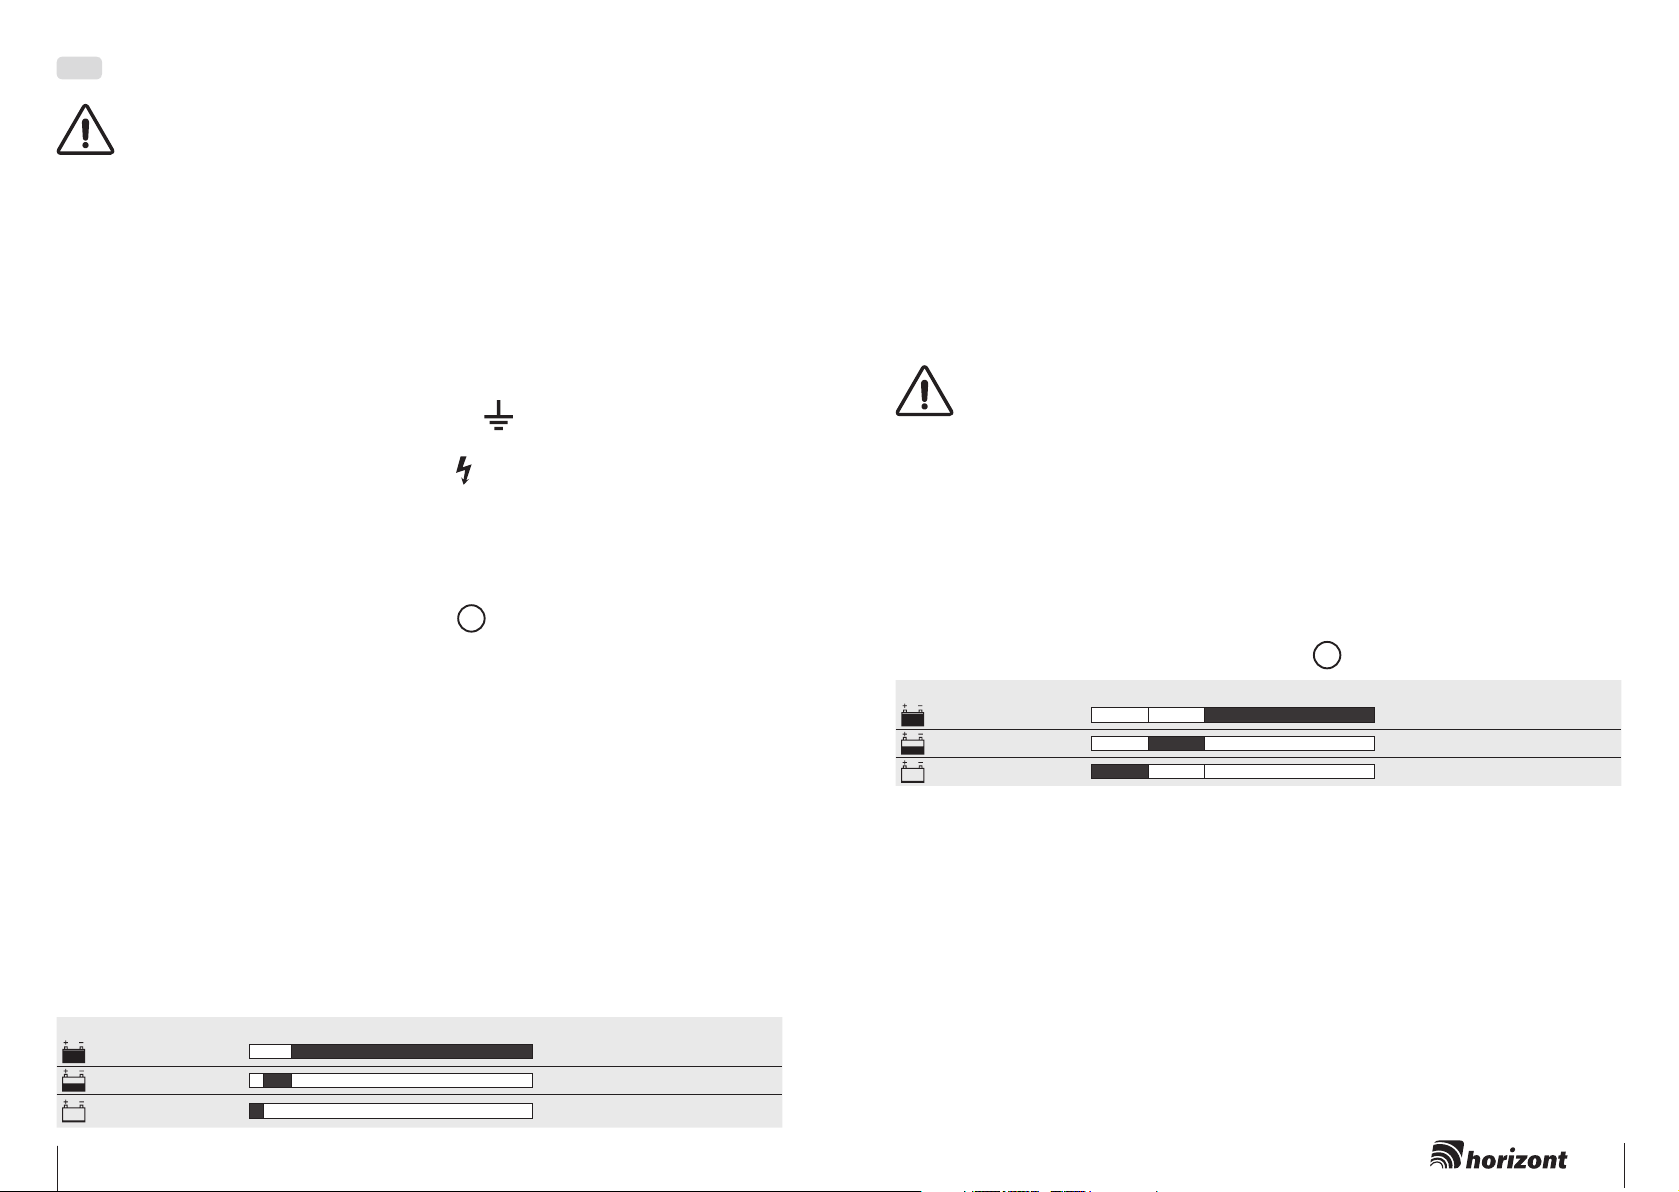
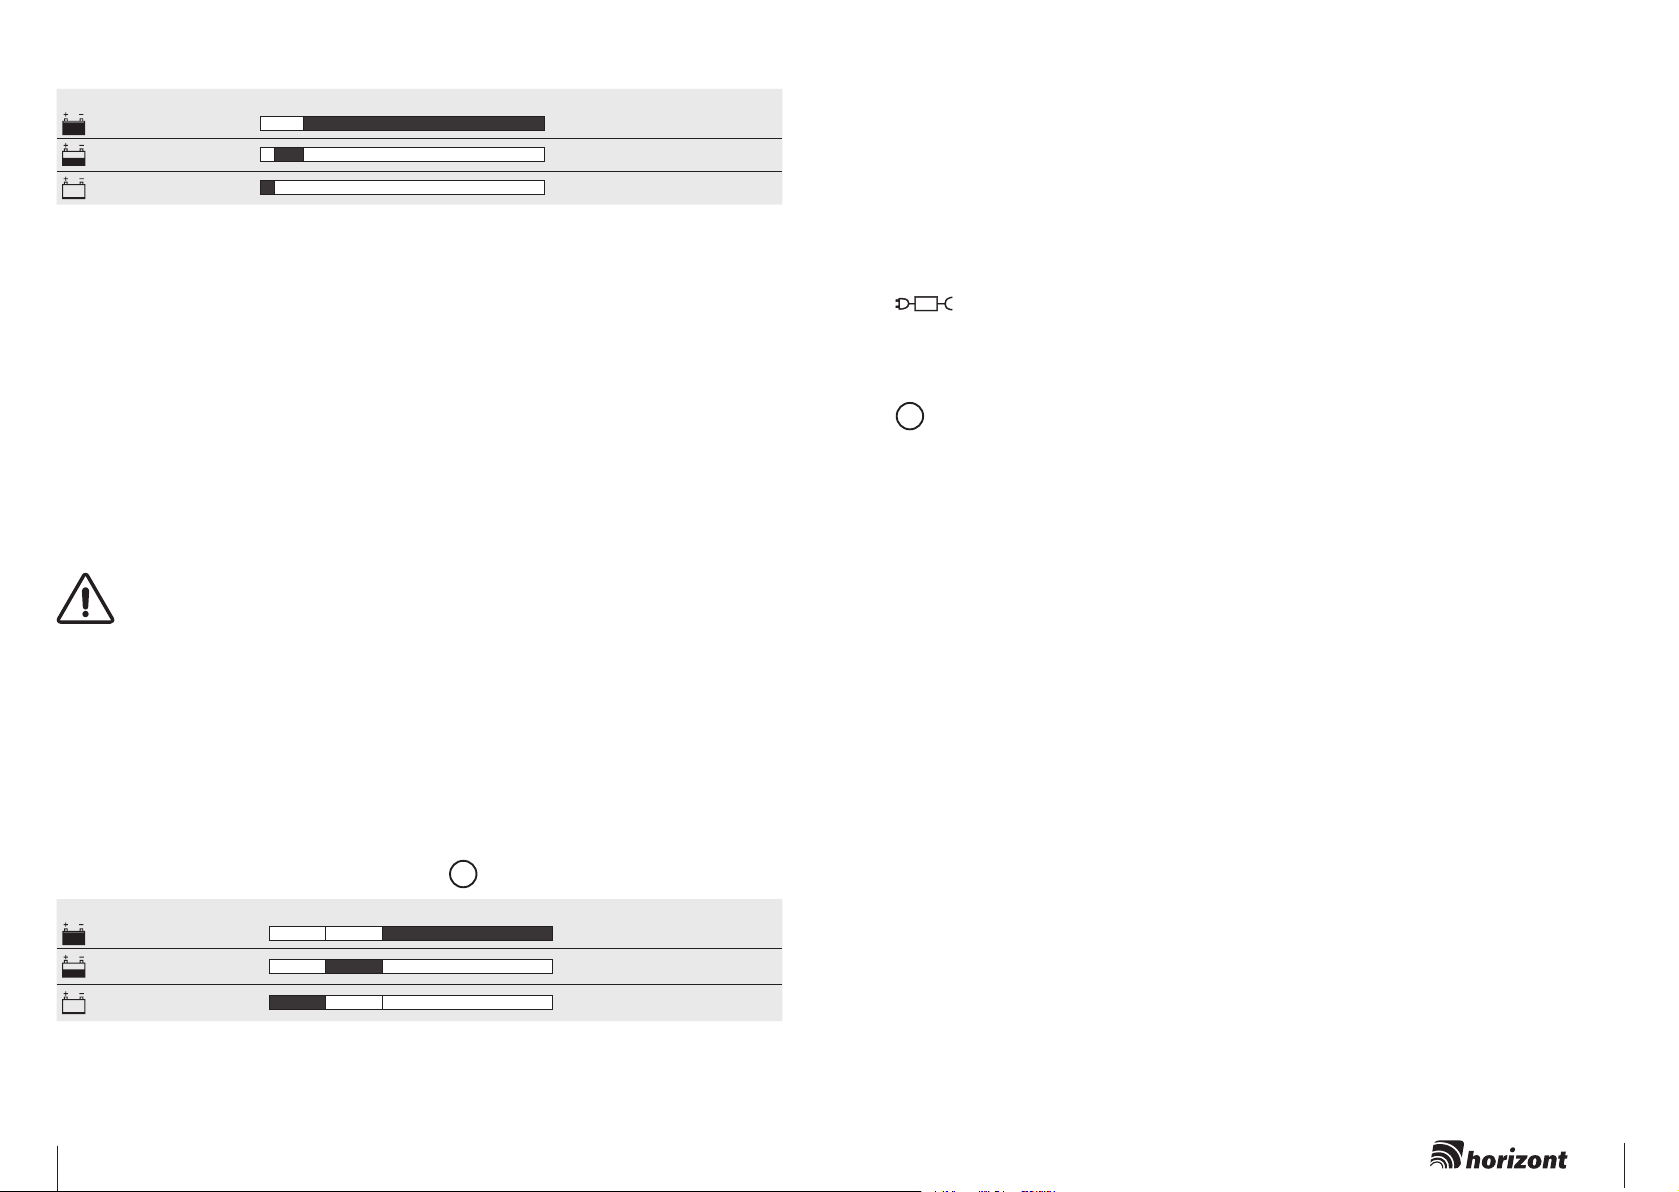
restkapazität
Blinklicht grün
Blinklicht rot/grün
Blinklicht rot
5-15 %
5 %
15-100%
Batterie gut
Batterie austauschen
Batterie ganz leer:
9V Batterie sofort austauschen
INBETRIEBNAHME MIT OPTIONALEM 12 V AKKUMULATOR
(S.35/FIG.3,4 & S.36/FIG.6):
Aufgeladene Akkus bis 34Ah in das Unterteil 87100 stellen (12Ah mit
Zwischenplatte 87102). Stellen Sie größere Akkus neben das Gerät
(siehe S.34/FIG 2b). Schließen Sie dann das Gerät an den 12V Akku an
(rot + / schwarz - ), achten Sie dabei auf saubere Polklemmen und die
richtige Polarität. Das Anschlusskabel ist im Lieferumfang der SuperVlies-Akkus enthalten! Für 12V-Spezial-Akkus optionales Anschlusskabel
(905010) verwenden. Nach einigen Sekunden hört man ein gleichmäßiges
Ticken, das Gerät ist in Betrieb. Bei falscher Polarität läuft das Gerät nicht
an.
Nur auadbare 12V-Blei-Akkus verwenden, dabei auadbare Akkus
mit Entlüftung nur in gut belüfteten Räumen laden. Während des
Ladevorgangs mit einem nicht in dieser Anweisung gelistetem Lade-
gerät, welches direkt an den 12V-Blei-Akku angeschlossenen ist,
muss der Akku vom Gerät getrennt werden. Der Akku sollte vor und
nach jedem Einsatz, sowie bei längerer Lagerung im Haus und bei
normaler Raumtemperatur (alle 2 Monate) gelagert und aufgeladen
werden.
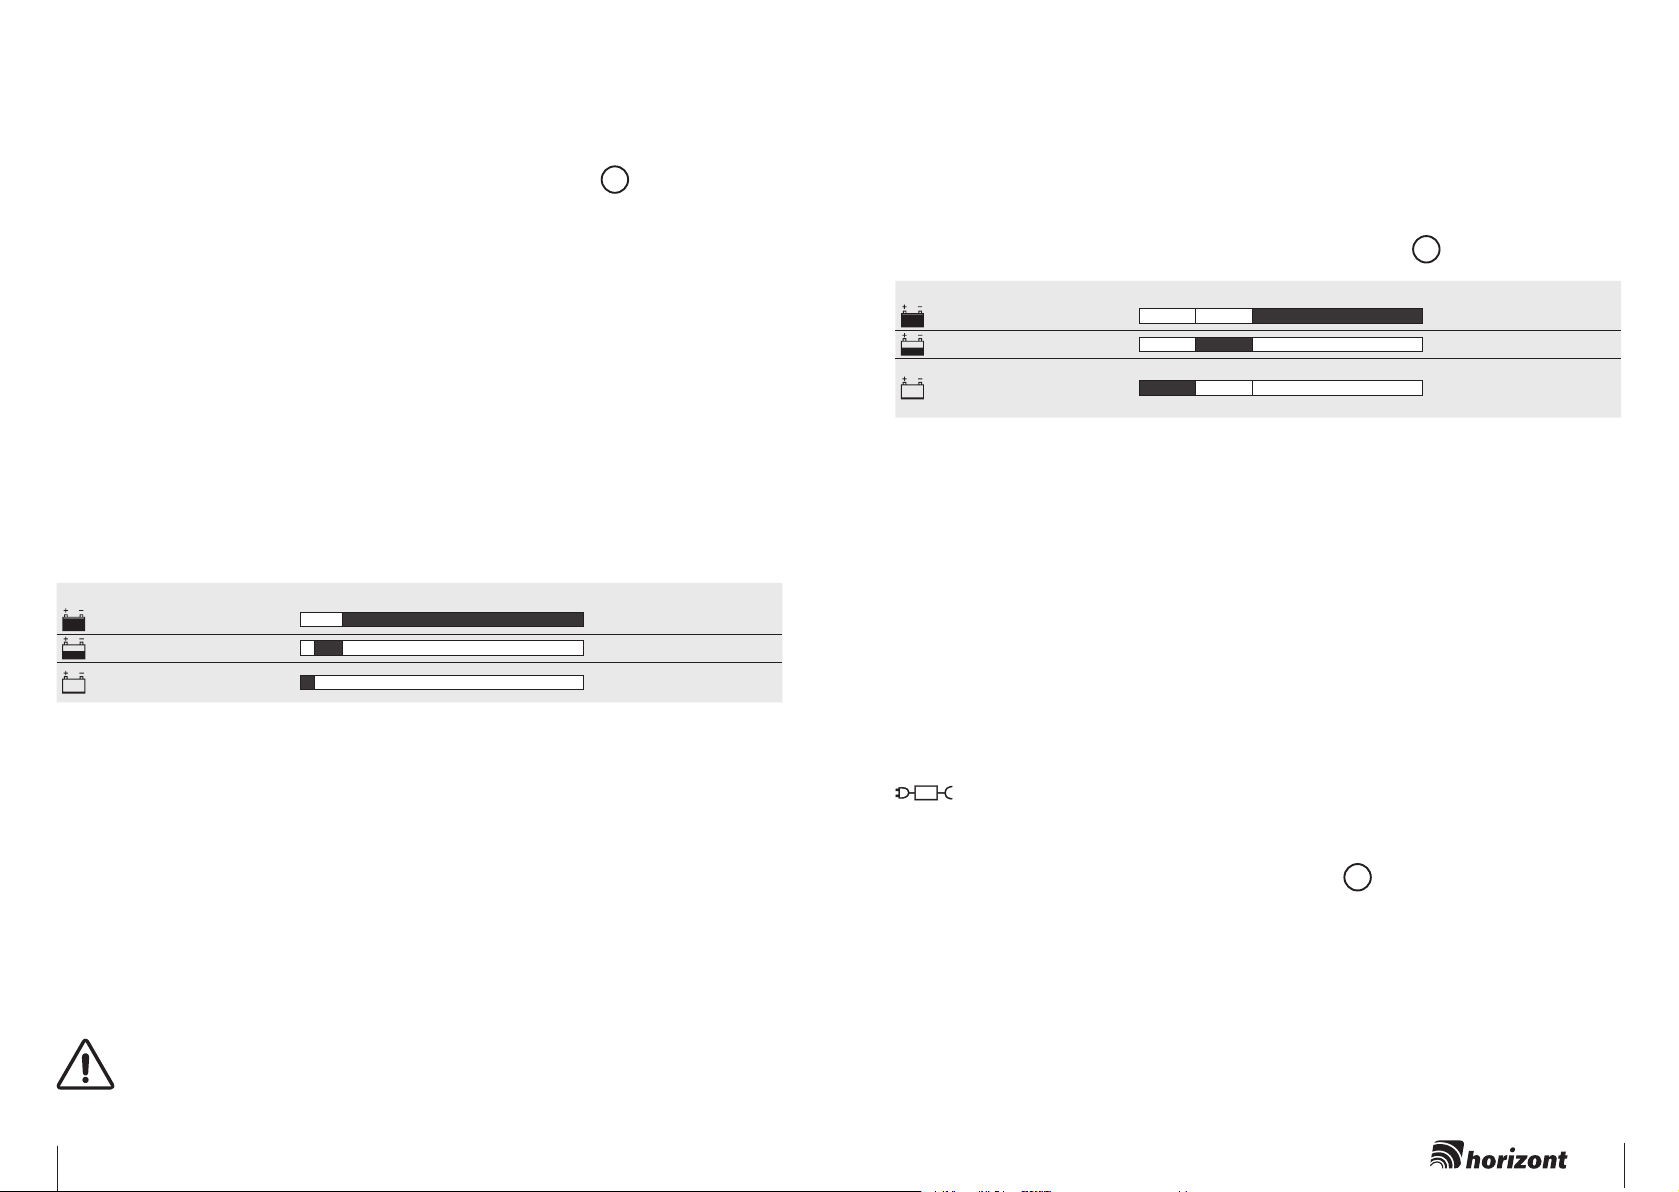
Spätestens wenn der Akku zu 80 % entladen ist (nur noch 20% Ladekapazität) muss er nachgeladen werden, um eine Tiefenentladung zu
verhindern. Die Akkuanzeige (S.34/FIG.2a /
restkapazität
Blinklicht grün
Blinklicht rot/grün
Blinklicht rot
20-40%
0-20%
40-100%
1
) leuchtet:
Akku gut
Akku laden
Akku ganz leer: sofort nachladen
Bitte beachten Sie, dass diese Werte in Abhängigkeit der Temperatur
(Kapazität) und Messabweichungen (Spannung) schwanken können. Bei
Betrieb mit einem Solarmodul, Akkuanzeige nur bei Tagesanbruch (ohne
Sonnenlicht) kontrollieren.
Mit Hilfe des empfohlenen, optional erhältlichen Netzadapters, können Sie
das Gerät betreiben oder den Akku mit optionalem Solarmodul in der Sonne
oder alternativ mit dem 230 V Netzadapter laden. Beenden Sie den
Ladevorgang sobald das grüne Licht der Batterieanzeige aueuchtet.
Vermeiden Sie ein Überladen des Akkus!
2
farmer ABN4 & hotshock ABN5
3

INBETRIEBNAHME 230 V MIT OPTIONALEN NETZADAPTER
(S.35/FIG.4 & S.36/FIG.5):
Verwenden Sie für den Betrieb im 230V Netz ausschließlich den
Netzadapter 47PSU0008FEU/UK/US, wie es auf der Zwischenplatte im
Gerät angegeben ist! Nach einigen Sekunden hören Sie ein gleichmäßiges
Ticken, das Gerät ist in Betrieb. Die Zaunspannungs-anzeige (S.34/FIG.2a/
1
) leuchtet im Rhythmus der elektrischen Impulse auf. Mit dem Netzadap-
ter kann ein angeschlossener 12V Akku im Parallelbetrieb leicht geladen
werden. Bei Ausfall der 230V-Versorgung wird das Gerät aus dem Akku
gespeist.
Beim Betrieb mit dem Netzadapter die 9V Trockenbatterie abklemmen. Bei
dem Betrieb mit einem Netzadapter ist kein Solarbetrieb möglich.
INBETRIEBNAHME MIT opTIoNAlEM SolARpANEl (≤ 20 W)
(S.37/FIG.7 & S.38/FIG.8):
Das Gerät verfügt über einen eingebauten Solarladeregler (wenn das Gerät
eingeschaltet ist). Die Kabel des Solarpanels 5W (60812) und 10W (60812)
durch die Kabeleinführung auf der Geräterückseite in das Gehäuse führen
und im Gehäusedeckel anschließen. Dabei auf richtige Polarität achten. Bei
einem Betrieb mit dem Solarpanel ist kein Betrieb mit einem Netzadapter
möglich.
WARNUNG:
Lassen Sie das ausgeschaltete Weidezaungerät nicht für einen längeren
Zeitraum mit einem Akku und einem Solarpanel in der Sonne stehen. War-
um? Dies könnte den Akku beschädigen.
ARBEITSPRINZIP:
Das Solarpanel produziert Strom sobald es nutzbarem Sonnenlicht ausgesetzt ist. Das Weidezaungerät benötigt durch-gängig Strom - sowohl bei Tag als auch bei Nacht. Auf diese Weise wird der durch das Panel erzeugte Strom in einem wieder
auadbaren 12 V Akku gespeichert und das Gerät kann demnach ohne Sonnenlicht arbeiten oder direkt über eine
9V Batterie versorgt werden. Es ist möglich, dass das Solarpanel nicht immer über eine ausreichend große Leistung verfügt,
um einen Akku vollständig wieder aufzuladen – besonders in dunklen, grauen und nebligen Monaten (z. B. Oktober bis
Februar).
Bei 0 Grad Celsius oder Temperaturen im Minusbereich, empehlt es sich ohnehin, eine große 9V alkaline Batterie anstelle
eines 12 V Akkus zu benutzten.
Vorrangig wird das Gerät aus dem Solarpanel betrieben. Kommt über das Solarpanel keine ausreichende Leistung, schaltet
das Gerät automatisch auf die angeschlossene 9 Volt Batterie oder den 12 Volt Akku um.
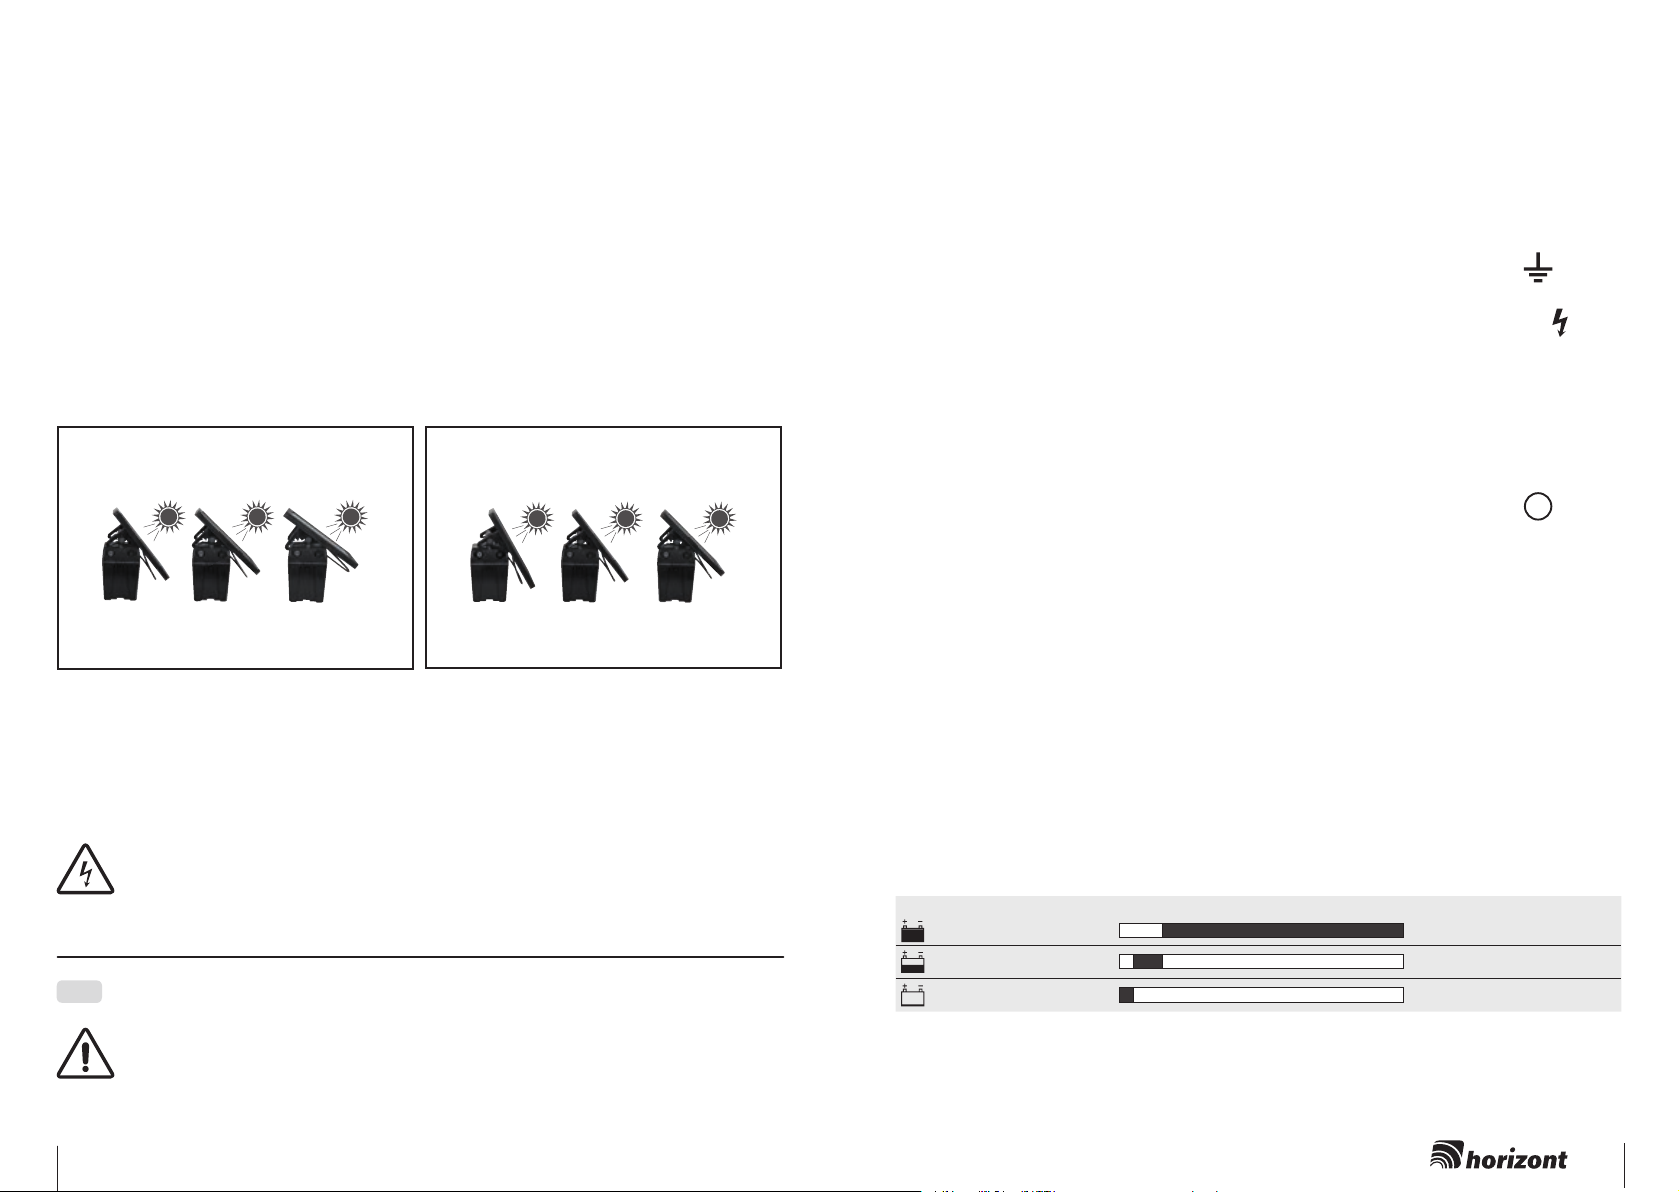
OPTIMALE SOLAR-AUSRICHTUNG UND EINSTELLUNG
Eine korrekte Platzierung des Weidezaungerätes und des Solarpanels ist ausschlaggebend für den bestmöglichen Betrieb
des Gerätes.
1. POSITIONIEREN SIE DAS WEIDEZAUNGERÄT SO, DASS DAS PANEL RICHTUNG SÜDEN ZEIGT.
Diese Positionierung ermöglicht es dem Panel selbst während der weniger hellen Wintertage eine maximale Menge an
Sonnenlicht aufzunehmen. Berücksichtigen Sie bei der Platzierung des Gerätes den Stand der Sonne im Laufe des Tages
und vermeiden Sie einen Standort, an dem das Gerät eventuell durch Schatten von Bäumen, Büschen oder durch hohes
Gras verdeckt werden könnte.
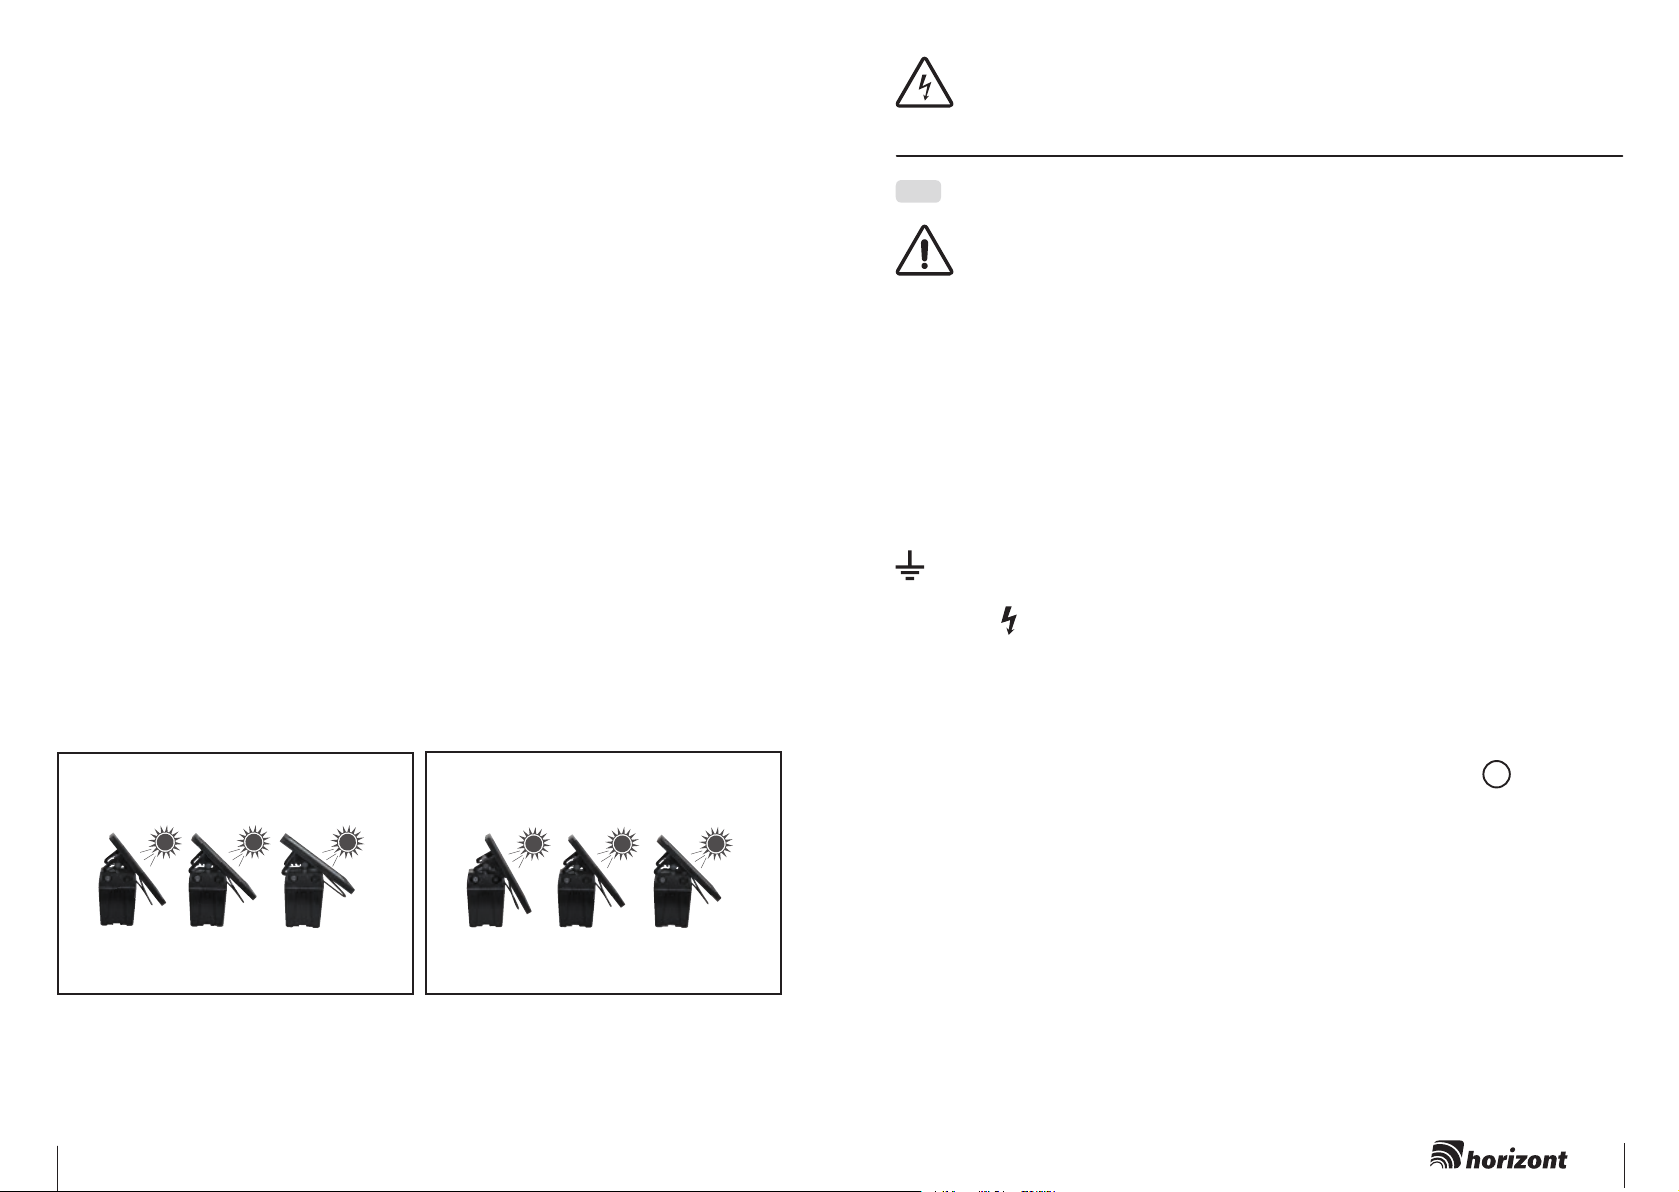
2. ERMITTELN SIE DEN KORREKTEN NEIGUNGSWINKEL FÜR DAS SOLARPANEL.
Die Position der Sonne über dem Horizont verändert sich im Laufe der Jahreszeiten. Als generelle Empfehlung gilt ein
Winkel von 50 Grad als optimal für den langfristigen Einsatz in den meisten Teilen Europas. Dennoch kann die Fähigkeit
des Solarpanels zur Auadung des Akkus durch Anpassungen des Winkels abhängig von der Saison optimiert werden
(Siehe Abbildung unten). Je steiler der Neigungswinkel, desto größer ist der Reinigungseffekt beim Regen oder Schnee.
Empfohlener Anstellwinkel des Panels
Während der Winterzeit (mit Ausnahme im Süden Europas) könnten die Sonnenstunden möglicher Weise nicht
ausreichen, um den Akku vollständig zu laden. Laden Sie den Akku extern, sobald die Batterieanzeige grün/rot oder rot
aufblinkt oder nutzen Sie alternativ eine große, alkaline 9V Batterie mit 170 – 200 Ah, welche auch bei Temperaturen um
oder unter den Gefrierpunkt empfohlen werden.
3. ENTFERNEN SIE REGELMÄSSIG ABLAGERUNGEN UND SCHMUTZ VOM SOLARPANEL.
Dies beinhaltet die Entfernung von Grasschnitt, Staub (speziell an Schotterwegen), Blättern und Schnee, da dies die
Leistung des Moduls zur Aufladung des Akkus reduzieren kann.
Südeuropa & Nordafrika (Süden CH & A)
50° 43°
Winter
Nov. - Feb.
Mär. & Apr.
Sep. & Okt.
Frühjahr
Herbst
Sommer
Mai & Aug.
36°
Empfohlener Anstellwinkel des Panels
Nord- & Mitteleuropa (einschließlich A & CH)
60° 50°
Winter
Nov. - Feb.
Frühjahr
Mär. & Apr.
Fall
Sep. & Okt.
Sommer
Mai & Aug.
43°
SERVICE:
Reparaturen dürfen nur von qualizierten Personen durchgeführt werden.
Es sind nur die vom Hersteller vorgeschriebenen Ersatzbauteile zu verwenden.
Technische Änderungen vorbehalten!
Operating instruction for electric fence controller farmer ABN4 & hotshock ABN5
EN
in connection with safety hints SECURA ANIMAL or
SECURA SECURITY(www.horizont.com/securaanimal or
www.horizont.com/securasecurity)
Energizer has to be turned OFF before any intervention!
ASSEMBLY AND CONNECTION:
Set the device up in as moist a location as possible. The supplied U
earthing rod/set-up post 14498 or the optional 1m earthing rod (longitudinal rod) 14041-1 must be driven as deeply as possible into the ground
in a damp area and connected with a high voltage-resistant connecting
cable (e.g. 90150) with the black earth terminal (
) of the device (PG.
37/FIG.7). Connect the high voltage-resistant fence cable (e.g. 90676U) to
the red terminal with the lightning symbol (
). The device is only protec-
ted against moisture if it is properly assembled. Place the device on the U
4
farmer ABN4 & hotshock ABN5
5
earthing rod and do not operate it while it is lying on the ground. Set the
device up in a non fire-hazard location.
COMMISSIONING:
1
Switch the device on with the push-button switch (PG.38/
) - after a few
seconds an LED lights up in the same rhythm as the impulses. The device
transmits impulses to the fence. If the LED does not light up, either the 9 volt
battery or the 12 volt rechargeable battery is spent. It could also be a defect
in the device or at the 230 volt mains adapter.
FARMER ABN4:
The incorporated current saving circuit is self-regulating and consumes less
energy with a well insulated fence.
COMMISSIONING WITH OPTIONAL 9 VOLT DRY BATTERY
(PG. 35/FIG.3,4 & PG. 36/FIG.6):
(use only alkaline batteries)
Open the housing and insert the 9 volt battery. Then connect the device to
the 9 V battery (red + / black -), ensure correct polarity.
residual capacity
flashing light grenn
flashing light red/green
flashing light red
5-15 %
5 %
15-100%
Battery good
Replace battery
Battery fully depleted: Replace
the 9 V battery immediately
COMMISSIONING WITH OPTIONAL 12 V RECHARGEABLE BATTERY
(PG.35/FIG.3,4 & PG.36/FIG.6):
Place the batteries charged to 34 Ah in the lower section 87100 (12 Ah with
intermediate plate 87102). Place larger rechargeable batteries next to the
device (see PG. 34/FIG.2b). Then connect the device to the 12 V recharge-
able battery (red + / black -), ensure correct polarity and make sure the pole
terminals are clean. The connecting cable is included with the super eece
rechargeable battery! Use the optional connecting cable (905010) for the 12
V special rechargeable battery. After a few seconds you will hear a steady
ticking indicating the device is in operation. The device will not start if the
polarity is reversed.
Only use rechargeable 12 V lead batteries; rechargeable batteries
with ventilation should only be recharged in well-ventilated rooms.
When charging with a charger that is not listed in these instructions
and is connected directly to the 12 V lead battery, you must remove
6
the rechargeable battery from the device. The rechargeable battery
should be stored and charged at normal room temperature before
and after every use as well as during longer periods of storage in the
house (every 2 months).
The rechargeable battery must be recharged by the latest when it has discharged 80 % (only 20 % charge capacity left) to prevent complete dischar-
1
ge. The rechargeable battery indicator (PG.34/FIG.2a /
residual capacity
flashing light green
flashing light red/green
flashing light red
20-40%
0-20%
40-100%
) glows:
Rechargeable battery good
Charge battery
Rechargeable battery fully
depleted: Recharge
immediately
Please note that the values can fluctuate depending on the temperature
(capacity ) and measurement deviations (voltage). For solar module operation, check the rechargeable battery indicator only at dawn (without sunlight).
You can operate the device with the recommended optionally available
mains adapter, or charge the rechargeable battery with the optional solar
module in the sun or alternatively with the 230 V mains adapter. End the
charging process as soon as the green light of the battery indicator lights
up.
Avoid overcharging the rechargeable battery!
COMMISSIONING 230 V WITH OPERATIONAL MAINS ADAPTER
(PG.35/FIG. 7 & PG.36/FIG.5):
To operate on the 230 V mains, use only the mains adapter 47PSU-
0008FEU/UK/US as specied on the intermediate plate in the device! After a
few seconds you will hear a steady ticking indicating the device is in operati-
1
on. The fence voltage indicator (PG.34/FIG.2a/
) lights up in the same
rhythm as the electrical impulses. With the mains adapter it is easy to charge
a connected 12 V rechargeable battery in parallel operation. If the 230 V
supply fails, the device is supplied from the rechargeable battery.
Disconnect the 9 V dry battery when operating with the mains adapter. Solar
operation is not possible when operating with a mains adapter.
CoMMISSIoNING WITH opTIoNAl SolAR pANEl (≤ 20 W)
(PG. 37/FIG.7 & PG. 38/FIG.8):
The device has an incorporated solar charge regulator (when the device
farmer ABN4 & hotshock ABN5
7
is switched on). Guide the cable of the solar panel 5W (60812) and 10W
(60812) through the cable entry on the back of the device into the housing
and connect in the housing lid. Make sure that the polarity is correct. Opera-
tion with the solar panel means you cannot operate it with a mains adapter.
WARNING:
Do not leave the switched off pasture fence device in the sun with a rechar-
geable battery and a solar panel for a longer period. Why? Because it could
damage the rechargeable battery.
OPERATING PRINCIPLE:
The solar panel produces electricity as soon as it is exposed to usable sunlight. The pasture fence device requires consistent
electricity - by day as well as by night. The electricity generated in this way by the panel is stored in a rechargeable 12 V
battery, which means the device can operate without sunlight or can be supplied directly by a
9 V battery. The solar panel may not always have a sufciently large output to completely recharge the battery - especially
during the dark, grey and foggy months (e.g. October to February).
For temperatures around 0 degrees Celsius or below, we recommend using a large 9 V alkaline battery instead of a 12 V
rechargeable battery in any case.
The device is operated primarily from the solar panel. If the solar panel does not have sufcient output, the device switches
automatically to the connected 9 volt battery or to the 12 volt rechargeable battery.
OPTIMAL SOLAR ALIGNMENT AND SETTING
The correct placement of the pasture fence device and the solar panel is crucial for the best possible operation of the device.
1. POSITION THE PASTURE FENCE DEVICE SO THAT THE PANEL POINTS SOUTH.
This position provides the panel with the maximum amount of sunlight even during the less bright
winter days. When placing the device, consider the position of the sun throughout the day and avoid
a location which could cover the device with shade from trees, bushes or high grass.
2. DETERMINE THE CORRECT ANGLE OF INCLINATION FOR THE SOLAR PANEL.
The position of the sun over the horizon changes during the year's seasons. As a general recom-
mendation, an angle of 50 degrees is optimal for long-term use in most parts of Europe. Still, the capability of the solar panel to recharge the battery can be optimised by adjusting the angle, depending
on the season (see gure below). The steeper the angle of inclination, the greater the cleaning eect
during rain or snow.
Recommended setting angle of the panel
During the winter (with the exception of southern Europe), there may not be enough sun hours to completely charge the
battery. Charge the battery externally as soon as the battery indicator ashes green/red or red, or alternatively use a large,
alkaline 9 V battery with 170–200 Ah, which is also recommended for temperatures around or below freezing.
3. REMOVE DEPOSITS AND DIRT FROM THE SOLAR PANEL AT REGULAR INTERVALS.
(specifically along gravel paths), leaves and snow, since these can reduce the performance of the module for recharging
the rechargeable battery.
South Europe / North Africa (South CH & A)
50° 43°
Winter
Nov. - Feb.
Spring
Mar. & Apr.
Fall
Sept. & Oct.
Summer
May & Aug.
36°
Recommended setting angle of the panel
North & Central Europe (including A & CH)
60° 50°
Winter
Nov. - Feb.
Spring
Mar. & Apr.
Sept. & Oct.
Summer
Fall
May & Aug.
43°
SERVICE:
Repair is only to be made by qualied service personnel. Only by
the manufacturer commanded replacement parts must be used.
Subject to technical alterations !
Mode d’emploi pour électrificateur farmer ABN4 & hotshock ABN5
FR
en relation avec les conseils de sécurité SECURA
ANIMAL ou SECURA SECURITY (www.horizont.com/securaanimal
ou www.horizont.com/securasecurity)
l‘appareil de clôture électrique doit être coupé avant
chaque intervention!
MONTAGE ET RACCORDEMENT:
Installer l’appareil dans un endroit humide si possible. Le pieu de terre avec
tête en U/poteau d’installation 14498 fourni, ou le pieu de terre d’1m (longi-
tudinal) 14041-1 en option, doit être enfoncé le plus profondément possible
dans le sol à un endroit humide, et être relié avec un câble de raccordement
résistant aux hautes tensions (par ex. 90150) à la borne de terre noire (
) de l’appareil (p.34/FIG.7). Raccorder le câble de clôture résistant aux
hautes tensions (par ex. 90676U) à la borne rouge marquée d’un symbole
« éclair » (
). L’appareil n’est protégé contre l’humidité que lorsqu’il est
monté correctement. Placez l’appareil sur le pieu de terre avec tête en U, et
ne l’utilisez pas à même le sol. Ne pas installer l’appareil dans un endroit à
risque d’incendie.
MISE EN SERVICE:
Mettre l’appareil en marche à l’aide du bouton-poussoir (p.38/
1
); au bout
de quelques secondes, une DEL se met à clignoter au rythme des impulsi-
ons. L’appareil transmet des impulsions à la clôture. Si la DEL ne s’allume
pas, la batterie 9V ou l’accumulateur 12V est vide. Il peut aussi bien s’agir
d’un défaut de l’appareil ou de l’adaptateur secteur 230V.
FARMER ABN4:
Le mode intégré d’économie d’énergie se règle automatiquement et permet
une consommation moindre de courant tout en isolant bien la clôture.
MISE EN SERVICE AVEC, EN OPTION, BATTERIE SECHE 9V
(P.35/FIG.3,4 ET P.36/FIG.6)
(n’utiliser que des batteries alcalines)
Ouvrez le boîtier et mettez la batterie 9V en place. Ensuite, branchez
8
farmer ABN4 & hotshock ABN5
9
l’appareil sur la batterie 9V (rouge + / noir -) en veillant à la bonne polarité.
capacité résiduelle
Clignotement vert
Clignotement
Clignotement rouge
rouge/
vert
5-15 %
5 %
15-100%
Batterie OK
Batterie à remplacer
Batterie entièrement vide : batterie
9V à remplacer immédiatement
MISE EN SERVICE AVEC, EN OPTION, ACCUMULATEUR 12V
(P.35/FIG.3,4 ET P.36/FIG.6)
Placez les accumulateurs rechargés jusqu’à 34Ah dans la partie inférieure
87100 (12Ah avec plaque intermédiaire 87102). Placez les accumulateurs
plus grands à côté de l’appareil
(voir P.34/FIG.2b). Branchez ensuite l’appareil sur l’accumulateur 12V (rouge
+ / noir -) en veillant à la propreté des bornes des pôles ainsi qu’à la bonne
polarité. Le câble de raccordement est fourni avec les accumulateurs super
gel ! Pour des accumulateurs spéciaux 12V, utiliser le câble de raccor-
dement en option (905010). Après quelques secondes, on entend un clic
régulier ; l’appareil est en marche. En cas d’erreur de polarité, l’appareil ne
démarre pas.
N’utiliser que des accumulateurs au plomb 12V rechargeables et
charger les accus rechargeables avec ventilation uniquement dans
des locaux bien aérés. Pendant le chargement d’un accumulateur au
plomb 12V auquel est directement relié un chargeur non mentionné
dans ces consignes, l’accumulateur doit être débranché de l’appareil.
Il faut recharger l’accu avant et après chaque utilisation ainsi que
tous les 2 mois en cas de stockage prolongé à la maison à une
température ambiante normale.
Au plus tard, lorsque l’accu est déchargé à 80 % (20 % de la capacité de
charge seulement), il faut le recharger pour éviter une décharge
1
profonde. L’afchage accu (p.34/FIG.2a /
capacité résiduelle
Clignotement vert
Clignotement
Clignotement rouge
rouge/
vert
20-40%
0-20%
) s’allume :
40-100%
Accu OK
Accu à charger
Accu entièrement vide :
à recharger immédiatement
Veuillez noter que ces valeurs peuvent varier en fonction de la température
(capacité) et des écarts de mesure (tension). En cas de fonctionnement
avec panneau solaire, contrôler l’afchage accu uniquement à l’aube (sans
rayonnement du soleil).
À l’aide de l’adaptateur secteur recommandé, disponible en option, vous
pouvez utiliser l’appareil ou recharger l’accumulateur au soleil grâce au pan-
neau solaire optionnel ; ou alors, en alternative, vous pouvez le recharger
avec l’adaptateur secteur 230V. Terminez le chargement dès que la diode
verte du témoin de la batterie s’allume.
Évitez de surcharger l’accumulateur !
MISE EN SERVICE 230V AVEC, EN OPTION, ADAPTATEUR SECTEUR
(P. 35/FIG.4 ET P.36/FIG.5)
Pour l’utilisation en réseau 230V, utilisez exclusivement l’adaptateur
secteur 47PSU0008FEU/UK/US, comme indiqué sur la plaque intermédiaire
dans l’appareil ! Après quelques secondes, vous entendez un clic régulier ;
l’appareil est en marche. L’indicateur de tension de la clôture (p.34/FIG.2a/
1
) clignote au rythme des impulsions électriques. L’adaptateur secteur
permet aisément de charger un accumulateur 12V en mode parallèle. En
cas de panne de l’alimentation 230 V, l’appareil est alimenté par l’accu.
Lors de l’utilisation avec l’adaptateur secteur, déconnecter la batterie sèche
9V. Lors de l’utilisation avec l’adaptateur secteur, l’alimentation par panneau
solaire n’est pas possible.
MISE EN SERVICE AVEC, EN opTIoN, pANNEAU SolAIRE (≤ 20 W)
(P.37/FIG.7 ET P.38/FIG.8):
L’appareil dispose d’un régulateur intégré de charge solaire (lorsque
l’appareil est allumé). Passer le câble du panneau solaire 5W (60812) et
10W (60812) dans le boîtier par l’orice de câble à la face arrière et rac-
corder dans le couvercle du boîtier. Veiller à la bonne polarité. Lors de
l’utilisation avec le panneau solaire, l’alimentation par adaptateur secteur
n’est pas possible.
AVERTISSEMENT :
Ne laissez pas l’appareil de clôture électrique éteint au soleil pendant longtemps avec un accumulateur ou un panneau solaire. Pourquoi ? Cela pour-
rait endommager l’accumulateur.
PRINCIPE DE FONCTIONNEMENT :
Le panneau solaire produit du courant dès qu’il est exposé à un rayonnement du soleil utile. L’appareil de clôture électrique
nécessite en permanence du courant – tant le jour que la nuit. De cette façon, le courant généré par le panneau est emmagasiné dans un accumulateur 12V rechargeable, permettant ainsi à l’appareil de fonctionner en l’absence de rayonnement
solaire ou d’être
directement alimenté par une batterie 9V. Il est possible que le panneau solaire ne produise pas toujours une puissance
sufsamment grande pour recharger entièrement un accumulateur, notamment dans les mois sombres, gris et brumeux (par
ex. d’octobre à février).
10
farmer ABN4 & hotshock ABN5
11
Par 0 °C ou des températures négatives, il est de toute manière recommandé d’utiliser une grande batterie alcaline 9V au
Sept & Oct
Sept & Oct
lieu d’un accumulateur 12V.
L’appareil est toutefois avant tout alimenté par le panneau solaire. Si le panneau ne génère pas assez de puissance,
l’appareil puisera automatiquement le courant sur la batterie 9V connectée ou l’accumulateur 12V.
POSITIONNEMENT OPTIMAL PAR RAPPORT AU SOLEIL ET CONFIGURATION
Une mise en place correcte de l’appareil de clôture électrique et du panneau solaire est décisive pour un fonctionnement
parfait de l’appareil de clôture électrique.
1. POSITIONNEZ L’APPAREIL DE CLOTURE ELECTRIQUE DE MANIERE QU’IL POINTE VERS LE SUD.
Ce positionnement permet au panneau d’absorber une quantité maximale de rayons du soleil pen-
dant les mois d’hiver, moins lumineux. Lors de la mise en place de l’appareil, considérez la position
du soleil au cours de la journée, en évitant les endroits où l’appareil pourrait glisser dans une zone
d’ombre due à la présence d’arbres, de buissons ou d’herbes hautes.
2. DETERMINEZ LE BON ANGLE D’INCLINAISON POUR LE PANNEAU SOLAIRE.
La hauteur du soleil au-dessus de l’horizon change selon les saisons. La recommandation générale est de choisir un angle
de 50 degrés, celui-ci étant optimal pour une utilisation de longue durée dans la plupart des régions européennes. Ceci dit,
il est toujours possible d’optimiser davantage la capacité du panneau solaire à charger l’accumulateur, en modiant son
angle suivant la saison (voir illustration ci-bas). Plus l’angle d’inclinaison est grand, plus l’effet de nettoyage est important
lorsqu’il pleut ou il neige.
Angle d’incidence recommandé du panneau
En hiver, à l’exception des pays d’Europe du Sud, il est possible que les heures de soleil ne soient pas assez nombreuses
pour charger entièrement l’accumulateur. Chargez l’accumulateur par une source externe dès que le témoin de la batterie
passe de vert à rouge ou qu’il clignote en rouge. Autrement, vous pouvez utiliser une grande batterie alcaline 9V
170-200Ah, à choisir parmi celles qui sont recommandées aussi pour les températures proches ou en dessous de zéro.
3. ENLEVEZ REGULIEREMENT LES DEPOTS ET LES SALETES SUR LE PANNEAU SOLAIRE.
Cette opération consiste en l’enlèvement de l’herbe de tonte, de la poussière (spécialement sur les chemins de terre
battue), des feuilles et de la neige, car cela peut entamer la capacité du panneau à charger l’accumulateur.
Europe du Sud et Afrique du Nord (Sud CH et A)
50° 43°
Hiver
Nov - Févr
Printemps
Mars & Avr
Automne
Été
Mai & Août
36°
Angle d’incidence recommandé du panneau
Europe du Nord et centrale (y compris A et CH)
60° 50°
Hiver
Nov - Févr
Printemps
Mars & Avr
Automne
Été
Mai & Août
43°
LA MAINTENANCE:
Les réparations ne doivent être faites que par des personnes qualiées.
Utiliser uniquement les pièces détachées et composants du fabricant.
Sous réserve de changements techniques!
Manual de instruções para a cerca eléctrica farmer ABN4 & hotshock ABN5
PT
a vedação deve ser desligada antes da realização de qualquer intervenção!
MONTAGEM E LIGAÇÃO:
Instalar o aparelho, de preferência, num local húmido. A estaca para ter-
ra em U/pilar de instalação fornecida/o 14498 ou a haste de terra de 1
m opcional (haste longitudinal) 14041-1 deve ser cravada o mais fundo
possível num ponto húmido do solo e ligado/a, com um cabo de ligação
resistente à alta tensão (p. ex. 90150), ao terminal de terra preto (
) do
aparelho (pág.37/FIG.7). Ligar os terminadores resistentes à alta tensão (p.
ex. 90676U) ao terminal vermelho com o símbolo de um relâmpago (
) O
aparelho estará protegido contra a humidade apenas se for montado corre-
tamente. Coloque o aparelho sobre a estaca para terra em U, não devendo
operar com ele pousado no solo. Instalar o aparelho num local que não
apresente risco de incêndio.
COLOCAÇÃO EM FUNCIONAMENTO:
1
Ligar o aparelho com o interruptor com botão de pressão (pág.38/
) alguns segundos depois acende um LED ao ritmo dos impulsos. O aparelho
emite os impulsos à vedação. Se o LED não acender, isso quer dizer que a
pilha de 9 Volts ou que a bateria de 12 Volts está vazia. Pode tratar-se aqui
de um defeito no aparelho ou no adaptador de rede de 230 Volts.
FARMER ABN4:
O modo de poupança de energia incorporado é autorregulador e causa um
menor consumo de energia no caso de um bom isolamento da vedação.
COLOCAÇÃO EM FUNCIONAMENTO COM PILHA SECA OPCIONAL DE
9 VOLTS (PÁG.35/FIG.3,4 E PÁG.36/FIG.6):
(Usar somente pilhas alcalinas)
Abra a caixa e coloque a pilha de 9 Volts. De seguida, ligue o aparelho à
pilha de 9 V (vermelho + / preto -), prestando atenção à polaridade correta.
capacidade restante
Luz intermitente Verde
Luz intermitente
Luz intermitente Vermelho
Vermelho/
Verde
5-15 %
5 %
15-100%
Pilha boa
Trocar pilha
Pilha totalmente vazia: Trocar
imediatamente a pilha de 9 V
em ligação com os conselhos de segurança SECURA ANIMAL ou
SECURA SECURITY (www.horizont.com/securaanimal ou www.
horizont.com/securasecurity)
12
COLOCAÇÃO EM FUNCIONAMENTO COM BATERIA OPCIONAL DE 12 V
(PÁG.35/FIG.3,4 E PÁG.36/FIG.6):
Colocar as baterias carregadas até 34 Ah na parte inferior 87100 (12 Ah
farmer ABN4 & hotshock ABN5
13
 Loading...