

Horizon Stretcher Hausted 4160 User manual

OPERATOR / SERVICE MANUAL
Hausted® Pediatric Care Stretcher
Models 4160
(07/18/06) 069216

A WORD FROM STERIS CORPORATION
This manual contains important information on proper use and
maintenance of the Horizon Stretcher. All personnel involved in the
use and maintenance of this equipment must carefully review and
comply with the warnings, cautions and instructions contained in this
manual. These instructions are important to protect the health and
safety of personnel operating a Horizon Stretcher and should be
retained in a conveniently accessible area for quick reference.
Complete instructions for unpacking this unit are provided in
ECTION 2 of this manual.
S
STERIS carries a complete line of accessories for use with this
stretcher. A STERIS representative will gladly review these with you.
Indications for Use
Service Information
Advisory
The Hausted® Pediatric Care Stretcher is designed for pediatric-age
patients transport, treatment and recovery.
A thorough preventive maintenance program is essential to safe and
proper unit operation. This manual contains maintenance schedules
and procedures which should be followed for satisfactory equipment
performance.
You are encouraged to contact STERIS concerning our
comprehensive Annual Maintenance Agreements. Under the terms
of these agreements, preventive maintenance, adjustments, and
replacement of worn parts are done on a scheduled basis to assure
equipment performance at peak capability and to help avoid
untimely or costly interruptions. STERIS maintains a global staff of
well equipped, factory-trained technicians to provide this service, as
well as expert repair services. Please contact your STERIS
representative for details.
A listing of the safety precautions to be observed when operating
and servicing this equipment can be found in S
manual. Do not operate or service the equipment until you have
become familiar with this information.
Any alteration of this equipment not authorized or performed by
STERIS Engineering Service which could affect its operation will void
the warranty; could violate national, state, and local regulations; and
could jeopardize your insurance coverage.
ECTION 1 of this
©2006, STERIS Corporation. All rights reserved. Printed in U.S.A.
069216
i

EC Authorized Representative
STERIS Ltd.
STERIS House
Jays Close
Viables
Basingstoke
Hampshire
RG22 4AX
Manufactured by:
STERIS Corporation
2720 Gunter Park East
Montgomery, AL 36109 • USA
Equipment not suitable for use in the
presence of a flammable anesthetic
mixture with air or oxygen or nitrous oxide.
ii
069216
STERIS Corporation,
Montgomery, Alabama is an
ISO 13485 certified facility.
The base language of this document is
ENGLISH. Any translations must be made
from the base language document.

TABLE OF CONTENTS
Section
Number Description Page
1 Safety Precautions ........................................................................................................................1-1
2 Unpacking Instructions.................................................................................................................2-1
3 Operating Instructions..................................................................................................................3-1
3.1 Braking and Steering Operation ............................................................................................................3-1
3.1.1 Applying The Brakes....................................................................................................................3-1
3.1.2 Releasing The Brakes...................................................... .... ... ... ... ... ............................................3-1
3.1.3 Applying The Steering Lock .........................................................................................................3-1
3.1.4 Releasing The Steering Lock........................ ... ... ....................................... ... .... ... ... .....................3-2
3.2 Stretcher Top Height Adjustment...........................................................................................................3-2
3.2.1 Height Adjustment.................. ....................................... ... .... ... ... ... ...............................................3-2
3.2.2 Lowering Litter Top ......................................................................................................................3-2
3.2.3 Trendelenburg Adjustment........................................................................................................... 3-2
3.2.4 Reverse Trendelenburg Adjustment ............................................................................................ 3-3
3.3 Fowler Operation ................................................................................................................................... 3-3
3.3.1 Raising the Fowler .............. ... .... ... ... ....................................... ... ... ... .... ... ..................................... 3-3
3.3.2 Lowering the Fowler..................................................................................................................... 3-3
3.4 Rail Operation........................................................................................................................................3-4
3.4.1 Raising the Rail to Full Height....................................................... ... .... ... ... ... ............................... 3-4
3.4.2 Raising the Rail to Half Height ...................................... ...............................................................3-4
3.4.3 Lowering the Rail ......................................................................................................................... 3-4
4 Recommended Preventive Maintenance.....................................................................................4-1
5 Recommended Optional Accessories.........................................................................................5-1
6 Replacement Parts ........................................................................................................................6-1
6.1 How to Use the Illustrated Parts Breakdown .........................................................................................6-1
6.2 List of Illustrations.................................................................................................................................. 6-3
Table of Contents Operator / Service Manual 069216
iii

!
!
1
SAFETY PRECAUTIONS
The following Safety Precautions must be observed when operating or servicing this Hausted® Pediatric Care
Stretcher. WARNING indicates the potential for personal injury and CAUTION indicates the potential for damage
to equipment. For emphasis, certain Safety Precautions are repeated throughout the manual. It is important to
review ALL Safety Precautions before operating or servicing the unit.
Strictly following these Safety Precautions enhances your ability to safely and effectively utilize the unit and helps
the customer avoid improper maintenance methods which may damage the unit or render it unsafe. It is important
to understand that these Safety Precautions are not exhaustive; customers are encouraged to develop their own
safety policies and procedures to enhance and compliment these Safety Precautions.
WARNING – LACERATION HAZARD:
When cutting bands always use a tool specifically designed for that purpose. This will help to avoid personal injuries frequently incurred when bands are cut and tension released.
WARNINGS – PERSONAL INJURY:
Do not sit on end – tipping may occur.
1
1-1
Safety Precautions Operator / Service Manual 069216

!
UNPACKING INSTRUCTIONS
Important: Report any shipping damage immediately! Inform shipper
of any damages – leave carton intact. Leave the Horizon Stretcher in
the receiving area until inspection is complete.
®
Your Hausted
at our manufacturing plant to ensure safe shipment to you medical
facility. There are several procedures you must follow to put your new
Horizon Stretcher into service. These procedures only take a few
minutes to complete and are required to ensure proper operation of
the Horizon Stretcher.
Pediatric Care Stretcher has been carefully packaged
2
WARNING – LACERATION
HAZARD: When cutting bands
always use a tool specifically
designed for that purpose.
This will help to avoid
personal injuries frequently
incurred when bands are cut
and tension released.
Step 1 – Cut the two bands around the shipping carton.
Step 2 – Remove the top half of the carton and cut one side of the
bottom half.
®
Step 3 – Remove the Hausted
carton. Cut the bands from around the stretcher.
Step 4 – Check to see if all features of the stretcher work properly. If
all features work properly, go to step 5. If any of the features
of the Hausted
properly, call STERIS for service.
Step 5 – Clean the Horizon Stretcher using a mild detergent to
remove any dirt accumulated during shipment.
Step 6 – Place the stretcher into service.
®
Pediatric Care Stretcher from the
Pediatric Care Stretcher do not work
2-1
Unpacking Instructions Operator / Serivce Manual 069216
OPERATING INSTRUCTIONS
3.1 Braking and
Steering Operation
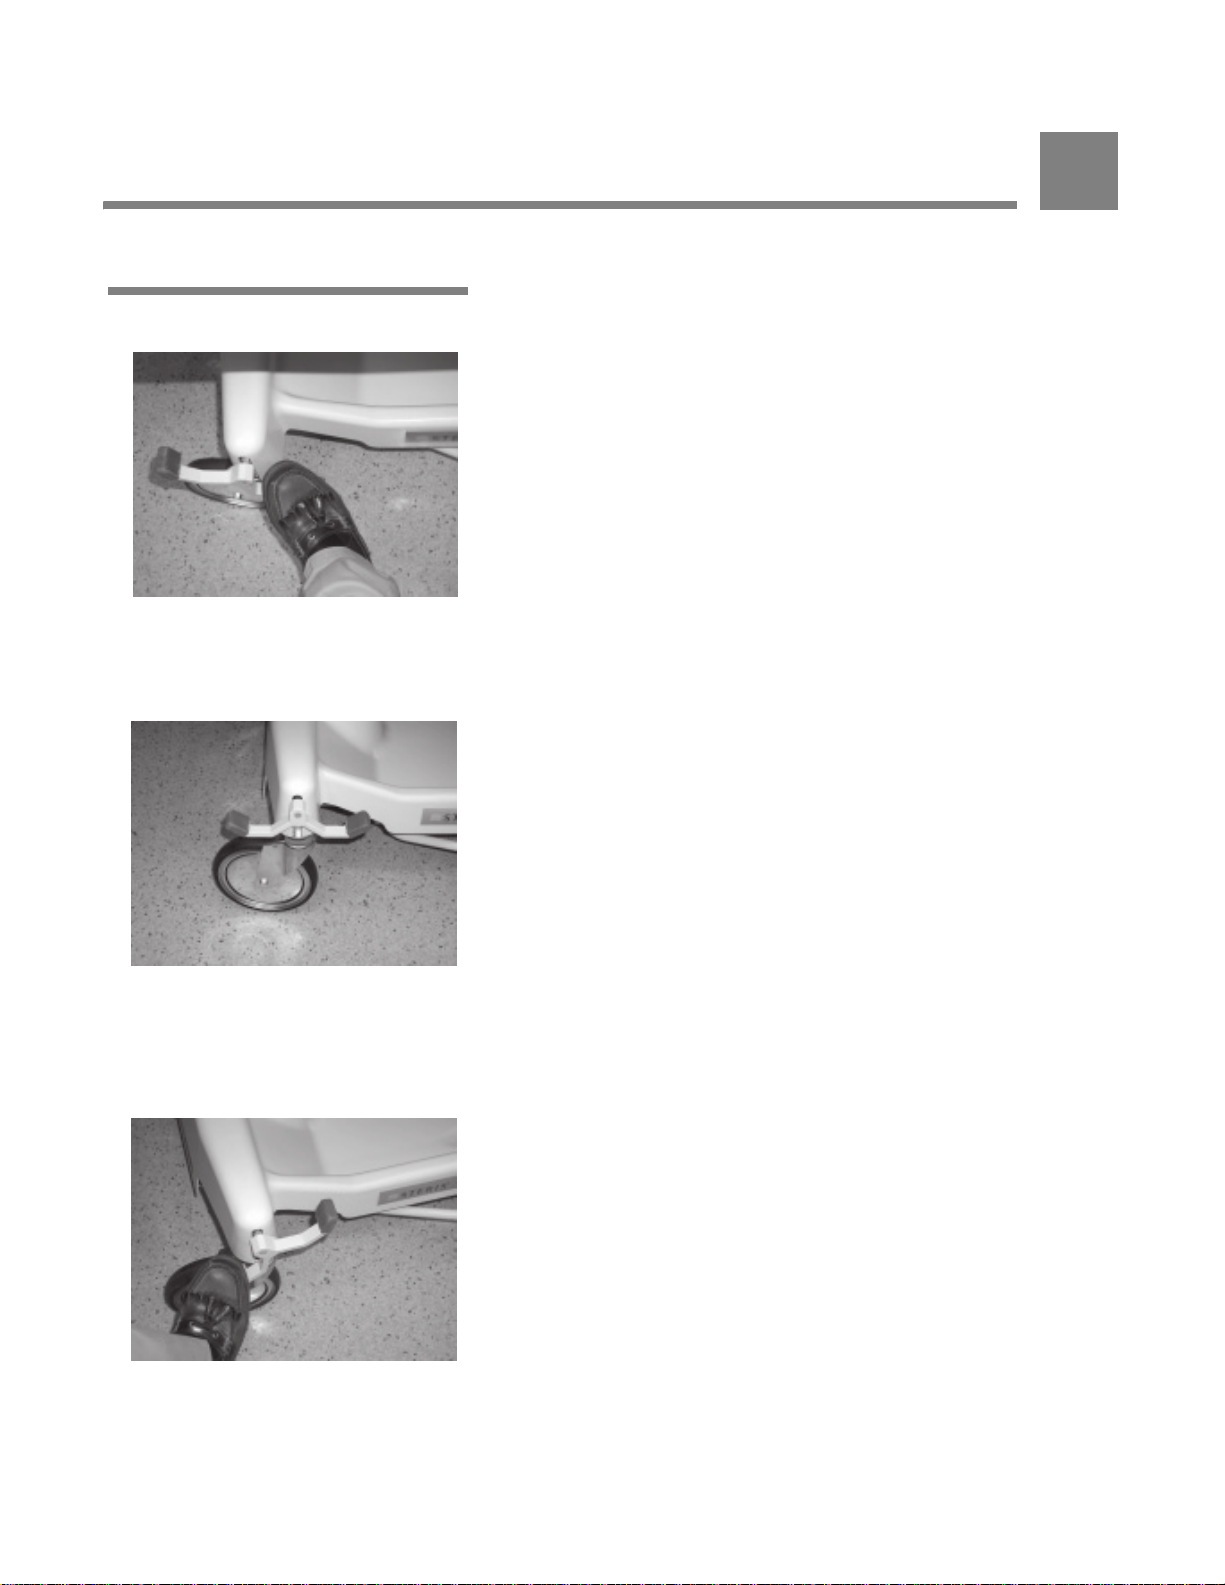
3.1.1 Applying The Brakes
The four wheel central braking system is activated by depressing the
red pedal at any of the four corners of the unit (Figure 3-1). To fully
engage the brakes, the pedal should be pressed to approximately
45º. All four caster wheels should be locked from swiveling and
rotating.
Figure 3-1
3.1.2 Releasing The Brakes
Depress the green pedal at any of the four corners of the unit, until
the pedal is in a horizontal position (Figure 3-2). All four wheels
should rotate and swivel freely.
3
Figure 3-2
3.1.3 Applying The Steering Lock
NOTE: Brakes should always be activated when unit is not in
transport.
From the head end of the stretcher, depress the green pedal
downward into locked position (Figure 3-3). Push the stretcher
forward. One caster at the foot end will lock into a non-swivel mode.
This allows straight steering by the attendant, when pushing from the
head end.
Figure 3-3
3-1
Operating Instructions Operator / Service Manual 069216
3.1.4 Releasing The Steering Lock
3.2 Stretcher Top
Height Adjustment
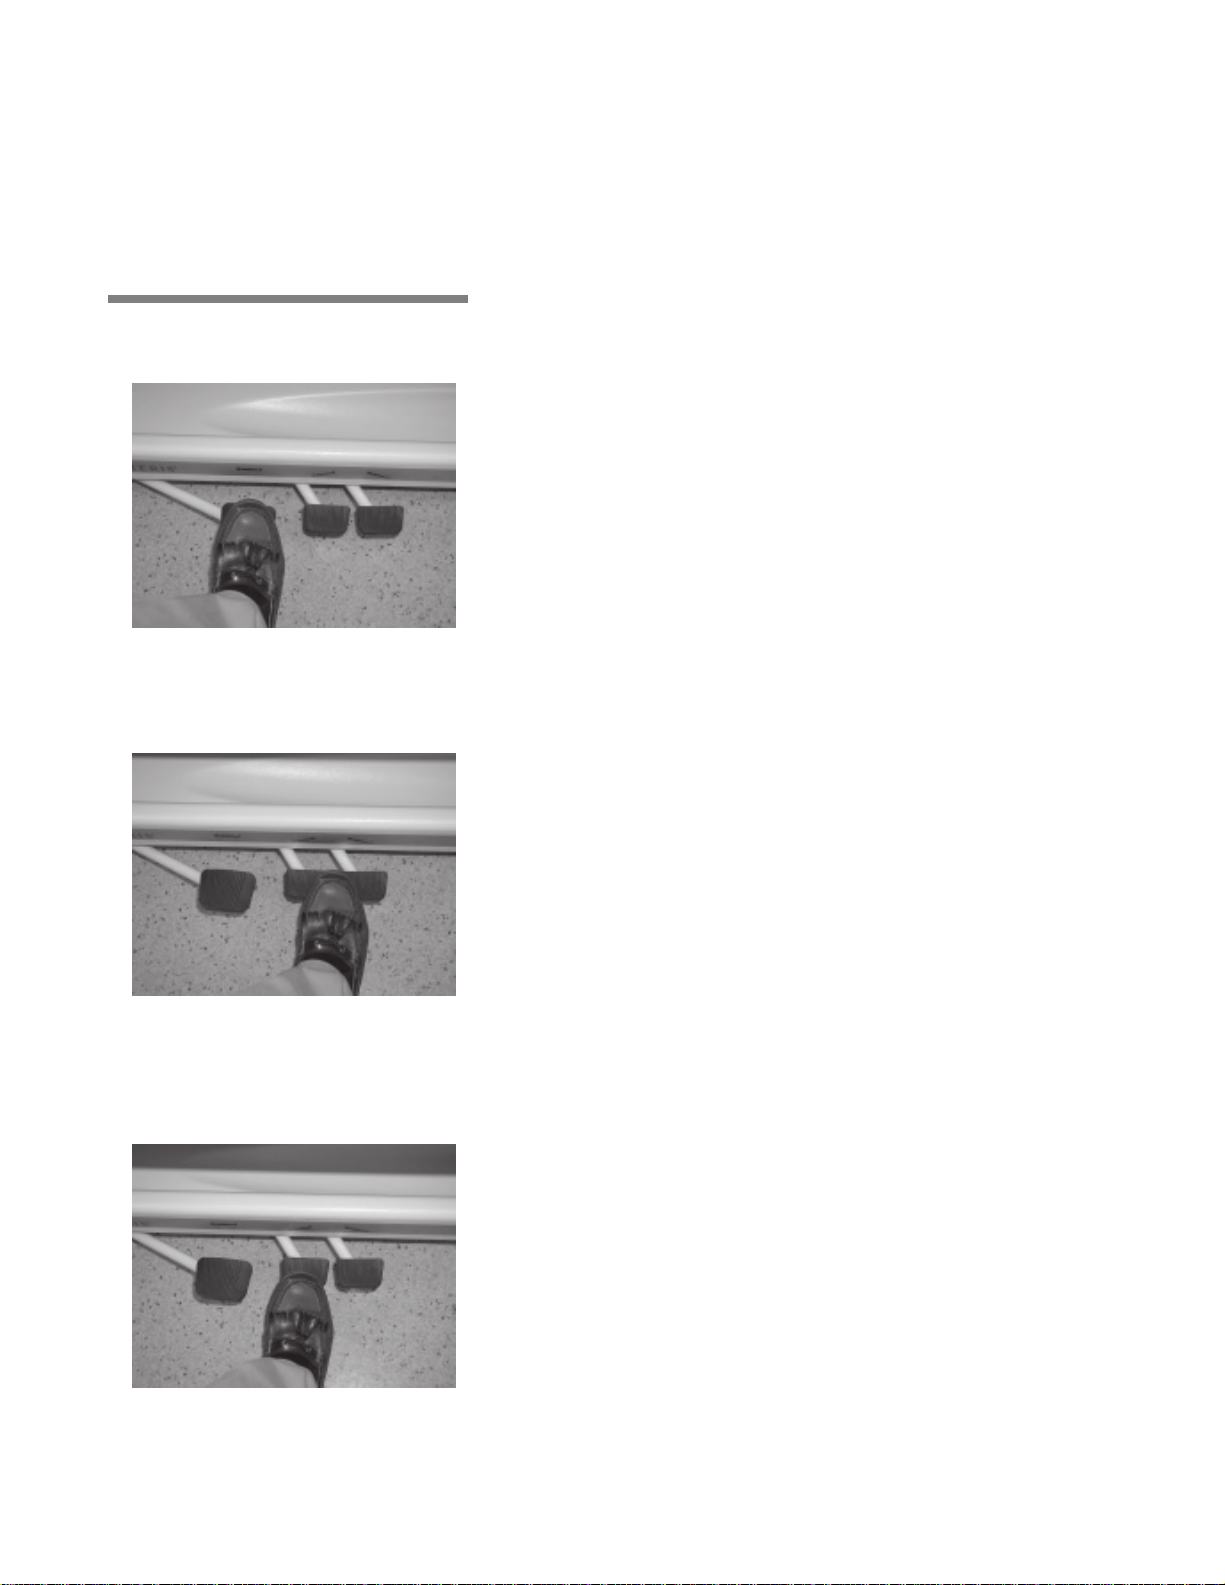
3.2.1 Height Adjustment
Figure 3-4
3.2.2 Lowering Litter Top
Depress the red pedal at any of the four corners of the unit, until the
pedal is in a horizontal position (Figure 3-2). All four wheels should
rotate and swivel freely.
Press the pump pedal to the floor (Figure 3-4), then release. Repeat
this process until desired height is obtained. Use smooth strokes on
pump pedal to ensure patient comfort.
Figure 3-5
3.2.3 Trendelenburg Adjustment
Press down on the two release pedals at the same time (Figure 3-5)
until desired height is obtained.
NOTE: Do Not Stand On Release Pedals.
Place the unit at maximum height, see SECTION 3.2‚ STRETCHER TOP
HEIGHT ADJUSTMENT‚ PAGE 3-2. Press down on the release pedal
nearest the head end (Figure 3-6) until desired position is obtained
then remove pressure.
Figure 3-6
3-2
069216 Operator / Service Manual Operating Instructions

3.2.4 Reverse Trendelenburg Adjustment
Place the unit at maximum height, see SECTION 3.2‚ STRETCHER TOP
HEIGHT ADJUSTMENT‚ PAGE 3-2. Press down on release pedal nearest
the foot end (Figure 3-7) until desired position is obtained, then
remove pressure.
Figure 3-7
3.3 Fowler Operation
3.3.1 Raising the Fowler Grasp the fowler frame tube (Figure 3-8A), and lift up on the fowler.
When desired height is reached, lower the fowler slightly until the
ratchet plates are engaged (Figure 3-8B). Be sure the fowler is
locked into place by pushing down slightly on the fowler before
releasing the tube.
A B
Figure 3-8
3.3.2 Lowering the Fowler
Grasp the fowler frame tube with hand and grasp the ratchet release
handle with finger tips (Figure 3-9). Squeeze the ratchet release
handle and the fowler frame tube together while lifting slightly on the
fowler. Once the ratchet supports are disengaged, while lowering
fowler to desired position, continue squeezing ratchet release
handle (Figure 3-8B). Be sure the fowler is locked into place by
pushing down slightly on the fowler before releasing the tube.
Figure 3-9
3-3
Operating Instructions Operator / Service Manual 069216
 Loading...