

Page 1
SAFE® Select Technology, Optional Flight Envelope Protection
The Eflite Carbon Z T-28 has been upgraded to include SAFE Select technology.
SAFE Select technology can offer an extra level of protection in fl ight. Use the
following instructions to make the SAFE Select system active and assign it to a
switch. When enabled, SAFE Select prevents the airplane from banking or pitching
past predetermined limits, and automatic self-leveling keeps the airplane fl ying in a
straight and level attitude when the aileron, elevator and rudder sticks are at neutral.
SAFE Select is enabled or disabled during the bind process. When the airplane is
bound with SAFE Select enabled, a switch can be assigned to toggle between SAFE
Select mode and AS3X mode.
AS3X® technology remains active with no banking limits or self leveling any time SAFE
Select is disabled or OFF.
Transmitter and Receiver Binding / Switching ON and OFF SAFE Select
The aircraft has an optional SAFE Select feature, which can be switched ON or OFF
easily by binding in a specifi c manner as described below.
IMPORTANT: Before binding a transmitter, read the Transmitter Setup section of your
manual to ensure that your transmitter is properly programmed for this aircraft.
®
EN
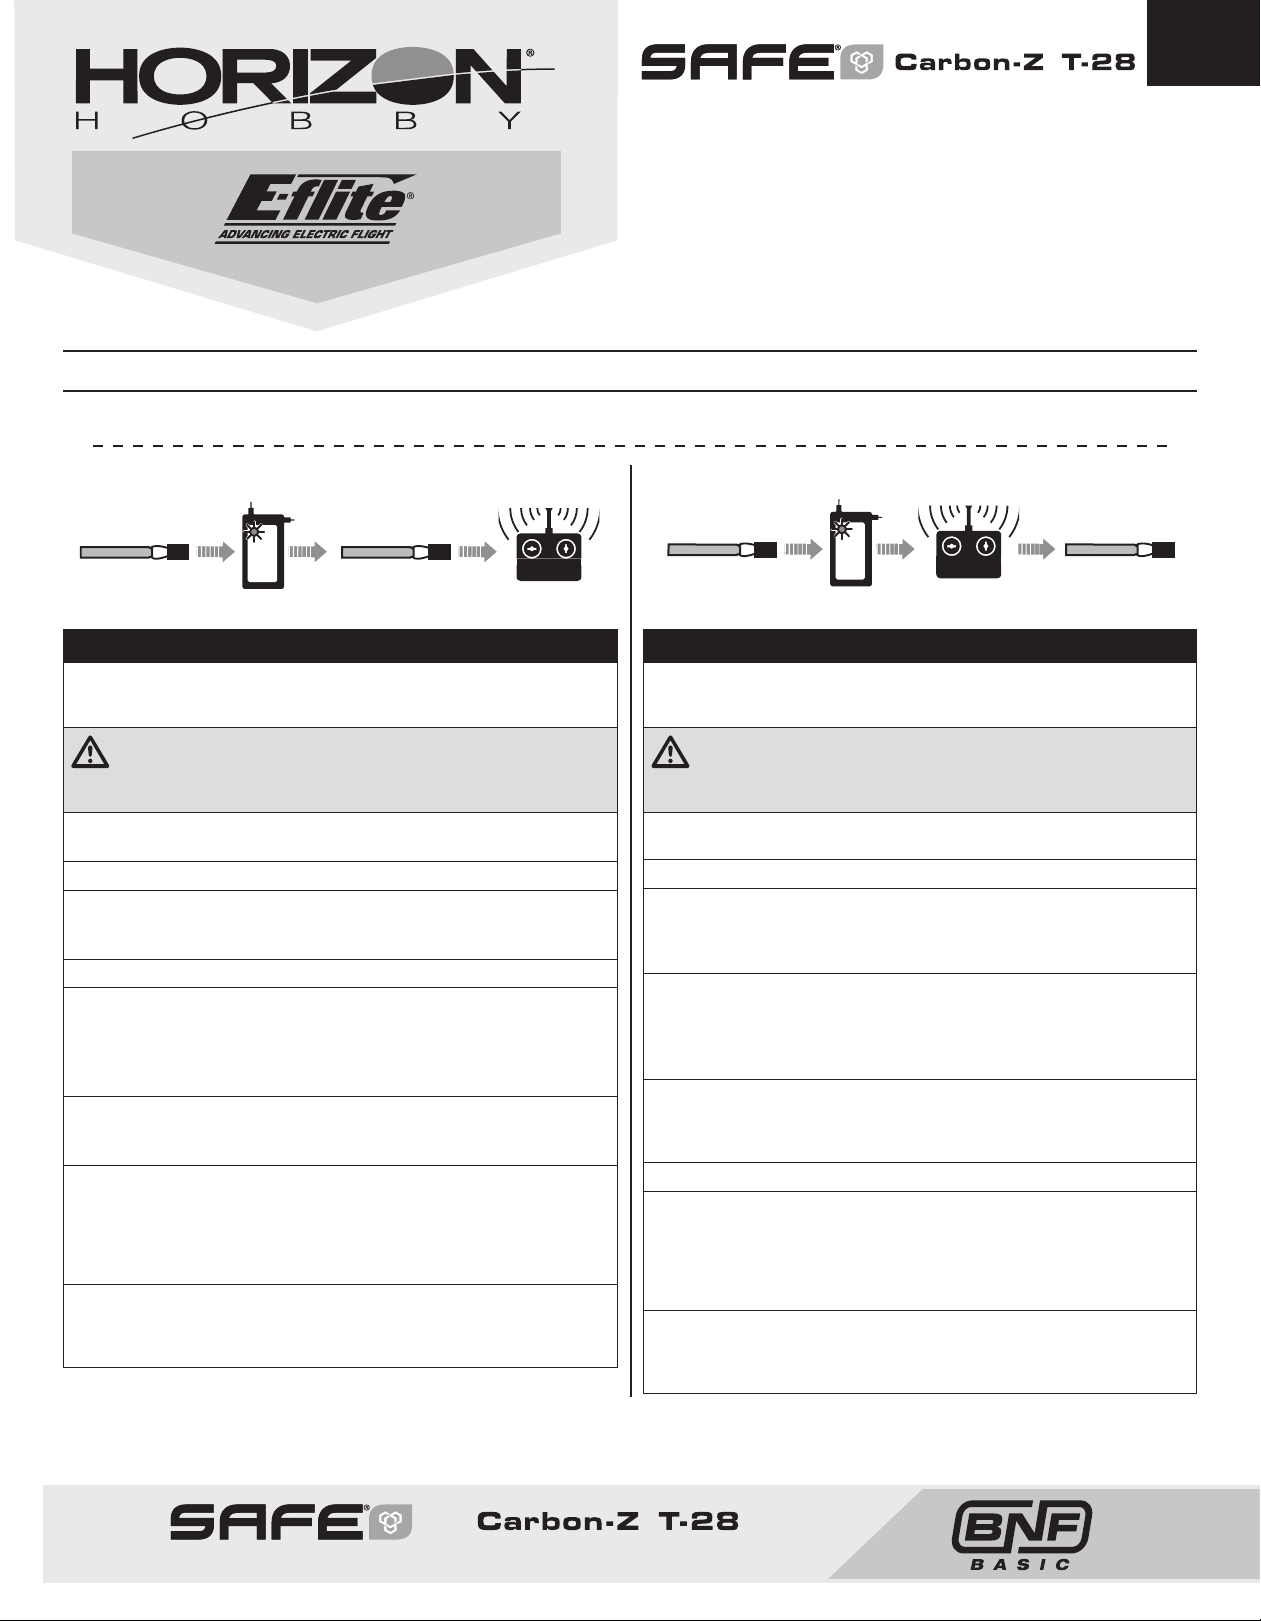
Switching ON SAFE Select Binding Sequence
Install Bind Plug
RX in Bind Mode
Binding Procedure / Switching ON SAFE Select
IMPORTANT: The included AR636 receiver has been programmed for operation
specifi cally for this aircraft. Refer to the receiver manual for correct setup if the
receiver is replaced or is used in another aircraft.
CAUTION: When using a Futaba® transmitter with a Spektrum™ DSM®
module, you must reverse the throttle channel and rebind. Refer to your
Spektrum module manual for binding and failsafe instructions. Refer to your Futaba
transmitter manual for instructions on reversing the throttle channel.
1. Move the transmitter controls to neutral (fl ight controls: rudder, elevators and
ailerons) or to low positions (throttle, throttle trim).*
2. Install a bind plug in the receiver bind port.
3. Place the aircraft level on its wheels, then connect the fl ight battery to the
ESC. The motor will produce a series of sounds. The orange bind LED on the
receiver will begin to fl ash rapidly.
4. Remove the bind plug from the bind port.
5. Take three steps away from the aircraft /receiver and then put the transmitter in
bind mode. Refer to your transmitter’s manual for specifi c binding instructions.
IMPORTANT: Do not point the transmitter’s antenna directly at the receiver
while binding.
IMPORTANT: Keep away from large metal objects while binding.
6. The receiver is bound to the transmitter when the orange bind light on the receiver
stays orange. The ESC will produce a series of sounds. The tones indicate the ESC is
armed, provided the throttle stick and throttle trim are low enough to trigger arming.
IMPORTANT: Once bound, the receiver will retain its bind settings for that transmitter until it has been intentionally changed, even when power is cycled ON and
OFF. Repeat the binding process as necessary.
SAFE Select ON Indication
Every time the receiver is powered ON the surfaces will cycle back and forth twice with
a slight pause at neutral position to indicate that SAFE Select is switched ON.
The throttle will not arm if the transmitter’s throttle control is not put at the
lowest position. If problems are encountered, follow the binding instructions and
refer to the transmitter troubleshooting guide for other instructions. If needed,
contact the appropriate Horizon Product Support offi ce.
Remove Bind Plug
Bind TX to RX
Switching OFF SAFE Select Binding Sequence
Install Bind Plug
RX in Bind Mode
Bind TX to RX
Binding Procedure / Switching OFF SAFE Select
IMPORTANT: The included AR636 receiver has been programmed for operation
specifi cally for this aircraft. Refer to the receiver manual for correct setup if the
receiver is replaced or is used in another aircraft.
CAUTION: When using a Futaba® transmitter with a Spektrum DSM module,
you must reverse the throttle channel and rebind. Refer to your Spektrum
module manual for binding and failsafe instructions. Refer to your Futaba transmitter
manual for instructions on reversing the throttle channel.
1. Move the transmitter controls to neutral (fl ight controls: rudder, elevators and
ailerons) or to low positions (throttle, throttle trim). *
2. Install a bind plug in the receiver bind port.
3. Place the aircraft level on its wheels, then connect the fl ight battery to the
The motor will produce a series of sounds.
ESC.
receiver will begin to fl ash rapidly.
DO NOT remove the bind plug at this time.
4. Take three steps away from the aircraft /receiver and then put the transmitter in
bind mode. Refer to your transmitter’s manual for specifi c binding instructions.
IMPORTANT: Do not point the transmitter’s antenna directly at the receiver
while binding.
IMPORTANT: Keep away from large metal objects while binding.
5. The receiver is bound to the transmitter when the orange bind light on the receiver
stays orange. The ESC will produce a series of sounds. The tones indicate the ESC
is armed, provided the throttle stick and throttle trim are low enough to trigger
arming.
6. Remove the bind plug from the bind port.
IMPORTANT: Once bound, the receiver will retain its bind settings for that trans-
mitter until it has been intentionally changed, even when power is cycled ON and
OFF. Repeat the binding process as necessary.
SAFE Select OFF Indication
Every time the receiver is powered ON the surfaces will cycle back and forth
once to indicate that SAFE Select has been switched OFF.
The throttle will not arm if the transmitter’s throttle control is not put at the
lowest position. If problems are encountered, follow the binding instructions and
refer to the transmitter troubleshooting guide for other instructions. If needed,
contact the appropriate Horizon Product Support offi ce.
The orange bind LED on the
Remove Bind Plug
* Failsafe
If the receiver loses transmitter communication, the failsafe will activate. When activated, failsafe moves the throttle channel to its preset
failsafe position (low throttle) that was set during binding. All other channels move to actively level the aircraft in fl ight.
®
SAFE® Select Technology, Optional Flight Envelope Protection
1
®
Page 2
EN
SAFE® Select Switch Designation
SAFE® Select technology can be assigned to any open switch (2 or 3 position) controlling a
channel (5–9) on your transmitter. Once assigned to a switch, SAFE select ON gives you the
fl exibility to choose SAFE technology or AS3X mode while in fl ight. If the aircraft is bound with
SAFE select OFF, the aircraft will be in AS3X mode exclusively.
IMPORTANT: Before assigning your desired switch, ensure that the travel for that channel
is set at 100% in both directions and the aileron, elevator, rudder and throttle are all on high
rate with the travel at 100%.
CAUTION: Keep all body parts well clear of the propeller and keep the aircraft
securely restrained in case of accidental throttle activation.
TIP: SAFE Select is assignable on any unused channels 5–9. See your transmitter manual
for more information about assigning a switch to a channel.
TIP: Use your radio channel monitor to confi rm that the four primary channels are showing
100% travel while assigning the switch.
TIP: Use the channel monitor to make sure the switch you are assigning for SAFE Select is
active and driving a channel between 5-9 and that it is traveling 100% in each direction.
TIP: Make sure your four primary channels are not reversed if you are having trouble
assigning a SAFE Select switch.
Control Surface Centering
After assembly and transmitter setup, confi rm that the control surfaces are
centered. If the control surfaces are not centered, mechanically center the control
surfaces by adjusting the linkages.
If adjustment is required, turn the clevis on the linkage to change the length of the
linkage between the servo arm and the control horn.
After binding a transmitter to the aircraft receiver, set the trims and sub-trims
to 0, then adjust the clevises to center the control surfaces.
Control surface centering should be done in AS3X mode before activating the
throttle after power up.
Assigning a switch
1. Bind the aircraft to choose SAFE Select ON. This will allow the system to be assigned to
a switch.
2. Hold both transmitter sticks to the inside bottom corners and toggle the desired switch
5 times (1 toggle = full up and down) to assign that switch. The control surfaces of the
aircraft will move, indicating the switch has been selected.
Repeat the process to assign a different switch or to deactivate the current switch if desired.
Mode 1 and 2 transmitters
100%
X 5
100%
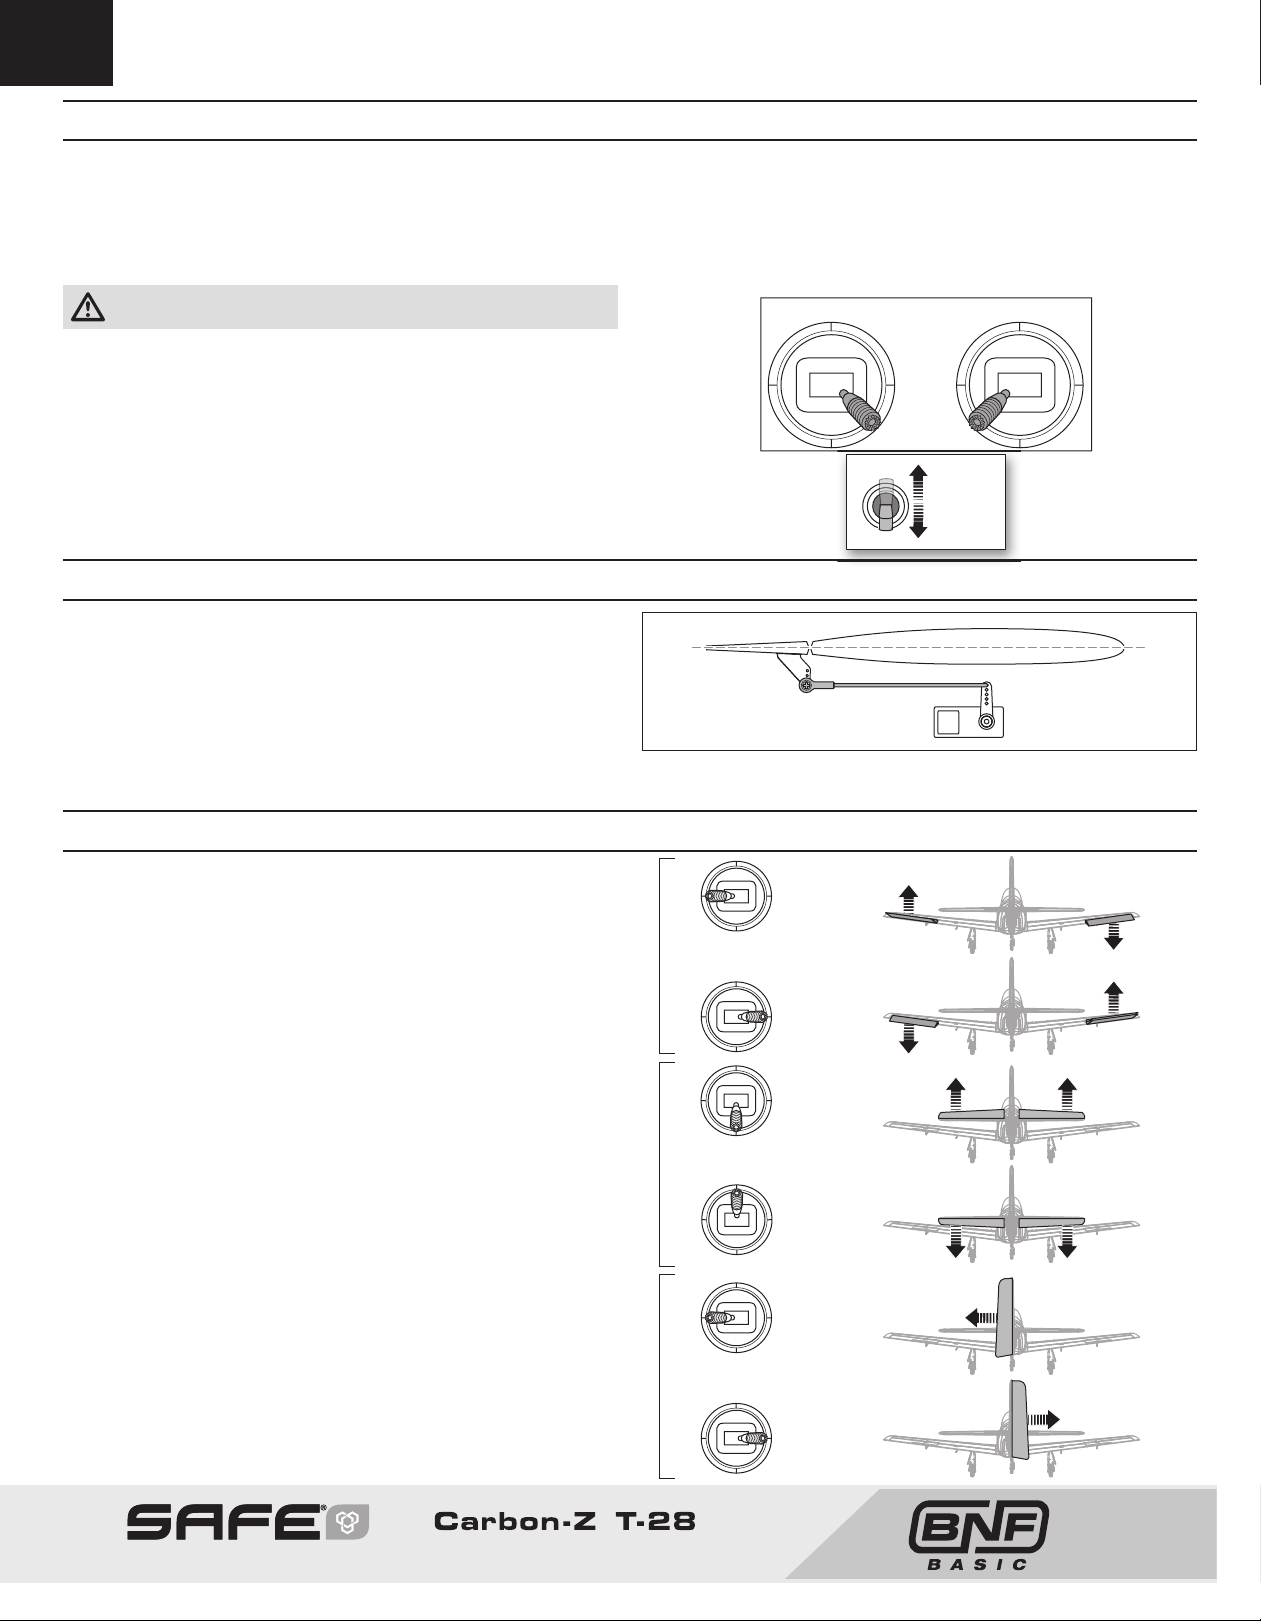
Control Surface Direction
Switch on the transmitter and connect the battery. Use the transmitter to operate
the aileron, elevator, and rudder controls. View the aircraft from the rear when
checking the control directions.
Ailerons
1. Move the aileron stick to the left. The right aileron should move down and the
left aileron up, which will cause the aircraft to bank left.
2. Move the aileron stick to the right. The right aileron should move up and the
left aileron down, which will cause the aircraft to bank right.
Elevators
3. Pull the elevator stick back. The elevators should move up, which will cause
the aircraft to pitch up.
4. Push the elevator stick forward. The elevators should move down, which will
cause the aircraft to pitch down.
Rudder
5. Move the rudder stick to the left. The rudder should move to the left, which
will cause the aircraft to yaw left.
6. Move the rudder stick to the right. The rudder should move to the right, which
will cause the aircraft to yaw right.
Aileron stick
Elevator stick
Rudder stick
2
®
®
SAFE® Select Technology, Optional Flight Envelope Protection
Page 3

Control Throws
EN
NOTICE: If control throws are changed from the factory settings, the AR636 gain
values may need to be adjusted. Refer to the Spektrum AR636 manual for adjustment of gain values.
After fl ying, you may choose to adjust the linkage positions for the desired control
response. See the table at the right.
AS3X Control Direction Test
This test ensures that the AS3X® control system is functioning properly. Assemble
the aircraft and bind your transmitter to the receiver before performing this test.
Airplane should be bound in AS3X mode or should bound in Safe Select mode with
a switch assigned and in the AS3X position
1. Raise the throttle just above 25%, then lower the throttle to
activate AS3X technology.
CAUTION: Keep all body parts, hair and loose clothing away from a
moving propeller, as these items could become entangled.
2. Move the entire aircraft as shown and ensure the control surfaces move in
the direction indicated in the graphic. If the control surfaces do not respond
as shown, do not fl y the aircraft. Refer to the receiver manual for more
information.
Tuning Horns Arms
More control throw
Less control throw
Aircraft
movement
AS3X Reaction
ElevatorAileronRudder
Once the AS3X system is active, control surfaces may move rapidly. This is normal.
AS3X remains active until the battery is disconnected.
In Flight Trimming
During your fi rst fl ight, trim the aircraft for level fl ight at 3/4 throttle with fl aps and
gear up. Make small trim adjustments with your transmitter’s trim switches to
straighten the aircraft’s fl ight path.
After adjusting trim do not touch the control sticks for 3 seconds. This allows the
receiver to learn the correct settings to optimize AS3X performance.
Failure to do so could affect fl ight performance.
3 Seconds
SAFE® Select Technology, Optional Flight Envelope Protection
®
®
3
Page 4

©2019 Horizon Hobby, LLC.
E-Flite, Carbon Z, Bind-N-Fly, BNF, the BNF logo, DSM, DSM2, DSMX, AirWare, AS3X, SAFE,
the SAFE logo and the Horizon Hobby logo are trademarks or registered trademarks of Horizon Hobby, LLC.
The Spektrum trademark is used with permission of Bachmann Industries, Inc.
Futaba is a registered trademark of Futaba Denshi Kogyo Kabushiki Kaisha Corporation of Japan.
All other trademarks, service marks and logos are property of their respective owners.
US 8,672,726. US 9,056,667. US 9,753,457. US 10,078,329.
http://www.horizonhobby.com/
EFL9850, EFL9875 Created 03/19 60997
 Loading...