

Horizon Dehumidifier Titan XP90 Installation And Operation Manual
®
Horizon® Titan XP90-Installation
and Operations Manual
Air Cleaning Equipment, Inc.
sales@horizondehumidifiers.com
14021 NC Hwy 50, Surf City, NC, 28445
Phone:(919) 258-3330x3
Fax: (919)258-3394
Use the Certification Mark as a label on products, homes, and buildings that have been verified to meet
ENERGY STAR requirements. The mark should be used only on or near an ENERGY STAR certified product,
home, or building. This mark may only be used by active ENERGY STAR partners who have signed a
partnership agreement. Please see the two examples of proper usage shown below.

Table of Contents
1
Warranty Registration
2
Safety Notes
2
Identification
3
Electrical Supply
3
Principle of Operation
3
Installation
3
Key Functions
4
Indicator Lights
5
Remote Control
6
Operating Instructions
7
Diagram
7
Maintenance
8
Dehumidifier Storage
9
Ducted Applications
9
Troubleshooting
11
Spare Parts
11
Warranty Information
12

Warranty Registration
Congratulations on purchasing a new Horizon Dehumidifier. Your new dehumidifier comes
with an extensive warranty plan. To register, simply visit:
www.horizondehumidifiers.com/warranty.
Be sure to note your dehumidifier serial number as you will need it for registration.
• The Horizon Series Dehumidifier must always be connected using a grounded electrical
connection (as required for all electrical appliances). If non-grounded wiring is used, all liability reverts to owner and the warranty is voided.
• Horizon Dehumidifiers should only be maintained and repaired by a qualified technician.
• Horizon Dehumidifiers are only intended for operation when oriented with the unit sitting
on its feel and level. Operating the unit in any other orientation could allow water to flood
electrical components.
• Always unplug dehumidifier before moving.
• If there is a chance that water flooded the dehumidifier, it should be opened and allowed
to dry thoroughly before reconnecting to electrical power and restarting.
• To ensure proper operation, neither the inlet nor discharge should be positioned against a
wall. The inlet requires a minimum of 12” clearance and the discharge required a minimum of 36” clearance.
• The best option for proper diffusion of air throughout the room is to have the discharge
blowing away from a wall and the inlet pulling air in parallel to a wall.
• Do not insert any objects or fingers into the inlet or discharge.
• All work on the dehumidifier should be done with the unit “off” and unplugged.
• Do not use water to clean the exterior. To clean unit, unplug from power, then use a damp
cloth to wipe exterior.
• Do not stand on machine or use as a device to hang clothes.
• Typically, the inlet filter doesn’t need to be cleaned more than once per month.
2
Safety Notes

Identification!
For future reference, write down the model, serial number, and date of purchase for your dehumidifier.
This is extremely helpful if you need to seek assistance in the future. The data label on the side of your
unit has key characteristics of your specific unit.
Model Number: Horizon Titan XP90
Serial Number: Date of Purchase:
For additional questions concerning your dehumidifier, the following options are available:
• Contact your installing contractor
• Call Horizon Dehumidifiers @ (919) 258-3330x4
• Email: sales@horizondehumidifiers.com
Electrical Supply
Power Supply: 115 V, 60 Hz AC, Single Phase
Outlet Requirement: 3-Prong, GFI
Circuit Protector: 15 Amp
WARNING: 120 Volts AC may cause serious injury from electric shock.
To ensure safety:
1. 1. Disconnect electrical power before servicing
2. 2. Only plug unit into grounded electrical circuit
3. 3. Do not use extension cord
4. 4. Do not use a plug adapter.
Principle of Operation
# The Horizon Series Dehumidifiers utilizes its integral humidistat to monitor the conditioned space.
When the relative humidity goes above the selected set point, the dehumidifier will energize. Air is
drawn across an evaporator coil, which is cooler than the dew point of air. This means moisture will condense out of the air. The air is then reheated through the condenser coil and distributed back into the
room.
Installation
# The area to be controlled should be sealed with a vapor barrier. If unit is installed in a crawlspace,
all vents should be sealed.
WARNING: Do not install your dehumidifier in a corrosive environment. Some liquid vapor
barriers dry via “solvent evaporation”. Always make sure that barrier is completely dry and
area is throughly ventilated before installing dehumidifier.
Step #1: Place dehumidifier on a level surface.
3
# If the unit is handled in such a manner that the compressor did not remain in the upright position,
it is necessary to place on a level surface and wait a minimum of 2 hours before turning the unit “on”
Step #2: Set Up Drain Line
# The included drain line attaches to unit via a compression type fitting on the discharge end of the
unit. To attach drain line, remove the compression nut and slide it over the end of the hose to be attached to unit. Slide compression nut side of hose over the insert on the compression fitting completely. Tighten compression nut.
Step #3: Plug unit into 15 amp grounded circuit.
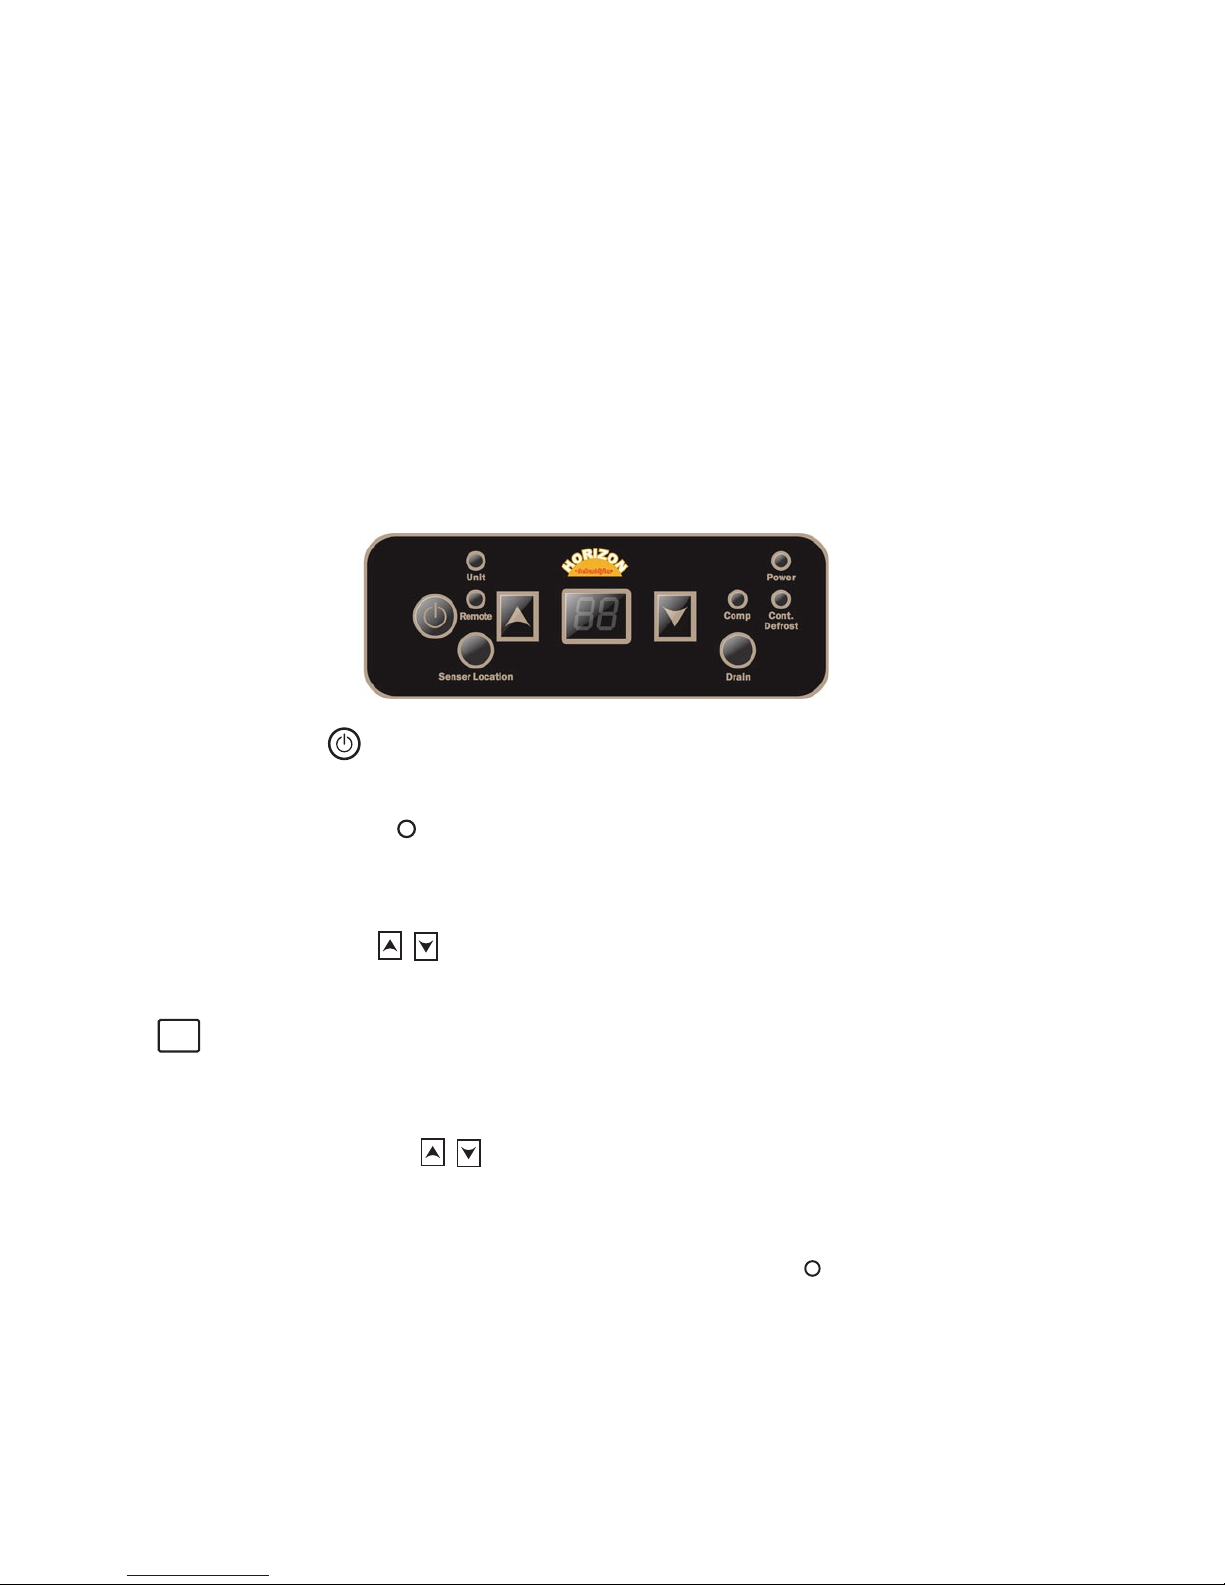
Key Functions
5.1. Power Key
HORIZON-DEHUMIDIFIERS
88
Power
Dehu mid ifi ersDehu mid ifi ers
Comp Cont.
Defrost
•
• Use this button to turn the dehumidifier on and off. Press once to turn machine on. You will
hear 2 beeps and the
HORIZON-DEHUMIDIFIERS
1. Power Key
indicator light must be on to show unit is plugged in and has power to it. Press the on/off
88
Power
Deh umi dif ier sDeh umi dif ier s
Comp Cont.
Defrost
Power
light will illuminate red. Press the power button a second time and
you will hear one beep as the machine shuts down. Note that there is a one minute fan delay on
shutdown.
6.2. Arrow Buttons
HORIZON-DEHUMIDIFIERS
88
Power
Dehu midi fier sDehu midi fier s
Comp Cont.
Defrost
HORIZON-DEHUMIDIFIERS
88
Power
Dehu midi fier sDehu midi fier s
Comp Cont.
Defrost
88
a. • Use the up and down arrow buttons to set the desired humidity setpoint on the display screen.
HORIZON-DEHUMIDIFIERS
88
Power
Deh umid ifi ersDehumi dif ier s
Comp Cont .
Defrost
88
The setpoint can be any number between 35-99%. Creating a setpoint means that when the
indoor humidity is lower than the set point, the machine will stop automatically. Conversely, when
the indoor humidity is higher than the set level, the unit will operate.
7.3. Continuous Mode
HORIZON-DEHUMIDIFIERS
88
Power
Dehu midi fier sDehu midi fier s
Comp Cont.
Defrost
HORIZON-DEHUMIDIFIERS
88
Power
Dehu midi fier sDehu midi fier s
Comp Cont.
Defrost
88
• • Continuous Mode can be used when you want your dehumidifier to run constantly for testing
purposes, To switch into continuous mode, press either the up or down arrow. Once you hear a
beep, press both arrow buttons simultaneously. At this point the
HORIZON-DEHUMIDIFIERS
88
Power
Dehu mid ifi ersDe humi dif iers
Comp Cont.
Defrost
88
88
Cont.
Defrost
light should illuminate green
on the display board to indicate you have successfully switched to continuous mode.
a. • When set to continuous, the dehumidifier will run constantly, regardless of the humidity level un-
til you turn the unit off or switch back to normal humidistat operation. If you would like to switch
back to normal humidistat operation, simply press the up and down arrows simultaneously.
4
 Loading...