

Horizon SXS5.7 Owner’s Manual
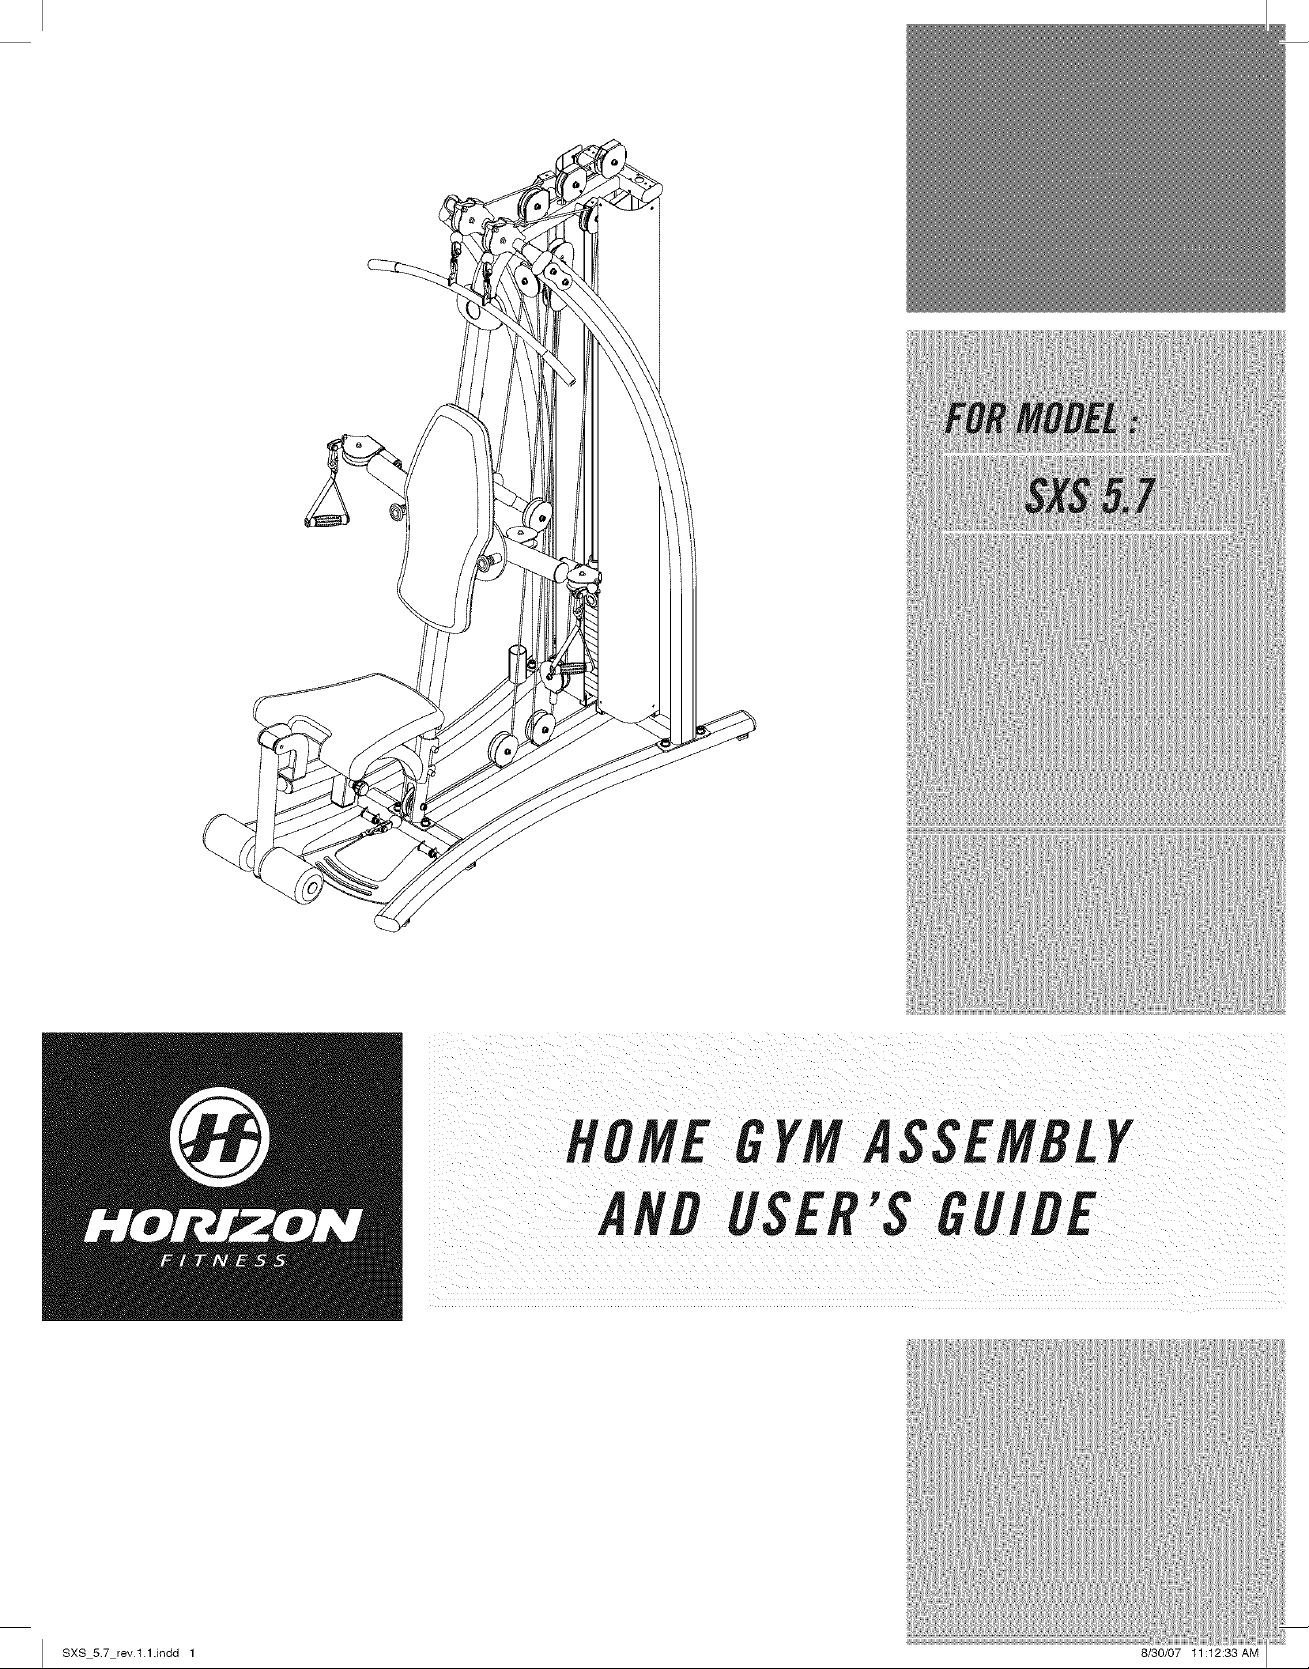
HOMEGYMASSEMBLY
ANB USER'S GU/DE
I SXS 57 revl.l.indd 1
8/30/07 11:12:33 AM
CONGRATULATIONSand THANKYOUforyourpurchaseof this Horizonhomegym!
Whether your goal is to tone your muscles, increase your strength or simply enjoy a lurer, healthier
fifestyle, a Horizon home gym can help you attain it- adding club-quality performance to your at-home
workouts, with the ergonomics and innovative features you need to get stronger and healthier, faster.
Because we're committed to designing fitness equipment from the inside out, we use only the highest
quality components. It's a commitment we back with one of the strongest warranty packages in the
industry.
Youwantexerciseequipmentthat offers the most comfort,the bestreliability and the highest quality
in its class.
A Horizonhomegym delivers.
_ iiii:iIIi
_i i i!
Important Precautions
Assembly
Before YouBegin 17
Conditioning Guidelines 18
Troubleshooting & Maintenance 24
Limited Warranty 26
CONTACTINFORMATIOIV Back Panel
4
5
I SXS 57 revl.lAndd 2-3
m
8130/07 11:12:34 AM ]
I
I
iill
y,
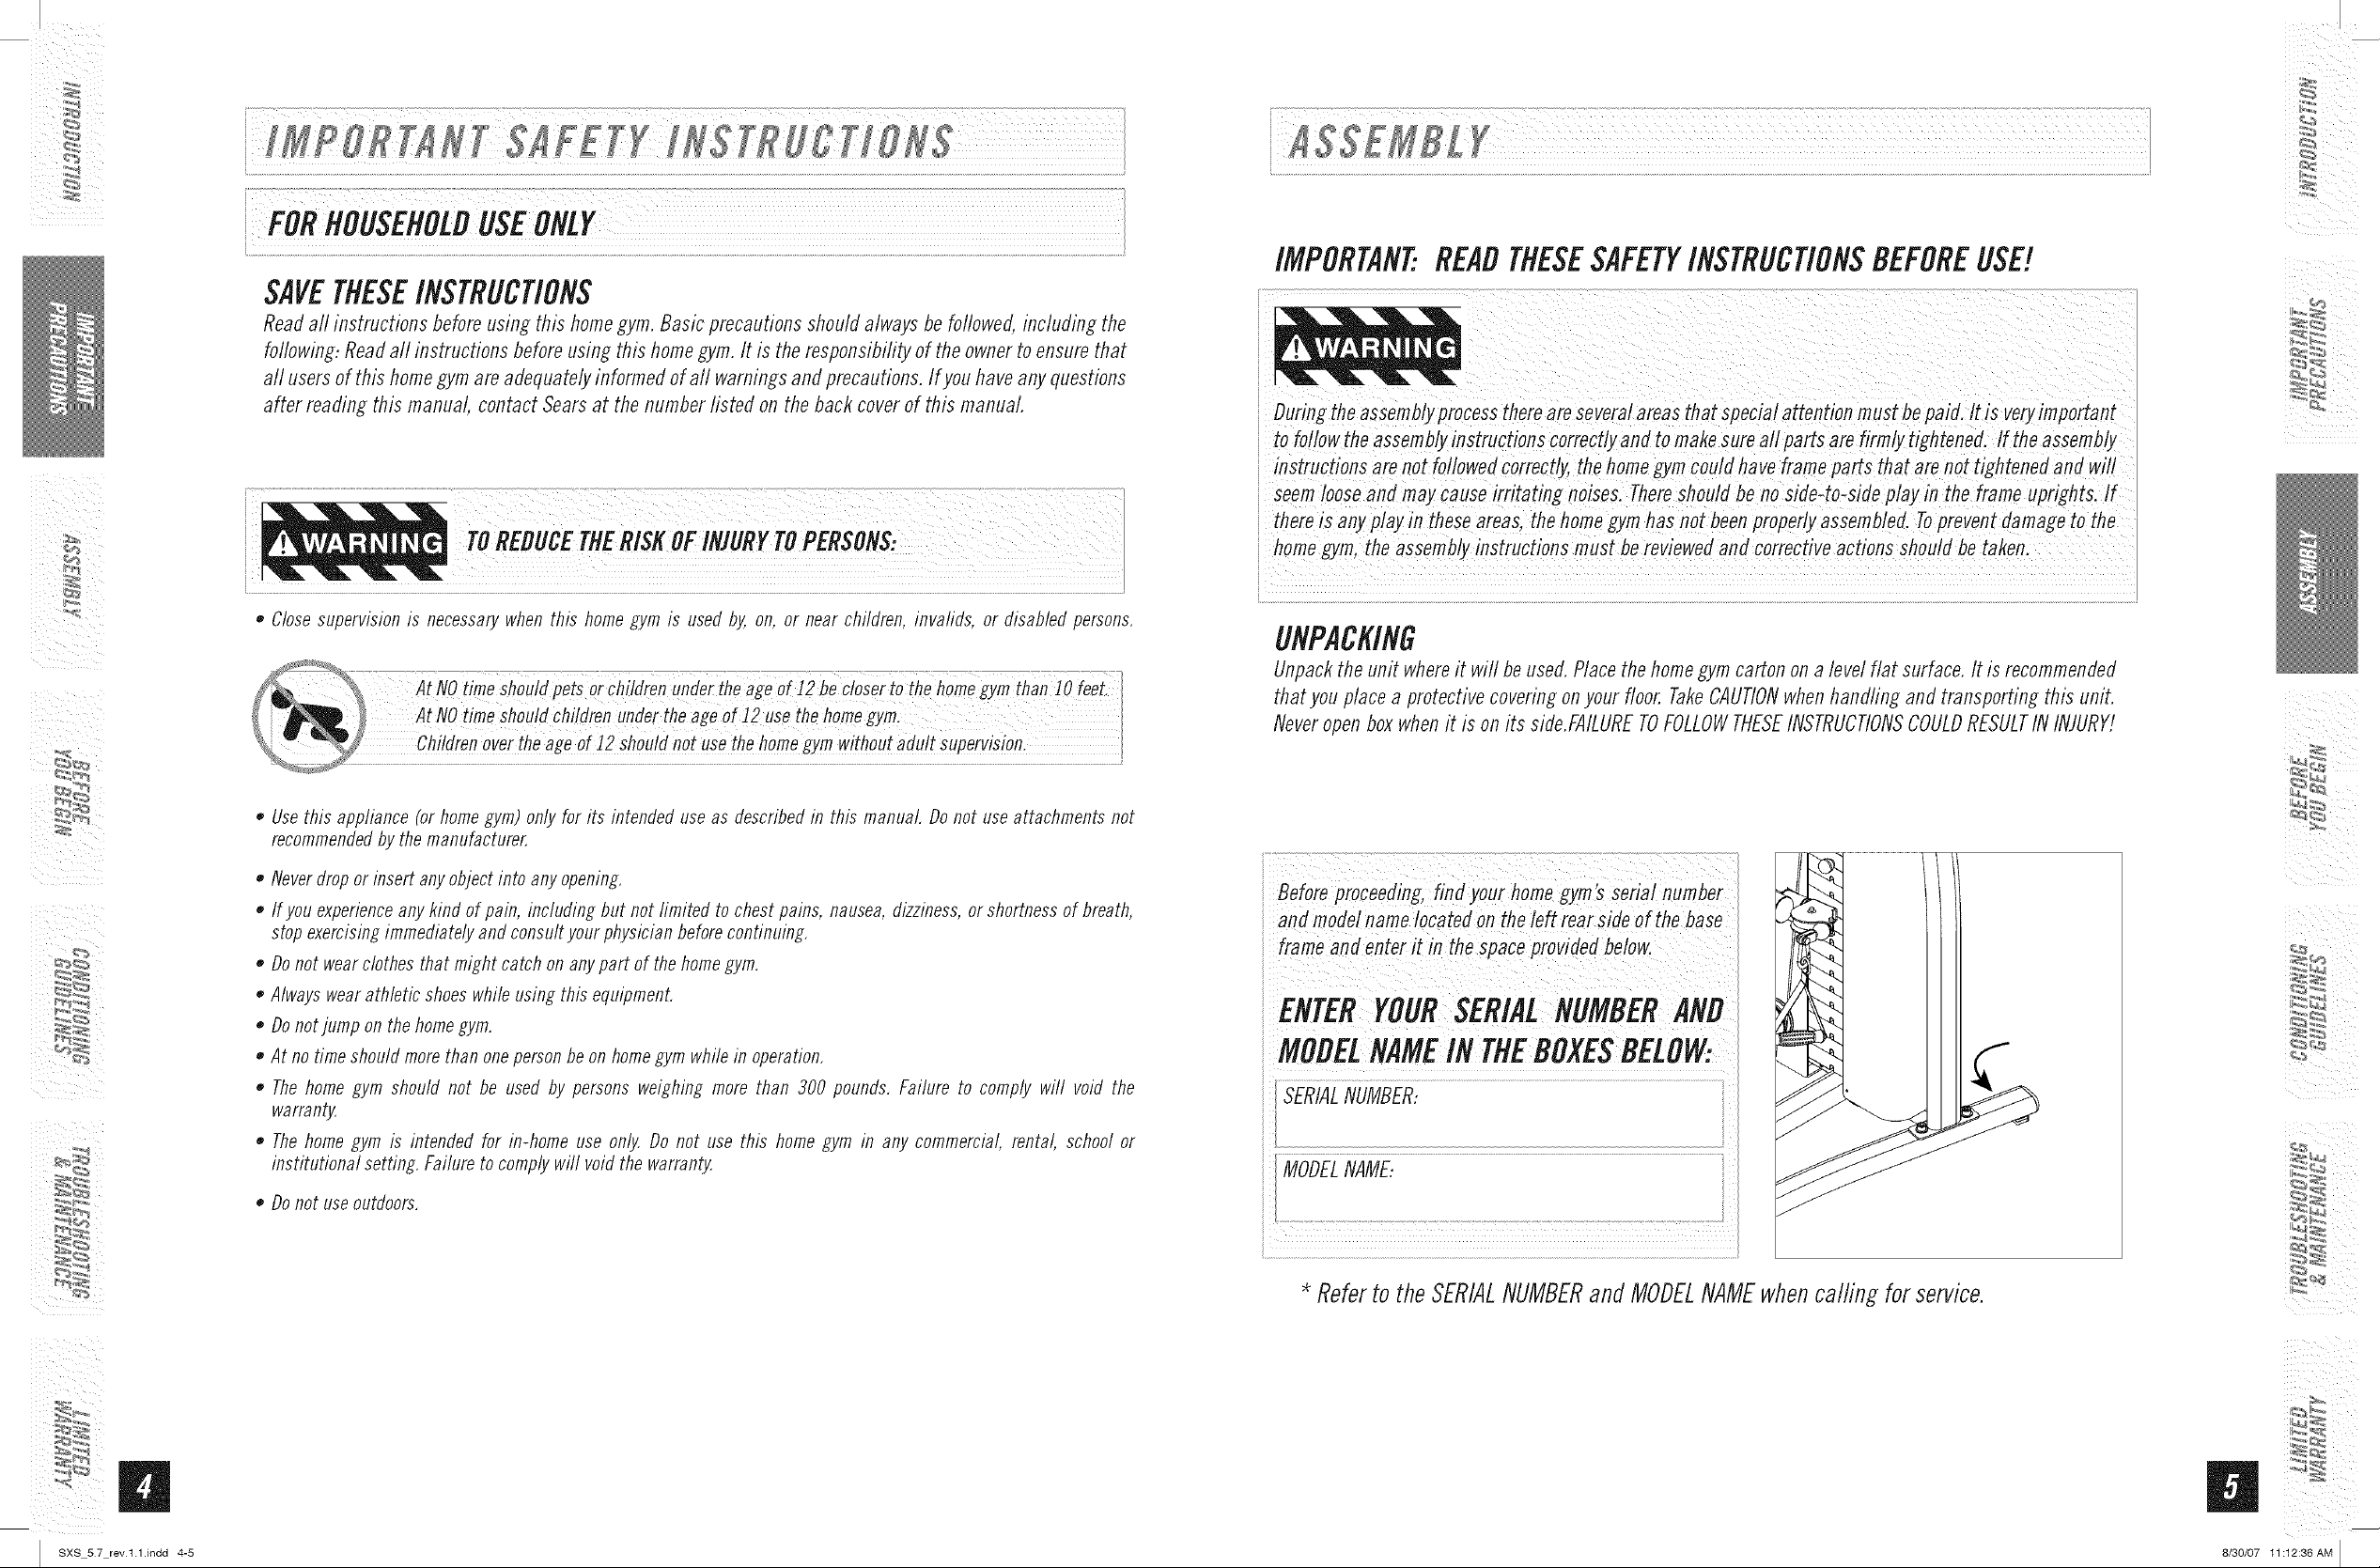
SAVETNESEINSTRUCtiONS
Readaftinstructions beforeusing this homegym.Basicprecautionsshouldalwaysbefollowed,including the
following:Readall instructions beforeusing this homegym.It is theresponsibilityoftheownertoensurethat
all users of this home gym are adequately informed of all warnings and precautions. If you have any questions
after reading this manual, contact Sears at the number listed on the back cover of this manual
I
IMPORTANT..READTHESESAFETYINSTRUCtiONSBEFOREUSE!
i Duringtheassemblyprocessthereareseveralareasthat specialattention mustbepaid. ItisveryimPortant
i to followtheassemblyinstructions correctlyand tomakesurea!!parts are firmlytightened, ff theassembly
i instructions arenot fo//owedcorrectly,the hOmegymCOu/dhaveframeparts that arenot tightenedandwil!
i seemboseand rnaycauseirritating noises.There shou/dbe nosifle to-sideplay in the frame uprights.!f
i thereis anyp!aYinthese areas,thehomegymhasnotbeenproper/yassemb!ed.Topreventdamageto the
• Close supervisionis necessarywhen this homegym is usedby, on, or near children, invalids, or disabled persons,
AtNOtimeShouldpetsorChildrenu'de_theageof
oii2.ie
Childrenover the ageOf !2 shouldnot usethe homegym withoutadult Supervision,
Usethis appliance (or homegym) only for its intended use as described in this manual Do not use attachments not
recommendedbythe manufacturer.
• Neverdrop or insert anyobjectinto anyopening,
If you experienceany kind of pain, including but not fimited to chest pains, nausea,dizziness,or shortnessof breath,
stop exercisingimmediately and consult your physician beforecontinuing,
• Donot wearclothes that might catch onanypart of the homegym,
Alwayswear athletic shoeswhile using this equipment.
• Donotjump on thehomegym,
At no time should morethan onepersonbe on homegym while in operation,
Thehome gym should not be used by persons weighing more than 300 pounds, Failure to comply will void the
warranty,
Thehome gym is intended for in-home use only, Do not use this home gym in any commercial, rental, school or
institutional setting, Failure to comply will void the warranty,
• Donot useoutdoors,
the reviewe_an_corrective
UNPACKING
Unpackthe unit whereit will be used.Placethehomegymcartonon alevel flat surface.It is recommended
that you place a protective covering on your floor. TakeCAUTIONwhen handling and transporting this unit.
Neveropenboxwhenit is onits side.FAILURETOFOLLOWTHESEINSTRUCTIONSCOULDRESULTININJURY!
7,:t
Beforeproceeding,find your homegym'sserial number
and modelnametocatedon the !eft rearside of thebase
i framea,d enterit in the SPaceprovidedbelow.
i ENTERYOURSERIALNUMBER
_MODELNAMEINTHEBOXESBELOW:
SERIALNUMBER:
MODELNAME..
iili_
I SXS 57
m
rev 1.1Jndd 4-5
* Referto theSERIALNUMBERandMODELNAMEwhencalfingforservice.
iii ii i
8/30/07 11:12:38 AM I
I
I
I
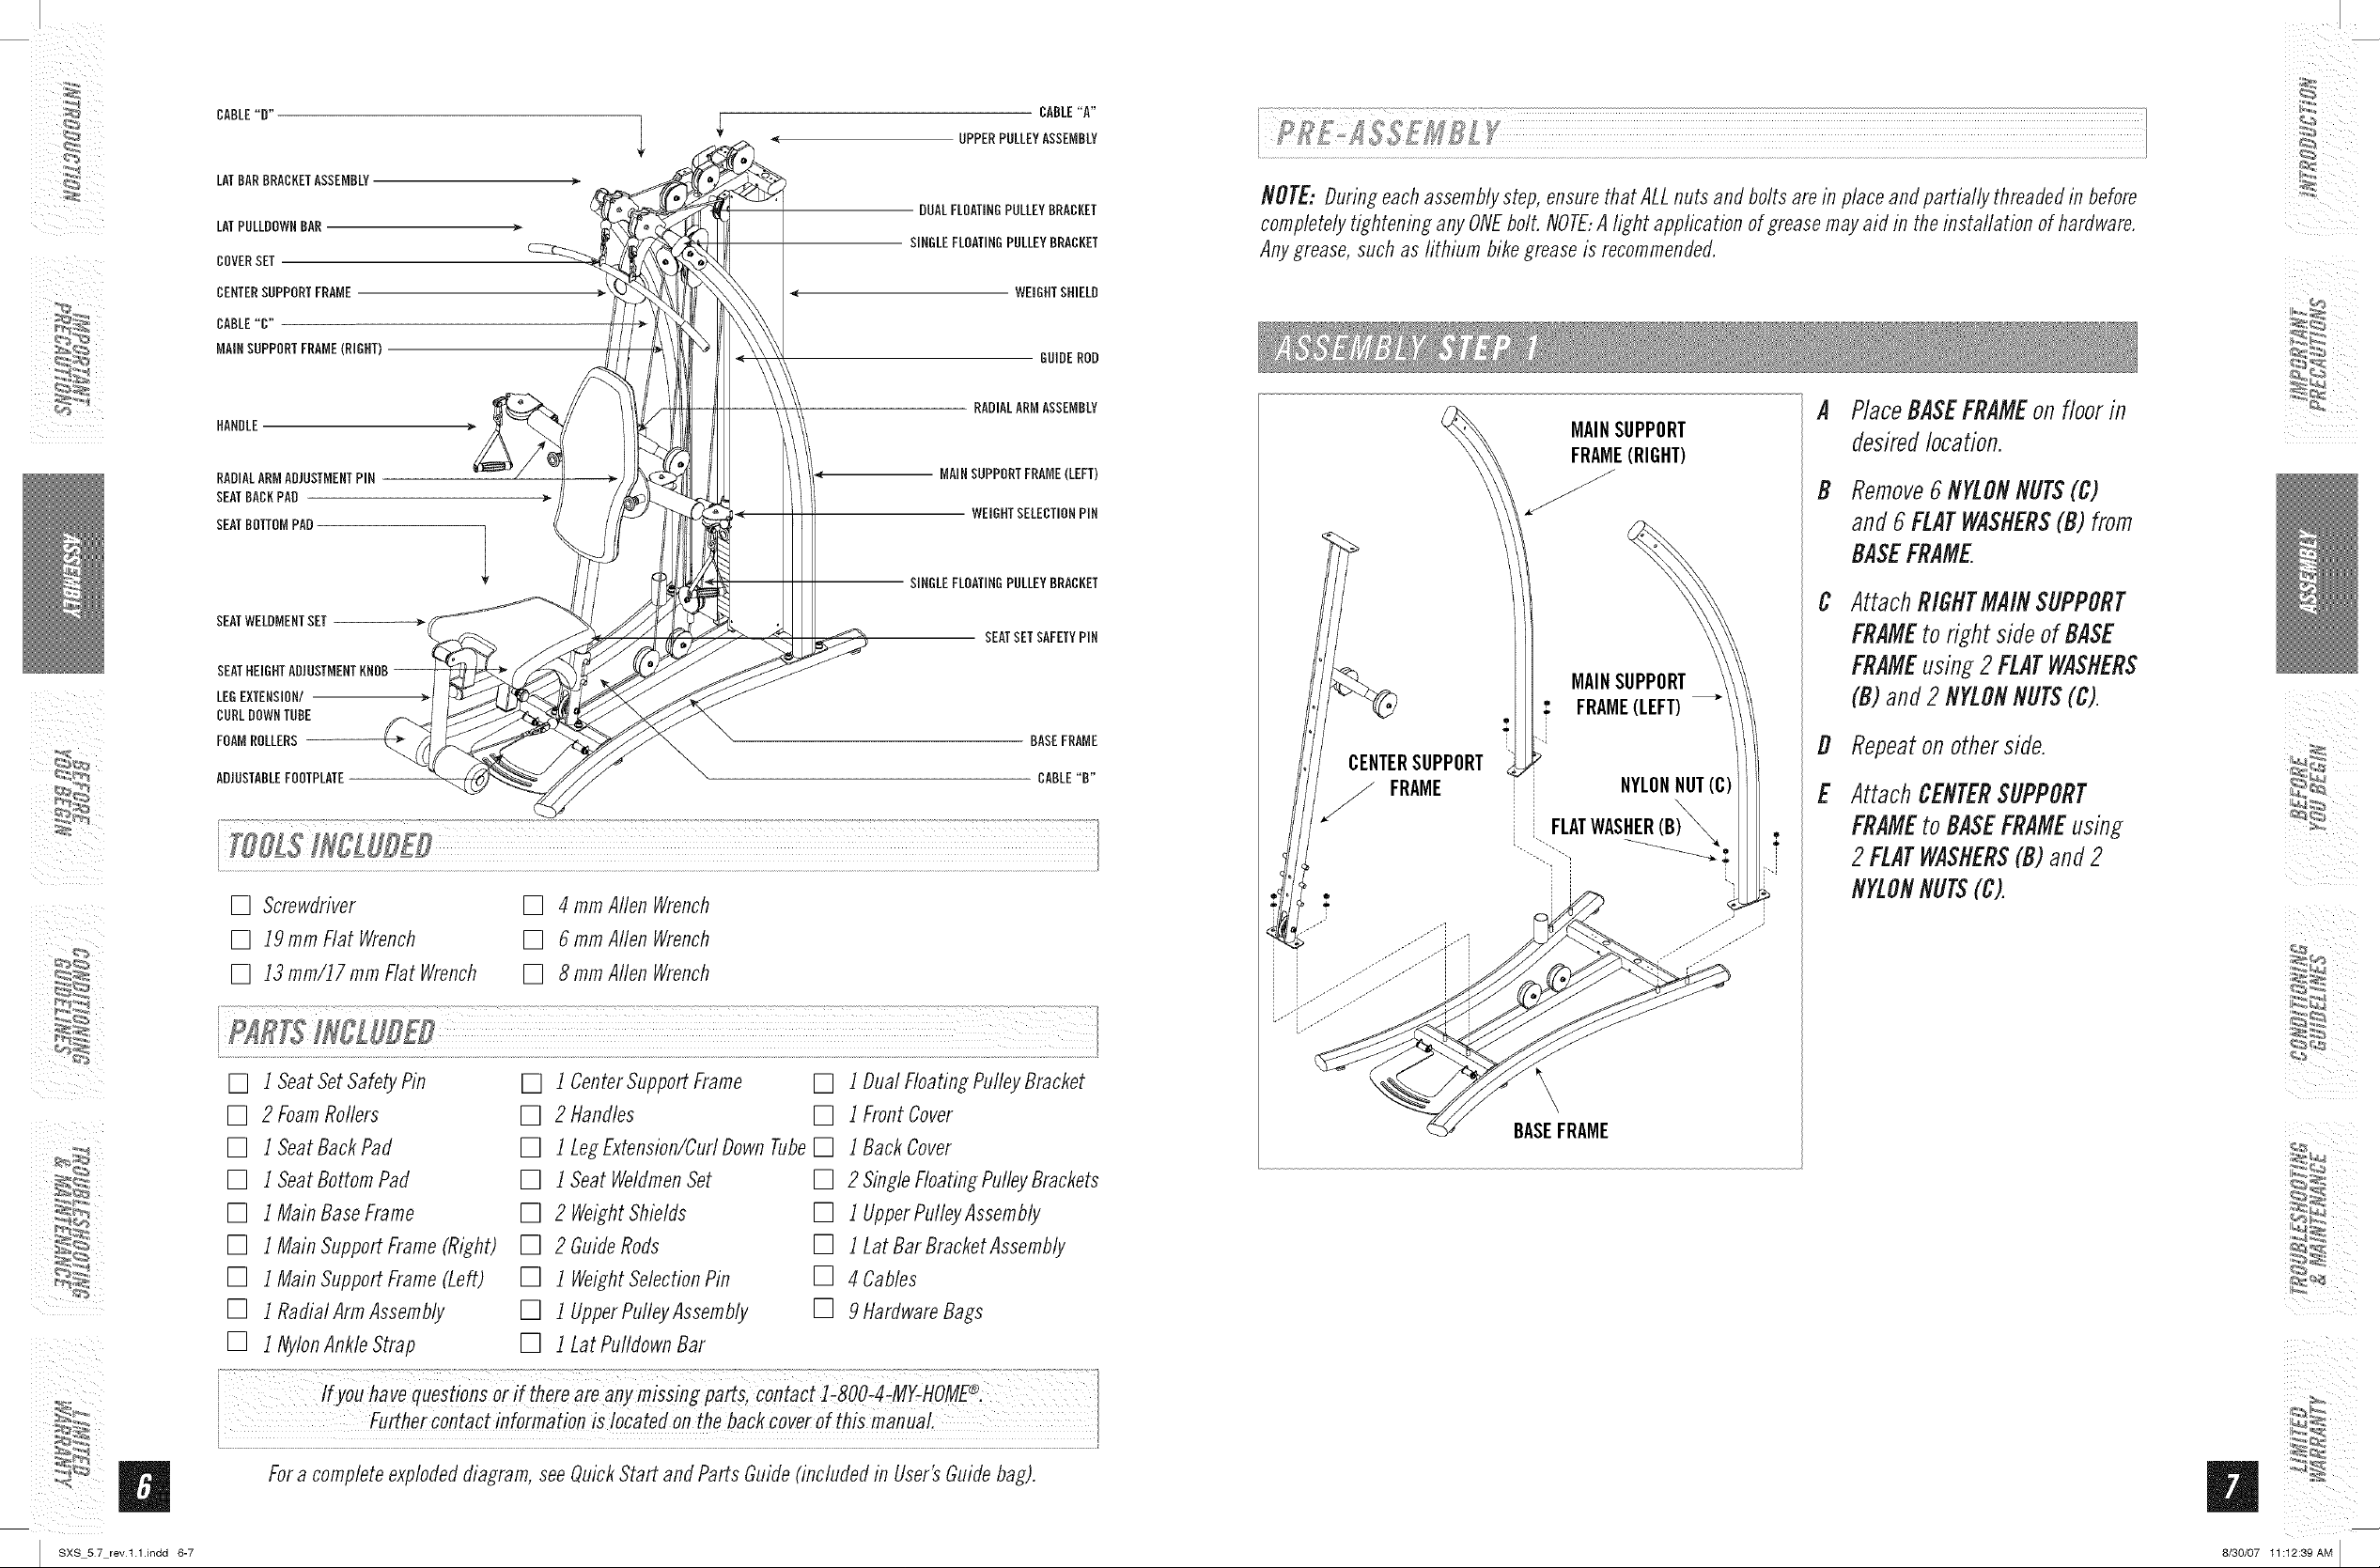
CABLE"0"
LATBARBRACKETASSEMBLY
LATPULLBOWNBAR
COVERSET
CENTERSUPPORTFRAME
CABLE"C"
MAINSUPPORTFRAME(RIGHT)
HANDLE
RACIALARMACJUSTMENTPiN
SEATBACKPAD
SEATBOTTOMPAD
SEATWELCMENTSET
LEOEXTENSION/
CURLDOWNTUBE
FOAMROLLERS
ADJUSTABLEFOOTPLATE
CABLE"A"
UPPERPULLEYASSEMBLY
DUALFLOATINGPULLEYBRACKET
SINOLEFLOATINOPULLEYBRACKET
WEIGHTSHIELD
BCICEROD
RACIALARMASSEMBLY
MAINSUPPORTFRAME(LEFT)
WEIGHTSELECTIONPiN
SINGLEFLOATINBPULLEYBRACKET
BEMSETSAFETYPiN
BASEFRAME
CABLE"B"
NOTE: Duringeachassemblystep,ensurethat ALLnuts and boltsarein placeandpartially threadedin before
completelytightening anyONEbolt.NOTE:Alight application of greasemayaid in theinstallation ofhardware.
Anygrease,such as lithium bikegreaseis recommended.
PlaceBASEFRAMEonfloor in
desiredlocation.
B
Remove6NYLONNUTS(C)
and6FLATWASHERS(B) from
BASEFRAME.
C
AttachRIGHTMAINSUPPORT
FRAMEto right sideof BASE
FRAMEusing 2 FLATWASHERS
(B)and2 NYLONNUTS(C).
B
Repeatonotherside.
E
AttachCENTERSUPPORT
FRAMEto BASEFRAMEusing
i
2 FLATWASHERS(B)and2
NYLONNUTS(C).
[] Screwdriver [] 4rnrnAllenWrench
[] 19 rnrnFlat Wrench [] 6rnrnAllenWrench
[] 13 rnrn/17rnrnFlat Wrench [] 8rnrnAllenWrench
i J£iii!L!!iilL!!!i¸:!!il!!i¸:!!iilii!!!!!iii!!!!!ii !!ikill
[] J SeatSetSafetyPin [] J CenterSupportFrarne [] J DualFIoafingPulleyBracMt
[] 2FoamRollers [] 2Handles [] i FrontCover
SN
[] i SeatBackPad [] i LegExtension/CurlDownTube[] i BackCover
[] i SeatBottomPad [] i SeatWelflrnenSet [] 2SingleFloatingPulleyBrackets
[] i MainBaseFrame [] 2 WeightShields [] i UpperPulleyAssernbly
[] i MainSupportFrarne(Right) [] 2 GuideRods [] i LatBarBracketAssernbly
[] i MainSupportFrame(Left) [] i WeightSelectionPin [] 4Cables
[] i RadialArmAssembly [] i UpperPufleyAssembly [] 9HardwareBags
[] 1NylonAnkleStrap [] 1Lat PufldownBar
BASEFRAME
S_
S n_
I SXS 57
m
rev 1.1Jndd 6-7
!fyouhaveque_tio,sor!_thereare_nymisSingpa_s,c_ntact!800i4_MY-HOMf'°,
i Fu_herc°ntactinf°rrna ti°nisl°cated On thebackcoverofthismanua!
Fora completeexplodeddiagrarn,seeQuickStartand PartsGuide(includedin User'sGuidebag).
8/30/07 11:12:39 AM I
I
I
I
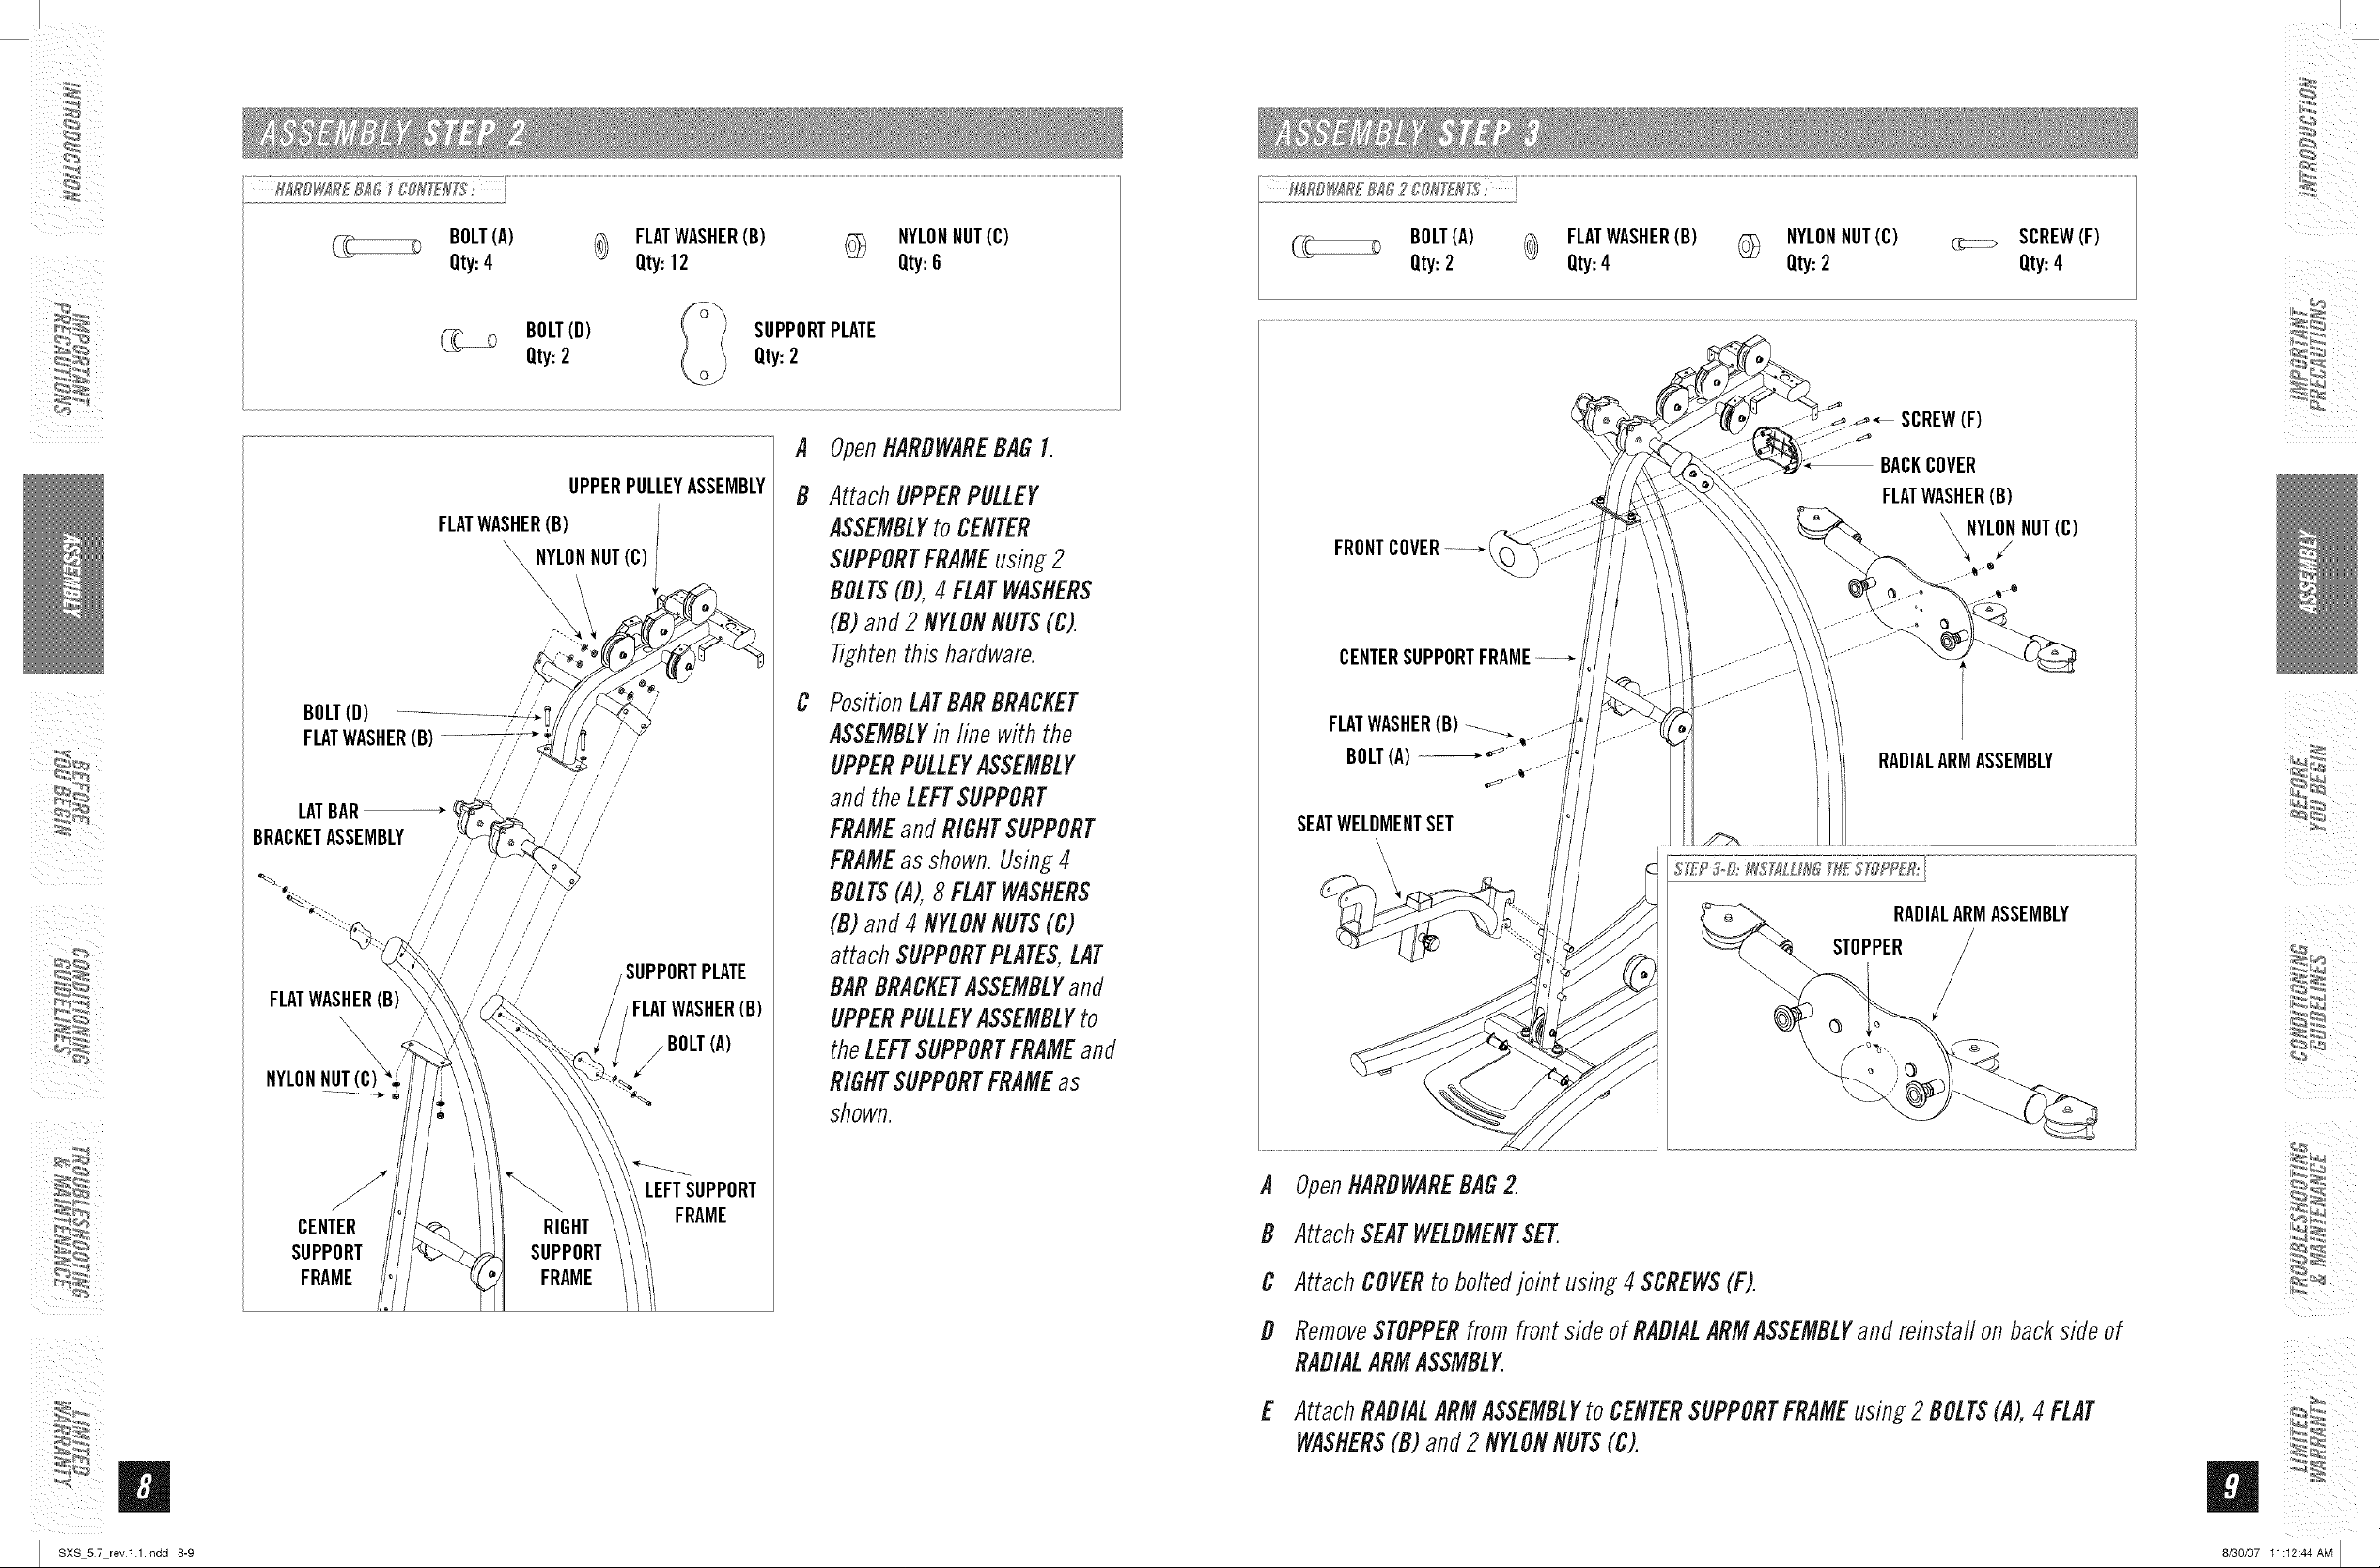
BOLT(D)
FLATWASHER(B) ///--- _,/_"
LATBAR
BRACKETASSEMBLY
BOLT(A) FLATWASHER(B) _ NYLONNUT(C)
Qty:4 Qty:12 Qty:6
BOLT(D)
Qty:2
UPPERPULLEYASSEMBLY
FLATWASHER(B)
SUPPORTPLATE
Qty:2
A
OpenHARDWAREBAGI.
B
Attach UPPERPULLEY
ASSEMBLYto CENTER
SUPPORTFRAMEusing2
\?LON NUT(C)
\
/'
BOLTS(D),4FLATWASHERS
(B)and2 NYLONflUTS(C).
Tig,_tenthis hardware.
,,r ,'
/ /
PositionLATBARBRACKET
ASSEMBLYin line withthe
/
/, /' /
/ / /
/
/
/ /
/
/' /'
ir
/
UPPERPULLEYASSEMBLY
andtheLEFTSUPPORT
FRAMEandRIGHTSUPPORT
FRAMEasshown.Using4
BOLTS(,4),8 FLATWASHERS
(B)and4 NYLONNUTS(C)
SUPPORTPLATE
attachSUPPORTPLATES,LAT
BARBRACKETASSEMBLYand
FLATWASHER(B)
/ BOLT(A)
/
UPPERPULLEYASSEMBLYto
theLEFTSUPPORTFRAMEand
RIGHTSUPPORTFRAMEas
shown.
BOLT(A) FLATWASHER(B) (_ NYLONNUT(C) _ SCREW(F)
Qty:2 Qty:4 Qty:2 Qty:4
_ SCREW(F)
j_1--
BACKCOVER
FLATWASHER(B)
\
FRONTCOVER---.i
CENTERSUPPORTFRAME--÷
RADIALARMASSEMBLY
SEATWELDMENTSET
RADIALARMASSEMBLY
STOPPER
iil i_
I SXS 57
m
rev 1.1.indd 8-9
CENTER
SUPPORT
FRAME
RIGHT
SUPPORT
FRAME
FRAME
A OpenHARDWAREBAG2
B AttachSEATWELDMENTSET
C AttachCOVERto boltefljobt using4 SCREWS(F).
D RemoveSTOPPERfromfrontsideofRADIALARMASSEMBLYandreinstallonbacksideof
RADIALARMASSMBLY
E AttachRADIALARMASSEMBLYto CENTERSUPPORTFRAMEusing2 BOLTS(,4),4FLAT
WASHERS(B) and 2 NYLONNUTS(C).
iiil _i
 Loading...