

Page 1
6 series
www.horizon-europe.com
Manual de utilizare
RO
User Manual
FHD TV 1080p
Ръководства на потребителя
HU Felhasználói útmutató
40HL6330F/B
BG
Упутство за коришћење
RS
alexa
Εγχειριδιο χρησης
GR
Nutzerhandbuch
DE
40”100cm
Page 2

Thank you for choosing this product!
Vă mulțumim pentru alegerea acestui produs!
Köszönkük, hogy ezt a terméket választotta!
Хвала што сте одабрали овај производ!
Благодарим ви, че избрахте този продукт!
Σας ευχαριστούμε που επιλέξατε αυτό το προϊόν!
Vielen Dank, dass Sie sich für dieses Produkt entschieden haben!
Please read the instructions carefully and keep the manual for further information.
To operate the unit correctly and safely, please read this manual carefully before installation and use.
Vă rugăm să citiți cu atenție instrucțiunile și să păstrați manualul pentru informări ulterioare.
This manual is designed to give you all the necessary instructions for installing, using and maintaining the appliance.
Acest manual este conceput pentru a vă oferi toate instrucțiunile necesare referitoare la instalarea, utilizarea și întreținerea aparatului.
Kérjük, gyelmesen olvassa el az utasításokat, és további információkért őrizze meg a kézikönyvet.
Ez a kézikönyv az összes szükséges útmutatást nyújtja az eszköz telepítéséhez, használatához és karbantartásához.
Pentru a opera unitatea corect și în siguranță, vă rugăm să citiți acest manual cu atenție înainte de instalare și utilizare.
Моля, прочетете внимателно инструкциите и запазете ръководството за допълнителна информация.
A készülék megfelelő és biztonságos üzemeltetése érdekében kérjük, gyelmesen olvassa el ezt a kézikönyvet, mielőtt telepítené és használja.
Молимо прочитајте упутства пажљиво и сачувајте приручник за додатне информације.
За да работите с уреда правилно и безопасно, моля, прочетете внимателно това ръководство преди да инсталирате и използвате.
Това ръководство е предназначено да ви даде всички необходими инструкции за инсталиране, използване и поддръжка на уреда.
Διαβάστε προσεκτικά τις οδηγίες και φυλάξτε το εγχειρίδιο για περισσότερες πληροφορίες.
Dieses Handbuch enthält alle erforderlichen Anweisungen zur Installation, Verwendung und Wartung des Geräts.
Да бисте правилно и сигурно радили са уређајем, пажљиво прочитајте овај приручник пре инсталације и употребе.
Овај приручник је дизајниран да вам пружи сва потребна упутства за инсталирање, употребу и одржавање уређаја.
Αυτό το εγχειρίδιο έχει σχεδιαστεί για να σας παρέχει όλες τις απαραίτητες οδηγίες για την εγκατάσταση, χρήση και συντήρηση της συσκευής.
Bitte lesen Sie die Anweisungen sorgfältig durch und bewahren Sie das Handbuch für weitere Informationen auf.
Για να χειρίζεστε τη μονάδα σωστά και με ασφάλεια, διαβάστε προσεκτικά αυτό το εγχειρίδιο πριν από την εγκατάσταση και τη χρήση.
Lesen Sie dieses Handbuch vor der Installation und Verwendung sorgfältig durch, um das Gerät ordnungsgemäß und sicher zu betreiben.
Page 3

............................................ 34
35
Cuprins
Cuprins .................................................................... 1
........................................................ 36
......................................... 36
...... 37
.................................................................. 37
............................................... 37
....................................................... 38
......................................................... 39
............................................................. 40
....................................................42
..................................... 43
- 1 -
...................................... 2
................................................... 2
....................................... 3
...................................................................... 4
...................................................... 4
............................... 4
........ 4
............. 5
.................... 7
................................ 7
................................................... 7
................................. 7
....................................... 8
............................................................... 8
......................................................... 10
............................................................... 11
........................................................ 12
...................................................... 12
...................................................... 14
.... 15
........................... 15
............................................... 15
.................................................... 17
CEC ....................................................................... 18
.................................................. 18
........................... 19
............ 28
....................................... 28
........................... 28
...................... 28
......................................................29
.............................................. 29
................................................ 30
.................. 31
............ 31
........ 32
............................................... 32
........................................... 32
............................................... 32
......................................... 33
....................................... 33
.......................................................... 34
......................................... 34
Page 4
i
AVERTISMENT
Notă:
- 2 -
Page 5
AVERTISMENT
sau
Notă:
.
Notă: Ecran oprit
Imagine
- 3 -
CLASS 1
LASER PRODUCT
-
-
-
-
Page 6
„
„
Notă:
- 4 -
Page 7

Notă:
sau
sau
sau
.
sau .
- 5 -
Page 8

.
.
.
-
.
- 6 -
TV
. Apoi
.
Page 9
- 7 -
2
1
ANT
LNB
Page 10
11 000
< 2
Notă
- 8 -
1 2
Page 11
-
-
- 9 -
Page 12
27
28
Româ
Prima
Page 13
CAM
module
Româ
Tip
VGA
YPBPR
CI
Page 14

.
- 12 -
Notă:
.
Notă:(*)
LimbăȚarăFirst
Time Installation
(*)
Page 15

sau
p
No p
Notă:
ca
sau
(*)
Note:
- 13 -
ca
Page 16

.
No
Notă:
sau
- 14 -
.
Menu
Setări>Instalare>Scanare Canale Automată>Satelit
Page 17

.
(*)
Notă:
Notă:
- 15 -
Page 18

.
TV
.
Notă:
.
sau
sau .
- 16 -
Page 19
.
Repetare/ Selecție aleatorie)
Loop/Shuffle Mode Operation (Operarea în modul
.
.
Info
.
- 17 -
sau
.
00001234.
primei instalări
Page 20

.
Notă:
Info.
.
Notă:
- 18 -
Notă: First Time
Installation
Notă:
CEC
CEC
.
Notă:
Page 21
.
Minim
sau .
Notă:
.
Româ
Page 22
-
Notă:
Picture Settings
Româ
Page 23
Notă: Sound (Sunet)
Off (Oprit)
Notă: Sound (Sunet)
Off (Oprit)
.
Numai
CEC
Notă:
sau
.
.
sau
Româ
Page 24
.
sau .
Notă:Connectivity
Româ
Page 25
Româ
Page 26
Româ
Notă:
Notă:
TV.
Page 27
sau
PIN
Notă: First Time Installation
primei instalări
CEC
Româ
sau
Page 28
Notă:
-
.
-
-
Biss
Româ
Page 29
Notă:
Româ
Page 30

.
Notă:
ON
.
Notă:Mutare în pozițieȘtergereEditare nume
TV>Canale>Editare
.
Notă:
de
model şi/sau
.
- 28 -
.
Page 31

.
IMPORTANT:
Observaţii:
.
- 29 -
Page 32

.
Notă:
V
- 30 -
Page 33
O
O
SECAM O
NTSC4.43 O
NTSC3.58 O
O
O
720p O
1080i O
O
O
720p O
1080i O
1080p
2
3
9
- 31 -
Page 34
Româ
.mp3 .mp3
.ac3 .ac3
.aac .AAC
.amr
Page 35
Româ
.ssa
.ass
.smi Sami
.jss
.mp4
Page 36
2
3
1
1
2
.
1
.
- 34 -
sau
Page 37

Notă:
sau
- 35 -
Notă:
.
.
Page 38

Notă:
- 36 -
cc
.
.
Page 39

Notă:
TV
TV
Observații:
.
- 37 -
AVS .
.
.
Page 40

.
Notă:
Privacy Settings
- 38 -
Page 41

Notă:
Notă:
Notă:
- 39 -
Page 42

Note:
Note:
-
.
-
(*)
Notă:
-
-
Notă:
- 40 -
Page 43
FN
-
-
-
sau
Notă:
FN
FN
-
FN
FN
FN
FN
FN
„FN
„FN
FN
„FN
FN
FN
FN
-
- 41 -
Page 44
.
Notă:
FN
FN
FN
FN
FN
FN
FN
FN
FN
FN
-
FN
-
FN
FN
FN
FN
- 42 -
FN
FN
FN
FN
FN
FN
-
FN
.
-
Page 45

- 43 -
Page 46

Wireless Display .................................................... 33
Connectivity Troubleshooting ................................ 33
Contents
Safety Information ................................................... 2
Using Audio Video Sharing Network Service ......... 33
Apps ...................................................................... 34
Internet Browser .................................................... 34
HBBTV System...................................................... 35
Smart Center ......................................................... 35
Alexa Ready .......................................................... 37
Google Assistant.................................................... 38
DVB functionality information ................................ 39
English - 1 -
Markings on the Product.......................................... 2
Environmental Information....................................... 3
Features .................................................................. 3
Accessories Included............................................... 4
Standby Notifications ............................................... 4
TV Control Button & Operation ................................ 4
Using Main TV Menu ............................................... 5
Inserting the Batteries into the Remote ................... 6
Power Connection ................................................... 6
Antenna Connection ................................................ 6
License Notification ................................................. 7
Disposal Information ................................................ 7
Specification ............................................................ 8
Remote Control ....................................................... 9
Connections........................................................... 10
Switching On/Off .................................................... 11
First Time Installation............................................. 11
First Time Installation............................................. 12
Using Satellite Channel Table Feature .................. 14
Media Playback via USB Input .............................. 14
USB Recording ...................................................... 14
Media Browser....................................................... 15
CEC ....................................................................... 16
E-Manual ............................................................... 16
Settings Menu Content .......................................... 17
General TV Operation ........................................... 25
Using the Channel List .......................................... 25
Configuring Parental Settings ................................ 25
Electronic Programme Guide ................................ 25
Teletext Services ................................................... 26
Software Upgrade.................................................. 26
Troubleshooting & Tips .......................................... 26
PC Input Typical Display Modes ............................28
AV and HDMI Signal Compatibility ........................28
Supported File Formats for USB Mode ................. 29
Video File Formats ................................................ 29
Picture File Formats .............................................. 29
Audio File Formats ................................................ 29
Subtitle File Formats.............................................. 30
Supported DVI Resolutions ................................... 30
Connectivity ........................................................... 31
Wired Connectivity................................................. 31
Wireless Connectivity ............................................ 31
Networked Standby Mode ..................................... 32
Page 47
heaters, radiators, etc. near the TV set.
surfaces.
out of the reach of the babies, children and domestic
Do not place any heat sources such as electric
Do not place the TV on the floor and inclined
animals.
To avoid danger of suffocation, keep plastic bags
CAUTION
DO NOT OPEN
RISK OF ELECTRIC SHOCK
Safety Information
Serious injury or death risk
Caution
provided with screws, tighten the screws firmly to
prevent the TV from tilting. Do not over-tighten the
screws and mount the stand rubbers properly.
hazardous or flammable materials.
such as sunshine, fire or the like.
Carefully attach the stand to the TV. If the stand is
NOT REMOVE COVER (OR BACK).
CAUTION: TO REDUCE THE RISK OF ELECTRIC SHOCK DO
Do not dispose of the batteries in fire or with
WARNING
NO USER-SERVICEABLE PARTS INSIDE. REFER
SERVICING TO QUALIFIED SERVICE PERSONNEL.
In extreme weather (storms, lightning) and long inactivity
periods (going on holiday) disconnect the TV set from the
mains.
The mains plug is used to disconnect TV set from the mains
headphones can cause hearing loss.
Batteries must not be exposed to excessive heat
Excessive sound pressure from earphones or
ABOVE ALL - NEVER let anyone, especially
children, push or hit the screen, push anything
into holes, slots or any other openings in the case.
by persons (including children) who are
WARNING: This device is intended to be used
IMPORTANT - Please read these instructions
and therefore it must remain readily operable. If the TV set is
not disconnected electrically from the mains, the device will
still draw power for all situations even if the TV is in standby
mode or switched off.
fully before installing or operating
Note: Follow the on screen instructions for operating the related
features.
Dangerous voltage risk
Important maintenance
component
Caution, See Operating Instructions: The
Class II Equipment: This appliance is
designed in such a way that it does not require
a safety connection to electrical earth.
Maintenance
Risk of electric shock
Markings on the Product
The following symbols are used on the product as
a marker for restrictions and precautions and safety
instructions. Each explanation shall be considered
where the product bears related marking only. Note
such information for security reasons.
above the sea level, in dry locations and in regions
with moderate or tropical climates.
capable / experienced of operating such a device
unsupervised, unless they have been given
supervision or instruction concerning the use of
the device by a person responsible for their safety.
Use this TV set at an altitude of less than 5000 meters
indoor use but may also be used in public places.
The TV set is intended for household and similar
For ventilation purposes, leave at least 5cm of free
Hazardous Live Terminal: The marked
space around the TV.
or blocking the ventilation openings with items, such
as newspapers, table-cloths, curtains, etc.
The ventilation should not be impeded by covering
marked area(s) contain(s) user replaceable
terminal(s) is/are hazardous live under normal
operating conditions.
not place the TV, furniture, etc. on the power cord.
A damaged power cord/plug can cause fire or give
you an electric shock. Handle the power cord by the
The power cord plug should be easily accessible. Do
product contains Class 1
laser source that is safe under
reasonably foreseeable
Class 1 Laser Product: This
conditions of operation.
coin or button cell batteries.
i
CLASS 1
LASER PRODUCT
plug, do not unplug the TV by pulling the power cord.
Never touch the power cord/plug with wet hands as
this could cause a short circuit or electric shock.
Never make a knot in the power cord or tie it with
other cords. When damaged it must be replaced, this
should only be done by qualified personnel.
liquids and do not place objects filled with liquids,
Do not expose the TV to dripping or splashing of
English - 2 -
such as vases, cups, etc. on or over the TV (e.g.,
on shelves above the unit).
place open flames such as lit candles on the top of
or near the TV.
Do not expose the TV to direct sunlight or do not
Page 48
WALL MOUNTING WARNINGS
on the wall.
Read the instructions before mounting your TV
The wall mount kit is optional. You can obtain from
WARNING
your local dealer, if not supplied with your TV.
wall.
accessories.
Do not install the TV on a ceiling or on an inclined
the TV from fall. Do not over-tighten the screws.
Use the specified wall mounting screws and other
Tighten the wall mounting screws firmly to prevent
Figures and illustrations in this user manual are
provided for reference only and may differ from the
actual product appearance. Product design and
specifications may be changed without notice.
Environmental Information
This television is designed to be environment friendly.
To reduce energy consumption, you can follow these
steps:
If you set the Energy Saving to Minimum, Medium,
Maximum or Auto the TV will reduce the energy
consumption accordingly. If you like to set the
Backlight to a fixed value set as Custom and adjust
the Backlight (located under the Energy Saving
setting) manually using Left or Right buttons on the
(DVB-T-T2/C/S-S2)
Fully integrated digital terrestrial/cable/satellite TV
HDMI inputs to connect other devices with HDMI
sockets
USB input
English - 3 -
remote. Set as Off to turn this setting off.
Note: Available Energy Saving options may differ depending
on the selected Mode in the Settings>Picture menu.
The Energy Saving settings can be found in the Set-
tings>Picture menu. Note that some picture settings
Proceed and press
will be unavailable to be changed.
If pressed Right button or Left button consecutively,
“Screen will be off in 15 seconds.
OK to turn the screen off immediately. If you don’t
press any button, the screen will be off in 15 seconds.
Press any button on the remote or on the TV to turn
the screen on again.
Note: Screen Off option is not available if the Mode is set
to Game.
Features
When the TV is not in use, please switch off or
disconnect the TV from the mains plug. This will also
reduce energy consumption.
Remote controlled colour TV
– – – – – – – – – – – –
Do not ingest the battery, Chemical Burn Hazard
This product or the accessories supplied with the pro-
duct may contain a coin/button cell battery. If the coin/
button cell battery is swallowed, it can cause severe
internal burns in just 2 hours and can lead to death.
Keep new and used batteries away from children.
If the battery compartment does not close secu-
rely, stop using the product and keep it away from
children.
If you think batteries might have been swallowed or
placed inside any part of the body, seek immediate
medical attention.
A television may fall, causing serious personal injury
or death. Many injuries, particularly to children, can
be avoided by taking simple precautions such as:
methods recommended by the manufacturer of
the television set.
television set.
ging the edge of the supporting furniture.
climbing on furniture to reach the television set
or its controls.
your television so they cannot be tripped over,
ALWAYS use cabinets or stands or mounting
ALWAYS use furniture that can safely support the
ALWAYS ensure the television set is not overhan-
ALWAYS educate children about the dangers of
pulled or grabbed.
ALWAYS route cords and cables connected to
location.
NEVER place a television set in an unstable
– – – – – – – – – – – –
(for example, cupboards or bookcases) without
anchoring both the furniture and the television set
to a suitable support.
materials that may be located between the televi-
sion set and supporting furniture.
to climb, such as toys and remote controls, on
the top of the television or furniture on which the
television is placed.
NEVER place the television set on tall furniture
NEVER place the television set on cloth or other
NEVER place items that might tempt children
The equipment is only suitable for mounting at
If the existing television set is going to be retained
and relocated, the same considerations as above
should be applied.
Apparatus connected to the protective earthing of the
building installation through the MAINS connection
or through other apparatus with a connection to
protective earthing – and to a television distribution
system using coaxial cable, may in some circumstan-
ces create a fire hazard. Connection to a television
distribution system has therefore to be provided
through a device providing electrical isolation below
a certain frequency range (galvanic isolator)
Page 49
The Auto Power Down option(in the Settings>System
and the TV has been left on and not been operated
during the set time, it will switch into standby mode
setting the No Signal Timer option in the Settings>
System>Device Settings menu accordingly.
>More menu) could have been set to a value between
after the set time has expired. When you next switch-on
1 and 8 hours by default. If this setting is not set as Off
the TV, the following message will be displayed. “TV
switched to stand-by mode automatically because
no operation was made for a long time.” Before the
TV switches into standby mode a dialogue window will
be displayed. If you do not press any button the TV
will switch into the standby mode after a waiting period
of about 5 minutes. You can highlight Yes and press
OK to switch the TV into standby mode immediately.
If you highlight No and press OK, the TV will remain
on. You can also choose to cancel the Auto Power
Down function from this dialogue. Highlight Disable
and press OK, the TV will remain on and the function
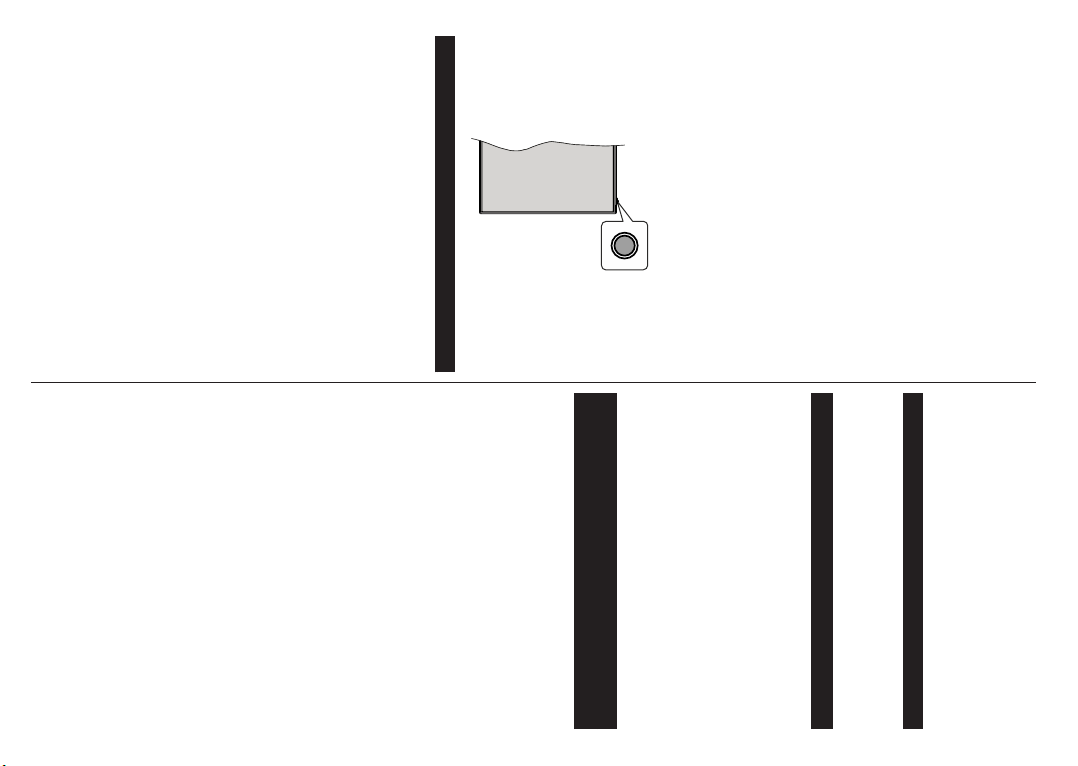
TV Control Button & Operation
will be cancelled. You can enable this function again by
changing the setting of the Auto Power Down option
from the Settings>System>More menu.
Note: The position of the control button may differ depending
on the model.
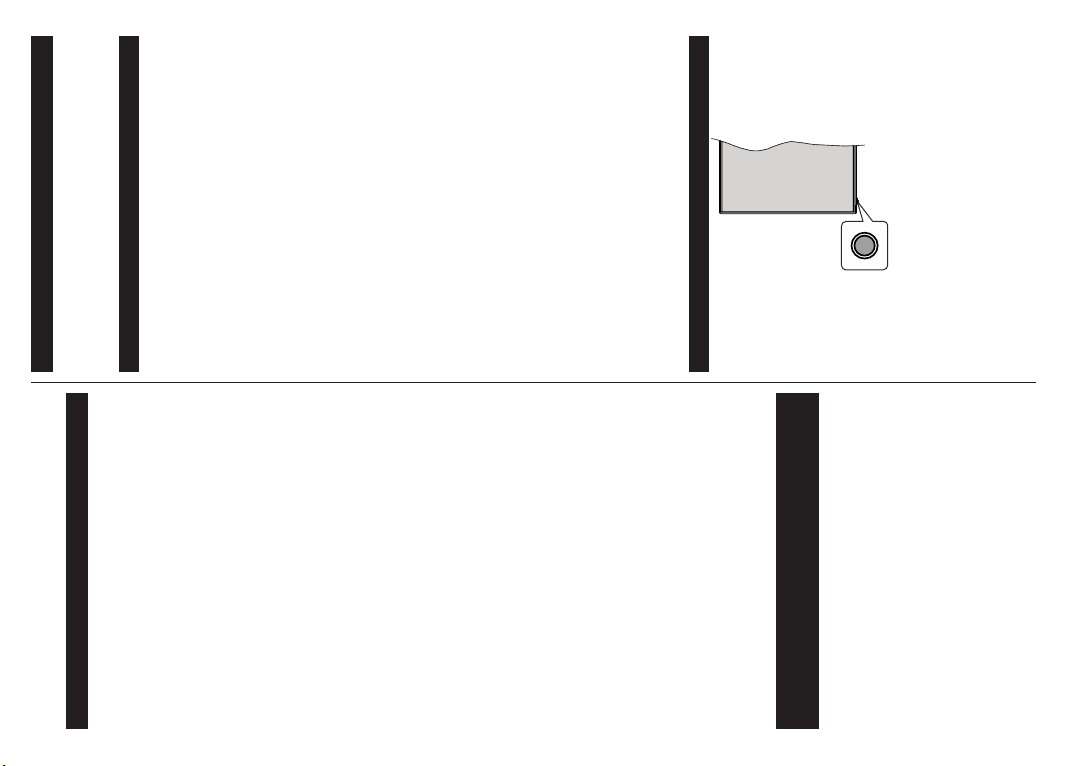
Your TV has a single control button. This button allows
options menu.
focus to the desired option if needed.
you to control the Standby-On / Source / Programme
and Volume functions of the TV.
Operating with the Control Button
Press the control button to display the function
activate the selected option. The icon colour of the
Then press the button consecutively to move the
Press and hold the button for about 2 seconds to
option changes when activated.
enter the sub menu.
deactivate the last activated option first. Press and
hold the button to deactivate it. The icon colour of
Press the button once again to use the function or
the option changes when deactivated.
To select another function option, you will need to
English - 4 -
Players, PVR, video games, etc.)
OSD menu system
Back AV inputs for external devices (such as DVD
Stereo sound system
Teletext
Headphone connection
Automatic programming system
Manual tuning
Automatic power down after up to eight hours
Sleep timer
Child lock
Automatic sound mute when no transmission
NTSC playback
AVL (Automatic Volume Limiting)
PLL (Frequency Search)
PC input
Game Mode (Optional)
Picture off function
Programme recording
Programme timeshifting
High Dynamic Range (HDR) / Hybrid Log-Gamma
Ethernet (LAN) for Internet connectivity and service
802.11 a/b/g/n built in WLAN Support
Audio Video Sharing
HbbTV
(HLG)
Using this feature the TV can reproduce greater
dynamic range of luminosity by capturing and then
combining several different exposures. HDR/HLG
promises better picture quality thanks to brighter, more
realistic highlights, more realistic colour and other
improvements. It delivers the look that filmmakers
intended to achieve, showing the hidden areas of
dark shadows and sunlight with full clarity, colour and
detail. HDR/HLG contents are supported via native
and market applications, HDMI, USB inputs and over
Accessories Included
DVB-S broadcasts.
Remote Control
Batteries: 2 x AAA
Instruction Book
Standby Notifications
If the TV does not receive any input signal (e.g. from
an aerial or HDMI source) for 3 minutes, it will go
into standby. When you next switch-on, the following
message will be displayed: “TV switched to stand-by
mode automatically because there was no signal
for a long time.” You can disable this functionality by
Page 50

s go to the TV menu,
Using Main TV Menu
When the Menu button is pressed, the main TV menu
will appear on the screen. You can navigate through
button for a period of about 5 seconds. The function
options menu will disappear.
To close the function options menu do not press the
highlight a menu option some of the sub-menu items
of this menu may appear on the upper side of the
menu bar for quick access. To use a quick access item
highlight it, press OK and set as desired using the Left/
Right directional buttons. When finished press OK or
Back/Return button to exit.
You can also see information on location, weather,
time and date on the main TV menu screen. The green
small icons indicate the current status for time, network
and sync for apps. If these icons appear in green, it
the menu items using the directional buttons on the
remote. To select an item or see the sub-menu options
of the highlighted menu press OK button. When you
To turn the TV off: Press the control button to display
the function options menu, the focus will be on the
Standby option. Press and hold the button for about
2 seconds to activate this option. The icon colour of
the option changes when activated. Then press the
button once again to turn the TV off.
To turn on the TV: Press the control button, the TV
will turn on.
To change volume: Press the control button to display
the function options menu and then press the button
means that the time information is updated, network
consecutively to move the focus to Volume + or
Volume - option. Press and hold the button for about
2 seconds to activate the selected option. The icon
colour of the option changes when activated. Then
is connected and sync is completed in success.
Otherwise the icons will appear in white.
Press Exit button to close the main menu.
1. Home
When main menu is opened Home menu bar will be
highlighted. The content of the Home menu can be
highlight the Edit Home option and press OK. The
Home menu will switch to edit mode. In edit mode
you can delete or change the position of any item in
the Home menu. Highlight an option and press OK.
Select Delete or Move option and press OK. In order
to move a menu item use the Right, Left, Up and Down
direction buttons to select the position that you want
the item to move to and press OK.
You can also add options from other menus to Home
menu. Just highlight an option and press the Down
direction button on the remote. If you see Add to Home
press the button to increase or decrease the volume.
To change channel: Press the control button to
display the function options menu and then press the
button consecutively to move the focus to Programme
+ or Programme - option. Press and hold the button
for about 2 seconds to activate the selected option.
The icon colour of the option changes when activated.
Then press the button to switch to the next or previous
channel in the channel list.
To change source: Press the control button to display
the function options menu and then press the button
consecutively to move the focus to Source option.
Press and hold the button for about 2 seconds to
activate this option. The icon colour of the option
changes when activated. Then press the button once
again to display the sources list. Scroll through the
available sources by pressing the button. TV will
automatically switch to the highlighted source.
option you can add it to the Home menu.
2. Search
You can search for Channels, Guide, TV menus,
Applications, Web, YouTube and Videos using this
option. Press OK and enter a key word using the virtual
keyboard. Then highlight OK and press OK to start
the search. Results will be displayed on the screen.
Highlight the desired result using the directional
buttons and press OK to open.
3. TV
3.1. Guide
You can access the electronic programme guide menu
using this option. Refer to Electronic Programme
Guide section for more information.
3.2. Channels
Note: Main menu OSD cannot be displayed via the control
button.
Operation with the Remote Control
Press the Menu button on your remote control to
display main menu. Use the directional buttons and
OK button to navigate and set. Press Return/Back
or Menu button to quit a menu screen.
Input Selection
Once you have connected external systems to your
TV, you can switch to different input sources. Press the
Source button on your remote control consecutively
to select the different sources.
Changing Channels and Volume
You can change the channel and adjust the volume
by using the Programme +/- and Volume +/- buttons
You can access the Channels menu using this option.
Refer to Using the Channel List section for more
information.
on the remote.
English - 5 -
Page 51
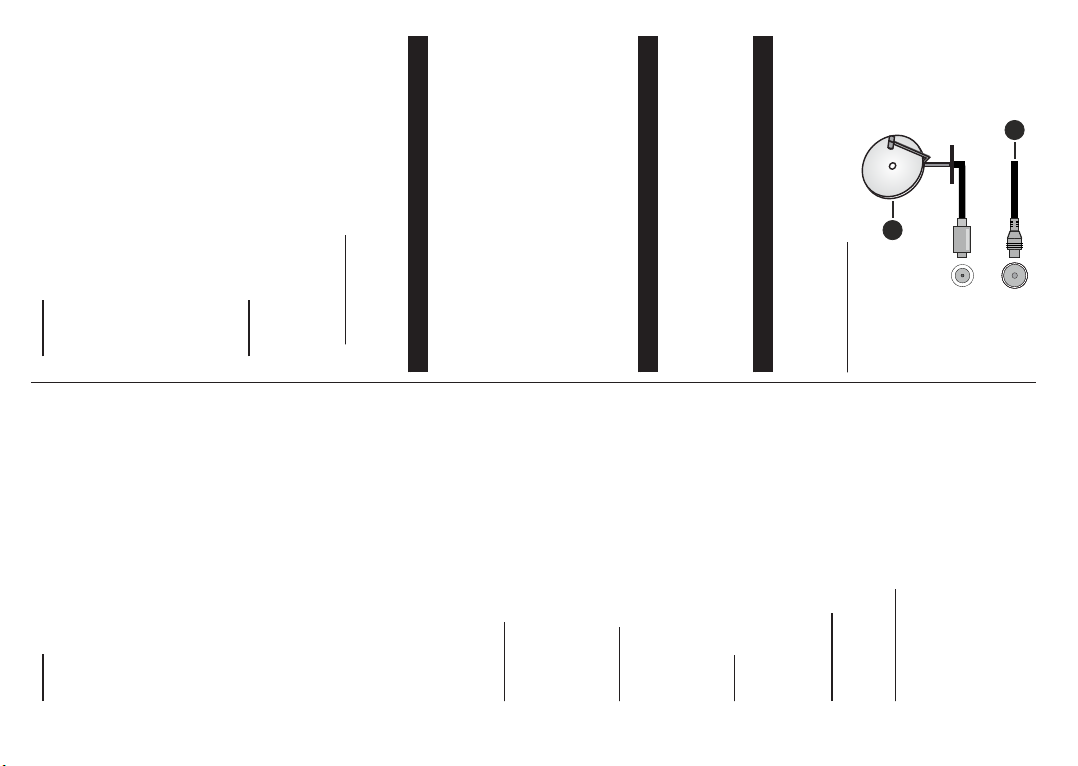
2
1
ANT
LNB
4. Settings
You can manage the settings of your TV using the
options of this menu. Refer to Settings Menu Content
section for more information.
You can reset your customisations on the Home menu
to defaults using the Reset Apps option (availability
depends on TV model and its features). Highlight and
press OK. A confirmation message will be displayed.
Highlight Yes and press OK to proceed. Note that you
will not be able to perform this operation again within
the next few minutes.
5. Sources
3.3. Timers
You can set timers for future events using the options of
this menu. You can also review the previously created
timers under this menu.
To add a new timer select the Add Timer tab using the
Left/Right buttons and press OK. Set the sub-menu
options as desired and when finished press OK. A new
timer will be created.
To edit a previously created timer, highlight that timer,
select the Edit Selected Timer tab and press OK.
Change the sub-menu options as desired and press
OK to save your settings.
You can manage your input source preferences using
To cancel an already set timer, highlight that timer,
select Delete Selected Timer tab and press OK. A
5.1. Source Settings
the options of this menu. To change the current source
or use your TV as a wireless display device highlight
one of the options and press OK.
confirmation message will be displayed. Highlight Yes
and press OK to proceed. The timer will be cancelled.
It is not possible to set timers for two or more events
that will broadcasted in different channels at the same
Inserting the Batteries into the Remote
You can access the source settings menu directly using
this option.
Remove the back cover to reveal the battery compart-
ment. Insert two size AAA batteries. Make sure the (+)
and (-) signs match (observe correct polarity). Do not
mix old and new batteries. Replace only with same or
equivalent type. Place the cover back on.
A message will be displayed on the screen when the
batteries are low and must be replaced. Note that when
the batteries are low, the performance of the remote
time interval. In this case you will be asked to choose
one of these timers and cancel others. Highlight the
timer you want to cancel and press OK, Options menu
will be displayed. Then highlight Set/Cancel and press
OK to cancel that timer. You will have to save changes
after that. In order to do that press OK, highlight Save
Changes and press OK again.
3.4. Recordings
You can manage your recordings using the options
of this menu. You can playback, edit, delete or sort
previously recorded events. Highlight a tab by using
the Left or Right direction button and press OK to see
control may be impaired.
Power Connection
Batteries should not be exposed to excessive heat
such as sunshine, fire or the like.
IMPORTANT: The TV set is designed to operate on a
220-240V AC, 50 Hz supply. After unpacking, allow the
TV set to reach the ambient room temperature before
you connect the set to the mains. Plug the power cable
available options.
3.5. More Apps
In order to manage the apps installed on your TV,
you can use this option. Highlight and press OK. You
can add an installed app to Home menu, launch or
remove it. Highlight an app and press OK to see the
available options.
3.6. Market
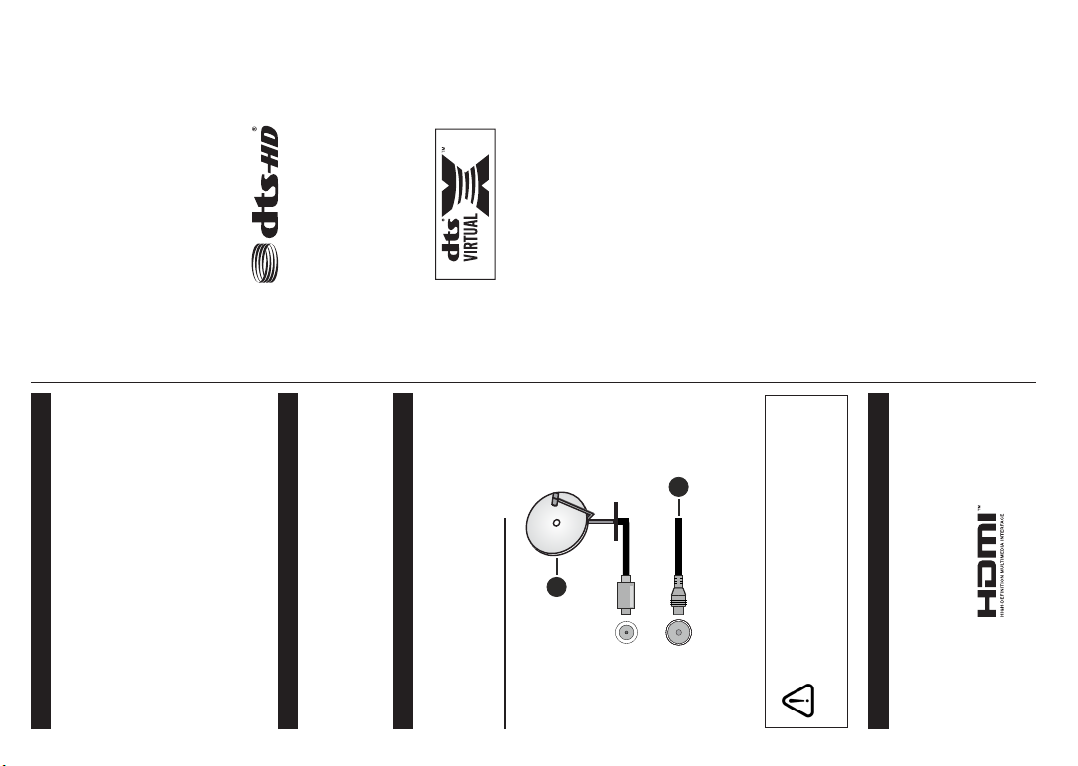
Antenna Connection
to the mains socket outlet.
Connect the aerial or cable TV plug to the aerial input
(ANT) socket or satellite plug to the satellite input (LNB)
socket located on the rear side of the TV.
Rear side of the TV
You can add new apps from the application market
using this option. Highlight and press OK. Available
apps will be displayed. You can also access the
application market from within the More Apps menu.
3.7. Accessibility
You can access the accessibility settings menu directly
using this option.
3.8. Privacy Settings
You can access the privacy settings menu directly
using this option. This option may not be available
depending on the model of your TV and the selected
country during the first time installation process.
English - 6 -
Page 52
device fails to properly enforce restrictions on content
usage, content owners may require Microsoft to revoke
the device’s ability to consume PlayReady-protected
content. Revocation should not affect unprotected
content or content protected by other content access
technologies. Content owners may require you to
upgrade PlayReady to access their content. If you
decline an upgrade, you will not be able to access
content that requires the upgrade.
The “CI Plus” Logo is a trademark of CI Plus LLP.
This product is protected by certain intellectual property
rights of Microsoft Corporation. Use or distribution of
If you want to connect a device to the TV, make
sure that both the TV and the device are turned off
before making any connection. After the connection
is done, you can turn on the units and use them.
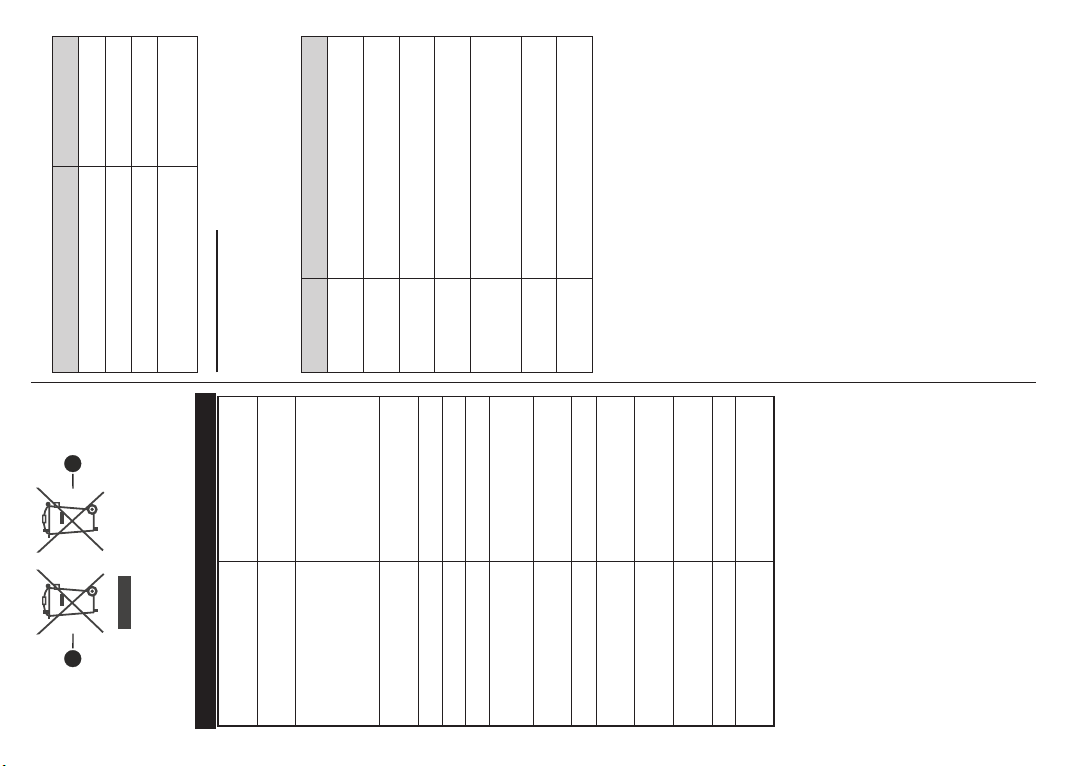
Disposal Information
such technology outside of this product is prohibited
without a license from Microsoft or an authorized
Microsoft subsidiary.
[European Union]
These symbols indicate that the electrical and
electronic equipment and the battery with this symbol
should not be disposed of as general household
waste at its end-of-life. Instead, the products should
be handed over to the applicable collection points for
the recycling of electrical and electronic equipment as
well as batteries for proper treatment, recovery and
recycling in accordance with your national legislation
and the Directive 2012/19/EU and 2013/56/EU.
By disposing of these products correctly, you will help
to conserve natural resources and will help to prevent
potential negative effects on the environment and
human health which could otherwise be caused by
inappropriate waste handling of these products.
For more information about collection points and
recycling of these products, please contact your
local municipal office, your household waste disposal
service or the shop where you purchased the product.
Penalties may be applicable for incorrect disposal of
this waste, in accordance with national legislation.
[Business users]
If you wish to dispose of this product, please contact
your supplier and check the terms and conditions of
the purchase contract.
[Other Countries outside the European Union]
These symbols are only valid in the European Union.
Contact your local authority to learn about disposal
and recycling.
The product and packaging should be taken to your
local collection point for recycling.
Some collection points accept products free of charge.
Note: The sign Pb below the symbol for batteries indicates
that this battery contains lead.
English - 7 -
1. Satellite
2. Aerial or cable
License Notification
The terms HDMI, HDMI High-Definition Multimedia
Interface, and the HDMI Logo are trademarks or
registered trademarks of HDMI Licensing Administrator,
Inc.
Manufactured under license from Dolby Laboratories.
Dolby, Dolby Audio, and the double-D symbol
are trademarks of Dolby Laboratories Licensing
Corporation .
YouTube and the YouTube logo are trademarks of
Google Inc.
For DTS patents, see http://patents.dts.com.
Manufactured under license from DTS Licensing
Limited. DTS, the Symbol, DTS and the Symbol
together, DTS-HD, and the DTS-HD logo are registered
trademarks or trademarks of DTS, Inc. in the United
States and/or other countries. © DTS, Inc. All Rights
Reserved.
For DTS patents, see http://patents.dts.com.
Manufactured under license from DTS Licensing
Limited. DTS, the Symbol, DTS and the Symbol
together, Virtual:X, and the DTS Virtual:X logo are
registered trademarks or trademarks of DTS, Inc. in
the United States and/or other countries. © DTS, Inc.
All Rights Reserved.
This product contains technology subject to certain
intellectual property rights of Microsoft. Use or
distribution of this technology outside of this product
is prohibited without the appropriate license(s) from
Microsoft.
Content owners use Microsoft PlayReady™ content
access technology to protect their intellectual property,
including copyrighted content. This device uses
PlayReady technology to access PlayReady-protected
content and/or WMDRM-protected content. If the
Page 53
< 200 mW
Frequency Ranges Max Output Power
2400 - 2483,5 MHz (CH1-CH13) < 100 mW
5150 - 5250 MHz (CH36 - CH48) < 200 mW
5250 - 5350 MHz (CH52 - CH64) < 200 mW
5470 - 5725 MHz (CH100 -
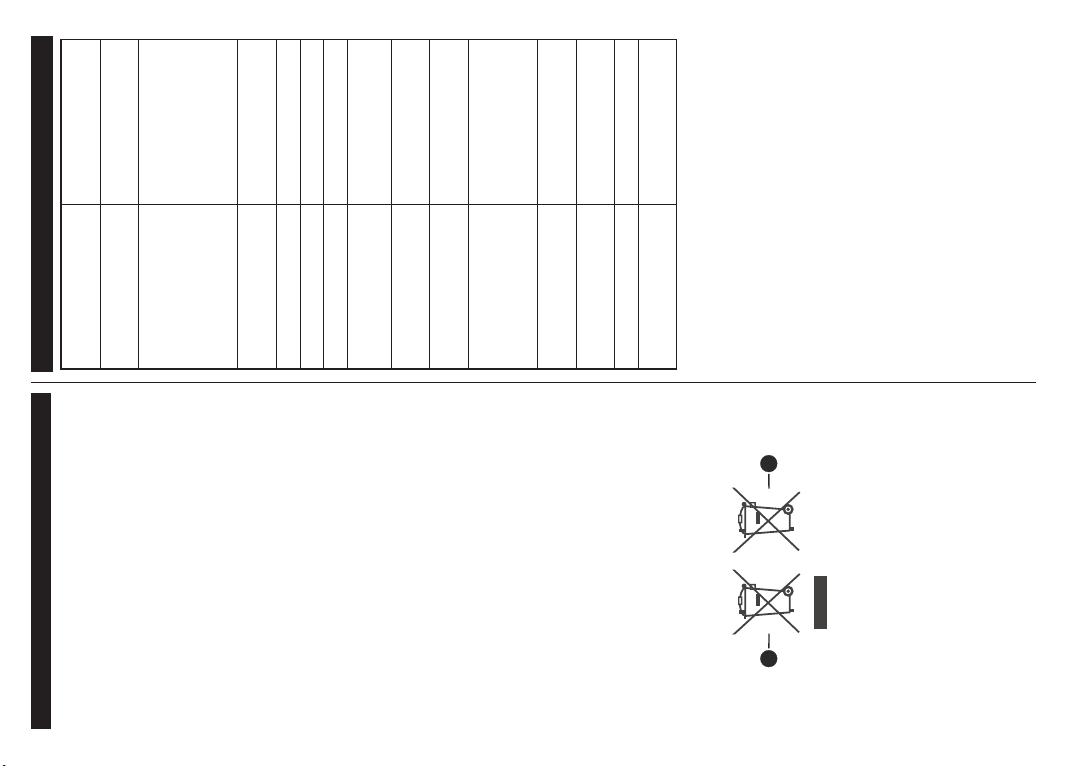
Wireless LAN Transmitter Specifications
1 2
CH140)
General authorization required for outdoor
use and public service
If used outside of own premises, general
authorization is required
In-door use only for 5470 MHz to 5725
MHz band
General authorization required for network
and service supply(not for spectrum)
Country Restriction
Bulgaria
Italy
Greece
Country Restrictions
This device is intended for home and office use in all
EU countries (and other countries following the rele-
vant EU directive) without any limitation except for the
countries mentioned below.
SECAM BG/DK
VHF (BAND I/III) - UHF
(BAND U) - HYPERBAND
TV(DVB-T-C-S) (DVB-T2, DVB-S2
PAL BG/I/DK
Luxembourg
11 000
Radio transmission is prohibited for the
geographical area within a radius of 20 km
from the centre of Ny-Ålesund
In-door use only
5 GHz band only for 5180 MHz-5320
MHz range
Norway
Russian Fe-
deration
Israel
DTS Virtual:X
DTS-HD
2x8
The requirements for any country may change at
any time. It’s recommended that user checks with
local authorities for the current status of their national
< 2
regulations for 5 GHz wireless LAN’s.
191 x 909 x 567
58/87 x 909 x 522
0ºC up to 40ºC, 85%
humidity max
English - 8 -
1. Products
2. Battery
Receiving Channels
TV Broadcasting
Specification
Digital Reception
Number of Preset
Channels
Channel Indicator On Screen Display
RF Aerial Input 75 Ohm (unbalanced)
Operating Voltage 220-240V AC, 50Hz.
Audio
Audio Output Power
(WRMS.) (10% THD)
Power Consumption (W) 75W
Networked Standby Mode
Power Consumption (W)
TV Dimensions DxLxH
(with stand) (mm)
TV Dimensions DxLxH
(without stand) (mm)
Display 40”
Operation temperature
and operation humidity
Page 54
27
28
a number or a letter in the text box on the screen.
alogue TV), displays and changes audio/subtitle
language and turns subtitles on or off (digital TV,
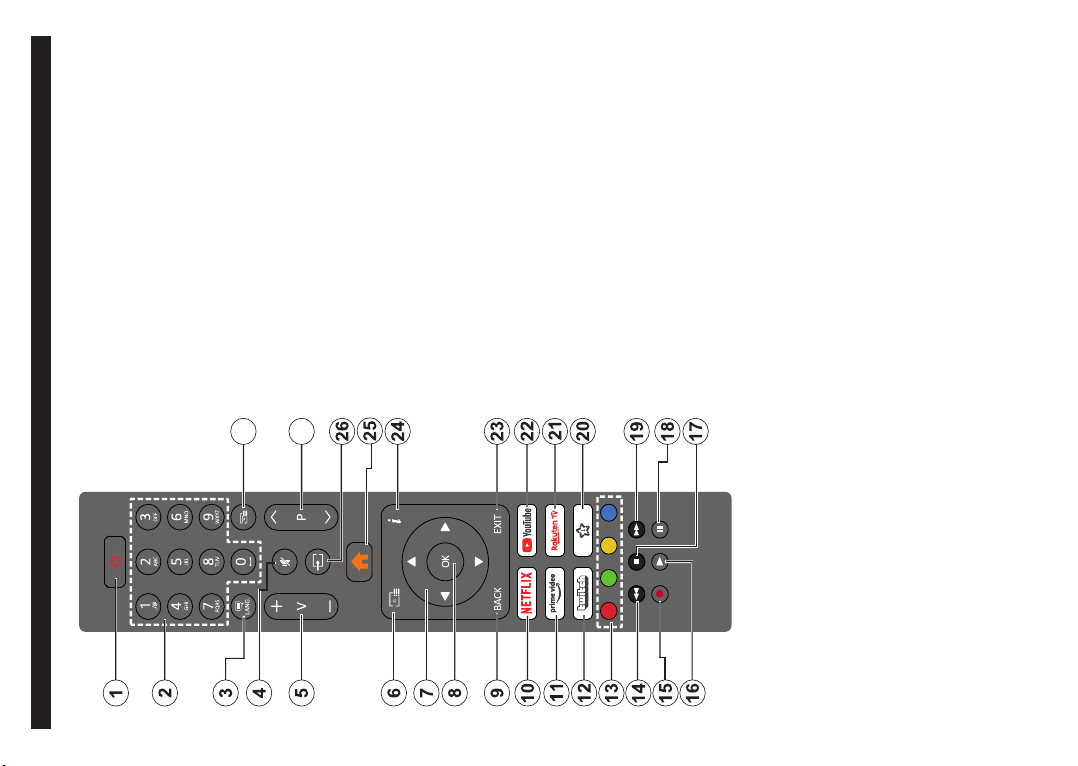
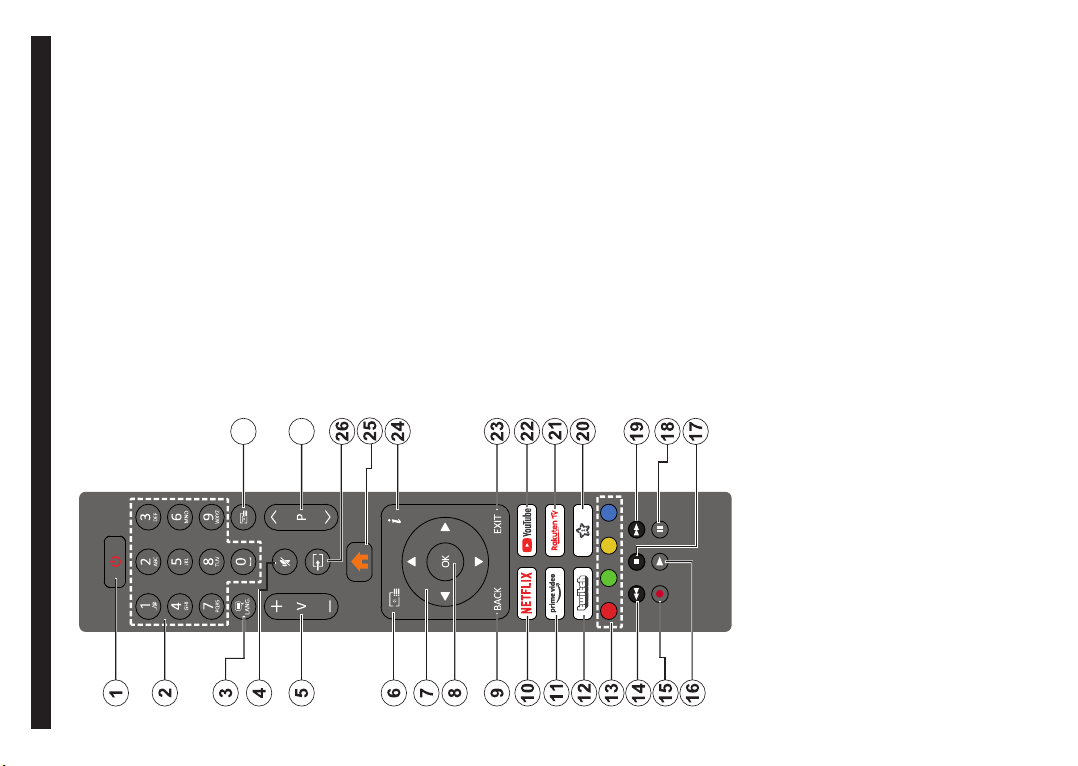
1. Standby: Switches On / Off the TV
2. Numeric buttons: Switches the channel, enters
3. Language: Switches among sound modes (an-
where available)
4. Mute: Completely turns off the volume of the TV
5. Volume +/-
content etc. and displays the subpages in TXT
mode when pressed Right or Left
6. Guide: Displays the electronic programme guide
7. Directional buttons: Helps navigate menus,
menu, opens index page (in TXT mode). Quickly
cycles between previous and current channels
TXT mode), views Channels menu (DTV mode)
8. OK: Confirms user selections, holds the page (in
or sources
application
9. Back/Return: Returns to previous screen, previous
10. Netflix: Launches the Netflix application
11. Prime Video: Launches the Amazon Prime Video
tions for coloured button functions
as movies
12. Twitch: Launches the Twitch application
13. Coloured Buttons: Follow the on-screen instruc-
14. Rewind: Moves frames backwards in media such
timeshift recording
such as movies
15. Record: Records programmes
16. Play: Starts to play selected media
17. Stop: Stops the media being played
18. Pause: Pauses the media being played, starts
19. Fast Forward: Moves frames forward in media
20. My Button 1 (*)
21. Rakuten TV: Launches the Rakuten TV application
22. YouTube: Launches the YouTube application
23. Exit: Closes and exits from displayed menus or
returns to previous screen
shows hidden information (reveal - in TXT mode)
sources
24. Info: Displays information about on-screen content,
25. Menu: Displays TV menu
26. Source: Shows available broadcast and content
27. Programme +/-
28. Text: Displays teletext (where available), press
again to superimpose the teletext over a normal
broadcast picture (mix)
29.
English - 9 -
Remote Control
(*) MY BUTTON 1:
This button may have default function depending on the
model. However you can set a special function to this
button by pressing on it for more than three seconds
when on a desired source, channel or application. A
confirmation message will be displayed on the screen.
Now the My Button 1 is associated with the selected
function.
Note that if you perform First Time Installation, My
Button 1 will return to its default function.
Page 55
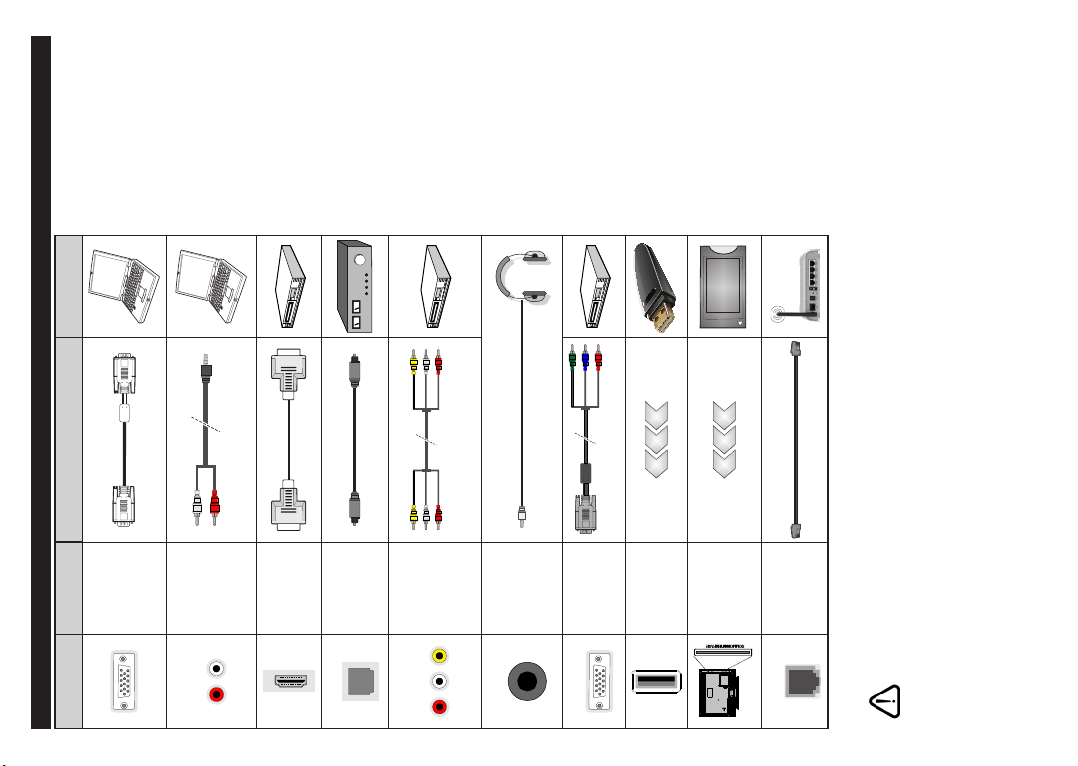
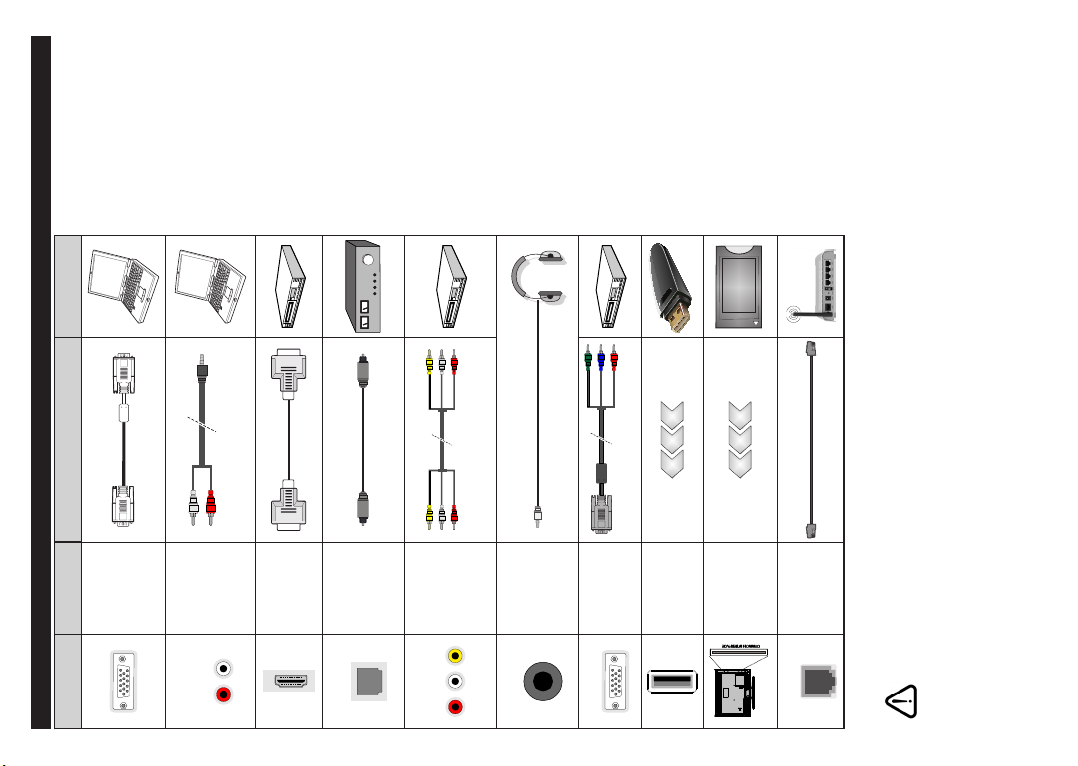
See the illustrations on the le ft
side. You can use YPbPr to VGA
cable to enable YPbPr signal via
VGA input. You cannot use VGA
and YPbPr at the same time. To
enable PC/YPbPr audio, you will
need to use the back audio inputs
with a YPbPr/PC audio cable for
audio connection. When using
the wall mounting kit (available
from a third party in the market,
if not supplied), we recommend
that you plug all your cables into
the back of the TV before mounting
on the wall. Insert or remove the
CI module only when the TV is
SWITCHED OFF. You should refer
to the module instruction manual
for details of the settings. The/
Each USB input of your TV supports
devices up to 500mA. Connecting
devices that have current value
above 500mA may damage your TV.
When connecting equipment using a
HDMI cable to your TV, to guarantee
sufficient immunity against parasitic
frequency radiation, you have to use
a high speed shielded (high grade)
HDMI cable with ferrites.
CAM
module
English - 10 -
VGA
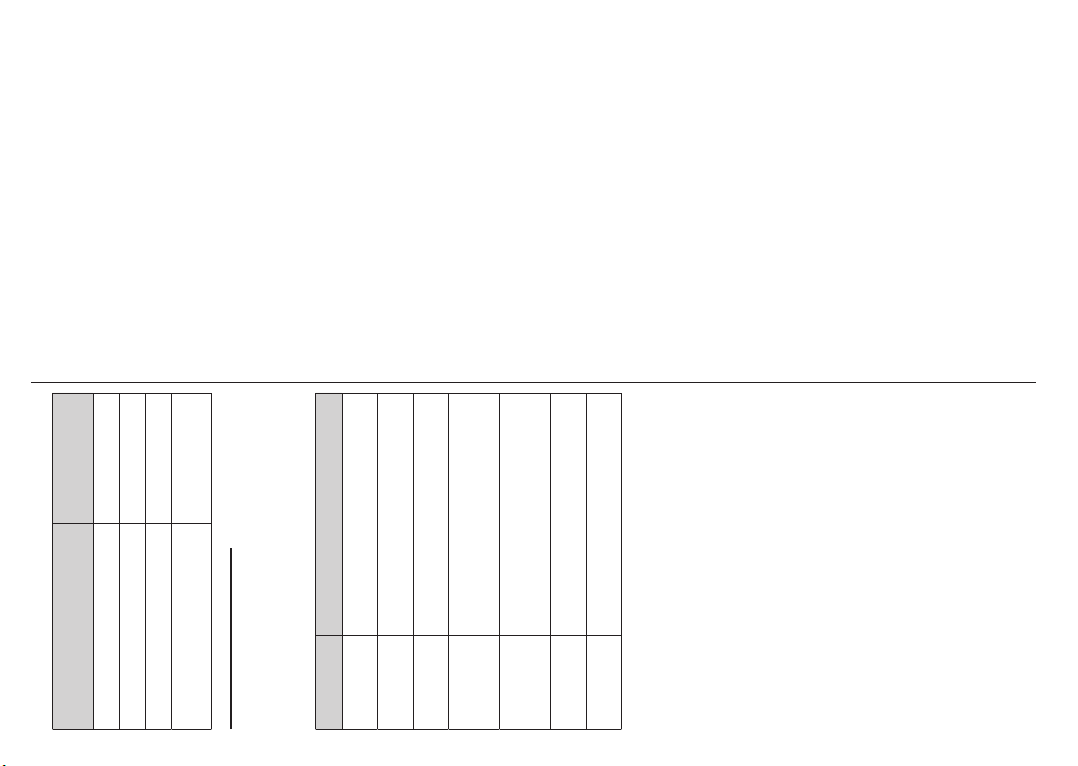
Connector Type Cables Device
Connections
Connection
(back)
YPbPr/PC Audio Cable
Audio
(back)
PC/YPbPr
Connection
AUDIO IN
HDMI
Connection
SPDIF
(side&back)
(Optical Out)
SPDIF
Connection
(back)
Audio Video Cable
PC to YPbPr Connection Cable
Connection
(back)
USB
(back)
Back AV
Connection
(Audio/Video)
BACK AV
(side)
Headphone
Connection
YPbPr Video
YPBPR
HEADPHONE
Connection
(side)
CI
(side)
Connection
LAN / Ethernet Cable
(back)
Ethernet
Connection
LAN
If you want to connect a device to the TV, make sure that both the TV and the device are turned off before making
any connection. After the connection is done, you can turn on the units and use them.
Page 56

preference for this setting can be changed later. Make
your selection and press OK to continue.
The picture mode selection screen will then be
your selection later using the Mode option in the
Settings>Picture menu.
Depending on the model of your TV and the country
selection Privacy Settings menu may appear at
this point. Using this menu you can set your privacy
privileges. Highlight a feature and use Left and
Right directional buttons to enable or disable. Read
the related explanations displayed on the screen
for each highlighted feature before making any
changes. You can use Programme +/- buttons to
scroll up and down to read the entire text. You will
be able to change your preferences at any time
later from the Settings>System>Privacy Settings
menu. If the Internet Connection option is disabled
displayed. In order for your TV to consume less
energy and be more environmentally friendly select
Natural and press OK to continue. You can change
Network/Internet Settings screen will be skipped
menu will be displayed. Please refer to Connectivity
Networked Standby Mode
Off
Next and press OK.
On next screen you can set broadcast types to be
searched, set your encrypted channel searching
and time zone (depending on the country selection)
preferences. Additionally you can set a broadcast
and not displayed. If you have any questions,
complaints or comments regarding this privacy
policy or its enforcement, please contact by email at
Next and press OK button on the remote
control to continue and the Network/Internet Settings
type as your favourite one. Priority will be given to the
selected broadcast type during the search process
and the channels of it will be listed on the top of the
channel list. When finished, highlight Next and press
OK to continue.
About Selecting Broadcast Type
To turn a search option for a broadcast type highlight
it and press OK. The checkbox next to the selected
option will be checked. To turn the search option off
clear the checkbox by pressing OK after moving the
focus on the desired broadcast type option.
Digital Aerial: If D. Aerial broadcast search option
is turned on, the TV will search for digital terrestrial
broadcasts after other initial settings are completed.
Digital Cable: If D. Cable broadcast search option
is turned on, the TV will search for digital cable
broadcasts after other initial settings are completed.
A message will be displayed before starting to search
English - 11 -
Switching On/Off
To Switch the TV On
Connect the power cord to a power source such as a
wall socket (220-240V AC, 50 Hz).
numeric button on the remote control.
To switch on the TV from standby mode either:
Press the Standby button, Programme +/- or a
Press the control button on the TV.
To Switch the TV Off
options menu will be displayed. The focus will be
on the Standby option. Press and hold the button
Press the Standby button on the remote control.
for about 2 seconds to activate this option. The icon
Press the control button on the TV, the function
colour of the option will change. Then press the
button once again, the TV will switch into standby
mode.
To power down the TV completely, unplug the
power cord from the mains socket.
Note: When the TV is switched into standby mode, the standby
LED can blink to indicate that features such as Standby Mode
Search, Over Air Download or Timer is active. The LED can
also blink when you switch on the TV from standby mode.
First Time Installation
When turned on for the first time, the language
selection screen is displayed. Select the desired
language and press OK. In the following steps of
the installation guide, set your preferences using the
directional buttons and OK button.
After the language selection, you will be asked whether
you want to change accessibility settings. Highlight
Yes and press OK to change. Refer to System Menu
Content section for detailed information on available
options.
Set your country preference on the next screen.
Depending on the Country selection you may be asked
to set and confirm a PIN at this point. The selected PIN
cannot be 0000. You have to enter it if you are asked
to enter a PIN for any menu operation later.
Note: M7(*) operator type will be defined according to the
Language and Country selections that you made in the First
Time Installation.
(*) M7 is a digital satellite service provider.
You can activate Store Mode option in the next step.
This option will configure your TV’s settings for store
environment and depending on the TV model being
used, the supported features of it may be displayed
on the side of the screen as an info banner or the pre-
installed video file may be played back. This option
is intended only for store use. It is recommended to
select Home Mode for home use. This option will be
available in Settings>System>More menu and your
Page 57

receivers and a single satellite cable system, select
this antenna type. Press OK to continue. Configure
settings by following instructions on the next screen.
Press OK to scan for services.
and a DiSEqC switch, select this antenna type. Then
set the DiSEqC version and press OK
You can set up to four satellites (if available) for
version v1.0 and sixteen satellites for version v1.1
on the next screen. Press OK button to scan the first
• Single Satellite Cable: If you have multiple
asking if you want to perform cable network search. If
you select Yes and press OK you can select Network
or set values such as Frequency, Network ID and
Search Step on the next screen. If you select No
and press OK you can set Start Frequency, Stop
• DiSEqC switch: If you have multiple satellite dishes
Frequency and Search Step on the next screen.
When finished, highlight Next and press OK button
to continue.
satellite in the list.
Analogue: If Analogue broadcast search option is
turned on, the TV will search for analogue broadcasts
after other initial settings are completed.
After the initial settings are completed TV will start
to search for available broadcasts of the selected
broadcast types.
Note: Searching duration will change depending on the
selected Search Step.
Satellite: If Satellite broadcast search option is turned
on, the TV will search for digital satellite broadcasts
after other initial settings are completed. Before
satellite search is performed some settings should
be made. A menu will be displayed where you can
select to start an M7 operator installation or a standard
installation. To start an M7 operator installation set the
Install Type as Operator and the Satellite Operator
as the related M7 operator. Then highlight Preferred
While the search continues current scan results will
be displayed at the bottom of the screen. After all the
available stations are stored, Channels menu will be
displayed. You can edit the channel list according to
your preferences using the Edit tab options or press
the Menu button to quit and watch TV.
While the search continues a message may appear,
asking whether you want to sort channels according
to the LCN(*). Select Yes and press OK to confirm.
(*) LCN is the Logical Channel Number system that organizes
available broadcasts in accordance with a recognizable
channel number sequence (if available).
Notes:
To search for M7 channels after the First Time Installation,
you should perform the first time installation again. Or press the
Menu button and enter the Settings>Installation>Automatic
channel scan>Satellite menu. Then follow the same steps
mentioned above in the satellite section.
Do not turn off the TV while initializing first time installation.
Scan option and set as Automatic channel scan and
press OK to start the automatic search. These options
can be preselected depending on the Language
and Country selections that you made in the earlier
steps of the first time installation process. You may be
asked to select HD/SD or country specific channel list
according to your M7 operator type. Select one and
press OK to proceed.
Wait till the scan is finished. Now the list has been
installed.
While performing an M7 operator installation, if you
want to use the satellite installation parameters that
differ from the default settings select the Preferred
Scan option as Manual channel scan and press the
OK button to proceed. Antenna Type menu will be
displayed next. After selecting the antenna type and
the desired satellite in the following steps press OK
in order to change the satellite installation parameters
in the sub-menu.
First Time Installation
Note that, some options may not be available depending on
the country selection.
When turned on for the first time, the language
selection screen is displayed. Select the desired
language and press OK. In the following steps of
the installation guide, set your preferences using the
directional buttons and OK button.
After the language selection, you will be asked whether
you want to change accessibility settings. Highlight
Yes and press OK to change. Refer to System Menu
Content section for detailed information on available
options.
Set your country preference on the next screen.
Depending on the Country selection you may be asked
to set and confirm a PIN at this point. The selected PIN
cannot be 0000. You have to enter it if you are asked
to enter a PIN for any menu operation later.
satellite dish, select this antenna type. Press OK to
Select an available satellite on the next
In order to search for satellite channels other than
M7 channels you should start a standard installation.
Select the Install Type as Standard and press the
OK button to proceed. Antenna Type menu will be
displayed next.
There are three options for antenna selection. You can
select Antenna Type as Direct, Single Satellite Cable
or DiSEqC switch by using Left or Right buttons.
After selecting your antenna type press OK to see
the options to proceed. Continue, Transponder list
and Configure LNB options will be available. You can
change the transponder and LNB settings using the
related menu options.
screen and press OK to scan for services.
• Direct: If you have a single receiver and a direct
English - 12 -
Page 58

Digital Aerial: If D. Aerial broadcast search option
is turned on, the TV will search for digital terrestrial
broadcasts after other initial settings are completed.
Digital Cable: If D. Cable broadcast search option
is turned on, the TV will search for digital cable
broadcasts after other initial settings are completed.
A message will be displayed before starting to search
asking if you want to perform cable network search. If
you select Yes and press OK you can select Network
You can activate Store Mode option in the next step.
This option will configure your TV’s settings for store
environment and depending on the TV model being
used, the supported features of it may be displayed on
the screen as an info banner. This option is intended
only for store use. It is recommended to select Home
Mode for home use. This option will be available in
Settings>System>More menu and can be turned off/
on later. Make your selection and press OK to continue.
Frequency and Search Step on the next screen.
or set values such as Frequency, Network ID and
Search Step on the next screen. If you select No
and press OK you can set Start Frequency, Stop
When finished, highlight Next and press OK button
to continue.
Note: Searching duration will change depending on the
The picture mode selection screen will then be
displayed. In order for your TV to consume less
energy and be more environmentally friendly select
Natural and press OK to continue. You can change
your selection later using the Mode option in the
Settings>Picture menu.
Depending on the model of your TV and the country
satellite dish, select this antenna type. Press OK to
continue. Select an available satellite on the next
selected Search Step.
Satellite: If Satellite broadcast search option is turned
on, the TV will search for digital satellite broadcasts
after other initial settings are completed. Before
satellite search is performed some settings should be
made. Antenna Type menu will be displayed first. You
can select Antenna Type as Direct, Single Satellite
Cable or DiSEqC switch by using Left or Right
buttons. After selecting your antenna type press OK to
see the options to proceed. Continue, Transponder
list and Configure LNB options will be available. You
can change the transponder and LNB settings using
the related menu options.
selection Privacy Settings menu may appear at
this point. Using this menu you can set your privacy
privileges. Highlight a feature and use Left and
Right directional buttons to enable or disable. Read
the related explanations displayed on the screen
for each highlighted feature before making any
changes. You can use Programme +/- buttons to
scroll up and down to read the entire text. You will
be able to change your preferences at any time
later from the Settings>System>Privacy Settings
menu. If the Internet Connection option is disabled
Network/Internet Settings screen will be skipped
and not displayed. If you have any questions,
screen and press OK to scan for services.
• Direct: If you have a single receiver and a direct
complaints or comments regarding this privacy
policy or its enforcement, please contact by email at
Highlight Next and press OK button on the remote
receivers and a single satellite cable system, select
this antenna type. Press OK to continue. Configure
settings by following instructions on the next screen.
Press OK to scan for services.
and a DiSEqC switch, select this antenna type. Then
set the DiSEqC version and press OK to continue.
You can set up to four satellites (if available) for
• Single Satellite Cable: If you have multiple
control to continue and the Network/Internet Settings
menu will be displayed. Please refer to Connectivity
• DiSEqC switch: If you have multiple satellite dishes
section to configure a wired or a wireless connection.
If you want your TV to consume less power in standby
mode, you can disable the Networked Standby
Mode option by setting it as Off. After the settings
version v1.0 and sixteen satellites for version v1.1
are completed highlight Next and press OK button
to continue.
On next screen you can set broadcast types to be
searched, set your encrypted channel searching
on the next screen. Press OK button to scan the first
satellite in the list.
Analogue: If Analogue broadcast search option is
turned on, the TV will search for analogue broadcasts
after other initial settings are completed.
After the initial settings are completed TV will start
to search for available broadcasts of the selected
broadcast types.
displayed. You can edit the channel list according to
While the search continues current scan results will
be displayed at the bottom of the screen. After all the
available stations are stored, Channels menu will be
English - 13 -
and time zone (depending on the country selection)
preferences. Additionally you can set a broadcast
type as your favourite one. Priority will be given to the
selected broadcast type during the search process
and the channels of it will be listed on the top of the
channel list. When finished, highlight Next and press
OK to continue.
About Selecting Broadcast Type
To turn a search option for a broadcast type highlight
it and press OK. The checkbox next to the selected
option will be checked. To turn the search option off
clear the checkbox by pressing OK after moving the
focus on the desired broadcast type option.
Page 59

You can use USB hubs with your TV’s USB inputs.
External power supplied USB hubs are recommended
in such a case.
Note: When viewing image files the Media Browser menu
can only display 1000 image files stored on the connected
USB device.
USB Recording
Recording a Programme
IMPORTANT: When using a new USB hard disk
drive, it is recommended that you first format the
disk using your TV’s Format Disk option in the
TV>Recordings>Settings menu.
To record a programme, you should first connect a USB
disk to your TV while the TV is switched off. You should
then switch on the TV to enable the recording feature.
It is recommended to use the TV’s USB input(s)
directly, if you are going to connect a USB hard disk.
To use recording your USB drive should have 2 GB free
space and be USB 2.0 compatible. If the USB drive
is not compatible an error message will be displayed.
To record long duration programmes such as movies, it
is recommended to use USB Hard disk drives (HDD’s).
Recorded programmes are saved into the connected
USB disk. If desired, you can store/copy recordings
onto a computer; however, these files will not be
available to be played on a computer. You can play
the recordings only via your TV.
Lip Sync delay may occur during the timeshifting. Radio
record is supported. The TV can record programmes
up to ten hours.
Recorded programmes are split into 4GB partitions.
If the writing speed of the connected USB disk is not
sufficient, the recording may fail and the timeshifting
feature may not be available.
It is recommended to use USB hard disk drives for
recording HD programmes.
Do not pull out the USB/HDD during a recording. This
may harm the connected USB/HDD.
Multipartition support is available. A maximum of two
different partitions are supported. The first partition
of the USB disk is used for USB Recording ready
features. It also must be formatted as the primary
partition to be used for the USB Recording ready
features.
Some stream packets may not be recorded because
of signal problems, as a result sometimes videos may
freeze during playback.
Record, Play, Pause, Display (for playlist dialogue) keys
can not be used when teletext is on. If a recording starts
from timer when teletext is on, teletext is automatically
turned off. Also teletext usage is disabled when there
is an ongoing recording or playback.
While recording a programme in the background you
can use menu options, switch to another source or use
Media Browser functions, such as viewing pictures,
English - 14 -
your preferences using the Edit tab options or press
the Menu button to quit and watch TV.
While the search continues a message may appear,
asking whether you want to sort channels according
to the LCN(*). Select Yes and press OK to confirm.
(*) LCN is the Logical Channel Number system that organizes
available broadcasts in accordance with a recognizable
channel number sequence (if available).
Using Satellite Channel Table Feature
Note: Do not turn off the TV while initializing first time
installation. Note that, some options may not be available
depending on the country selection.
You can perform these operations using the Set-
tings>Installation>Satellite Settings>Satellite
Channel Table menu. There are two options regarding
to this feature.
You can download or upload satellite channel table
data. In order to perform these functions a USB device
must be connected to the TV.
You can upload current services and related satellites
& transponders in TV, to a USB device.
Additionally you can download one of the satellite
channel table files stored in USB device, to the TV.
When you select one of these files, all services and
related satellites and transponders in the selected
file will be stored in the TV. If there are any installed
terrestrial, cable and/or analogue services, they will
be kept and only satellite services will be removed.
Afterwards, check your antenna settings and make
changes if necessary. An error message stating “No
Signal” may be displayed if the antenna settings are
Media Playback via USB Input
not configured properly.
You can connect 2.5” and 3.5” inch (HDD with external power
supply) external hard disk drives or USB memory stick to your
TV by using the USB inputs of the TV.
IMPORTANT! Back up the files on your storage devices
before connecting them to the TV. Manufacturer will
not be responsible for any file damage or data loss.
Certain types of USB devices (e.g. MP3 Players)
or USB hard disk drives/memory sticks may not be
compatible with this TV. The TV supports FAT32 and
NTFS disk formatting but recording will not be available
with NTFS formatted disks.
While formatting USB hard drives which have
more than 1TB (Tera Byte) storage space you may
experience some problems in the formatting process.
Wait a little while before each plugging and unplugging
as the player may still be reading files. Failure to do
so may cause physical damage to the USB player
and the USB device itself. Do not pull out your drive
while playing a file.
Page 60

Oldest, Longest or Shortest. If it is not set to None,
you can set the Unplayed option as Included or
Excluded. These options determine the preferences
for deleting the recordings in order to obtain more
storage space for ongoing records.
Hard disk information: You can view detailed
information about the USB storage device connected
to your TV. Highlight and press OK to see and press
Back/Return to close.
Format Disk: If you want to delete all files on the
connected USB storage device and convert the disk
format to FAT32, you can use this option. Press OK
button while the Format Disk option is highlighted. A
menu will appear on the screen, requiring you to enter
have enough free space otherwise instant recording
may not be possible.
Auto discard: You can set the Discard type as None,
playing video and music files, and even play back the
ongoing recording.
Timeshift Recording
Press Pause button while watching a broadcast to
activate timeshifting mode. In timeshifting mode, the
programme is paused and simultaneously recorded to
the connected USB disk.
Press Play button again to resume the paused
programme from where you stopped. Press the Stop
button to stop timeshift recording and return to the
live broadcast.
Timeshift cannot be used while in radio mode.
You can use the timeshift rewind feature after resuming
normal playback or fast forward option.
the PIN(*). After you enter the PIN, a confirmation
Instant Recording
Press Record button to start recording an event
instantly while watching a programme. Press Stop
button to cancel instant recording.
message will be displayed. Select Yes and press OK
to start formatting the USB storage device. Select No
and press OK to cancel.
have defined the PIN(is requested depending on the country
selection) during the First Time Installation use the PIN that
you have defined.
IMPORTANT: Formatting your USB drive will erase
ALL the data on it and it’s file system will be converted
to FAT32. In most cases operation errors will be fixed
after a format but you will lose ALL your data.
If “USB disk writing speed too slow to record”
message is displayed on the screen while starting a
recording, try restarting the recording. If you still get
the same error, it is possible that your USB disk does
not meet the speed requirements. Try connecting
(*) Default PIN could have been set to 0000 or 1234. If you
You can not switch broadcasts during the recording
mode. While recording a programme or during the
timeshifting, a warning message appears on the screen
if your USB device speed is not sufficient.
Watching Recorded Programmes
Select Recordings from the TV menu. Select a
recorded item from the list (if previously recorded).
Press the OK button to view the Options menu. Select
an option then press OK button.
Note: Viewing main menu and menu items will not be available
during the playback.
Press the Stop button to stop a playback and return
another USB disk.
to the Recordings.
Slow Forward
If you press Pause button while watching recorded
Media Browser
You can play back music and movie files and display
photo files stored on a USB storage device by
connecting it to your TV. Connect a USB storage device
to one of the USB inputs located on the side of the TV.
After connecting a USB storage device to your TV, the
Sources bar will be displayed with USBx highlighted.
programmes, the slow forward feature will be available.
You can use Fast Forward button to slow forward.
Pressing Fast Forward button consecutively will
change slow forwarding speed.
Recording Settings
You can configure your recording preferences using the
Settings tab in the TV>Recordings menu. Highlight
Press OK, Media Browser menu will be displayed on
to display or play it back. You can access the content
of the connected USB device any time later from the
Sources menu. You can also press the Source button
the screen. Select the file of your choice and press OK
on the remote and then select your USB storage device
from the list of sources.
You can set your media browser preferences by using
the Settings menu. Settings menu can be accessed
via the information bar which is displayed on the
bottom of the screen while playing back a video or
an audio file or displaying a picture file. Press the
Info button if the information bar has disappeared,
English - 15 -
Settings tab by using Left or Right button and press
OK. Then select the desired item in the sub-menu and
set by using Left or Right button.
Start early: You can set recording timer’s starting time
to start earlier by using this setting.
End late: You can set recording timer’s end time to
end later by using this setting.
Max Timeshift: This setting allows you to set the ma-
ximum duration for the timeshift recording. Available
options are approximate and the actual recording time
may change in practice depending on the broadcast.
The reserved and free storage space values will
change according to this setting. Make sure that you
Page 61
CEC
This function allows to control the CEC-enabled
devices, that are connected through HDMI ports by
using the remote control of the TV.
The CEC option in the Settings>System>Device
Settings menu should be set as Enabled at first. Press
the Source button and select the HDMI input of the
connected CEC device from the Sources List menu.
When new CEC source device is connected, it will be
listed in source menu with its own name instead of
the connected HDMI ports name(such as DVD Player,
Recorder 1 etc.).
The TV remote is automatically able to perform the
main functions after the connected HDMI source has
been selected. To terminate this operation and control
the TV via the remote again, press and hold the “0-
Zero” button on the remote control for 3 seconds.
All files in the list will be
continuously played in
original order
The same file will be
played continuously
(repeat)
All files in the list will be
Loop/Shuffle Mode Operation
Start playback and activate
highlight the gear wheel symbol positioned on the
right side of the information bar and press OK. Picture
Settings, Sound Settings, Media Browser Settings
and Options menus may be available depending on
the media file type and the model of your TV and its
features. The content of these menus may also differ
according to the type of the currently open media file.
Only Sound Settings menu will be available while
playing back audio files.
Start playback and activate
You can disable the CEC functionality by setting the
related option under the Settings>System>Device
Settings menu accordingly.
The TV supports ARC (Audio Return Channel). This
feature is an audio link meant to replace other cables
between the TV and an audio system (A/V receiver or
speaker system).
played once in random
order
All files in the list will be
continuously played in
the same random order
,
Start playback and activate
Start playback and activate
To use the functions on the information bar highlight the
symbol of the function and press OK. To change the
When ARC is active, the TV will mute its other audio
outputs, except the headphone jack, automatically
and volume control buttons are directed to connected
audio device. To activate ARC set the Sound Output
option in the Settings>Sound menu as HDMI ARC.
Note: ARC is supported only via the HDMI2 input.
System Audio Control
Allows an Audio Amplifier/Receiver to be used with the
TV. The volume can be controlled using the remote
control of the TV. To activate this feature set the
Sound Output option in the Settings>Sound menu
as HDMI ARC. When HDMI ARC option is selected,
CEC option will be set as Enabled automatically, if it
is not already set. The TV speakers will be muted and
the sound of the watched source will be provided from
the connected sound system.
Note: The audio device should support System Audio Control
status of a function highlight the symbol of the function
and press OK as much as needed. If the symbol is
marked with a red cross, that means it is deactivated.
Custom Boot Up Logo
You can personalize your TV and see your favourite
image or photo on the screen each time your TV boots
up. To do this, copy your favourite image files into a
USB disk and open them in the Media Browser. Select
USB input from the Sources menu and press OK.
When you have chosen the desired image, highlight
it and press OK to view it in full screen. Press the
Info button, highlight the gear wheel symbol on the
information bar and press OK. Select Options and
press OK to enter. Set Boot Logo option will be
available. Highlight it and press OK again to choose the
image as custom boot logo. A confirmation message
will be displayed. Select Yes and press OK again. If
E-Manual
feature.
You can find instructions for your TV’s features in the
the image is suitable(*) you will see it on the screen
during the TV’s next boot up.
Note: If you perform a First Time Installation the TV will
E-Manual.
To access the E-Manual, enter Settings menu, select
Manuals and press OK. For quick access press Menu
button and then Info button.
By using the directional buttons select a desired
category. Every category includes different topics.
Select a topic and press OK to read instructions.
To close the E-Manual screen press the Exit or Menu
button.
Note: Depending on model, your TV may not support this
function. The contents of the E-Manual may vary according
to the model.
return to using the default logo, if any.
(*) Images should be in jpeg file formats. Only files with sizes
no greater then 4MB are supported. FollowMe TV
With your mobile device you can stream the current
broadcast from your smart TV using the FollowMe
TV feature. Install the appropriate Smart Center
application to your mobile device. Start the application.
For further information on using this feature refer to
the instructions of the application you use.
Note: Depending on model, your TV may not support this
function. The application may not be compatible with all mobile
devices. UHD (4K, Ultra HD) channels are not supported and
both of the devices must be connected to the same network.
English - 16 -
Page 62
Picture Menu Content
You can change the picture mode to suit your preference or requirements. Picture mode can
Contrast
Brightness
Sharpness
Colour
Contrast
Skin Tone
Colour Shift
be set to one of these options: Cinema, Game(optional), Sports, Dynamic and Natural.
Adjusts the light and dark values on the screen.
Settings Menu Content
Mode
Screen Off or Off.
Adjusts the brightness values on the screen.
Sets the sharpness value for the objects displayed on the screen.
Note: Available options may differ depending on the selected Mode.
Sets the colour value, adjusting the colours.
For setting the Energy Saving to Custom, Minimum, Medium, Maximum, Auto,
This setting controls the backlight level. The backlight function will be inactive if the
Energy Saving is set to an option other than Custom.
Sets the desired image size format.
This option may be available depending on the Picture Zoom setting. Highlight and
press OK, then use directional buttons to shift the picture upwards or downwards.
Appears only when the input source is set to VGA/PC.
If the image is not centered in VGA mode use this option to automatically adjust the
position of the image. Press OK to start the auto adjustment.
Backlight
Energy Saving
Picture Shift
Picture Zoom
PC Position
Autoposition
This item shifts the image horizontally to the right hand side or left hand side of the screen.
This item shifts the image vertically towards the top or bottom of the screen.
Dot Clock adjustments correct the interference that appear as vertical banding in dot
H Position
V Position
intensive presentations like spreadsheets or paragraphs or text in smaller fonts.
Depending on the input source(computer etc.) you may see a hazy or noisy picture on
the screen. You can use phase to get a clearer picture by trial and error.
You can change the dynamic contrast ratio to desired value.
Sets the desired colour temperature value. Cool, Normal, Warm and Custom options
are available.
If the Colour Temp option is set as Custom, this setting will be available. Increase the
‘warmth’ or ‘coolness’ of the picture by pressing Left or Right buttons.
White colour enhancement function that makes white colour more cooler in order to
make more bright picture. Set as On to enable.
Low, Medium, High and Off options are available. While Micro Dimming is active, it
will enhance contrast locally for each defined zone.
Low, Medium, High and Off options are available. If the signal is weak and the picture
is noisy, use the Noise Reduction setting to reduce the amount of noise.
Films are recorded at a different number of frames per second to normal television programmes.
Turn this feature on when you are watching films to see the fast motion scenes clearly.
Skin tone can be changed between -5 and 5.
Adjust the desired colour tone.
Opens colour tuner settings. Set the Colour Tuner as enabled to adjust the Hue, Colour
and Brightness values manually.
White Point
Dot Clock
Phase
Dynamic
Colour Temp
Blue Stretch
Noise Reduction
Micro Dimming
Film Mode
Colour Tuner
Advanced Settings
English - 17 -
Page 63

You can use this option to set the range of colours displayed on your TV screen. When
set as On, colours are set according to the source signal. When set as Off, the TV’s
maximum colour capacity is used by default (recommended option).
Note: This option may not be available depending on the TV model and its features.
While watching from a HDMI source, this feature will be visible. You can use this feature
to enhance blackness in the picture.
Resets the picture settings to factory default settings (except Game mode).
Gamut Mapping
HDMI Full Range
Reset
While in VGA (PC) mode, some items in Picture menu will be unavailable. Instead, VGA mode settings will be added to the Picture menu
while in PC mode.
English - 18 -
Page 64
Sound Menu Content
Smart, Movie, Music, News and Off options will be available. Set as Off to disable.
Note: Some items in Sound menu will be grayed out and unavailable if set to an option other than Off.
Settings of some other options may also change depending on the current settings.
This feature will enhance your sound experience by providing a virtualisation of surround
speakers through your TV’s speakers. You can select one of the predefined sound
modes. Music, Sports,Cinema and Off options will be available. Set as Off to disable.
Dolby Audio
DTS Virtual:X
Note: Some items in Sound menu will be grayed out and unavailable if set to an option other than Off.
Settings of some other options may also change depending on the current settings.
Sets the sound output preference. TV, S/PDIF, HDMI ARC, Headphone Only and
Lineout options will be available. There will be no sound output except through the
selected option and the headphone jack.
When you connect an external amplifier to your TV using the headphone jack, you can
select this option as Lineout. If you have connected headphones to the TV, set this
option as Headphone Only. Please ensure before using headphones that this menu
item is set to Headphone Only. If it is set to Lineout, the output from the headphone
socket will be set to maximum which could damage your hearing.
If HDMI ARC option is selected, CEC feature will be enabled.
Note: Depending on the selected option some items in Sound menu will appear as grayed out and will be
unavailable.
Sets the sound to obtain fixed output level between programmes.
If the Dolby Audio menu item is set to an option other than Off the AVL setting options
will change. Auto, Night, Normal and Off options will be available. In Auto mode the
TV will switch to Normal or Night mode automatically according to the current time
information. If no time information is available this option will always function as Normal.
When the TV switches to Night mode for the first time after setting this option as Auto,
an information bar will pop up on the screen.
Please note that compared to Normal mode Night mode provides more aggressive
Sound Output
AVL (Automatic
Volume Limiting)
dynamic compression control which is suitable for silent environments.
Selects the equalizer mode. Custom settings can be made only when in User mode.
Enables or disables the Dynamic Bass.
Dynamic Range Control provides gain adjustment of the source to maintain suitable
audible range at both low and high playback levels. Enable or disable the DTS DRC
by setting as On or Off.
You can select a sound mode (If the viewed channel supports).
Sets digital out audio type.
Sets headphone volume. This option will not be available if the Sound Output option
is set as Lineout.
Please ensure before using headphones that the headphone volume is set to a low
level, to prevent damage to your hearing.
Sets sound balance. This feature will be activated if Sound Output option is set as
TV or Headphone Only. Balance item adjusts the balance level of the TV speakers
and headphone together.
Resets some of the sound settings to factory defaults.
Equalizer
Dynamic Bass
DTS DRC
Sound Mode
Digital Out
Headphone
Balance
Reset
Advanced Settings
English - 19 -
Page 65
Network Menu Content
Network Type
Disable the network connection or change the connection type.
Scan Wireless
Networks
Advanced Settings
Mode
Start a search for wireless networks. This option will be available if the Network Type
is set as Wireless Device.
To disconnect from a wireless network and delete your saved wireless network profile (if
previously saved), highlight this option and press OK. This option will not be available
if you did not connect to a wireless network. Refer to Connectivity section for more
information.
If your modem/router device has WPS, you can directly connect to it using this option.
Highlight this option and press OK. Go to your modem/router device and press the
WPS button on it to make the connection. This option will be available if the Network
Type is set as Wireless Device.
Start a speed test to check your connection bandwidth. The result will be displayed on
the screen when finished.
Change the IP and DNS configurations of your TV.
Enable or disable this feature by setting it as On or Off.
English - 20 -
Disconnect
Press WPS on your
wifi router
Internet Speed Test
Networked Standby
Note: For detailed information on the options of this menu refer to the Connectivity section.
Page 66
Installation Menu Content
Displays automatic tuning options. D. Aerial: Searches and stores aerial DVB stations.
Network
D. Cable: Searches and stores cable DVB stations. Analogue: Searches and stores
analogue stations. Satellite:
This feature can be used for direct broadcast entry.
Searches for the linked channels in the broadcast system. D. Aerial: Searches for aerial
network channels. D. Cable: Searches for cable network channels. Satellite: Searches
Automatic channel
scan (Retune)
Manual channel
scan
Network channel
scan
option is set to Denmark, Sweden, Norway or Finland.
This setting allows you to select only the broadcasts within the selected network to be
listed in the channel list. This feature is available only for the country option of Norway.
You can use this menu item to monitor signal related information such as signal level/
for satellite network channels.
You can use this setting for fine tuning analogue channels. This feature is not available
if no analogue channels are stored and if currently watched channel is not an analogue
channel.
Displays satellite settings. Satellite list: Displays available satellites. You can Add,
Delete satellites or Edit satellite settings on the list. Antenna installation: You can
change satellite antenna settings and/or start a satellite scan.
Displays installation settings menu. Standby Mode Search (*): Your TV will search for
new or missing channels while in standby. Any new found broadcasts will be shown.
Dynamic Channel Update(*): If this option is set as Enabled, the changes on the
broadcasts such as frequency, channel name, subtitle language etc., will be applied
automatically while watching.
(*) Availability depends on model.
Using this menu, you can edit the main and backup home transponder parameters,
including the Pid of the related M7 operator, which are used to download the channel
list. Set your preferences and press the Green button to save the settings. Then start
an M7 operator installation using the Automatic channel scan>Satellite menu.
(*) This menu option will only be available if an M7 operator installation is performed.
Use this setting to clear channels stored. This setting is visible only when the Country
Analogue fine tune
Satellite Settings
Installation Settings
(optional)
Setup Home
Transponder (*)
Clear Service List
quality, network name,etc. for available frequencies.
Select Active
Signal Information
English - 21 -
Deletes all stored channels and settings, resets TV to factory settings.
First time installation
Page 67
System Menu Content
Accessibility
Text, Yellow Text and Off options will be available.
Hard of Hearing
with
Language
Language
Conditional Access
kies
Enables any special feature sent from the broadcaster.
Displays accessibility options of the TV.
Increase the contrast of the menu options and texts to make them easier to read. White
A narration track will be played for the blind or visually impaired audience. Press OK to
High Contrast
see all available Audio Description menu options. This feature is available only if the
broadcaster supports it.
Note: Audio description sound feature is not available in recording or time shifting mode.
This feature provides sound post-processing options for speech-gated dialogue
enhancement. Off, Low, Medium and High options will be available. Set according
your preference.
Note: This feature has an effect only if input audio format is AC-4 and this effect only applies to TV loudspeaker
output.
Default preference of spoken subtitles is selected with this setting option. To make spoken
subtitles priority higher than normal ones, this option should be set to On.
This option may not be available depending on the model of your TV and is only visible
when the source is set to TV.
Enables the use of button combinations to magnify the screen. On and Off options
will be available. Set as On to enable.
Magnification support will be enabled or disabled with long-press of the numeric button
5. First top-left quadrant of the screen will be zoomed. After the magnification support
is enabled, long-press of the numeric buttons 2, 4, 6, 8 will move the zoomed area to
up, left, right and down.
Minimap is enabled and deactivated by default. It will be activated when Magnification
Audio
Description
Dialogue
Enhancement
Spoken Subtitles
Magnification
feature is enabled. With this option, you can prevent magnification feature from displaying
the minimap.
This option enables the key click sound on TV menu. Set to On to enable.
Minimap
Click Sound
If this option is enabled and if any electronic programme guide event has "Subtitle" access
Highlight
programmes
service, this events will be highlighted with another colour.
If this option is enabled and if any electronic programme guide event has "Sign Language"
access service, this events will be highlighted with another colour.
[S] Subtitle
[SL] Sign
If this option is enabled and if any electronic programme guide event has "Audio
Description" access service, this events will be highlighted with another colour.
You may set a different language depending on the broadcaster and the country.
[AD] Audio
Description
English - 22 -
Controls conditional access modules when available.
Manage your privacy privileges for smart TV related applications. Press OK to enter the
menu and set according to your preferences.
Manage your privacy privileges for smart TV related applications. Press OK to enter the
menu and set according to your preferences.
You can set your preference regarding the tracking behaviour for HbbTV services using
this option.
Privacy Settings
Show All Coo-
Delete All Co-
okies
Do Not Track
Privacy
Page 68
Date/Time
Sources
Samba Interactive TV powers recommendations and other apps by gathering data
TV's Terms of Service, Privacy Policy and manage your advertising preferences, etc.
Internet connection will be required in order to access HTML based settings. You can
Device Settings
Mode
Screen
Alexa Alarm
Volume
Sign Out
Works With
Alexa
Works With Alexa feature will be
tarts the setup process to enable your TV to work with Google Assistant devices.
Maturity Lock, Child Lock or Guidance in this menu. You can also set a new PIN
or change the Default CICAM PIN using the related options.
Note: Some menu options may not be available depending on the country selection in the First Time
Installation. Default PIN could have been set to 0000 or 1234. If you have defined the PIN(is requested
depending on the country selection) during the First Time Installation use the PIN that you have defined.
Sets date and time.
Edit the names, enable or disable selected source options.
If this feature is supported by your TV, you can view your ESN(*) number and deactivate
Netflix.
(*) ESN number is an unique ID number for Netflix, created especially to identify your TV.
regarding consumption of specific on-screen content to enhance your viewing experience.
Using this option you can access Samba Interactive TV settings menu, review Samba
enable or disable Interactive TV at any time from the Settings>System>Privacy>Privacy
Settings menu by checking or unchecking the check box next to the related item. This
option may not be available depending on the selected country during the First Time
Installation process, the model of your TV and its features.
Enter correct password to change parental settings. You can easily adjust Menu Lock,
Parental
Netflix
Samba ACR
With this setting you can enable and disable CEC functionality completely. Press Left or
Right button to enable or disable the feature.
This function allows the connected HDMI-CEC compatible device to turn on the TV
and switch to its input source automatically. Press Left or Right button to enable or
disable the feature.
If your TV does not receive any input signal (e.g. from an aerial or HDMI source) for
3 minutes, it will go into standby mode. You can enable or disable this functionality by
setting this option accordingly.
Starts the setup process for this feature manually. If the setup is priorly completed Alexa
Language, Alexa On Standby Mode, Alexa Alarm Volume and Sign Out options will
be available. Refer to Alexa Ready section for more information.
Sets the language preference for Alexa.
Alexa
Language
CEC
CEC Auto Power
On
No Signal Timer
Alexa Built-in
Voice Assistant
Enables or disables Alexa On Standby Mode feature. If enabled Alexa will be available
while the TV is in standby mode.
Note: This feature may affect your TV’s power consumption.
Set as Off to disable this feature or choose one of the inactivity periods to enable. 15
min, 30 min, 1 hour and 2 hour options will be available.
Alexa On
Standby
Alexa Home
Sets the volume level for Alexa alarms.
You can use this option to sign out. If you sign out Alexa Built-in feature will be disabled..
Starts the setup process for this feature manually. If the setup is priorly completed Sign
Out option will be available. Refer to Alexa Ready section for more information.
You can use this option to sign out. If you sign out
disabled.
S
Sign Out
English - 23 -
Assistant section for more information.
Highlight Start and press OK. If the setup is priorly completed Sign Out option will be
available. If you sign out Google Assistant feature will be disabled. Refer to Google
Google
Assistant
Page 69
Displays other setting options of the TV.
Upgrade
Version
Virtual Remote
OSS
Changes timeout duration for menu screens.
If set as Off the standby mode LED will not light up when the TV is in standby mode.
Ensures that your TV has the latest firmware. Press OK to see the menu options.
Displays current software version.
Menu Timeout
Standby Mode
LED
Software
Application
More
Sets the desired time for the TV to automatically go into standby mode when not being
operated. This option can be set from 1 to 8 hours in steps of 1 hour. You can also disable
this option by setting as Off.
This option is used to select which subtitle mode will be on the screen (DVB subtitle /
Teletext subtitle) if both is available. Default value is DVB subtitle. This feature is available
only for the country option of Norway.
Biss is a satellite signal scrambling system that is used for some broadcasts. If you need
to enter Biss key on a broadcast, you can use this setting. Highlight Biss Key and press
OK to enter keys on the desired broadcast.
Select this mode for store display purposes. Whilst Store Mode is enabled, some items
in the TV menu may not be available.
This feature allows you to share files stored on your smartphone or tablet pc. If you have
a compatible smartphone or tablet pc and the appropriate software is installed, you can
share/play photos on your TV. See instructions of your sharing software for more information.
This setting configures the power up mode preference. Last State and Standby Mode
options are available.
Enable or disable the virtual remote feature.
Displays Open Source Software license information.
Auto Power
Down
Subtitle Mode
Biss Key
Store Mode
Audio Video
Sharing
Power Up Mode
English - 24 -
You can set your preference regarding the priority between the broadcast applications
and CICAM AppMMI applications using this option. In case a CICAM is inserted into
the TV and a contention occurs between the applications the priority will be given to the
selected type of application.
Application
Priority
Note: Some options may not be available depending on the model of your TV and the selected country in the First Time Installation.
Page 70

set as France, Italy or Austria, Maturity Lock’s value will be
set to 18 as default.
Child Lock: If this option is set to On, the TV can only
be controlled by the remote control. In this case the
control buttons on the TV will not work.
Internet Lock: If this option is set to ON, the internet
using applications will be disabled. Set to OFF to
Note: If the country option in the First Time Installation is
General TV Operation
Using the Channel List
The TV sorts all stored stations in the channel list. You
can edit this channel list, set favourites or set active
release these applications again.
stations to be listed by using the Channels menu
options. Press the OK button to open the channel list.
You can filter the listed channels or make advanced
changes in the current list using the Filter and Edit
tab options. Highlight the tab you want and press OK
Set PIN: Defines a new PIN number.
Default CICAM PIN: This option will appear as greyed
out if no CI module is inserted into the CI slot of the
TV. You can change the default PIN of the CI CAM
using this option.
TV PIN(*): By enabling or disabling this option you can
allow or restrict some M7 operator channels to send
PIN queries. These PIN queries provide an access
control mechanism for related channels. If this option
is set as On, the channels which send PIN queries can
not be accessed without entering the right PIN first.
(*) This menu option will only be available if an M7 operator
installation is performed.
Note: Default PIN could have been set to 0000 or 1234. If you
have defined the PIN(is requested depending on the country
selection) during the First Time Installation use the PIN that
to see available options.
In order to add the channel you are currently watching
to the Home menu, highlight the Add to Home option
in the Edit tab in the Channels menu and press OK.
Note: The commands Move to position, Delete and Edit
name in the TV>Channels>Edit menu are not available for
channels that are being broadcasted from an M7 operator.
Managing the Favourite Lists
You can create four different lists of your favourite
channels. Enter the TV>Channels menu or press
the OK button in order to open the Channels menu.
Highlight the Edit tab and press OK to see the editing
options and select the Tag/Untag channel option.
Select the desired channel on the list by pressing the
OK button while the channel is highlighted. You can
you have defined.
make multiple choices. You can also use the Tag/
Electronic Programme Guide
Some options may not be available depending on the model
and/or on the country selection in the First Time Installation.
By means of electronic programme guide function of
your TV you can browse the event schedule of the
currently installed channels on your channel list. It
Untag all option to select all channels on the list.
Then press Back/Return button to return to the Edit
menu options. Select Add/Remove Favourites option
and press the OK button again. Favourite channel list
options will be displayed. Set the desired list option
to On. The selected channel/s will be added to the
list. In order to remove a channel or channels from a
depends on the related broadcast whether this feature
is supported or not.
To access the programme guide, press the Guide
button on your remote. You can also use the Guide
option under TV menu.
favourite list follow the same steps and set the desired
list option to Off.
You can use the filtering function in the Channels menu
to filter the channels in the channel list permanently
according to your preferences. For instance, using the
There are 2 different types of schedule layouts
available, Timeline Schedule and Now/Next. To
switch between these layouts highlight the tab with
the name of the alternative layout on the upper side
of the screen and press OK.
Use the directional buttons to navigate through the
programme guide. Use the Back/Return button to
use the tab options on the upper side of the screen.
Timeline Schedule
In this layout option, all events of the listed channels will
be displayed by timeline. You can use the directional
buttons to scroll through the list of the events. Highlight
an event and press OK to display event options menu.
Press Back/Return button to use available tab options.
Highlight Filter tab and press OK to see the filtering
options of the Filter tab, you can set one of your four
Configuring Parental Settings
favourite lists to be displayed every time the channel list
is opened. The selected filtering options will be shown
on the top of the Channels menu screen.
The Parental menu options can be used to prohibit
users from viewing of certain programmes, channels
and using of menus. These settings are located in the
Settings> System>Parental menu.
To display parental lock menu options, a PIN should be
entered. After coding the correct PIN, Parental menu
will be displayed.
Menu Lock: This setting enables or disables access
to all menus or installation menus of the TV.
options. To change the layout highlight Now/Next and
press OK. You can use the Previous Day and Next
English - 25 -
Maturity Lock: If this option is set, TV gets the maturity
information from the broadcast and if this maturity level
is disabled, prohibits access to the broadcast.
Page 71

Teletext Services
Press the Text button to enter. Press again to activate
mix mode, which allows you to see the teletext page
and the TV broadcast at the same time. Press once
more to exit. If available, sections in the teletext pages
will become colour-coded and can be selected by
pressing the coloured buttons. Follow the instructions
displayed on the screen.
Digital Teletext
Press the Text button to view digital teletext information.
Operate it with the coloured buttons, cursor buttons
and the OK button. The operation method may differ
depending on the contents of the digital teletext. Follow
the instructions displayed on the digital teletext screen.
When the Text button is pressed again, the TV returns
Highlight Genre: Displays Highlight Genre menu.
Select a genre and press OK. The events in the
programme guide matching the selected genre will
be highlighted.
Guide Search: Displays searching options. Using
these options, you can search the programme guide
database in accordance with the selected criteria.
Matching results will be listed.
Now: Displays current event of the highlighted
channel.
Zoom: Highlight and press OK to see events in a
Day options to display the events of the previous and
next day.
Highlight Extras tab and press OK to access below
options.
wider time interval.
Software Upgrade
to television broadcast.
Your TV is capable of finding and updating the firmware
automatically via the broadcast signal or via Internet.
Software upgrade search via user interface
On the main menu select Settings>System and then
More. Navigate to Software upgrade and press the
OK button. Then select Scan for upgrade and press
OK button to check for a new software upgrade.
If a new upgrade is found, it starts to download the
upgrade. After the download is completed, a warning
will be displayed, press OK button to complete software
upgrade process and restart TV.
3 AM search and upgrade mode
Your TV will search for new upgrades at 3:00 o’clock
Now/Next Schedule
In this layout option, only the current and next events
of the listed channels will be displayed. You can use
the directional buttons to scroll through the list of the
events.
Press Back/Return button to use available tab options.
Highlight Filter tab and press OK to see the filtering
options. To change the layout highlight Timeline
Schedule and press OK.
Event Options
Use the directional buttons to highlight an event
and press OK button to display Options menu. The
following options are available.
Select Channel: Using this option, you can switch
to the selected channel in order to watch it. The
programme guide will be closed.
the TV is connected to an aerial signal or to Internet. If
a new software is found and downloaded successfully,
it will be installed at the next power on.
Note: Do not unplug the power cord while led is blinking during
the reboot process. If the TV fails to come on after the upgrade,
if Automatic scanning option is set to Enabled and if
More Info: Display detailed information on the selected
event. Use up and down directional buttons to scroll
through the text.
unplug, wait for two minutes then plug it back in.
Set Timer on Event / Delete Timer on Event: Select
Set Timer on Event option and press OK. You can set
timers for future events. To cancel an already set timer,
highlight that event and press the OK button. Then
Troubleshooting & Tips
All updates are automatically controlled. If a manual search
is carried out and no software is found then this is the current
version.
TV will not turn on
Make sure the power cord is plugged in securely to a
wall outlet. Press the Power button on the TV.
Poor picture
Check if you have correctly tuned the TV.
select Delete Timer on Event option. The timer will
be cancelled.
Record / Delete Rec. Timer: Select the Record
option and press the OK button. If the event is going
to be broadcasted at a future time, it will be added
to Timers list to be recorded. If the selected event is
being broadcasted at the moment, recording will start
immediately.
To cancel an already set record timer, highlight that
event and press the OK button and select the option
Delete Rec. Timer. The record timer will be cancelled.
check antenna connections.
frequency if you have performed manual tuning.
Low signal level can cause picture distortion. Please
Check if you have entered the correct channel
English - 26 -
IMPORTANT: Connect a USB disk to your TV while the TV
is switched off. You should then switch on the TV to enable
the recording feature.
Notes: You cannot switch to any other channel while there is
an active recording or timer on the current channel.
It is not possible to set timer or record timer for two or more
individual events at the same time interval.
Page 72

English - 27 -
source has been selected.
No picture
TV is not receiving any signal. Make sure the correct
Is the antenna connected properly?
Is the antenna cable damaged?
Are suitable plugs used to connect the antenna?
If you are in doubt, consult your dealer.
No sound
button or increase the volume to check.
the balance settings from Sound menu.
Check if the TV sound is muted. Press the Mute
Sound may be coming from only one speaker. Check
batteries.
The batteries may be exhausted. Replace the
the section “Inserting the Batteries into the Remote”.
The batteries maybe inserted incorrectly. Refer to
No signal on an input source
It is possible that no device is connected.
Remote control - no operation
device.
Check the AV cables and connections from your
Check the device is switched on.
The Image is not centered in VGA source
To have your TV automatically center the image, enter
the PC Position menu in Picture menu, highlight
Autoposition and press OK. Wait for it to finish. In
order to set the position of the image manually you
can use H Position and V Position options. Select
the desired option and use Left and Right directional
buttons on the remote to set.
Recording unavailable
To record a programme, you should first correctly
connect a USB storage device to your TV, while the
TV is switched off. You should then switch on the TV to
enable recording feature. If you cannot record, check
the storage device is correctly formatted and there is
sufficient space.
USB is too slow
If a “USB disk writing speed too slow to record”
message is displayed on the screen while starting a
recording, try restarting the recording. If you still get
the same error, it is possible that your USB storage
device does not meet the speed requirements. Try
using a different USB storage device.
Page 73
O
24Hz, 25Hz,
30Hz, 50Hz,
60Hz
PAL O
SECAM O
NTSC4.43 O
NTSC3.58 O
480i, 480p 60Hz O
576i, 576p 50Hz O
720p 50Hz,60Hz O
1080i 50Hz,60Hz O
480i, 480p 60Hz O
576i, 576p 50Hz O
720p 50Hz,60Hz O
1080i 50Hz,60Hz O
1080p
Source Supported Signals Available
AV and HDMI Signal Compatibility
PC Input Typical Display Modes
The following table is an illustration of some of the
Back AV
1 640x480 60Hz
2 640x480 75Hz
Index Resolution Frequency
typical video display modes. Your TV may not support
all resolutions.
3 800x600 56Hz
YPbPr
4 800x600 60Hz
5 800x600 72Hz
6 800x600 75Hz
7 1024x768 60Hz
8 1024x768 70Hz
9 1024x768 75Hz
10 1152x864 75Hz
HDMI
11 1280x768 60Hz
12 1360x768 60Hz
13 1280x960 60Hz
14 1280x1024 60Hz
15 1280x1024 75Hz
(X: Not Available, O: Available)
In some cases a signal on the TV may not be displayed
properly. The problem may be an inconsistency with
standards from the source equipment (DVD, Set-top
box, etc. ). If you do experience such a problem please
contact your dealer and also the manufacturer of the
source equipment.
16 1400x1050 60Hz
17 1440x900 60Hz
18 1440x900 75Hz
19 1920x1080 60Hz
English - 28 -
Page 74
H.264: 1080Px2@30fps - 50Mbps, 1080P@60fps -
50Mbps Other: 1080P@60fps - 50Mbps
8192 x 8192
English - 29 -
MPEG1/2, H.264, VC1
Supported File Formats for USB Mode
Extension Video Codec Max. Resolution & Frame Rate & Bit Rate
Video File Formats
.mpg, .mpeg, .dat, .vob
MPEG1/2, H.263, MPEG4, H.264
.ts, .trp, .m2ts
.avi MPEG1/2, MPEG4, H.264, MJPEG
.mp4, .m4a, .m4v, .mov, .qt,
.3gp, .3g2, .3gpp
.mkv MPEG 1/2, MPEG4, H.264
.flv Sorenson Sp, MPEG4, H.264
.asf, .wmv MPEG4, WMV3, VC1
.webm VP9, VP8
.mp4, .mov, .3gpp, .3gp,
HEVC/H.265
Picture File Formats
.ts,.trp, .tp, .mkv
Baseline 8192 x 8192
Progressive 3000 x 3000
RGB 1/4/8/16/24/32 bit
RLE 4/8 bit
Grayscale, 24/32 bit per pixel
Extension Specification Resolution (width x height)
.jpg, .jpeg
.bmp
Interlace format
Progressive
.png
Audio File Formats
Extension Format
.mp3 .mp3
.ac3 .ac3
.aac .AAC
.wma .WMA
.amr .AMR-NB, .AMR-WB
.wav . MPEG La, .AAC, .PCM
Page 75
Specification
English - 30 -
56Hz 60Hz 66Hz 70Hz 72Hz 75Hz
External Subtitles
Extension Specification
.ssa SubStation Alpha
.ass Advanced SubStation Alpha
Subtitle File Formats
.srt Subripper
.sub Micro DVD / SubViewer
.sub + .idx VOBSub
.txt Micro DVD / TMPlayer / MPL2
.mpl MPL2
.smi Sami
.jss JACOSUB
.ttml TTML
.txt / .sub DVDSUBTITLE
Internal Subtitles
.lrc -
Extension
.mkv VOBSub
.mkv ASS / SSA / TEXT
.dat, .mpg, .mpeg, .vob DVD Subtitle
.mp4 DVD Subtitle, TEXT
Supported DVI Resolutions
640x400 x
832x624 x
640x480 x x x x
800x600 x x x x x
1152x864 x x x
1152x870 x
1024x768 x x x x x
1280x768 x x
1360x768 x
1280x960 x x
1440x900 x x
1280x1024 x x
1400x1050 x x
1600x1200 x
1680x1050 x
1920x1080 x
Page 76
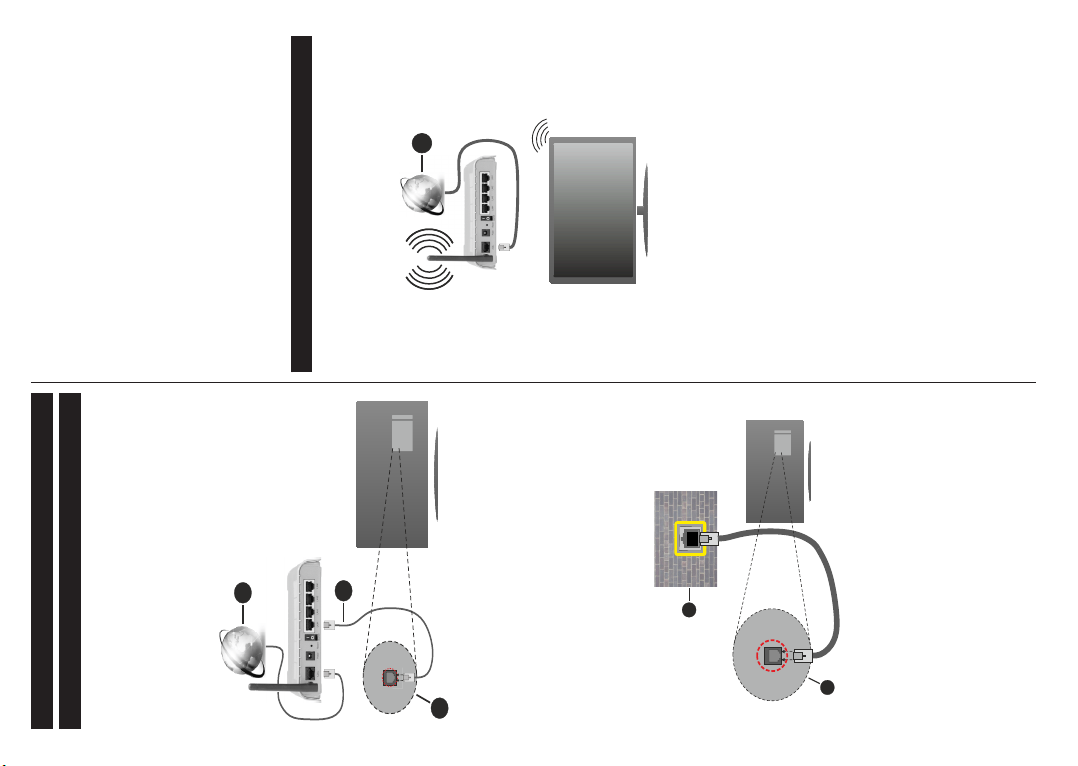
2
3
1
1
2
Internet Speed Test
Highlight Internet Speed Test and press the OK
button. TV will check the internet connection bandwidth
and display the result when complete.
Advanced Settings
Highlight Advanced Settings and press the OK
button. On the next screen you can change the IP and
DNS settings of the TV. Highlight the desired one and
press Left or Right button to change the setting from
Automatic to Manual. Now you can enter the IP and
/ or DNS values manually. Select the related item in
Wireless Connectivity
the drop down menu and enter the new values using
the numeric buttons of the remote. Highlight Save and
press the OK button to save settings when complete.
To Connect to a Wireless Network
The TV cannot connect to the networks with a hidden
SSID. To make your modem’s SSID visible, you should
change your SSID settings via the modem’s software.
1
the area.
other WLAN
1. Broadband ISP connection
A Wireless-N router (IEEE 802.11a/b/g/n) with
simultaneous 2.4 and 5 GHz bands is designed to
increase bandwidth. These are optimized for smoother
and faster HD video streaming, file transfers and
wireless gaming.
English - 31 -
Connectivity
Wired Connectivity
To Connect to a Wired Network
You must have a modem/router connected to an
(back) of your TV.
1. Broadband ISP connection
2. LAN (Ethernet) cable
3. LAN input on the rear side of the TV
To configure wired settings refer to the Network
section in the Settings menu.
a case, use an Ethernet cable to connect your TV
1. Network wall socket
2. LAN input on the rear side of the TV
Configuring Wired Device Settings
Network Type
The Network Type can be selected as Wired Device,
Wireless Device or Disabled, in accordance with the
active connection to the TV set. Select this as Wired
Device if you are connecting via an Ethernet cable.
Page 77

Save and press the
Advanced Settings and press the OK button to
OK
Other Information
Connected or Not Connected and the current IP
You must change your modem’s SSID when there
Connecting to your mobile device via WLAN
WLAN feature, you can
Configuring Wireless Device Settings
Open the Network menu and select Network Type as
Wireless Device
your TV.
of your TV.
Sources menu and press OK
OK
controller application from the server of your mobile
device application provider.
Note: This feature may not be supported on all mobile
devices.
Audio Video Sharing
If available, you can download a virtual remote
Networked Standby Mode
Networked Standby Mode is standard that allows
a device to be turned on or woken up by a network
message. The message is sent to the device by a
program executed on a remote device connected to
the same local area network, such as a smartphone.
Your TV is WoL and WoWLAN compatible. This feature
might be disabled during the First Time Installation
process. To enable this feature set the Networked
Standby Mode option in the Network menu as On.
It is necessary that both the device, from which the
network message will be sent to the TV, and the
TV are connected to the same network. Networked
Standby Mode feature is only supported for Android
OS devices and can only be used via YouTube and
Netflix applications.
In order to use this feature the TV and the remote
device should be connected at least once while the
TV is on. If the TV is powered off, the connection
should be re-established, the next time it is switched
on. Otherwise this feature will be unavailable. This
English - 32 -
Scan Wireless Networks
OK
OK to connect. A
network with hidden SSID can not be detected by
other devices. If you want to connect to a network with
hidden SSID, scroll down the list of detected wireless
networks, highlight the Add New Network option and
press OK. Enter the name of the network and select
the security type using the related options to connect.
Note: If the modem supports N mode, you should set N
mode settings.
OK button on the remote control.
Network Type
as Disabled.
If you have connected to a wireless network Dis-
connect option will appear in the Network menu and
your wireless network profile will also be saved, thus
your TV will connect to the same network automati-
cally whenever you switch to wireless connection. To
saved wireless network profileDisconnect
and press OK.
If your router has WPS, you can directly connect to the
modem/router without entering a password or adding
the network first. Highlight Press WPS on your wifi
router option and press OK. Go to your modem/router
device and press the WPS button on it to make the
connection. You will see a connection confirmation on
your TV once the devices have paired. Select OK to
proceed. No further configuration is required.
Internet Speed Test and press the OK button
Page 78

Connection is Slow
Disruption during playback or slow reactions
You could try the following in such a case:
Keep at least three meters distance from microwave
ovens, mobile telephones, bluetooth devices or any
other WLAN compatible devices. Try changing the
active channel on the WLAN router.
Internet Connection Not Available / Audio Video
Sharing Not Working
does not apply, when the TV is switched into the
standby mode.
The performance of some devices in the market,
may vary due to the software architecture. In order to
use Networked Standby Mode feature with a better
performance, please make sure that your device has
latest firmware version.
Wireless Display
If you want your TV to consume less power in standby
mode, you can disable this feature by setting the
Networked Standby Mode option as Off.
Wireless Display is a standard for streaming video and
sound content. This feature provides the ability to use
your TV as wireless display device.
Using with mobile devices
There are different standards which enable sharing of
screens including graphical, video and audio content
between your mobile device and TV.
Plug the wireless USB dongle to TV first, if the TV
doesn’t have internal WLAN feature.
Then press the Source button on the remote and
switch to Wireless Display source.
A screen appears stating that the TV is ready for
connection.
Open the sharing application on your mobile device.
These applications are named differently for each
brand, refer to the instruction manual of your mobile
device for detailed information.
Scan for devices. After you select your TV and connect,
Invalid Domain
the screen of your device will be displayed on your TV.
Note: This feature can be used only if the mobile device
supports this feature. If you experience problems with the
connection check if the operating system version you use
supports this feature. There may be incompatibility problems
with the operating system versions which are released after
the production of this TV. Scanning and connecting processes
Using Audio Video Sharing Network Service
network.
to your home network.
1. Server Software Installation
TV wireless connection.
Connectivity Troubleshooting
differ according to the programme you use.
Wireless Network Not Available
Network menu screen.
Ensure that any firewalls of your network allow the
If the wireless network does not function properly, try
using the wired network in your home. Refer to the
Wired Connectivity section for more information on
The feature cannot be used if the
server programme is not installed onto your PC
the process.
check the modem (router). If the router does not have a
. Prepare your PC with a proper
server programme.
English - 33 -
Page 79

Internet Browser
To use the internet browser, enter the Home
In the initial screen of the browser, the thumbnails of
the predefined (if any) links to web sites available will
be displayed as Speed Dial options along with the
Edit Speed Dial and the Add to Speed Dial options.
To navigate the web browser, use the directional
the browser bar which contains previous/next buttons,
the refresh button, the address/search bar, the Speed
Dial and the Vewd buttons are available.
access, move the cursor to the top of the page or press.
buttons on the remote or a connected mouse. To see
the browser options bar, move the cursor to the top of
the page. History, Tabs and Bookmarks options and
The browser bar will appear. Highlight the Speed Dial
To add a desired website to the Speed Dial list for quick
- button and press the OK button. Then select Add
the blanks for Name and Address, highlight OK and
to Speed Dial option and press the OK button. Fill in
press the OK button to add. Whilst you are on the site
you wish to add to the Speed Dial list, highlight the
Vewd button and press the OK button. Then highlight
Add to Speed Dial option in the submenu and press
the OK button again. Name and Address will be filled
automatically according to the site you are visiting.
address bar and highlight the Enter button on the
virtual keyboard and press the OK button to visit the
site.
Highlight OK and press the OK button to add.
You can also use the Vewd menu options to manage
the browser. Highlight the Vewd button and press the
OK button to see available page specific and general
options.
There are various ways to search or visit websites
using the web browser.
Enter the address of a website(URL) into the search/
highlight the Enter button on the virtual keyboard
Enter keyword/s into the search/address bar and
and press the OK button to start a search for the
related websites.
button to visit the related website.
Highlight a Speed Dial thumbnail and press the OK
Your TV is compatible with USB mice. Plug your mouse
or wireless mouse adaptor into the USB input of your
TV for easier and quicker navigation.
Some web pages include flash content. These are not
supported by the browser.
Your TV does not support any download processes
from the internet via the browser.
All sites on the internet might not be supported.
According to the site; content problems may occur.
English - 34 -
2. Connect to a Wired or Wireless Network
See the Wired/Wireless Connectivity chapters for
detailed configuration information.
3. Enable Audio Video Sharing
Enter the Settings>System>More menu and
enable the Audio Video Sharing option.
4. Play Shared Files via Media Browser
Audio Video Sharing
Sources menu by using the directional buttons and
press OK.
OK to
The media browser will then be displayed.
Refer to the Media Browser menu section for further
information on file playback.
If a problem occurs with the network, switch your
television off at the wall socket and back on again.
Trick mode and jump are not supported with the
feature.
PC/HDD/Media Player or any other devices that are
compatible should be used with a wired connection for
higher playback quality.
Use a LAN connection for quicker file sharing between
other devices like computers.
Note: There may be some PC’s which may not be able to
utilize the Audio Video Sharing feature due to administrator
and security settings (such as business PC’s).
Apps
You can access the applications installed on your TV
from the Home menu. Press the Menu button on the
remote, Home menu will be displayed. Highlight an
app and press OK to launch.
In order to manage the apps installed on your TV, you
can use the More Apps option in the TV menu. You
can add an installed app to Home menu, launch or
remove it. Highlight an app and press OK to see the
available options.
You can add new apps from the application market. To
access the market highlight the Market option in the TV
menu and press OK. Available apps will be displayed.
You can also access the application market from within
the More Apps menu.
You can reset your customisations on the Home
menu, including app-related ones, to defaults using the
Reset Apps option in the Settings menu (availability
depends on TV model and its features). Highlight this
option and press OK. A confirmation message will be
displayed. Highlight Yes and press OK to proceed.
Note that you will not be able to perform this operation
again within the next few minutes.
Notes:
Possible application dependent problems may be caused by
the content service provider.
Third party internet services may change, be discontinued or
restricted at any time.
Page 80

VOD (video on demand) and catch-up TV services.
The user can use play, pause, stop, forward, and
rewind keys on the remote control to interact with the
AV content.
Note: You can enable or disable this feature from the Privacy
Settings menu in Settings>System menu.
Smart Center
Smart Center is a mobile application running on iOS
and Android platforms. With your mobile device,
you can easily stream your favourite live shows and
programmes from your smart TV. Also; you can launch
your applications, use your mobile device as a remote
control for your TV and share media files.
Note: Being able to use all functions of this application
depends on the features of your TV.
Getting Started
are connected to the same network.
For media sharing feature Audio Video Sharing option
IMPORTANT: Make sure the TV and mobile device
should be enabled(if available). Press the Menu button
To be able to use internet based features, your modem/
router must be connected to the internet.
on the remote, select Settings>System>More menu
and press OK. Highlight Audio Video Sharing and
change as Enabled. Your TV is ready to connect to
your mobile device now.
Install the Smart Center application onto your mobile
device.
Start the Smart Center application. If all connections
are configured properly, you will see your TV’s name on
your mobile device. If your TV’s name doesn’t appear
on the list, wait a while and tap on the Refresh widget.
Select your TV from the list.
Mobile Device screen
On the main screen you can find tabs to access
various features.
The application retrieves actual channel list from TV
first when it starts.
MY CHANNELS: The programmes of first four
channels from the channel list retrieved from the TV
are shown. You can change the listed channels. Press
on the channel thumbnail and hold. A list of channels
will be displayed and you can choose your desired
channel to be replaced.
TV: You can watch content through the TV tab. In
this mode you can navigate through the channel list
retrieved from your TV and click on thumbnails to view
the detail pages.
RECORDINGS: You can view your active recordings(if
available) and reminders through this tab. To delete
any item, simply press on the delete icon found on
each row.
EPG(Electronic programme guide): You can view
the broadcast schedules of selected channel lists
English - 35 -
HBBTV System
In some circumstances video contents might not be
able to be played.
HbbTV (Hybrid Broadcast Broadband TV) is a new
industry standard that seamlessly combines TV
services delivered via broadcast with services delivered
via broadband and also enables access to Internet only
services for consumers using connected TVs and set-
top boxes. Services delivered through HbbTV include
traditional broadcast TV channels, catch-up services,
video-on-demand, electronic programme guide,
interactive advertising, personalisation, voting, games,
social networking and other multimedia applications.
HbbTV applications are available on channels where
they are signalled by the broadcaster. The broadcaster
marks one application as “autostart” and this one is
started by the platform automatically. The autostart
applications are generally launched with a small red
button icon to notify the user that there is an HbbTV
application on that channel. Press the red button to
open the application page. After the page is displayed
you can go back to the initial red button icon state
by pressing the red button again. You can toggle
between the red button icon mode and full UI mode
of the application via pressing red button. It should
be noted that the red button switching capability is
provided by the application and some application may
behave differently (other colour buttons such as green,
yellow, blue, may be defined for some other functions,
e.g. shurtcuts).
If you switch to another channel while an HbbTV
application is active (either in red button icon mode
or full UI mode), the following scenarios can occur.
The application can continue running.
The application can be terminated.
The application can be terminated and another
autostart red button application can be launched.
HbbTV allows the applications to be retrieved both from
broadband or broadcast. The broadcaster may enable
both ways or one of them. If the platform does not have
an operational broadband connection, the platform
can still launch applications transmitted on broadcast.
The autostart red button applications generally provide
links to other applications. The user then can switch
to other applications by using the links provided.
The applications should provide a way to terminate
themselves, usually Exit button is used for this.
HbbTV applications use keys on the remote control to
interact with the user. When an HbbTV application is
launched, the control of some keys are owned by the
application. For example, numeric channel selection
may not work on a teletext application where the
numbers indicate teletext pages.
HbbTV requires AV streaming capability for the
platform. There are numerous applications providing
Page 81

Mirror Mode
This mode of FollowMe TV feature is enabled by
default and allows streaming the content from any other
selected TV sources and Media Browser.
Notes:
Note that only digital(DVB-T/C/S) SD and HD channels are
supported.
Multilanguage audio support and subtitle on/off features are
not functional.
The streaming performance may change depending on the
quality of your connection.
Media Share Page
To access the Media Share widget tap on the Up-
arrow on the upper right side of the screen.
If the Media Share widget is pressed, a screen is
displayed where you can select the media file type to
Auto-enable FollowMeTV: FollowMeTV function (if
available) will start automatically when this setting
is enabled. Default is disabled.
Auto-connection to TV: When enabled, your
mobile device will automatically connect to last
connected TV and skips the TV search screen.
Change TV: Shows the currently connected TV. You
through this tab. You can also navigate through
channels by pressing on the selected channel on the
EPG grid. Please note that updating / refreshing the
EPG information may take a while depending on your
network and web service quality.
Note: Internet connection is required for WEB based EPG
information.
SETTINGS: Configure the application to your liking.
You can change;
can press on this setting to go to the “TV search”
share with your TV.
Note: Not all image file formats are supported. This function
will not work if Audio Video Sharing feature is not supported.
Smart Remote Feature
You can use your mobile device as a remote control
for your TV once it has connected to the TV. To access
smart remote’s full features you can use the menu at
the bottom middle of the screen.
Voice Recognition
screen and change to a different TV.
Edit custom channel list: You can edit your custom
channel list using this setting.
Choose channel list source: You can choose the
channel list source to be used in the application. The
options are “TV List” and “Custom List”. Additionally
you can activate “Remember my choice” option to
set the selected channel list source as a constant
choice. In this case if the selected source is available
manage your application, giving voice commands
such as “Volume Up/Down!”, “Programme Up/Down!”.
Note: This feature is only for android based devices available.
Keyboard Page
The keyboard page can be opened in two ways; by
pressing the Keyboard( ) widget on the application
screen or automatically by receiving a command
from the TV.
You can tap on the Microphone( ) widget and
it will be used in the application.
Version No: Displays the current version of the
application.
Detail Page
To open detail page tap on a programme. On the
detail page screen you can get detailed information
Requirements
of the programmes you select. There are “Details”,
“Cast&Crew” and “Videos” tabs to find on this page.
DETAILS: This tab provides summary and information
about the selected programme.
(Android OS 5.1 or higher; IOS 12 or higher
version)
application stores based on Android and iOS
platforms)
1. Smart TV
2. Network connection
3. Mobile Device based on Android or iOS platform
4. Smart Center app.(to be found on online
CAST&CREW: Shows all the people contributed to
the current programme.
VIDEOS: Provides videos on Youtube related to the
selected programme.
Note: For some functions an internet connection may be
required.
FollowMe TV Feature (if available)
Tap on the FOLLOW ME TV widget located at the
USB Recording feature, if available)
5. Router modem
6. USB storage device in FAT32 format (required for
upper right of the screen of your mobile device to
change the layout for FollowMe TV feature.
Tap the play icon to start streaming of the content from
the TV to your mobile device. Available if your device
Notes:
For Android devices, Normal(mdpi), Large(hdpi) and Extra
Large(xhdpi) screen sizes are supported. Devices with 3” or
smaller screen sizes are not supported.
English - 36 -
is in your routers operation range.
Page 82

tings>System>Voice Assistant menu
wizard will be displayed after the installation process
is completed
Carry out first time installation on your TV. The setup
Alexa is Amazon’s cloud-based voice service available
on many voice controlled assistant devices. By means
Setup process
of the Alexa built-in and Works With Alexa features you
can use your TV as an Alexa device and control the
completed. The setup can be carried out in the ways
described below.
Use the Works With Alexa option in the Set-
Alexa Ready
For iOS devices, all screen sizes are supported.
User interface of the Smart Center application is subject to
change according to version installed on your device.
the Alexa setup wizard will be displayed after the
installation process is completed. On the first screen
highlight Learn More option and press OK. On the
next screen you will be informed about the feature.
do this, a Microphone Box(*) will be required. After
connecting your Microphone Box to your TV the setup
process should be completed. The setup can be carried
Highlight Start and press OK to proceed.
If you skip the setup wizard after the first time ins-
out in the ways described below.
(*) The Microphone Box can be purchased separately if not
supplied with the unit. For more information contact your local
The wizard will guide you through the setup process.
If you carry out first time installation on your TV,
functions of your TV with Alexa.
Alexa Built-in
You can use your TV as an Alexa device. In order to
tallation you can use the Works With Alexa option
in the Settings>System>Voice Assistant menu to
dealer or retail outlet where you bought your TV.
Connect your Microphone Box to your TV
carry out the setup later manually. On the first screen
you will be informed about the feature. Highlight Start
Use the Alexa Built-in option in the Settings>Sys-
and press OK to proceed.
on the screen. Use your computer or any other device
with internet access to go to the internet address
(URL) shown on the screen. You will be directed
to a page where you can sign in to your Amazon
account first, if you are not already signed in. Then
you will be directed to a page where you can enter
the authentication code you see on the TV and link
your TV to your Amazon account.
asked to determine a name for your TV, called
‘Friendly Name’(FN). A ‘Friendly Name’ is a name
that reminds you of your TV, such as ‘Living Room
An authentication code will be created and displayed
tem>Voice Assistant menu
Carry out first time installation on your TV. The setup
wizard will be displayed after the installation process
is completed
The wizard will guide you through the setup process.
If the linking process was successful you will be
Refer to the user manual of the Microphone Box for
detailed information.
Alexa Home Screen
Once the setup is complete, Alexa Home Screen
feature will be integrated. This feature is an ambient
TV’, ‘Kitchen TV’, ‘Dining Room TV’, etc. Choose an
screen which appears when no user activity is
detected. A background image, time and date
information and voice command suggestions will be
displayed on the Alexa Home Screen.
easy-to-say name. You will say this name to tell Alexa
which TV to control. When you are done, highlight
OK and press OK.
the setup.
lation you will return to the first screen of the setup
wizard when you press OK. In that case press Exit
or highlight Setup Later and press OK in order to
Netflix is running. It appears when no user activity is
detected during the predefined inactivity period unless
a media playback is in progress. Watching a movie, for
exit the setup.
Once the setup is complete, you will be able to control
the functions of your TV with Alexa.
Note: Make sure that the devices are connected to the internet.
example, is not considered as user inactivity.
You can press remote control buttons to make it
disappear. As an exception you can use the Volume
+/- buttons to control volume level even when Alexa
Home Screen is running.
displayed on the next screen. Press OK to finish
Examples about the use of the feature will be
You can use the Alexa Home Screen option in the
Settings>System>Voice Assistant>Alexa Built-in
menu to configure the settings of this feature. You can
set to one of the inactivity periods to enable or set to
Off to disable.
If you carried out the setup after the first time instal-
Alexa Home Screen is displayed only when web brow-
ser or any other video on demand application except
Works With Alexa
You can control the functions of your TV with Alexa.
In order to do this, the setup process should be
English - 37 -
Page 83
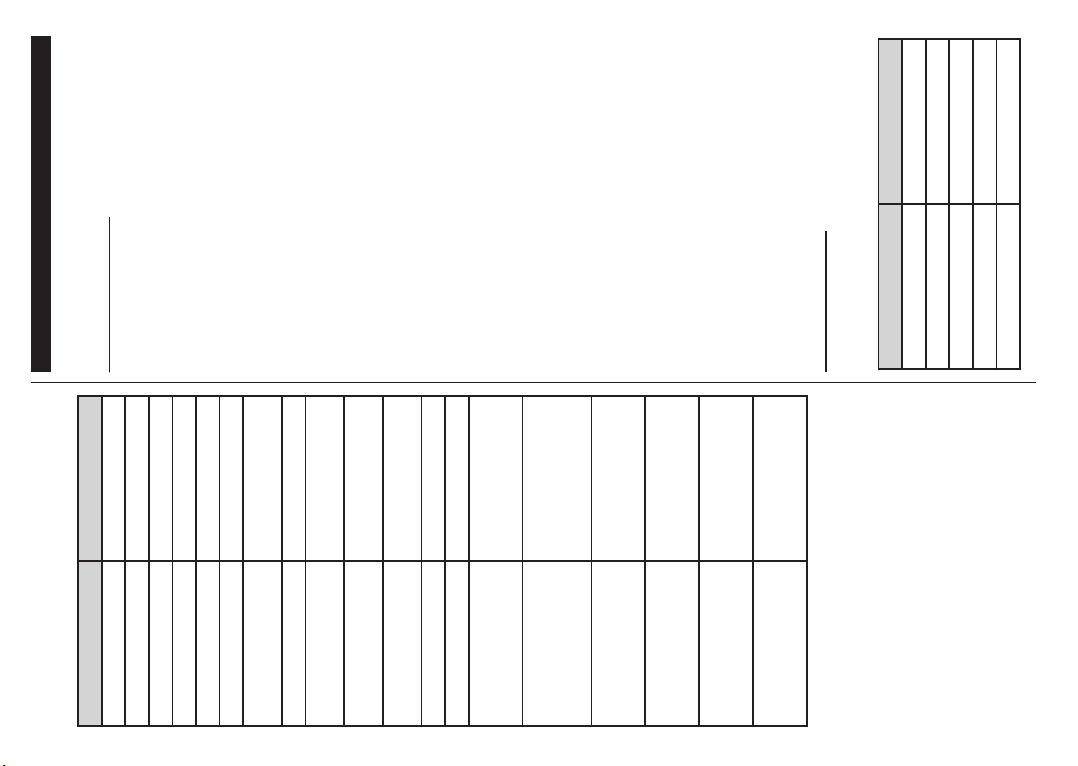
Google Assistant
Your TV works with Ok Google for voice control of your
connected devices and appliances.
Works With Ok Google
By means of this feature you can control the functions
of your TV with Google Assistant devices. In order to do
this, the setup process should be completed.
Before the setup
Command Function
Alexa, turn on ‘FN’ Powers on the TV
FN’
Alexa, play ‘FN’ Starts media playback
Example Commands
Here are some voice commands that you can use:
Alexa, pause ‘FN’ Pauses media playback
phone and login to your account
Complete the following procedures before you start
the setup on your TV.
Install the Google Home application on your mobile
Add the assistant device to your account
Select the Vsmart TV action from the list of actions
Advances media in fast
forward mode
Sets the volume to the
Alexa, resume ‘FN’ Resumes media playback
Alexa, stop ‘FN’ Stops media playback
Alexa, fast forward on ‘FN’
Alexa, rewind on ‘FN’ Rewinds media
Alexa, set the volume of
within the application
authentication code which will be created during the
setup process on your TV in order to link your TV to
your account. Continue with the setup on your TV to
A screen will be displayed where you will enter the
Increases volume by 10
‘FN’ to 50
Alexa, turn the volume up
get the authentication code
Setup process
units
Decreases volume by
10 units
on ‘FN’
Alexa, turn the volume
down on ‘FN’
Alexa, mute ‘FN’ Mutes sound
The setup can be carried out by using the Google
Assistant option in the Settings>System>Voice
The TV switches to the
input source with the spec-
Alexa, unmute ‘FN’ Unmutes sound
Alexa, change the input to
to proceed
Assistant menu. The wizard will guide you through
the setup process.
On the first screen highlight Start and press OK
You will be asked to determine a name for your TV
The TV switches to the
number (e.g., channel
200)
“input_name” on ‘FN’
Alexa, change channel to
"channel_number" on ‘FN’
‘Friendly Name’ is a name that reminds you of your
TV, such as ‘Living Room TV’, ‘Kitchen TV’, ‘Dining
Room TV’, etc. Choose an easy-to-say name. When
on the next screen, called ‘Friendly Name’(FN). A
The TV switches to the
you are done, highlight OK and press OK
on the screen. Enter the code you see on the TV on
the Google Home application
An authentication code will be created and displayed
name
The TV switches to the
next higher channel, if any
available
The TV switches to the
next lower channel, if any
Alexa, change channel to
“channel_name" on ‘FN’
Alexa, channel up on ‘FN’
Alexa, channel down
on ‘FN’
Once the setup is complete, you will be able to control
the functions of your TV with Google Assistant.
Note: Make sure that the devices are connected to the internet.
available
The TV switches to the
next channel on the
Alexa, next channel on
‘FN’
Command Function
turn on ‘FN’ Powers on the TV
FN’
pause on ‘FN’ Pauses media playback
You can link only one TV to your account.
Example Commands
Just say “Ok Google” to control your TV using just
your voice.
channel list
resume on ‘FN’ Resumes media playback
FN is the abbreviation for ‘Friendly Name’.
stop on ‘FN’ Stops media playback
English - 38 -
Page 84
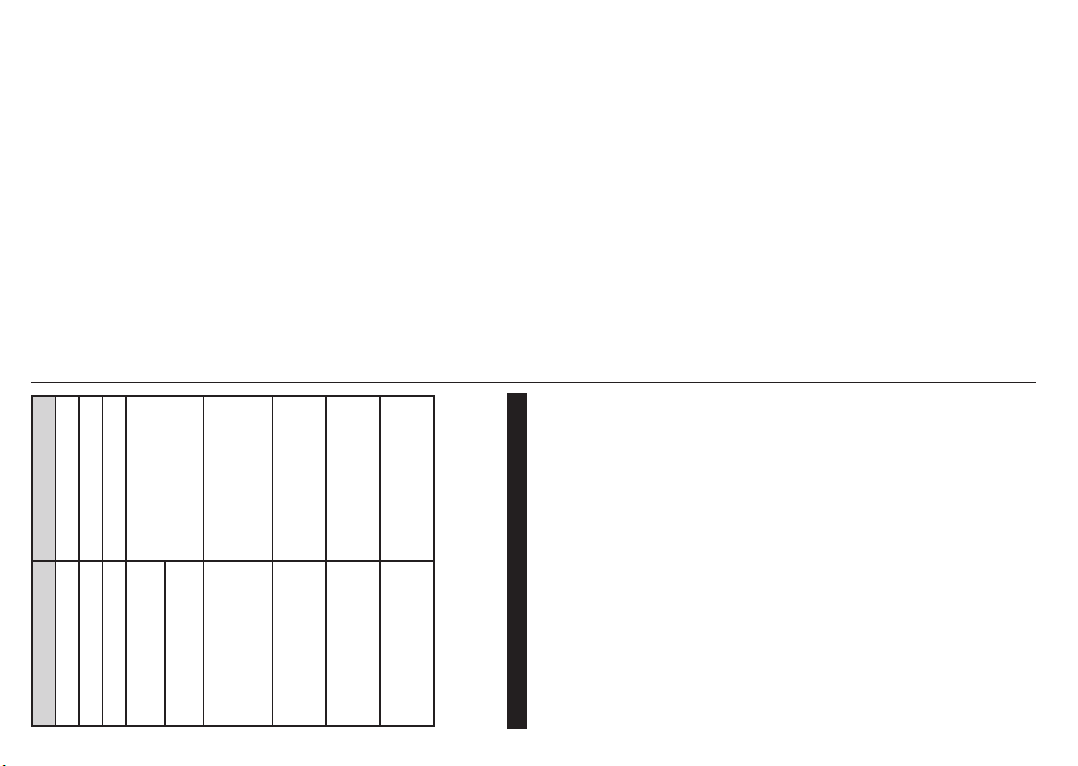
Command Function
volume up on ‘FN’ Increases volume
volume down on ‘FN’ Decreases volume
The TV switches to the
input source with the spec-
set mute volume on ‘FN’ Mutes sound
switch input to “input_
name” on ‘FN’
switch to “input_name”
on ‘FN’
The TV switches to the
number (e.g., channel
200)
The TV switches to the
change channel to "chan-
nel_number" on ‘FN’
change channel to “chan-
name
The TV switches to the
next higher channel, if any
available
The TV switches to the
nel_name" on ‘FN’
channel up on ‘FN’
next lower channel, if any
available
channel down on ‘FN’
FN is the abbreviation for ‘Friendly Name’.
DVB functionality information
Google is a trademark of Google LLC.
This DVB receiver is only suitable for use in the country
which it was designed to be used in.
Although this DVB receiver conforms to the latest DVB
specifications at the time of manufacture, we cannot
guarantee compatibility with future DVB transmissions
due to changes that may be implemented in broadcast
signals and technologies.
Some digital television functions may not be available
in all countries.
We continually strive to improve our products;
therefore, specifications may change without prior
notice.
For advice on where to purchase accessories,
please contact the store where you purchased your
equipment.
English - 39 -
Page 85

....................................... 35
..................................... 35
............................................................. 36
Alkalmazások ........................................................ 36
.................................................. 36
HBBTV rendszer.................................................... 37
Smart Center ......................................................... 38
Alexa Ready .......................................................... 39
Tartalomjegyzék
Biztonsági információ .............................................. 2
Jelzések a Terméken ............................................... 2
Környezetvédelemmel kapcsolatos információk...... 4
................................................................. 4
Mellékelt tartozékok ................................................. 5
Készenléti jelzések .................................................. 5
.......................... 5
Google Assistant.................................................... 41
..................................... 42
Magyar - 1 -
.................................6
..................... 7
................................ 7
Az antenna csatlakoztatása..................................... 7
.................................................. 8
Tájékoztatás az ártalmatlanításról ........................... 8
................................................... 9
............................................................. 10
Csatlakozások ....................................................... 11
Be-ki kapcsolás ..................................................... 12
........................................... 12
........................................... 14
......... 15
...... 15
USB feljátszás ....................................................... 16
..................................................... 17
CEC ....................................................................... 18
E-kézikönyv ........................................................... 18
..................................... 19
..................................27
..................................... 27
.................................... 27
..................................... 27
Teletext szolgáltatások .......................................... 28
Szoftverfrissítés ..................................................... 28
.......................................... 29
..................... 30
................................30
......... 31
.......................................... 31
............................................ 31
............................................. 31
.......................................... 32
.................................. 32
...................................... 33
Vezetékes kapcsolat .............................................. 33
......................................33
................................ 34
Page 86
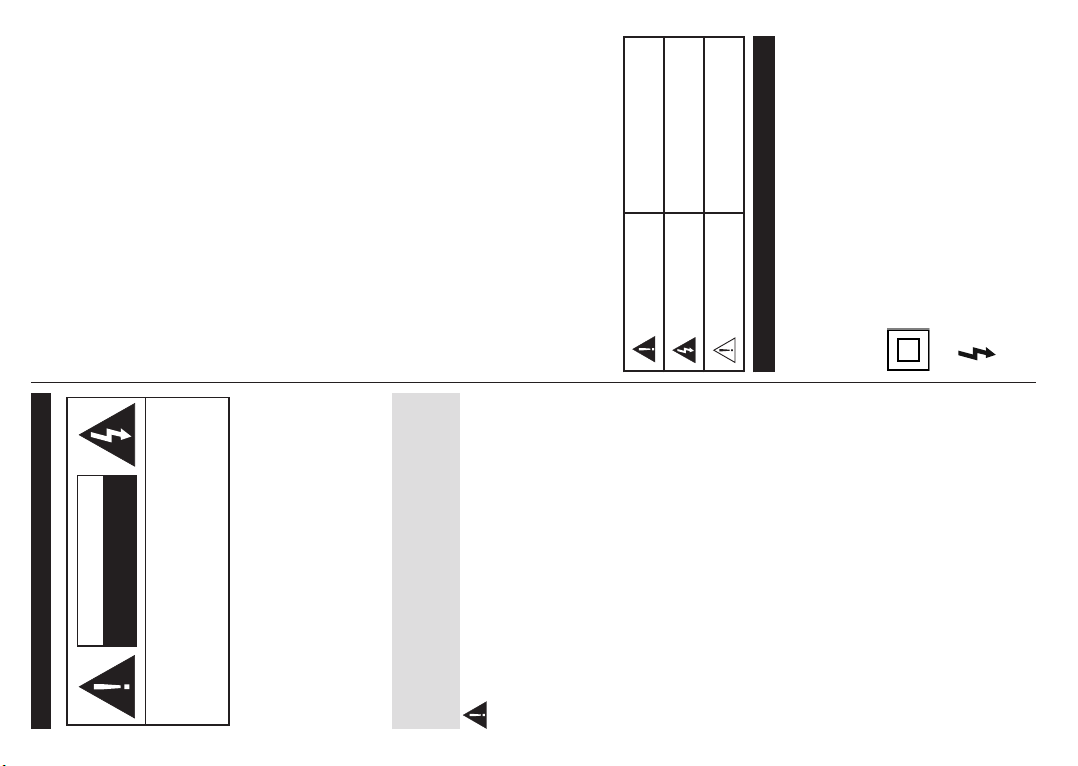
FIGYELEM
Biztonsági információ
NE NYISSA KI
ÁRAMÜTÉS VESZÉLYE
ÉRDEKÉBEN NE TÁVOLÍTSA EL A FEDELET (VAGY
FIGYELEM: AZ ÁRAMÜTÉS VESZÉLYÉNEK ELKERÜLÉSE
HÁTLAPOT).
A KÉSZÜLÉK BELSEJÉBEN NEM TALÁLHATÓK A
FELHASZNÁLÓ ÁLTAL JAVÍTHATÓ ALKATRÉSZEK.
A JAVÍTÁST VÉGEZTESSE SZAKEMBERREL.
FONTOS – Kérjük olvassa el figyelmesen
Megjegyzés:
FIGYELEM
ezeket az utasításokat a telepítés és a
a burkolat hátulját, tárgyakat helyezzenek a
nyílásokba, résekbe vagy a burkolat bármilyen
FIGYELEM: Ezt a berendezés azoknak a
személyeknek (beleértve a gyermekeket is) a
tapasztalattal rendelkeznek ilyen berendezés
felügyelet nélküli kezelésére, ha nincsenek
alkatrész
Vigyázat
Jelzések a Terméken
A jelzett terminál(ok)
csatlakozásra.
aktív(ak).
Magyar - 2 -
Page 87
FIGYELEM
áll fenn.
-
-
Ez a termék tartalmaz 1.
A
i
CLASS 1
LASER PRODUCT
-
– – – – – – – – – – – –
-
óvintézkedésekkel mint:
MINDIG a televízió gyártója által ajánlott szekré-
-
-
SOHA ne tegye a televíziót anyagra vagy más
– – – – – – – – – – – –
és távirányítók.
-
alkalmazni.
-
rendszer csatlakozásának rendelkeznie kell egy
Magyar - 3 -
Page 88

(DVB-T-T2/C/S-S2)
Távirányítóval vezérelt színes televízió
UTASÍTÁSOK
Teletext
Gyerekzár
NTSC megjelenítés
pompázó napfényt. A HDR/HLG tartalmakat saját
valamint DVB-S adások támogatják.
Magyar - 4 -
A FALI RÖGZÍTÉSRE VONATKOZÓ
Környezetvédelemmel kapcsolatos információk
Ha az Energiamegtakarítást a Minimumra
Közepesre, Maximumra vagy Automatára
egy
Egyéniként
(az Energiamegtakarítás
Ki pozícióra.
Megjegyzés: Energy Saving opciók
Settings>Picture
Mode
Az Energy Saving Settings>Picture
Ha felváltva
Proceed (Folytatás)
OK
kikapcsol.
Megjegyzés: A Képernyő ki
a Mód Játékra
Page 89
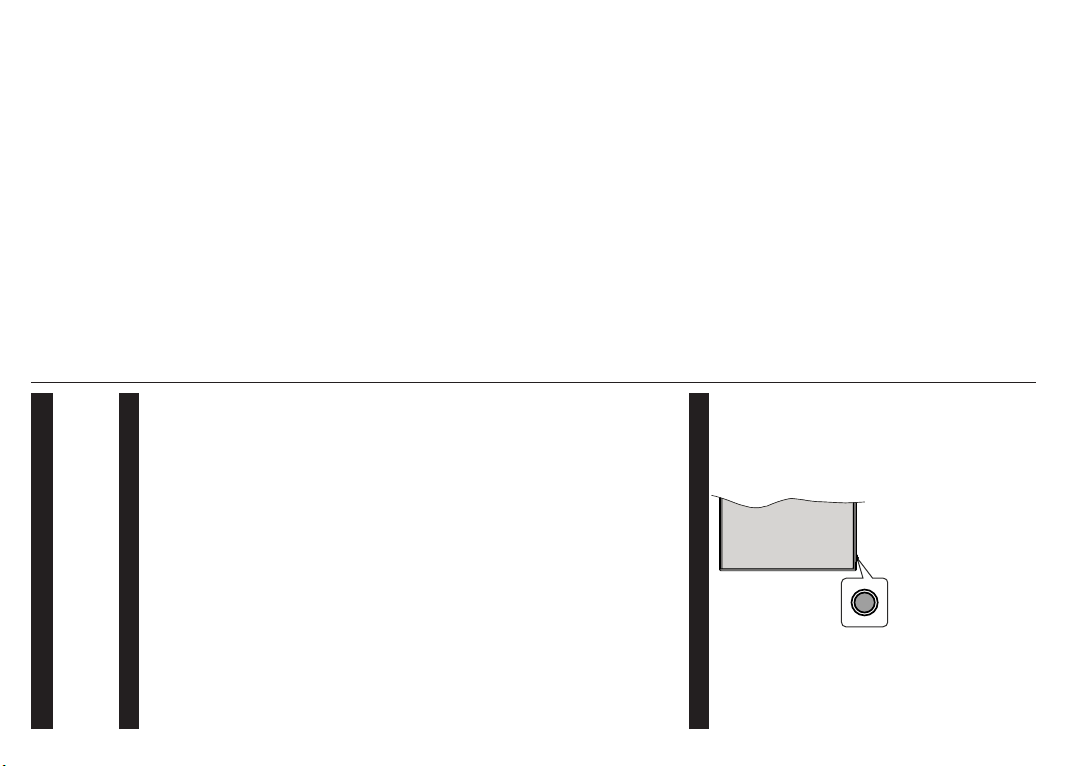
Aktiváláskor az opció ikon színe megváltozik.
Kikapcsoláskor az opció ikon színe megváltozik.
A TV kikapcsolása:
Készenléti üzemmódban lesz. Nyomja meg és
A TV bekapcsolása
Nyomja
Volume + vagy opcióra
Csatornák váltása:
a Program + vagy a opcióra mozgassa.
A forrás váltása:
Forrás opcióra
megnyomásával görgessen a rendelkezésre álló
forrásra.
Megjegyzés:
Magyar - 5 -
Mellékelt tartozékok
Készenléti jelzések
Ha a 3percig nem fogad semmilyen
„A
mert sokáig nem volt jel.”
Beállítások>Rendszer>Eszköz beállítások
opciójával.
Az Auto TV KI opció (a Settings>System >More
Kikapcsolva
“A TV-
”
Yes
megnyomja az OKNem
és megnyomja az OK
Automatikus kikapcsolás
törlését is. Ha a Letilt
az OK
a Settings>System>MoreAuto TV KI
Megjegyzés:
Page 90

A
a Nyitólap
Keresés
OK
OK
nyomja meg az OK
OK
TV
Útmutató
Elektronikus programfüzet
Csatornák
a Csatornák
Csatornalista használata
segítségével válassza az Add Timer
nyomja meg az OK
meg az OK
az Edit Selected TimerOK
az OK
Delete Selected Timer
OK
Yes
nyomja meg az OK
az OK Options
Set/Cancel
és nyomja meg az OK
Magyar - 6 -
Vezérlés a távirányítóval
nyomja mega távirányító
Menu
OK
Return/Back vagy a Menu
Bemenet kiválasztása
távirányító Forrás
Program és a
a távirányítón.
Amikor a Menu
OK
OK
OK vagy a Back/Return
kilépni.
Kilépés
Nyitólap
Nyitólap
meg. A tartalom a
TV
szerkesztéseOK
A szerkesztési módra vált. Szerkesztési
meg az OK Törlés vagy az
Áthelyezés OK
OK
Page 91
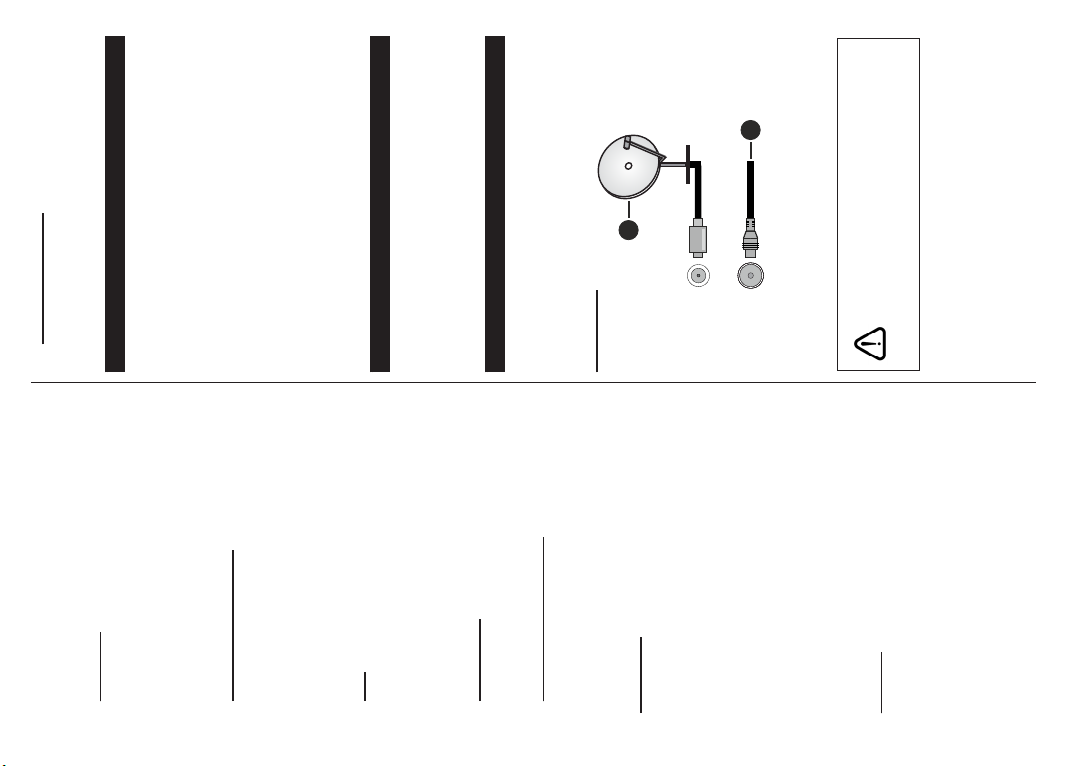
2
1
ANT
LNB
és az eszköz is ki van kapcsolva. A kapcsolat
Források beállítása
OK
a Változások elmentése
AAA elemet.
ismét az OK
Felvételek
Helyezze vissza a fedelet.
és nyomja meg az OK
További alkalmazások
az OK-t. A
OK
Csatlakozás az áramforráshoz
Piac
FONTOS
az alkalmazáspiacról. Emelje ki és nyomja le az
OK
Alkalmazások piacra a Több alkalmazás
Az antenna csatlakoztatása
(LNB) BEMENETHEZ(*).
Adatvédelmi beállítások
A TV hátulja
Beállítások
a Menü tartalmának a beállítása
Az Aplikáció visszaállítása opcióval a
az alapértelmezésekre (a rendelkezésre állás a
nyomja le az OK
Yes
OK
Források
OK
Magyar - 7 -
Page 92
1 2
Tájékoztatás az ártalmatlanításról
[ Európai Unió számára]
Licensing Corporation védjegye.
védjegyei.
találja. Gyártva a DTS Licensing Limited licence
Minden jog fenntartva.
vásárolta.
[Üzleti felhasználók]
[ Európai Unión kívüli országok számára]
Megjegyzés
Termékek
Elem
Magyar - 8 -
találja. Gyártva a DTS Licensing Limited licence
Ez a termék a Microsoft társaság szellemi termékjogai
alkalmaz a PlayReady védett tartalom vagy a WMDRM
Page 93
Maximális kimeneti
teljesítmény
Frekvenciatartomány
100 mW
SECAM BG/DK
VHF (I/III SÁV) - UHF (U
PAL BG/I/DK/
Vett csatornák
TV sugárzás
200 mW
5150 - 5250 MHz (CH36 - CH48) 200 mW
5250 - 5350 MHz (CH52 - CH64) 200 mW
5470 - 5725 MHz (CH100 -
CH140)
Országok szerinti korlátozás
SÁV) - SZÉLESSÁV
(DVB-T-C-S)
Digitális vétel
-
11 000
csatornák száma
RF Antenna bemenet
Ország Korlátozás
Olaszország
Görögország
DTS-HD
2x8
Üzemi feszültség
Audió
Audio kimeneti
és nyilvános szolgáltatás esetén (nem
Norvégia
< 2
Áramfogyasztás (W) 75W
üzemmód
energiafogyasztás (W)
5 GHz sáv csak az 5180 MHz-5320 MHz
Orosz Föde-
ráció
Izrael
-
191 x 909 x 567
58/87 x 909 x 522
85% páratartalom
TV méretei SZxMxM
(állvánnyal együtt) (mm)
TV méretei SZxMxM
(állvánnyal együtt) (mm)
40”
és páratartalom
Magyar - 9 -
Page 94
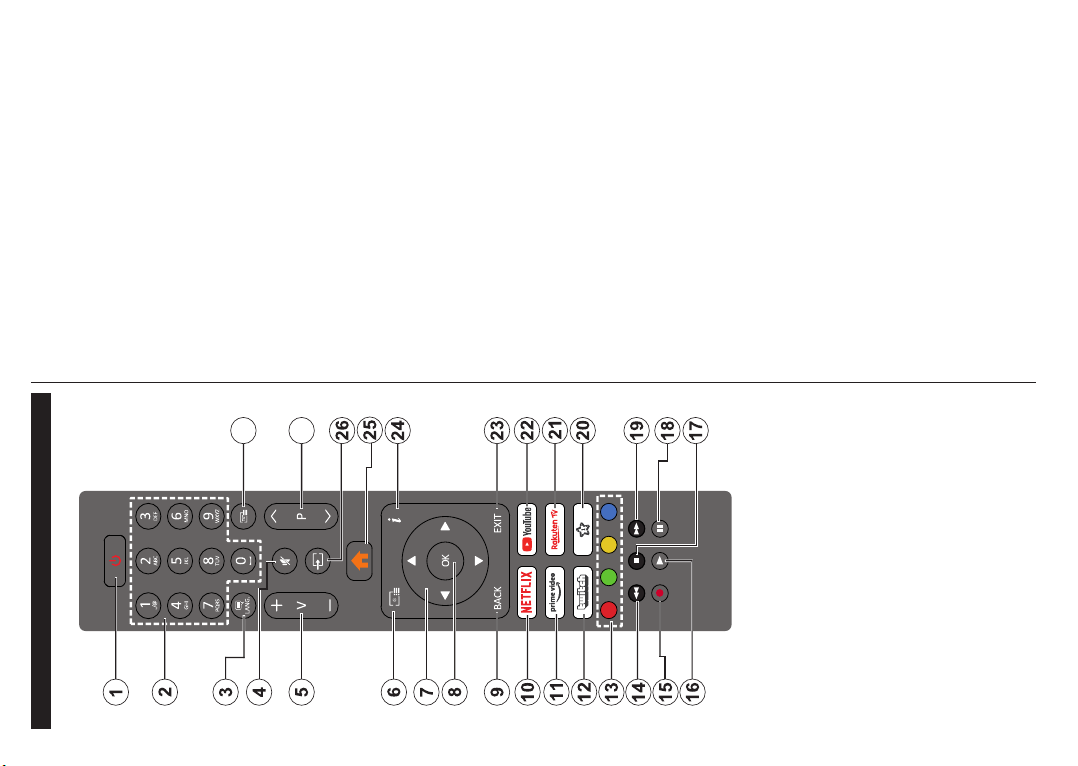
27
28
Készenlét:
Számgombok:
Nyelv:-
Némítás:
Megjeleníti az elektromos
Iránygombok:
az aloldalakat
OK:
a Channels
Vissza/Visszatérés:
alkalmazást
Netflix: Elindítja a Netflix alkalmazást.
Prime Video: Elindítja az Amazon Prime Video
Twitch:
visszajátssza a filmkockákat
Színgombok: -
Visszatekerés:
Felvétel:
Lejátszás: Elkezdi a kiválasztott média lejátszását
Leállítás: Leállítja a lejátszott médiát
tekeri a filmkockákat
Szünet:
Saját gomb 1 (*)
Rakuten TV:
vonatkozó információkat (reveal - a Teletext
és tartalmakat
Youtube:
Kilépés:
Infó:
Forrás:
Szöveg:
szövegoldalt (mix)
Magyar - 10 -
(*) SAJÁT GOMB 1:
Page 95
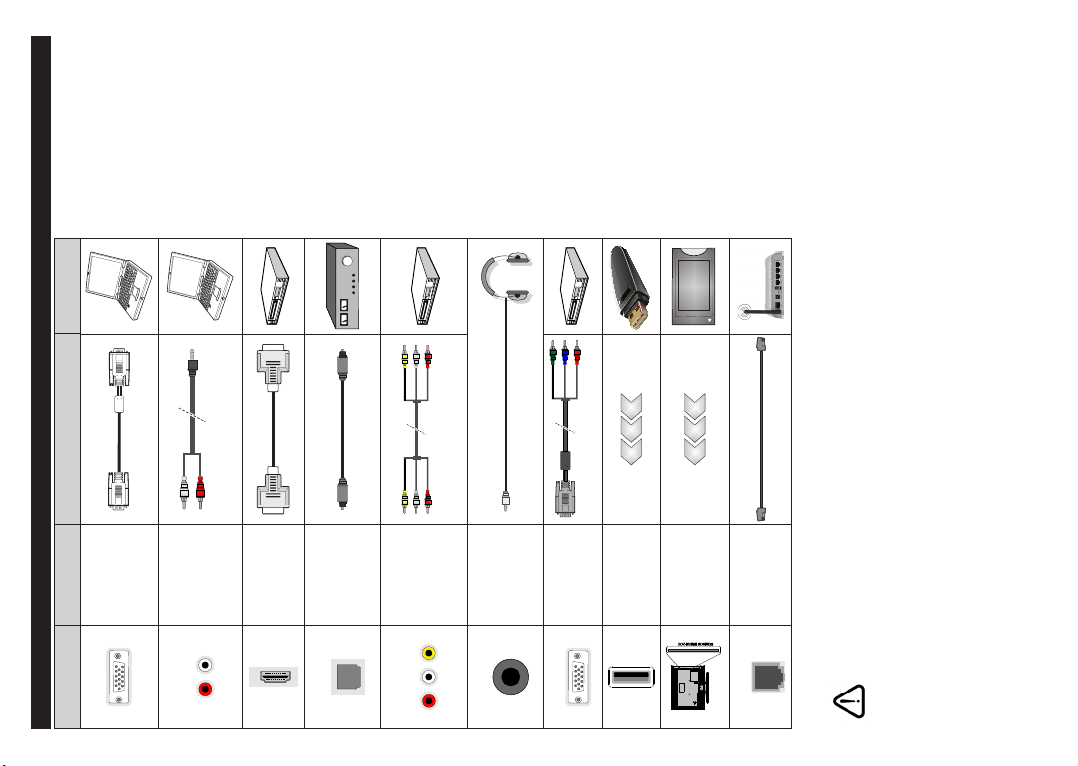
CAM
module
Magyar - 11 -
VGA
csatlakozás
Csatlakozó Típus Kábelek Eszközök
Csatlakozások
(hátul)
Audio
PC/YPbPr
csatlakoztatása
AUDIO BE
(hátul)
hátsó)
(oldalsó és
csatlakozás
SPDIF
(Optikai
SPDIF
(hátul)
kimenet)
csatlakoztatása
(oldalról)
csatlakozás
CI
(oldalról)
csatlakozás
(hátul)
csatlakozása
(oldalról)
Fejhallgató
csatlakozása
USB
(hátul)
csatlakozás
YPbPr video
YPBPR
(hátul)
Ethernet
csatlakozás
LAN
Page 96

módot. Ez az opció a Beállítások>Rendszer>Tovább
OK
Nyomja meg a Standby vagy
a TermészetesOK
a választást a Beállítások> Kép Mode
az Adatvédelmi beállítások
Készenléti
üzemmódban lesz. Nyomja meg és tartsa lenyomva
Beállítások>Rendszer>Adatvédelmi beállítások
Internetkapcsolat
Megjegyzés:
nyomja meg az OK
a
OK
OK
Válassza a Yes
nyomja meg az OK
Rendszermenü tartalma
majd nyomja meg az OK
ország
keresési folyamat során a kiválasztott közvetítési mód
OK
OK
OK
Magyar - 12 -
Megjegyzés: (*) Első telepítés
NyelvOrszág
(*)
Áruházi mód
Otthoni
Page 97

vagy . Az
OK
Folytassa
Digitális kábel: Ha a Digitális kábel segítségével
valamint a LNB konfigurálása opciók fognak
Antennatípust KözvetlenEgyetlen
Digitális Antenna: Ha a Digitális antennás
Direkt:
Ha az IgenOK
és Keresés
Nyomja meg az OK
meg az OK
Egykábeles terjesztés:
a Nem
OKakkor
Start Stop és Keresés .
Next
majd nyomja meg az OK
Megjegyzés:
OK lenyomásával
és egy DiSEqC kapcsolóval
verzióját
DiSEqC kapcsoló:
Ha a
operátor telepítését
OK
Analóg: Ha az Analóg
Csatornák
Edit lap opcióinak a segítségével
vagy a Menü
jeleníteni a csatornákat az LCN(*)
Válassza ki az Igen
meg az OK
(*)
Megjegyzések:
Magyar - 13 -
Telepítés típusát Szolgáltatóra
és a
szolgáltatóra. Majd jelölje ki a Preferált keresés
Automatikus csatornakeresésre
meg az OK
lépései során milyen Nyelvet és Országot választott.
/
SD csatornalista kiválasztását. Válasszon ki egyet és
OK
telepítve van.
Preferált keresés opciót
Kézi csatornakeresésre
meg az OKAntennatípus
OK
Telepítés típust állítsa Standard
nyomja meg az OK
Antennatípus
Page 98

majd a távirányítón nyomja meg az OK
a
keresési folyamat során a kiválasztott közvetítési mód
OK
OK
OK
Digitális Antenna: Ha a Digitális antennás
Digitális kábel: Ha a Digitális kábel segítségével
Ha az IgenOK
Gyakoriság és Keresés
Nem
OK
Start Gyakoriság Stop Gyakoriság és Keresés .
Next
majd nyomja meg az OK
Megjegyzés:
Ha a
Magyar - 14 -
Első telepítés
Menü
Beállítások>Telepítés>Automatikus
csatornakeresés>Műhold
jelenik meg. Válassza ki a nyelvet és nyomja meg az
OK
OK
Válassza a Yes
nyomja meg az OK
Rendszermenü tartalma
Ország
Bolti mód opciót.
Otthoni
módot. Ez az opció a Beállítások>Rendszer>Tovább
az OK
a TermészetesOK
a választást a Beállítások> Kép Mode
az Adatvédelmi beállítások
Beállítások>Rendszer>Adatvédelmi beállítások
Internetkapcsolat
Page 99

opció tartozik.
Megjegyzés:
megjelenik az Antennatípus
Antennatípust
Közvetlen
vagy
nyomja meg az OKFolytassa
LNB konfigurálása
Direkt:
USB eszközre.
OK
meg az OK
Egykábeles terjesztés:
OK lenyomásával
Média lejátszás az USB bemeneten keresztül
Nincs jel
és egy DiSEqC kapcsolóval
DiSEqC kapcsoló:
FONTOS! Mentse el a memória eszközökön
csatlakoztatná. Megjegyzés: A gyártó nem vállal
OK
Analóg: Ha az Analóg
merevlemezek formázása során a formázási folyamat
Csatornák
Edit lap opcióinak a segítségével
vagy a Menü
jeleníteni a csatornákat az LCN(*)
Válassza ki az Igen
Megjegyzés:Média tallózó
Magyar - 15 -
meg az OK
(*)
Page 100

Lejátszás
Nyomja le a Stop
USB feljátszás
FONTOS:
lemezt a tévé TV>Recordings>Settings
a Format Disk opció segítségével.
Azonnali felvétel
Nyomja le a Record
A tévé Recordings opciót.
Stop/Leállítás
Opciók
meg az OK OK
felvétel során. A rádió adások felvétele nem támogatott.
tárolásra.
Megjegyzés:
Stop
és térjen vissza a Felvételek
Szünet
lép. A Fast Forward
Fast Forward
Felvétel beállításai
TV>FelvételBeállítások lapján. Válassza ki a
SettingsBal vagy a Jobb
és nyomja meg az OK
Bal vagy a Jobb
Korai kezdés:
Ennek
Médialejátszó
vissszajátszása.
a Pause/szünet
Magyar - 16 -
 Loading...