

Horiba Scientific LAQUA EC210, LAQUA EC220, LAQUA PC220, LAQUA PC210 Quick Manual
Conductivity Calibration & Measurement
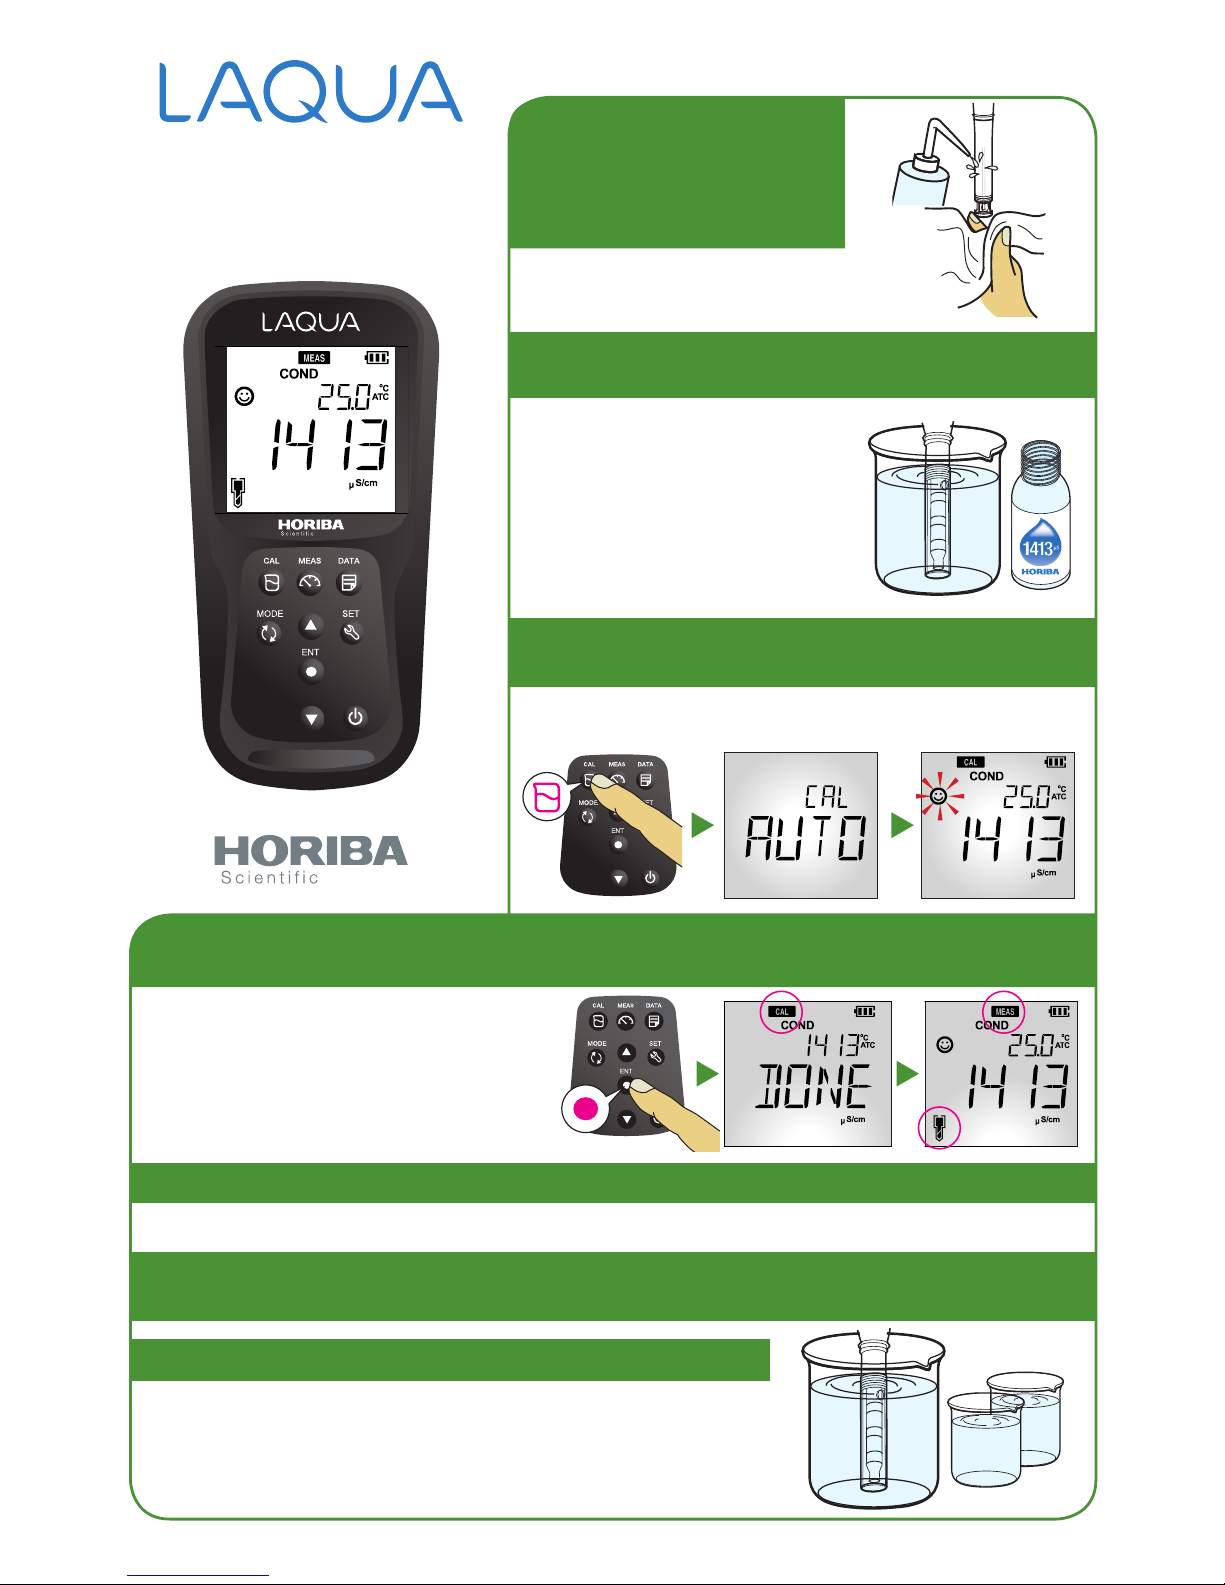
The screen will display the calibration type briefly and the
will start blinking until the reading stabilizes.
1. Rinse the conductivity
electrode with clean
water and blot using
lint-free tissue to
remove excess water.
2. Immerse the conductivity electrode in
standard solution.
3. Press CAL button on the meter to switch
to calibration mode.
4. Press ENT button to conrm the conductivity reading. To abort calibration,
press MEAS key.
Perform calibration using a
standard solution that has a
conductivity value close to the
expected sample value.
For multi-point calibration, start
with the lowest conductivity
standard. Move to standards with
increasing conductivity values.
Make sure that the uppermost black ring in
the conductivity electrode body is immersed
in sample and there are no bubbles trapped
within the electrode.
5. Repeat step nos. 1 to 4 to perform calibration with the next standard solution(s).
6. Rinse the conductivity electrode with clean water and blot using lint-free
tissue to remove excess water.
7. Immerse the conductivity electrode in sample.
The meter allows up to 4 points for auto calibration and up to 5 points for manual calibration.
Quick Guide
LAQUA 200 Series
EC210/220 & PC210/220
Handheld Meters
www.horiba-laqua.com
Press
The meter will switch to measurement
mode and the electrode icon will
appear on the screen.
EC210
Press

Measurement Modes
VIDEO VIDEO
VIDEO
Auto Stable Auto Hold Real Time
Conductivity
Calibration Data
Conductivity
Calibration
Cell Constant
Setting
VIDEOVIDEOVIDEO
Conductivity Setup
Press
Press
Press
Press up or down
buttons to scroll
through settings
Press ENT button to
confirm settings
EC210
Press
P1 COND
• P1.6 C.CLR – Erase CAL data
• P1.5 T.REF – Set reference temperature
• P1.4 T.CFF – Set temperature coefficient
• P1.3 A.CAL – Switch on / off auto cal
• P1.2 UNIT – Select conductivity unit
• P1.1 CELL – Set cell constant
P2 TDS
• P2.2 UNIT – Select TDS unit
• P2.1 FACT – Select TDS curve
P3 SAL
• P3.3 C.CLR – Erase CAL data
• P3.2 TYPE – Select salinity curve
• P3.1 UNIT – Select salinity unit
P4 D ATA
• P4.3 D.CLR – Erase data log
• P4.2 PRNT – Print data log
• P4.1 LOG – Set data log interval
P5 GEN
• P5.4 RSET – Reset meter
• P5.3 °C/°F – Select temperature unit
• P5.2 A.OFF – Set auto shut-off time
• P5.1 STBL – Select measurement mode
P6 CLK*
• P6.2 TIME – Set time
• P6.1 DATE – Set date
*Available in 220 models only
 Loading...