

Hope Industrial Systems, Inc.
User Manual
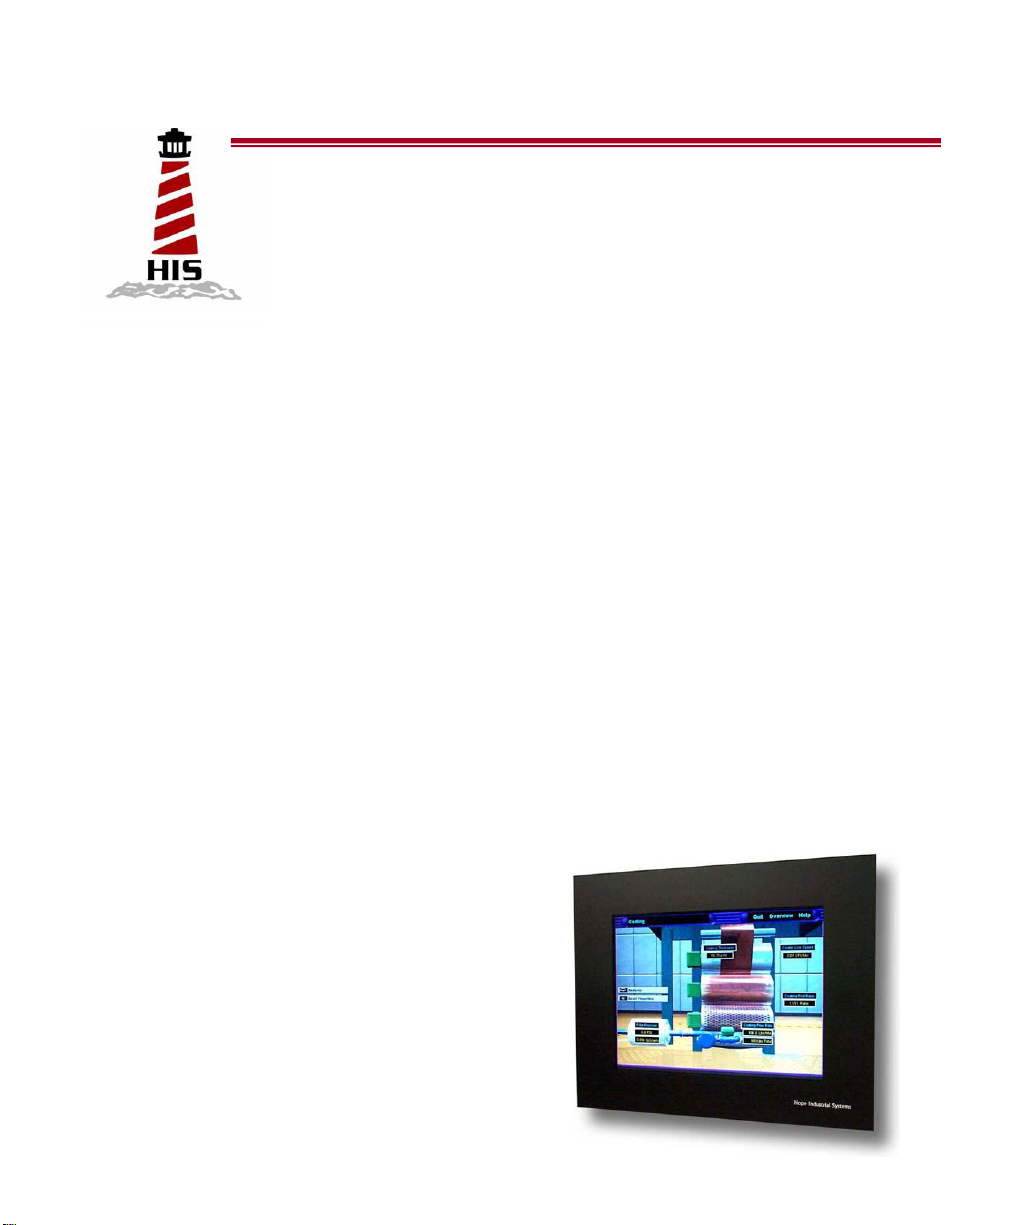
15” Panel Mount Industrial Monitor
Revision E
Model Numbers: HIS-ML15- _ _ _ E

TABLE OF CONTENTS
Safety and Regulation Information ........................... 3
Factory Preset Timing ............................................... 4
Setting the Timing Mode ........................................... 5
OSD and Power Lock Settings ................................. 6
Adjusting the Screen Image...................................... 7
Main Menu Controls ................................................. 9
Information for Resistive Touchscreen Monitors ..... 13
Installation Instructions ........................................... 14
Cleaning ................................................................. 16
Troubleshooting ...................................................... 17
Drawings ................................................................ 18
Specifications ......................................................... 20
Warranty Statement ................................................ 23
2

Safety and Regulator y Information
Warning
To prevent fire or shock hazard, do not expose the unit to rain or moisture.
Dangerously high voltages are present inside the unit. Do not disassemble the
unit. Refer servicing to qualified personnel only.
This equipment is not intended for use in critical applications where its failure
to operate would create immediate life threatening circumstances. Applications including but no limited to nuclear reactor control, aerospace navigation
systems and life support systems are not appropriate for this product.
This product is intended to be mounted in a suitable cabinet or other enclosure.
The NEMA 4, 4x or 12 ratings are applicable only when properly installed in a
like rated enclosure.
This product is a UL Recognized Component and must be used with a listed
computer.
FCC Notice
This equipment has been tested and found to comply with the limits for a Class A digital device,
pursuant to Part 15 of the FCC Rules. These limits are designed to provide reasonable protection
against harmful interference when the equipment is operated in a commercial environment. This
equipment generates, uses and can radiate radio frequency ener gy and, if not installed and used in
accordance with the instruction manual, may cause harmful interference to radio communications.
Operation of this equipment in a residential area is likely to cause harmful interference in which case
the user will be required to correct the interference at his own expense. Any changes or modifications not expressly approved by the grantee of this device could void the user’s authority to operate
the device.
3
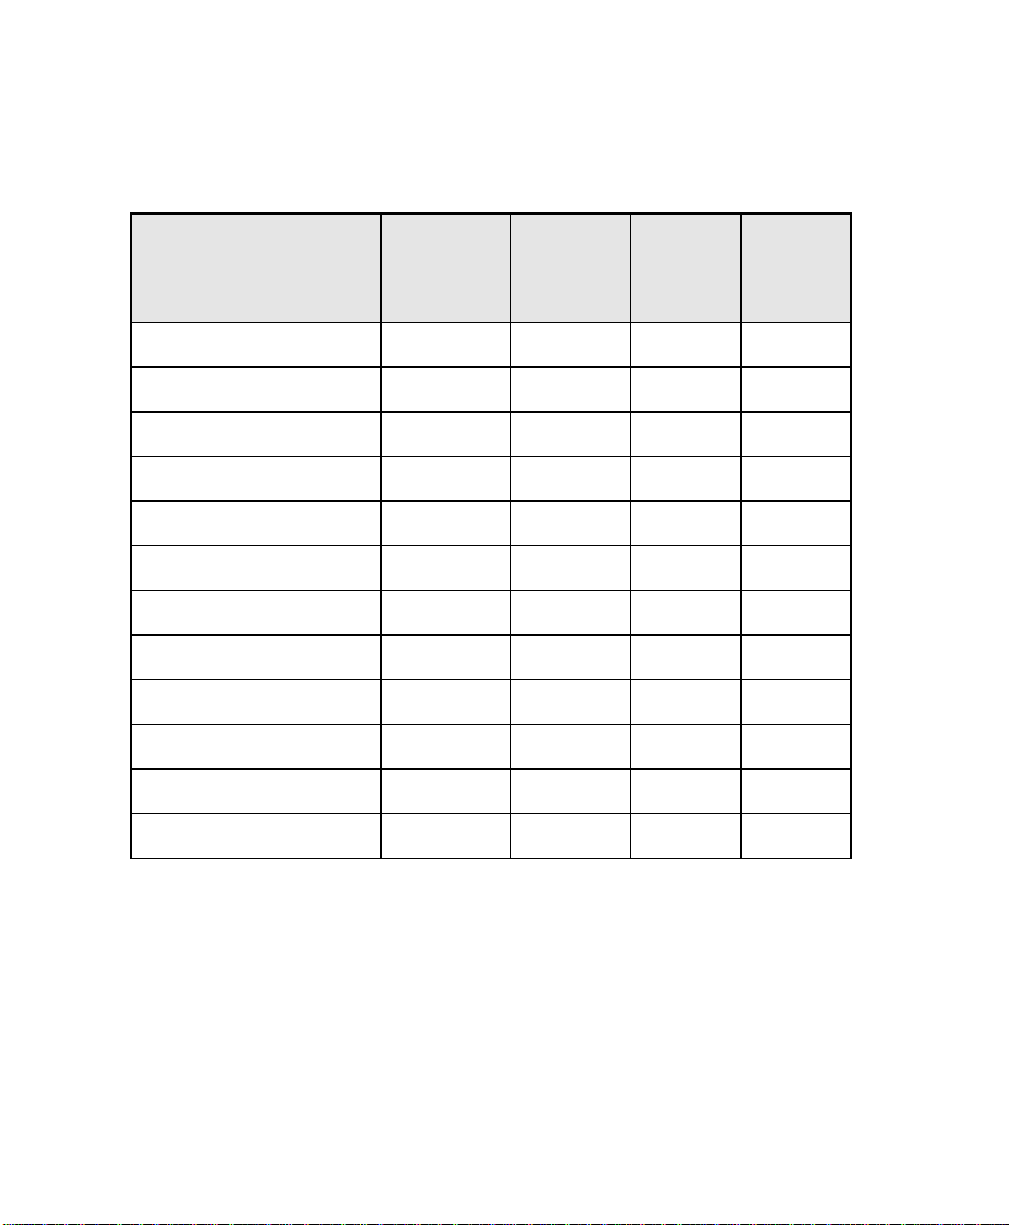
Factory Preset Timing
Resolution
IBM, 640 x 350 31.469 70.086 25.175 +/IBM, 640 x 480 31.469 59.940 25.175 -/-
IBM, 720 x 400 31.469 70.087 28.322 -/+
VESA, 640 x 480 37.500 75.000 31.500 -/VESA, 640 x 480 37.861 72.809 31.500 -/-
VESA, 800 x 600 35.156 56.250 36.000 -/VESA, 800 x 600 37.879 60.317 40.000 +/+
VESA, 800 x 600 46.875 75.000 49.500 +/+
VESA, 800 x 600 48.077 72.188 50.000 +/+
Horizontal
Frequency
(KHz)
Vertical
Frequen-
cy
(Hz)
Pixel
Clock
(MHz)
Sync
Polari-
ty
(H/V)
*VESA, 1024 x 768 48.363 60.004 65.000 -/*VESA, 1024 x 768 56.476 70.069 75.000 -/*VESA, 1024 x 768 60.023 75.029 78.750 +/+
* Factory recommended timings for best p ic ture quality
4

Setting the Timi ng Mode
Setting the computer’s timing mode is important for maximizing the quality
of the screen image and minimizing eye strain. The timing mode consists
of the screen resolution (ex. 1024 x 768) and the refresh rate (ex. 60 Hz or
vertical frequency). After setting the computer’s timing mode, use the OSD
(On Screen Display) controls to adjust the screen image.
For the best picture quality set your LCD display timing mode to:
1024 x 768 @ 60Hz.
To set the timing mode on a computer running Microsoft Windows:
1. Set the resolution: Right-click on the Windows desktop > Properties
> Settings > adjust the resolution.
2. Set the refresh rate: See your graphic card’s user guide for instructions.
Warning: Do not set the graphics card in your computer to exceed the
maximum refresh rate of 75 Hz; doing so may result in permanent damage
to your LCD display.
5

OSD and Power Lock Settings
OSD Lock: Press and hold the up arrow for 10 seconds. Locking the
OSD disables the OSD buttons. If any buttons are pressed, the message
OSD Locked will display for 5 seconds.
OSD Unlock: Press and hold the up arrow again for 10 seconds.
Power Button Lock: Press and hold the down arrow for 10 seconds.
Locking the power button disables it. If the power button is pressed, the
message Power Button Locked will display for 5 seconds. With or without
this setting, after a power failure, your LCD display’s power will automatically turn ON when power is restored.
Power Button Unlock: Press and hold the down arrow again for 10
seconds.
6
Adjusting the Screen Image
• Contrast Adj ustment
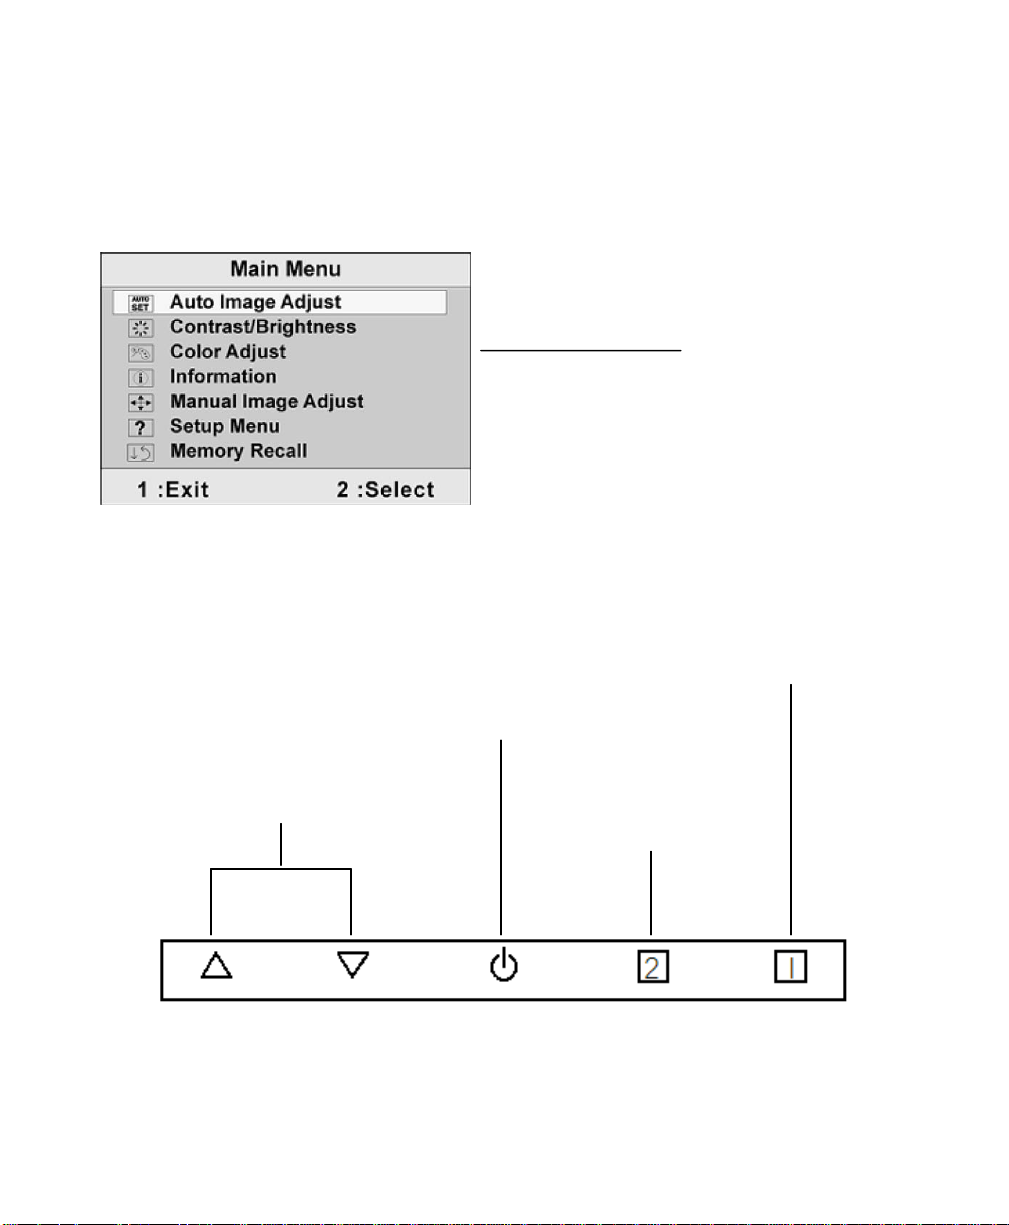
Use the buttons on the rear control panel to display and adjust the OSD controls which display on the screen.
Main Menu
With OSD Controls
• Scrolls through menu
options and adjusts the
displayed control
• Power Light:
• Standby Power
o Green = On
o Orange = Power
Saving
• Auto Image Adjust
• Displays the control
• Displays the Main Menu
or exists the control
screen, saving a djustments
screen for the highlighted control
7

1. To display the Main Menu, press button [1].
The area at the bottom of the
tions of buttons 1 and 2.
Note: All OSD menus and adjustment screens disappear automatically after about
15 seconds. This is adjustable through the OSD timeout setting in the setup menu.
2. To select a control to adjust, press
3. After the desired control is selected, press button [2]. A control screen like the one
shown below appears.
4. To adjust the setting, press the up
5. To save the adjustments and exit the menu, press button [1] twice.
The following tips may help optimize your display:
• Adjust the computer’s graphics card so that it outputs a 1024 x 768 @ 60 Hz video
signal to the LCD display. (Look for instructions on “changing the refresh rate” in
the graphics card’s user guide.)
• If necessary, make small adjustments using H. POSITION and V. POSITION until
the screen image is completely visible. (The black border around the edge of the
screen should barely touch the illuminated “active area” of the LCD display.)
or to scroll up or down in the Main Menu.
screen shows the cur rent func-
or down buttons.
8

Main Me nu Cont rols
Control
Explanation
Auto Image Adjust automatically sizes, centers, and fine tunes the video
60 Hz and set the resolution to its pre-set value.
Contrast adjusts the difference between the image background (black
Color Adjust provides several color adjustment modes, including preset
Adjust the menu items shown below by using the up and down buttons.
signal to eliminate waviness and distortion. Press the [2] button to execute
Auto Image Adjust.
Note: Auto Image Adjust works with most common video cards. If this
function does not work on your LCD display, lower the video refresh rate to
level) and the foreground (white level).
Brightness adjusts background black level of the screen image.
color temperatures and a User Color mode which allows independent adjustment of red (R), green (G), and blue (B). The factory setting for this
product is 6500K (6500 Kelvin).
9
sRGB – This is quickly becoming the industry standard for color manage-
3. When all color adjustments are complete, press button [1] twice.
tion is 1024 x 768 and the refresh rate is 60 Hertz.
to the right. The Vertical setting moves the screen image up and down.
ment, with support included in many of the latest applications. Enabling
this setting allows the LCD display to more accurately display colors the
way they were originally intended. Enabling the sRGB setting will cause
the Contract and Brightness adjustment to be disabled.
9300K – Adds blue to the screen image for cooler white (used in most office settings with fluorescent lighting).
6500K – Adds red to the screen image for warmer white and richer red.
5400K – Adds green to the screen image for a darker color.
User Color – Individual adjustments for red (R), green (G), and blue (B).
1. To select color (R, G, or B) press button [2].
2. To adjust selected color, press
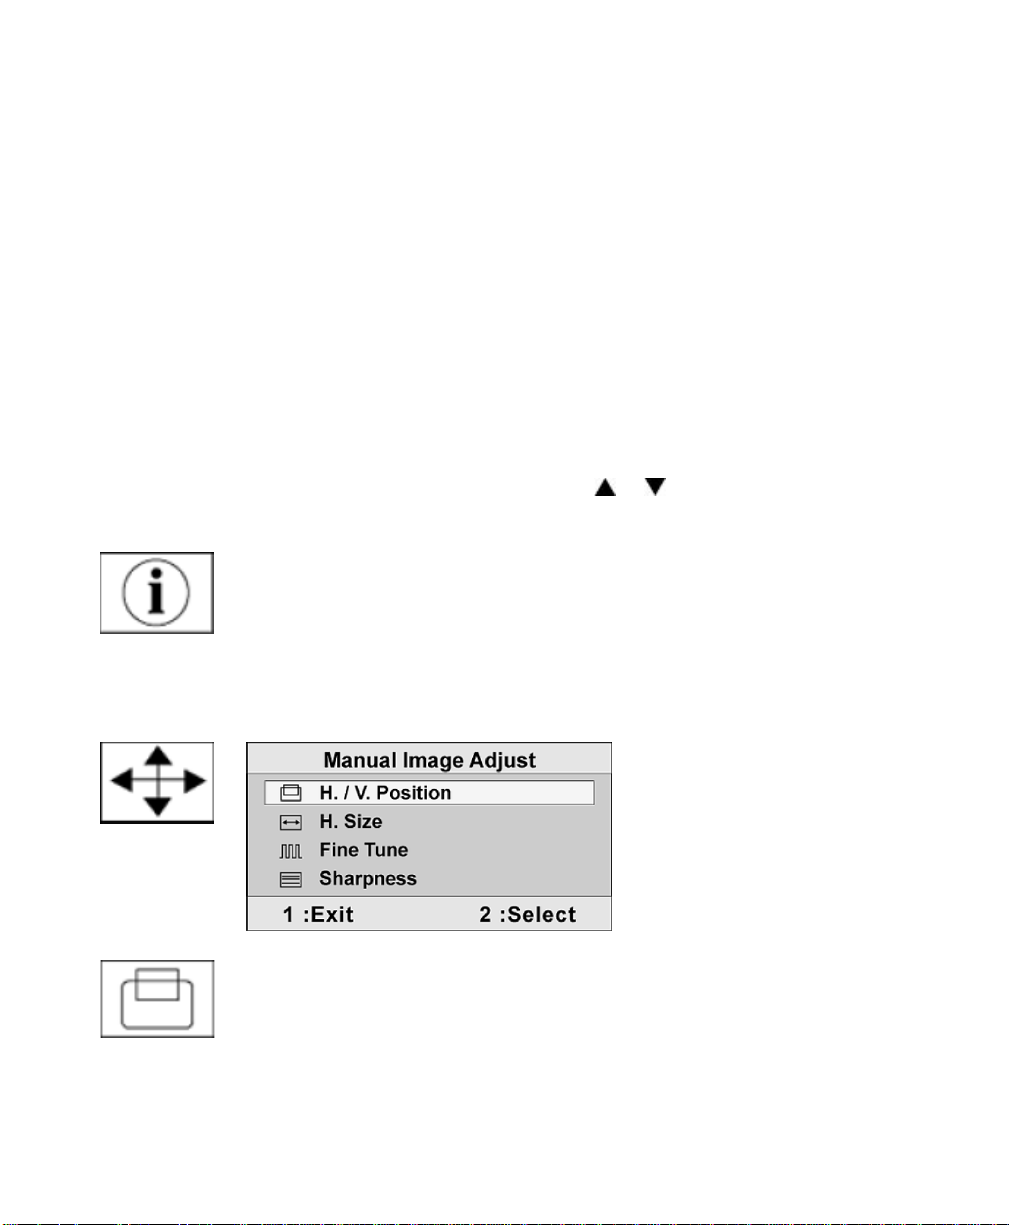
Information displays the timing mode (video signal input) coming from the
graphics card in the computer, the LCD model number, and the serial
number. See your graphics card’s user guide for instruction on changing
the resolution and refresh rate (vertical frequency).
Note: VESA 1024 x 768 @ 60 Hz (recommended) means that the resolu-
or .
H./V. Position (Horizontal/Vertical Position) moves the screen image
left or right and up or down. Press button [[2] to toggle between Horizontal
and Vertical. The Horizontal setting moves the screen image to the left or
10
H. Size (Horizontal Size) adjusts the width of the screen image.
Note: Try the Auto Adjust function before using the Fine Tune control.
Sharpness adjusts the clarity and focus of the screen image.
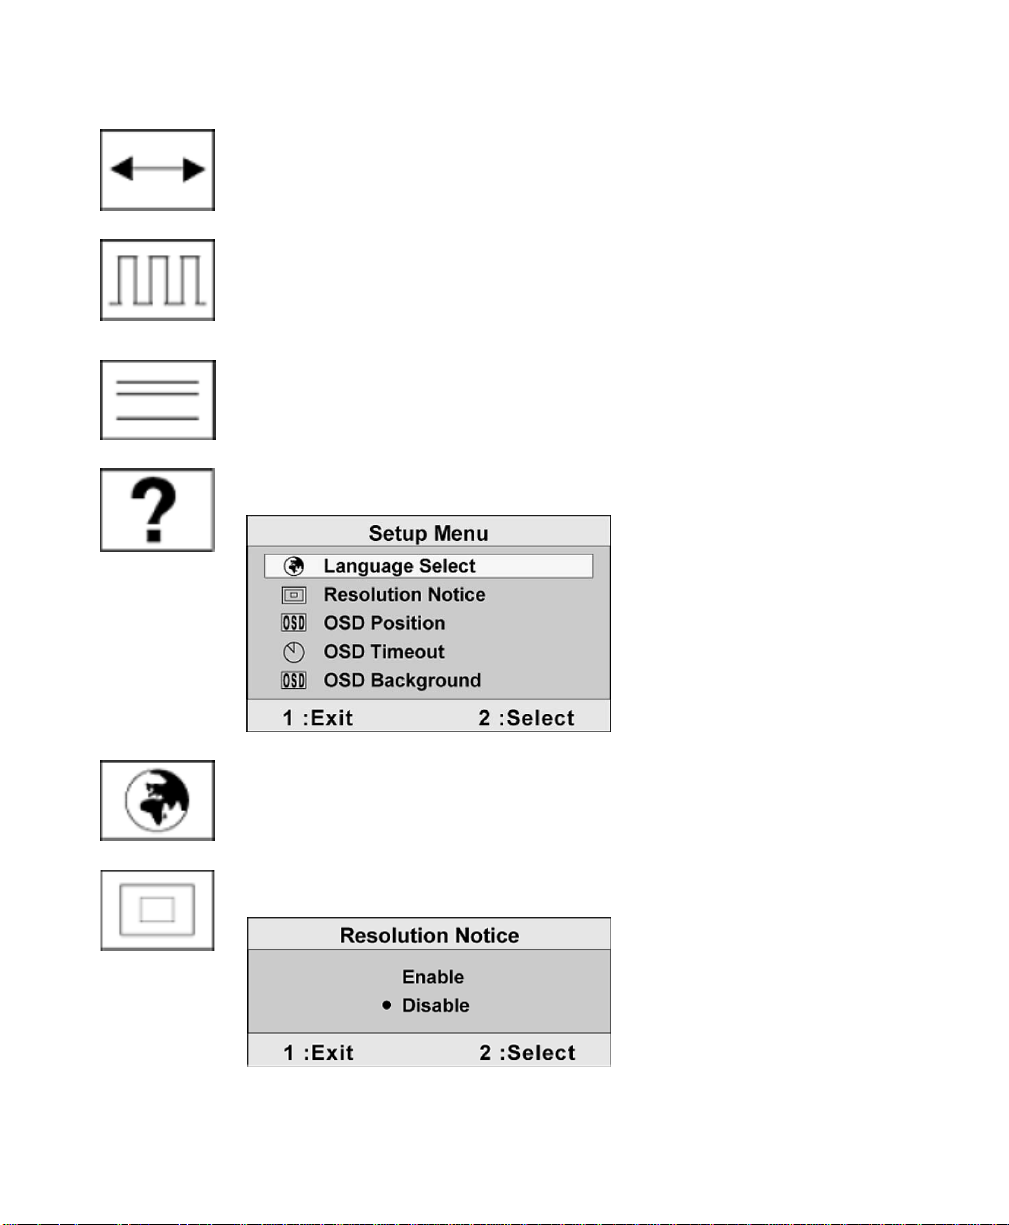
Setup menu displays the menu shown below:
Language Select allows the user to choose the language used in the me-
Fine Tune sharpens the focus by aligning text and/or graphics with pixel
boundaries.
nus and control screens.
Resolution Notice advises the optimal resolution to use.
11

OSD Position allows the user to move the on-screen display menus and
OSD Background allows the user to turn the On-Screen Display back-
Memory Recall returns the adjustments back to factor settings if the dis-
control screens.
OSD Timeout sets the length of time the on-screen display screen is displayed. For example, with a “15 second” setting, if a control is not pushed
within 15 seconds, the display screen disappears.
ground On or Off.
play is operating in a factory Preset Timing Mode listed in the Specifications of this manual.
12

Information for Re s istive Touchscreen Monitors
The enclosed CD-ROM contains documentation and drivers for all major
operating systems (touchscreen monitors only). To assure you have the
most current information, check the following Internet addresses:
http://www.hismonitors.com/Touchscreen_Drivers.htm
13
 Loading...