

Hoover SteamVac Widepath LS Owner's Manual

HOOVER,.
Widepath _
The Easy to Use Deep Cleaner
Congratulations on your purchase
SteamVac _ Widepath cleaners have 6 rotating
brushes that deep clean carpets and scrub
bare floor!!
SteamVac TM Widepath Deep Cleaner cleans carpet fibers
by applying hot tap water and cleaning solution,
www,hoover,com
°
LS MODEL
56518114
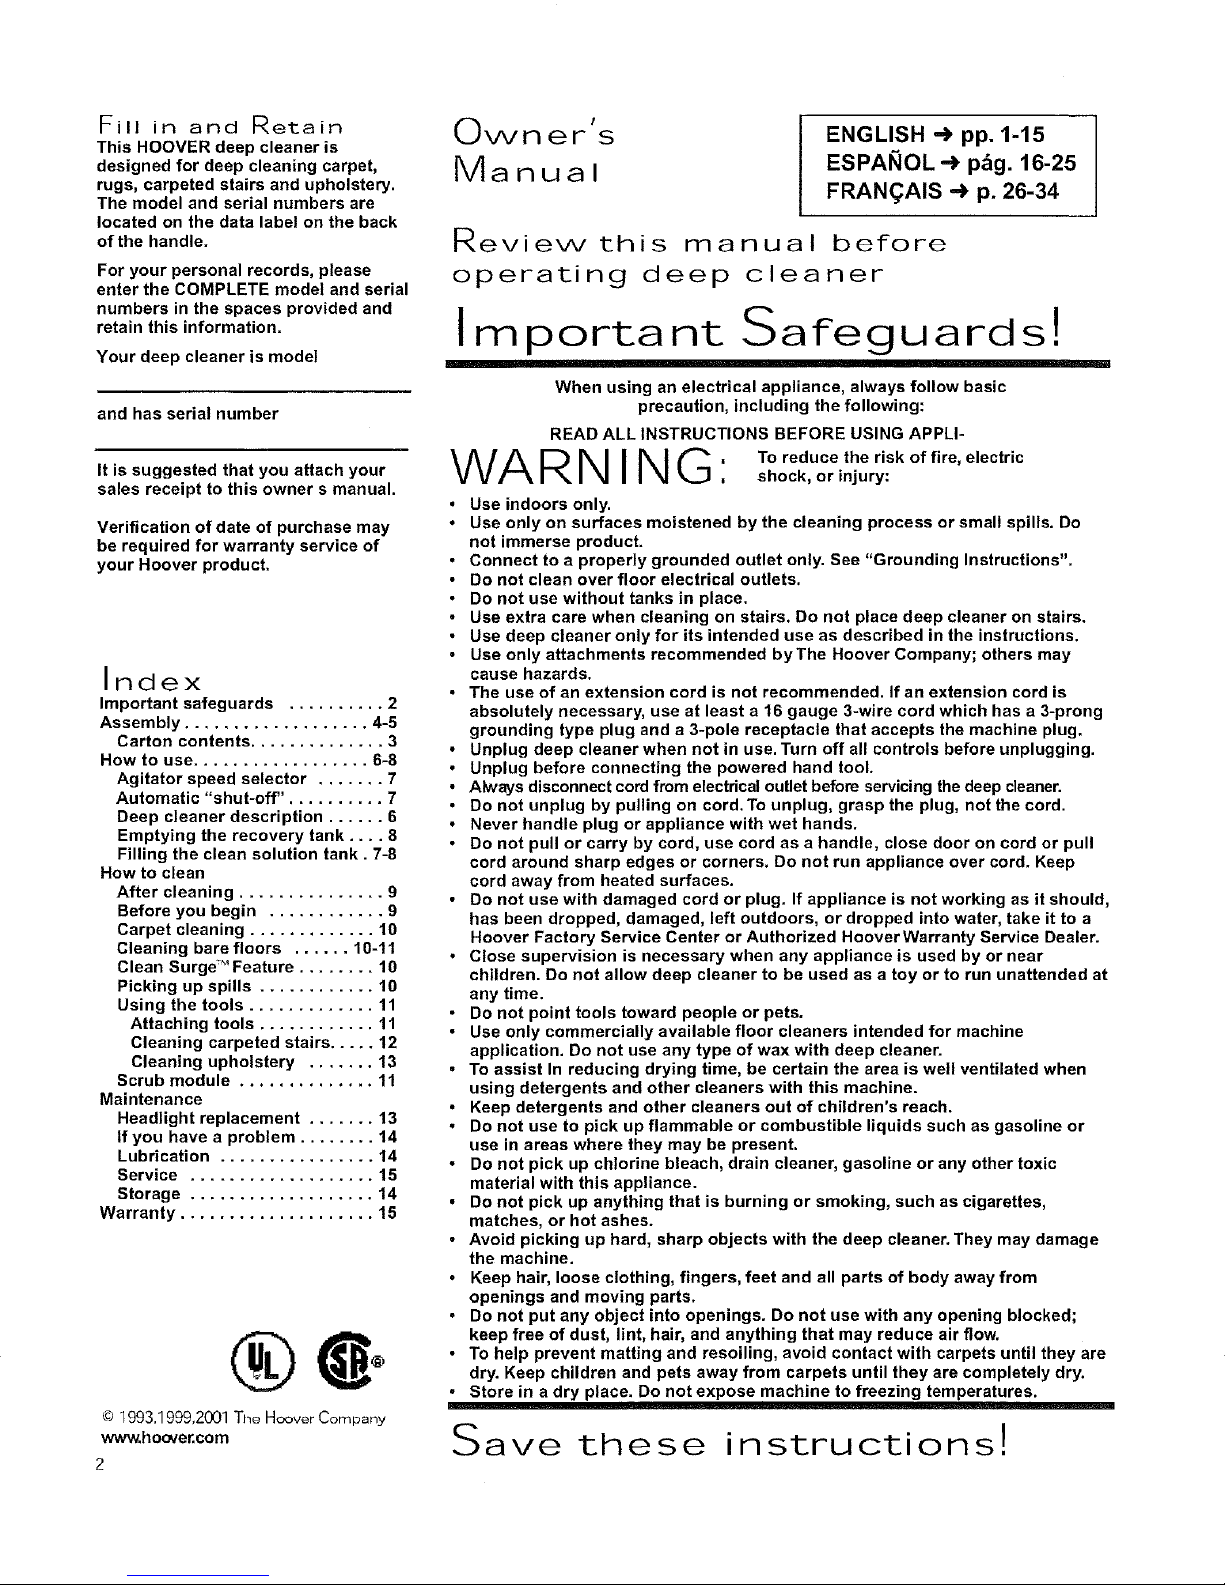
Fill in and Retain
This HOOVER deep cleaner is
designed for deep cleaning carpet,
rugs, carpeted stairs and upholstery.
The model and serial numbers are
located on the data label on the back
of the handle.
For your personal records, please
enter the COMPLETE model and serial
numbers in the spaces provided and
retain this information.
Your deep cleaner is model
and has serial number
Own er's
Manual
ENGLISH _ pp. 1-15
ESPAI_OL _ pbg. 16-25
FRAN(_AIS -> p. 26-34
Review this manual before
operating deep cleaner
Important Safeguards!
When using an electrical appliance, always follow basic
precaution, including the following:
READ ALL INSTRUCTIONS BEFORE USING APPLI-
It is suggested that you attach your
sales receipt to this owner s manual.
Verification of date of purchase may
be required for warranty service of
your Hoover product.
Index
Important safeguards .......... 2
Assembly ................... 4-5
Carton contents .............. 3
How to use .................. 6-8
Agitator speed selector ....... 7
Automatic "shut-off". ......... 7
Deep cleaner description ...... 6
Emptying the recovery tank .... 8
Filling the clean solution tank. 7-8
How to clean
After cleaning ............... 9
Before you begin ............ 9
Carpet cleaning ............. 10
Cleaning bare floors ...... 10-11
Clean Surge-'_Feature ........ 10
Picking up spills ............ 10
Using the tools ............. 11
Attaching tools ............ 11
Cleaning carpeted stairs ..... 12
Cleaning upholstery ....... 13
Scrub module .............. 11
Maintenance
Headlight replacement ....... 13
If you have a problem ........ 14
Lubrication ................ 14
Service ................... 15
Storage ................... 14
Warranty .................... 15
_)1993,1999,2001The HooverCompany
ww_hoover.com
2
RNING' To reduce the risk of fire, electric
Use indoors only.
Use only on surfaces moistened by the cleaning process or small spills. Do
not immerse product.
Connect to a properly grounded outlet only. See "Grounding Instructions".
Do not clean over floor electrical outlets.
Do not usa without tanks in place.
Use extra care when cleaning on stairs. Do not place deep cleaner on stairs.
Use deep cleaner only for its intended use as described in the instructions.
Use only attachments recommended byThe Hoover Company; others may
cause hazards.
The use of an extension cord is not recommended. If an extension cord is
absolutely necessary, usa at least a 16 gauge 3-wire cord which has a 3-prong
grounding type plug and a 3-pole receptacle that accepts the machine plug.
Unplug deep cleaner when not in use. Turn off all controls before unplugging.
Unplug before connecting the powered hand tool.
Always disconnectcord from electricaloutlet before servicingthe deep cleaner.
Do not unplug by pulling on cord. To unplug, grasp the plug, not the cord.
Never handle plug or appliance with wet hands.
Do not pull or carry by cord, use cord as a handle, close door on cord or pull
cord around sharp edges or corners. Do not run appliance over cord. Keep
cord away from heated surfaces.
Do not use with damaged cord or plug. If appliance is not working as it should,
has been dropped, damaged, left outdoors, or dropped into water, take it to a
Hoover Factory Service Center or Authorized HooverWarranty Service Dealer.
Close supervision is necessary when any appliance is used by or near
children. Do not allow deep cleaner to be used as a toy or to run unattended at
any time.
Do not point tools toward people or pets.
Use only commercially available floor cleaners intended for machine
application. Do not use any type of wax with deep cleaner.
i
To assist In reducing drying time, be certain the area is well ventilated when
using detergents and other cleaners with this machine.
Keep detergents and other cleaners out of children's reach.
Do not use to pick up fammable or combustible liquids such as gasoline or
use in areas where they may be present.
Do not pick up chlorine bleach, drain cleaner, gasoline or any other toxic
material with this appliance.
Do not pick up anything that is burning or smoking, such as cigarettes,
matches, or hot ashes.
Avoid picking up hard, sharp objects with the deep cleaner. They may damage
the machine.
Keep hair, loose clothing, fingers, feet and all parts of body away from
openings and moving parts.
Do not put any object into openings. Do not use with any opening blocked;
keep free of dust, lint, hair, and anything that may reduce air flow.
To help prevent matting and resoiling, avoid contact with carpets until they are
dry. Keep children and pets away from carpets until they are completely dry.
Store in a dry place. Do not expose machine to freezing temperatures.
, shock, or injury:
Save these instructions!
Grounding
Instructions
o
This applianc[_- must be grounded. If it
should malfunction or breakdowl%
grounding provides a path of least resis-
tance for electrical current to reduce the
risk of electric shock, This appliance Is
equippod with a cord having an equip-
ment-grounding conductor (C) and
grounding plug (A). The plug must be
plugged Into an appropriate outlet (S)
that i-; properly install(_d and ground(;d in
accordance with all local codes and
ordinnnces.
DANGER-
Improper connectio[1 of the equipment-
grounding conductor can result in the
risk of E_lectric shock, Check with a qual-
ified electrician or service person if you
art-; in doubt as to whother tile outlet ie,
properly grounded, Do not modify tile
plug provided with the appliance - if' it
will not fit the outlet, have a proper outlet
installed by a qualified electrician, This
appliance is for use on a nominal 120
volt circuit and has a grounding plug
that looks lik[_ tho plug illustrated in
sketch (A).
A temporary adapter (D) may be used to
connect this plug tO £ 2-pole receptacle
(E) if a properly grounded outlet is not
available, The temporary adapter should
be used only until a properly grourlded
outlet (B) can be installed by a qualified
electrician, Tho green colored rigid ear_
lug, or the llke (F) extending from the
adapt[;r must be connected to a perma-
nent ground (a) such as a properly
grounded outlet box cover, Whenever
the adapter is used, it must be held in
place by a metal screw, NOTE: In
Canada, the use of a temporary adapter
is not permitted by the Canadian
Electrical Code,
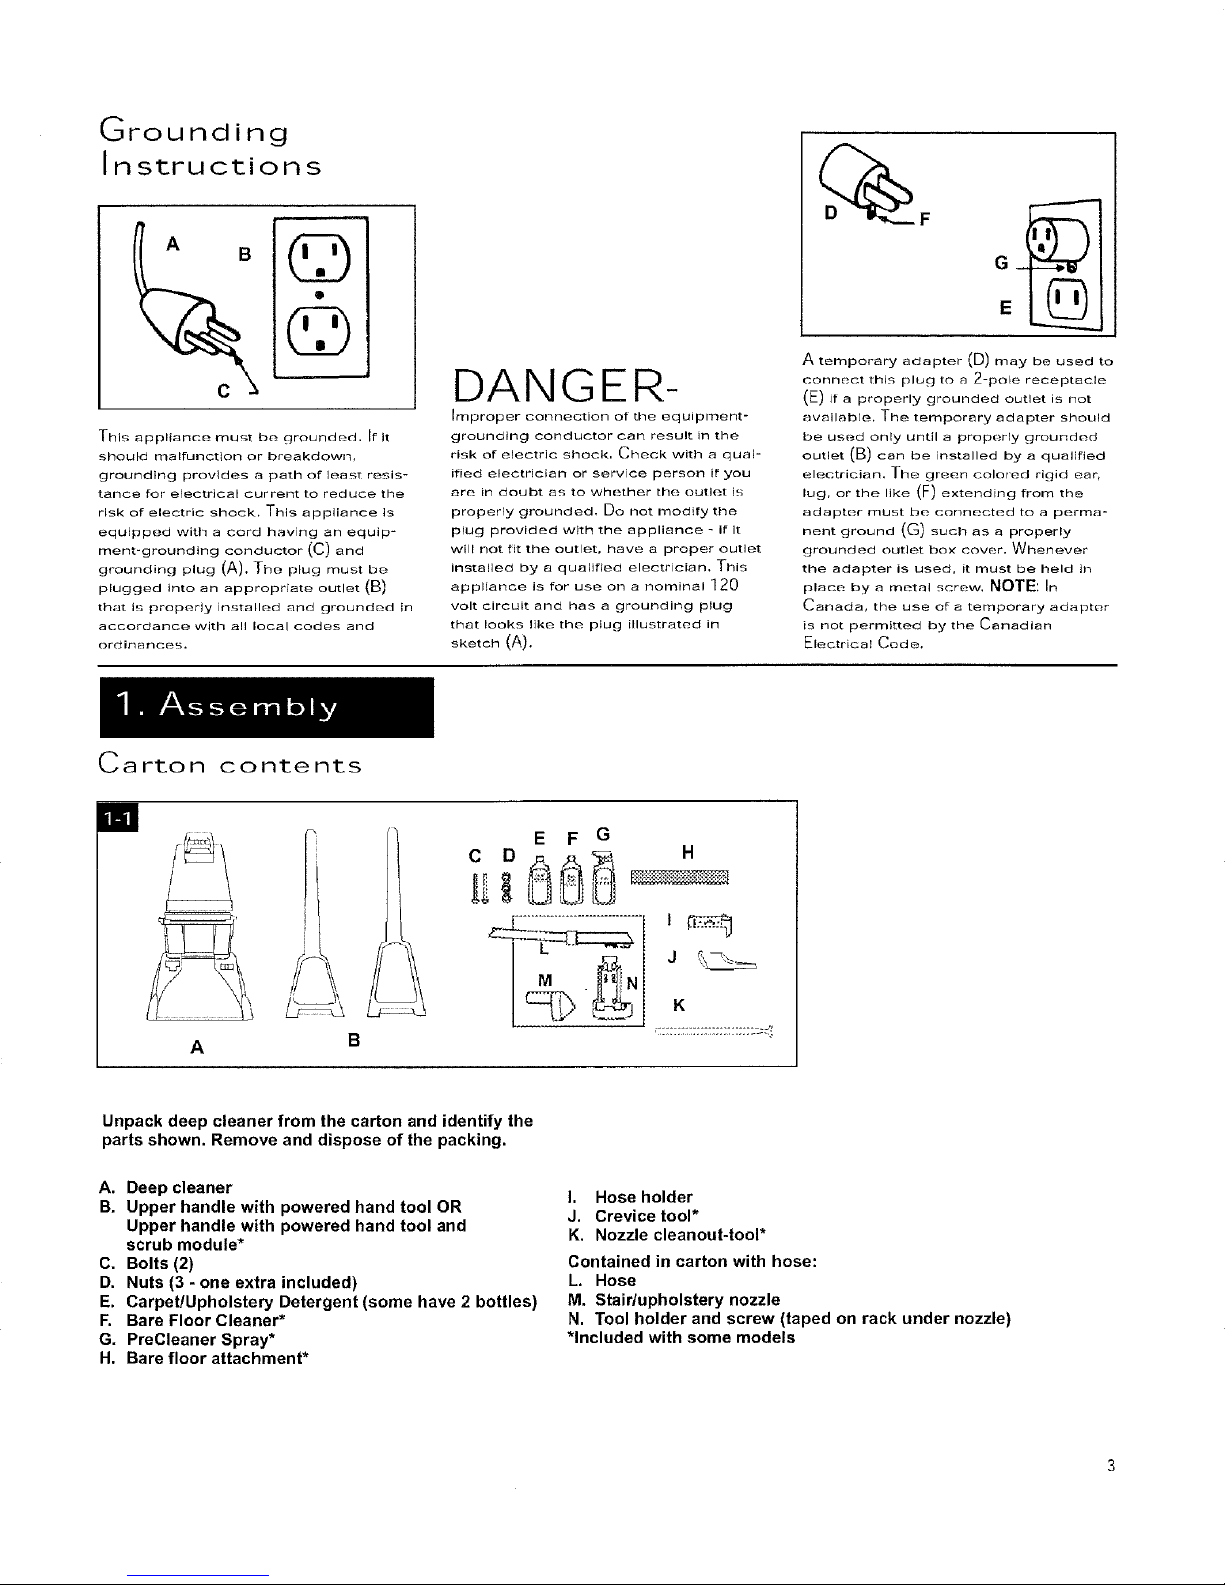
Carton contents
m
C D _ H
A
Unpack deep cleaner from the carton and identify the
parts shown. Remove and dispose of the packing.
A. Deep cleaner
B. Upper handle with powered hand tool OR
Upper handle with powered hand tool and
scrub module*
C. Bolts (2)
D. Nuts (3 - one extra included)
E. Carpet/Upholstery Detergent (some have 2 bottles)
F. Bare Floor Cleaner*
G. PreCleaner Spray*
H. Bare floor attachment*
E F G
M ._N J
I. Hose holder
J. Crevice tool*
K. Nozzle cleanout-tool*
Contained in carton with hose:
L. Hose
M, Stair/upholstery nozzle
N, Tool holder and screw (taped on rack under nozzle)
*Included with some models
K
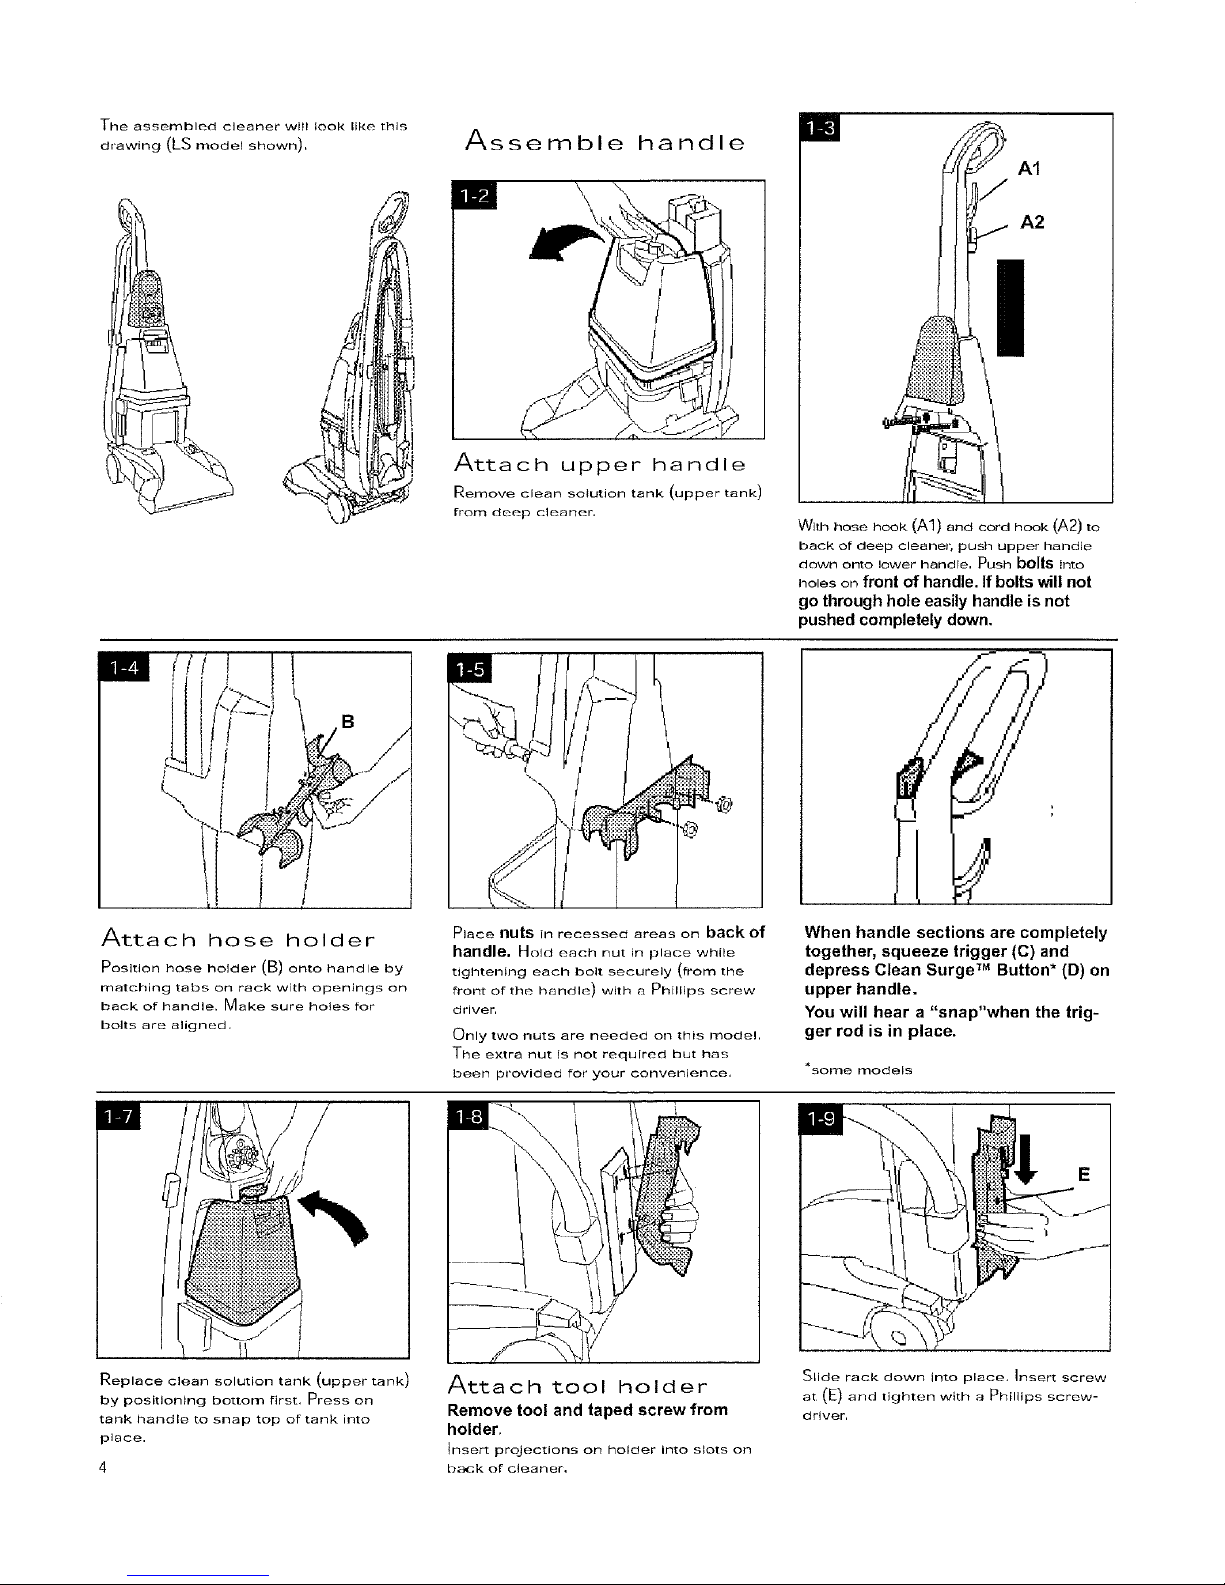
The assembled cleaner wi+l took like this
drawing (LS modet shown),
Assemble handle
Attach upper handle
Remove clean solution tank (upper tank)
from de_;p clc-an_;r,
m
AI
A2
i
W+thhosehook (A1) and cord hook (A2)to
back of deep cleaner, push upper handle
down onto lower handle, Push bOllS into
ho+s on front of handle. If bolts will not
go through hole easily handleis not
pushed completely down,
)/
/
Attach hose holder
Position hose holder (B) onto handle by
matching tabs on rack with op[_nings on
back of handle, Make sure holes for
bolts are aligned,
Replace clean solution tank (upper tank)
by positioning bottom first, Press on
tank handle to snap top of tank into
place.
4
Place nuts in recessed areas on back of
handle, Hold each nut in place while
tightening each bolt securely (from the
front of the brindle) with a Phillips screw
driver,
Only two nuts are needed on this model,
The extra nut is not required but has
beelq provide_ for your convenience,
Attach tool holder
Remove tool and taped screw from
holder.
Insert projections on holder into slots on
b_k of cleaner,
When handle sections are completely
together, squeeze trigger (C) and
depress Clean Surge TM Button* (D) on
upper handle.
You will hear a "snap"when the trig-
ger rod is in place.
+some models
Slide rack down into place, insert screw
at (E) and tight_;n with a Phillips screw-
driver,
I / :,,_1
ii' iii
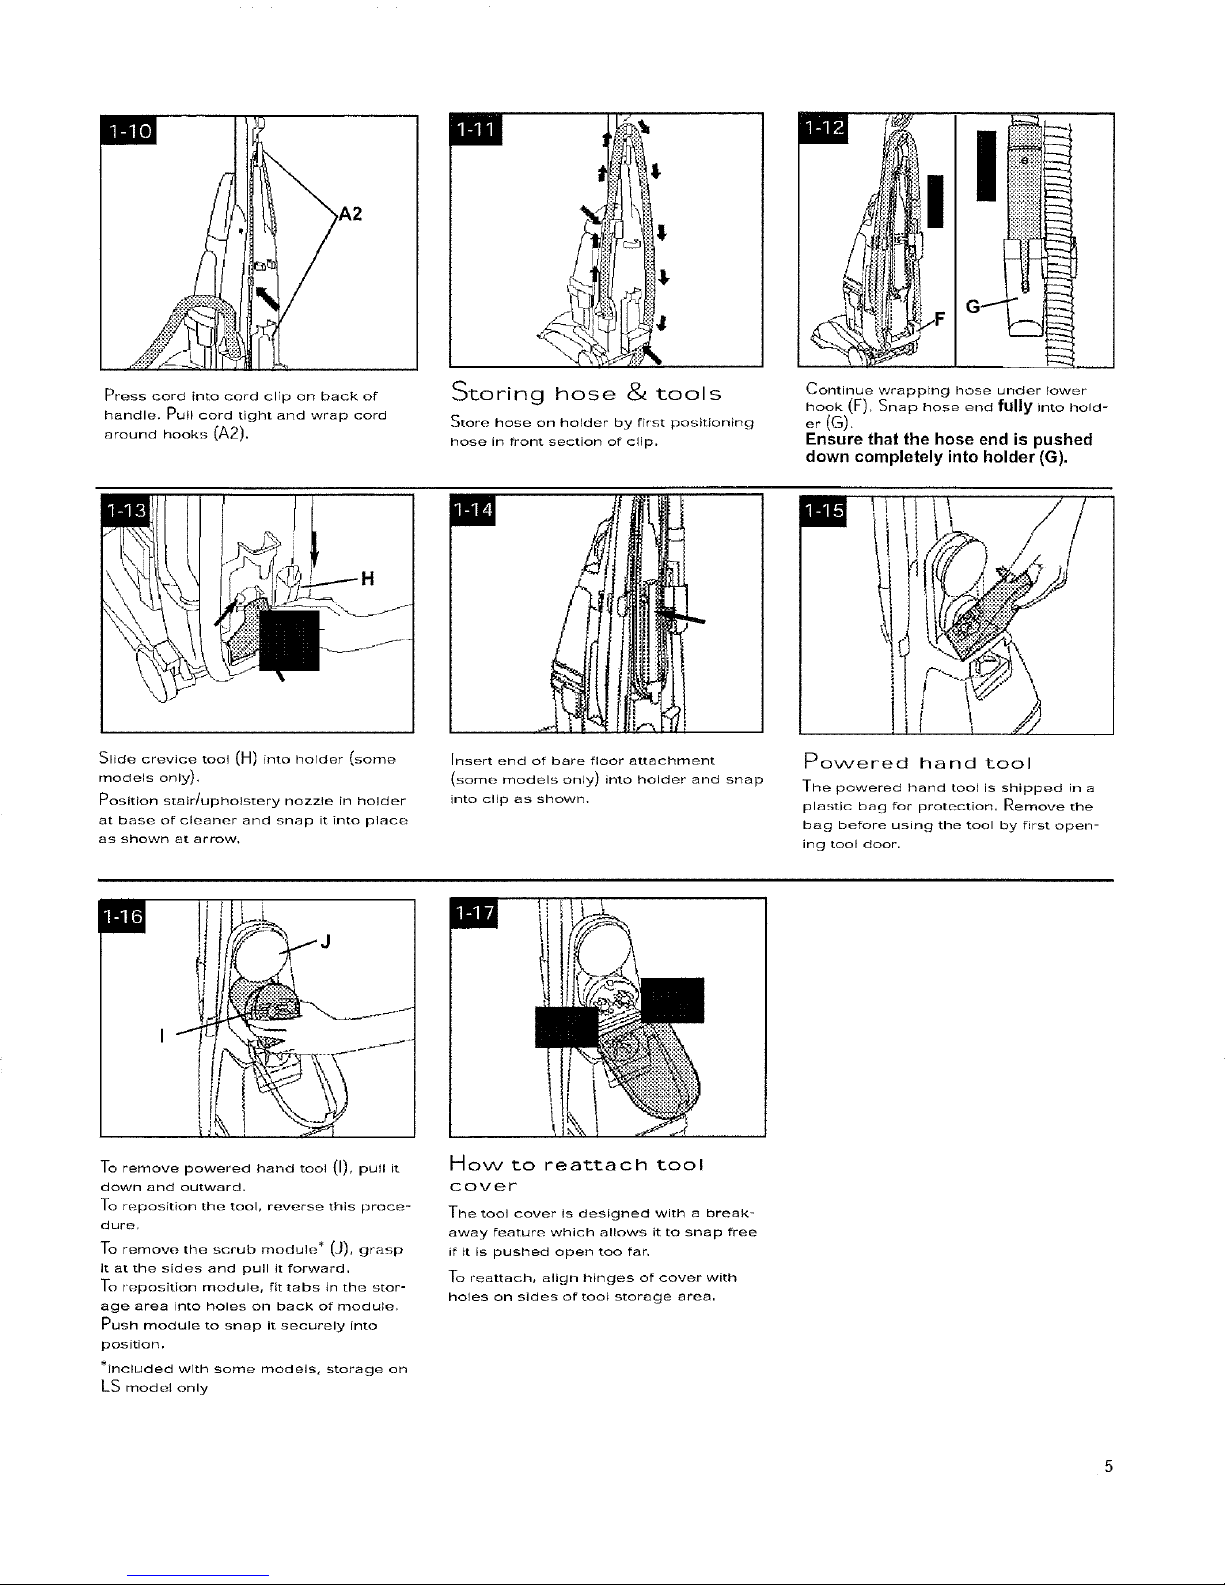
Presscordintocordcliponbackof
handle,Pullcordtightandwrapcord
aroundhooks(A2),
Slide
crevice tool (H) into Iqolder"[......
models only),
Position stairtupholstery nozzle in holder
at base of cleaner and snap it into plac{;
as shown at arrow,
Storing hose (_z tools
Store hose on holder by first positioning
hose in front section of clip,
Insert end of bare floor attachment
(som(; models only) into holder and snap
into clip as showm,
Continue wrapping hose under lower
hook (F), Snap hose end fully into hold-
er (G).
Ensure that the hose end is pushed
down completely into holder (G).
Powered hand Loci
The powered hand tool is shipped in a
plnstic bag for protection, Remove the
bag before using the tool by first open-
iiqg tool door.
To remove powered hand tool (I), pull it
down and outward.
To r0.position the tool, roverse this proce-
dure,
To remove the scrub module* (J), grasp
it atthe sides and pull it forward,
To reposition module_ fit tabs in the stor-
age area into holes on back of module,
Push module to snap it securely into
position,
_incllJded with some models, storage on
LS mod_.l only
How to reattach tool
cover
The tool cover Is deslglqed with a break-
away feature which allows it to snap free
if it is pushed open too far,
To reattach, align hinges of cover with
holes on sides of tool storage area,
 Loading...