

Page 1
• HOZP717IN
USER INSTRUCTIONS
OVENS
NOTICE D'EMPLOI ET D'INSTALLATION
DES FOURS ENCASTRABLES
MANUALE D’ISTRUZIONI
FORNO
INSTRUCCIONES DE USO
HORNOS EMPOTRABLES
BEDIENUNGSANLEITUNG
BACKOFEN
KULLANIM KILAVUZU
FIRINLAR
POKYNY PRO UŽIVATELE
TROUBY
EN
FR
IT
ES
DE
TR
CZ
02
15
30
43
56
69
84
BEDIENUNGSANLEITUNG
BACKOFEN
SL
RÚRA NA PEČENIE
NÁVOD NA POUŽITIE
CANDY HOOVER GROUP S.R.L. • Via Privata Eden Fumagalli • 20047 Brugherio Milano Italy
SK
97
110
Page 2

Safety Indications
• WARNING:the applianceand accessibleparts becomehot duringuse.
Be carefulnot to touchanyhot parts.
•WARNING: the accessible parts can become hot when the oven is in
use. Childrenmustbe keptatasafe distance.
•WARNING: ensure that the appliance is switched off before replacing
the bulb,toavoid the possibilityofelectricshocks.
•WARNING:beforeinitiatingthe automatic cleaning cycle:
- Clean theovendoor;
- Removelarge or coarsefoodresidues from the inside of the ovenusing
a dampsponge.Donotuse detergents;
- Removeall accessoriesand the sliding rackkit(wherepresent);
- Do notplaceteatowels
• In ovens with meat probe it is necessary, before making the cleaning
cycle, close the hole with the nut provided. Always close the hole with
the nutwhenthemeatprobe is not used.
•Children under 8 must be kept at a safe distance from the appliance if
not continuouslysupervised.
•Children must not play with the appliance. The appliance can be used
by those aged 8 or over and by those with limited physical, sensorial or
mental capacities, without experience or knowledge of the product,
only if supervised or provided with instructionastotheoperation of the
appliance, inasafe waywithawareness of the possiblerisks.
•Cleaning and maintenance should not be carried out by unsupervised
children.
•Do not use rough or abrasive materials or sharp metal scrapers to
clean the oven door glasses, as they can scratch the surface and cause
the glasstoshatter.
•The oven must be switched off before removing the removable parts
and, aftercleaning,reassemblethem according the instructions.
•Only usethemeatprobe recommendedforthis oven.
•Do notuseasteamcleaner for cleaningoperations.
• Connect a plug to the supply cable that is able to bear the voltage,
current and load indicated onthe tag and having theearth contact. The
EN 02
Page 3

socket must be suitable for the load indicated on the tag and must be
having the earth contact connected and in operation. The earth
conductor is yellow-green in colour. This operation should be carried
out by a suitably qualified professional. In case of incompatibility
between the socketand theapplianceplug,askaqualifiedelectricianto
substitute the socket with another suitable type. The plug and the
socket must be conformed to the current norms of the installation
country. Connection to the power source can also be made by placing
an omnipolar breaker between the appliance and the power source
that can bear the maximum connected load and that is in line with
current legislation. The yellow-green earth cable should not be
interrupted by the breaker. The socket or omnipolar breaker used for
the connection should be easily accessible when the appliance is
installed.
•The disconnection maybeachievedbyhaving the plug accessible or by
incorporating a switch in the fixed wiring in accordance with the wiring
rules.
•If the power cable is damaged, it must be substituted with a cable or
special bundle available from the manufacturer or by contacting the
customerservicedepartment.
•The type ofpowercable must be H05V2V2-F.
•Failure to comply with the above can compromise the safety of the
appliance andinvalidate theguarantee.
•Anyexcess of spilledmaterialshould beremoved before cleaning.
•During the pyrolytic cleaning process, surfaces can heat up more than
usual, childrenmustthereforebekept atasafe distance.
•The appliance must not be installed behind a decorative door in order
toavoidoverheating.
•When you place the shelf inside, make sure that the stop is directed
upwardsand inthe back of the cavity.
The shelfmustbeinserted completely intothecavity
• WARNING: Do not linethe oven walls with aluminum foil or single-use
protectionavailable from stores. Aluminum foilor anyother protection,
in direct contactwith the hot enamel, riskmelting and deteriorating the
enamel oftheinsides.
• WARNING:Never removetheovendoor seal.
EN 03
Page 4

Summary
General Instructions
5
Product Description
7
Use of the Oven
8
Oven Cleaning and Maintenance
12
1.1 Safety indications
1.2 Electrical safety
1.3 Recommendations
1.4 Installation
1.5 Waste management
1.6 Conformity declaration
2.1 Overview
2.2 Accessories
2.3 First use
3.1 Display description
3.2 Cooking modes
4.1 General notes on cleaning
4.2 Maintenance
• Removal and cleaning of grills
• Removal of the oven window
• Removal and cleaning of the glass
door
• Changing the bulb
Troubleshooting
14
5.1 F.A.Q.
EN 04
Page 5
1. General Instructions
We thank you for choosing one of our products. For the
best results with your oven, you should read this
manual carefully and retain it for future reference.
Before installing the oven, take note of the serial
number so that you can give it to customerservice staff
if any repairs are required. Having removed the oven
from itspackaging, check thatit has notbeen damaged
during transportation. If you have doubts, do not use
the oven and refer to a qualified technician for advice.
Keep all of the packaging material (plastic bags,
polystyrene, nails) out of the reach of children. When
the oven is switched on for the first time, strong
smelling smoke candevelop, whichis caused by the glueon the insulation panels surrounding theoven
heating for the first time. This is absolutely normal and, if it occurs, you should wait for the smoke to
dissipate before putting food in the oven. The manufacturer accepts no responsibility in cases where
the instructions contained in thisdocument are notobserved.
NOTE: the oven functions, properties and accessories cited in this manual will vary, depending on the
model you have purchased.
1.1 Safety Indications
Only use the oven for its intended purpose, that is only for the cooking of foods; any other use, for
example as a heat source, is considered improper and therefore dangerous. The manufacturer cannot
be held responsibleforany damage resulting from improper,incorrector unreasonableusage.
The use ofany electrical applianceimplies theobservance ofsome fundamental rules:
- do notpull onthe powercable to disconnectthe plug fromthe socket;
- do nottouch the appliancewith wetor damphands orfeet;
- in generalthe use ofadaptors,multiple sockets andextension cablesis not recommended;
- in caseof malfunction and/orpoor operation, switch offthe applianceand donot tamper withit.
1.2 Electrical Safety
ENSURE THAT ANELECTRICIAN OR QUALIFIED TECHNICIANMAKES THE ELECTRICAL CONNECTIONS.
The powersupply to which the ovenis connected must conform with the lawsin forcein the country of
installation.The manufactureraccepts noresponsibility for anydamage causedby the failureto observe
these instructions.The oven mustbe connected toan electrical supply with an earthed wall outlet ora
disconnector with multiple poles, depending on the laws in force in the country of installation. The
electrical supply should be protected with suitable fuses and the cables used must have a transverse
section that canensurecorrect supplyto theoven.
CONNECTION
The ovenis supplied with a powercable thatshould only be connected toan electricalsupply with 220240 Vac 50 Hz power between the phases or between the phase and neutral. Before the oven is
connectedto theelectrical supply,it isimportantto check:
- power voltage indicated on thegauge;
- the settingof the disconnector.
The groundingwire connectedto the oven's earth terminal mustbe connected to the earthterminal of
the power supply.
WARNING
Beforeconnecting the ovento thepowersupply,ask aqualified electrician tocheck thecontinuity of the
power supply's earth terminal. The manufacturer accepts no responsibility for any accidents or other
problems caused byfailure to connectthe oven tothe earthterminal orby anearth connection thathas
defectivecontinuity.
EN 05
Page 6

NOTE: as the oven couldrequire maintenance work,it isadvisable tokeep another wall socket available
so that the oven can be connected to this if it is removed from the space in which it is installed. The
power cable must only be substituted by technical service staff or by technicians with equivalent
qualifications.
1.3 Recommendations
Aftereach useof the oven,a minimumof cleaningwill helpkeepthe oven perfectly clean.
Do not line the ovenwalls withaluminium foil orsingle-use protection available from stores.Aluminium
foil or any other protection, in direct contact with the hot enamel, risks melting and deteriorating the
enamel of the insides. In order to prevent excessive dirtying of your oven and the resulting strong
smokey smells, we recommend not using the oven at very high temperature. It is better to extend the
cooking time and lower the temperature a little. In addition tothe accessories supplied with the oven,
weadvise youonly use dishesand bakingmoulds resistant tovery hightemperatures.
1.4 Installation
The manufacturers have noobligationto carrythis out.If theassistance of the manufacturer isrequired
to rectify faults arising from incorrect installation, this assistance is not covered by the guarantee. The
installation instructions for professionally qualified personnel must be followed. Incorrect installation
may cause harm or injury to people, animals or belongings. The manufacturer cannot be held
responsiblefor such harmor injury.
The oven can be located high in a column or under a worktop. Before fixing, you must ensure good
ventilation in the oven space to allow proper circulation of the fresh air required for cooling and
protectingthe internal parts. Makethe openings specifiedon last page according to thetype offitting.
1.5 Waste management and environmental protection
This appliance is labelled in accordance with European Directive 2012/19/EU regarding
electric and electronic appliances (WEEE). The WEEE contain both polluting substances
(that can have a negative effect on the environment) and base elements (that can be
reused). Itis important thatthe WEEE undergo specifictreatments to correctlyremove and
dispose of the pollutants and recover all the materials. Individuals can play an important
role in ensuring that the WEEE do not become an environmental problem; it is essential to
followa few basic rules:
- the WEEEshould notbe treatedas domestic waste;
- the WEEE should be taken to dedicated collection areasmanaged by the town council or a registered
company.
In many countries, domestic collections may be available for large WEEEs. When you buy a new
appliance, the old one can be returned tothe vendor whomust accept itfree of charge as aone-off, as
long as theappliance isof anequivalent type andhas thesame functionsas thepurchasedappliance.
SAVINGAND RESPECTINGTHE ENVIRONMENT
Where possible,avoid pre-heating theoven and always try to fill it.Open the oven door asinfrequently
as possible, because heat from the cavity disperses every time it is opened. For a significant energy
saving, switch offthe oven between 5 and10 minutes before the planned end ofthe cooking time, and
use the residualheat that theoven continues togenerate.Keepthe sealsclean andin order,to avoid any
heat dispersal outside of the cavity. If you have an electric contract with an hourly tariff, the "delayed
cooking" programme makes energy saving more simple, moving the cooking process to start at the
reducedtariff time slot.
1.6 Declaration of compliance
The parts ofthis appliancethat may comeintocontact with foodstuffs comply withthe provisionsof EEC
Directive89/109.
By placing the mark on thisproduct, we are confirming compliance toall relevantEuropeansafety,
health and environmental requirements whichare applicablein legislation forthis product.
EN 06
Page 7

2. Product Description
2.1 Overview
1
3
5
4
6
2
2.2 Accessories (according to the model)
Drip pan
1
Collects the residuesthat drip duringthe cooking
of foods onthe grills.
Metal grill
2
Grill pan set
4
The simple shelfcan take moulds anddishes.
The tray holder shelfis especiallygood for grillingthings.
Use it withthe drip tray.
1. Control panel
2. Shelf positions
(lateral wire grid if included)
3. Metal grill
4. Drip pan
5. Fan (behind the steel plate)
6. Oven door
Holds baking trays and plates.
Lateral wire grids
3
Lateralwire grid ifincluded.
The special profile of the shelves means they stay
horizontal even when pulled right out. There is no risk of
a dish slidingor spilling.
The drip tray catches the juices from grilled foods. It is
only usedwith the Grill, Rotisserie, or Fan Assisted Grill;
removeit from theoven forother cookingmethods.
Never use the drip tray as a roasting tray as this creates
smokeand fat willspatter your oven making it dirty.
The tray holder
The tray holder shelf is ideal for grilling. Use it in
conjunction with the drip tray. A handle is included to
assist inmoving the both accessories safely.Do no leave
the handle insidethe oven.
EN 07
Page 8

2.3 First Use
PRELIMINARYCLEANING
Clean theoven before usingfor thefirst time. Wipe over externalsurfaces witha dampsoft cloth.Wash
all accessories and wipe inside the oven with a solution of hot water and washing up liquid. Set the
empty ovento the maximum temperature and leave on for about1 hour, this will remove any lingering
smells of newness.
3. Use of the Oven
3.1 Display description
ON / OFF
EXTRA
Cooking
duration
Clock
set
The oven is switched on and off with this button.
Cooking
end
Child
lock
Timer
If the oven is switched off, the display shows the clock. When
the oven is inactive, all the functions are available except the
cookingduration and endof cooking.
If the clock is not set, the oven does not work: the display
flashes, showing "12:00" and the only functioning key is
Extra.From theExtra key,the following functionscan beset:
WiFi
EN 08
Page 9

FUNCTION HOW TO DEACTIVATE WHAT IT DOES WHY IT IS NEEDED
COOKING
DURATION
END OF
COOKING
TIMER
SETTING
THE CLOCK
CHILD
SAFETY
HOW TO USE
NB: can only be set with an
activecooking programme.
Press EXTRA twice and set
the time using the “+” and
“-” keys, confirming by
pressing"SELECT".
The display shows “00:00”
if no cooking duration has
been inserted, otherwise
the display shows the time
remaining.
NB: can only be setwith an
activecooking programme.
Press EXTRA enough times
to illuminate the icon, set
the end of cooking time
using the “<” and “>” keys
and confirm by pressing
"SELECT".
Press EXTRA enough times
to illuminate the icon, set
the end of cooking time
using the “<” and “>” keys
and confirm by pressing
"SELECT".
The cooking duration is
automaticallycalculated.
•The display shows
“00:00” ifno timehas been
inserted or the time
remaining if this has
alreadybeen set.
Press EXTRA enough times
to illuminate the icon and
use the “<” and“>” keys to
set the time,confirming by
pressingSELECT.
•Switched on for the first
time, the display
illuminates and shows
"12:00".
•Tomodify the time, press
EXTRA enough times to
illuminate theicon anduse
the “<” and “>” keys to set
the time, confirming it by
pressingSELECT.
•Press the EXTRA key
enough times to illuminate
the icon and then either
the“<”or“>”keyto
activate this function: the
display will show ON; to
confirmpress SELECT.
•To modify cooking before
the set time, press EXTRA
twice and regulate the
cooking time as required
using the “<” and “>” keys,
before pressing "SELECT"
once more.
•To cancel the cooking
duration, reset the display
to“00:00”.
To modify the end of
cooking before the set
time, press EXTRA enough
times to illuminate the
icon, regulate the end of
cooking time as required
using the “<” and “>” keys
and confirm by pressing
"SELECT".
To cancel the end of
cooking time, reset the
displayto “00:00”.
•Tomodify the timer, press
EXTRA enough times to
illuminate the icon,
regulate the cooking time
as required using the “<”
and “>” keys and confirm
by pressing "SELECT".
•Press the EXTRA key
enough times to illuminate
the icon and then either
the“<”or“>”keyto
deactivate this function:
the display will show OFF;
toconfirm press SELECT.
When acooking programme
terminates, the oven
switches off while the
display shows "END" (the
cooking programme icon
remains on)until theOn/Off
button, the onlyfunctioning
key, is pressed. When a
cooking programme
terminates, an alarm will
sound.
When a cooking
programme terminates,
the oven switches off while
the display shows "END"
(the cooking programme
icon remains on) until the
On/Off button, the only
functioning key,is pressed.
When a cooking
programme terminates, an
alarm willsound.
•This function activates an
alarm thatsounds fora few
seconds when the set time
expires (this function does
not switch theoven off).
You can select a time
between00:00 and23:59.
•It allows you to set the
time that appears on the
display.
•If thefunction isactive
only the "Extra"button, to
deactivate the function,
and "On/Off" button can
be used.
When the cooking time has
finished, the oven
automatically switches offand
the alarm sounds for a few
seconds.
•This function is also used for
cooking that can be scheduled
in advance.
•If acooking programmeis set,
it will be lost if the "F" key is
pressed.
•If delayed cooking is set, the
oven switches off and the
display shows the currenttime
while the cooking programme,
cooking duration and end of
cookingicons areilluminated.
•If acooking programmeis set,
by pressing the “<” and “>”
keys you can see and modify
the temperatureset: atthe first
touch, the operating
temperature is shown while
another touch willallow you to
modify saidtemperature.
• The timer functions
regardless of whether the
ovenis switchedon.
•The alarm functions
regardless of whether the
ovenis switchedon.
•This function is useful
when there are children in
the house.
EN 09
Page 10
WiFi (depends on the oven model)
Pressing"Extra" onthe timerdisplay allows you to selectthe Wi-
Fi menu. Inthe Wi-Fimenu ifyou press the"< >" buttonsyoucan select:
- : Wi-Fi isoff; the ovenis not controllable viathe app.Off
- : Wi-fi is on andthe oven isonly controllable via the app. Itmeans that itis not possible to select cookingOn
functions, recipes andtemperature from the display.Only the Wi-Fi menu isavailable by pressing "Extra". You
can switch the oven off using the On/Off button, but you cannot switch it back on again viathe display, it can
only be switchedon viathe app.
-:Reset This setting should be used to enrol the oven the first time it connects to your Wi-Fi network and to
reset the current Wi-Fi connection to allow a new enrolment. Once selected, the appliance gives you 5
minutes to complete the enrolment process. During this process the cooking functions, recipes and
temperature setting are notaccessible from thedisplay. Only the Wi-Fi menuis available by pressing "Extra".
Youcan switch theoven off using the On/Off button,but you cannot switch it back onagain via the display, it
can only beswitched on via the app. To exit the enrolment/reset procedure via the display, press "Extra" and
then use "< >" buttons to select "Off". After five minutes, the appliance will exit the enrolment/reset
procedureautomatically.
- : the oven sends its status to the app but it cannot be controlled remotely. The oven must be enrolledRead
beforethis is possible.
If Wi-Fi isnot configured it isonly possibleto choosebetween off andreset.
When theoven is connected toWi-Fi, thedefault cooking timeduration is5 hours, butthis canbe modified by
the user.
Wi-Fi Enrolment:
To enrollthe appliance for Wi-Fi, press "Extra" on the displayuntil the Wi-Fi icon lights,then select "Reset" by
pressing "< >". Theprocedure on the app should then be followed. Once selected, the appliance gives you 5
minutesto complete theenrolment process.
Wi-Fi icon
- icon notlit: Wi-Fi isoff.
- Icon blinks1 second onan 1second off:the oven isaccessible toyour Wi-Finetwork andready to beenrolled.
If the enrolmenthas notbeen successful,the Wi-Fiicon will switchoff after 5minutes.
- Icon ispermanently lit: theoven is connectedto yourWi-Fi router.
- The iconblinks 3 secondson and 1second off: theovenis tryingtoconnect toyour Wi-Firouter.
- The iconblinks 1 secondon and 3seconds off: theoven is inread only mode.
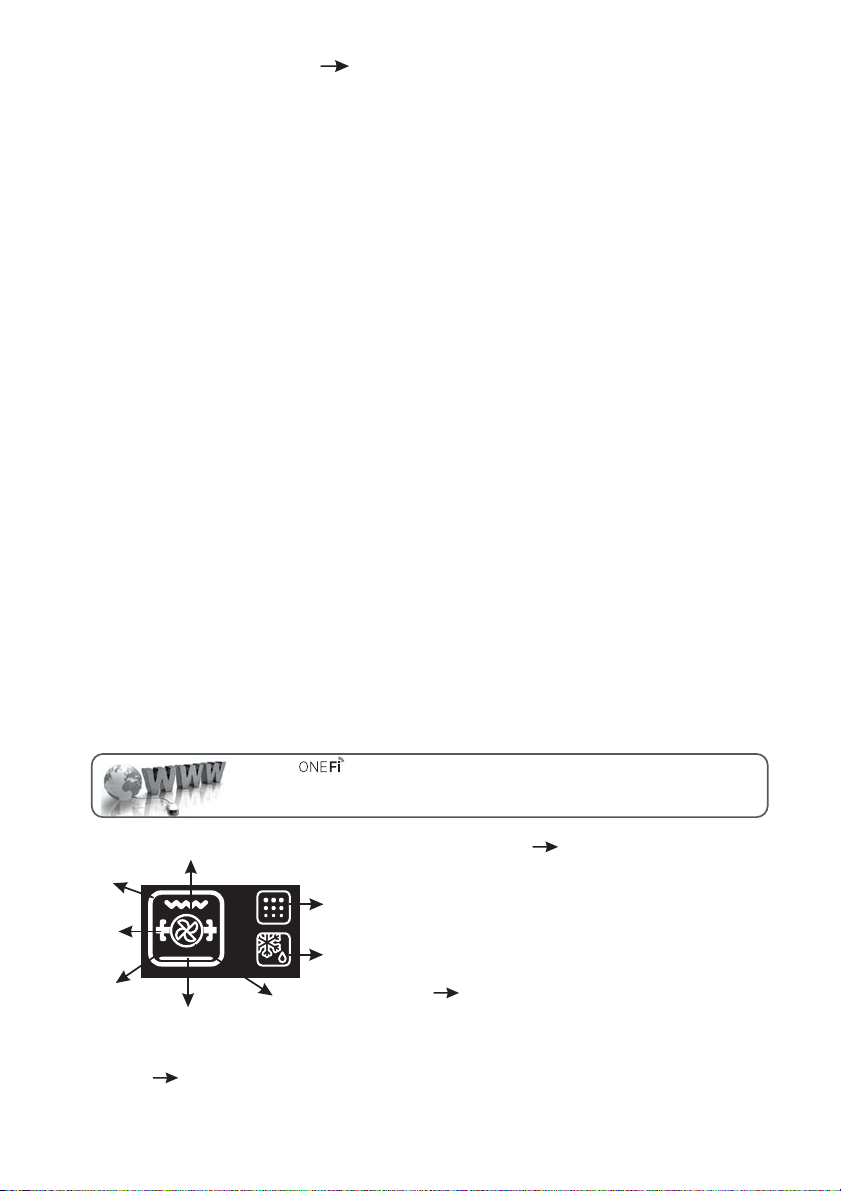
HOOVER :
For detailed information on HOW TO CONNECT your OneFi appliance and HOW
TO USE IT effectively, go to http://wizardservice.candy-hoover.com/
LANGUAGE SETTING The language can be set when
the oven is switched off by pressing the Extra and Select
buttonssimultaneously andfor 3".The current language is
Pyro
shown on thedisplay and can be changed by pressing the
“<” or“>” keys, confirmingit by pressing SELECT.Available
languagesare: Italian,English, Frenchand German.
Defost
SELECT Any selection must be confirmed. If not
confirmed within 15 seconds, the selection is cancelled.
Oven box
Turnspit
Circular
heating element
Bottom heating element
Grill
Fan
Bychanging menu,anyunconfirmed selectionis lost.
“HOT” ICON When a cooking programme finishes or when the oven switchesoff, if the ovenis still
hot, the displayshowsthe currenttime alternatingwith the message“HOT” at3" intervals.
EN 10
Page 11

3.2 Cooking Modes
Function
Dial
T °C
default
T °C
range
Function (Depends on the oven model)
LAMP: Turns on the oven light.
40
40 ÷ 40
180
50 ÷ 240
210
50 ÷ 240
*
*Tested in accordance with the CENELEC EN 60350-1 used for definition of energy class.
220 50 ÷ 280
210 50 ÷ 230
210
50 ÷ 230
200
150 ÷ 220
L1 ÷ L5
L3
DEFROST: When the dial is set to this position. The fan circulates air at room
temperature around the frozen food so that it defrosts in a few minutes
without the proteincontent ofthe foodbeing changedor altered.
FAN COOKING: We recommend you usethis method for poultry, pastries,fish
and vegetables. Heatpenetrates intothe foodbetter and both the cooking and
preheating times are reduced. You can cook different foods at the same time
with or without the same preparation in one or more positions. This cooking
method gives evenheat distributionand the smellsare not mixed.
Allow about tenminutes extrawhen cookingfoods at thesame time.
CONVENTIONAL COOKING: Both top and bottom heating elements are used.
Preheat theoven for aboutten minutes. Thismethod is ideal for all traditional
roastingand baking.For seizingred meats, roast beef,leg oflamb, game,bread,
foilwrapped food (papillotes),flaky pastry. Placethe food andits dish on ashelf
in mid position.
BOTTOM: Using the lower element. Ideal for cooking all pastry based dishes.
Use this for flans, quiches, tarts, pate and any cooking that needs more heat
frombelow.
FAN + LOWER ELEMENT: The bottom heating element is used with the fan
circulatingthe airinside theoven. This methodis idealfor juicyfruit flans, tarts,
quiches and pâté.
It prevents food from drying and encourages rising in cakes, bread dough and
other bottom-cookedfood.
Place the shelfin the bottomposition.
FANASSISTED GRILL: usethe turbo-grillwith thedoor closed.
The top heating element is used with the fan circulating the air inside the oven.
Preheating is necessary for red meats but not for white meats. Ideal for cooking
thick food items, whole pieces such asroast pork, poultry, etc.Place the food tobe
grilled directly onthe shelf centrally,at the middle level.Slide thedrip trayunder the
shelf to collect the juices.Make sure that the food is not too close tothe grill. Turn
the food over halfway throughcooking.
GRILL: use thegrill withthe doorclosed.
The top heating element is used alone and you can adjust the temperature. Five
minutes preheating is required to get the elements red-hot. Success is guaranteed
forgrills, kebabs andgratindishes. Whitemeats should be putat adistance fromthe
grill; the cooking time is longer, but the meat will be tastier. You can put red meats
and fish fillets on the shelf with the drip tray underneath. The oven has two grill
positions:
Grill: 2140 W Barbecue: 3340 W
EN 11
Page 12

4. Oven cleaning and maintenance
4.1 General notes on cleaning
The lifecycle ofthe appliancecan beextended throughregular cleaning.Waitfor the ovento cool before
carrying out manual cleaning operations.Never useabrasive detergents, steel woolor sharpobjects for
cleaning, so as to not irreparably damage the enamelled parts. Use only water, soap or bleach-based
detergents(ammonia).
GLASS PARTS
It is advisable to clean the glass window with absorbent kitchen towel after every use of the oven. To
remove more obstinatestains, you can use a detergent-soakedsponge, well wrung out, and then rinse
with water.
OVENWINDOW SEAL
If dirty,the sealcanbe cleanedwith aslightlydamp sponge.
ACCESSORIES
Clean accessories with a wet, soapy sponge before rinsing and drying them: avoid using abrasive
detergents.
DRIP PAN
After using thegrill, removethe pan fromthe oven.Pourthe hotfat into acontainer and washthe panin
hot water,using asponge andwashing-up liquid.
If greasy residuesremain, immerse the pan in water anddetergent. Alternatively,you can wash the pan
in the dishwasheror use acommercial oven detergent. Never puta dirtypan backinto the oven.
4.2 Maintenance
REMOVALAND CLEANINGOF THESIDE RACKS
1. Unscrew thebolt in ananti-clockwise direction.
2. Remove theside racksby pulling themtowardsyou.
3. Clean theside racks in adishwasher or witha wetsponge andthen drythem immediately.
4. Having cleaned the side racks, put them back in and reinsert the bolts, ensuring that they are fully
tightened.
A
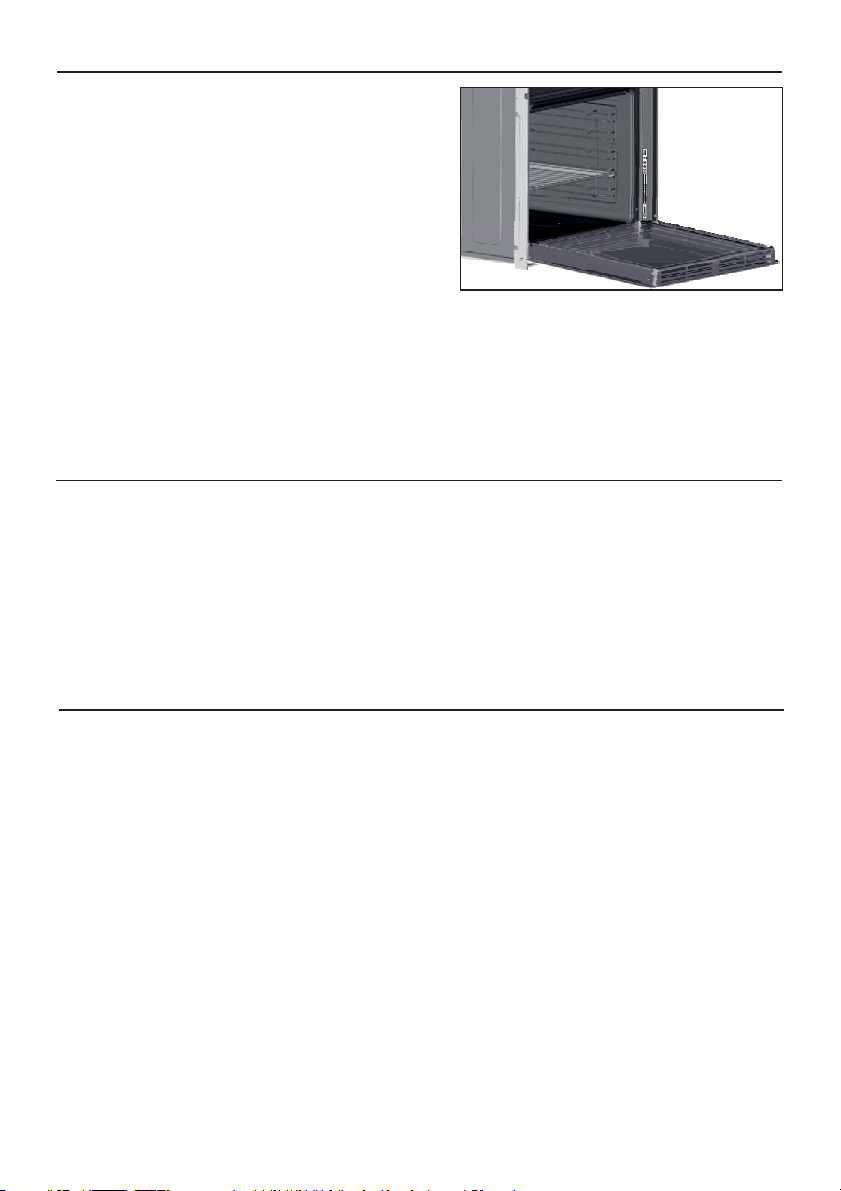
REMOVALOF THEOVEN WINDOW
1. Open thefront window.
2. Openthe clamps of the hingehousing on the right andleft side of the front window by pushing them
downwards.
3. Replace thewindow by carryingout the procedurein reverse.
EN 12
Page 13

LOW-E
REMOVALAND CLEANINGOF THEGLASS DOOR
1. Open theoven door.
2.3.4. Lock thehinges, remove thescrews andremovethe uppermetalcover by pullingit upwards.
5.6. Remove the glass, carefully extracting it from the oven door (NB: in pyrolytic ovens, also remove
the second andthird glass (ifpresent)).
7. At theend of cleaningor substitution, reassemble theparts inreverse order.
On all glass, the indication"Pyro" must belegible andpositioned onthe left side of the door,close tothe
left-handlateral hinge. Inthis way, theprinted labelof the firstglass will beinside thedoor.
1.
2.
3.
5.
6.
1
2
3
7.
4.
EN 13
Page 14

CHANGING THE BULB
1. Disconnect theoven from themains supply.
2. Undo theglass cover, unscrew the bulband replaceit witha newbulb ofthe sametype.
3. Once thedefectivebulb isreplaced,replace theglass cover.
5. Troubleshooting
5.1 FAQ
PROBLEM POSSIBLE CAUSE SOLUTION
The oven does not heat up
The oven does not heat up
The oven does not heat up
No reaction of the touch
user interface
The clock is not set Set the clock
The child lock is on
A cooking function and
temperature has not been set
Steam and condensation on
the user interface panel
Deactivate the child lock
Ensure that the necessary
settings are correct
Clean with a microfiber
cloth the user interface
panel to remove the
condensation layer
EN 14
Page 15

INSTALLATION
INSTALLATION DU FOUR
INSTALLAZIONE
INSTALACIÓN
Opening/Ouverture/
Apertura/Öffnung/Açıklık/
560 mm
Otvor/
460 mm x 15 mm
Odprtina/Otvor
EN
FR
IT
ES
INSTALLATION
KURULUM
INSTALACE
VGRADNJA PEČICE
INŠTALÁCIA
550 mm
DE
TR
CZ
SL
SK
560 mm
590 mm
EN
If the furniture is coverage with a bottom at the back part, provide an opening for
the power supply cable.
Si le fond du meuble est doté d’un panneau de fermeture, prévoyez un orifice pour
FR
le passage du câble d’alimentation.
Se il mobile ha un fondo posteriore, praticare un foro per il passaggio del cavo di
IT
560 mm x 45 mm
500 mm x 10 mm
If the oven does not have a cooling fan, create an opening 460 mm x 15 mm
EN
FR
Si le four n’a pas de ventilateur de refroidissement, créer une
ouverture 460 mm x 15 mm
Se il forno non dispone di una ventola di raffreddamento, lasciare uno
IT
spazio 460 mm x 15 mm
Si el horno no tiene ventilador de refrigeración, practique una
ES
abertura. 460 mm x 15 mm
Schaffen Sie eine Öffnung, wenn der Ofen über keinen Lüfter verfügt
DE
460 mm x 15 mm
TR
Fırında soğutma fanı yoksa bir açıklık oluşturun 460 mm x 15 mm
Pokud nemá trouba chladicí ventilátor, vytvořte otvor. 460 mm x 15 mm
CZ
Če pečica nima hladilnega ventilatorja, napravite ustrezno odprtino
SL
460 mm x 15 mm
Ak na rúre nie je chladiaci ventilátor, vytvorte otvor 460 mm x 15 mm
SK
alimentazione.
Si el mueble tiene panel posterior, haga un orificio para el cable de alimentación.
ES
Wenn das Gerät mit einer Abdeckung auf der Rückseite ausgestattet ist, sorgen Sie
DE
für eine Öffnung für das Stromversorgungskabel.
Mobilyanın arka tarafında bir kaplama bulunuyorsa güç kaynağı kablosu için bir delik
TR
açın.
Je-li nábytek v zadní části vybaven krytem, vytvořte otvor pro napájecí kabel.
CZ
Če je na omarici tudi hrbtna stran, morate v njej narediti odprtino za napajalni kabel.
SL
SK
Ak je nábytok vybavený zo zadnej časti krytom, zabezpečte otvor pre prívodný
elektrický kábel.
580 mm
545 mm
22 mm
Opening/Ouverture/
Apertura/Öffnung/
Açıklık/Otvor/Odprtina/
Otvor 560 mm x 45 mm
595 mm
mm
600
595 mm
mm
560
560
mm
Opening/Ouverture/
Apertura/Öffnung/Açıklık/
Otvor/Odprtina/Otvor
500 mm x 10 mm
Page 16

EN
The manufacturer willnot beresponsible forany inaccuracyresultingfrom printing ortranscript errorscontained inthis brochure.We
reserve theright tocarry out modificationsto productsas required,including the interestsof consumption, withoutprejudice tothe
characteristicsrelating tosafetyor function.
FR
Le constructeur décline toute responsabilité concernant d'éventuelles Inexacltudes Imputables à des erreurs d'impression ou de
transcriptioncontenue danscette notice.Le constructeurse réserve ledroit demodifier lesproduits encas de nécessité, mêmedans
l'intérêtde l'utilisation, sanscauser depréjudicesaux caractéristiques defonctionnement desécurité desappareils.
IT
Il produttore declina ogniresponsabilità per inesattezze contenute nel documento stampato per errori ditrascrizione contenuti ino
questa brochure. Inoltre, si riserva il diritto di apportare modifiche al prodotto, nell'interesse dei consumatori, senza alcun
pregiudizioper lasua sicurezza funzionalità.o
ES
El fabricante no se responsabiliza de las inexactitudes debidas a fallos de impresión o transcripción contenidos eneste folleto. Nos
reservamos el derecho a modificar los productos como sea necesario, incluidos los intereses de consumo, sin perjuicio de las
característicasrelacionadas conla seguridad o sufuncionamiento.
DE
Der Herstellerübernimmt keineHaftung für eventuelleDruck- oder Übersetzungsfehler dieserBedienungsanleitung. Der Hersteller
behält sichvor technischeÄnderungen zurVerbesserungder Produktqualität imInteresse desEndverbrauchers vorzunehmen.
TR
Üretici bu kullanma kılavuzunda bulunan basım veya kopyalama hatalarından kaynaklanan herhangi bir yanlışlıktan sorumlu
olmayacaktır. Güvenlik veya işlevle ilgili özelliklere zarar vermeden tüketim istekleri dahil olmak üzere ürünlerde gerektiğinde
değişiklik yapma hakkımızmahfuzdur.
CZ
Výrobceneodpovídá za tiskové chybyv návodu.Vyhrazujemesi právo nazměny spotřebičepodle potřeby, včetněúdajů spotřeby, bez
vlivu nabezpečnost nebofunkci.
SL
Proizvajalecne prevzema odgovornostiza morebitne tiskarske napake vtej knjižici.Pridržuje si pravicodo sprememb naaparatu brez
predhodnegaobvestilavključno sporabo, kine vplivajona varnostali delovanjepečice.
SK
Výrobca nezodpovedá za žiadne nepresnosti obsiahnuté v tejto brožúre spôsobené chybami tlače alebo prepisu. Vyhradzujeme si
právo vykonať zmeny na výrobkoch podľa potreby, vrátane zlepšení v záujme spotreby bez toho, aby došlo k negatívnemu
ovplyvneniu bezpečnostných alebofunkčných charakteristíkspotrebiča.
02.2018 • REV.0 • 42825960
 Loading...