

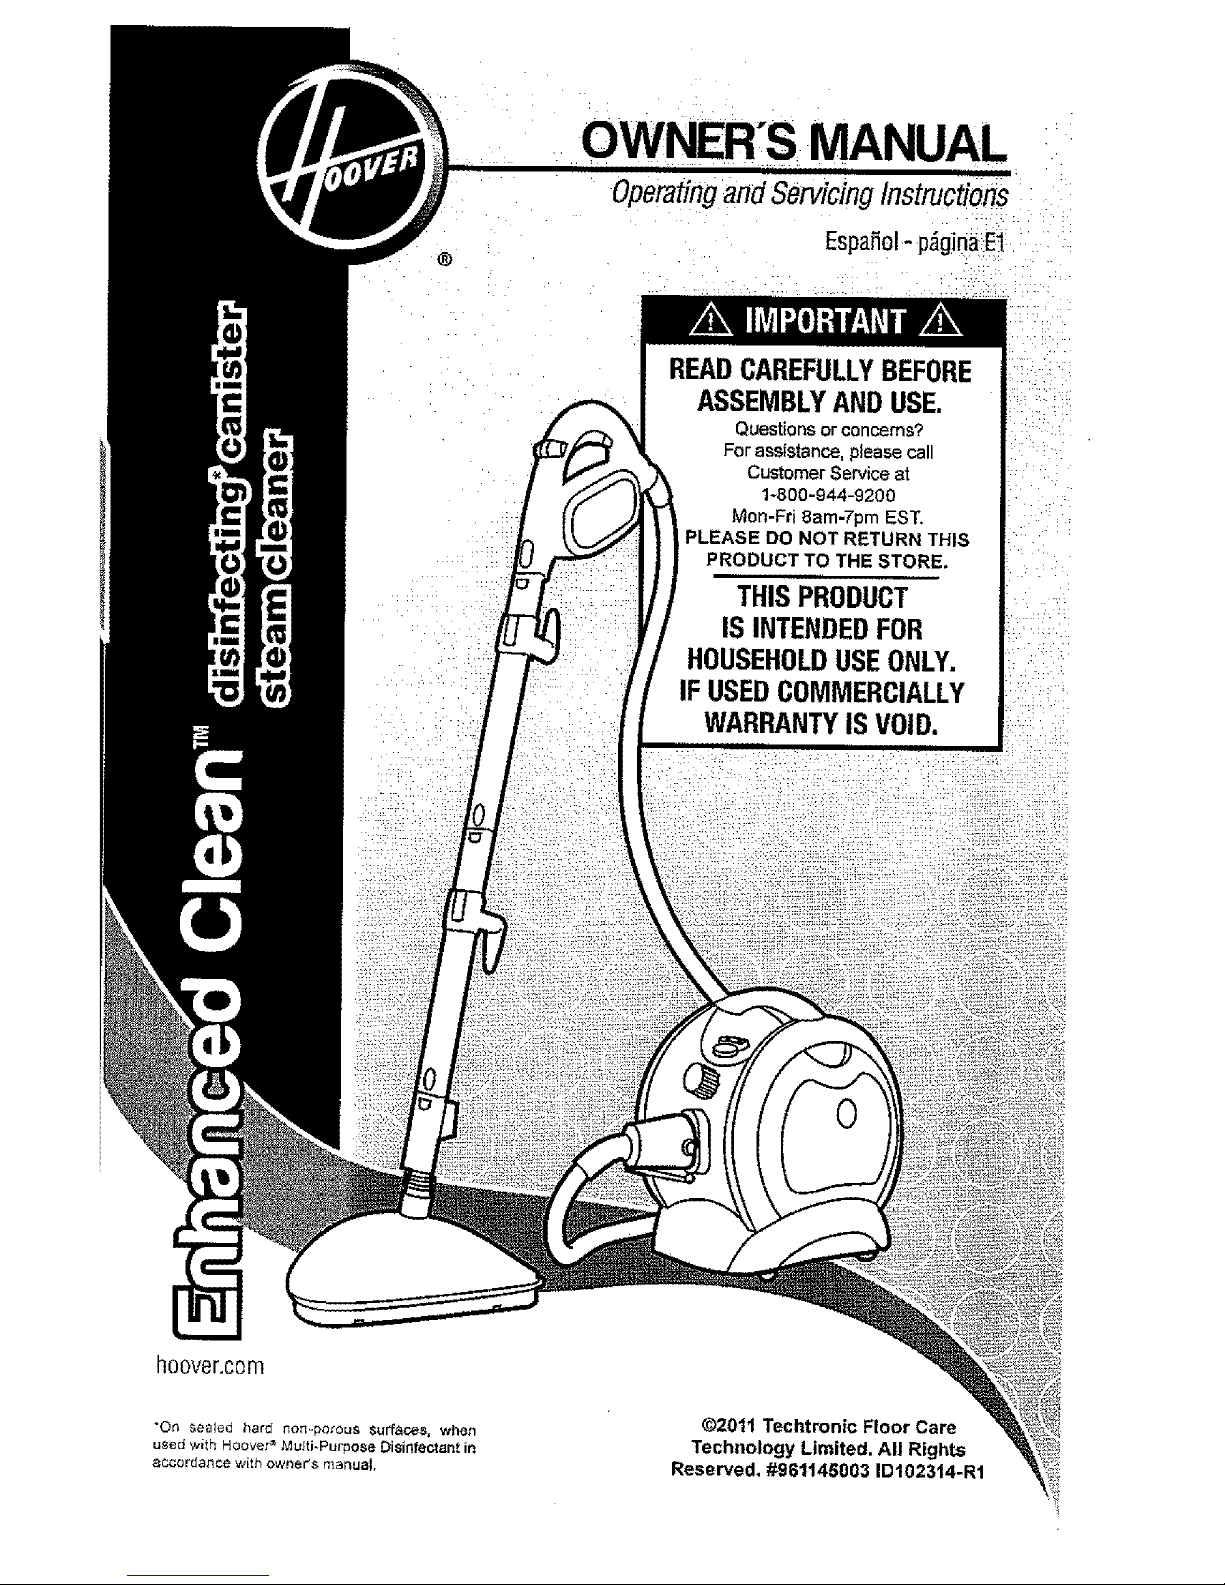
Hoover clean Owner's Manual
®
OWNEES MANUAL
Operatingand ServicingInstructions
Espa_ol- p,_ginaE1 i::
i i: i
READCAREFULLYBEFORE ....
ASSEMBLY AND USE. ::
Questions or concerns?
For assistance, please call
Customer Service at
1-800-944-9200
Mon-Fri 8am-7pm EST.
PLEASE DO NOT RETURN THIS
PRODUCT TO THE STORE.
THIS PRODUCT
IS INTENDEDFOR
HOUSEHOLDUSEONLY.
IF USED COMMERCIALLY
WARRANTY IS V01D. :i
hoover.c0m
"Or, sealed hard non=porous surfaces, wherl
usecl with Hoover _ MuJti-Purpose Disinfectan_ in
8ccordatlce with owner's mar_ua!,
@201t Techtronic Floor Care
Technology Limited. All Rights
Reserved, #961145003 IDI02314-R1
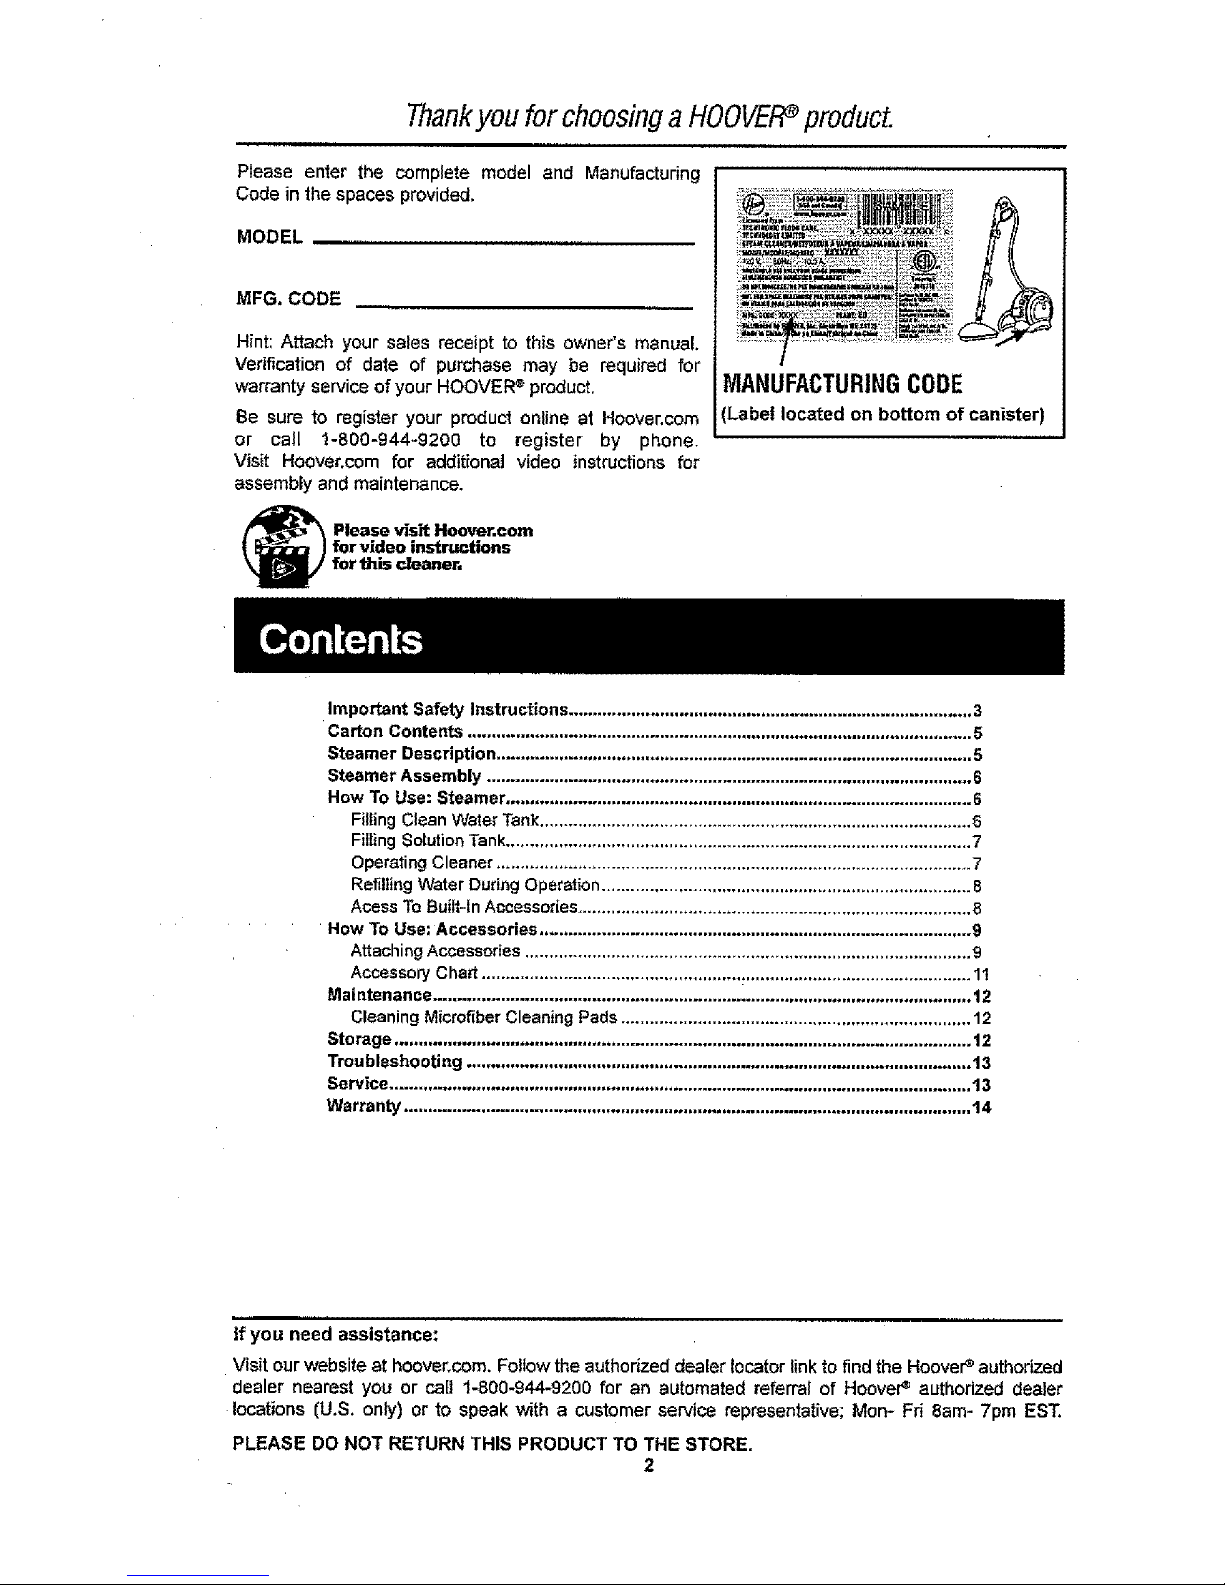
Thankyou for choosinga HOOVEFPproduct.
PIease enter the complete model and Manufacturing
Code in thespaces provided.
MODEL
MFG, CODE
Hint: Attach your sales receipt to this owner's manual.
Verification of date of purchase may be required for
,warranty service of your HOOVER ®product,
Be sure to register your product online at Hoover.corn
or call t-800-944-9200 to register by phone
Visit Hoover.com for additional video instructions for
assembly and maintenance.
(_ lease visit Hoover.corn
for video instructions
for this cleaner,
MANUFACTURINGCODE
(Labe| located on bottom of canister)
Important Safety Instructions .................................................................................... 3
Carton Contents ......................................................................................................... 5
Steamer Description ................................................................................................... 5
Steamer Assembly ..................................................................................................... 6
How To Use: Steamer ................................................................................................. 6
Filling Clean Water Tank.......................................................................................... 6
Filling Solution Tank................................................................................................. 7
Operating Cleaner ................................................................................................... 7
Refilling Water During Operation ............................................................................. 8
Acess To Built-In Accessories .................................................................................. 8
HOWTo Use: Accessories .......................................................................................... 9
Attaching Accessories ............................................................................................. 9
Accessory Chart ...................................................... _............................................... 11
Maintenance ................................................................................................................ 12
Cleaning Microfiber Cleaning Pads ......................................................................... 12
Storage ........................................................................................................................ 12
Troubleshooting ......................................................................................................... 13
Service ......................................................................................................................... 13
Warranty ...................................................................................................................... 14
if you need assistance:
Visit our website at hoover.com. Follow the authorized dealer locater link to find the HooveP authorized
dealer nearest you or call 1-800-944-9200 for an automated referral of Hoover • authorized dealer
locations (U.S. only) or to speak with a customer service representative; Men- Fn 8am- 7pm EST.
PLEASE DO NOT RETURN THIS PRODUCT TO THE STORE.
2

IMPORTANTSAFETYINSTRUCTIONS
SAVETHESEINSTRUCTIONS
When using an electrical appliance, basic precautions should always be
followed, includingthe foflowing:
READALLINSTRUCTIONSBEFOREUSINGTHISAPPLIANCE.
WARNING:TOREDUCETHERISKOFFIRE,
ELECTRICSHOCKORINJURY:
• Fullyassemblebeforeoperating.
• Operateapplianceonlyatvoltagespecifiedondatalabelon bottomof product.
° Donotleaveappliancewhenpluggedin.Unplugfromoutletwhennotinuseandbefore
cleaningor servicingproduct.
° Notforspaceheatingpurposes.
° Donotuseorstoreoutdoors.
° Donotallowto be usedasa toy. Notintendedfor usebychildrenage12andunder.
Closesupervisionis necessarywhenusednearchildren.Toavoidinjuryor damage,
keepchildrenawayfrom produc%anddo notallowchildrento placefingersorother
objectsintoanyopenings.
° Use only as described in this manual. Use only manufacturer'srecommended
attachmentsandproducts.
° Donotusewith damagedcordor plug.If applianceis notworkingasit should,has
beendropped,damaged,leftoutdoors,ordroppedintowater,takeitto a servicecenter
priortocontinuinguse.
° Donotpull or carrybycord,usecord as a handle,closea dooron cord,or pullcord
aroundsharpedgesor corners.Donotplaceproducton cord.Donot run appliance
overcord.Keepcordawayfrom heatedsurfaces.
• Donot unplugbypullingoncord.Tounplug,grasptheplug,notthe cord.
° Donothandleplugorappliancewithwet hands.
° Donotputanyobjectintoopenings.Donotusewithanyopeningblocked.
,* Keephair,looseclothing,fingers,and all parts of bodyaway from openingsand
movingparts.
o Turnoff allcontrolsbeforeunplugging.
° Useextracarewhencleaningonstairs.Whennotin usedonotplaceproductonstairs
orfumibJre,asit mayresultin injuryordamage.
• Donot use in areaswhereflammable or combustible liquids, such as gasoline
may bepresent.
• Connecttoa properlygroundedoutletonly.SeeGroundingInstructions.
• Donotcleanoverfloorelectricaloutlets.
• Onlyusewaterto refillthe cleanwatertank. Donot useanytype of chemicalsor
additivesinthe cleanwatertank.
° Donotopenthewaterfill safetycapwhenusingtheappliance.
° Wheninuse,neverturnthe applianceoveror usewhileonitsside.
° Allowappliancesufficienttimeto coolpdorto removingthe microfiberpad.
•AppIiance shouldonlybeusedincontainersortubsthatarenotfilledwith liquid.
Donotoperatesteamcanisterwithoutwaterin cleanwatertank. Donot overfill the
tank.Usethemeasuringcupsuppliedwith unit.
• Donot usewithoutmicrofibercleaningpadproperlyattachedto mophead.
3
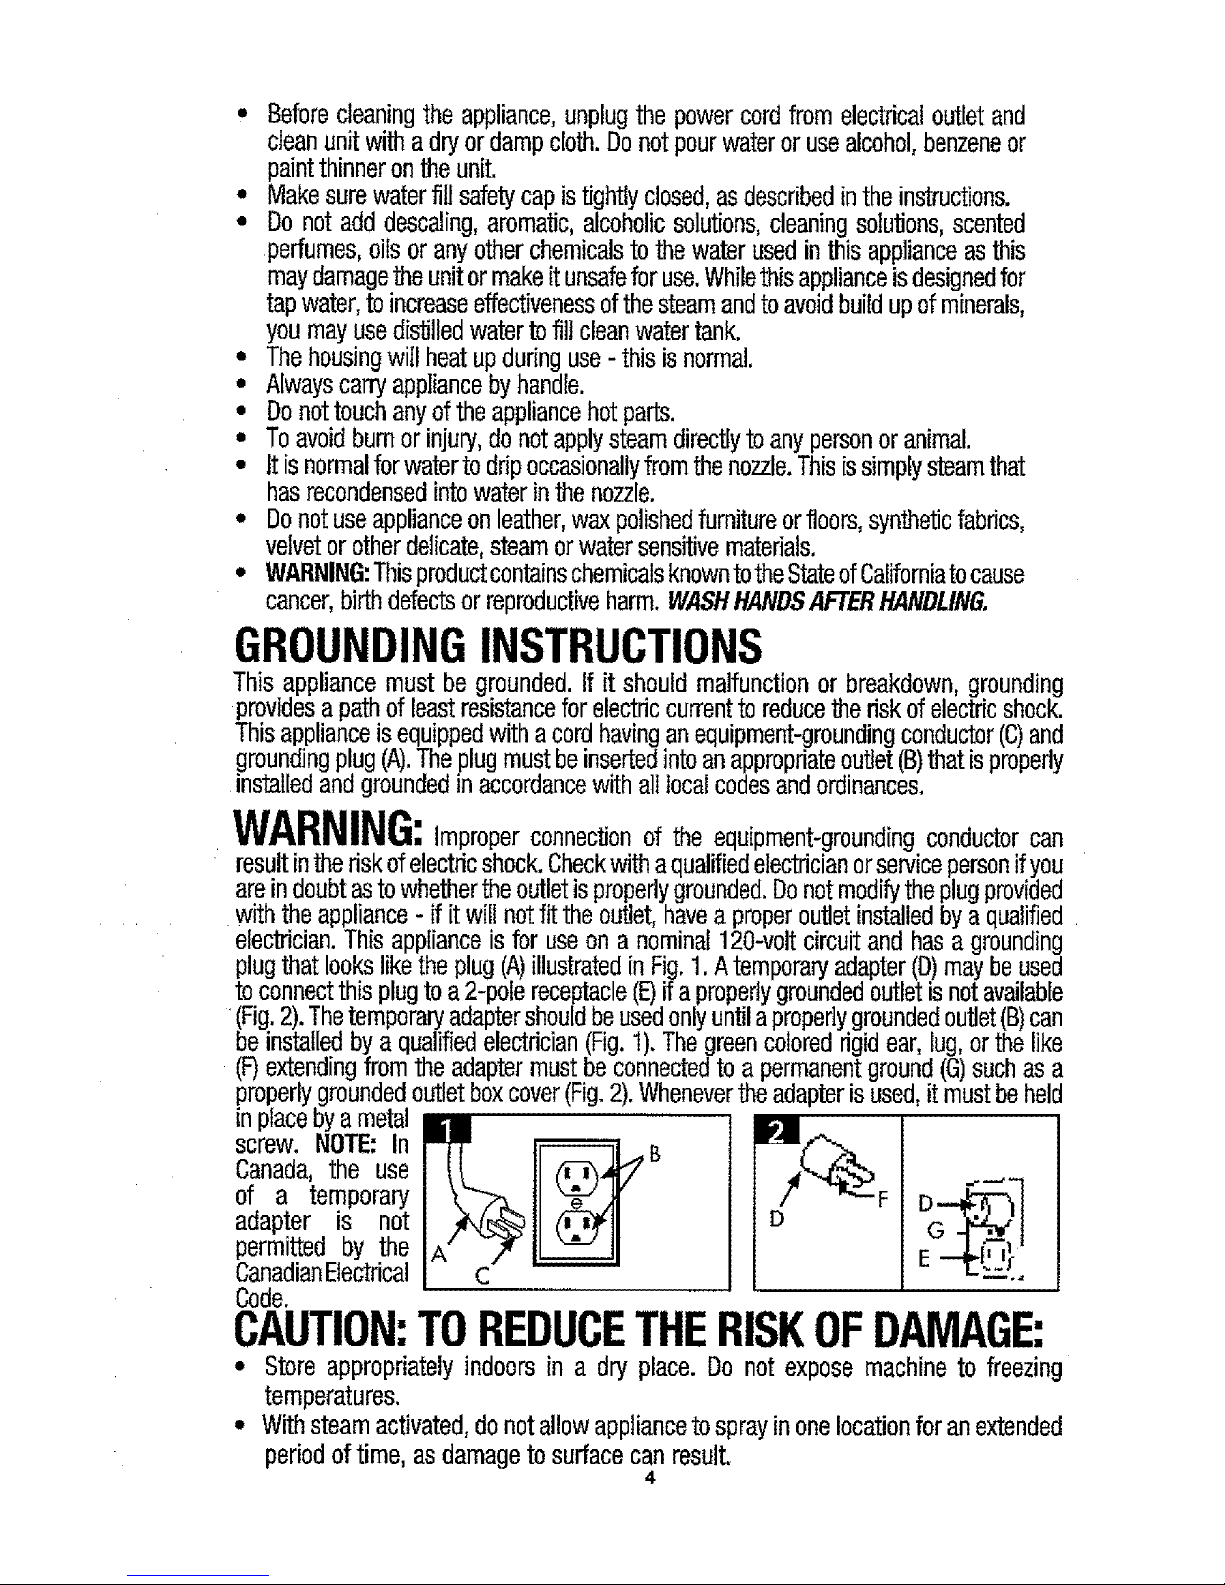
• Beforecleaningthe appliance,unplugthe powercord from electricaloutletand
cleanunit with adry'or dampcloth.Donotpourwateror usealcohol,benzeneor
paintthinnerontheunit.
• Makesurewaterfill safetycapistightlyclosed,asdescribedintheinstructions.
• Do notadd descaling,aromatic,alcoholicsolutions,cleaningsolutions,scented
perfumes,oilsor any otherchemicalstothe waterusedinthisapplianceasthis
maydamagetheunitor makeitunsafeforuse.Whilethisapplianceisdesignedfor
tapwater,toincreaseeffectivenessofthesteamandtoavoidbuildupof minerals,
youmayusedistilledwatertofl]l cleanwatertank.
• Thehousingwill heatupduringuse-this isnormal.
• Alwayscarryappliancebyhandle.
• Donottouchanyof the appliancehot parts.
• Toavoidburnor injury,donotapplysteamdirectlyto anypersonor animal.
• It is normalforwaterto dripoccasionallyfromthenozzle.Thisissimplysteamthat
hasrecondensedintowaterinthenozzle.
• Donot useapplianceon leather,waxpolishedfurnitureorfloors,syntheticfabdcs,
velvetorotherdelicate,steamorwatersensitivematerials.
• WARNING:ThisproductcontainschemicalsknowntotheStateofCaliforniatocause
cancer,birthdefectsorreproductiveharm.WASHHANDSAFTERHANDLING.
GROUNDINGINSTRUCTIONS
This appliance must be grounded. If it shouldmalfunctionor breakdown,grounding
providesa pathof leastresistancefor electdccurrentto reducetheriskofelectricshock.
Thisapplianceisequippedwitha cordhavinganequipment-groundingconductor(C)and
groundingplug(A).Theplugmustbeinsertedintoanappropriateoutlet(13)thatisproperly
installedandgroundedinaccordancewith all localcodesandordinances.
WARNING:Improperconnectionof the equipment-groundingconductorcan
resultintheriskofelectricshock.Checkwithaqualifiedelectdcianorservicepersonifyou
areindoubtastowhethertheoutletisproperlygrounded.Donotmodifytheplugprovided
with the appliance- if it willnotfit theoutJet,haveaproperoutletinstalledbya qualified
electrician.Thisapplianceisfor useona nominal120-voltcircuitand hasa grounding
plugthat looksliketheplug(A)illustratedinFig.1.Atemporaryadapter(D)maybeused
toconnectthis plugto a2-polereceptacle(E)ifa properlygroundedoutletisnotavailable
(Fig.2).Thetemporaryadaptershouldbeusedonlyuntilapropedygroundedoutlet(B)can
be installedby a qualifiedelectrician(Fig.1).Thegreencoloreddgidear, lug, orthelike
(F)extendingfrom theadaptermustbe connectedto a permanentground(G)suchasa
properlygroundedoutletboxcover(Fig.2).Whenevertheadapteris used,itmustbehel,
in placebya metal
screw. NOTE: In
Canada, the use
of a temporary
adapter is not
permitted by the
CanadianElectrical
Code.
CAUTION:TOREDUCETHERISKOFDAMAGE:
• Storeappropriatelyindoors in a dry place. Do not expose machineto freezing
temperatures.
• Withsteamactivated,donotallowappliancetosprayinonelocationfor anextended
periodoftime, as damageto surfacecan result.
4
/
!
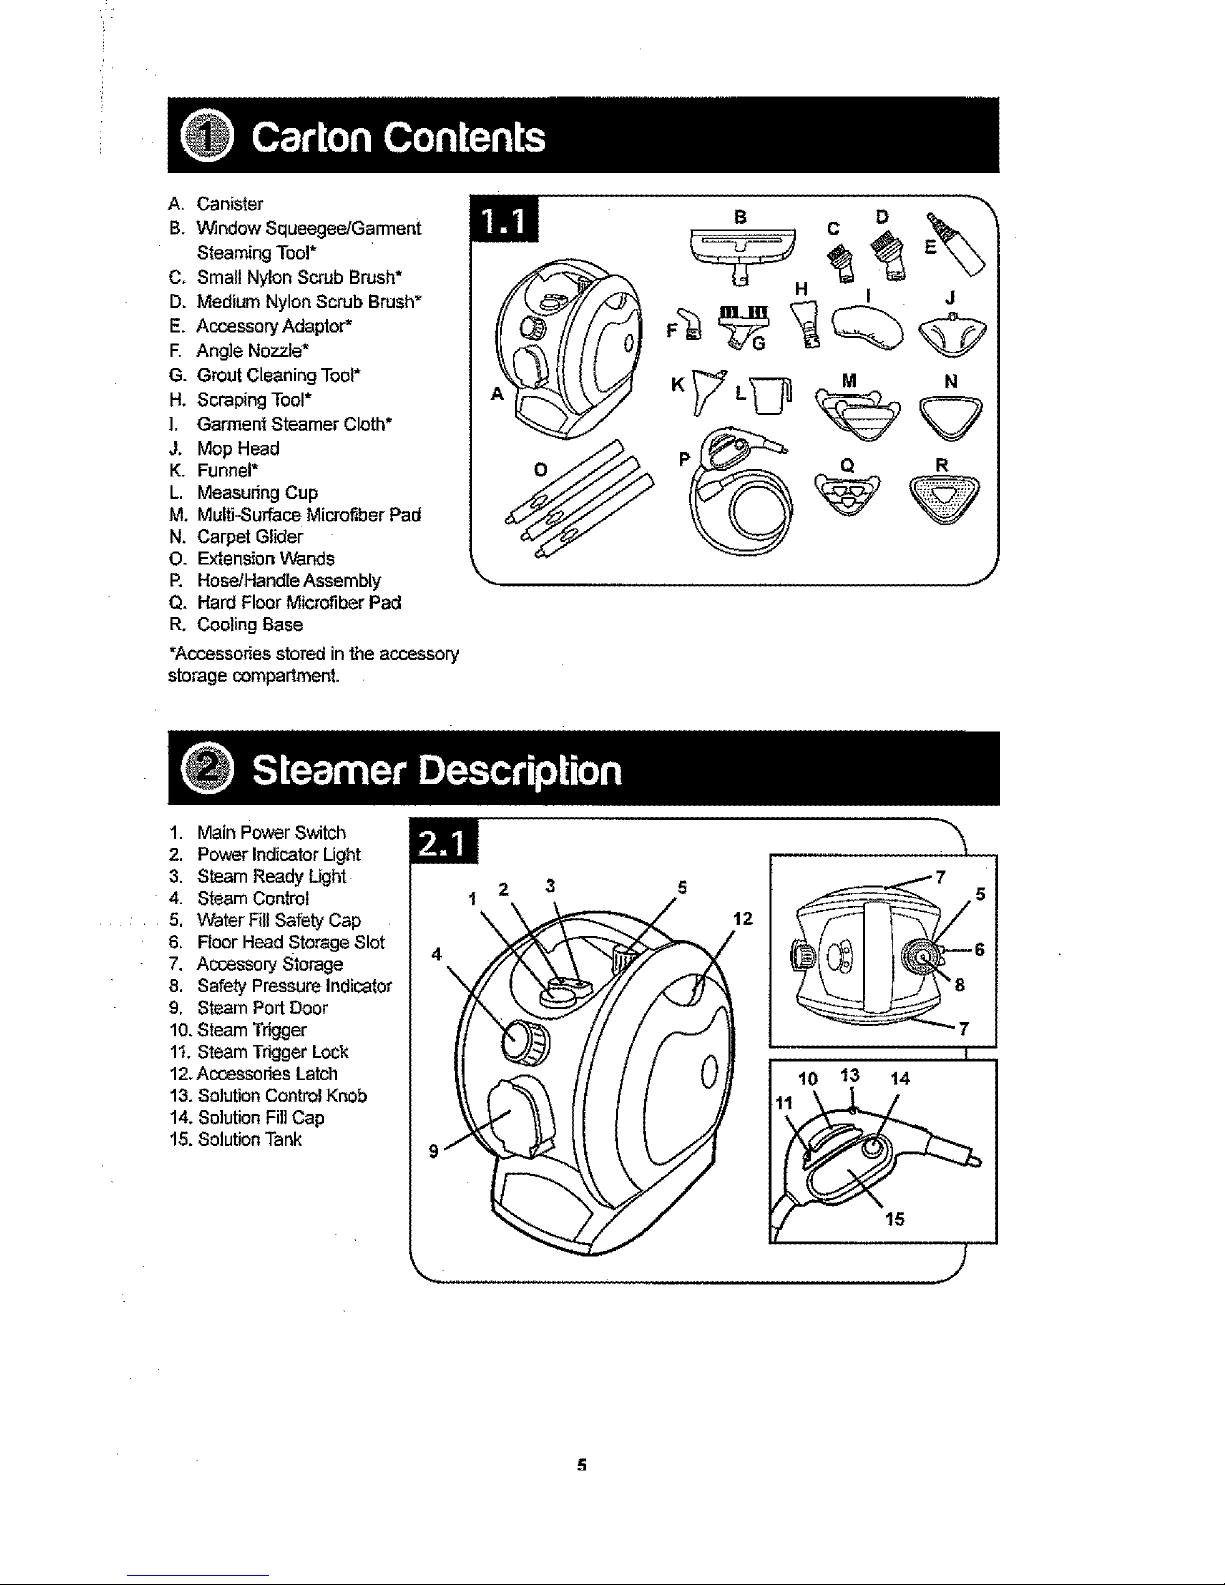
A, Canister
B. Window Squeegee/Garment
Steaming Tool*
C. Small Nylon Scrub Brush*
D. Medium Nylon Scrub Brush"
E. Accassory Adaptor"
E Ang]e Nozzle*
G. Grout Cleaning Tool*
H. Scraping Tool*
]. Garment Steamer Cloth*
J. Mop Head
K. Funnel*
L. Measuring Cup
M. Multi-Surface Microfiber Pad
N. Carpet Glider
O. Extension Wands
P, HoseiHandte Assembly
Q. Hard Floor Microfiber Pad
R. Cooling Base
*Accessories stored in the accessory
storage compartment.
@
_%_,,
I J
e N
J
1. Main Power Switch
2. Power Indicator Light
3, Steam Ready Light
4. Steam Control
5. Water Fill Safety Cap
6, Floor Head Storage Slot
7. Accessonj Storage
8, Safety Pressure Indicator
9. Steam Port Door
10. Steam Trigger
1I. Steam Trigger Lock
12, Accessories Latch
13. Solution Control Knob
14. So]ution Fill Cap
15. Solution Tank
4
9 j
2 3
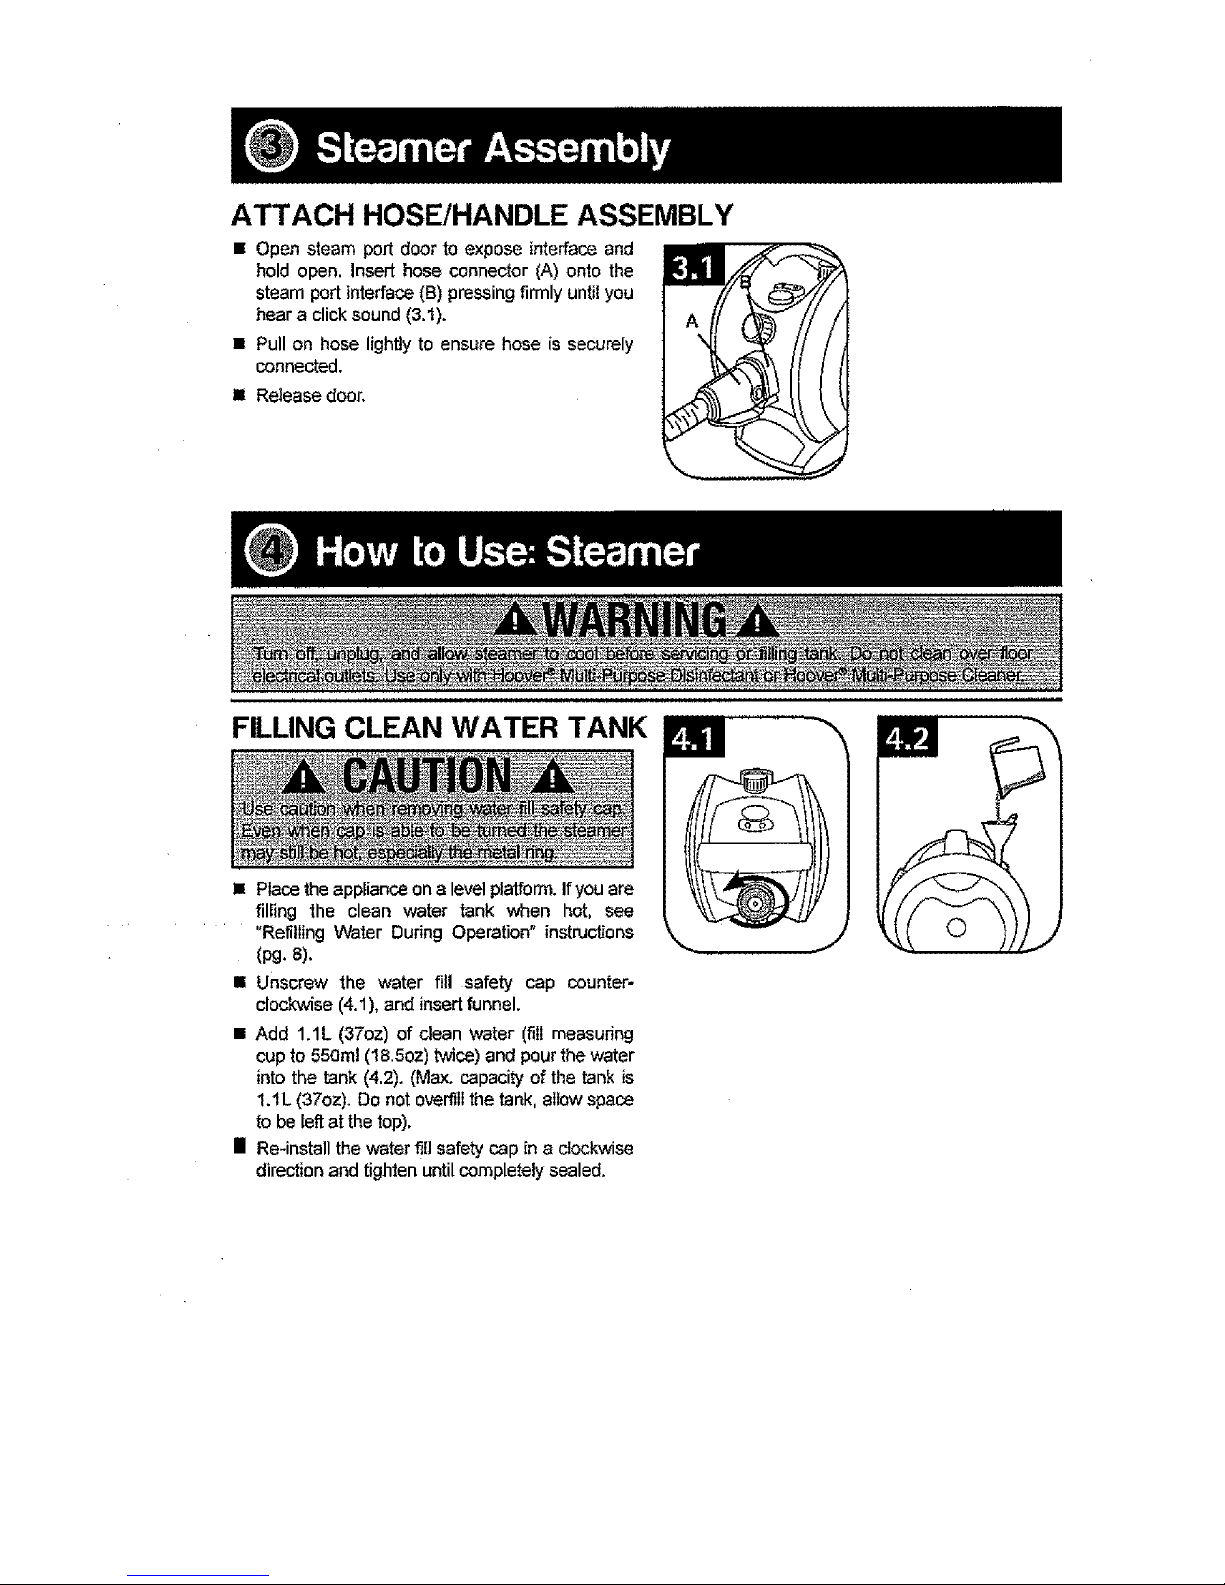
ATTACH HOSE/HANDLE ASSEMBLY
• Open steam port door to expose interface and
hold open, Insert hose connector (A) onto the
steam port interface (B) pressing firmly until you
hear a click sound (3.1).
• Pull on hose lightly to ensure hose is securely
connected.
I Release door.
FILLING CLEAN WATER TANK
i Place the appliance on a level platform. If you are
tilling the clean water tank when hot, see
"Refilling Water During Operation" instructions
(pg. 8).
• Unscrew the water fill safety cap counter-
clockwise (4.1), and insert funnel.
• Add 1.1L (37oz) of dean water (fill measuring
cup to 550ml (18.50z) twice) and pour the water
into the tank (4,2). (Max. capacity of the tank is
1.1L (37oz). Do not overfill the tank, allow space
to be left at the top).
| Re-install the water t_l]safety cap in a clockwise
direction and tighten until completely sealed.
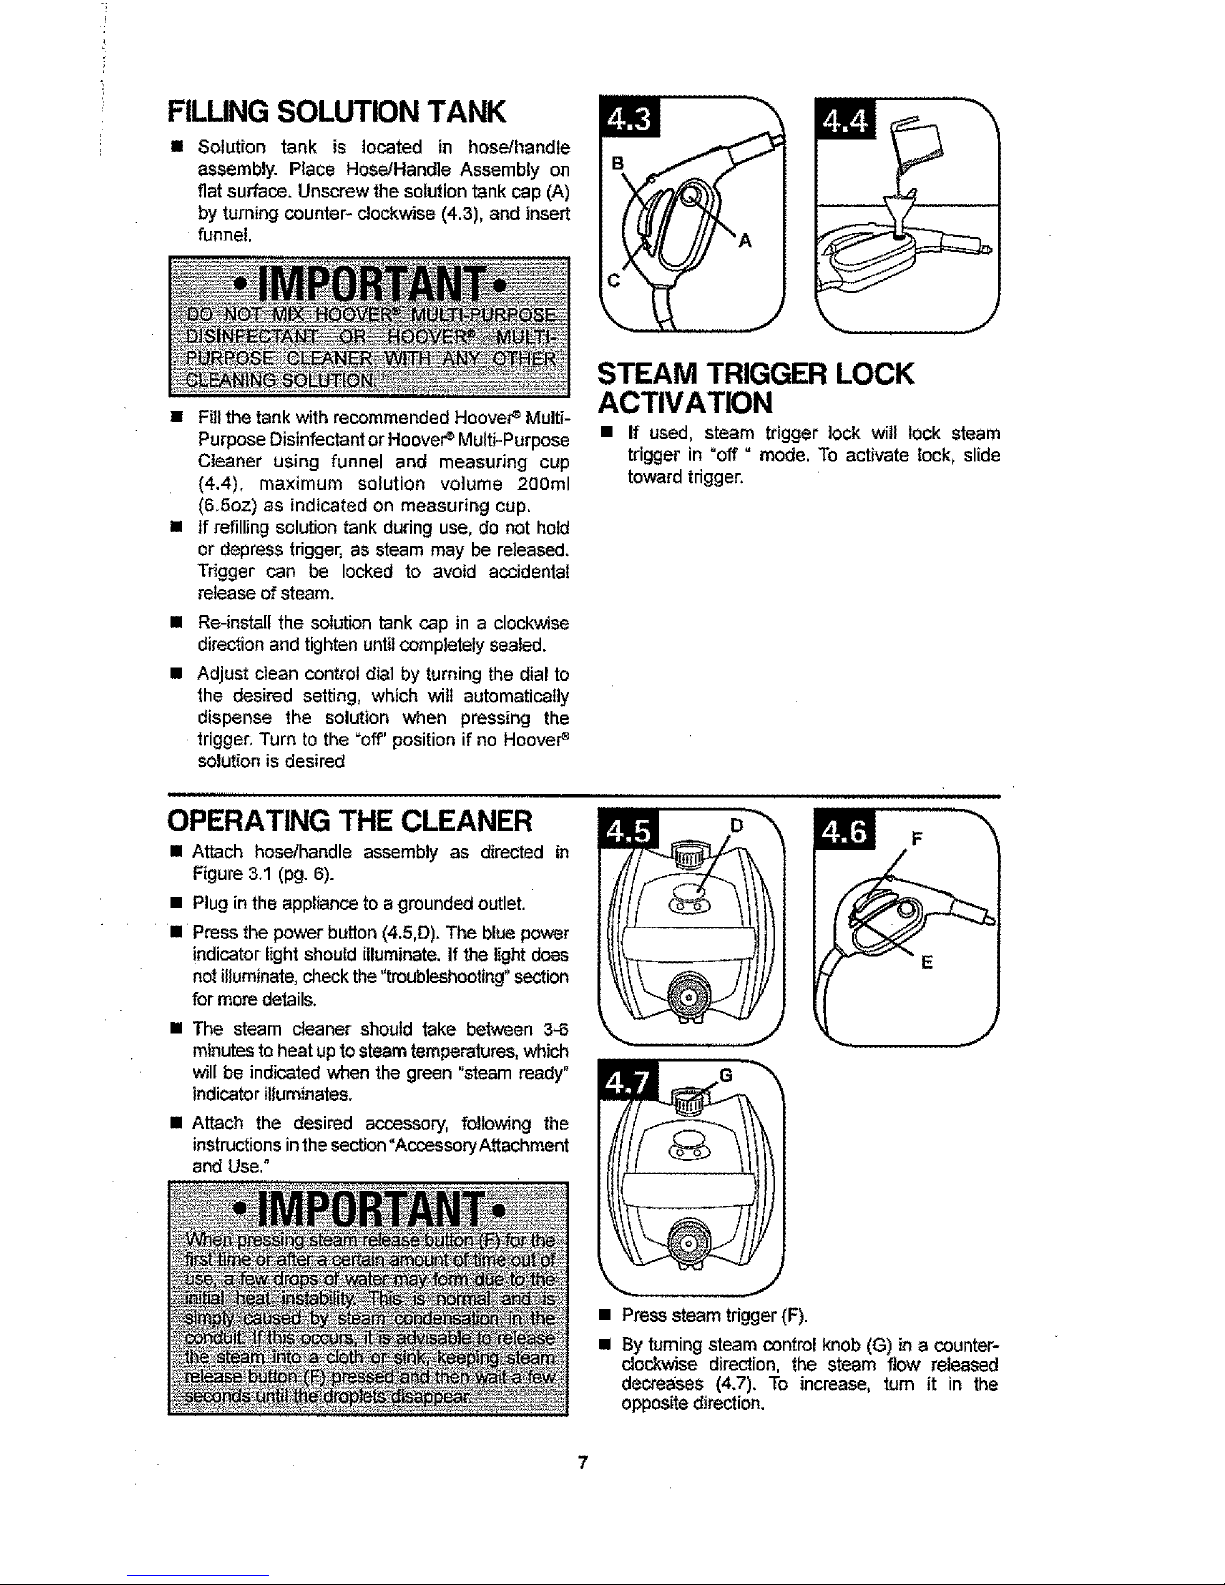
FILLING SOLUTION TANK
• Solution tank is located in hoselhandle
assembly. Place Hose!Handle Assembly on
flat surface. Unscrew the solution tank cap (A)
by turning counter- clockwise (4,3), and insert
funnel,
• Fill the tank with recommended HooveP Multi-
Purpose Disinfectant or HooveP Multi-Purpose
Cleaner using funnel and measuring cup
(4.4), maximum solution volume 200ml
(6.5oz) as indicated on measuring cup,
• If refilling solution tank during use, do not hold
or depress tdgger, as steam may be released.
Trigger can be locked to avoid accidental
release of steam.
Re-install the solution tank cap in a clockwise
direction and tighten until completely sealed.
Adjust clean control dial by turning the dial to
the desired setting, which will automaticaBy
dispense the solution when pressing the
trigger. Turn to the "off' position if no Hoover _
solution is desired
STEAM TRIGGER LOCK
ACTIVATION
• If used, steam trigger ]ock will lock steam
trigger in %ff = mode, To activate lock, slide
toward tdgger.
OPERATING THE CLEANER
• Attach hose/handle assembly as directed in
F{gure 3.1 (pg. 6).
• Plug {nthe appliance to a grounded outlet.
• Press the power button (4,5,D). The blue power
indicator light should {lluminate. If the light does
not illuminate, check the "troubteshoeting" section
for more details.
• The steam cleaner should take between 3"5
minutes to heat up to steam temperatures, which
will be indicated when the green "steam ready"
indicator illuminates.
• Attach the desired acoessoP/, following the
instructions inthe section"AccessoryAttachment
and Use,"
• Press steam tdgger (F).
= By tuming steam control knob (G) in a counter-
clockwise direction, the steam flow released
decre_;ses (4.7). To increase, turn it in the
oppos;te direction.
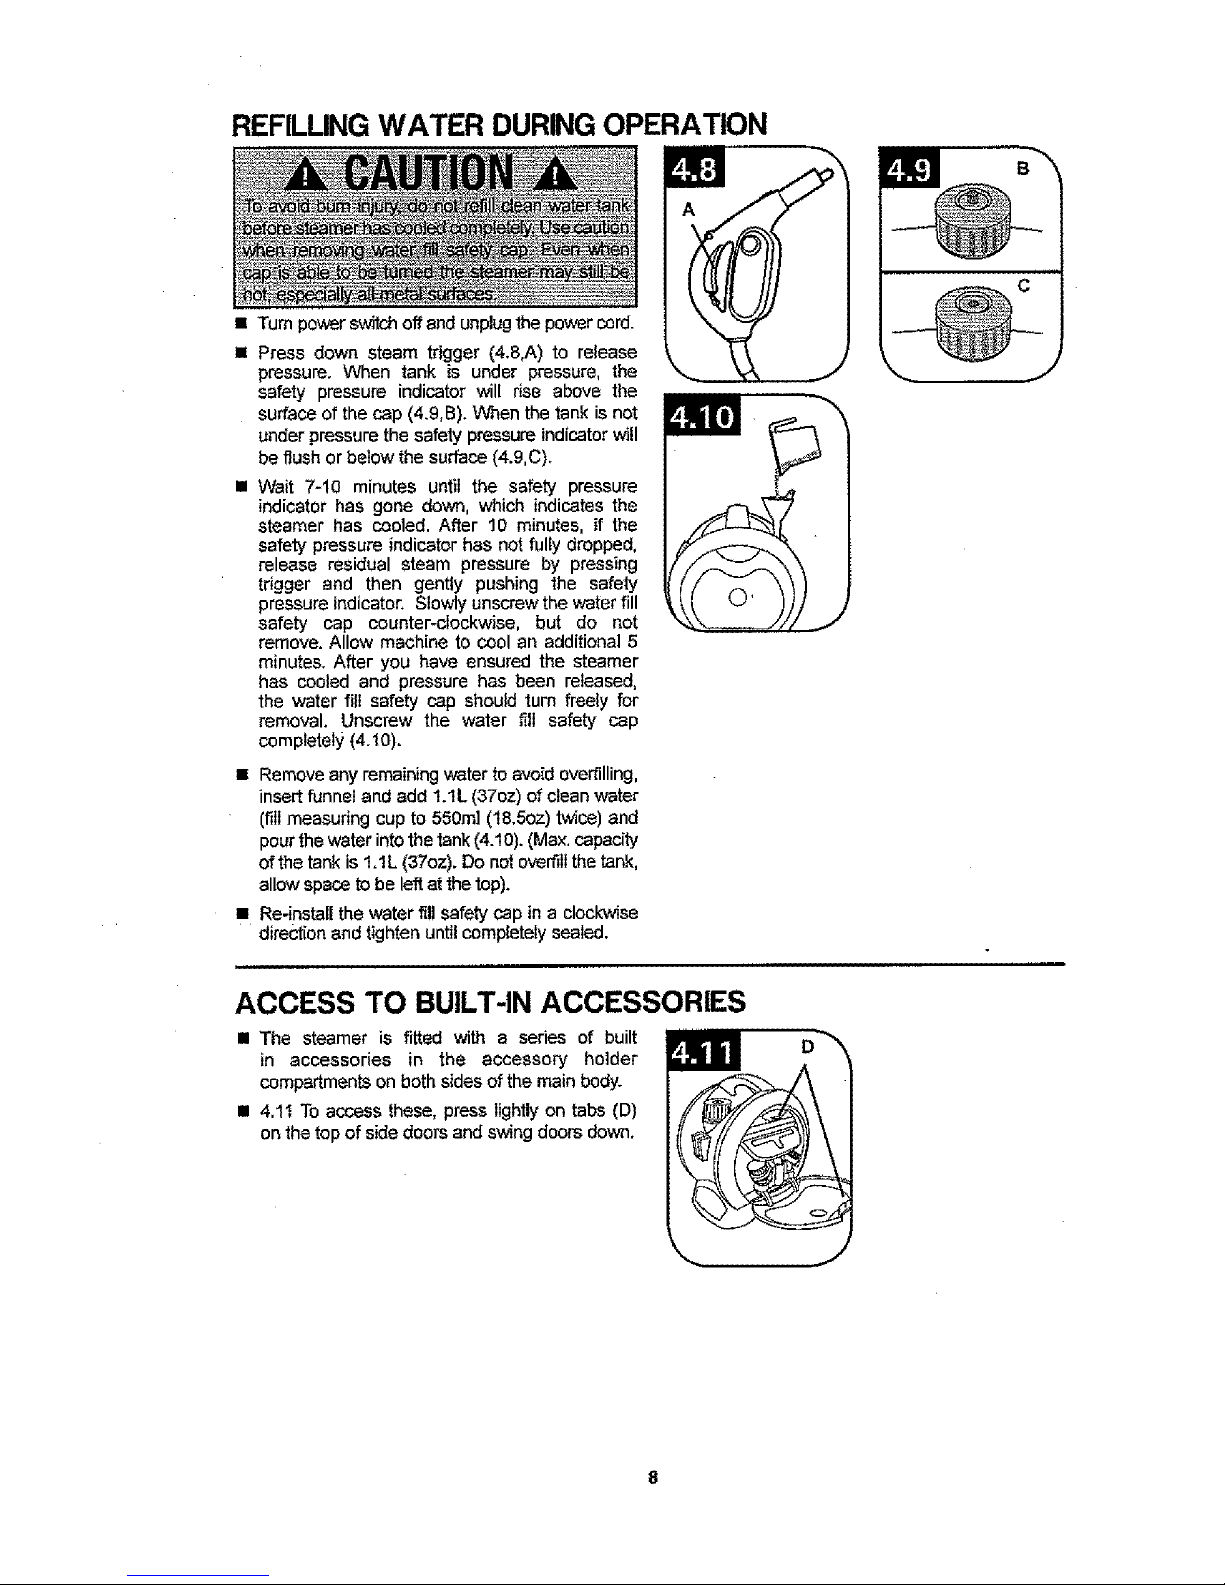
REFILLING WATER DURING OPERATION
• Turn paver switch off and unplug the power cord.
• Press down steam tdgger (4.8,A) to release
pressure. When tank is under pressure, the
safety pressure indicator will rise above the
surface of the cap (4.9,B). When the tank is not
under pressure the safety pressure indicator wi!l
be flush or below the su#ace (4.9,C).
= Wait 7-t0 minutes until the safety pressure
indicator has gone down, which indicates the
steamer has cooled, After 10 minutes, if the
safety pressure indicator has net fully dropped,
release residual steam pressure by pressing
trigger and then gently pushing the safety
pressure indicator. Slowly unscrew the water fill
safety cap counter-clockwise, but do not
remove. Allow machine to ¢0ol an additional 5
minutes. After you have ensured the steamer
has cooled and pressure has been released,
the water fill safety cap should turn freely for
removal. Unscrew the water fill safety cap
completely (4.10).
• Remove any remaining water to avoid overfilling,
insert funnel and add 1.1L (37oz) o_ clean water
(fill measuring cup to 550m1 (t8.50z) twice) and
pour the water into the tank (4.10). (Max, capacity
of the tank is 1.1L (37oz). Do not overfill the tank,
allow space to be left at the top).
• Re-install the water f_li safety cap in a clockwise
direction and tighten until completely sealed.
ACCESS TO BUILT-IN ACCESSORIES
II The steamer is fitted with a series of built
in accessories in the accessory holder
compartments on both sides of the main body_
II 4,1I To access these, press lightly on tabs (D)
on the top of side doors and swing doors down.

ATTACHING ACCESSORIES
EXTENSION WAND SECTIONS
• Align Extension Wand (A) with hose handle
(B) (5._,). Connect the wand with the rotating
cord hook first to the hose and handle assembly.
• Press Extension Wand with the rotating cord
hook against the hose handle until you hear
a click.
• Repeat this p_ocedure if it is necessary to attach
more wands. The fixed hook extension wand will
be last to be attached (closest to the accessory
or mop head).
• Use ExtensionWands
to increase the distance
from HoselHandle
Assembly to the chosen
accessory (mop head,
grout tool, etc.)
ATTACHING MOP HEAD
• 5.2 Align Extension Wand (C) with the opening on the Mop Head (D), at the
corresponding end,
• Press Extension 'Wand against the Mop Head until you hear a click.
=' Use Mop Head to clean sealed hard floors and carpets. Pad must be
attached. Reference section "Attaching the Microflber Pads" to ensure
correct pad is being used.
I Mop head can also be connected directly to the hoselhandle assembly.
ATTACHING THE MICROFIBER PADS
ForGeneralCleaning
ii Use the "Multi-Surface Microfiber Pad" (5.3).
II Place the "Multi-Surface Microfiber Pad" on
the floor (white side up).
i Place the product on top of the pad making
sure the mop head covers the entire pad
(5.3). Hook and loop feature on the bottom
of the mop head will hold the pad in place.
ForDisinfecting
• To disinfect and kill or remove 99.9% of
harmful bacteria, use the "Hard Floor Microfiber
Pad", which contains the cut outs in it (5.4).
• Place the "Hard Floor Microflber Pad" on
the floor (white side up).
• Follow directions For General Cleaning.
• Fill the solution tank with the HooveP Multi-
Purpose Disinfectant as directed in "Removing
and Filling Solution Tank" section on page 7. Turn
Clean Control dial to HIGH,
• Run a minimum of 4 strokes at a medium pace
across same area and allow to air dry.
 Loading...