

Page 1
Instruction for
(Based
on Download the software for Windows from:
by simply
After the installation,
/Laptop
(HooToo TripMate
HooToo TripMate HT
Build up the connection with “
11111111
right system tray to scan for available networks within range. Locate the
network that you want to connect to in the list of available networks. In this case, the
Trip
HooToo TripMate
will search all the connected devices
the utility search out only one TripMate device.
USB storage is attached to your TripMate HT
named
www.hootoo.com/downloads
and follow the
HooToo
laptop (wireless
Click on your Wireless Network Manager icon in
. The software utility
in the following case,
my
corner, it will
Install the software
on-screen instruction.
TripMate” icon on your PC
“HooToo TripMate”
on Windows
HooToo TripMate_V1.0.8.0)
double clicking on the program
there should be a “
.
_V1.0.8.0)
a. Power up your
b.
enabled) - password is “
the lower-
network SSID is in the name of "
c. Double click the “
-TM01 by long pressing on it for 3-5s
TripMate-XXXX” using your PC or
”. (
Mate-XXXX")
” icon on your PC/Laptop
within your network, e.g.
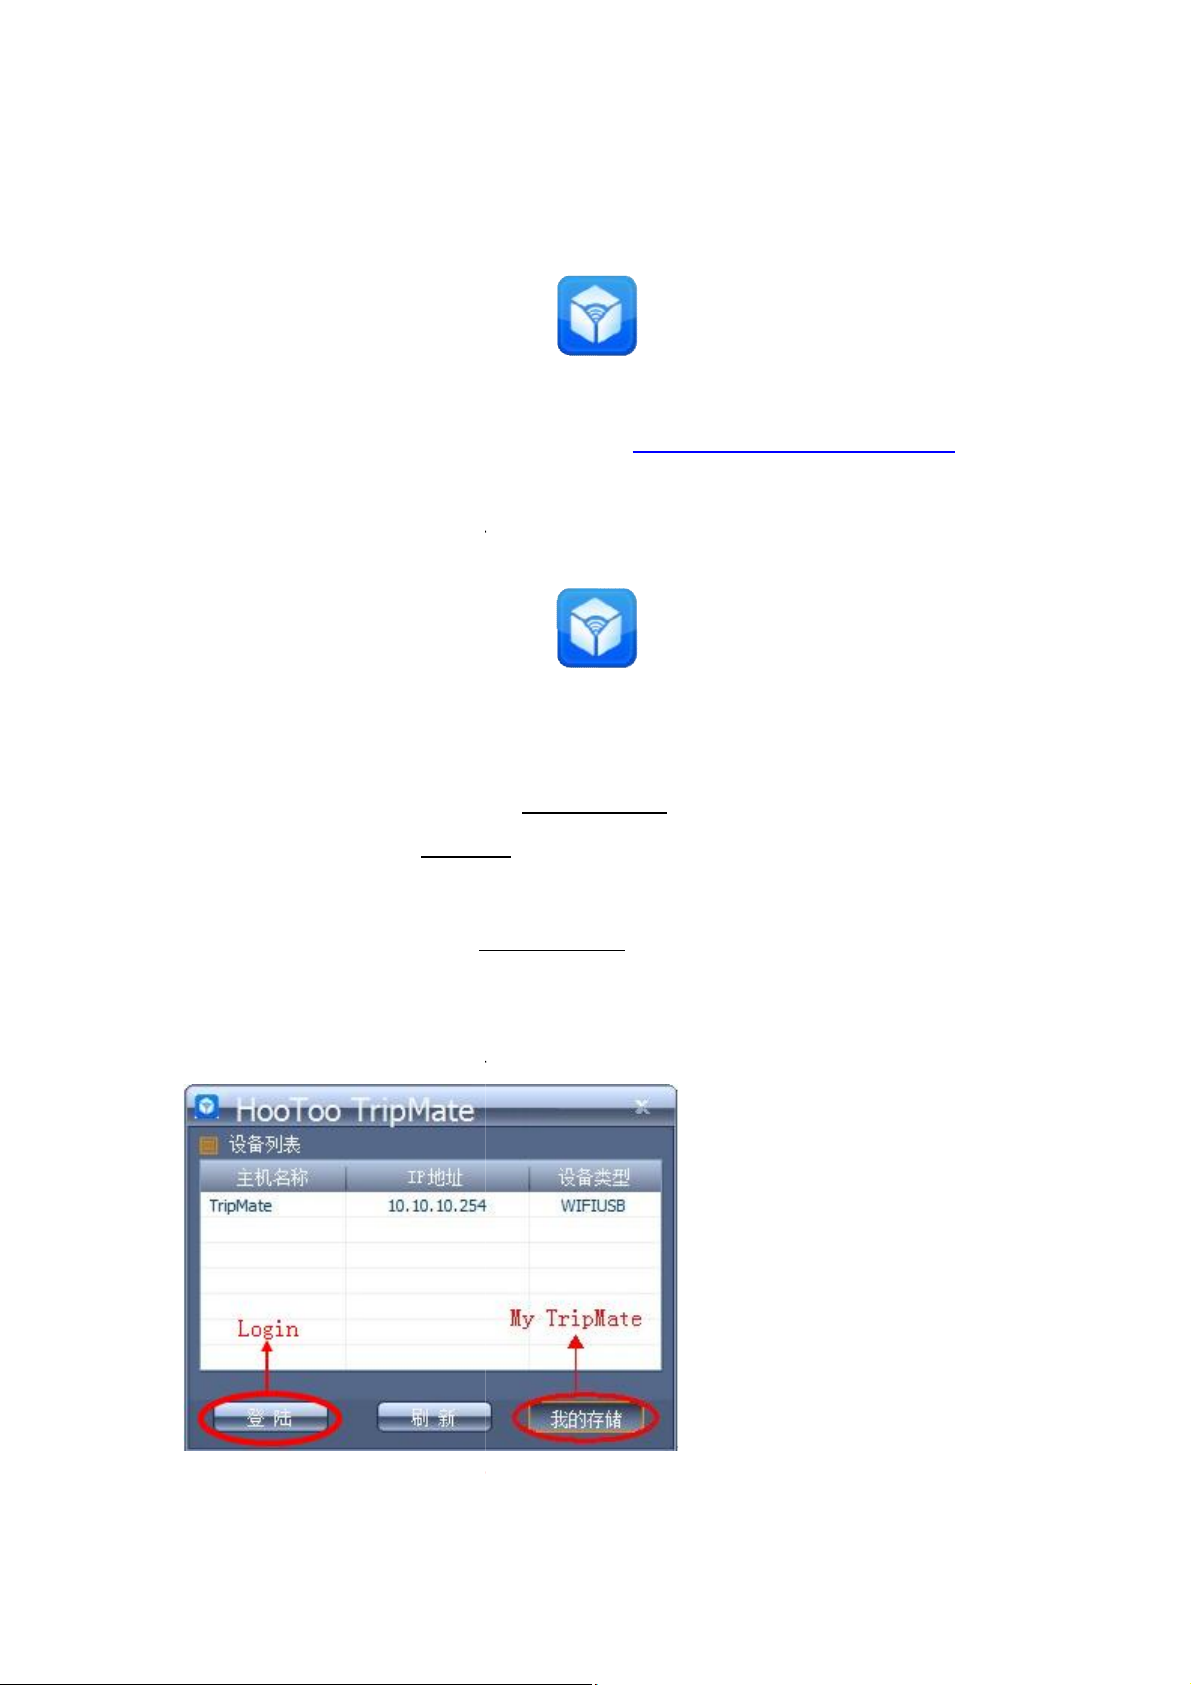
[Note]: If
device” (in some version it’s
“my TripMate”) on the bottom right
-TM01, and you click on “
Page 2
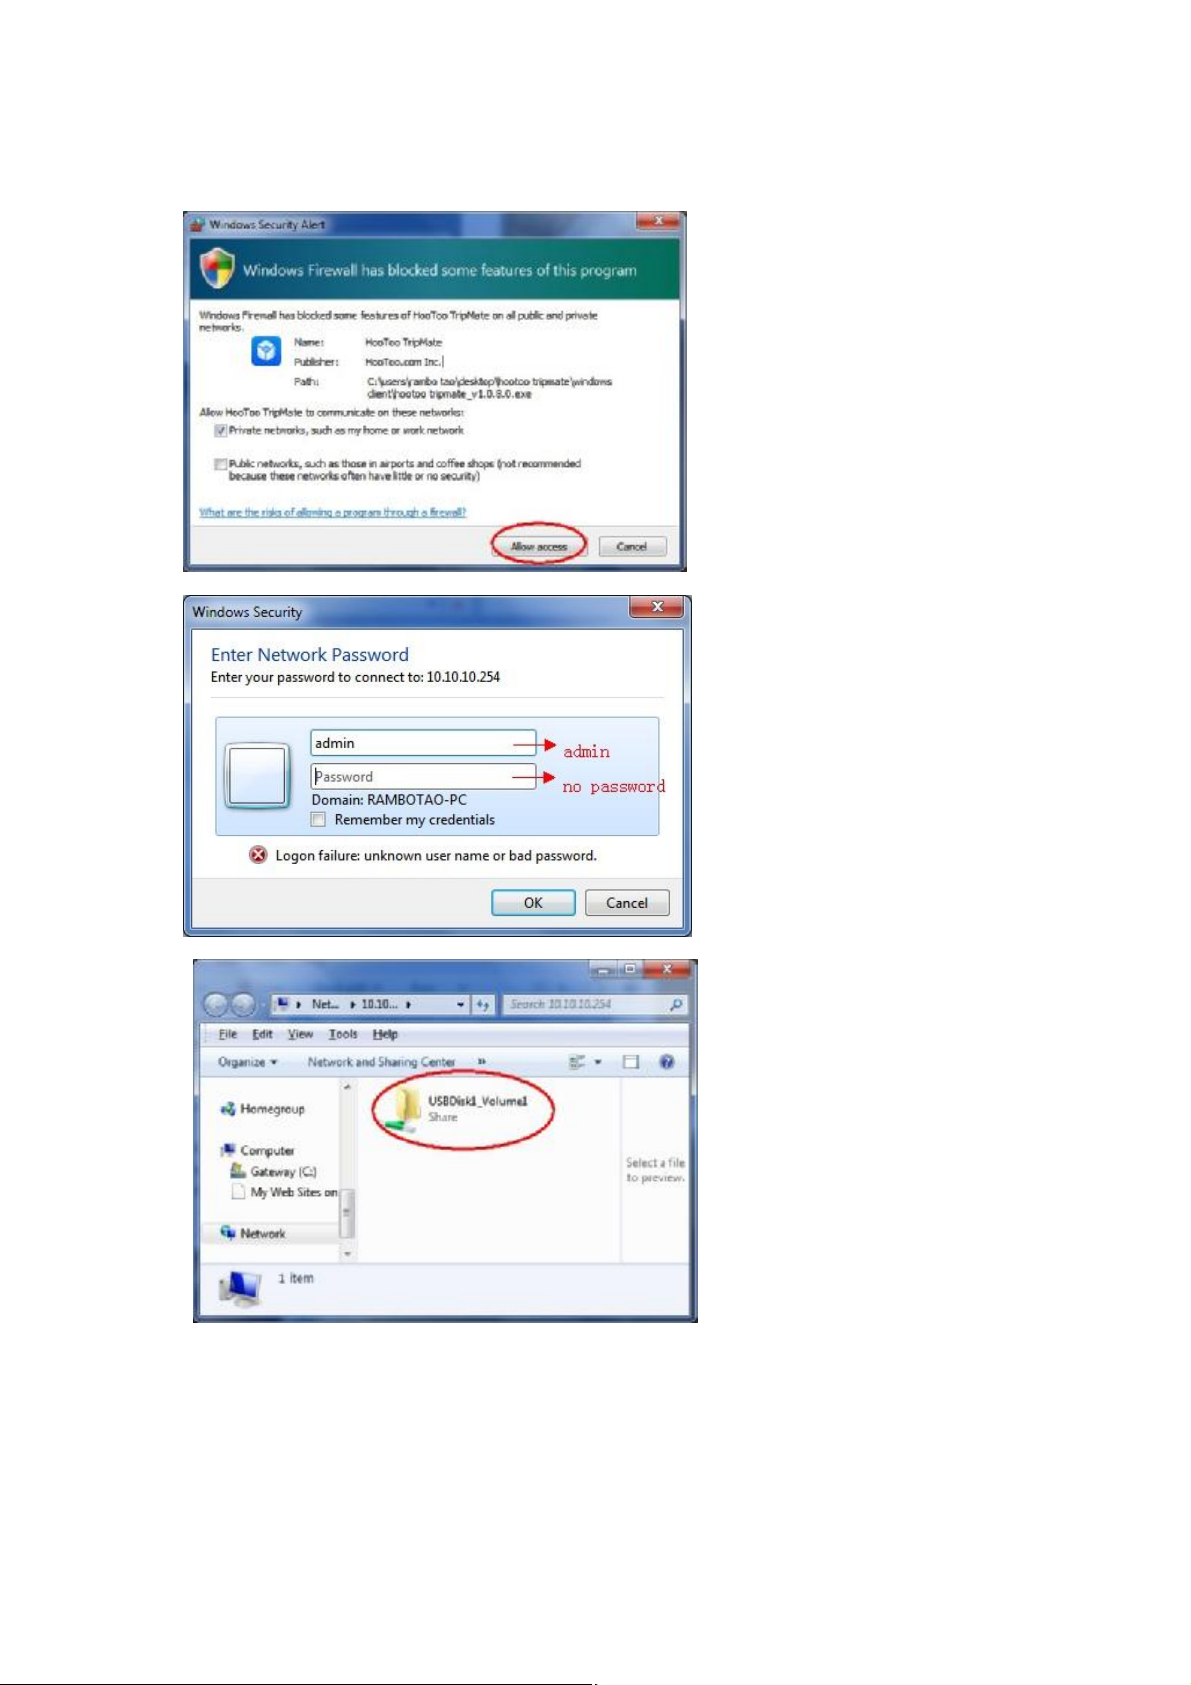
lead you to a folder where contents of your USB storage is accessiable and
transferable), this process may include the following steps:
(grant access to Windows)
(verify your credentials)
(access destination folder)
d. Select the TripMate on the list and click “Login” on the left corner, and you can
enter the login screen (User Name: Admin / leave password blank. Click “Login”),
check below the on-screen instructions, OR you can simply put 10.10.10.254 into any
of your web browser to enter the admin setup page of TripMate. (See below)
Page 3
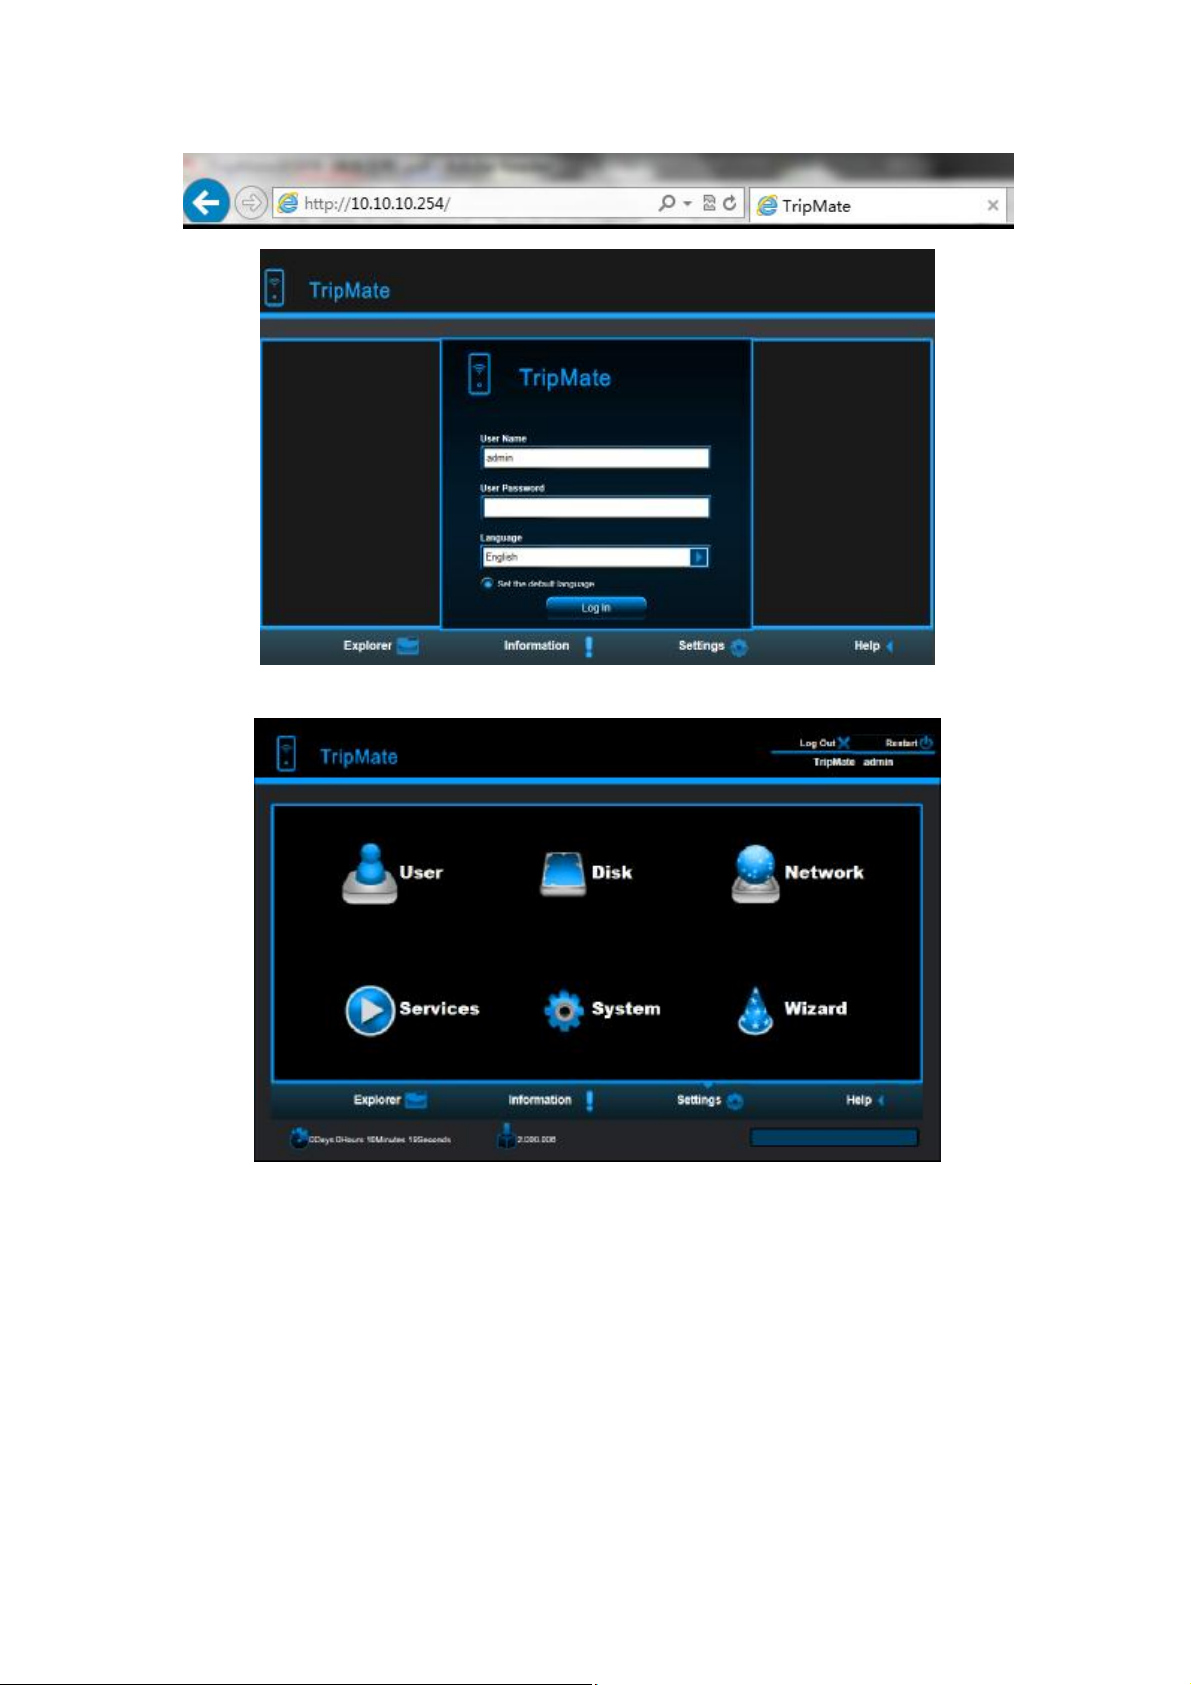
(log-in page on Windows)
(Your TripMate admin setup page)
Page 4

There are 4 main webpage Management Interfaces:
1. Explorer Function:
This section is based on the fact that the NAS (USB storage) is properly attached to
your TripMate device. It allows the user to upload files to your NAS (USB storage),
create new folders, copy, move, delete and rename the folders or files.
Refresh Button – To refresh the display
Upload Button – To upload the files in your PC/Laptop to USB External Storage
Create Folder – To create new folders on you USB External storage devices
Copy Button – To copy files and paste them into another folder
Cut/Move Button – To move files and paste them into another folder
Download Button – To download files to your PC/Laptop
Delete Button – To delete the files you do not need any more
Rename Button – To rename the files or folder
Photo Viewer – To view the photos on one folder with slide
Page 5
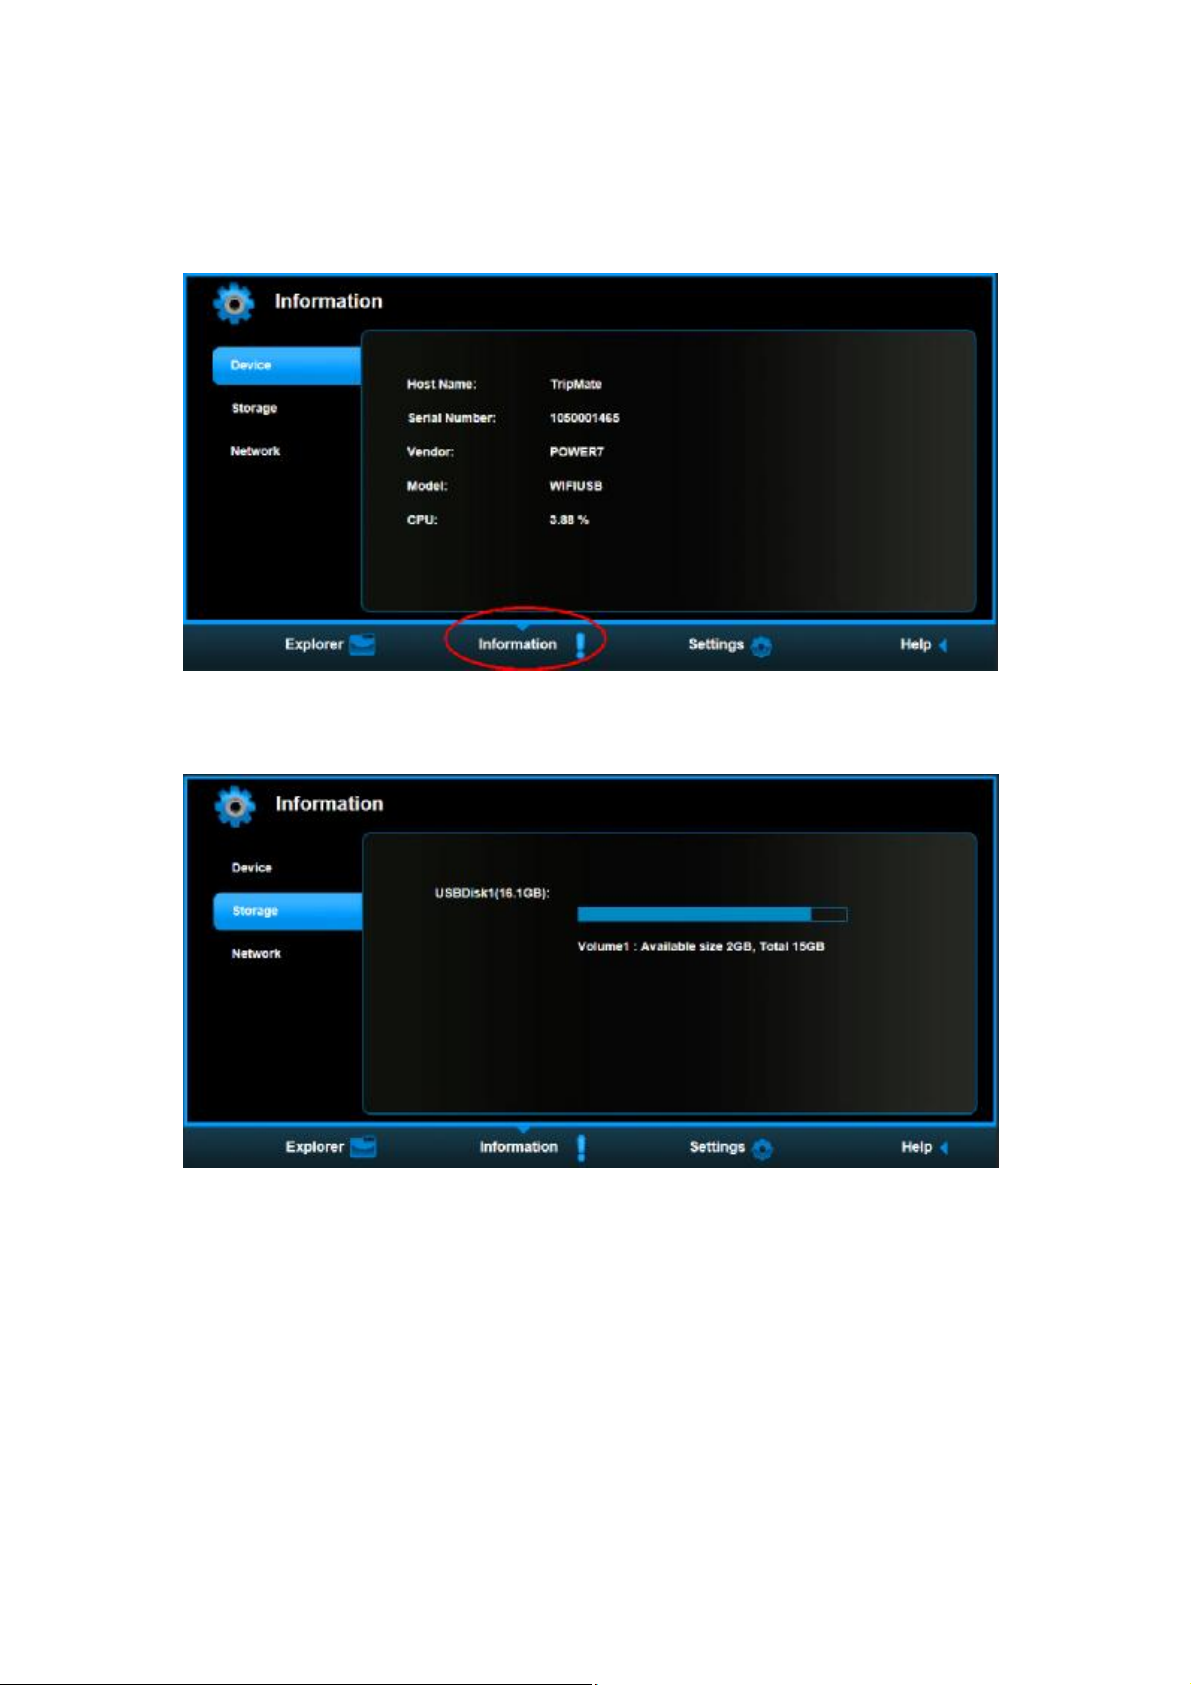
2. Information Function:
Device: You can see all the information of your TripMate HT-TM01, including
the host name, serial number, model etc.
Storage: Provides information of the USB external storage, including the brand,
total capacity, available capacity.
Page 6

Network: Provides detailed information regarding the current network setting,
including the connections access to the Internet, WIFI SSID and IP address. You
may click on the “Detail” to check more information, and click “return” to go
back the following page.
Page 7

3. Setting Function
User Setting:
This window will allow you to modify the admin password (5 characters
minimum and 32 characters maximum.)
Password is case sensitive, once you change the password; there is no way to
go back to the “no password” status, unless you perform a reset to the device.
Password update will apply to admin login page and USB storage access
folder login page(see previous instruction in RED color)
Page 8

Disk Setting:
This window provides information regarding the internal hard drive as seen on
the screenshot below.
Disk: It provides detailed information on your NAS/External USB Disk, including
firmware version, serial number, disk total capacity, temperature, and more.
Volume: It provides information regarding the File System used to format the
internal hard disk drive, total and available capacity.
Page 9

Network Setting:
Host Name: The Hostname is a name that is assigned to a device connected
to a computer network. It can be modified to whatever name that will fit your
needs. (It must begin with a letter and followed by a combination of letters
and numbers and required minimum 2 characters and maximum 8 characters
in length.)
WiFi & LAN: The WiFi & LAN can be modified based on your needs.
However, we do not recommend you to change the default settings unless
you can not get your TripMate to work properly. Please always contact us at
support@hootoo.com and let us assist you if you really need them changed.
Page 10

DHCP Server: The DHCP or Dynamic Host Configuration Protocol is a network
protocol that enables a server to automatically assign an IP address to a
computer connected into a network. By default, the DHCP Server option is
enabled. And this option can be disabled if needed and the IP address can
be manually assigned. This is similar to parameter setup in a regular router; you
may consult us for setup if needed.
Internet: There are two available Internet Access options. One is Wireless
Access, and the other is Wired Access.
Wireless Access: Connect your TripMate to another wireless device to have
the internet access. This is usually called “Bridge Mode”
Page 11

Wired Access: Directly connecting your TripMate to the available port on the
back the router. In this case, your TripMate will be set up as a router, for
detailed steps on this setup, you may also refer to the included Instruction
Manual from P13-P15
DDNS Setting: Enable DDNS to allow users to remotely access the device by a
register hostname and the default setting is “Enable DDNS: off”
Page 12

System Setting:
Time Setting: Choose to synchronize time with the Internet or the time on your
PC.
Backup Setting: To save your TripMate system configuration. Please note that
this process will NOT create a backup of the NAS/USB storage contents.
Page 13

Firmware Update: Update the latest version of the firmware.
Please always contact us at support@hootoo.com before you run a firmware
upgrade on the device, failure to do so may render the 12-month warranty
voided.
Reset Setting: Resetting to factory defaults will reset all your customized
settings or whatever changes you made back to its original settings
Page 14

4. Help Function:
A detailed operating instruction regarding the function of the HT-TM01
Any questions, please feel free to contact us at support@hootoo.com .
Thank you very much for your support!
 Loading...