

Page 1

HooToo
HT-TM0
User Guide
Page 2

2
Thank you for choosing HooToo TripMate Travel Router. Please read this
guide first to understand the essential functions of the TripMate before
using. If you need any assistance, please contact us or email at
support@hootoo.com with details.
Symbols and Conventions
To make it easier to find the information you need, the following symbols
and conventions are used:
Notes: information that should be read before using the TripMate.
Reference: references to other pages in this manual.
TripMate Settings
This manual assumes that default settings are used.
Page 3
3
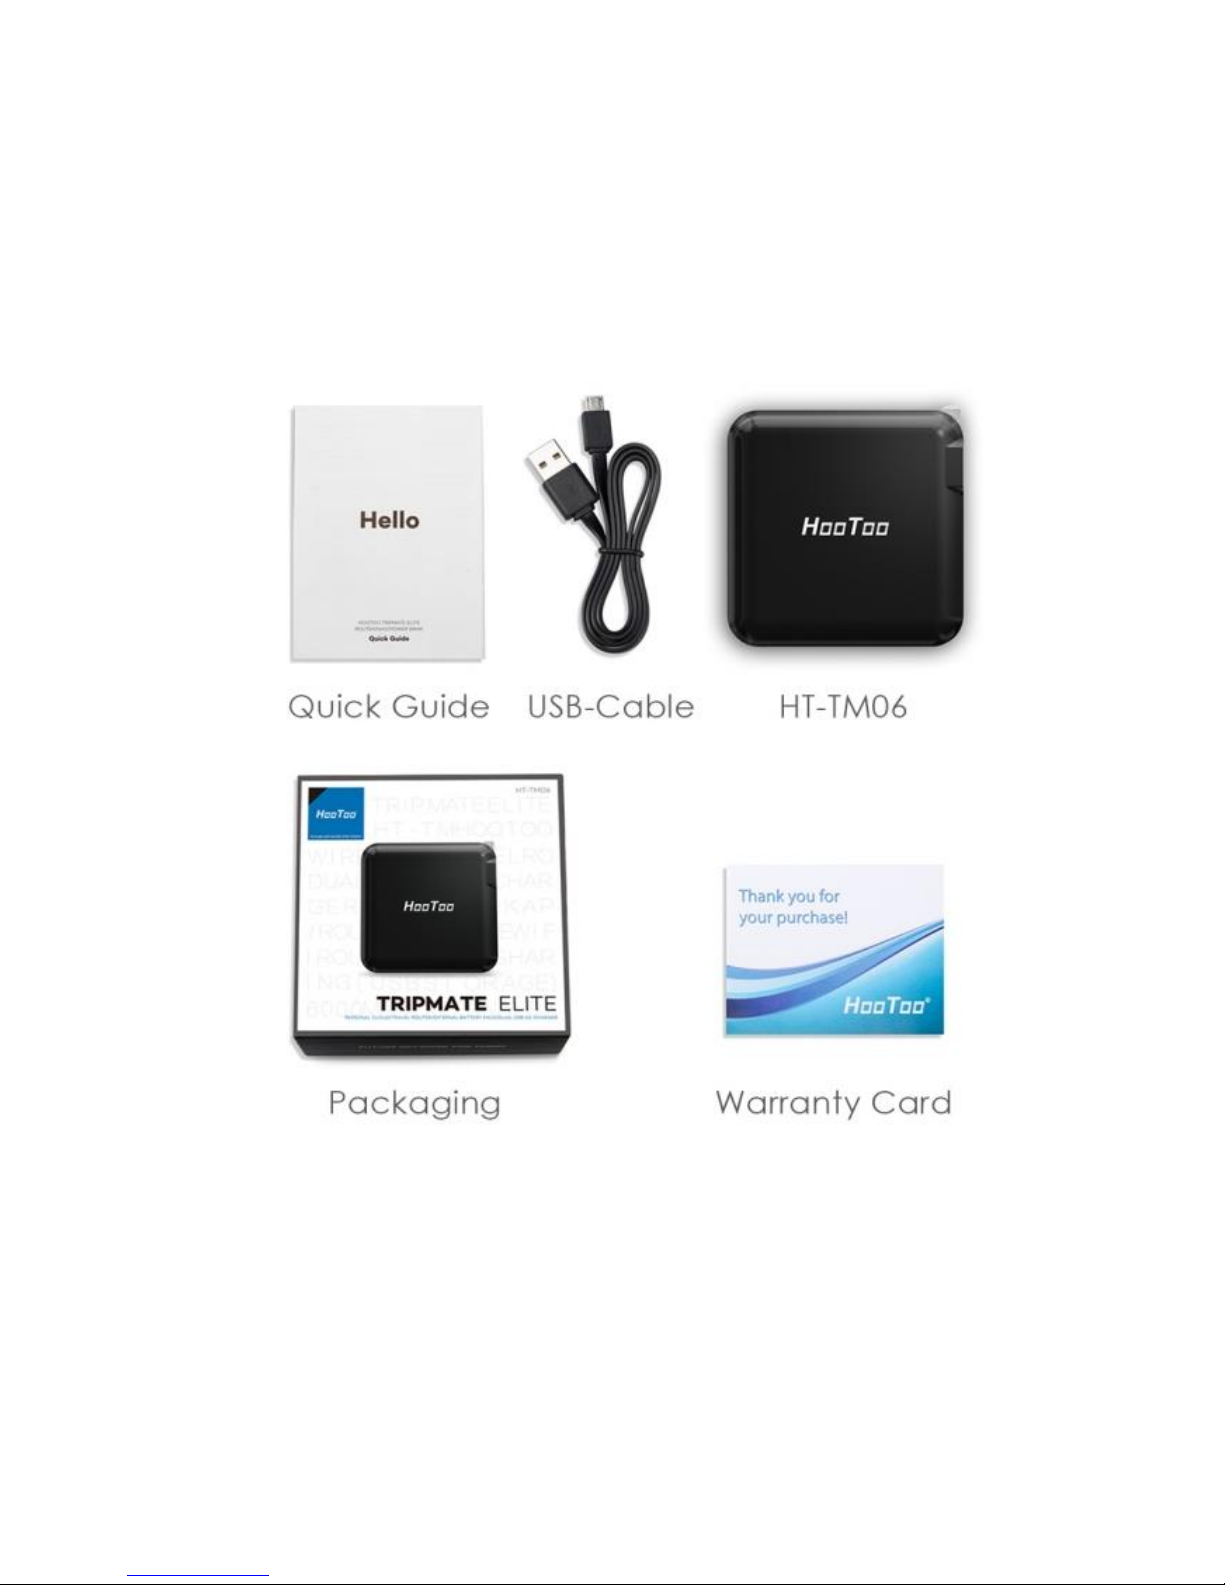
Package Contents
Page 4

4
Contents
Package Contents ................................................................................ 3
Getting to Know the TripMate ............................................................... 7
Features ................................................................................................ 9
Wireless Sharing ............................................................................... 9
Travel Router .................................................................................. 10
External Battery Pack + Wall Charger ............................................. 10
Configure the TripMate ...................................................................... 11
Connect to TripMate Wireless Network ......................................... 11
More on TripMate................................................................................ 30
Wireless Sharing ............................................................................. 30
Travel Router .................................................................................. 37
Access Point Mode ..................................................................... 37
Router Mode .............................................................................. 38
Bridge Mode ............................................................................... 48
System Tools ...................................................................................... 59
Language......................................................................................... 59
Common Icons ................................................................................ 62
Main Page ....................................................................................... 63
Page 5

5
Explorer .......................................................................................... 64
Information ..................................................................................... 71
User Settings ................................................................................... 76
Admin ......................................................................................... 77
Guest........................................................................................... 81
Network Settings ............................................................................ 84
Host Name .................................................................................. 85
SSID Settings ............................................................................... 86
Mac Address ............................................................................... 95
Region & Wi-Fi Channel .............................................................. 96
Hide SSID..................................................................................... 98
DHCP Settings ............................................................................. 99
Service Settings............................................................................. 102
Samba Service ........................................................................... 103
DLNA Service............................................................................. 104
Auto-jump Service .................................................................... 109
Time Settings ............................................................................ 111
Firmware Upgrade .................................................................... 115
Factory Default ......................................................................... 119
Page 6

6
Wizard........................................................................................... 121
Battery Backup ................................................................................. 122
Charge TripMate ....................................................................... 122
Charge Devices ......................................................................... 123
Caring for the TripMate .................................................................... 124
Storage ...................................................................................... 124
Cleaning .................................................................................... 124
Cautions ........................................................................................... 125
Caring for the Battery ............................................................... 125
Troubleshooting ............................................................................... 126
Error Messages ................................................................................. 127
Hardware Specifications .................................................................. 128
Software Specifications ................................................................... 131
Warranty and Support ...................................................................... 135
Contact ............................................................................................. 136
Page 7
7
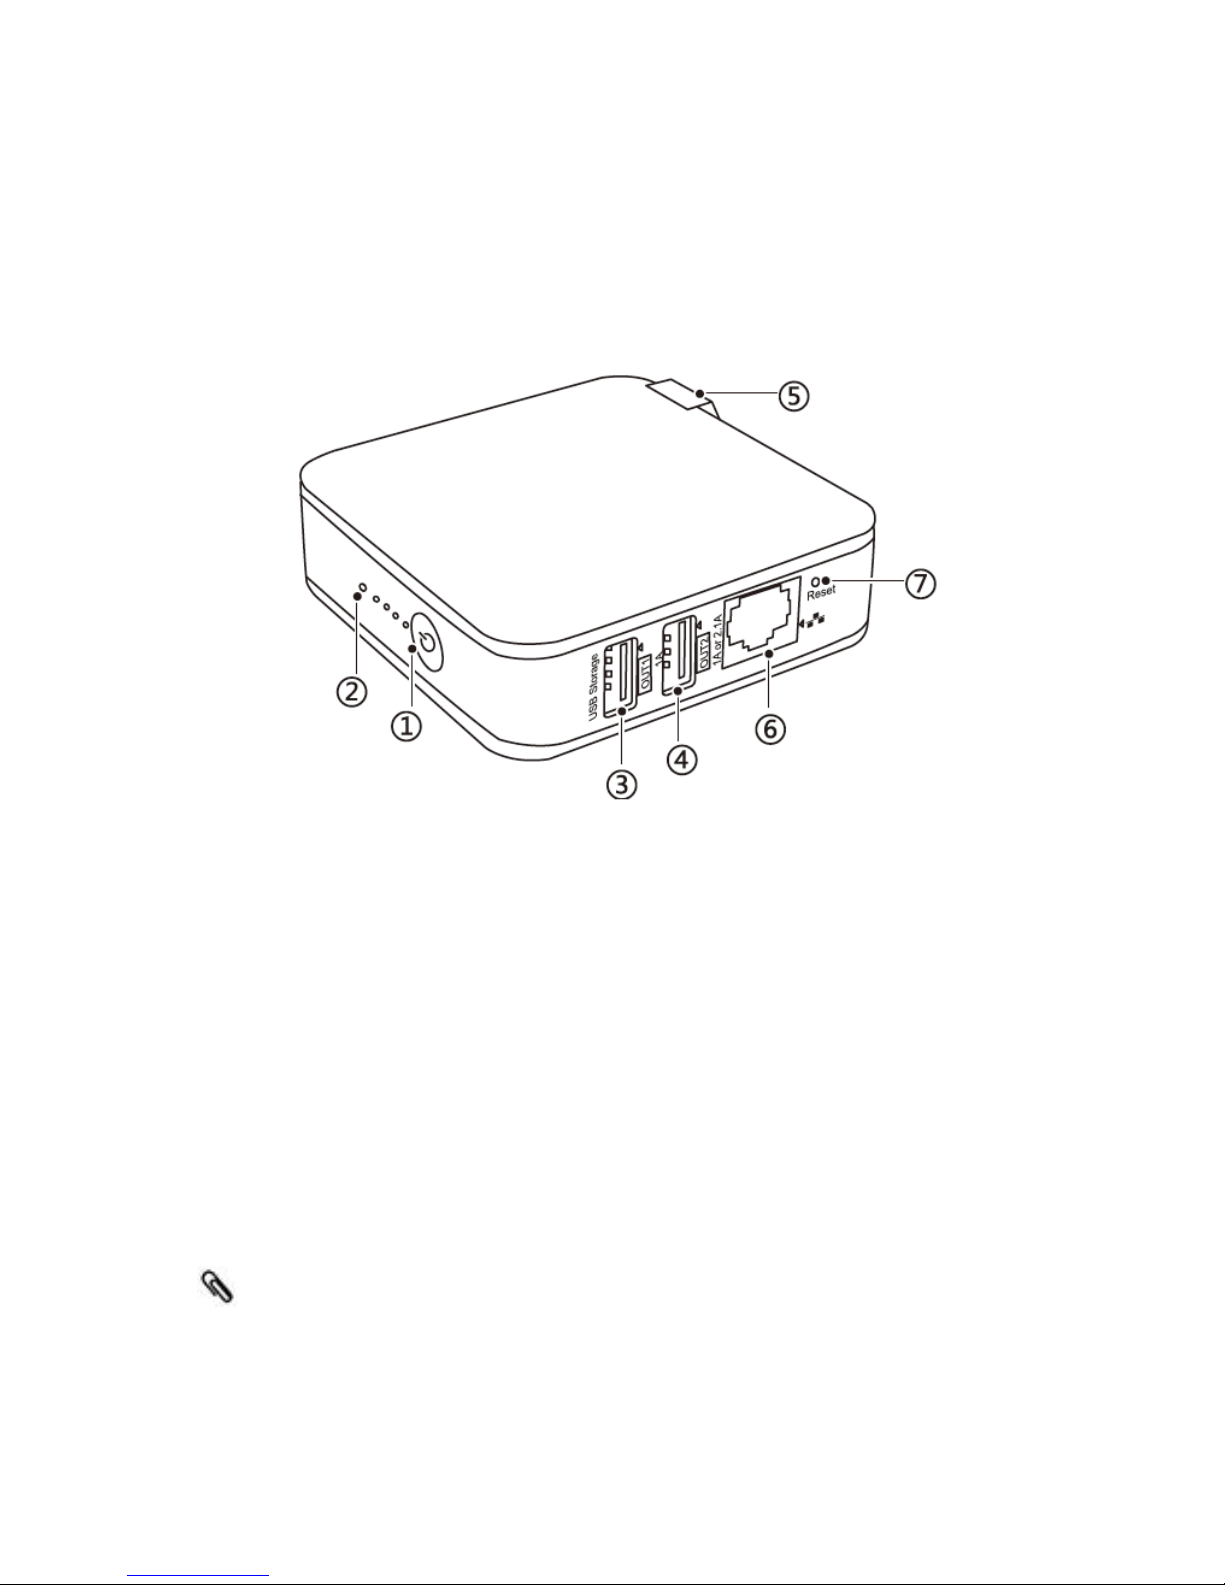
Getting to Know the TripMate
○1 Power Button:
Short Press (1 second): Activates battery LED indicators
Long Press (3 seconds): Activates Internet/LAN
Battery LED Indicators:
Indicate how much battery is left.
1 LED: 0~25%
2 LEDs: 26~50%
3 LEDs: 51~75%
4 LEDs: 76~100%
If you long press the power button and all lights flash, this means the
remaining battery is not enough to power on. Please recharge your
Page 8

8
TripMate ( 122)
○2 Wi-Fi LED:
Flashing Blue: System loading
Solid Blue: System loaded
Flashing Green: Connecting to the Internet
Solid Green: Internet connected
○3 USB Port 1:
For plug in external USB storage or charging other devices (Output:
5V/1A MAX)
○4 USB Port 2:
For charging other devices ONLY (Output: 5V/2.1A MAX)
○5 RJ45 Ethernet Port:
Connect to your existing router/modem to set TripMate as
AP/Bridge/Router
○7 Reset Button:
Press with a small pin about 10 seconds to reset your TripMate
○8 AC Plug
Recharge TripMate
Page 9

9
Features
Wireless Sharing
Share Photos/Videos/Documents from your USB storage, smartphone or
tablet with friends and colleagues through TripMate wireless network
USB Hub + Multi USB Storage Devices attachable
Not only can you add single USB storage to the TM06, also add 4 USB
storage devices simultaneously by using a USB hub to connect them.
Chromecast Friendly
Unable to get onto a local network? Connect Google Chromecast to your
TM06 and play videos and music on your connected USB storage through
Chromecast to the big screen.
Control Via App
Available for FREE from App Store and Google Play. The brand new
HooToo TripMate Plus App can change network settings, browse content
from USB storage, and move files between devices. Better user-friendly
design means you can start using the TM06 straight away.
Page 10

10
Travel Router
Take the TripMate HT-TM06 and you have a battery powered travel
router in your pocket. Provide you with convenient router functions
while you are on the go. It offers 3 router modes to suit today’s popular
network demands:
AP Mode: Connect your smartphone or tablet to wired network, let you
use wired network without carrying a cable.
Bridge Mode: Never pay for multiple network connections, use TM06 to
connect and share connections.
Router Mode: Connect your mobile devices directly to cable to DSL
modem
External Battery Pack + Wall Charger
The core of TM06 is a 6000mAh external battery charger capable of
charge typical smartphone 2-2.5 times, extending the run time of your
phone or tablet whenever you need. With the 2 PINs, TM06 itself can be
a wall charger adapter, save you from mess of charging cables.
Page 11

11
Configure the TripMate
Connect to TripMate Wireless Network
The TripMate TM06 can create a private wireless local area network
(LAN). Your device can connect to TripMate via its wireless network.
TripMate functions and settings are based on the wireless network
connection.
To connect to the TripMate network:
1. Press the power button for 3 seconds to power on the device. Wait
for the Wi-Fi indicator to be ready
Page 12
12
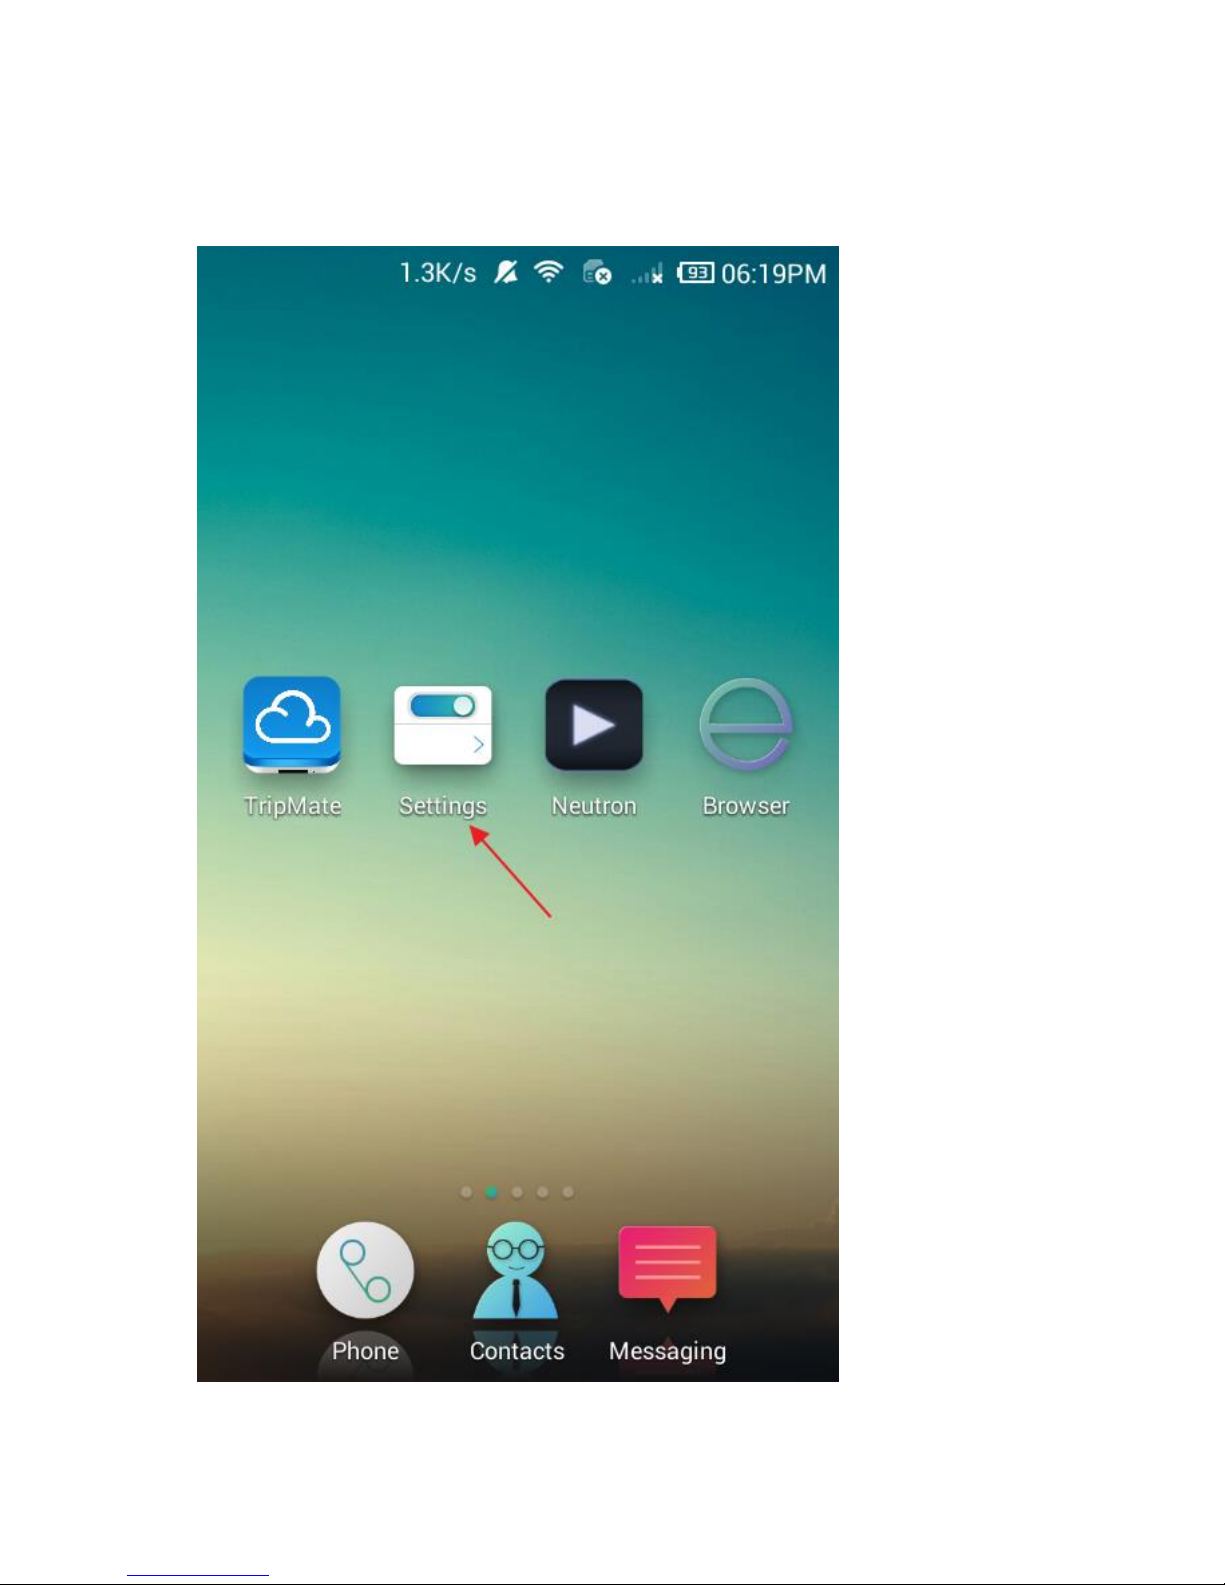
Go to Settings on your device
Page 13

13
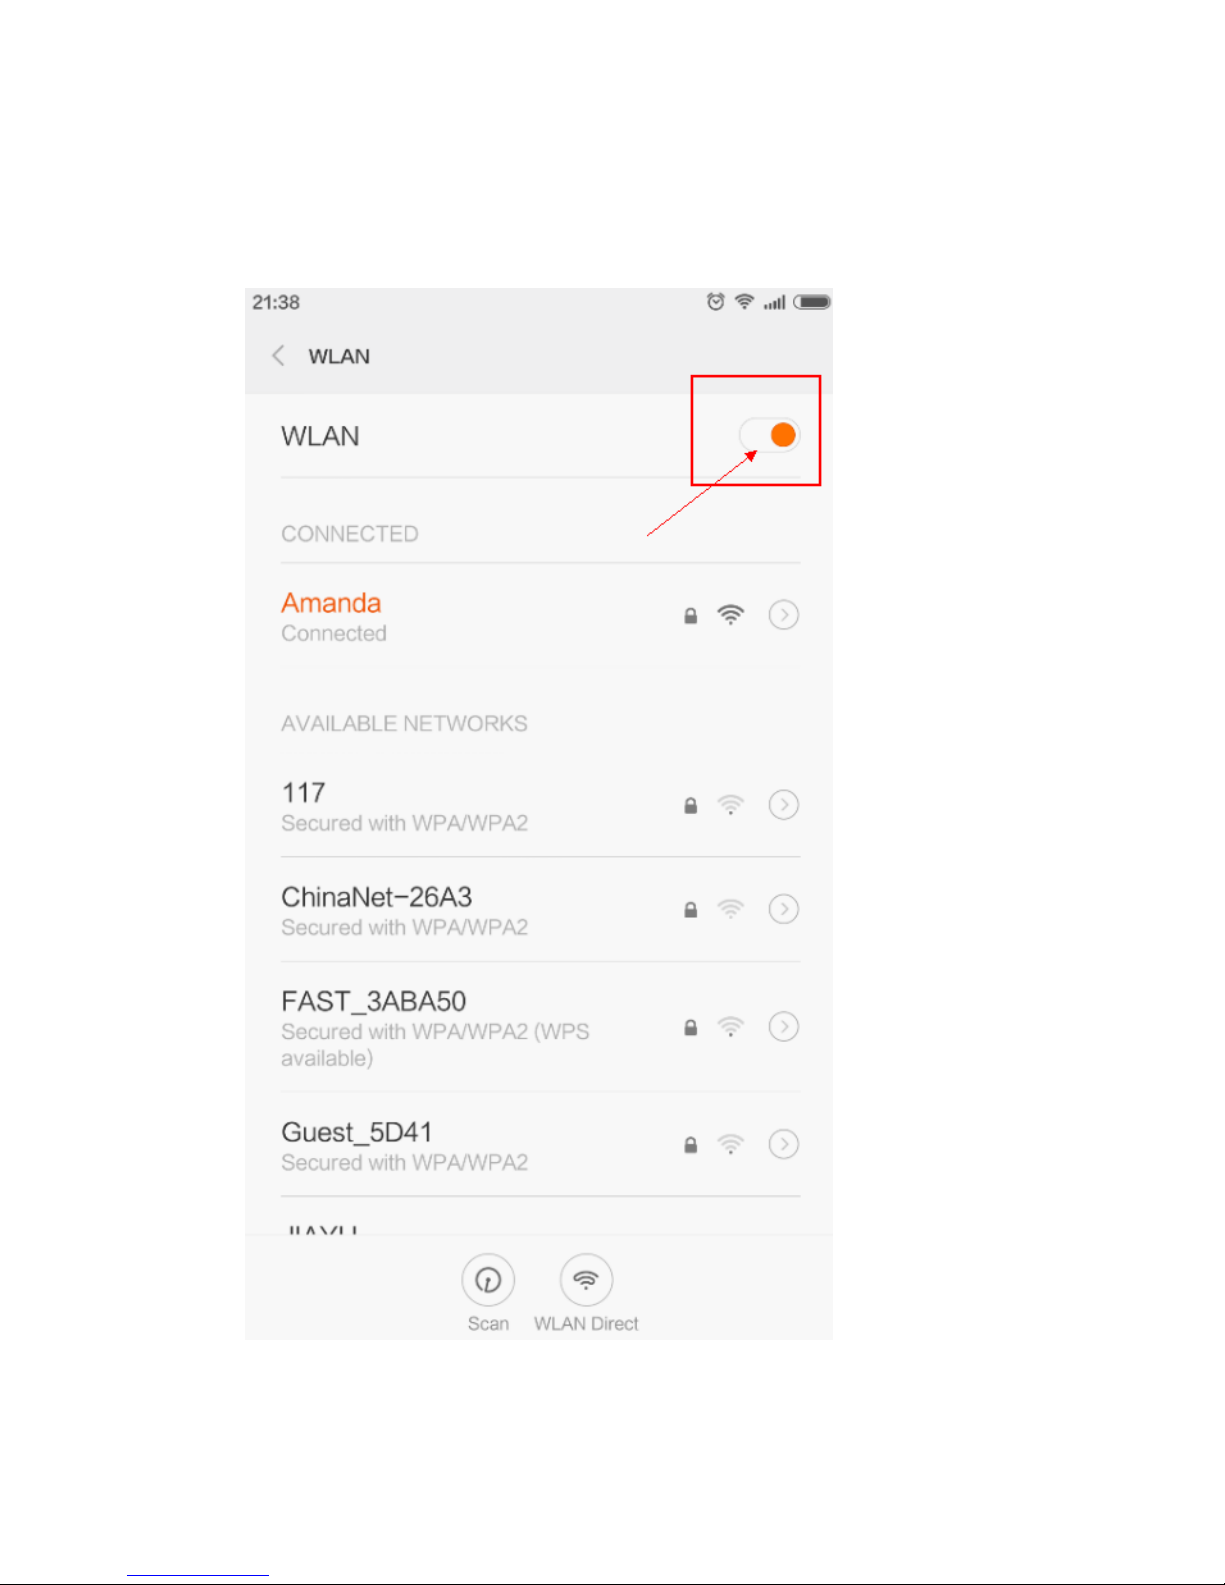
2. Go to Wi-Fi (or WAN) settings
Page 14
14
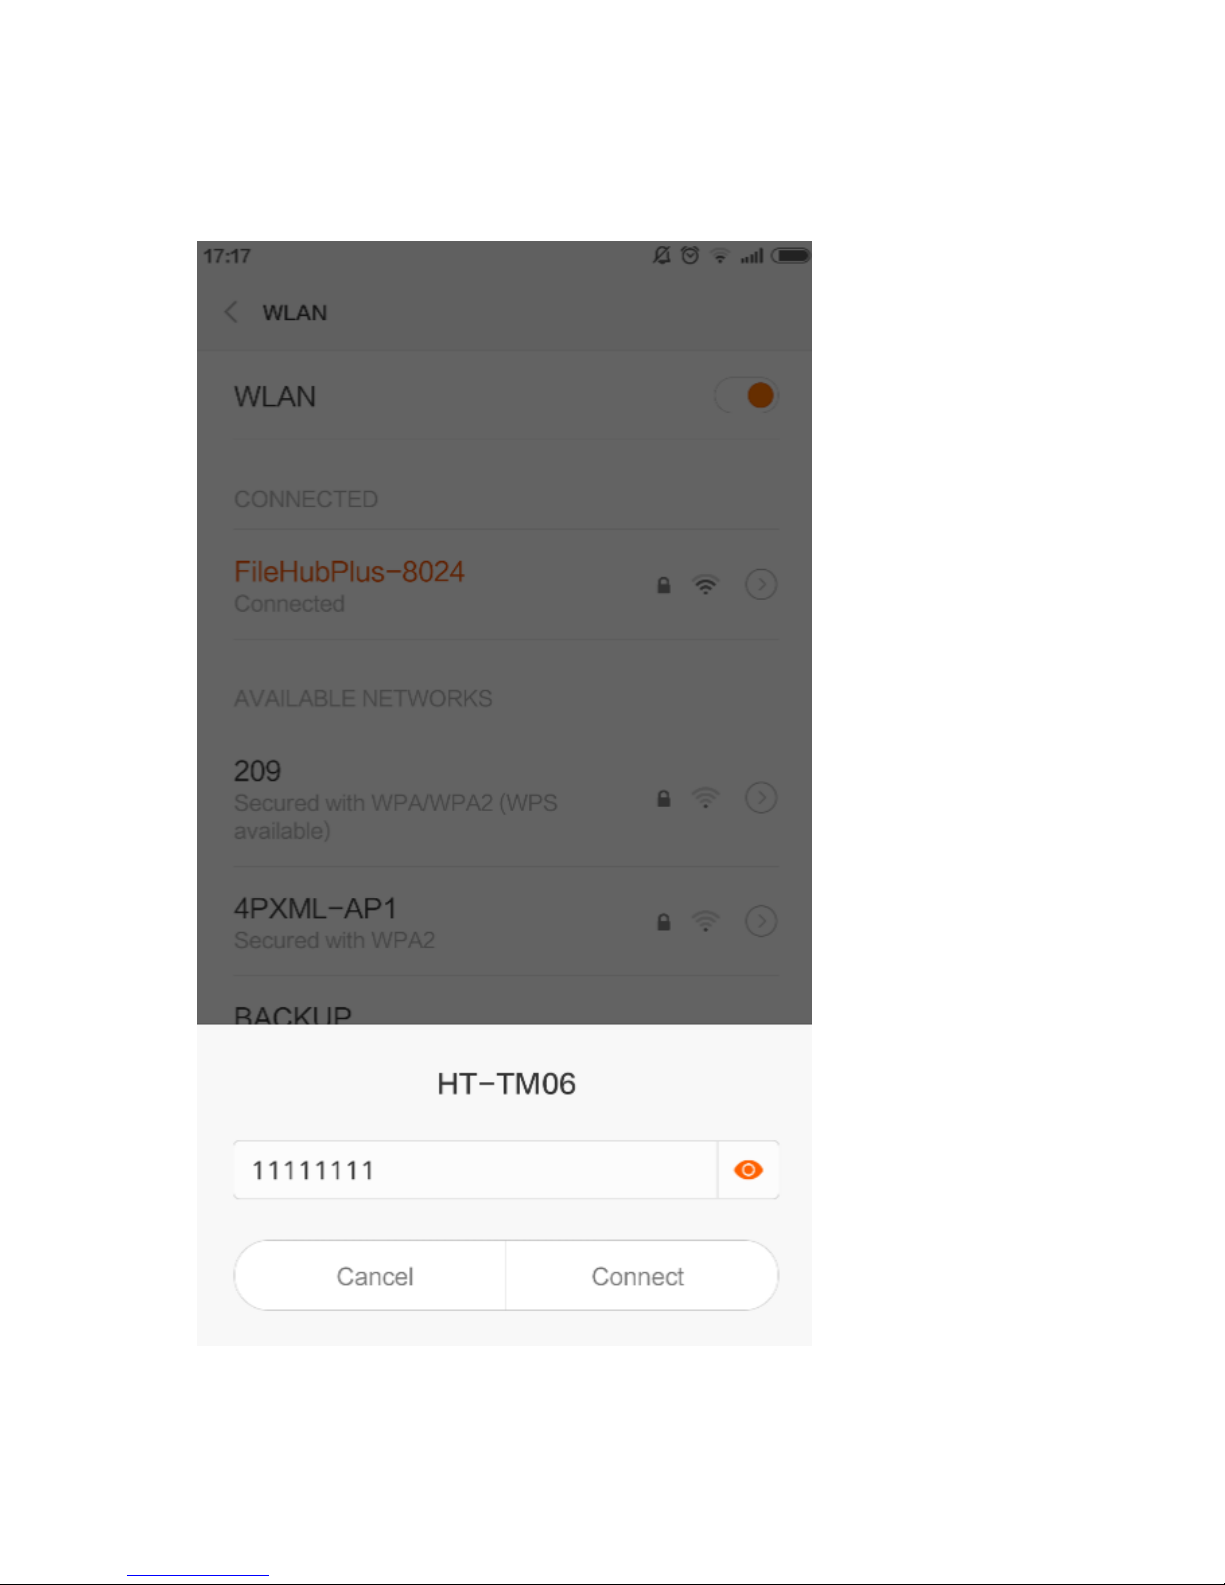
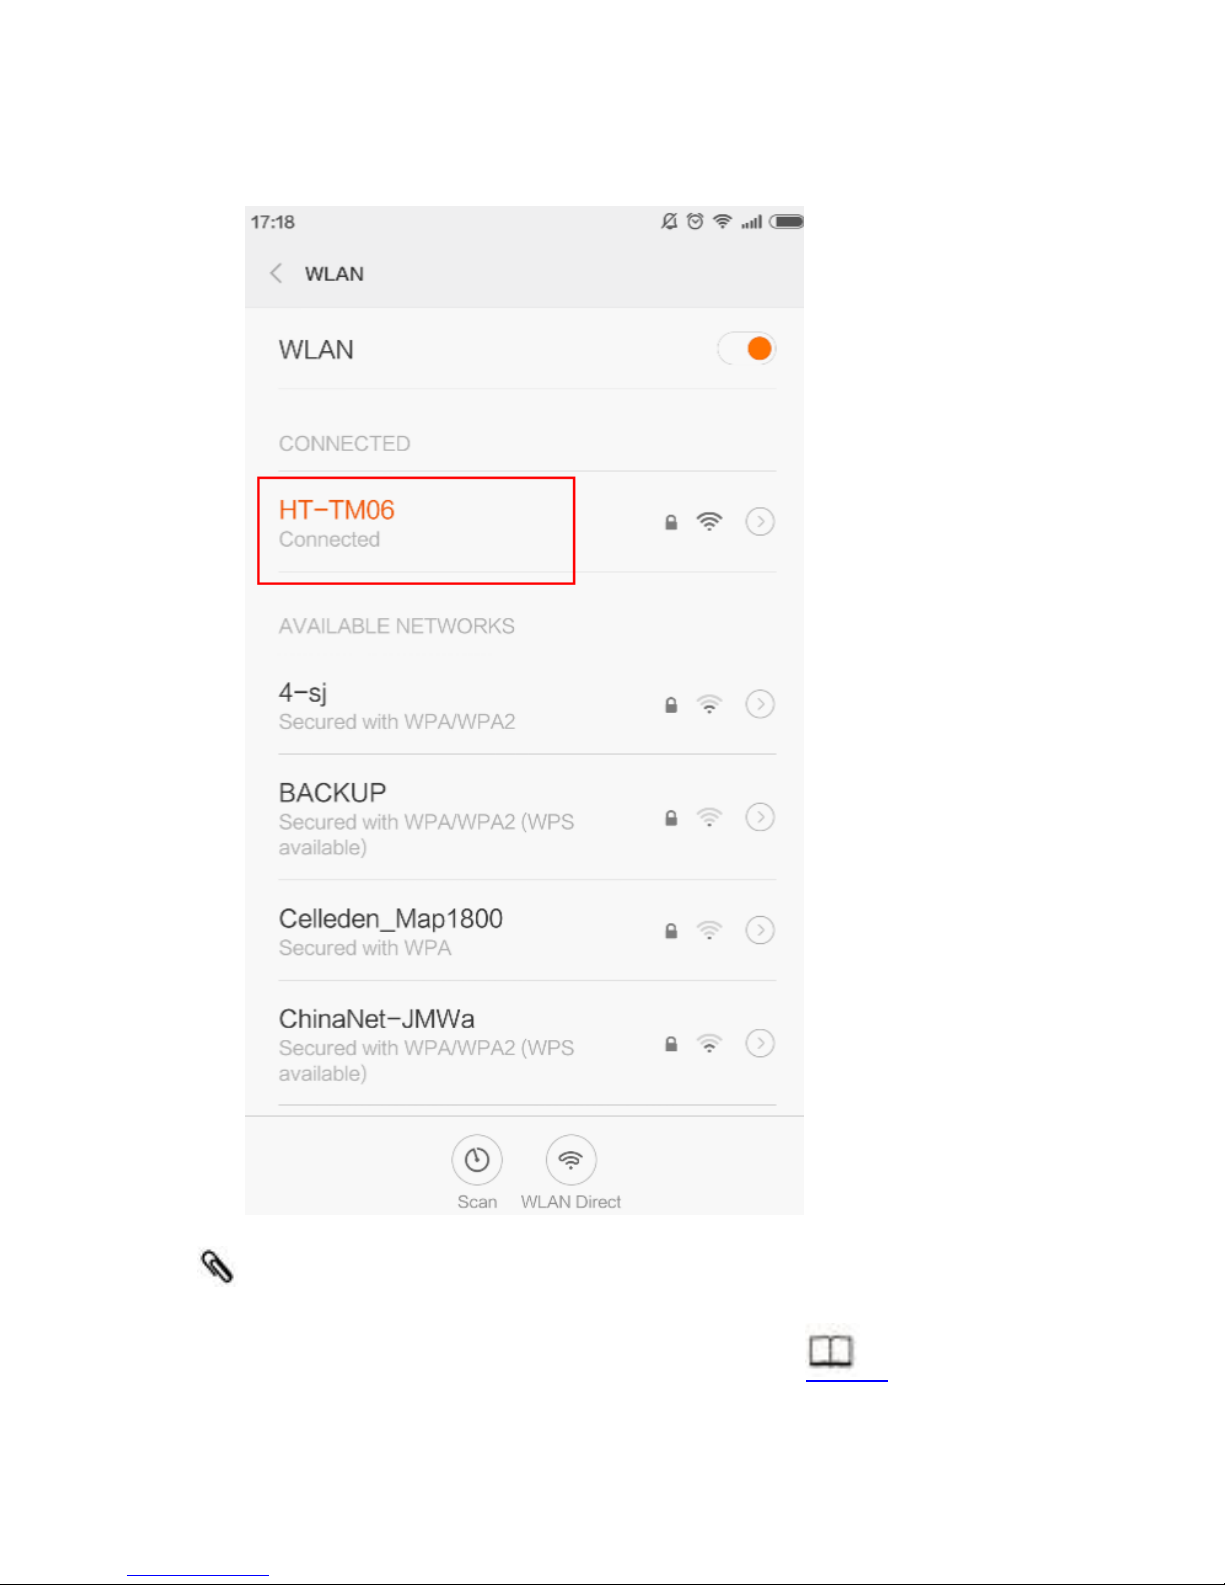
3. Enable Wi-Fi function, and select
TripMateTM06-XXXX
Page 15

15
Page 16
16
4. Enter the default password: 11111111 (8 x 1’s), click Connect
Page 17
17
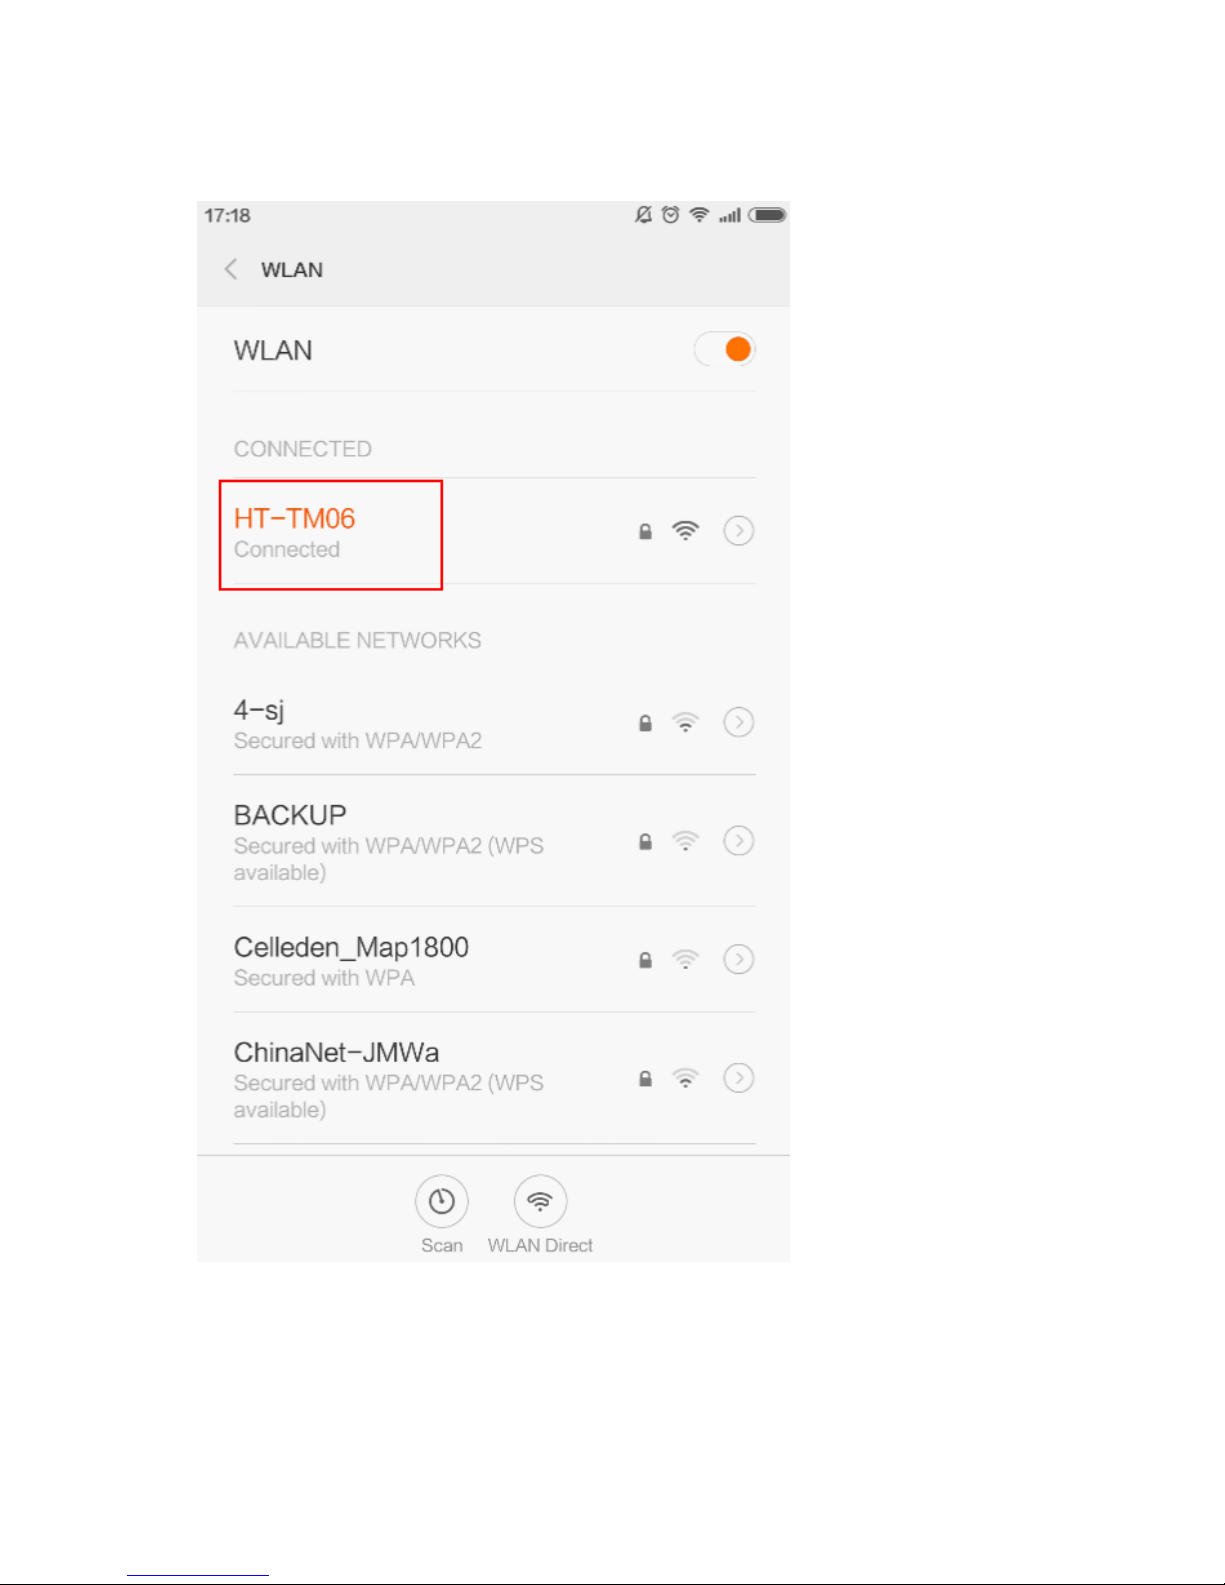
Now your device is successfully connected to the TripMate network. You
can setup the TripMate using setup Wizard.
Page 18
18
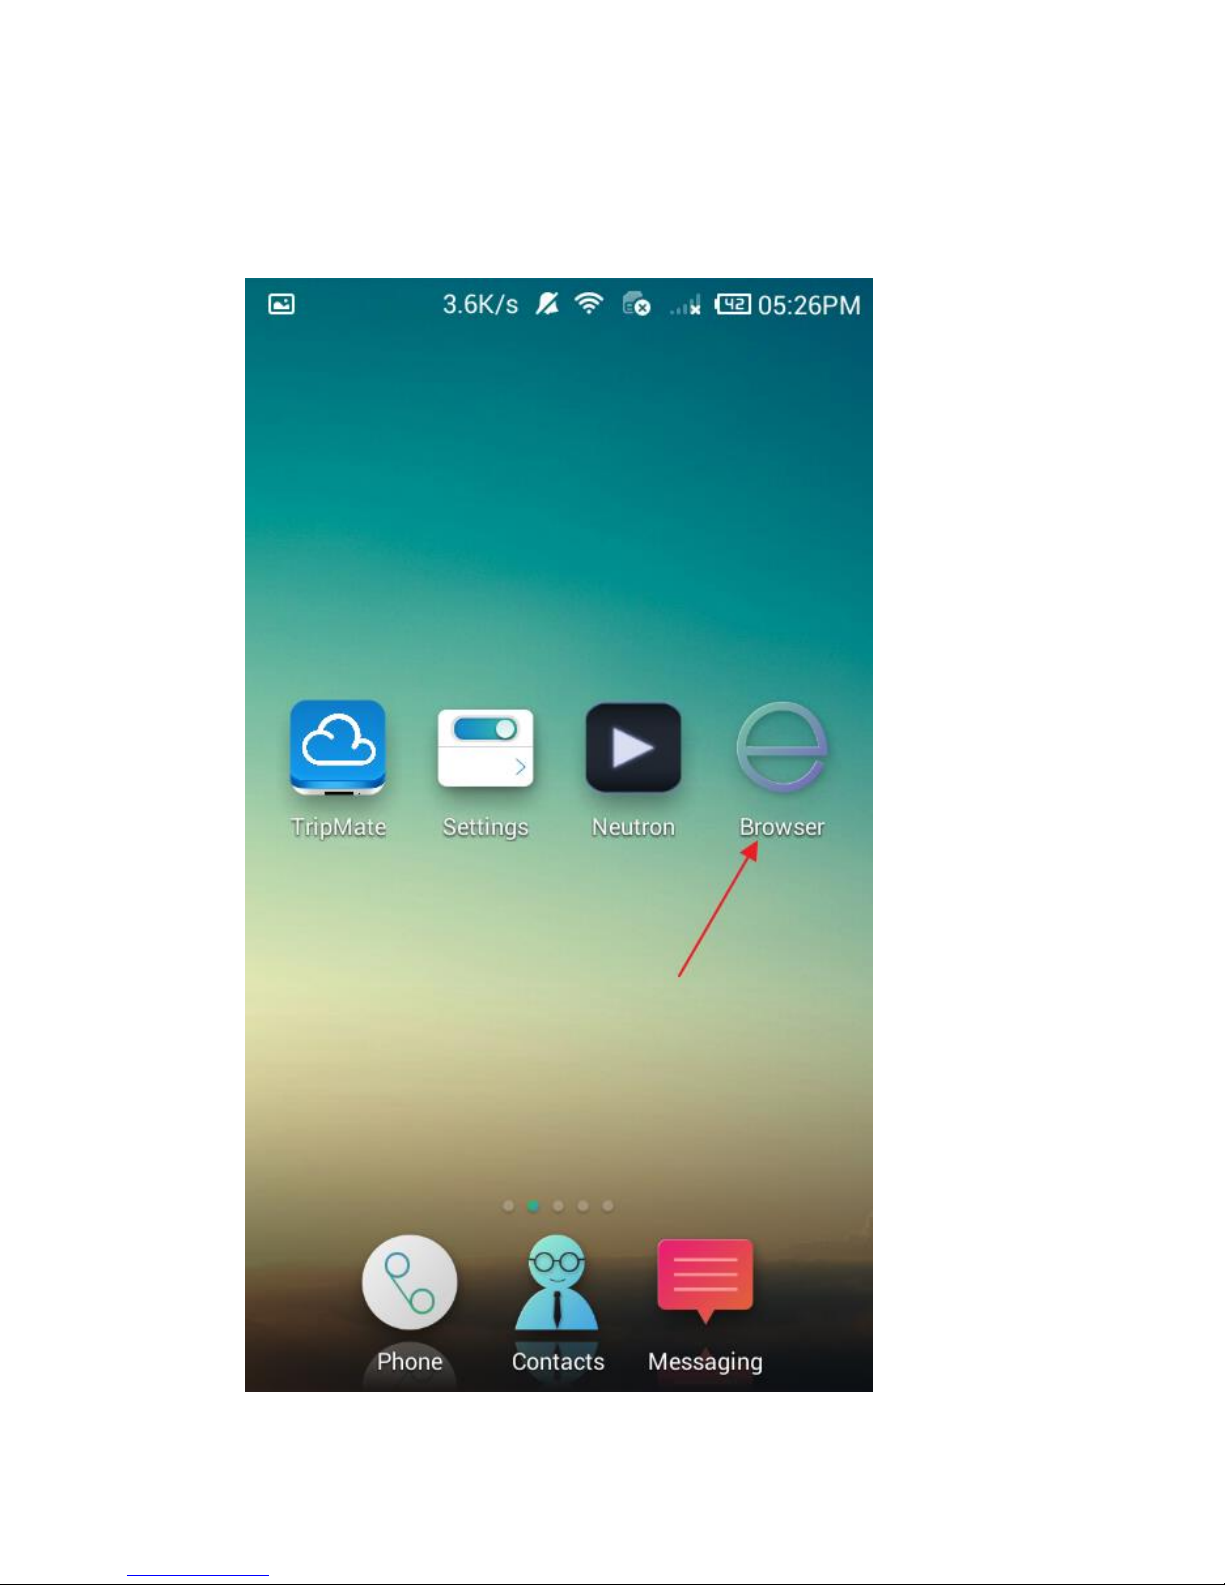
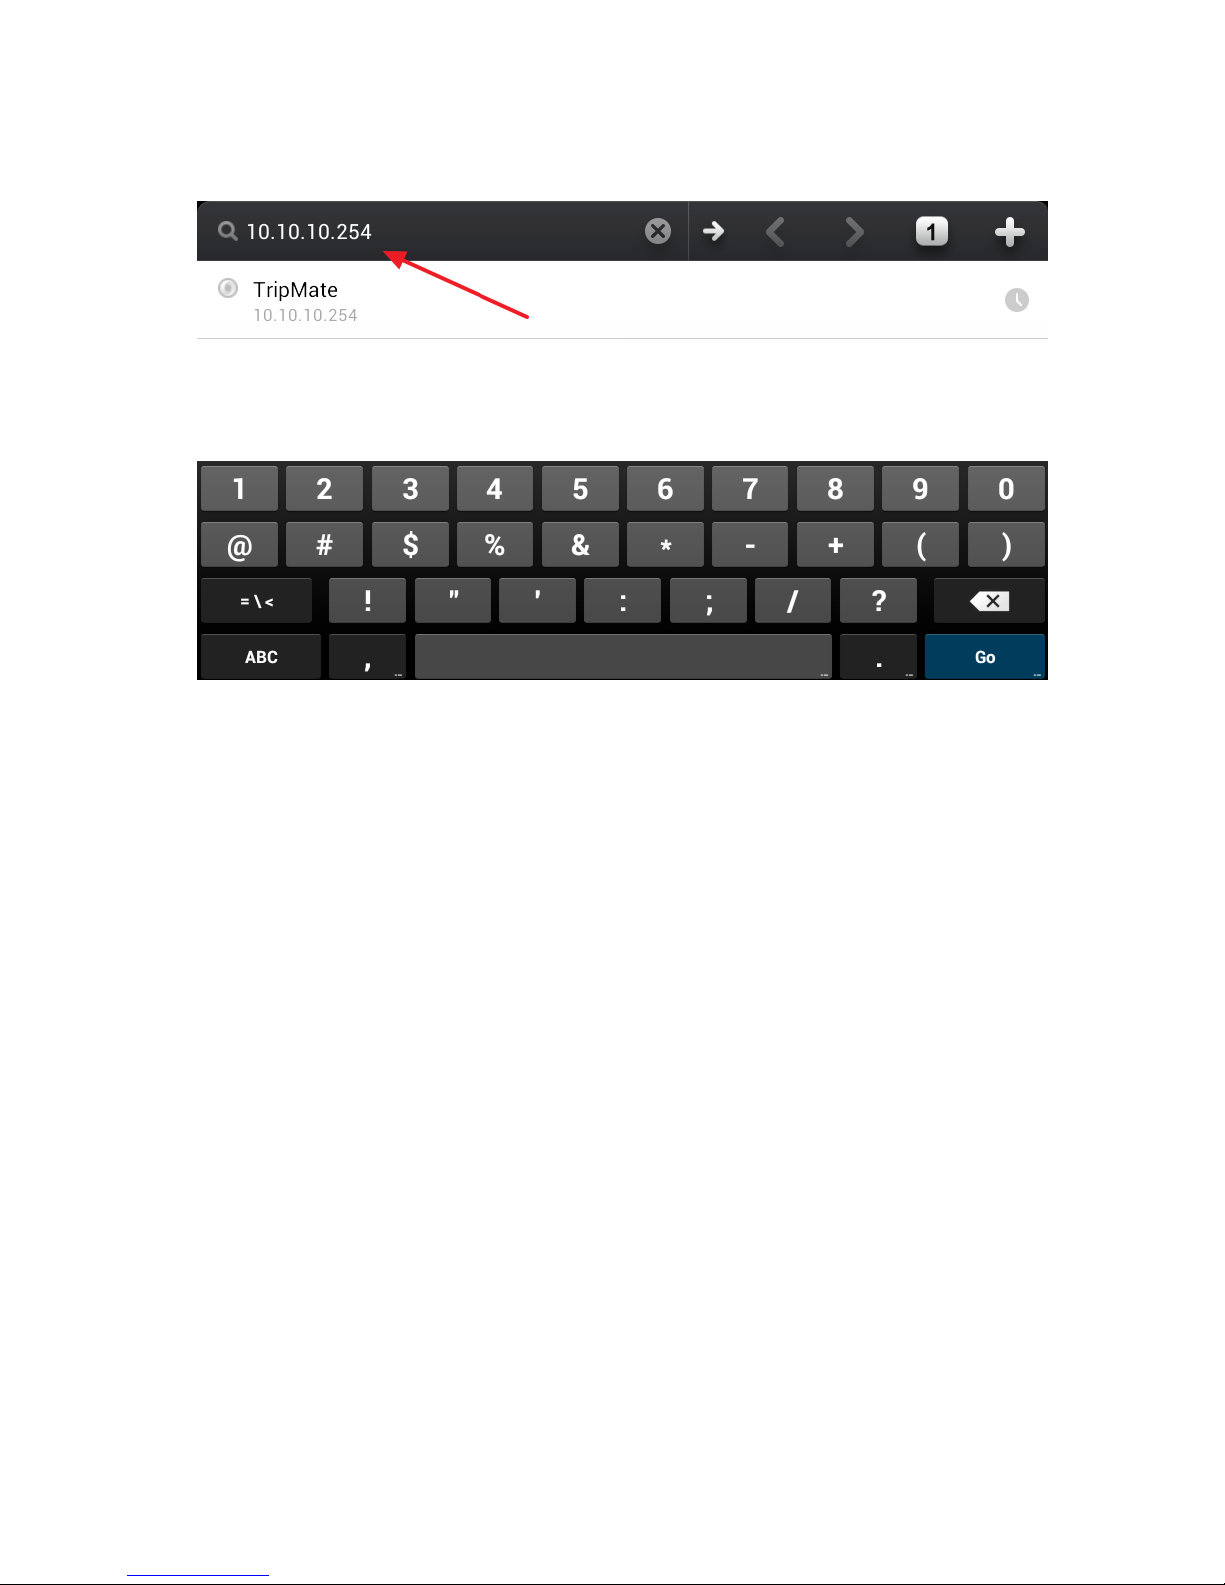
1. Make sure you device is connected with the TripMate network
2. Open Web browser, enter 10.10.10.254 in the url box
Page 19
19
Page 20
20
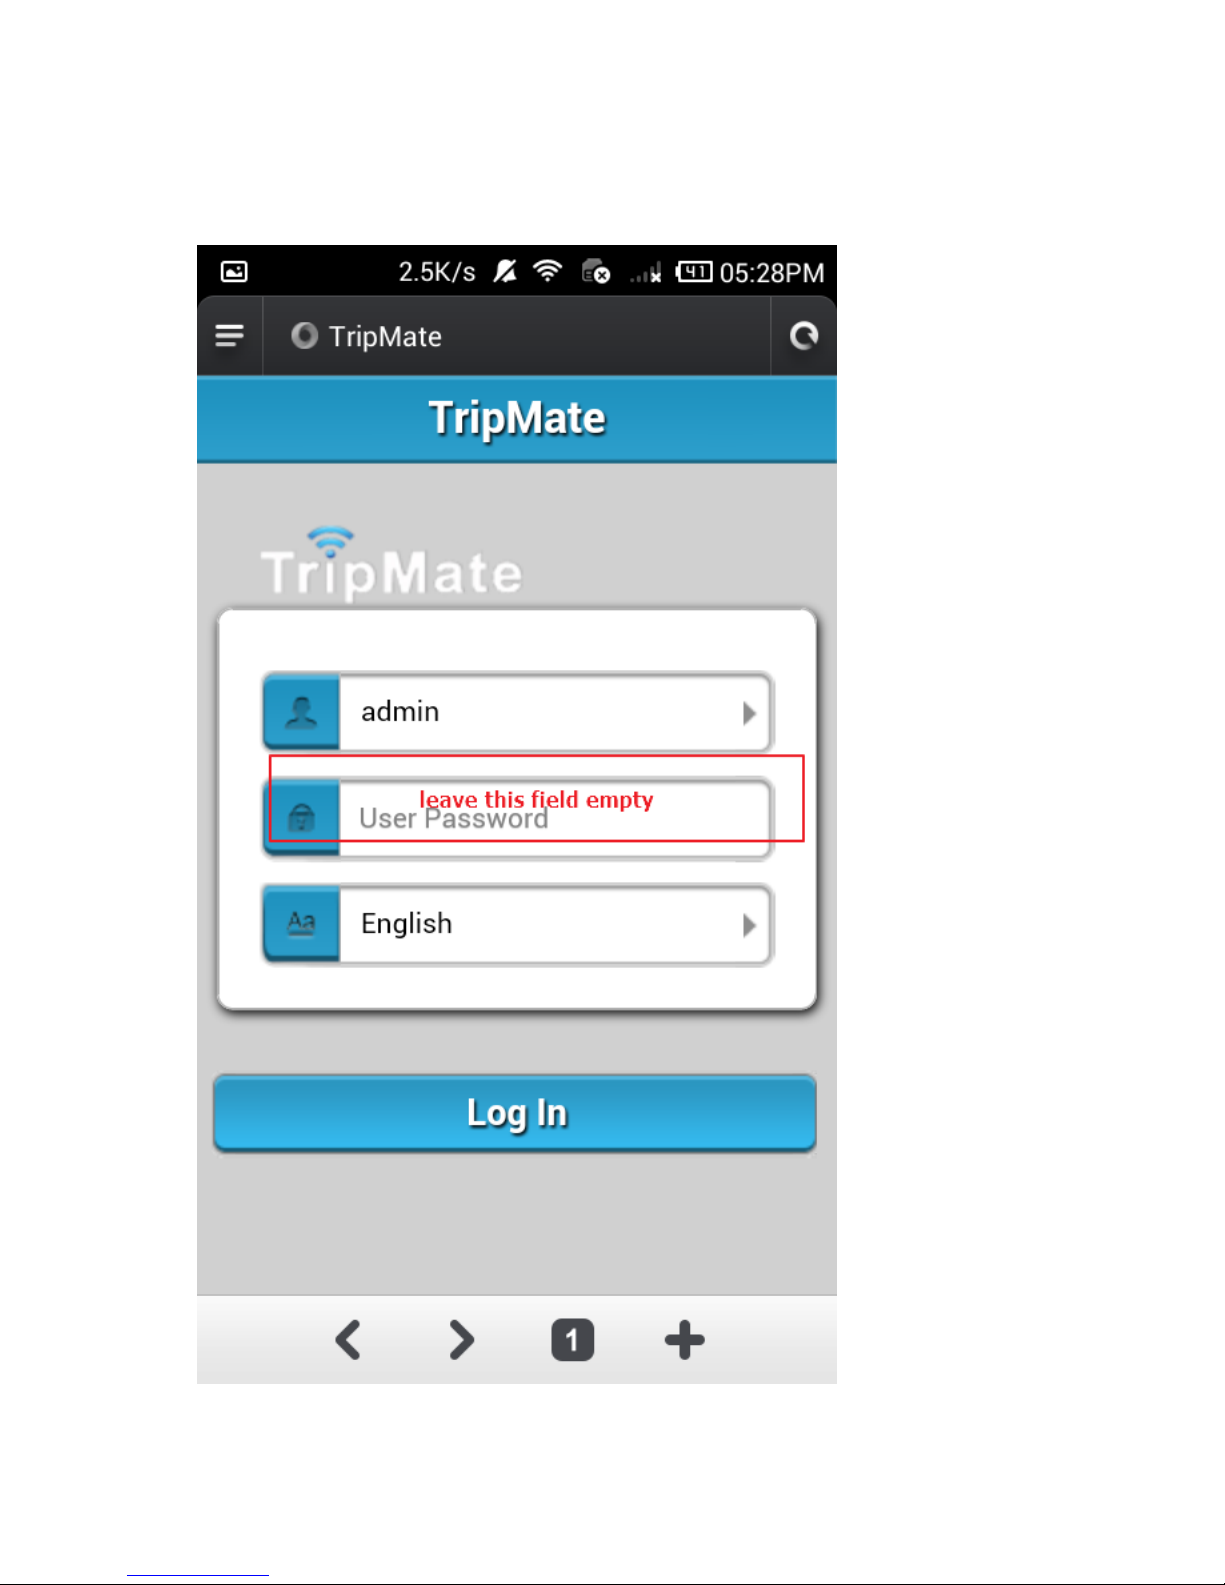
3. Log in with default user name: admin, password: (leave it empty)
Page 21
21
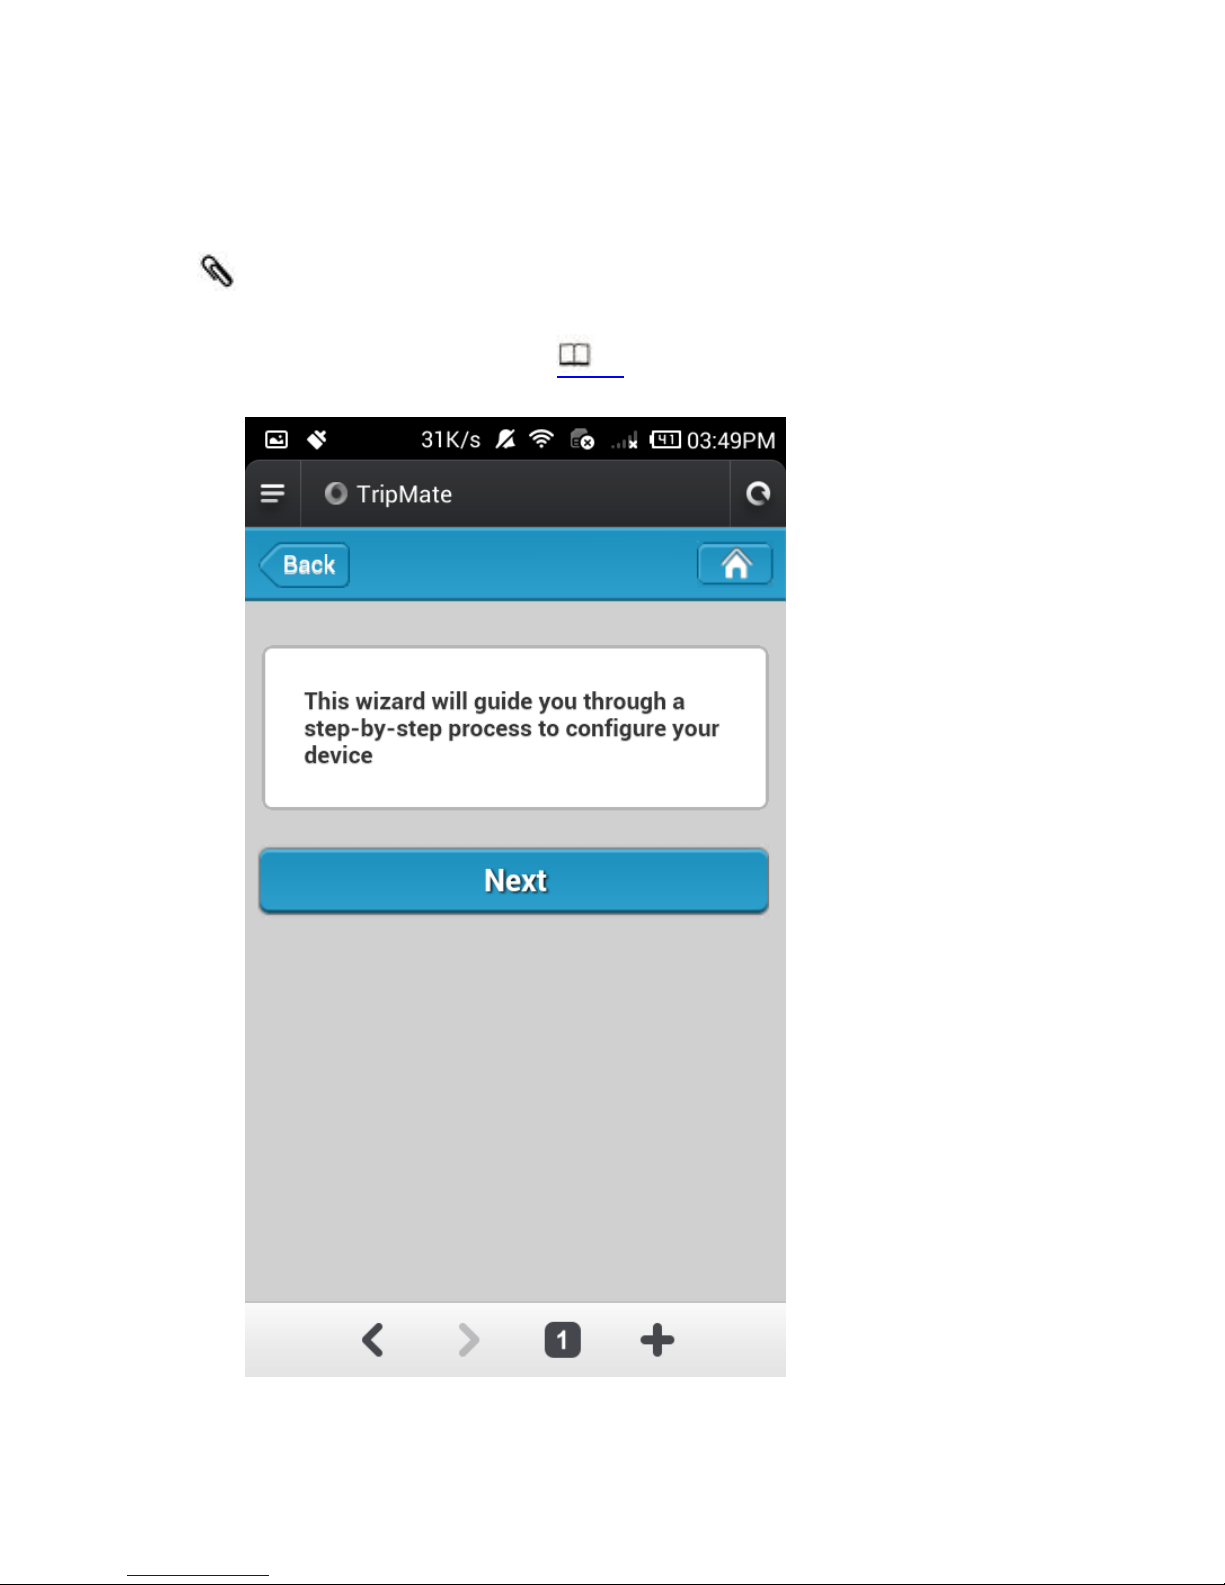
4. Then you will be prompted to the Setup Wizard
The wizard only helps you to connect your TripMate to Internet. To
get more usage, please step to 30 to get full guide.
Page 22
22
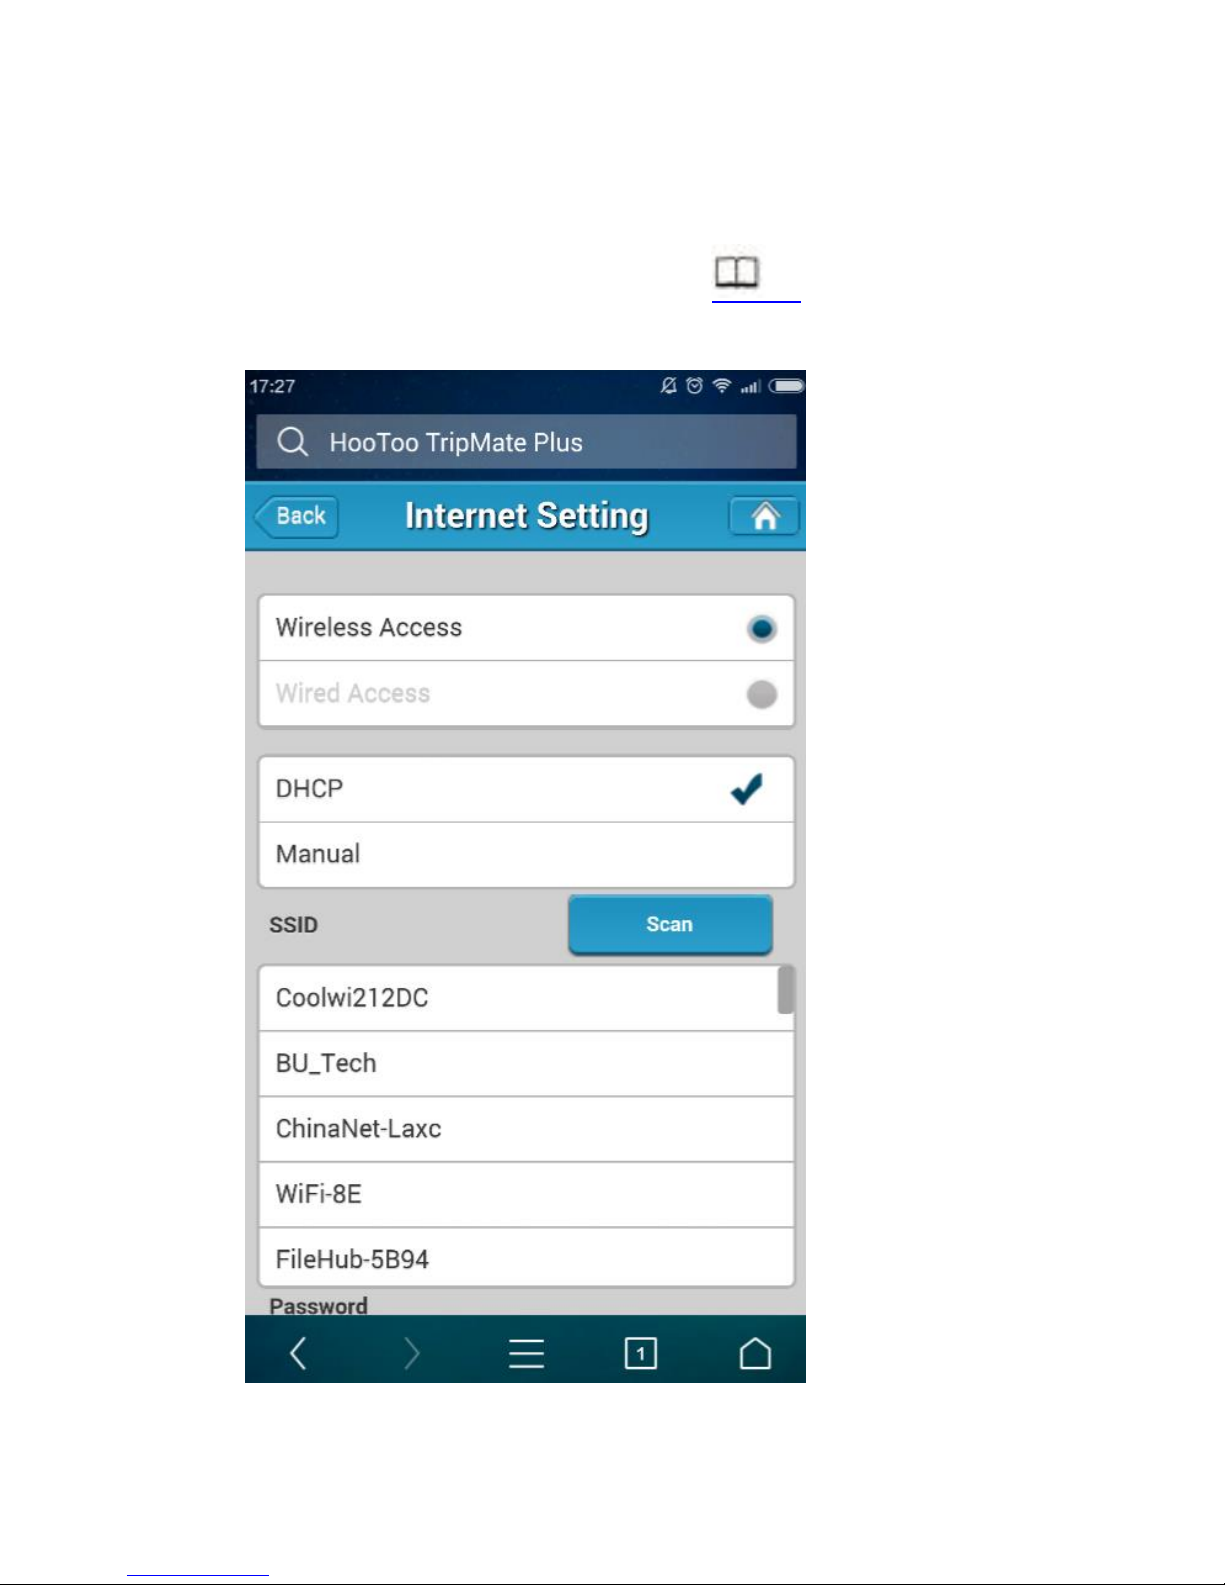
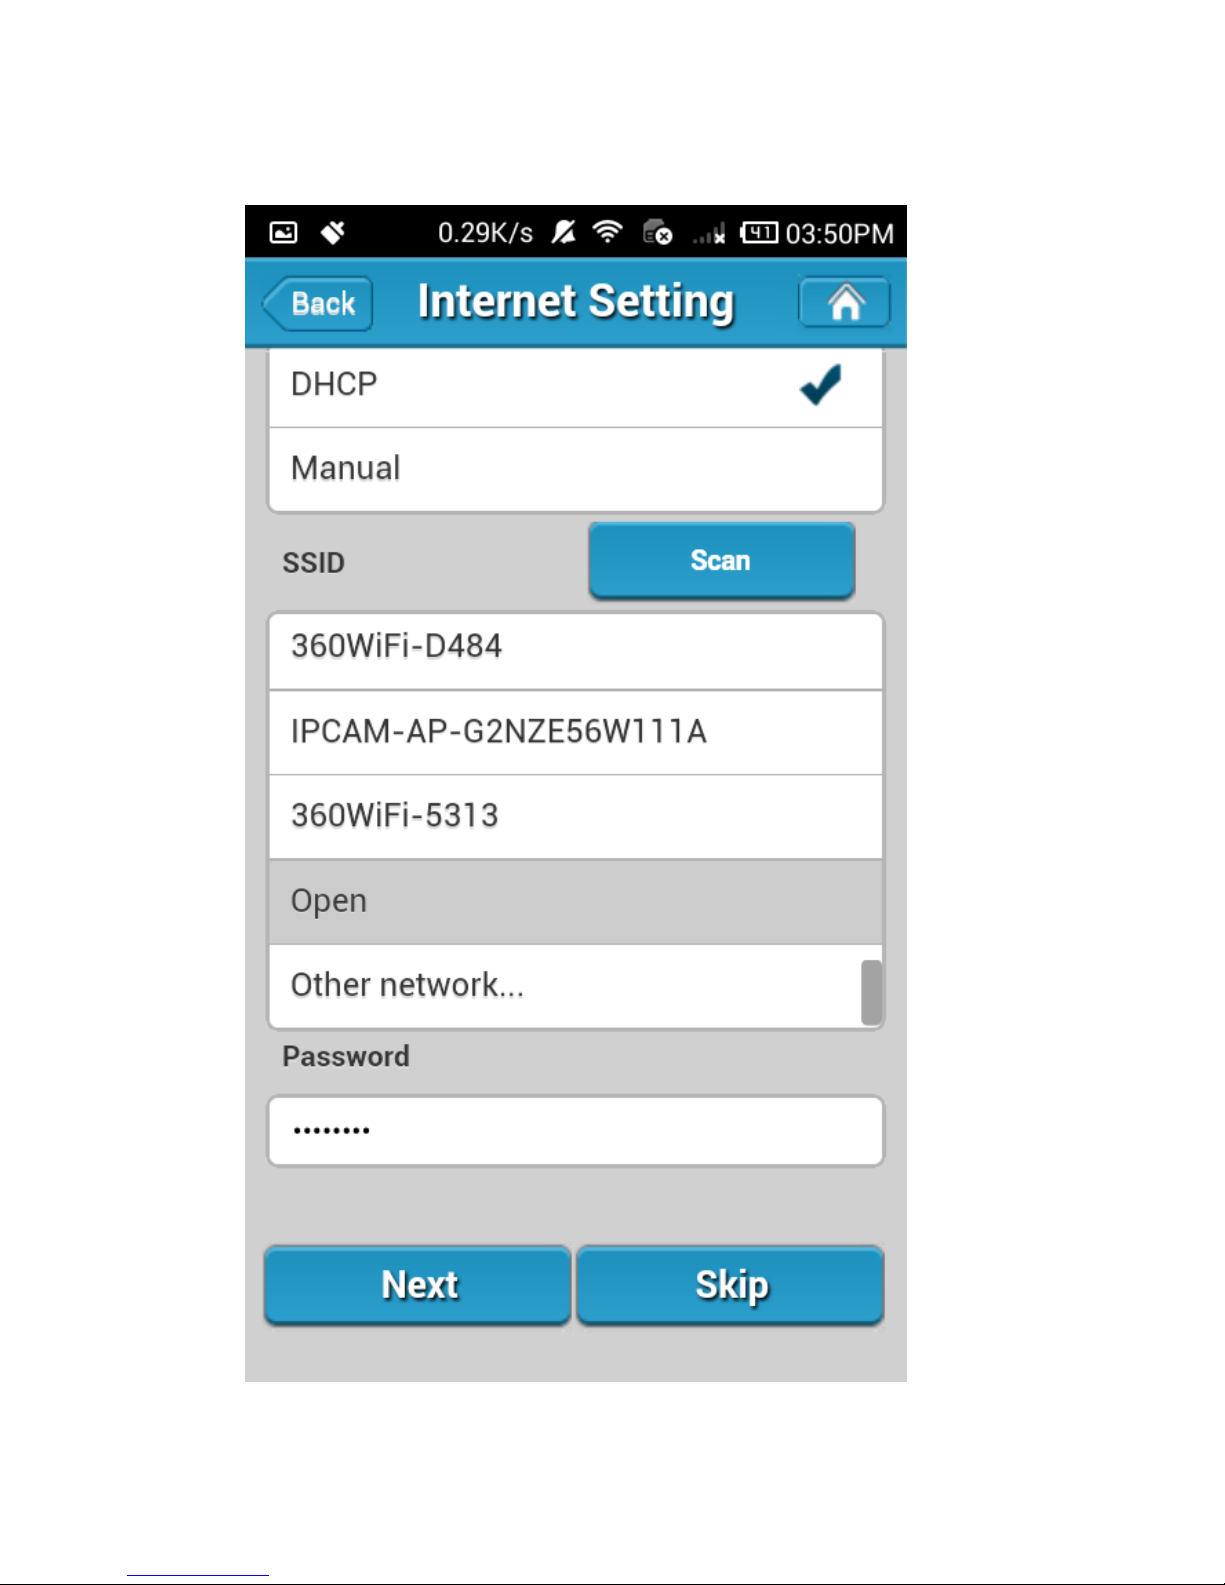
5. Click Next and set up the Internet connection on this page. (Taking
wireless access as an example here, click 37 to get all modes for
wired/wireless access)
Page 23
23
6. Click Scan to search available Wi-Fi. Select your Wi-Fi and enter the
password.
Page 24
24
Page 25
25
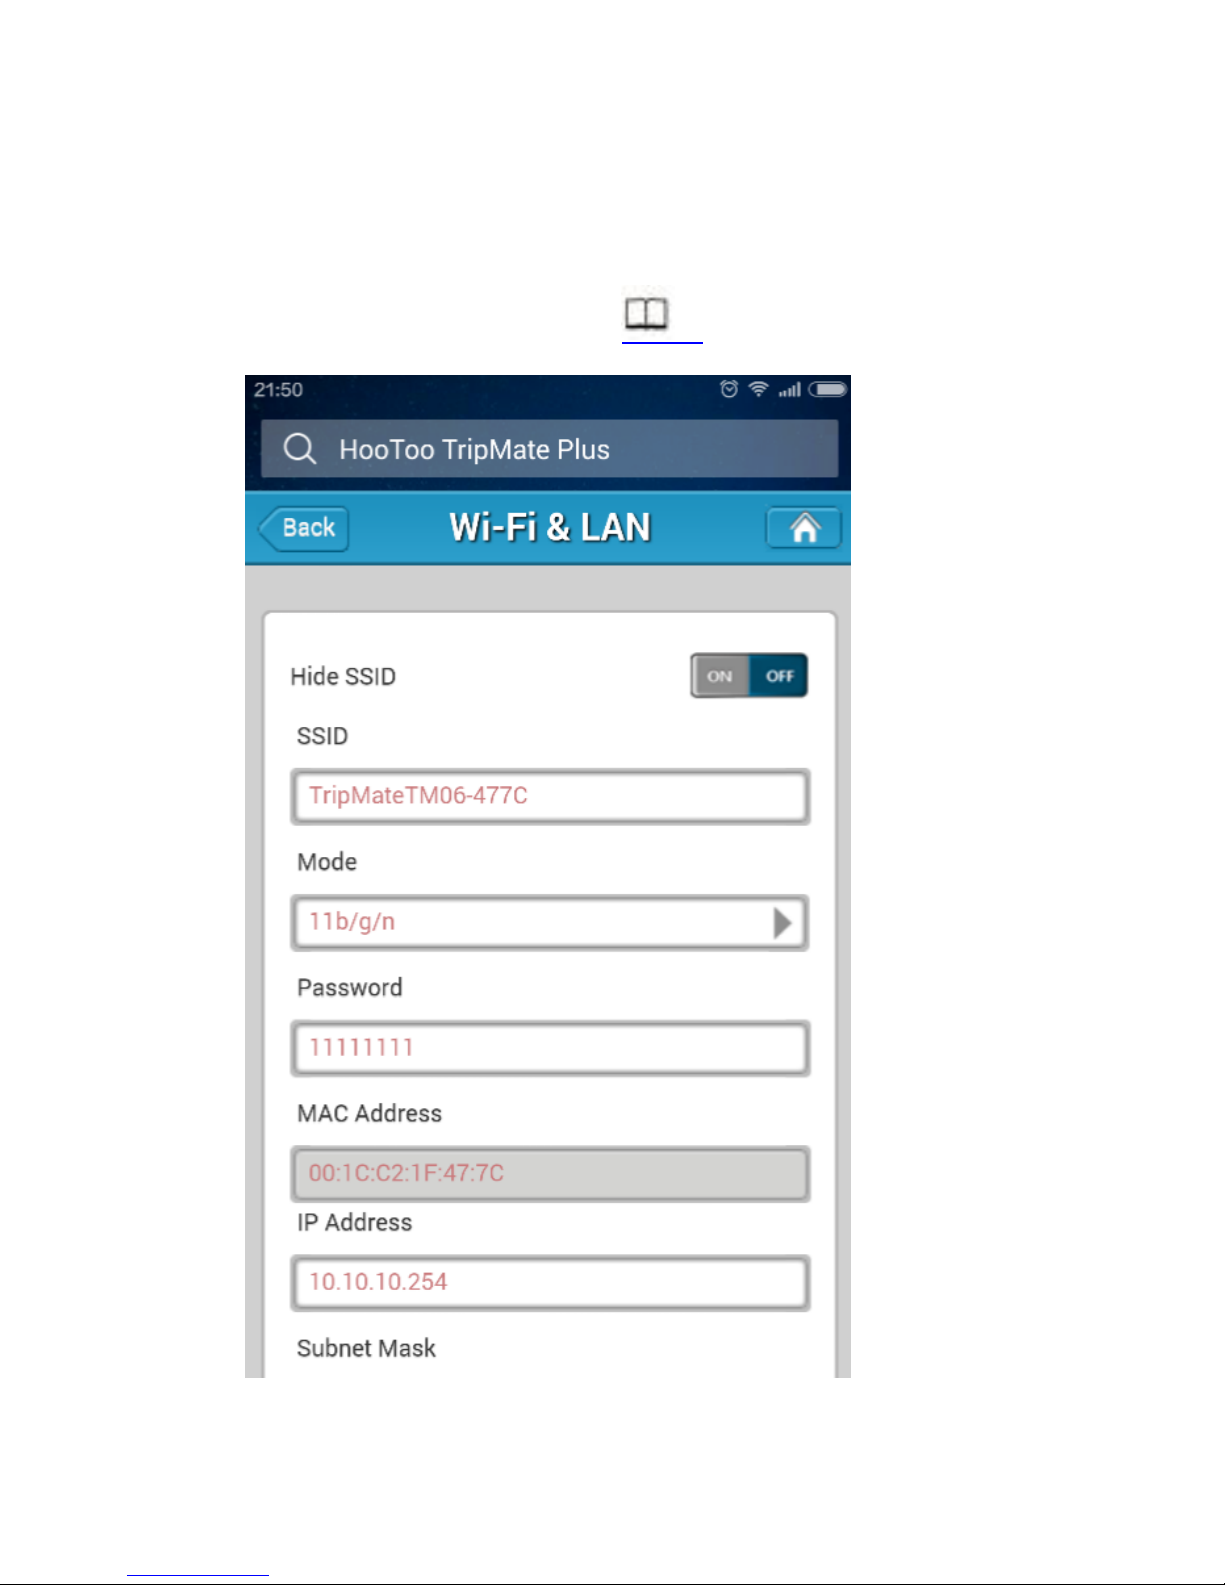
7. Click Next, then you can change the default TripMate Wi-Fi SSID and
password to what you want. (To get more information about the
Wi-Fi & LAN settings, please click 86)
Page 26
26
Page 27
27
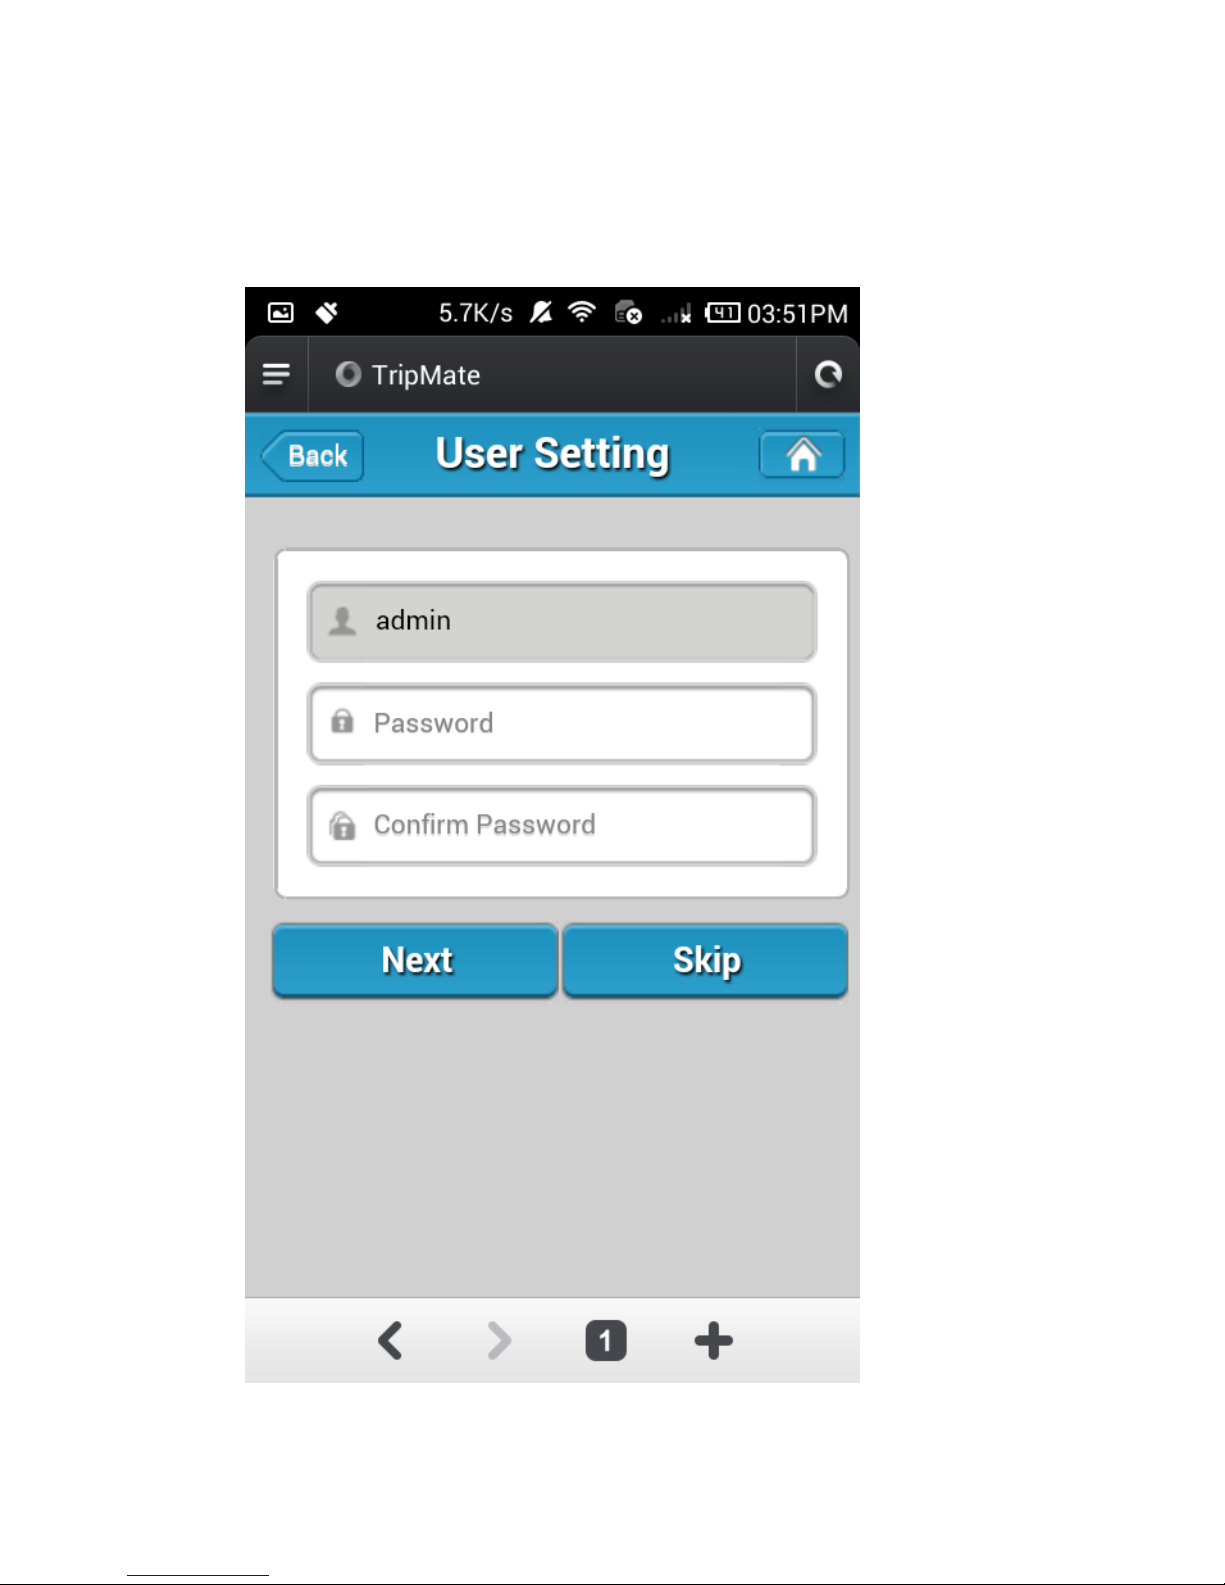
8. Click Next and then you can change the password of the admin
account.
Page 28
28
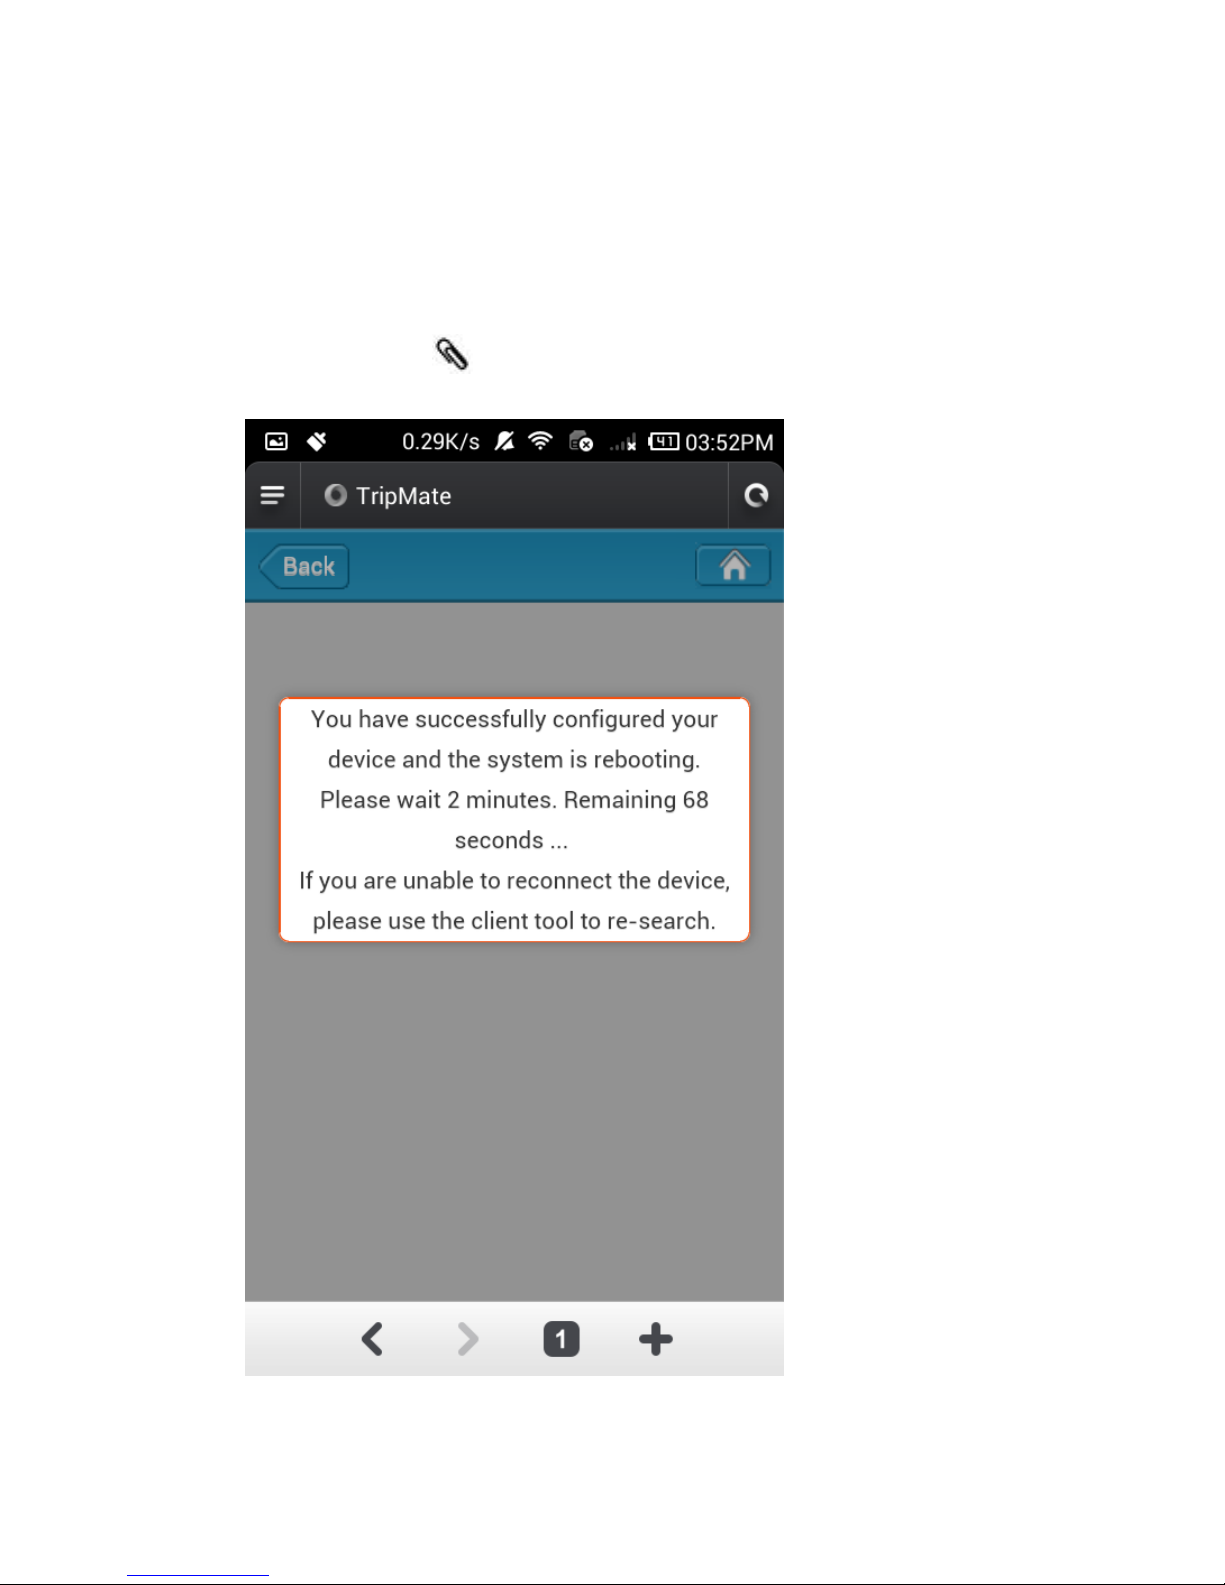
9. Click Next then you will be prompted to wait 2 minutes while the
system reboots. After the system has successfully rebooted, please
reconnect to the TripMate wirelessly. Then your TripMate connects
to the Internet. The Wi-Fi LED indicator will turn to green.
Page 29
29
If you change the SSID and password of TripMate, you may need to
forget the password of TripMate on your phone first. 90
Page 30
30
More on TripMate
Wireless Sharing
You can create your own wireless personal media sharing center.
Download the "HooToo TripMate Plus" app from App Store or Google
Play first. You may also download it from HooToo website:
www.hootoo.com
1. Insert a USB thumb drive, a card reader with SD card (up to 64GB),
or a USB HDD (supported format: NTFS/FAT16/FAT32, up to 4TB) into
the USB port of the TripMate, then power on the TripMate.
HT-TM06 supports a USB hub with up to 4 USB flash disks at one
time (or 2 hard disks at one time max)
2. Download the app HooToo TripMate Plus from Google Play to your
Android phone
3. Follow previous steps to connect your device to TripMate network
4. Run the TripMate app
Page 31

31
Also you can access the USB storage via the admin web end
10.10.10.254 ( 64). To get full use of wireless sharing, we
recommend the HooToo TripMate Plus.
Page 32

32
5. Login with the default user name “admin” and leave the password
field empty. (The username and password are the same as the key
you use to login the admin configuration page 10.10.10.254)
Page 33

33
6. Tap on File/Folder, and select TripMate. All of the contents can be
found under the main folder WiFiDisk1-Volume1
Page 34

34
Page 35

35
Page 36

36
7. Tap on Local Device. All of the contents on the phone can be read.
If you need specific instructions for the HooToo TripMate Plus app,
please refer to the instructions listed on the HooToo website
www.hootoo.com
Page 37

37
Travel Router
Note: Screen shots are taken with Android device. Other devices can
follow the same steps with slight variation according to device maker and
model.
Access Point Mode
TripMate will automatically become an access point at once:
1. Power on the TripMate;
2. Connect an internet enabled network cable to TripMate, wait for the
blue Wi-Fi indicator light to stop flashing and remain steady;
3. Your device can now gain wireless internet access via TripMate
network.
No need to change any parameters once it becomes an Access
Point.
Page 38

38
Router Mode
In router mode, TripMate connects to a DSL or cable modem and acts as
a regular wireless router.
1. Power on TripMate
2. Connect the TripMate to Internet modem via network cable
3. Connect your device to TripMate network
4. Login 10.10.10.254
5. Click Settings, then select Network Settings
Page 39

39
Page 40

40
6. Select Internet, choose Wired Access.
Page 41

41
Depends on your Internet connection type, you will need to obtain
Dynamic IP / Static IP / PPPoE setup information from your ISP to
complete the setup with TripMate.
If using a DSL Internet, please enter the PPPoE username and password.
Click Save
Example:
Page 42

42
Page 43

43
Page 44

44
If a static IP address is issued by the network provider (please request
network provider), the given static IP fields (including network mask and
gateway) must also be set to the router. Click Save
Page 45

45
Tips
When connecting devices with network cables, please make sure the
cable is connected securely. Loose cables are one of the most common
sources of network setup problems.
If a wired network type cannot be chosen, an alternative method is
available to set up the router mode
1. Connect the computer directly to the wired connection with an
Ethernet cable
2. Press both WIN (Windows Key) + R on the keyboard at the same
time
3. Enter CMD, press OK. Inside the CMD dialog box, enter ipconfig. Get
the IP address, subnet mask and default gateway assigned by the
router/modem.
Page 46

46
Page 47

47
4. Connect TripMate to the wired connection with an Ethernet cable
5. Login 10.10.10.254
6. Click Settings → Network Settings
7. Select Internet , then choose Wired Access and Static IP from the
drop-down list
8. Enter into the IP field the same IP information assigned by the wired
network. Click Save
TripMate now connects to the internet
Page 48

48
Bridge Mode
In bridge mode, the TripMate connects to an existing network (with
Internet access), and share Internet access with devices connected to the
TripMate network.
Configuration:
Bridge mode has two ways to allow your device to connect to TripMate
network.
1. Secured Wi-Fi, requires password to connect
2. Open Wi-Fi, has an authorization page
Page 49

49
Secured Wi-Fi (Password required)
1. Power on TripMate
2. Connect your device to TripMate network
3. Open browser and log in 10.10.10.254
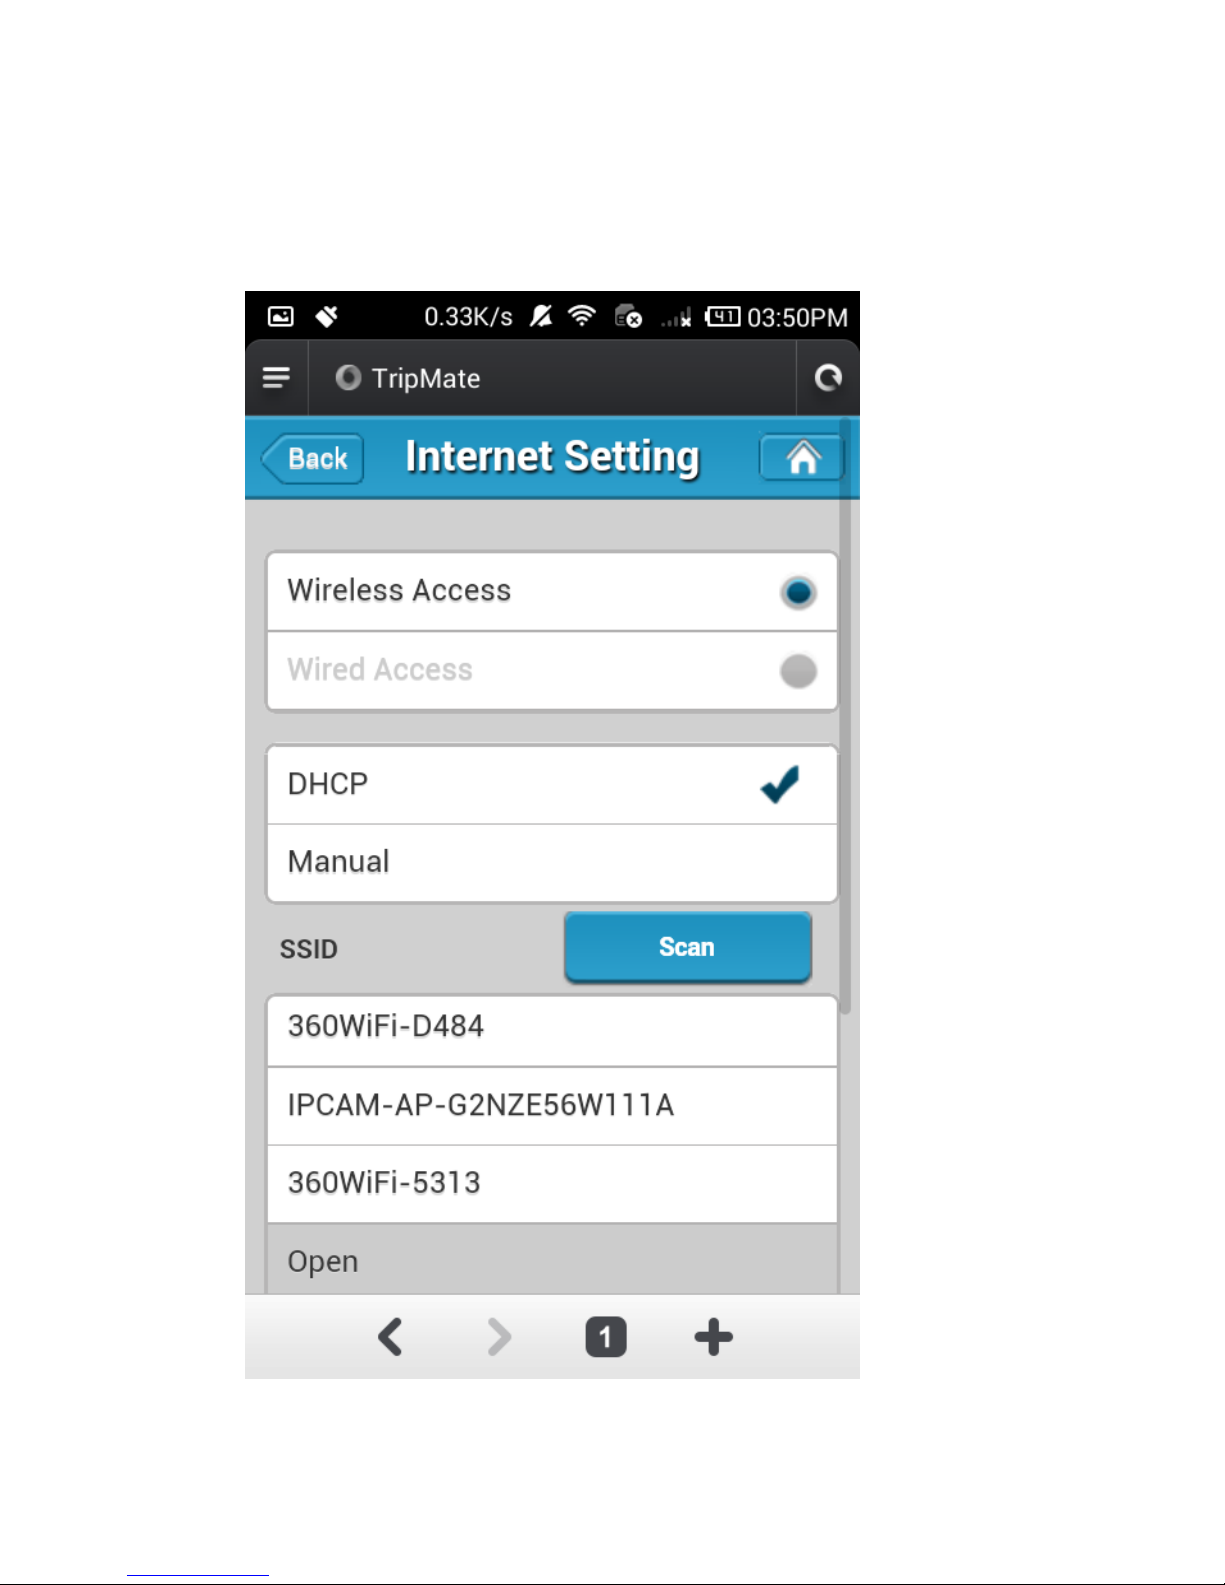
4. Settings→ Network Settings → Internet, choose Wireless Access,
Click Scan to search available Wi-Fi
Page 50

50
Page 51

51
Page 52

52
Page 53

53
5. Select the wireless network you want the TripMate to connect to;
enter the password and click Save
TripMate now connects to the internet
Page 54

54
TripMate can store the connected wifi.
TripMate can connect to a hidden SSID
1. Pull the SSID drop-down list to bottom. Click Other network…
Page 55

55
2. Enter the SSID and password, click Save
Page 56

56
Page 57

57
Wait a few seconds. The TripMate will connect to the hidden SSID.
Page 58

58
Open Wi-Fi (Authentication Page Required: Hotel, Public, charged Wi-Fi
connection issues)
The setting applies to the wireless network that you have to enter the
username and password to connect or click through the Terms of
Authentication Service
1. Get the user name and password of the Wi-Fi (if necessary)
2. Connect your device to TripMate network
3. Network-> Internet -> wireless access -> scan -> select your hotel's
wifi name (SSID), leave the password empty-> save.
4. Open another page on your phone browser, the restrict page pops
up, login with the username & password.
(If the restrict page doesn’t pop up, please login 10.10.10.254->
settings -> service-> Auto-jump Service-> Turn off-> save)
5. Then your other devices could access the network bridged by
TripMate.
(Clear your browser cache if it failed to connect at the first time)
Page 59

59
System Tools
Language
At the login page, you may change the language
Page 60

60
And select the account
To get more information about setting the admin& guest account,
please click 76
Page 61

61
Guest can only visit the content of the folder “Share” which is created
automatically on your USB storage. You can put the files that you want
others to view into this folder (Caution: Guest can delete files in this file
folder). And guest can edit the password of guest account.
Page 62

62
Common Icons
How much battery is left on your TripMate
No Internet connection
Connected to Internet
Home Page
Go Back
Log out
Page 63

63
Main Page
Videos/Photos/Music/Documents show the contents of the DLNA
folder 104
Page 64

64
Explorer
It shows the contents of the USB storage that attached to the TripMate
Screen shot taken with Windows 7/Firefox
Page 65

65
Here you may view the pictures:
Page 66

66
Play songs:
Page 67

67
Watch videos:
Videos will be downloaded to your computer then open in the player
you select. If you open videos on your phone or tablets, the supported
formats of your phones/tablets can be opened directly.
Page 68

68
If your phone doesn’t support the formatted video, it will be downloaded
on your phone:
We recommend using the HooToo TripMate Plus APP when using the
media sharing function.
Page 69

69
Here are some basic functions to manage your USB storage:
Refresh the display
Create new folder
To copy files and paste them into another folder
To move files to another folder
To rename files or folders
Page 70

70
To delete the files you do not need any more
Upload
To upload the files to USB External Storage
Select All
To select all the files below
Up one level
Stream this to your DLNA devices that connects
to your TripMate wirlessly
Page 71

71
Information
The information of your TripMate and the USB storage device can be
checked here.
Login 10.10.10.254 →Settings→ Information
Page 72

72
Page 73

73
Page 74

74
Click Device to view the TripMate information
Serial number: it refers to which batch your TripMate belongs to.
When you have some problems with your TirpMate, providing the serial
number to our tech Support will help to solve the issues.
Page 75

75
Click Storage to view the information of the USB storage that you attach
to the TripMate
You may click Delete to eject your USB device
Page 76

76
User Settings
Login 10.10.10.254 in browser, Settings →User Manager
Page 77

77
Admin
Select Admin. Here you can change the password of admin account.
Page 78

78
Enter your new password, click Save
Note: Please make sure you remember the password that you change
otherwise you have to reset the TripMate to factory settings to enter
10.10.10.254
Page 79

79
Page 80

80
Page 81

81
Guest
Click guest
Click to enable or disable the guest account
Page 82

82
And you can set the password of guest account here.
Page 83

83
Page 84

84
Network Settings
Log in 10.10.10.254, Settings → Network Settings
Page 85

85
Host Name
TripMate host name can be changed here:
Select Host Name, enter the new host name, click Save
Now the host name has changed.
Page 86

86
SSID Settings
To change the SSID name and password of TripMate, please follow the
steps below:
1. Select Wi-Fi & LAN
Page 87

87
2. Enter your new SSID name and password. Click Save
Page 88

88
3. After changing the SSID and Password, your phone will lose the
connection to your TripMate. You have to reconnect your phone to
TripMate
Page 89

89
Page 90

90
If you only changed the password, the TripMate will lose the
connection to your phone as well. And you have to click the TripMate
SSID to Forget Network then reconnect to TripMate, because generally
your phone can store the connected WiFi.
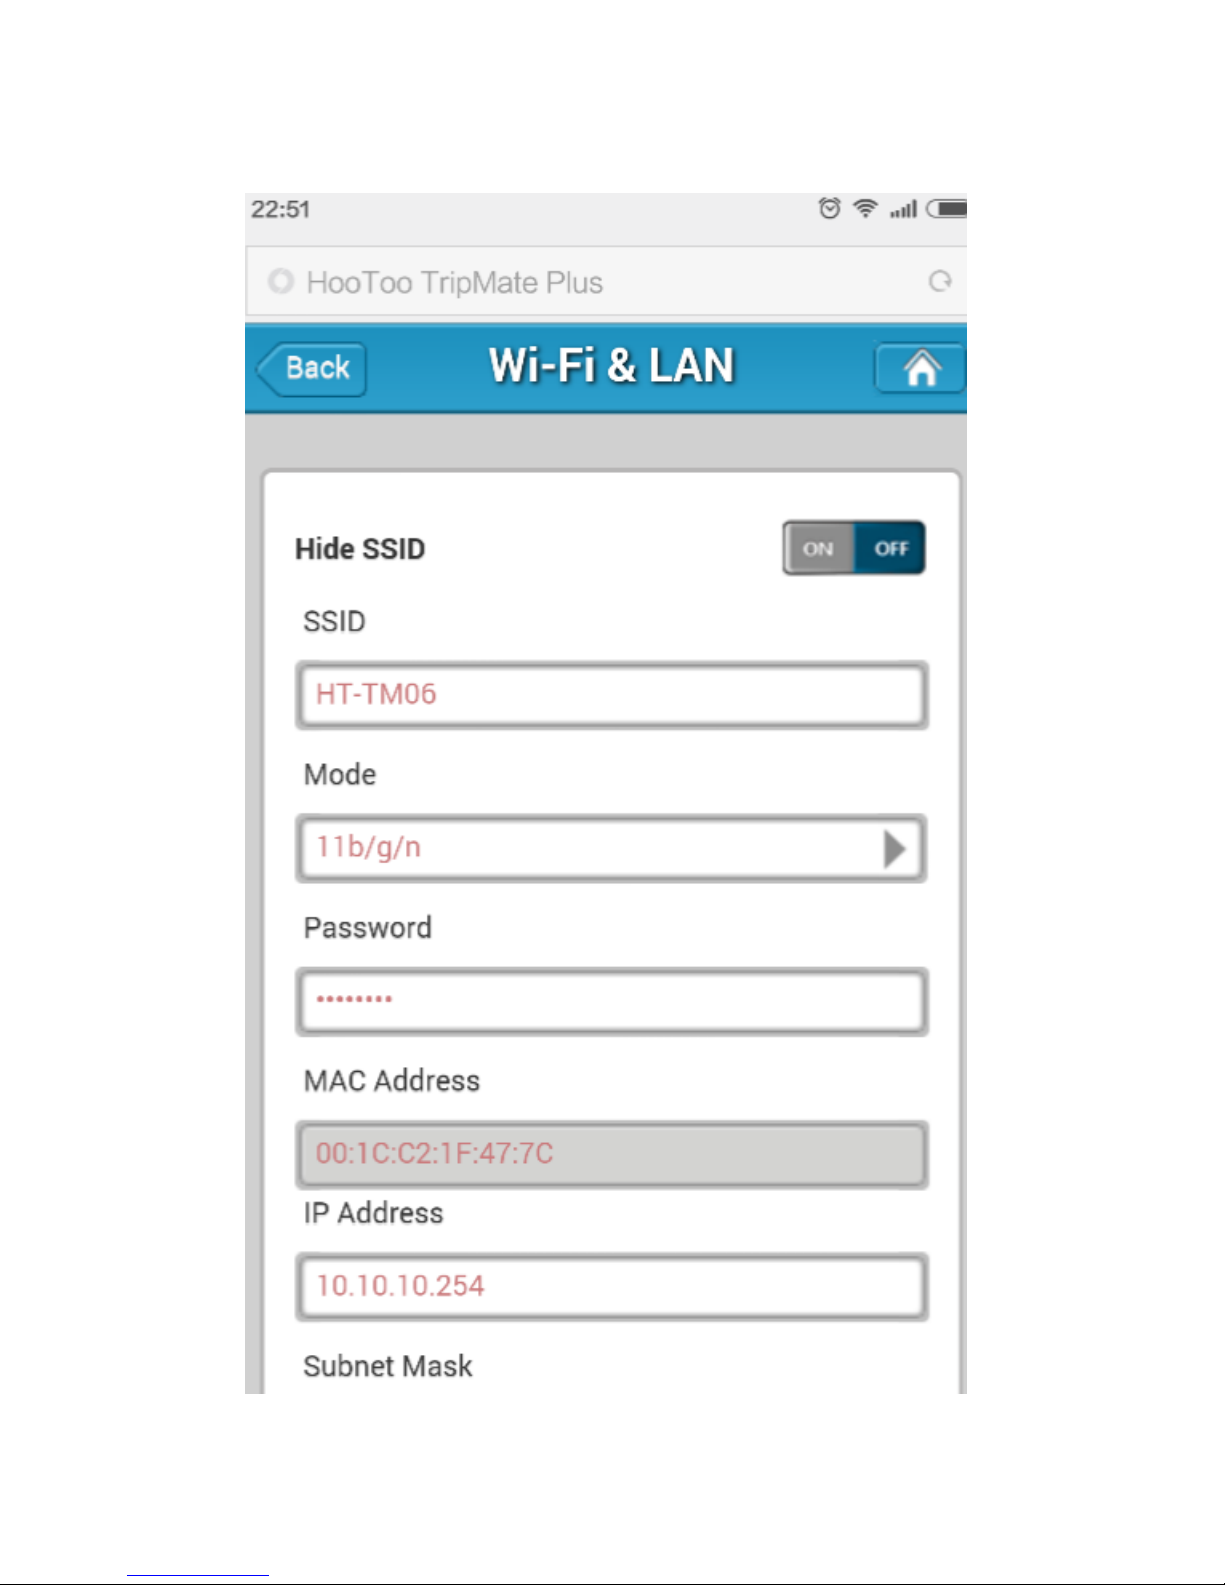
Example:
If you only change the password for HT-TM06, TripMate loses the
connection to your phone.
Page 91

91
Go back to the WiFi setting on the phone. The phone fails to connect to
the TripMate, because it remembers the last password. Click
(every phone has a different button) to Forget Network
Page 92

92
Page 93

93
Then reconnect it with new password
Page 94

94
Page 95

95
Mac Address
This is the Mac address of TripMate LAN itself. If your home router has a
mac filtering, please add the TripMate MAC address to the white list of
your router. Or your TripMate will reject to connect to your home router.
When TripMate connects to your router wirelessly, please add the
listed MAC address to the white list. E.g. 00:1C:C2:11:6D:22
When TripMate connects to the router via network cable, please add “1”
to the end number, then add the changed MAC address to the white list.
E.g. 00:1C:C2:11:6D:23
Page 96

96
Region & Wi-Fi Channel
You may manually set the Region and Wi-Fi Channel
Page 97

97
And change the Security type (default: Mixed WPA/WPA2-PSK):
Page 98

98
Hide SSID
If you hide the SSID, your wireless network will not show up in Wi-Fi
search result. Others need to manually input the SSID and password to
connect to your wireless network.
If you would like to hide your SSID, please make sure you have set
up the network setting (wired/wireless) previously, otherwise you will
lose the connection to TripMate, and will need to reset the TripMate to
restore the original settings.
Page 99

99
DHCP Settings
Click to enable/disable
the DHCP server.
If you turn off the DHCP server, TripMate will NOT assign an IP
address to your wireless device therefore making them unable to
connect to the TripMate. The IP address from your wireless device needs
to be inputted manually.
Page 100

100
Towards the bottom of this page, you may view the list of devices
currently connected to your TripMate.
 Loading...