

Page 1
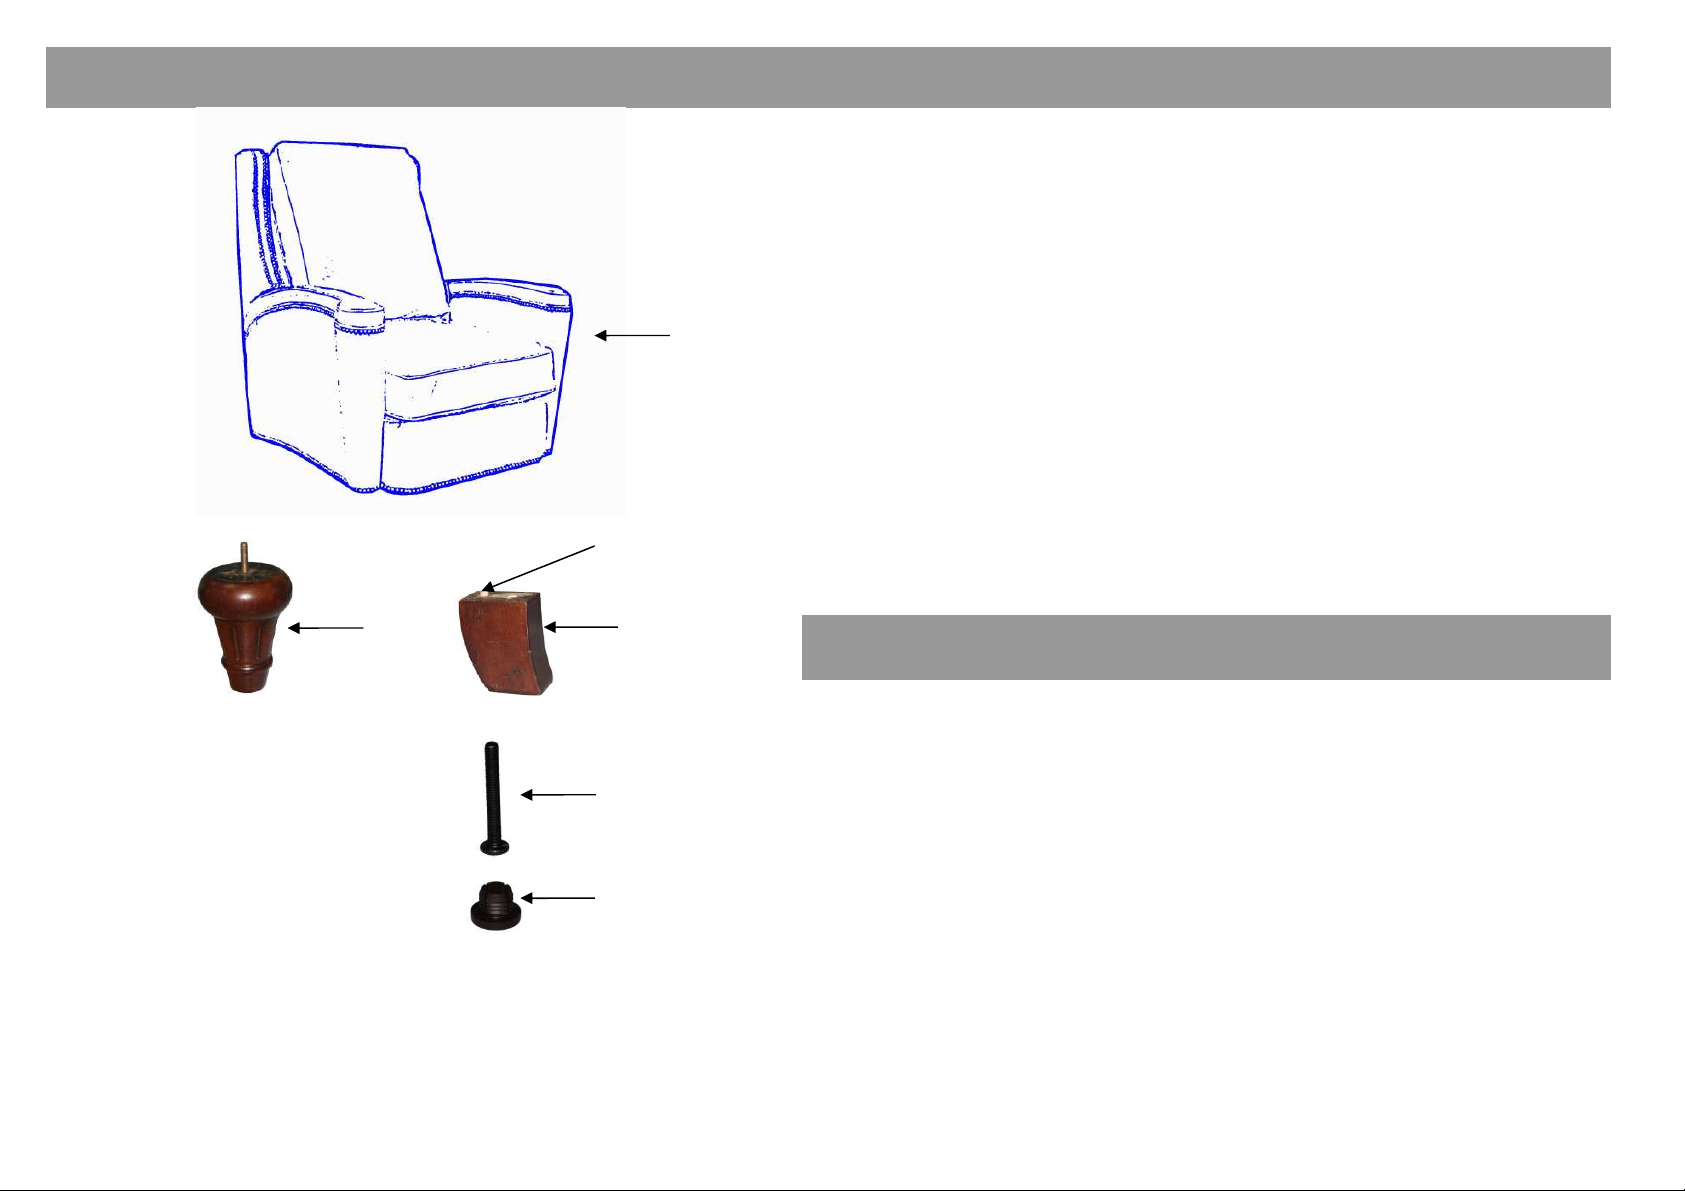
Style No.: RC216 Assembly Instructions
Tighten the
Carefully unpack all parts and identify them on the list before attempting to
assemble the chair.
IMPORTANT: DO NOT TIGHTEN BOLTS AND SCREWS FULLY UNTIL
YOU HAVE COMPLETED ASSEMBLY.
1. Place the bolts attached to the top of the FRONT LEGs(B) into the
holes on thesides of the bottom of the front of the CHAIR (A). Screw to
A
F
B
E
tighten the legs in place
2. Put BOLTs(C) in the BACK LEGs(E) through the holes at the bottom of
the legs, with the threaded stem of the BOLT (C) coming out the hole
on top of the BACK LEG (E).
3. Position the BACK LEGs(E) at the holes at the back of the CHAIR (A),
so that the DOWEL (F) is positioned in the dowel hole in front of the
screw opening hole at the back of the CHAIR(A) bottom.
BOLT (C) that has been threaded through the back leg into the screw
hole on the bottom of the CHAIR (A) until the BOLT (C) is tight.
4. Push the GLIDEs(D) into the holes of the bottom of BACK LEGS(E).
5. Be sure that all the parts are fully tightened before using.
Parts List
A. CHAIR 1
B. FRONT LEG 2
C. BOLT 2
C
D
D. GLIDE 2
E. BACK LEG
F. DOWEL
2
2
 Loading...