

Page 1
Style No.: EC245
Assembly Instructions
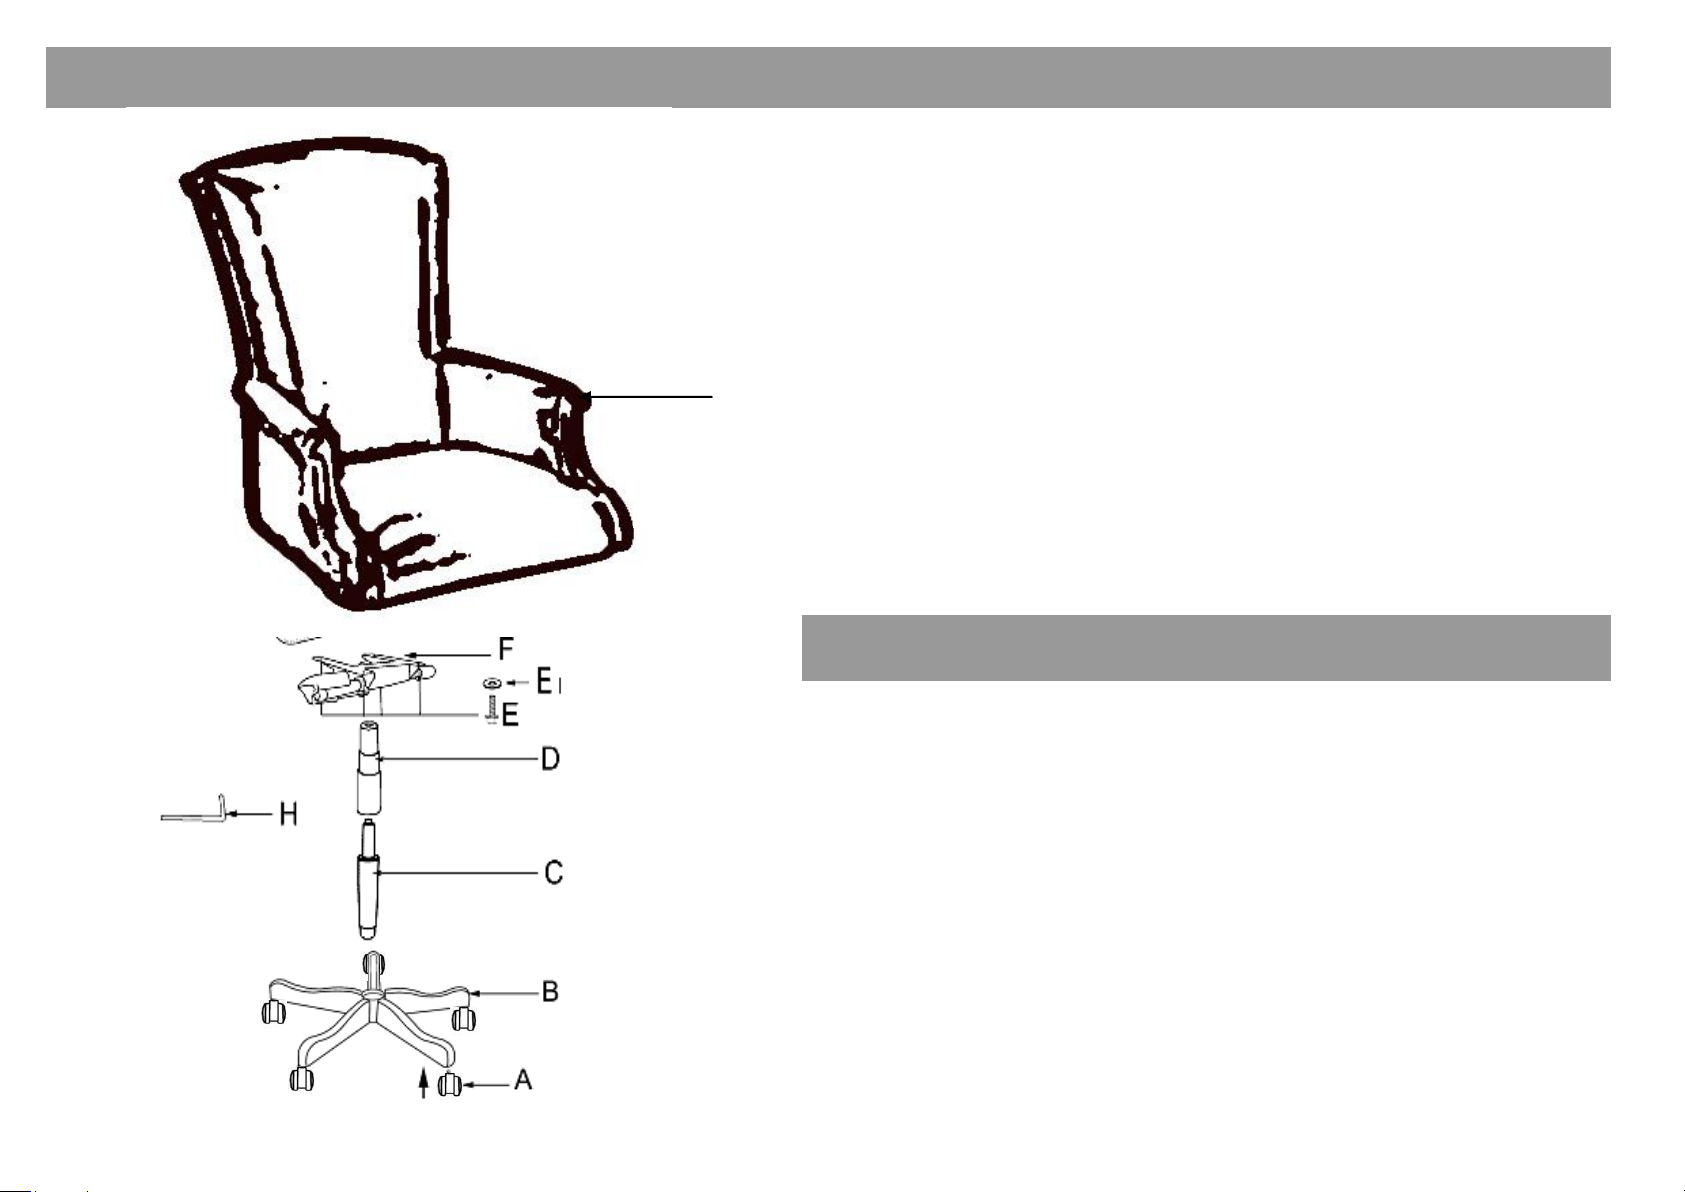
Carefully unpack all parts and identify them with parts list before
attempting to assemble the chair.
IMPORTANT: DO NOT TIGHTEN BOLTS AND SCREWS FULLY UNTIL
YOU HAVE COMPLETED THE FINAL ASSEMBLY.
1. Carefully remove the 5 STAR BASE(B) from the carton. The base is
located behind the fiberboard that is behind the chair UNIT
SEATING(G).
2. Put 5 CASTERS (A) into the holes of 5 STAR BASE (B).
3. Insert GAS LIFT (C) to the center hole top of 5 STAR BASE (B), and
put the BELLOWS(D) onto the GAS LIFT(C).
4. Attach SEAT PLATE (F) to the Unit Seating(G) by using 4 SCREWS
(E) with 4 FLAT WASHERS (E1).
5. Insert the pre-assembled seat unit onto the gas lift to finish the final
assembly.
6. Be sure that all the screws are fully tightened before using.
Parts List
A. CASTERS
5 B. 5 STAR BASE
1
C. GAS LIFT
1
D. BELLOWS
1
E. SCREWS (5/16”x1-1/4”)
E1. FLAT WASHERS
4
4
F. SEAT PLATE
1
G. UNIT SEATING
H. ALLEN KEY
1
1
G
Page 2

The instructions below are for the chair mechanism operating:
EC245 Operational Instruction
A:This handle is for the seater reclining locking,pull the handle
outwards,the mech is loose to recline; when you want to keep the
chair upright,push the handle inwards and it will lock at this
position.There is only one position you can lock at.
B:This handle is for gas lift locking/unlocking,turn this upwards,the
gas lift is active and you can adjust the seat height by your body
motion,release it when you get a desired seat height,then it will lock
the mechanism to keep this height for you.
C:This knob is for adjusting the tightness of the mechanism.Turn it
leftwards,the mechanism is easier to recline,turn it rightwards,the
mechanism gets firmer for reclining.
A
B
C
 Loading...