

Hooker Furniture 638-90967, 638-90968, 638-90969, 638-90970 Assembly Instruction Manual
1/4
ASSEMBLY INSTRUCTION
ITEM# 638-90967 6/6 Montage Poster Headboard
638-90968 6/6 Montage Poster Footboard
638-90969 6/6 Montage Poster Rails
638-90970 6/6 Montage Canopy
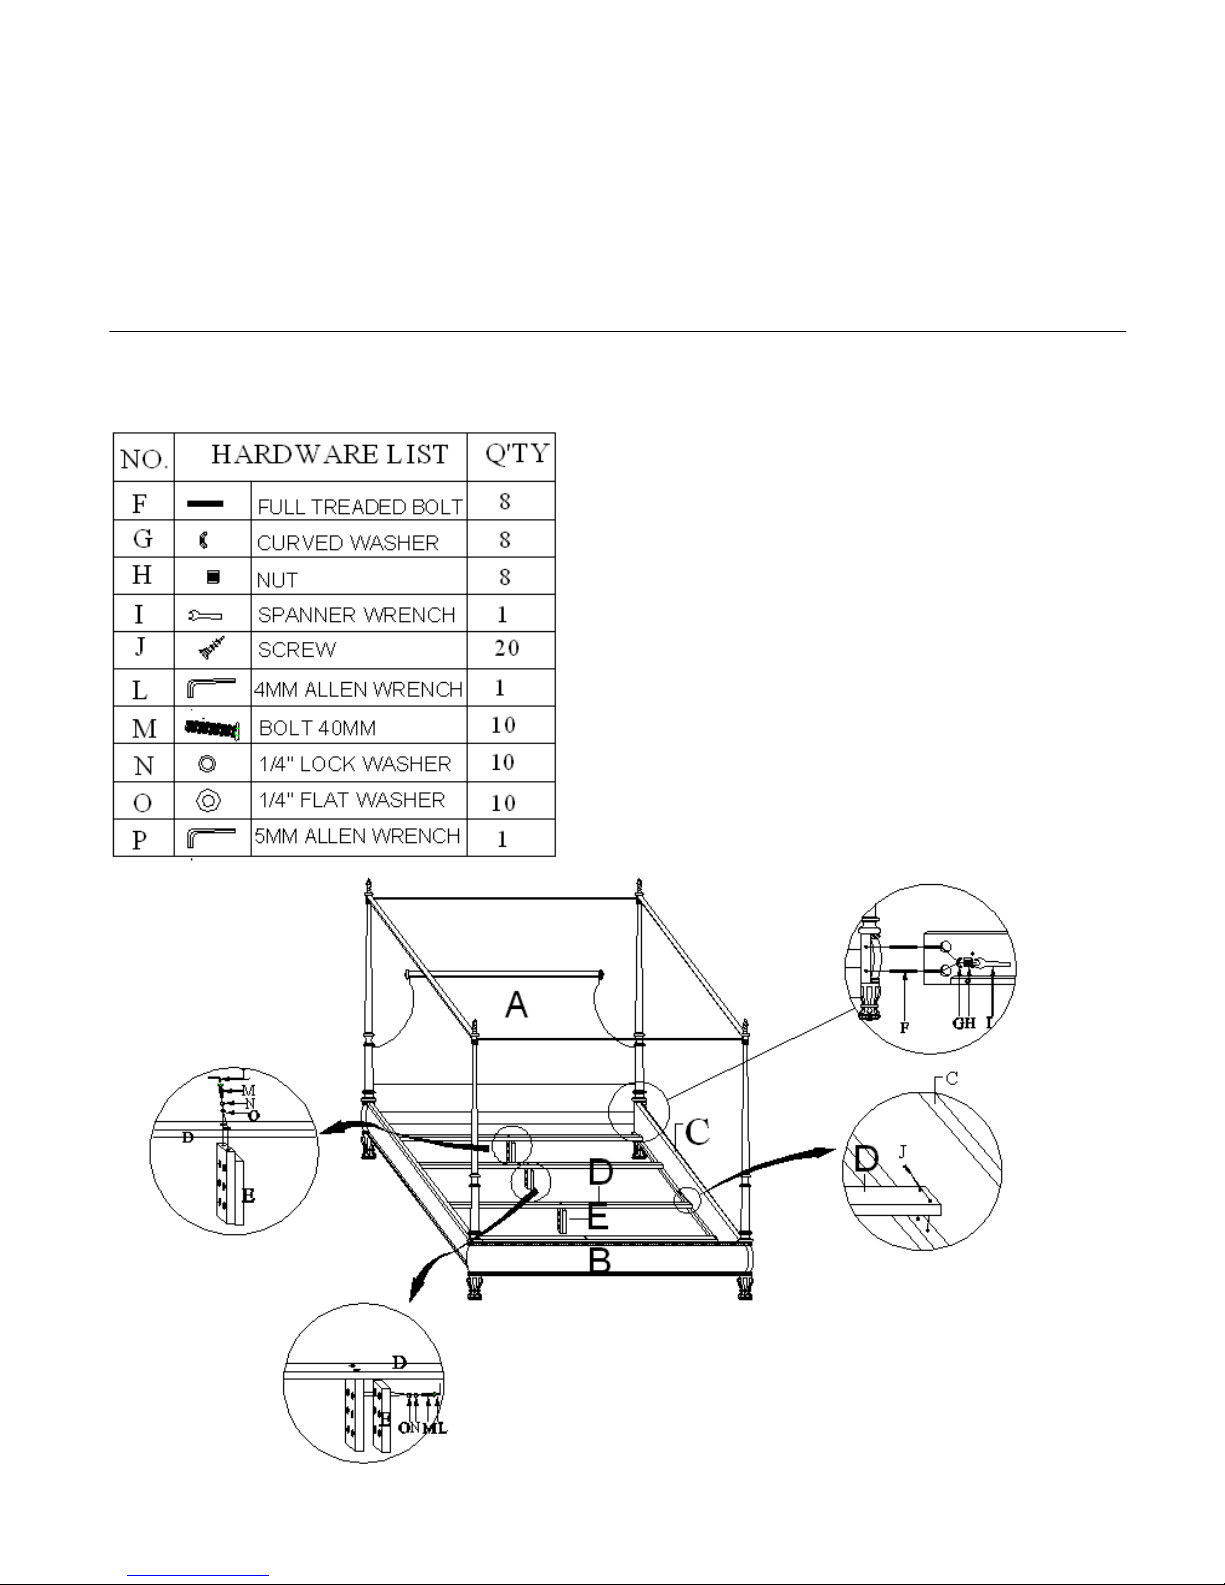
Caution: Please make sure you have all parts indicated below prior to assembly.
This unit is heavy and can best be assembled with the help of two or more persons.
See Diagram 1
See Diagram 2
See Diagram 3
See Diagram 5
2/4
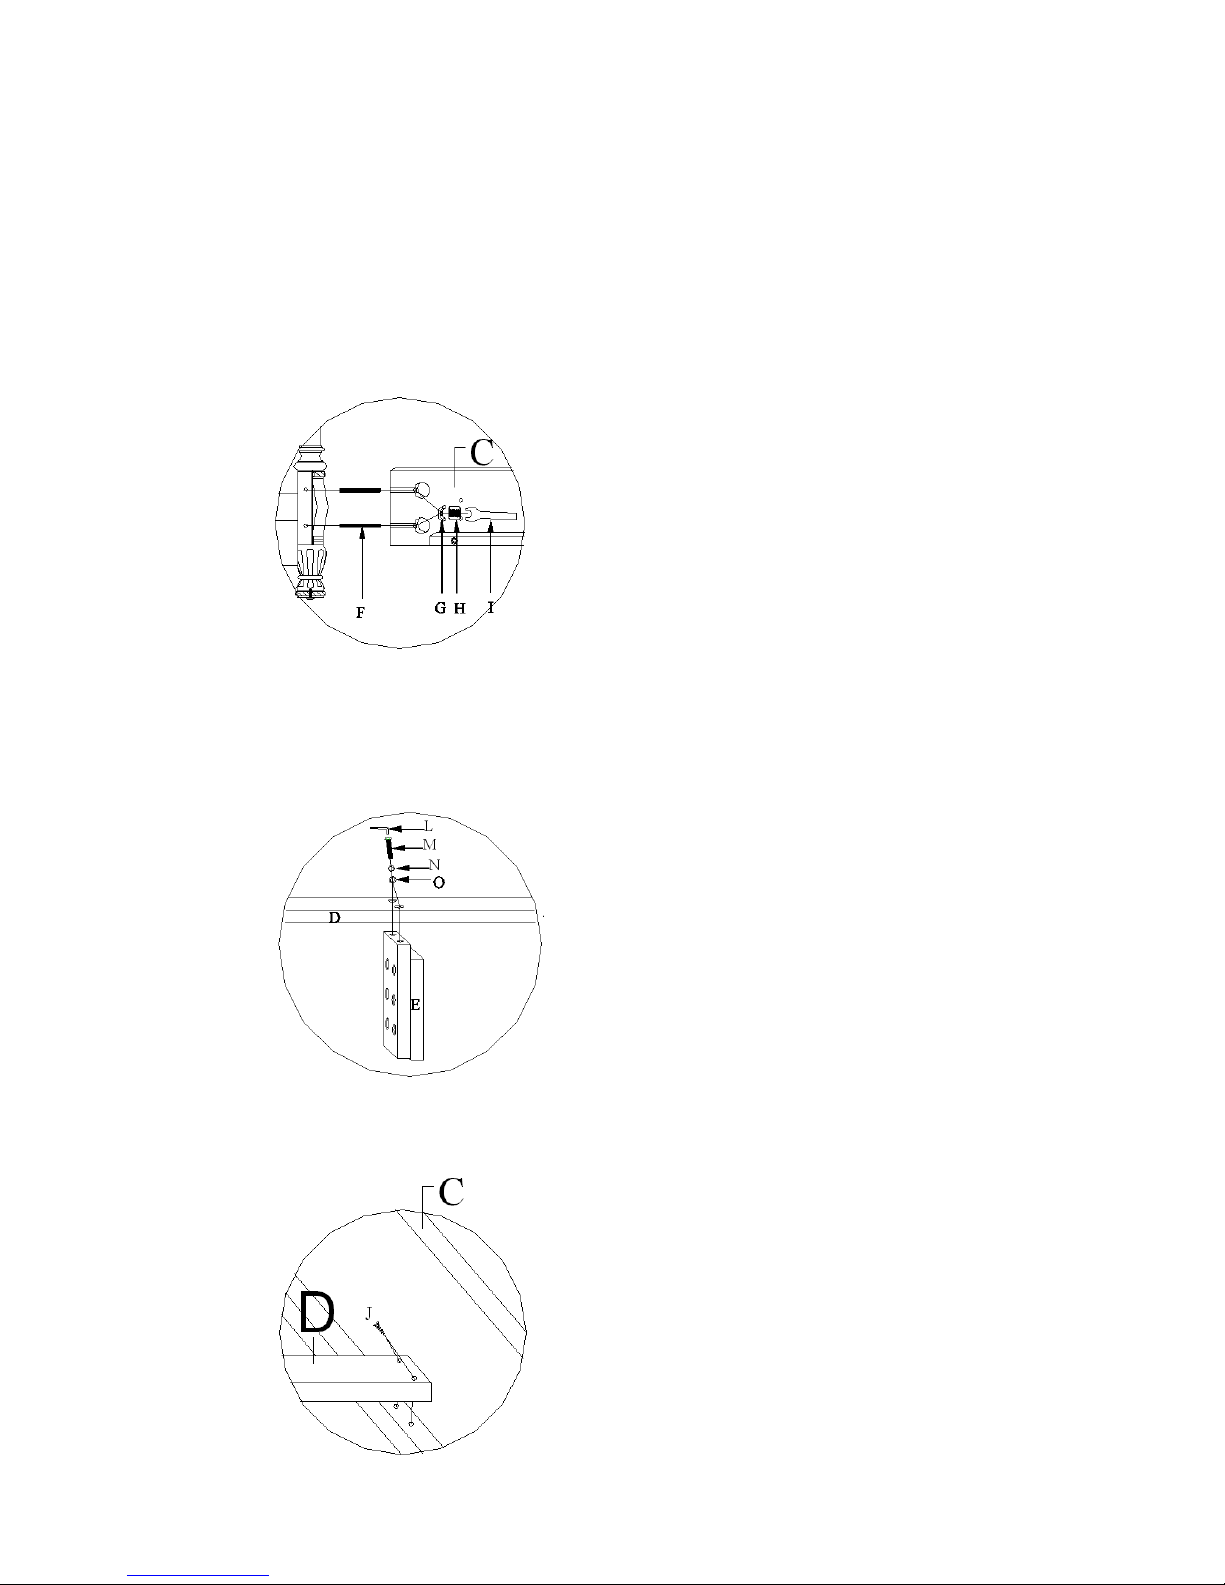
Please note the hardware bag to assemble side rails to HB&FB is in the box of side rails.
Assembly steps for side rails to HB/FB, slats to side rails, adjusting cleats on
side rails to desired locations and height of center supports.
1. Insert 2 bolts (F) into holes of each side post on Headboard (A) and Footboard (B), attach the end of
side rails (C) to bolts (F) on posts using 2 curved washers (G)and 2 nuts (H), tighten nuts (H) securely
with spanner wrench (I). (See diagram 1)
Diagram 1
2. Take out center supports (E) from the rail box, attach center supports (E) to slats using 2 bolts (M),
2 lock washers (N) and 2 flat washers (O). Secure bolts (Q) by using allen wrench (L). (See
diagram 2)
Diagram 2
3 Attach slats (D) to side rails (C), align pre-drilled holes on the slat to holes on the cleat of side rail
(C), using screws (J) to tighten both. (See diagram 3)
Diagram 3
 Loading...