

Page 1
ASSEMBLY INSTRUCTION
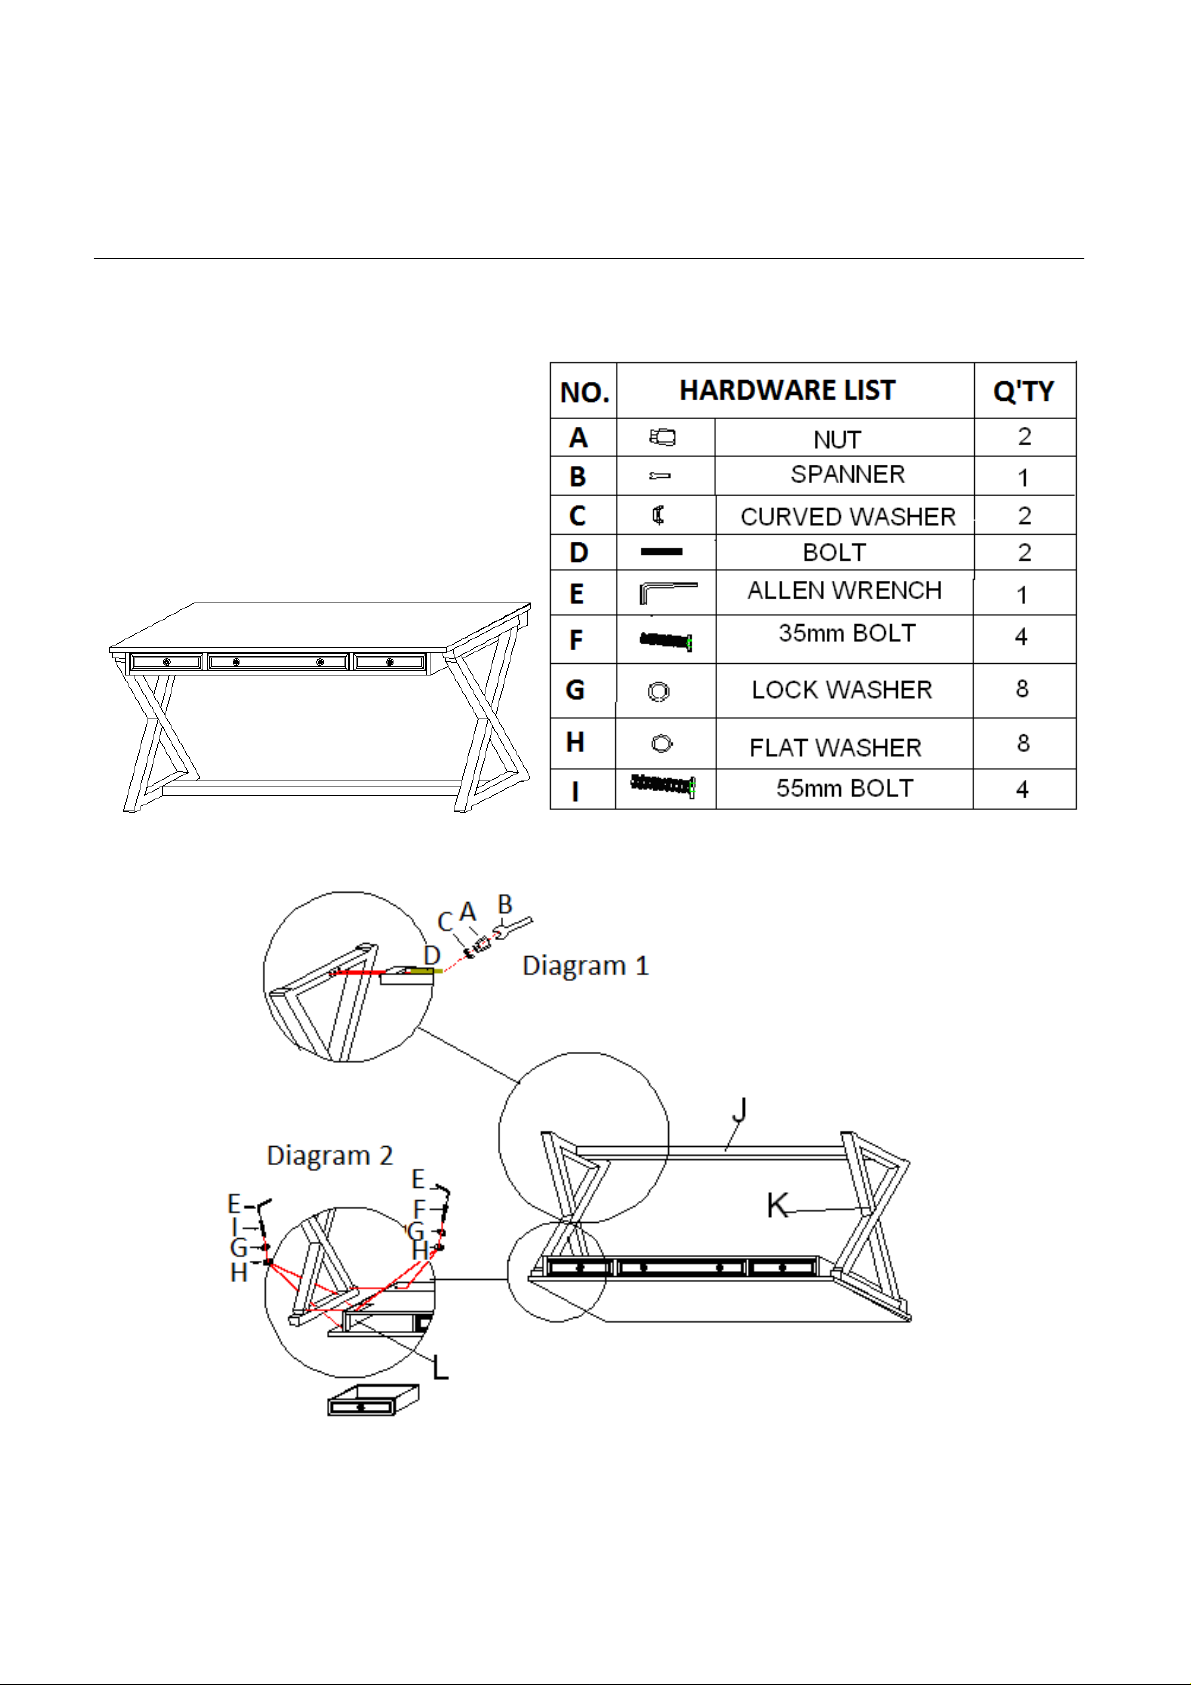
Item#: 638-10019-GRY Dixon Writing Desk
** Please make sure you have all parts indicated below prior to assembly.
1/2
Page 2

Assembly steps:
1. Pull out two side drawers and place desk top upside down on a soft surface to prevent it from
scratching.
2. Insert bolt(D) into hole of left and right X-bases(K), attach the end of stretcher(J) to bolts(D) on
X-bases(K) using curved washer(C), nut(A), tighten securely with spanner (B)(see diagram 1).
3. Attach assembled X-base(K) to top panel using bolts (I), lock washers (G), flat washers (H),
and secure all bolts with allen wrench (E) in a clockwise direction (see Diagram 2).
4. Then secure assembled X-base with the end of top by using allen wrench(E) to tighten bolts(F),
lock washers(G) and flat washers(H) in a clockwise direction (see Diagram 2).
5. Turn the desk upright and put drawers back.
Cleaning Instruction: Clean finished parts with a damp cl o t h using a m ild dishwashing liquid and
water solution. Polish the finish with soft cloth and an industry recognized furniture polish.
2/2
 Loading...