

Page 1
ASSEMBLY INSTRUCTION
Item#:5107-70465/70467/70451/70452 4pcs Wall Group
Caution: Please read all instructions carefully before starting the assembly process.
This unit is heavy and can best be assembled with the help of at least five persons.
Assembly steps:
Left End Panel
Top Back Rail
Diagram 1
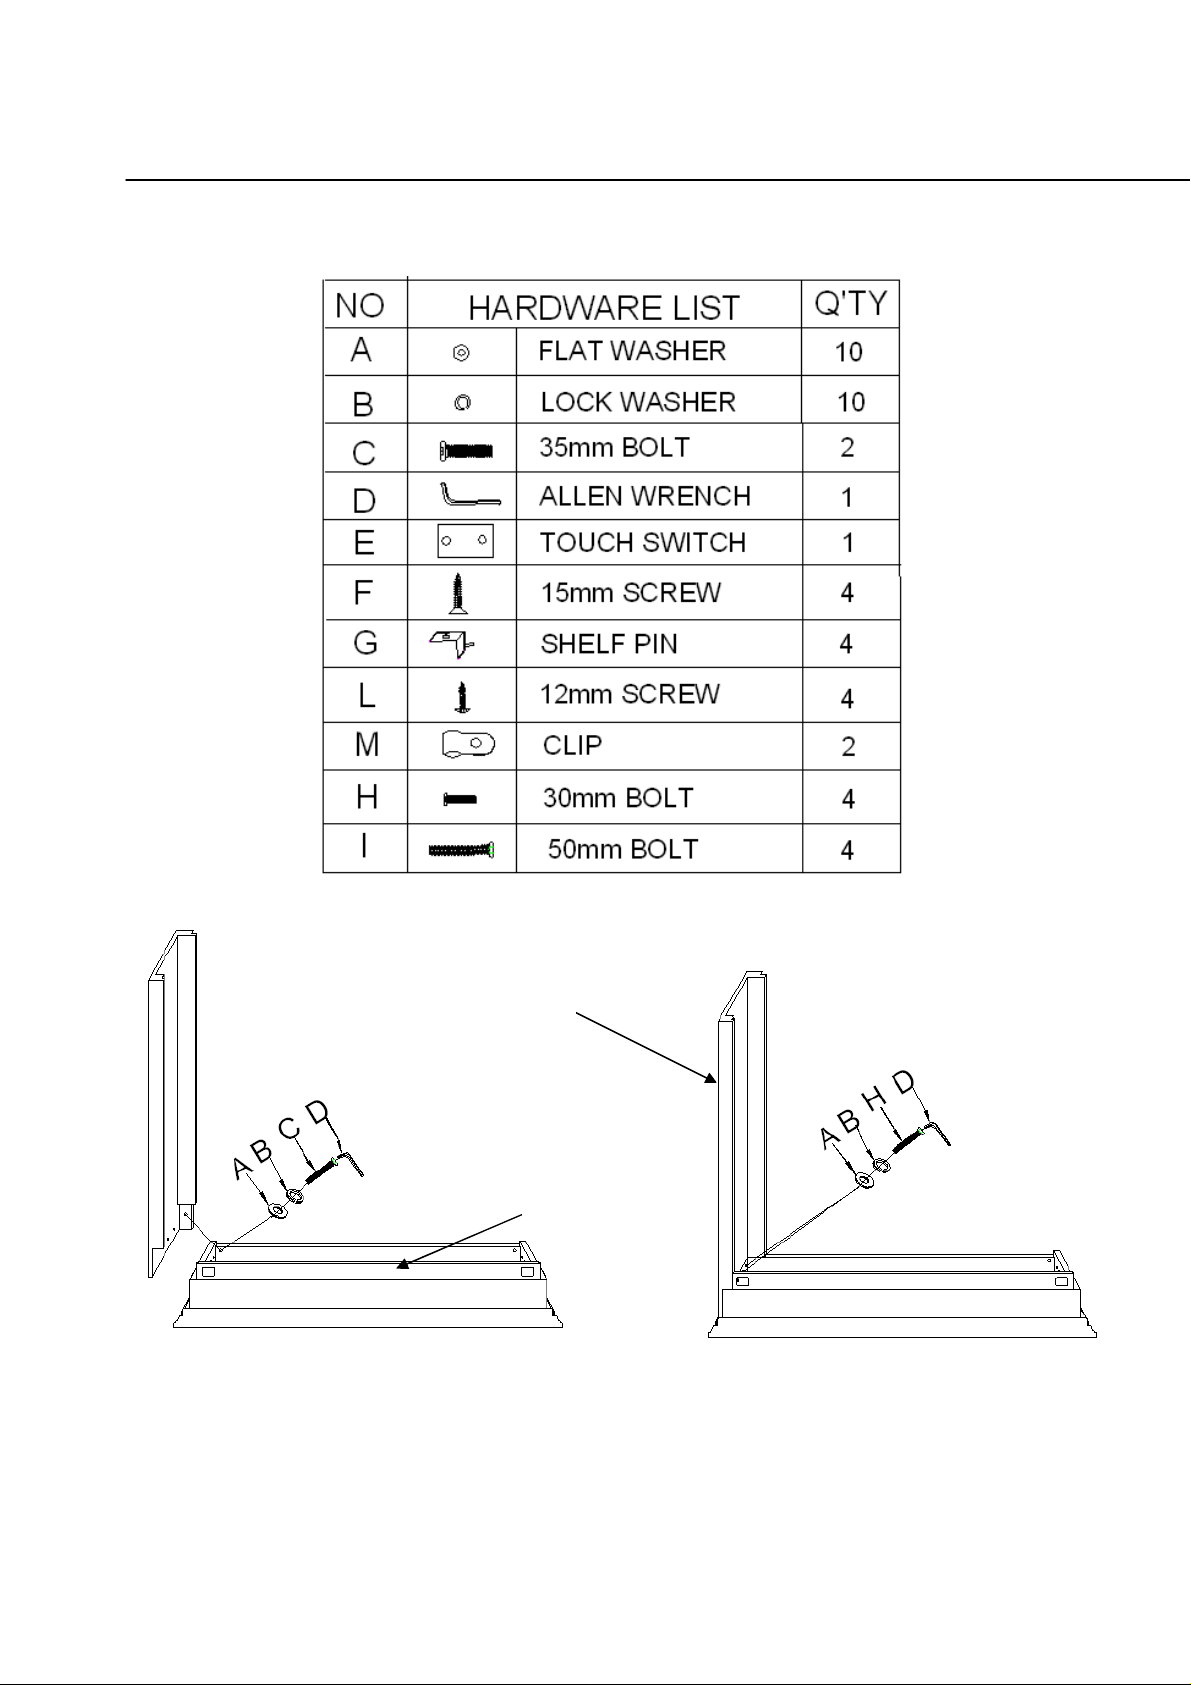
1. Place the top of Hutch upside down on a soft surface to prevent from scratching. Attach
left end panel to the top of Hutch and screw with 1 flat washer (A), 1 lock washer (B), 1 bolt
(C) in the front and 2 flat washers (A), 2 lock washers (B), 2 bolts (H) in the center. Tighten
all bolts securely with allen wrench (D). (See diagram 1)
1/5
Page 2
Left End Panel
Bottom Back Rail
Top Back Rail
Back Panel
Back PanelCenter Rail
Diagram 2
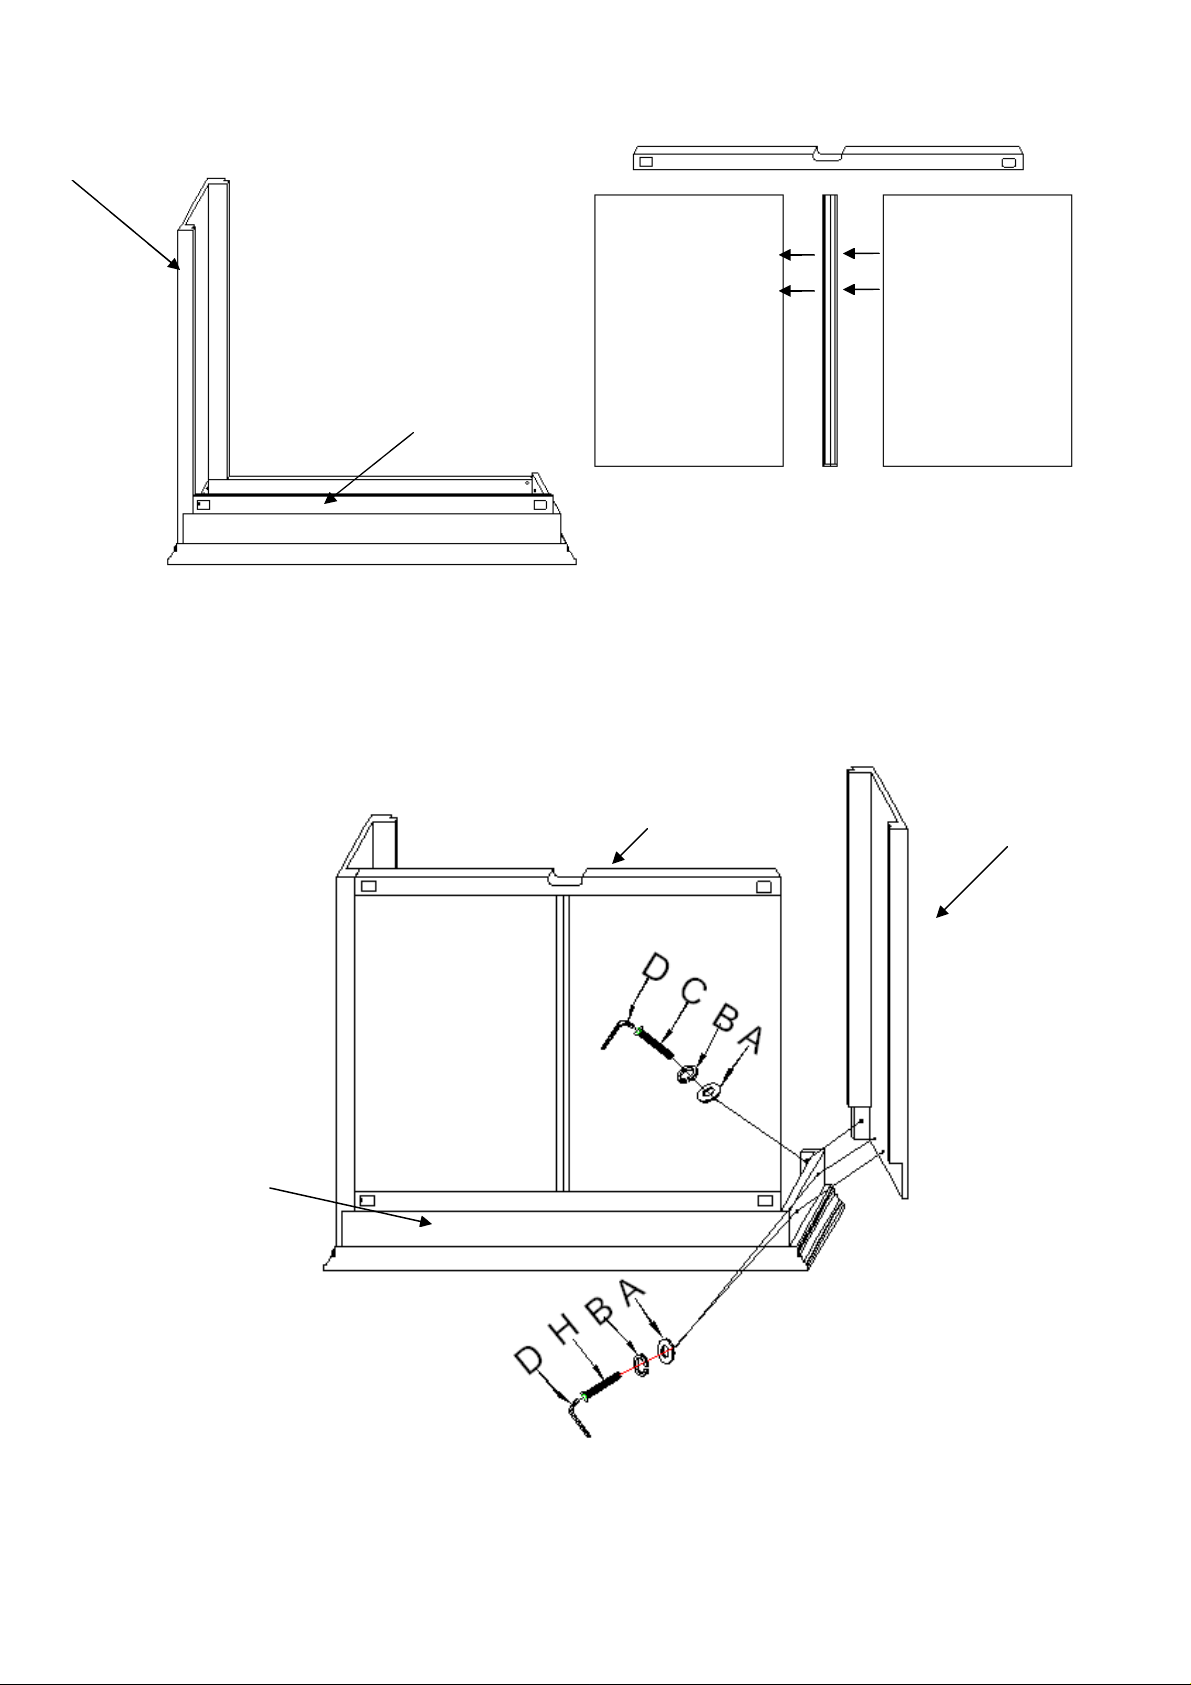
2. Insert one back panel, center rail and the other back panel into the groove line of top back
rail as showed in diagram 2, then attach bottom back rail onto the back panels. (Actually
these two back panels are the same)
Bottom Back Rail
Right End Panel
Top Back Rail
Diagram 3
2/5
Page 3

3. Attach right end panel on the top of Hutch with 2 flat washers (A), 2 lock washers (B), 2
bolts (H) in the center and with 1 flat washer (A), 1 lock washer (B), 1 bolt (C) in the front.
Tighten all bolts securely with allen wrench (D). (See diagram 3)
Diagram 4
4. Screw bottom back rail and top back rail to left and right end panels by using 4 flat
washers (A), 4 lock washers (B) and 4 bolts (I), tighten all bolts securely with allen wrench
(D). (See diagram 4)
Diagram 5
5. Place the Hutch upright and face front. Fix the wiring of touch switch on the inside of front
right post with 2pcs of clips (M) and 2pcs of screws (L), and install the touch switch (E) with
2pcs of screws (L). (See diagram 5)
3/5
Page 4

Diagram 6
6. Insert 2pcs of shelf pins (G) into the desired holes on one side of end panel. Place one
side of shelf on them and hold another side of shelf steady and higher than the desired holes
on the other side of end panel, Then, insert another 2pcs of shelf pins (G) into the other side
of end panel, Now rest whole shelf on shelf pins with care and secure the shelf by using 4pcs
of screws (F). (See diagram 6)
Back side
Diagram 7
7. Place hutch on top of console and unscrew bolts (R), lock washers (Q), flat washers (P) in
counter-clockwise direction, turn mending plate (O) following the direction of arrowhead,
screw the bolts (R), lock washers (Q), flat washers (P) tightly in clockwise direction. (See
Diagram 7)
4/5
Page 5

Diagram 8
8. Put left pier, hutch & console, and right pier together in desired location. (See Diagram 8)
Steps to exchange wood panel and glass panel.
Remove rubber gasket around center two glass doors on the Entertainment Console.
Replace glass panels with wood panels. Insert rubber gasket to support the panels.
Instructions for Lighting Assembly
Make sure you turn off the plug on back of hutch, then connect the wire before
you put the wall units against the wall.
Cleaning Instruction: Clean finished parts with a damp cloth using a mild dishwashing liquid
and water solution. Polish the finish with soft cloth and an industry recognized furniture polish.
5/5
 Loading...