

Hooker Furniture 507050001 Assembly Guide
ASSEMBLY INSTRUCTION
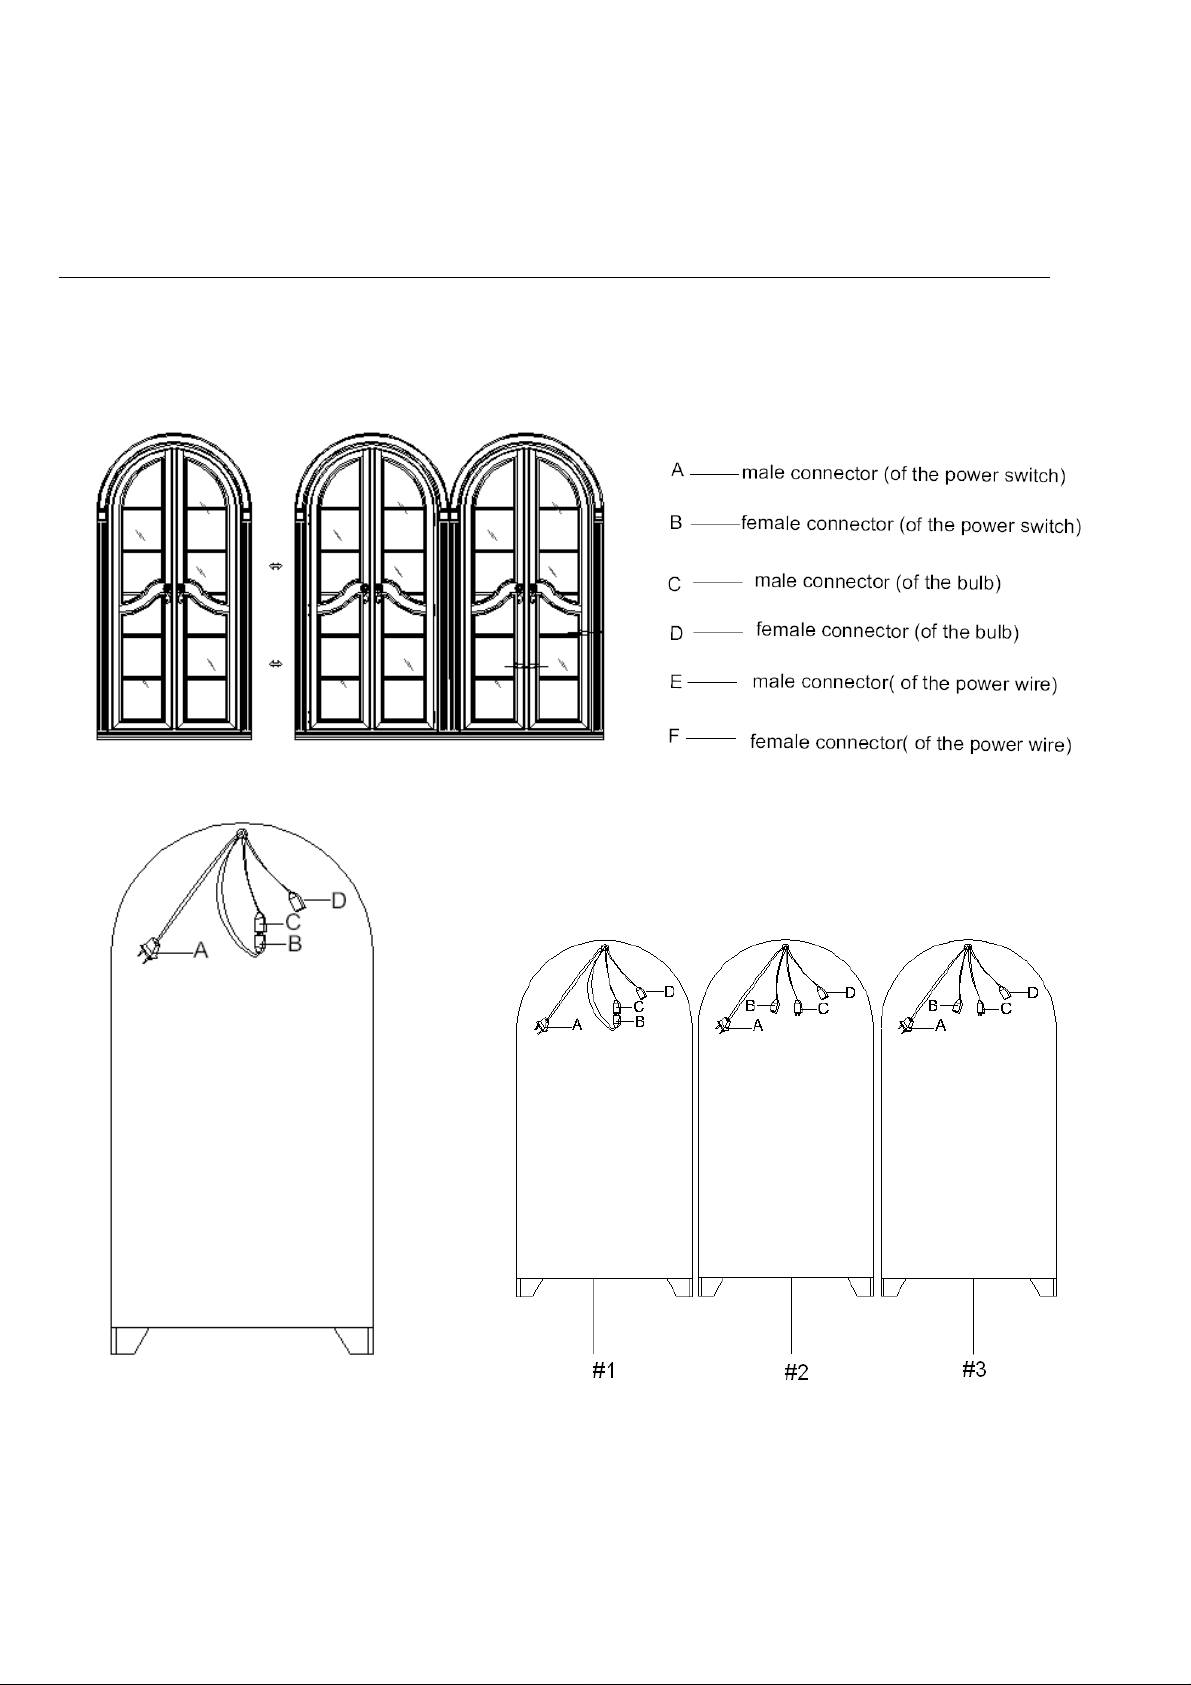
(for connecting the wire of the light on this curio)
Item#: 5070-50001 Bunching Curio
*** Caution: Please read all instructions carefully before starting the assembly process.
Please note the curio can be used alone with can light on by a touch dimmer. Also, when 2or more are
bunched together, you can control all can lights by touching one dimmer.
DIAGRAM 1 DIAGRAM 2
Assembly steps:
1. When each piece of curio is used alone, attach male connector of the power switch (A) to a wall plug. (see
diagram 1)
2. Touch the dimmer at the right top of door hinge, the can light of it will be on.
3. If you want to bunch 2 or more curios together, place them all side by side in a desired location.
4. Leave male connector of the bulb (C ) and female connector of power Switch (B) for the first curio (#1) as it
is. Keep male connector of the bulb (C ) and female connector of power switch (B) off for the rest curios( #2,
#3, and so on). See diagram 2.
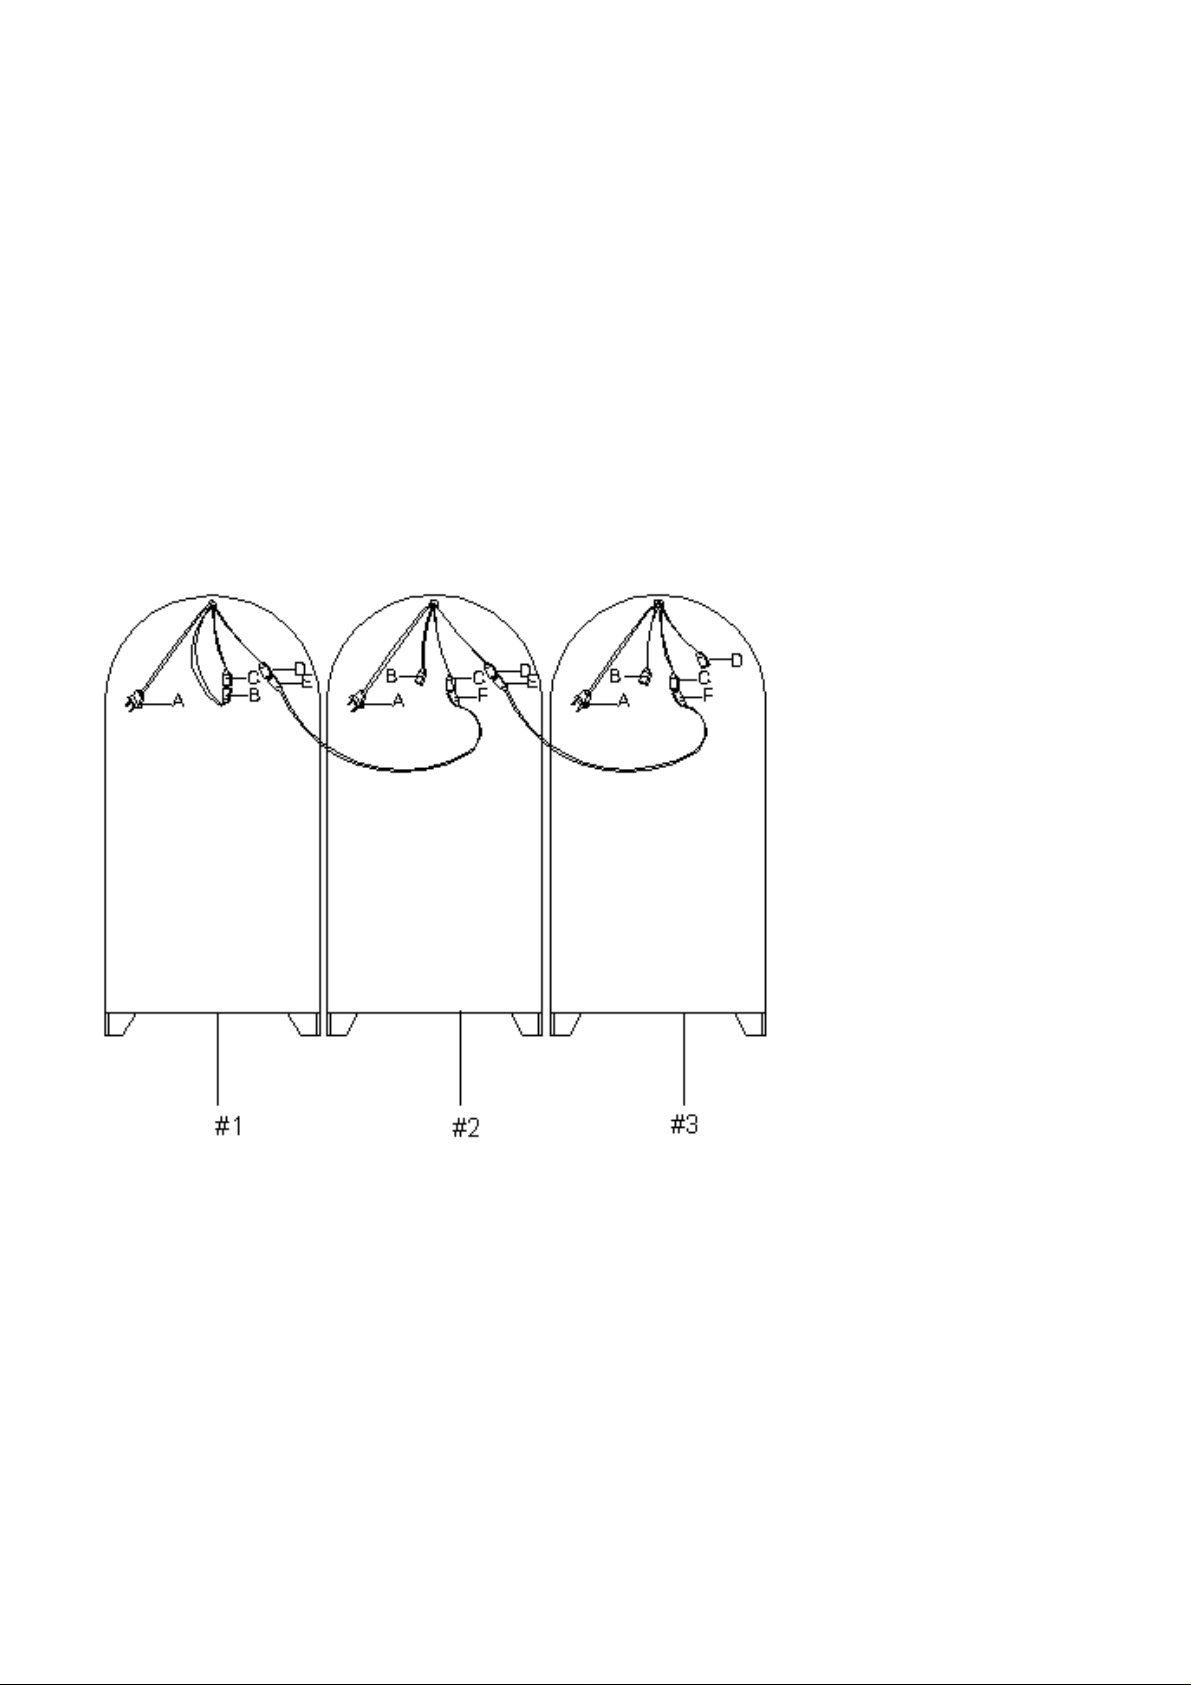
5. Connect female connector of the bulb(D) (the #1 curio) with male connector of power wire (E), then have
female connector of power wire(F) connected to male connector of the bulb(C) (the #2 curio). See diagram
3.
DIAGRAM 3
6. Repeat step 5 for the 3rdcurio and the rest ones when more than 2 are bunched together till each one is
connected.
7. Attach male connector of power switch (A)(the #1 curio) to a wall plug.
8. Touch the dimmer of the #1 curio, all can lights connecting together will be on at the same time.
Cleaning Instruction: Clean finished parts with a mild dishwashing liquid and water solution on a damp
cloth. Polish the finish with soft cloth and an industry recognized furniture polish.
 Loading...