

Hooker Furniture 165490250DKW1 Assembly Guide
ASSEMBLY INSTRUCTION
ITEM# 1654-90251-DKW1 5/0 Panel Headboard
1654-90252-DKW1 5/0 Panel Footboard
1654-90253-DKW1 5/0-6/6 Rails
Caution: Please make sure you have all parts indicated below prior to assembly.
This unit is heavy and can best be assembled with the help of two or more persons.
NO.
E
F
G
H
K
R
Q
V
U
M
Diagram 1
1/3
HARDWARE LIST
NUT
SPANNER WRENCH
CURVERD WASHER
FULL THREADED BOLT
SCREW
4mm ALLEN WRENCH
BOLT
LOCK WASHER
FLAT WASHER
5mm ALLEN WRENCH
Q'TY
8
1
8
8
16
1
8
8
8
1
Assembly steps:
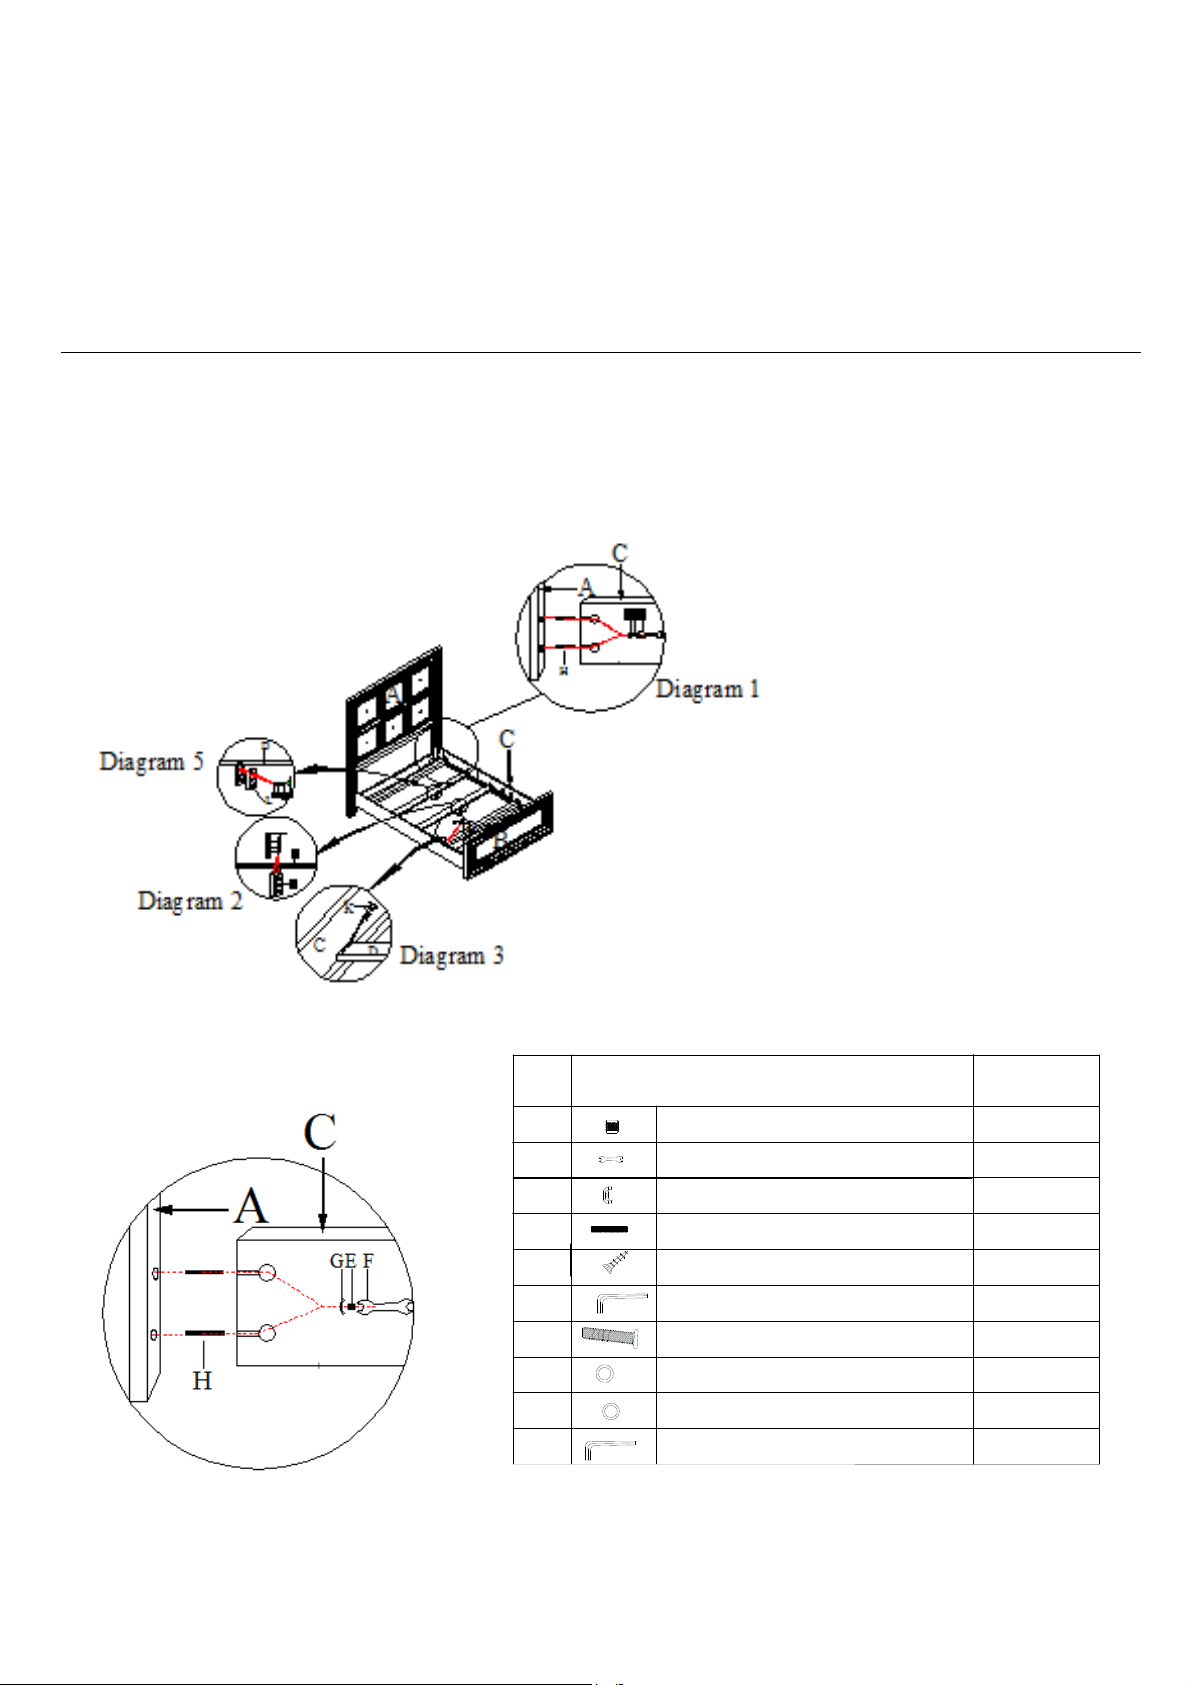
1. Insert 2 bolts (H) into holes of each posts on Headboard (A) and Footboard (B), attach end of side
rails (C) to the bolts (H) on posts using 2 curved washers (G) and 2 nuts (E), tighten nuts (E) securely
with spanner wrench (F). (See diagram 1)
R
Q
V
D
U
L
Diagram 2
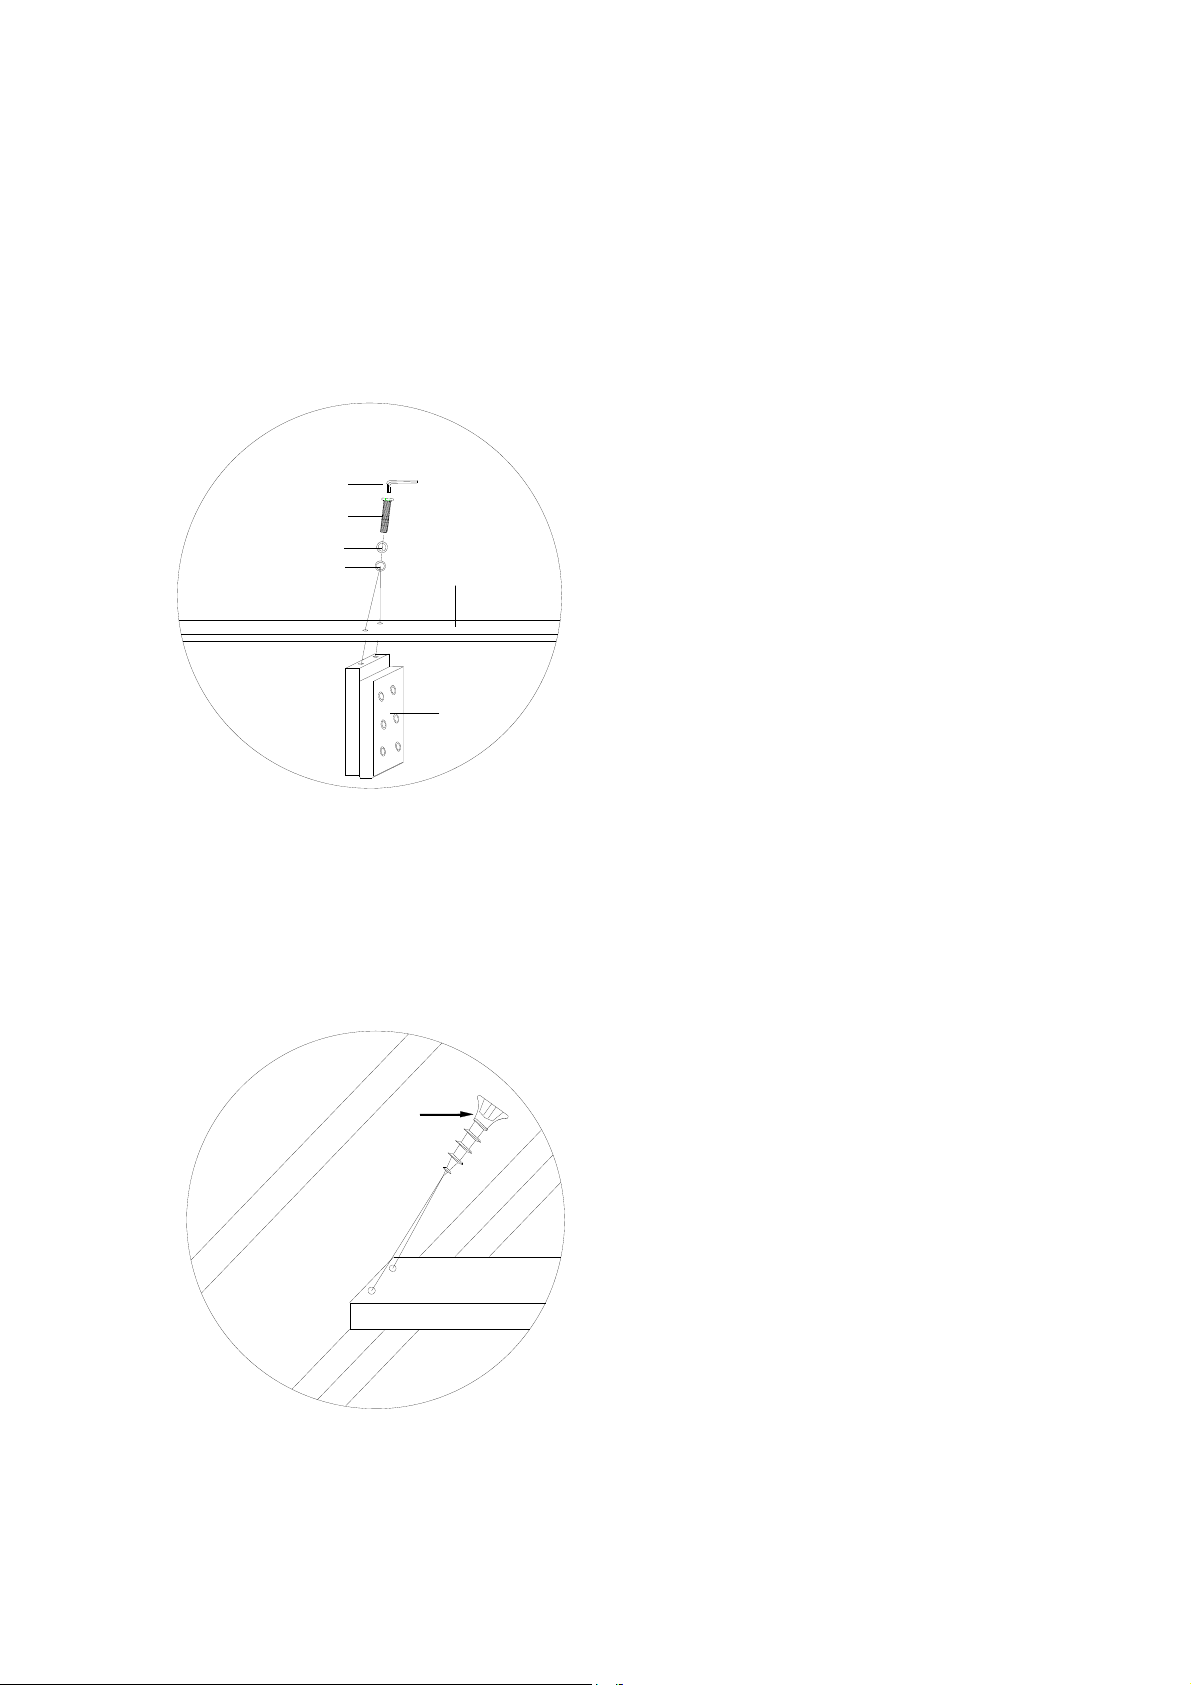
2. Take out center supports (L) from rail box, attach center supports (L) to slats using 2 bolts (Q), 2 lock
washers (V) and 2 flat washers (U). Securing the bolts (Q) by using Allen wrench (R). (See diagram
2)
k
C
Diagram 3
3. Attach slats (D) to side rails (C), align pre-drilled holes on the slat to holes on the cleat of side rail
(C), using screws (K) to tighten both. (See diagram 3)
2/3
D
 Loading...