

Page 1
1/2
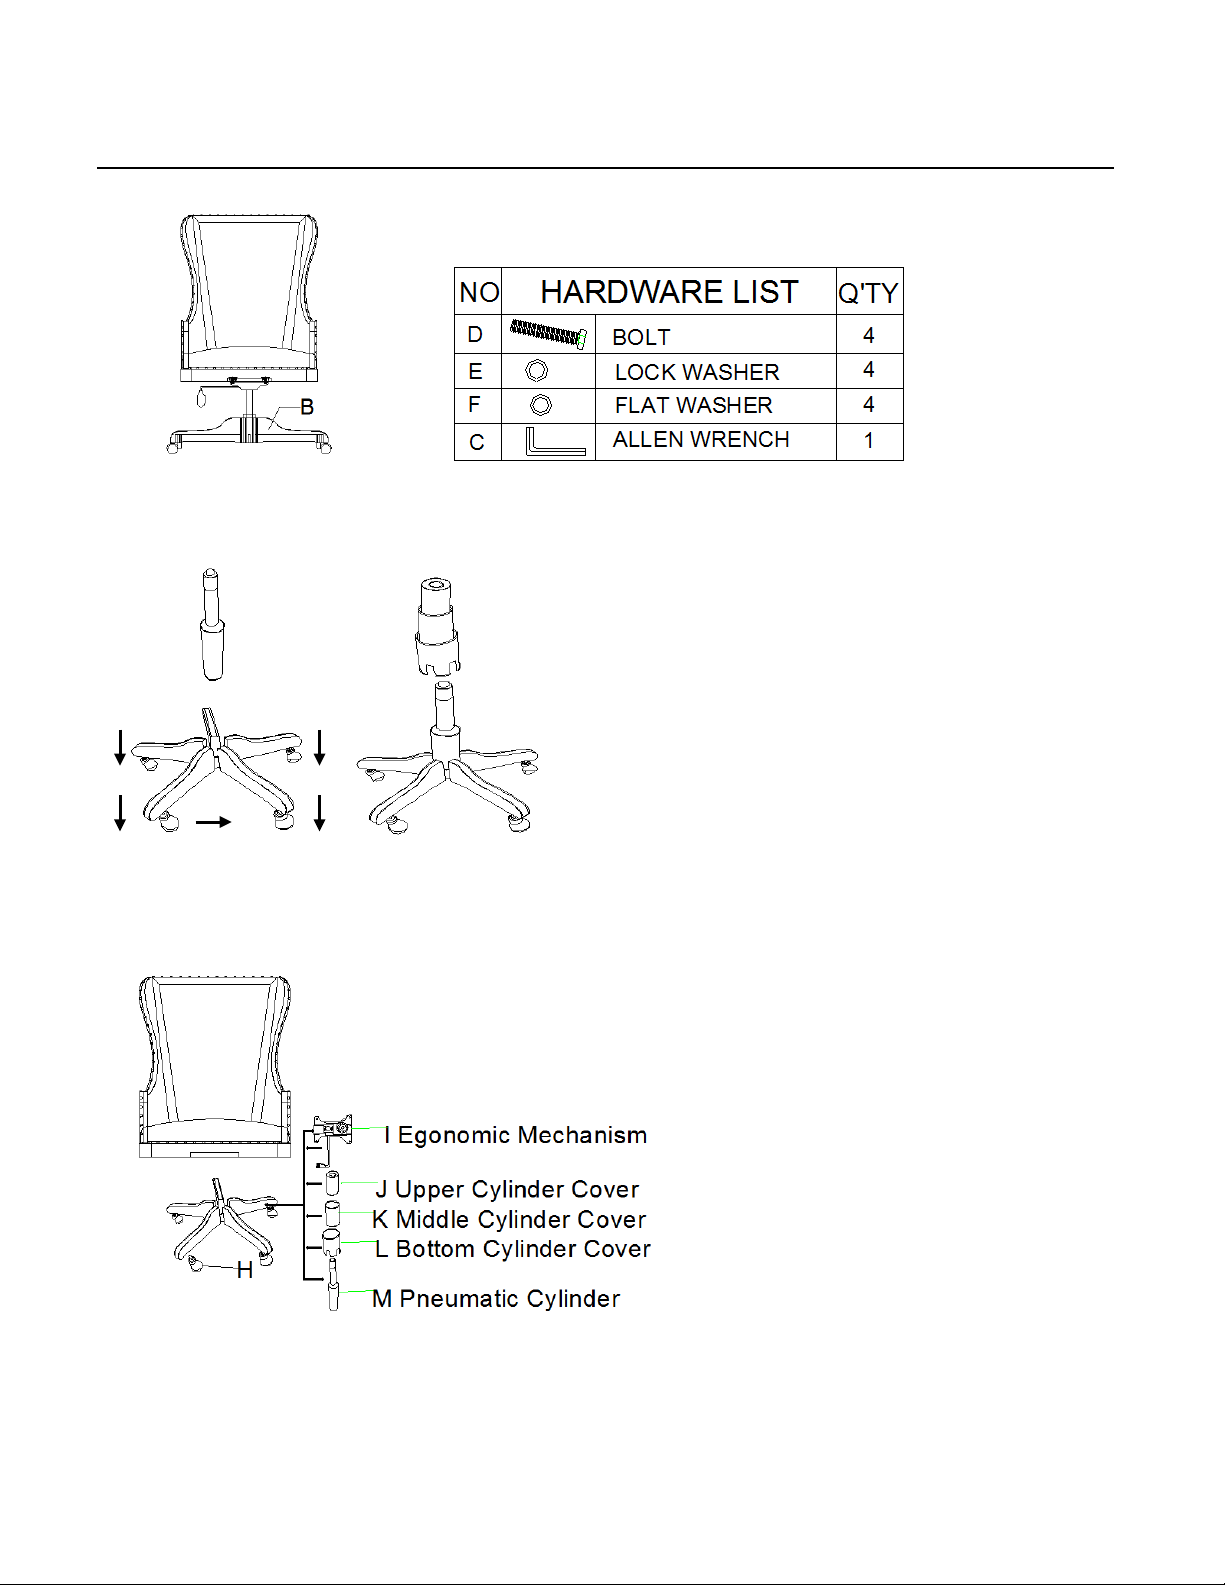
ASSEMBLY INSTRUCTION
1. Insert the Pneumatic Cylinder into the base, this is
3. Place Cylinder cover over the cylinder
H
Diagram 3
Item#: 1618-30220-DKW Deconstructed Tilt Swivel Chair
*** Please ensure you have all parts indicated below prior to assembly.
This item should be assembled on a flat, soft surface to prevent from scratching the
finish while assembling.
a taper fit and no mechanical fastening is
required.(See Diagram 1)
2. Put slip sleeve onto the pneumatic cyl inder.
(See Diagram 2)
Note: Casters (H) are removable.
Diagram 1 Diagram 2
(see Diagram 3)
Page 2

2/2
4. Use the Allen Wrench (C) with 4 bolts (D), 4
lock washers (E), 4 Flat Washers (F), attach
5. Place the chair body onto the Cylinder. No
Seat height lever
To lower the seat:
Diagram 6
the ergonomic mechanism to the bottom of the
seat. (See Diagram 4)
Please note the correct direction to place the
tilting mechanism, follow the left diagram.
Diagram 4
mechanical fastening is necessary
because this is a taper fit. Now sit in the
chair. This will firmly secure the taper fit.
(See Diagram 5)
Diagram 5
You can lower, raise and tilting the seat rightly: (See Diagram 6)
The seat can be adjusted so that your feet are comfortably flat on the floor.
While seated, raised the seat height lever, the chair will lower
with your body weight. The seat height lever will lock into
place when your release the lever.
To raise the seat:
Move your weight slightly from the chair and raise the seat
height lever, the chair will raise when the lever is lifted. The
seat height lever will lock into place when your release the
lever.
Tilting the seat:
To tilt the chair back, pull out the seat height lever.
To lock the chair to prevent tilting, push the
seat height lever in.
Cleaning Instruction: Clean finished parts with a mild dishwashing liquid and water solution on a damp cloth.
Polish the finish with soft cloth and an industry recognized furniture polish
 Loading...