

Page 1
1/2
DISASSEMBLY INSTRUCTION
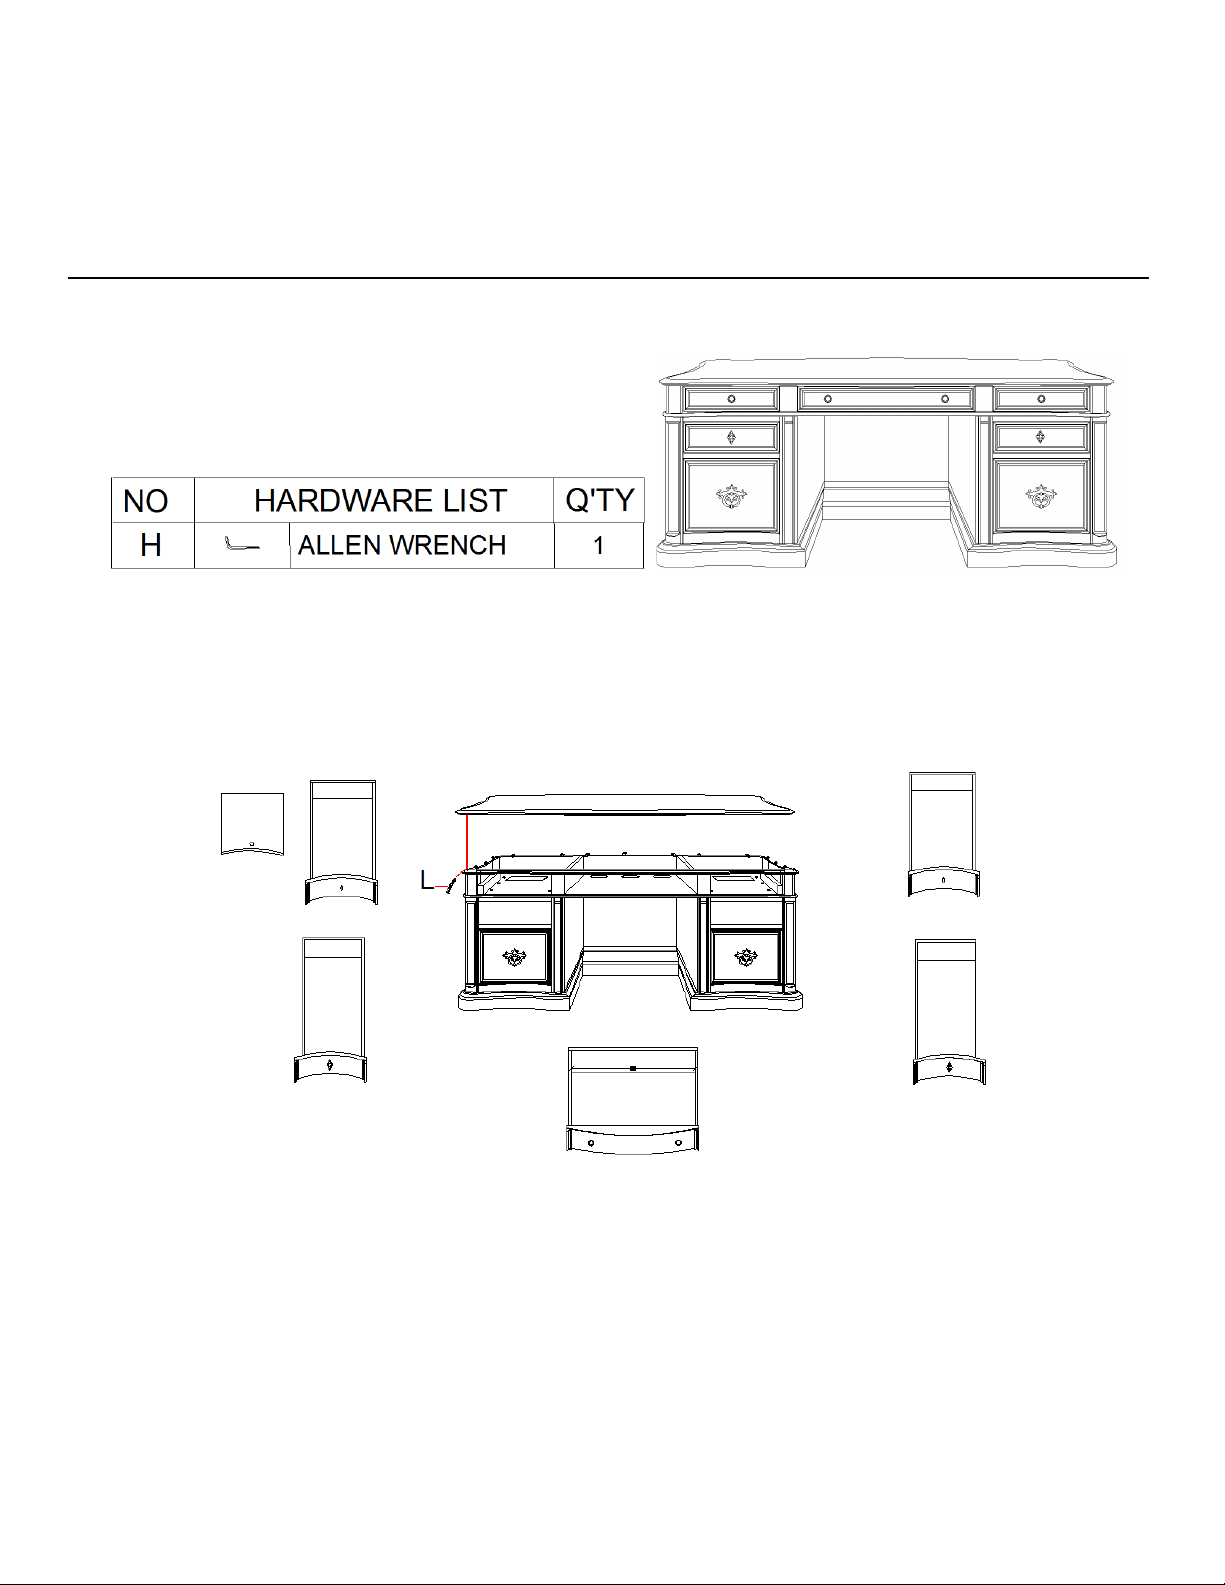
Item#: 5960-10563-MULTI St. Hedwig Executive Desk
Caution: Please read all instructions carefully before starting the disassembled process.
This unit is heavy and can best be with the help of two or more people.
For easier delivery, the desk can be taken apart as shown below.
Step 1: Take out all three top drawers and second drawers on both sides, loosen all screws (L) on
L-shaped metal plates, and remove top panel from desk(see Diagram 1).
Diagram 1
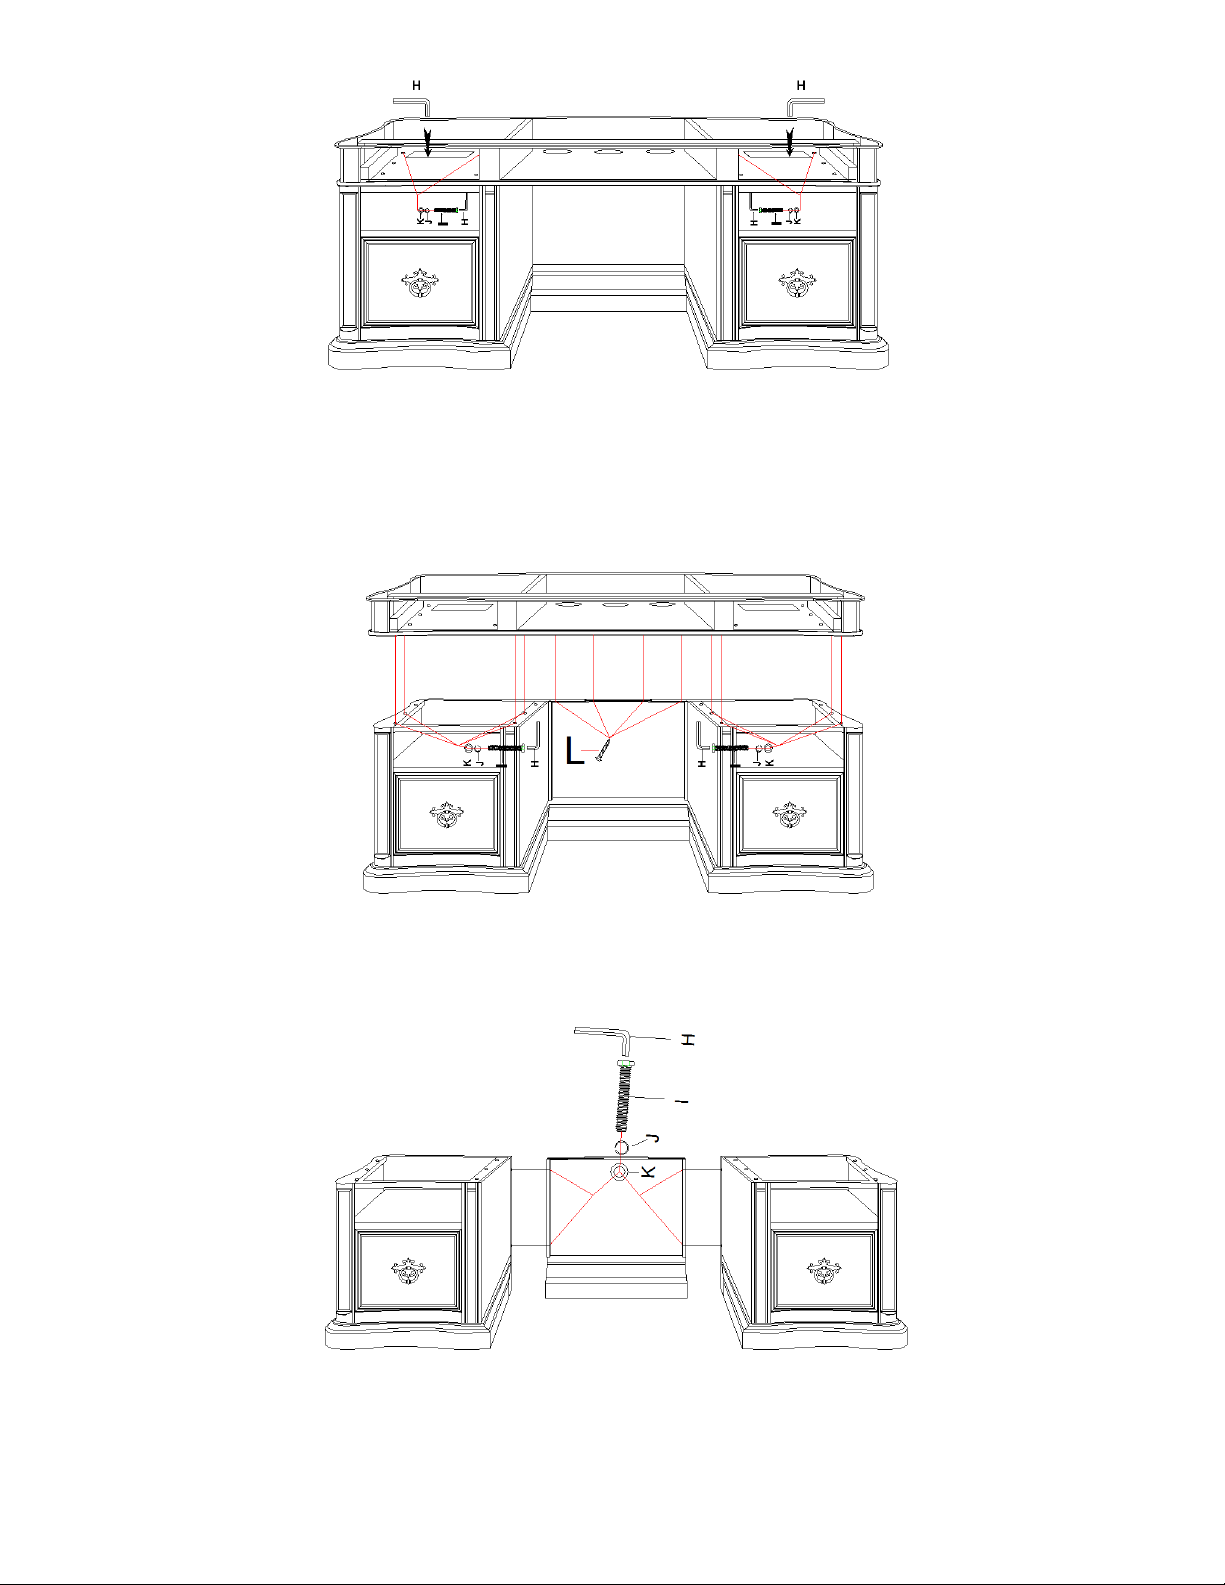
Step 2. Loosen 2 bolts (I), 2 lock washers (J), 2 flat washers (K) at wood cleats under left bottom panel
through the holes by using allen wrench (H), and then repeat the steps at right side(See
Diagram 2, arrow indicated).
.
Page 2
2/2
Diagram 2
Step 3: Loosen the remaining 4 bolts (I), 4 lock washers (J), 4 flat washers (K) attached at wood
cleats under left base by using allen wrench (H) from the bottom, repeat the steps at right
base, and loosen all screws (L) under back edged of top section, then take off the top
section(C) (see Diagram 3).
Diagram 3
Step 4: loosen 4 bolts (I), 4 lock washers (J), 4 flat washers (K) attached back panel (D) to the bases
with allen wrench (H) and separate back panel (D) by pulling it upright(see Diagram 4).
Diagram 4
Cleaning Instruction: Clean finished parts with a mild dishwashing liquid and water solution on
a damp cloth. Polish the finish with soft cloth and an industry recognized furniture polish.
D
C
 Loading...