

Page 1
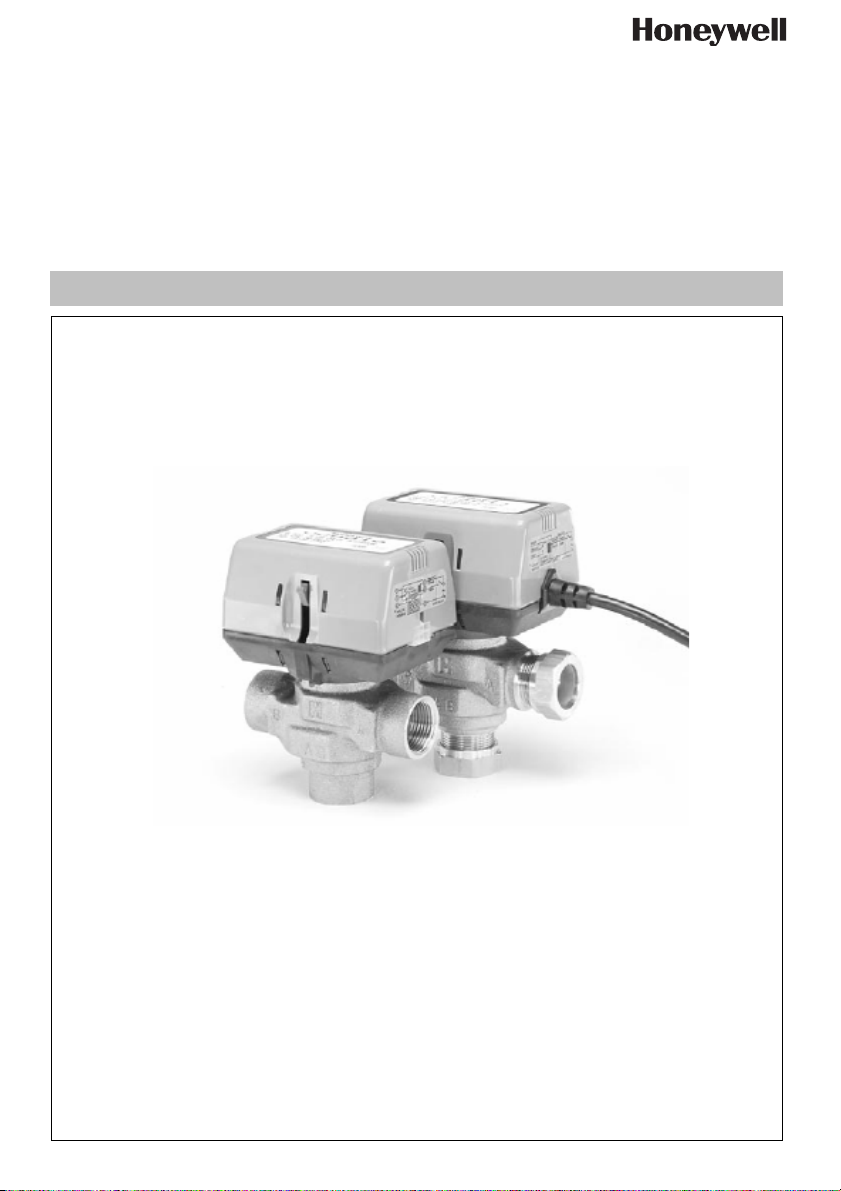
VC Series
Installation instruction • Einbauanleitung
Keep instructions for later use!
Anleitung zum späteren Gebrauch aufbewahren!
MU1H-2806GE25 R0107
3-Way Zone Valves
3-Wege Zonenventile
Page 2

MU1H-2806GE25 R0107 2 www.honeywell.com
Page 3

GB
1. Application ...................................4
2. Specifications ...............................4
3. Manual Opener ............................ 5
4. Installation ....................................5
5. Wiring ...........................................6
6. Checkout and service ..................7
D
1. Anwendungsbereich ....................8
2. Spezifikationen .............................8
3. Handöffner ...................................9
4. Einbau ..........................................9
5. Verdrahtung ...............................10
6. Probebetrieb und Wartung .........11
MU1H-2806GE25 R0107 3 www.honeywell.com
Page 4
GB
1. Application
The VC series 2-position hydronic valves are used in
domestic and small commercial applications to control
the flow of hot and/or cold water or glycol solution to
50% concentration. They consist of an actuator, valve
and a replaceable cartrige assembly.
These 3-Way valves are designed for ON-OFF control
and can be piped for either diverting or mixing valve
applications for domestic hot water service, in central
heating and/or cooling systems; or for individual room
temperature control (fan coil, radiator or convector
applications).
Depending on the model selected, they can be controlled by either a low or line voltage SPST or
SPDT controller, such as a room thermostat,
a chronotherm or other suitable two-position controller.
2. Specifications
The following specifications are nominal and conform to generally accepted industry standards. Honeywell is not
responsible for damages resulting from misapplication or misuse of its product.
Voltage 230V 50-60Hz, standard models. 24V 50-60Hz models are available on
request
Power Consumption 6 Watts Max. at nominal Voltage (during valve position change).
Use 24 V class 2 transformer. Provide 6 VA for transformer and connection
wire size.
Maximum duty Cycle 15 %
End switch rating 2.2 A inductive from 5 to 110 Vac,
1.0 A inductive above 110 to 277 Vac.
Min. DC switching capability: 5 mA @ 24 Vdc
Nominal timing Valve opens in 7 seconds ≅ 50 Hz (20% faster ≅ 60 Hz)
Electrical termination With integral 1 meter leadwire cable or with Molex™ connector
Operating ambient temperature 0...65°C
Shipping & storage temperature -40...+65°C
Atmosphere non-corrosive, non-explosive
Min. & max. fluid temperatures 1...95°C
Operating pressure differential Max. - 4 bar (400 kPa)
Pressure rating Static - 20 bar (2000 kPa)
Valve materials Body of bronze; cartridge of Ryton™ (polyphenylene sulphide) & Noryl™
Insulation class Double insulation
Protection class IP40
Approval CE
Burst - 100 bar
(polyphenylene oxide); O-ring seals of EPDM rubber; stainless steel stem
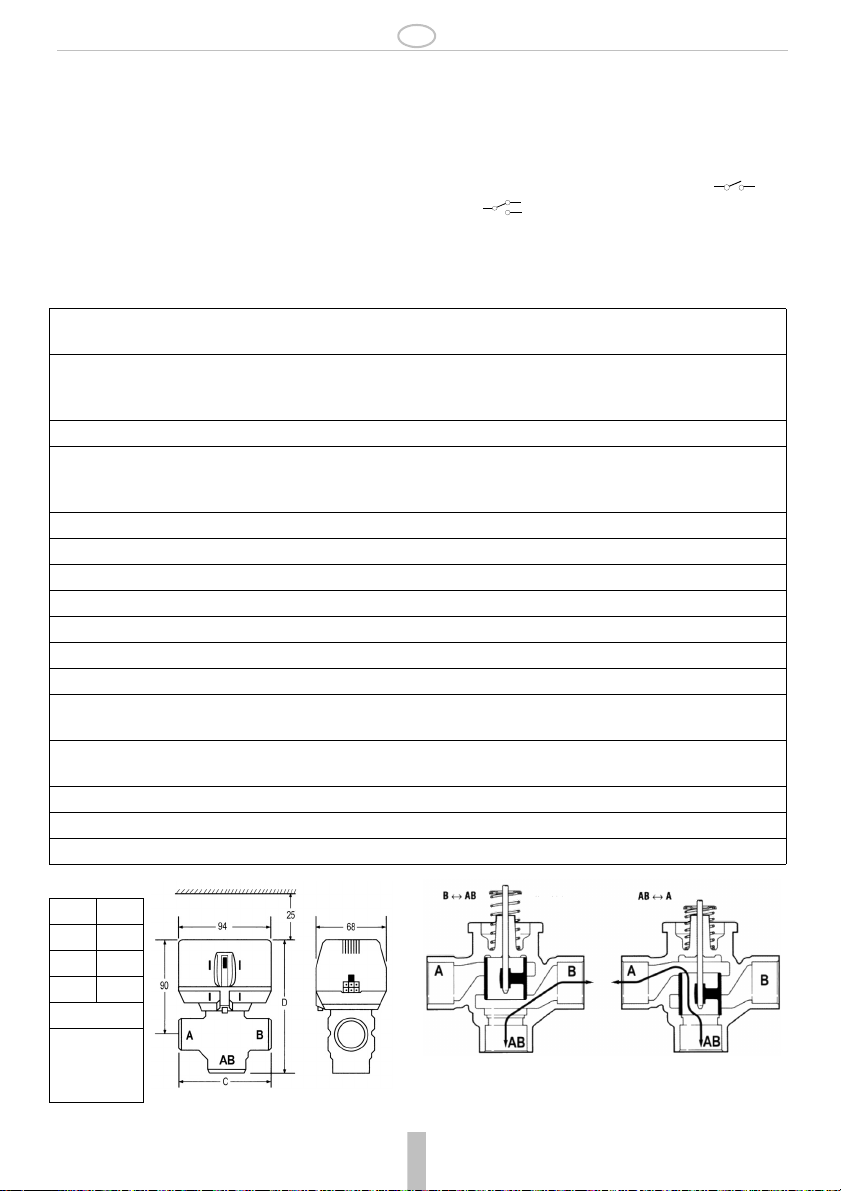
Open
CD
98 136
94 130
94 130
94 136
94 136
Port A normally closed without actuator
Fig. 1: Dimensions (mm) Fig. 2: Flow direction
MU1H-2806GE23 R0107 4 Honeywell GmbH
B-AB
Open
A-AB
Page 5

GB
3. Manual Opener
The manual opener (Fig. 6) can be manipulated only
when in the up position. This must be done without
electrical hook-up. The motorized valve can be
opened by firmly pushing the white manual lever down
to midway and in. This holds the valve in the open position, and with auxiliary switch models the N.O. switch
is closed.
This "manual open" position may be used for filling,
venting, or draining the system, or for opening the
valve in case of power failure.The valve can be
restored manually to the closed position (stem up) by
depressing the white manual lever lightly and then
pulling the lever out. The valve and actuator will return
to the automatic position when power is restored.
Note:If the valve is powered open, it cannot be
manually closed
4. Installation
4.1 General notes
The following instructions refer to the version of VC
valve with BSPP thread. Other versions are available
on request. Refer to the boiler manufacturer's manual
for installation instructions and model number
WARNING:
The products are intended to be installed
by a trained, experienced service-person
and according to the RATINGS given in
the Instructions and on the product.
4.2 Before installing this product
1. Read these instructions carefully. Failure to follow
them could damage the product or cause a hazardous condition
2. Check and make sure the ratings of this product are
suitable for your application
3. Check the controller for SPDT or SPST output to
make sure it matches the valve actuator selected.
4. Always conduct a thorough checkout when installation is completed
5. Disconnect power supply before connecting wiring
to prevent electrical shock and equipment damage
4.3 Plumbing
1. While not necessary to remove the actuator from the
body, it can be removed for ease of installation.
2. You don't need any tool to remove the actuator. The
actuator head is automatically latched to the valve.
To remove, (Fig. 4) press up on the latch mechanism (1) located directly below the white manual
open lever with thumb. Simultaneously press the
actuator down towards the body with moderate
hand force and turn the actuator counter-clockwise
by 1/8 turn (45 degrees). Lift actuator off the valve
body.
3. The valve may be installed with flow from A to B, or
B to A (Fig. 2). The valve body may be plumbed in
any angle but not with the actuator below the horizontal level of valve body (Fig. 3). Make sure there
is enough room around the actuator for servicing or
replacement. Install the valve in a good location for
future maintenance, leaving an extra 25 mm head
clearance required to remove the actuator.
4. Prepare the pipes according to valve connections.
5. For compression fitted models, tighten the compression nuts enough to make a watertight seal.
Maximum torque limit is 45 Nm for the 22 mm
compression fitting, and 65 Nm for the 28 mm
compression fitting
- Take care not to over tighten
6. Either hold valve body in your hand (Fig. 5-A) or
attach adjustable spanner (38mm or 1-1/2") across
the hexagonal or flat faces on the valve body (Fig.
5-B). If assembly valve train on a bench, take care
not to deform body with vice. Do not place the raised
"H" logo between the jaws of the vice. Excess jaw
force can deform the body.
7. Install the actuator by reversing the process in (2).
4.4 Commissioning hydronic system
For trouble-free operation of the product, good installation practice must include initial system flushing,
chemical water treatment, and the use of fine system
side stream filter(s).
Put the VC actuator manual lever (Fig. 6) in the manual
open (middle) position to allow initial system flushing
with the actuator mounted. This operation must be
done without electrical hook-up
MU1H-2806GE23 R0107 5 Honeywell GmbH
Page 6

GB
A
B
Manual opener
X
Fig. 3: Valve mounting
position
Fig. 4: Removing the
actuator
Fig. 5: Valve mounting Fig. 6: The manual opener
5. Wiring
WARNING:
Electrical installation, cables and related
accessories must comply with local laws,
directives and competent authorities
Important
• Each 3-wire (SPDT) actuator must have individual
SPDT controller.
• On 24V systems, never jumper the valve coil terminals, even temporarily.This may damage the thermostat.
• The cable version must be used for mixed line
voltage and 24 Vac (Safety Extra Low Voltage)
applications
Table 1: Electrical termination - colours & pin numbers
Actuator type Cable models MOLEX™ models 2-way valve
3-WIRE
(for SPDT Controller)
2-WIRE + COM
(for SPST Controller)
Blue & Brown energised
(Black de-energised)
Blue & Black energised
(Brown de-energised)
Blue & Brown energised
(Brown & Black open)
Blue & Brown energised
(Brown & Black closed)
For controller action and electrical terminations, see
Tables 3 & 4.
Fig. 7 & 8 show wiring diagrams as printed on product
label for the Cable Model and Molex™ Model for use
with SPDT controller.
Fig. 9 & 10 show wiring connections with SPDT and
SPST controllers. Port "A" open and closed denote
valve open and closed positions respectively. On auxiliary switch models, terminal 4 (grey wire) contact
makes at the end of the Port A opening stroke. On
Molex™ connector models, valve & auxiliary switch
voltage must be the same to meet approval requirement
Pin # 2 & 3 energised
Pin # 6 de-energised
Pin # 2 & 6 energised
Pin # 3 de-energised
Pin # 2 & 3 energised
Pin # 3 & 6 open
Pin # 2 & 3 energised
Pin # 3 & 6 closed
Stem up
(A port closes)
Stem down
(B port closes)
Stem up
(A port closes)
Stem down
(B port closes)
MU1H-2806GE23 R0107 6 Honeywell GmbH
Page 7

Table 2: Electrical termination - contacts function
r
Terminal Cable models
Wire Colour
(See Fig. 7)
Actuator Brown
Black
Blue
Auxiliary switch
(optional)
White
Orange
Grey
GB
MOLEX™ models
(See Fig. 8)
3
6
2
5
1
4
Action
A - Closes
A - Open
Common
NC
COM
NO
5
2
M
4
1
PORT ‘A’
3
6
L
2
N
SW1
NC
SW3
NO
SW2
Cam
RLY1
5
1
4
3
6
L
M
2
N
Fig. 7: VC Actuator with 1 meter leadwire cable
for SPDT Controller
PORT ‘A’
Brown / Marrone / Marrón
NC
Controller
SPDT
NO
Black / Nero / Negro
L
N
Blue / Blu / Azul
Close / Chiude / Se cierra
Open / Apre / Se abre
3
6
2
SW1
SW2
Cam
5
1
4
6
3
Fig. 8: VC Actuator with Molex™ connector
for SPDT Controller
Brown / Marrone / Marrón
Controlle
SPST
Black / Nero / Negro
L
N
Blue / Blu / Azul
3
Close / Chiude / Se cierra
Open / Apre / Se abre
6
2
Fig. 9: VC Actuator for SPDT Controller Fig. 10: VC Actuator for SPST Controller
6. Checkout and service
6.1 Checkout
1. Raise the set point of the zone thermostat above
room temperature to initiate a call for heat. White
valve position lever should move.
2. For auxiliary switch models, observe all control
devices. The valve should open and the auxiliary
switch (if present) should close and make at the end
of the opening stroke to activate auxiliary equipment.
3. Lower the set point of the zone thermostat below
room temperature.
4. Observe the control devices. Port A should close
and all auxiliary equipment should stop.
Service
This valve should be serviced by a trained, experienced service technician.
1. If the valve is leaking, drain system OR isolate valve
from the system. Do not remove body from plumbing.
2. Check to see if the cartridge needs to be replaced.
3. If the motor or other internal parts of the actuator is
damaged, replace the entire actuator assembly
Note: Honeywell hydronic valves are designed and
tested for silent operation in properly designed
and installed systems. However, water noises
may occur as a result of excessive water
velocity. Piping noises may occur in high temperature (100°C) systems with insufficient water
pressure.
Honeywell GmbH 7 MU1H-2806GE23 R0107
Page 8

D
1. Anwendungsbereich
Die 2-Positionen-Warmwasserventile der VC-Serie
werden in Wohnungen und kleinen Industrieanwendungen eingesetzt, um den Fluss von heißem und/oder
kaltem Wasser bzw. bis zu fünfzigprozentiger Glykollösung zu regeln. Sie bestehen aus einem Stellglied,
einem Ventil sowie einem auswechselbaren Filtereinsatz.
Diese 3-Wege-Ventile wurden für die An-Aus-Regelung
entwickelt. Sie können entweder für Anwendungen mit
Mischventilen in der häuslichen Warm-wasserversorgung, in zentralen Heiz- oder Kühlanlagen eingebaut
werden ; oder für individuelle Raumtemperaturregelung
(Heizlüfter, Heizkörper oder Konvektoren)
Abhängig vom gewählten Modell können die Ventile mit
Nieder- oder Netzspannung entweder durch einen
Einpoligen Ein-/Ausschalter (SPST )oder einen
einpoligen Umschalter (SPDT ), zum Beispiel ein
Raumthermostat, ein Chronotherm oder einen anderen
geeigneten Zweipunktregler, gesteuert werden.
2. Spezifikationen
Folgende Spezifikationen sind Nennwerte und entsprechen allgemein gültigen Industriestandards. Honeywell haftet
nicht für Schäden, die durch falsche Verwendung oder Zweckentfremdung seiner Produkte entstehen.
Spannung
Leistungsaufnahme
Maximales Schaltverhältnis
Endschalterbelastung
Nenn-Schaltzeit
Elektrische Anschlüsse
Betriebsraumtemperatur
Transport- und Lagertemperatur
Klima
Min. und max. Flüssigkeitstemperatu-
ren
Betriebsdruckdifferenz
Nenndruck
Ventilwerkstoffe
Isolierungsklasse
Schutzklasse
Zulassung
230V 50-60Hz, Standardmodelle. Modelle mit 24V 50-60Hz sind auf
Anfrage erhältlich
Max. 6 Watt bei Nennspannung (bei Wechsel der Ventilspannung).
Transformator 24 V Klasse 2 verwenden. 6 VA für Transformator und
Anschlusskabelgröße vorsehen.
15 %
2,2 A induktiv bei 5 bis 110 VAC, 1,0 A induktiv bei 110 bis 277 VAC.
Min. Schaltfähigkeit (Gleichstrom): 5 mA @ 24 VDC
Das Ventil öffnet sich in 7 Sekunden ≅ 50 Hz (20% schneller ≅ 60 Hz)
Mit eingebautem Verbindungskabel (1 Meter) oder mit Molex™
Anschluss.
0...65°C
-40...+65°C
Nicht korrosiv, nicht explosiv
1...95°C
Max. - 4 bar (400 kPa)
Ruhend - 20 bar (2000 kPa)
Bruch - 100 bar
Ventilkörper: Bronze; Filtereinsatz: Ryton™ (Polyphenylensulfid) und
Noryl™ (Polyphenylenoxid); O-Ring-Dichtung: EPDM-Gummi; Ventilschaft: Edelstahl
Doppelte Isolierung
IP40
CE
CD
98 136
94 130
94 130
94 136
94 136
Anschluss A Ohne Stellglied normalerweise
MU1H-2806GE23 R0107 8 Honeywell GmbH
Fig. 1: Baumaße (mm) Fig. 2: Flussrichtung
Offen
B-AB
geschlossen
Offen
A-AB
Page 9

D
3. Handöffner
Der Handöffner (Abb. 6) kann nur in der oberen Position
betätigt werden.
dung unterbrochen werden.
Ventil kann geöffnet werden, indem man den weissen
Handhebel halb herunter drückt und ihn dann nach
innen drückt. So bleibt das Ventil in der geöffneten Stellung. Bei Modellen mit Hilfsschalter ist der N.O-Schalter
so geschlossen.
Diese "handgeöffnete" Ventilstellung kann zum
Befüllen, Entlüften oder zur trockenlegung des Ventils
genutzt werden. Bei Stromausfall kann das Ventil so
geöffnet werden. Das Ventil kann manuell wieder
geschlossen werden (Verschluss), indem man den
weißen Handhebel leicht eindrückt und dann herauszieht. Wenn wieder Strom fließt, kehren Ventil und Stellglied in die Automatikstellung zurück.
Hinweis:Wenn das Ventil durch elektrischen Strom
Dazu muss die elektrische Verbin-
Das motorgetriebene
offengehalten wird, kann es nicht manuell
geschlossen werden.
4. Einbau
4.1 Allgemeine Hinweise
Folgende Anweisungen beziehen sich auf die Version
des VC-Ventils mit BSPP-Gewindeverbindung. Speziell
gefertigte Ventile sind auf Anfrage erhältlich. Einbauhinweise und Modellnummer finden Sie im Handbuch des
Boilerherstellers.
WARNUNG:
Die Produkte sind für den Einbau durch
eine geschulte und erfahrene Fachkraft
konzipiert. Der Einbau muss gemäß den
Angaben und Hinweisen auf dem Produkt
erfolgen.
4.2 Vor dem Einbau dieses Produkts
1. Lesen Sie diese Hinweise aufmerksam. Bei Nichtbeachtung kann das Produkt beschädigt werden bzw.
eine Gefahrensituation eintreten.
2. Überprüfen Sie die angegebenen Werte und stellen
Sie sicher, dass diese für Ihre Anwendung geeignet
sind.
3. Überprüfen Sie, ob der Reglerausgang für SPDT oder
SPST ausgelegt ist, um sicherzustellen, dass der
Regler zum gewählten Stellglied passt.
4. Führen Sie nach Abschluss des Einbaus immer eine
gründliche Überprüfung durch.
5. Unterbrechen Sie die Stromversorgung, bevor Sie
elektrische Leitungen verbinden, um einen elektrischen Schlag und Beschädigungen des Systems zu
vermeiden.
4.3 Rohrverbindungen
1. Es ist nicht erforderlich, das Stellglied vom Ventilkörper zu entfernen, es erleichtert aber den Einbau.
Honeywell GmbH 9 MU1H-2806GE23 R0107
2. Das Stellglied kann ohne Werkzeuge abgenommen
werden. Der Kopf des Stellglieds ist automatisch am
Ventil eingeklinkt. Zur Entfernung (Abb. 4) muss der
Befestigungsmechanismus (1) mit dem Daumen
nach oben gedrückt werden. Der entsprechende
Hebel befindet sich direkt unterhalb des Hebels zur
Handöffnung. Gleichzeitig muss das Stellglied mit
moderater Kraft nach unten auf den Ventilkörper
gedrückt und im entgegengesetzten Uhrzeigersinn
um 1/8 gedreht werden (45 Grad). Dann kann das
Stellglied vom Ventilkörper abgehoben werden.
3. Das Ventil kann mit der Flussrichtung A nach B oder B
nach A eingebaut werden (Abb. 2). Der Ventilkörper
kann in beliebigem Winkel eingebaut werden, allerdings darf sich das Stellglied horizontal nicht unterhalb
des Ventilkörpers befinden (Abb. 3). Stellen Sie sicher,
dass am Stellglied genug Platz für einen Austausch
oder Wartungsarbeiten vorhanden ist. Bauen Sie das
Ventil so ein, dass Wartungsarbeiten leicht durchzuführen sind. An der Oberseite sind 25 mm Platz erforderlich, um das Stellglied abzunehmen.
4. Bereiten Sie die Rohre entsprechend der Ventilanschlüsse vor.
5. Bei Modellen mit Druckpassung sind die Druckmuttern so fest anzuziehen, dass eine wasserdichte
Abdichtung entsteht. Das maximale Drehmoment für
die 22mm-Druckpassung beträgt 45 Nm (65 Nm bei
28mm-Druckpassung).
- Achten Sie darauf, die Muttern nicht zu fest an-
zuziehen.
6. Halten Sie den Ventilkörper dabei in einer Hand (Abb.
5 A) oder setzen Sie einen verstellbaren Schraubenschlüssel (38 mm bzw. 1-1/2") an den Sechskant
oder die flache Seite des Ventilkörpers (Abb. 5 B). Bei
Einbau auf einer Werkbank ist darauf zu achten, den
Ventilkörper nicht mit dem Schraubstock zu deformieren. Achten Sie darauf, dass sich das hervorstehende "H"-Logo nicht zwischen den Spannbacken
befindet. Übermäßige Spannkraft kann zur Verformung des Ventilkörpers führen.
7. Der Einbau des Stellglieds kann erfolgen, indem die unter
(2) beschriebene Vorgehensweise umgekehrt wird.
Inbetriebnahme der Warmwasserheizung
Um den reibungsfreien Betrieb des Produkts zu gewährleisten, muss eine fachgerechte Inbetriebnahme eine
Spülung des Systems, eine chemische Behandlung des
Wassers und den Einsatz von feinen Seitenstromfiltern
beinhalten.
Bringen Sie den Handhebel des VC-Stellglieds (Abb. 6)
in die (mittlere) Handöffnungsstellung, um eine erste
Systemspülung mit eingebautem Stellglied durchführen
zu können. Dazu muss die elektrische Verbindung unterbrochen werden.
Page 10

D
A
B
Manual opener
X
Fig. 3: Lage des Ventils Fig. 4: Entfernung des
Stellglieds
5. Verdrahtung
WARNUNG:
Elektrische Installationen, Kabel und Zusatzbauteile müssen örtlichen Gesetzen,
Richtlinien und behördlichen Vorschriften
entsprechen.
Wichtig
• Jedes SPTD-Stellglied (3 Anschlüsse) muss über
einen eigenen SPDT-Regler verfügen.
• Bei 24V-Systemen darf niemals der Anschluss der
Ventilspule überbrückt werden, auch nicht vorübergehend. Dabei kann das Thermostat beschädigt
werden.
• Der Kabeltyp muss für Anlagen mit Mischspannung
und 24 VAC (Sicherheits-Kleinspannung) geeignet
sein.
Table 1: Elektrische Anschlüsse - Farben und Pin-Nummern
Stellglied Kabel MOLEX™ Modelle 2-Wege-Ventil
Dreidrahtig
(SPDT-Regler)
Zweidrahtig +
COM (SPST-
Regler)
Blau und Braun unter Spannung
(Schwarz ohne Spannung)
Blau und Schwarz unter Span-
nung
(Braun ohne Spannung)
Blau und Braun unter Spannung
(Braun und Schwarz offen)
Blau und Braun unter Spannung
(Braun und Schwarz geschlos-
sen)
Fig. 5: Einbau des Ventils Fig. 6: Manuelle Öffnung
Regelungsverhalten und elektrische Anschlüsse: siehe
Tabellen 3 und 4.
Abb. 7 und 8 zeigen Schaltpläne, die auf den Produktschildern von Kabeln und Molex™ Modellen, die für
SPTD-Regler geeigenet sind, zu finden sind.
Abb. 9 und 10 zeigen mögliche Schaltungen mit SPDTund SPST-Reglern. Port "A" zeigt an, ob das Ventil
geöffnet oder geschlossen ist. Bei Modellen mit Hilfsschalter erfolgt durch Anschluss 4 (grauer Draht) ein
Kontakt am Ende des Öffnungsvorgangs an Port A. Bei
Modellen mit Molex™ Anschluss muss die Spannung
an Ventil und Hilfsschalter identisch sein, um die Zulassung zu erhalten.
Pin 2 und 3 unter Spannung
Pin 6 ohne Spannung
Pin 2 und 6 unter Spannung
Pin 3 ohne Spannung
Pin 2 und 3 unter Spannung
Pin 3 und 6 offen
Pin 2 und 3 unter Spannung
Pin 3 und 6 geschlossen
Schaft oben
(Anschluss a geschlossen)
Schaft unten
(Anschluss B geschlossen)
Schaft oben
(Anschluss a geschlossen)
Schaft unten
(Anschluss B geschlossen)
MU1H-2806GE23 R0107 10 Honeywell GmbH
Page 11

Table 2: Elektrische Anschlüsse - Kontaktfunktionen
r
Anschluss Kabeltyp
Farbe des Drahts
(siehe Abb. 7)
Stellglied Braun
Schwarz
Blau
Hilfsschalter
(optional)
Weiß
Orange
Grau
D
MOLEX™ Modelle
(siehe Abb. 8)
Verhalten
3
6
2
5
1
4
A - geschlossen
A - Geöffnet
Common
NC
COM
NO
5
2
PORT ‘A’
3
6
SW2
2
SW1
Cam
RLY1
L
N
NC
SW3
NO
M
4
1
5
1
4
3
6
L
M
2
N
Fig. 7: VC-Stellglied mit 1 Meter Anschlusskabel für
SPDT-Regler
PORT ‘A’
Brown / Marrone / Marrón
NC
Controller
SPDT
NO
Black / Nero / Negro
L
N
Blue / Blu / Azul
Close / Chiude / Se cierra
Open / Apre / Se abre
3
6
2
SW1
SW2
Cam
5
1
4
6
3
Fig. 8: VC-Stellglied mit Molex™ Anschluss für
SPDT-Regler
Brown / Marrone / Marrón
Controlle
SPST
Black / Nero / Negro
L
N
Blue / Blu / Azul
3
Close / Chiude / Se cierra
Open / Apre / Se abre
6
2
Fig. 9: VC-Stellglied für SPDT-Regler Fig. 10: VC-Stellglied für SPST-Regler
6. Probebetrieb und Wartung
6.1 Probebetrieb
1. Stellen Sie den Sollwert des Zonenthermostats auf
einen Wert oberhalb der Raumtemperatur, um einen
Heizvorgang auszulösen. Der weiße Ventilstellungshebel sollte sich bewegen.
2. Bei Modellen mit Hilfsschalter müssen alle Regeleinrichtungen beobachtet werden. Das Ventil sollte sich
öffenen und der Hilfsschalter (wenn vorhanden)
sollte sich am Ende des Öffnungsvorgangs
schließen, um die Hilfseinrichtungen zu aktivieren.
3. Stellen Sie den Sollwert des Zonenthermostats auf
einen Wert unterhalb der Raumtemperatur.
4. Beobachten Sie die Regeleinrichtungen. Anschluss
A sollte sich schließen und alle Hilfseinrichtungen
sollten deaktiviert werden
6.2 Wartung
Dieses Ventil sollte von einem geschulten und erfahrenem Wartungstechniker gewartet weden.
1. Wenn das Ventil leckt, muss das Ventil entleert
werden ODER vom System abgekoppelt werden.
Der Ventilkörper darf nicht von der Rohrleitung
entfernt werden.
2. Der Filter muss überprüft und ggfs. ausgetauscht
werden.
3. Falls der Motor oder andere Einzelteile des Stellglieds beschädigt sind, muss das gesamte Stellglied
ausgetauscht werden.
Hinweis:Heizungsventile von Honeywell sind so konzi-
piert und getestet worden, dass in fachgerecht
installierten Systemen ein geräuschloser
Betrieb gewährleistet ist. Allerdings sind
Wassergeräusche durch zu hohe Wassergeschwindigkeiten möglich. Bei unzureichendem
Wasserdruck und hohen Temperaturen
(100°C) können Leitungsgeräusche auftreten.
Honeywell GmbH 11 MU1H-2806GE23 R0107
Page 12

A
Honeywell Austria
Ges.m.b.H.
Handelskai 388
1023 Wien
T (01) 72 78 00
F (01) 72 78 08
www.honeywell.at
B
Honeywell SA-NV
Hermes Plaza
Hermeslaan 1H
B-1831 Diegem
Tel.: +32 2 728 23 86
Fax.: +32 2 728 26 97
BG
Honeywell EOOD
14, Iskarsko Chaussee
POB 79
1592 Sofia
T (02) 79 40 27
F (02) 79 40 90
CH
Honeywell AG
Honeywell-Platz 1
8157 Dielsdorf
T (01) 8 55 24 24
F (01) 8 55 24 25
www.honeywell.ch
CZ
Honeywell spol., s r.o.
Na Strži 65/1702
140 00 Praha 4
T (02 42) 44 21 11
F (02 42) 44 21 21
www.honeywell.cz
D
Honeywell GmbH
Vertriebsbüro Haustechnik
Hardhofweg
74821 Mosbach
T (0 18 01) 46 63 00
F (0 29 32) 98 83 46
www.honeywell.de/haustechnik
DK
Honeywell A/S
Strandvejen 70
2900 Hellerup
T 39 55 55 55
F 39 55 55 51
www.honeywell.dk
E
Honeywell S.A.
Josefa Valcárcel, 24
28027 Madrid
T 913 13 61 00
F 913 13 61 27
www.honeywell.es
F
Honeywell SA
72, Chemin de la Noue
74380 Cranves-Sales
T (04) 50 31 67 30
F (04) 50 31 67 40
www.honeywell.fr
FIN
Honeywell OY
Ruukintie 8
02320 Espoo 32
T (09) 3 48 01 01
F (09) 34 80 12 34
www.honeywell.fi
GB
Honeywell Control Systems
Ltd.
Honeywell House
Arlington Business Park
Bracknell, Berkshire
RG12 1EB
T (0 13 44) 65 60 00
F (0 13 44) 65 62 40
www.honeywell.com/uk
GR
Honeywell EPE
313 Irakliou Ave./
1-3 Viotias Str.
Neon Iraklion - Athens
T 12 84 80 49
F 12 84 80 55
I
Honeywell S.p.A.
Via Gobetti, 2b
20063 Cernusco sul Naviglio
T (02) 92 14 61
F (02) 92 14 68 88
www.honeywell.it
HU
Honeywell Kft.
Petneházy u. 2-4.
1139 Budapest
T (1) 4 51 43 00
F (1) 4 51 43 43
NL
Honeywell B.V.
Laarderhoogtweg 18
1101 EA Amsterdam Z.O.
T (0 20) 5 65 69 11
F (0 20) 5 65 66 00
www.honeywell.nl
NO
Honeywell A/S
Askerveien 61
Postboks 263
1372 Asker
T 66 76 20 00
F 66 76 20 90
www.honeywell.no
P
Honeywell Portugal Lda
Edificio Suecia II
Av do Forte Nr. 3 - Piso 3
2795 Carnaxide
T (02) 14 24 50 00
F (02) 14 24 50 99
RO
Honeywell Romania srl,
Calea Floreasca nr. 48 B,
Sector 1
014462 - Bucharest
T (02 12) 31 64 37
F (02 12) 31 64 39
PL
Honeywell Sp.z.o.o.
ul Domaniewska 41
02-672 Warszawa
T (0 22) 60 60 900
F (0 22) 60 60 901
www.honeywell.com.pl
Russia
ZAO Honeywell
4th floor, 24 Luzhniki,
Moscow 119048, Russia
T 095) 796 9800, 797 6301
F (095) 796 9894, 796 9893
SK
Honeywell Ltd
Mlynske Nivy 73
PO Box 75
82007 Bratislava 27
T (02) 58 24 74 00
F (02) 58 24 74 15
S
Honeywell AB
Storsätragränd 5
127 86 Skärholmen
T (08) 7 75 55 00
F (08) 7 75 56 00
www.honeywell.se
TR
Honeywell Otomasyon Ve
Kontrol
Sistemleri San. Ve Tic. A.S.
Cayiryolu Sok. (Halyolu)
Ucgen Plaza No: 7, Kat 5-67
Icerenkoy 81120 / Istanbul
T 65 75 66 10
F 65 75 66 37
www.honeywell.com.tr
UA
Honeywell
4, I. Lepse av.
03067 Kiev
T (0 38) 4 42 01 44 74
F (0 38) 4 42 01 44 75
Middle East Headquarters
Honeywell Middle East Ltd.
PO Box 6034
14th Floor, Golden Towers
Corniche Road
Sharjah
United Arab Emirates
T +971 65 72 61 43
F +971 65 72 61 65
Distributors & Africa
Headquarters
Honeywell S.p.A.
International Operations
Via Gobetti, 2b
20063 Cernusco sul Naviglio
T +39 (02) 92 14 61
F +39 (02) 92 14 68 88
South Africa
Honeywell Southern Area
(Pty) Ltd.
PO Box 66 74
Midrand 1685
T (01) 18 05 12 01
F (01) 18 05 15 54
www.honeywell.co.za
Asia Pacific Headquarters
Honeywell China Co., Ltd.
35F., Tower A, City Center,
100 Zun Yi Road,
Shanghai 200051, China
T +86 (21) 52 57 45 68
F +86 (21) 62 37 28 25
America
Honeywell Water Controls
65 Access Road
Warwick
Rhode Island 02886
USA
Phone: (401) 7 38-42 90
Fax: (401) 7 38-41 56
Manufactured for and on behalf of the Environmental
and Combustion Controls Division of Honeywell Technologies Sàrl, Ecublens, Route du Bois 37, Switzerland or by its Authorized Representative.
MU1H-2806GE25 R0107
January 2007
© 2007 Honeywell International Inc.
Subject to change without notice • All rights reserved
 Loading...