

Page 1
® U.S. Registered Trademark
Copyright © 2003 Honeywell International Inc.
All Rights Reserved
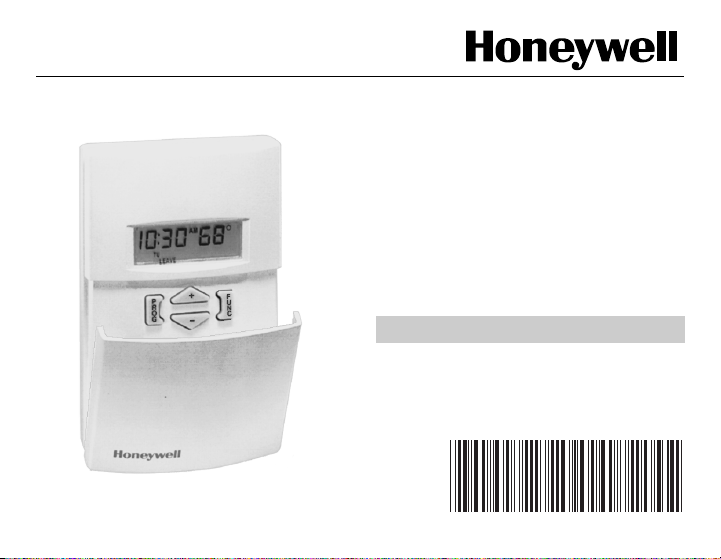
T4700 Chronotherm™
Electronic
Programmable
Line Voltage
Thermostat
OWNER’S GUIDE
69-1396-2
Page 2

Features
• Digital temperature sensing and
control for energy efficient
precision operation.
• Flexibility of 5-1-1 day or 7-day
programming
• Exceptional comfort control of
resistance-rated heating
equipment.
• Patented CoolSwitch™ design
offers a long service life.
69-1396—2 2
• Night and day setback of space
temperature can save up to 29
percent of the energy used to
heat a controlled zone.
• Offers up to a 12 percent energy
saving during comfort periods
compared with conventional bimetallic electric heating
thermostat, according to the
Electric Power Research
Institute.
Page 3

Welcome ... to the world of comfort and
energy savings with your new Honeywell
programmable thermostat.
Your new T4700 Chronotherm™
Programmable Electronic Line Voltage
Thermostat is designed to provide you with
reliable, precise temperature control. When
you follow the simple programming
instructions in this manual, your thermostat
automatically controls the temperature in
your home, saving energy and allowing you
to awake (or return home) to a comfortable
temperature in your home.
Please direct any questions about the
operation of this thermostat to Honeywell
Customer Assistance at 1-800-468-1502.
Contents
Features ................................................. 2
Specifications ......................................... 4
Programming Thermostat....................... 5
Initial Power-Up ................................. 5
Factory Set Programming ................. 5
Thermostat Reset .............................. 6
Homeowner Programming ................ 6
Setting the Current Day and Time ......... 7
Setting the Daily Schedule (7-Days........ 8
Copying Schedules to Another Day ....... 9
Overriding a Program ............................. 10
Programming Additional Functions ........ 10
Checkout ................................................ 12
Troubleshooting...................................... 12
Customer Assistance.............................. 13
One-Year Limited Warranty .................... 14
3 69-1396—2
Page 4

Specifications
Models:
T4700A: SPST; makes heating circuit
on temperature fall.
T4700B: DPST; makes heating circuit
on temperature fall. Breaks both
sides of 240 volt line with switch in
OFF position.
Temperature Ratings:
Operating Range: -20 to +104°F (-30°
to +40°C).
Control Range: 45 to 80°F (7 to 27°C)
in 1° increments. Factory set at 16°C
(61°F).
Humidity Ratings: 55 to 95 percent
RH, non-condensing.
69-1396—2 4
Wiring: 6 in. (150 mm) stranded copper
leadwires, suitable for connection to
aluminum wiring if approved special
service CO/ALR connectors are used.
Electrical Ratings (Noninductive):
3800W, 16A maximum;
500W, 2A minimum at 240V, 60 Hz.
Sensing Element: Electronic
thermistor.
Switching: Patented CoolSwitch®.
Page 5

Programming Thermostat
Initial Powerup
When the thermostat is first powered up (or
after eight hours of continuous power loss),
the display blinks for two seconds and then
undergoes a self-test — while 00E displays
for about 15 seconds.
This is followed by the display flashing
(1:00 PM); the internal checkout is
complete and the thermostat is ready to be
programmed.
To verify that the thermostat is turning on
the baseboard heater, press the (+) key
until the setpoint displayed exceeds the
room temperature.
The (°) symbol is flashing. Feel for warmth
in the area close to the heating element;
the unit should be starting to generate heat.
Press and hold the Prog key to return the
thermostat to the Run mode.
Factory Set Programming
The thermostat defaults to a normal nonprogrammable thermostat at power-up,
indicated with Hold appearing in the
display. Pressing the Prog key once enters
the programming mode. The thermostat is
preset with a factory set schedule for 7
days, see Table 1.
Table 1. Preset Factory Schedule
Event Time Temperature
WAKE 6:00 AM 70°F (21°C)
LEAVE 8:00 AM 61°F (16°C)
RETURN 6:00 PM 70°F (21°C)
SLEEP 10:00 PM 61°F (16°C)
5 69-1396—2
for 7-days.
Page 6

Thermostat Reset
The T4700 can be reset to its default
settings (Table 1) by inserting a bent paper
clip or similar wire into the small hole on the
front of the thermostat (next to to the (+)
key with the cover open). This resets only
the clock; the programmed schedule is
retained.
Homeowner Programming
IMPORTANT
The thermostat is flexible and can be
programmed to meet your lifestyle. Four
time periods are available:
WAKE is the time the thermostat turns on
the equipment after an energy saving
period. When deciding what time to set for
your WAKE period, include extra lead time,
depending on the outside temperature and
69-1396—2 6
After programming is complete, the
device reverts to normal Run mode
within five minutes, if no key was
pressed, and any new setting is
stored in its memory.
your equipment response time, to give the
equipment time to adjust the temperature
before you get up.
LEAVE is the time you can set for an
energy-saving temperature while you are
away at work or school.
RETURN is the time the thermostat turns
on the equipment after an energy saving
period. When deciding what time to set for
your RETURN period, include extra lead
time, depending on the outside
temperature and your equipment response
time to give the equipment time to adjust
the temperature before you arrive home.
SLEEP is the time you can set for an
energy-saving temperature while you are
sleeping.
IMPORTANT
Always press the keys with you fingertip or similar blunt tool. Sharp
instruments like pens and pencil
points can damage the keys.
See Tables 2 - 6 to program your
thermostat.
Page 7

Table 2. Setting the Current Day and Time.
Step Press This Key Display Shows Description
1 Displays day of the week.
2 Displays changed day of the week.
3 Displays hour of the day.
4 Displays changed hour of the day.
5 Displays minute of the day.
6 Displays changed minute of the
7 69-1396—2
day.
Page 8

Table 3. Setting the Daily Schedule (7-Days).
Step Press This Key Display Shows Description
1 Scrolling through the display shows
the first day to program, beginning
with Monday.
2 Displays WAKE time.
3 Displays changed WAKE time in
4 Displays WAKE setpoint
5 Displays changed WAKE setpoint
ten-minute increments.
temperature.
temperature.
6 Displays LEAVE time.
NOTE: Continue through LEAVE, RETURN, and SLEEP periods using the same procedure
to set the time and temperature for each period. To easily copy one day schedule to
another day, see Table 4.
69-1396—2 8
Page 9

Table 4. Copying Schedules to Another Day.
Step Press This Key Display Shows Description
1 Selects and displays the day to be
copied; for example, MOnday.
2 Displays COPY FROM day
(MOnday).
3 Displays COPY TO day (TUesday).
4 Enters the program.
(NOTE: Repeat sequence to copy
additional days.)
NOTE: To exit the programming mode: 1) press and hold the Prog key for three seconds and
the display returns to Run mode, or 2) during the programming session, after five minutes
elapsed time with no program change, the display reverts to Run mode. This does not
change any of the programmed steps. Simply keep pressing the Prog key until you arrive
at the desired mode.
9 69-1396—2
Page 10

Table 5. Overriding a Program.
Step Press This Key Display Shows Description
Temporarily Overriding a Program
Temporary
(TEMP)
Mode
Indefinitely Overriding a Program
Hold
(HOLD)
Mode
Changes to TEMPorary mode and
controls at a new temperature until
the next scheduled event (for
example, RETURN).
Changes to HOLD mode and controls
at the HOLD temperature indefinitely.
Increases or decreases the HOLD
temperature.
Changes from the HOLD mode to the
RUN mode.
Programming Additional
Functions
To change display or function (for example,
69-1396—2 10
to °C or °F temperature setting, or to 7-day
or 5-1-1 programming), see Table 6.
Page 11

Table 6. Programming Additional Functions.
Function Press This Key Display Shows Description
Begin
sequence to
convert
display
or mode.
Press and hold both the Prog and
Func keys. Initially a random fourdigit/letter display occurs (for
example, FF FF). Continue to
press Prog key until temperature
symbol appears.
Convert to °C
or °F.
Convert 5-1-1
to 7 day.
Press Prog key a second time to
display °C.
Use (+) key to change to °F if
desired (or °F to C°).
Press Prog key a third time to
display 511d.
Press (+) key to change mode to
7-day programming (or back to 51-1 programming). Then adjust
using the (+) or (-) keys.
NOTE: To exit the programming mode: 1) press and hold the Prog key for three seconds and
the display returns to Run mode, or 2) during the programming session, after five minutes
elapsed time with no program change, the display reverts to Run mode. This does not
change any of the programmed steps. Simply keep pressing the Prog key until you arrive
at the desired mode.
11 69-1396—2
Page 12

Checkout
After initial thermostat powerup (or after
eight hours of continuous power loss), the
display blinks for two seconds, then runs a
self-test (when 00E displays) for 15
seconds. When the internal self-test
checkout is complete, the display flashes
(1:00 PM) and the thermostat is ready to be
programmed.
1. Press the (+) key until the setpoint
displayed exceeds the room temperature to verify that the thermostat is
turning on the baseboard heater.
2. When the (°) symbol is flashing, feel
for warmth near the heating element
that indicates that the unit is generating heat.
3. Press and hold the Prog key until
the thermostat returns to the RUN
mode.
Troubleshooting
Display Code Cause Action
Oload Connected load
06E Power failure
Missing segment
or other abnormal
display.
69-1396—2 12
exceeds 3800W.
detected.
Unknown. Push Reset key to clear and reset clock. If problem
Ensure total baseboard wattage connected does
not exceed 3800W. A fire hazard exists if wattage
exceeds 3800W. Push Reset key to clear and reset
clock.
Push Reset key to clear and reset clock.
persists, call Honeywell Customer Response
Center at 1-800-468-1502.
Page 13

Customer Assistance
Please direct any questions about the operation of this thermostat to Honeywell Customer
Assistance at 1-800-468-1502, Monday-Friday, 7:00 a.m. - 5:30 p.m. Central time.
13 69-1396—2
Page 14

Limited One-Year Warranty
Honeywell warrants this product, excluding battery, to be free from defects in the workmanship or
materials, under normal use and service, for a period of one (1) year from the date of purchase by the
consumer. If, at any time during the warranty period, the product is defective or malfunctions, Honeywell
shall repair or replace it (at Honeywell’s option) within a reasonable period of time.
If the product is defective,
(i) return it, with a bill of sale or other dated proof of purchase, to the retailer from which you purchased
it, or
(ii) package it carefully, along with proof of purchase (including date of purchase) and a short description
of the malfunction, and mail it, postage prepaid, to the following address:
Honeywell Return Goods Canada:Honeywell Limited/Honeywell Limitée
Dock 4 MN10-3860 Product Services ON15-FFE
1885 Douglas Dr N 740 Ellesmere Road
Golden Valley, MN 55422 Scarborough, Ontario M1P 2V9
This warranty does not cover removal or reinstallation costs. This warranty shall not apply if it is shown by
Honeywell that the defect or malfunction was caused by damage which occurred while the product was in
the possession of a consumer.
Honeywell’s sole responsibility shall be to repair or replace the product within the terms stated above.
HONEYWELL SHALL NOT BE LIABLE FOR ANY LOSS OR DAMAGE OF ANY KIND, INCLUDING ANY
INCIDENTAL OR CONSEQUENTIAL DAMAGES RESULTING, DIRECTLY OR INDIRECTLY, FROM
ANY BREACH OF ANY WARRANTY, EXPRESS OR IMPLIED, OR ANY OTHER FAILURE OF THIS
PRODUCT. Some states do not allow the exclusion or limitation of incidental or consequential damages,
so this limitation may not apply to you.
69-1396—2 14
Page 15

THIS WARRANTY IS THE ONLY EXPRESS WARRANTY HONEYWELL MAKES ON THIS PRODUCT.
THE DURATION OF ANY IMPLIED WARRANTIES, INCLUDING THE WARRANTIES OF
MERCHANTABILITY AND FITNESS FOR A PARTICULAR PURPOSE, IS HEREBY LIMITED TO THE
ONE YEAR DURATION OF THIS WARRANTY. Some states do not allow limitations on how long an
implied warranty lasts, so the above limitation may not apply to you.
This warranty gives you specific legal rights, and you may have other rights which vary from state to state.
If you have any questions concerning this warranty, please write Honeywell Customer Assistance Center,
1985 Douglas Dr, Golden Valley, MN 55422 or call 1-800-468-1502, Monday-Friday,
7:00 a.m. to 5:30 p.m., Central time. In Canada, write Retail Products ON15-02H, Honeywell Limited/
Honeywell Limitée, 35 Dynamic Drive, Scarborough, Ontario M1V4Z9.
15 69-1396—2
Page 16

Automation and Control Solutions
Honeywell International Inc. Honeywell Limited-Honeywell Limitée
1985 Douglas Drive North 35 Dynamic Drive
Golden Valley, MN 55422 Scarborough, Ontario
69-1396—2 G.H. Rev. 1-03 www.honeywell.com/yourhome
M1V 4Z9
Printed in U.S.A. on recycled
paper containing at least 10%
post-consumer paper fibers.
 Loading...