

Page 1

Honeywell
Honeywell
HD61 Series
Operation Manual
Color Dome Camera
OREAD AND KEEP THIS
OPERATION MANUAL
□igitaL
cai-DR
www.honeywellvideo.com
Page 2
CAUTION! TO REDUCE THE RISK OF ELECTRIC SHOCK, DO NOT REMOVE COVER (OR BACK).
NO USER-SERVICEABLE PARTS INSIDE. REFER SERVICING TO QUALIFIED SERVICE PERSONNEL.
Kxplanation of two Symbols
. User Information
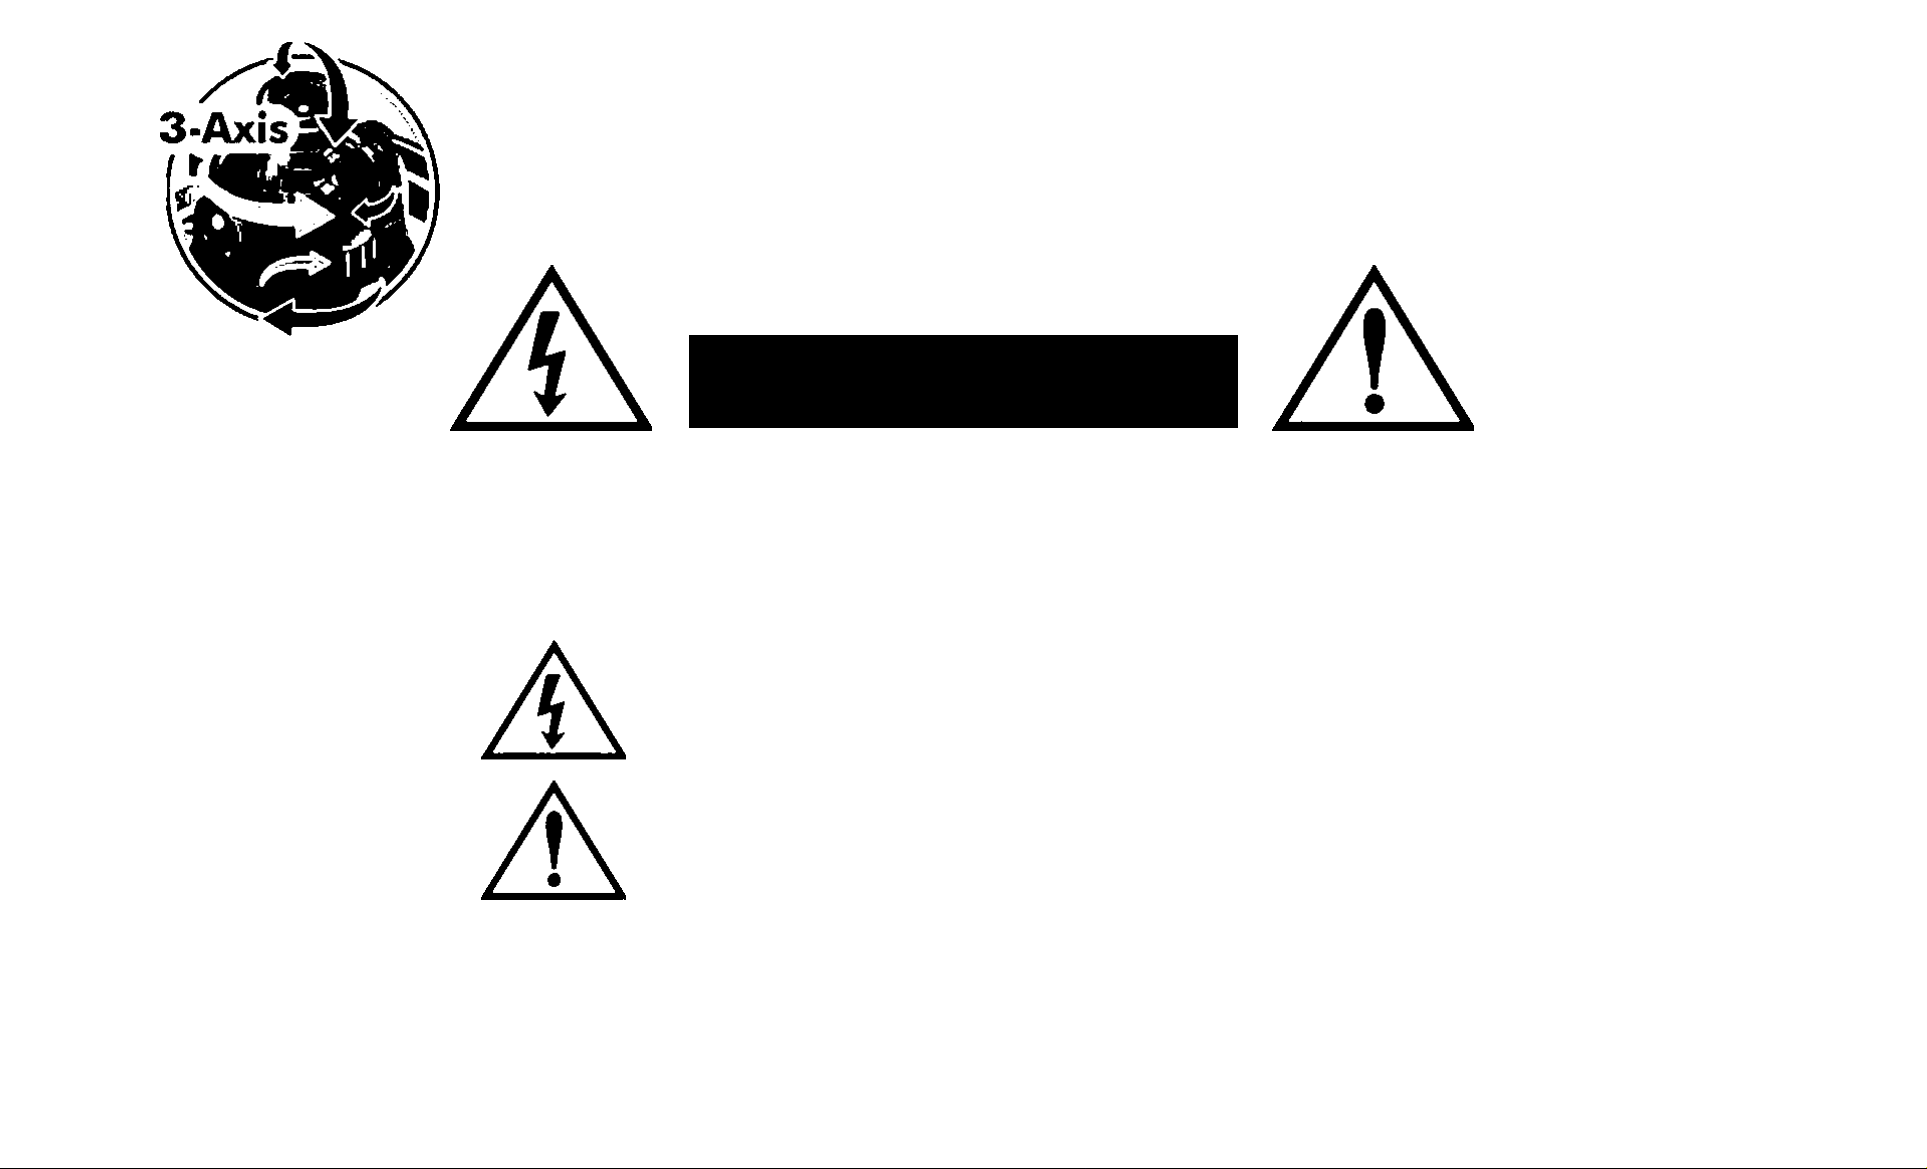
CAUTION
RISK OF ELECTRIC SHOCK
DO NOT OPEN
The lightning flash with arrowhead symbol, within an equilateral
triangle, is intended to alert the user to the presence of un-insulated
"dangerous voltage" within the product's enclosure that may be of
sufficient magnitude to constitute a risk of electric shock to persons.
The exclamation point within an equilateral triangle is intended to
alert the user to the presence of important operating and maintenance-
(servicing) instructions in the literature accompanying the appliance.
THE GRAPHIC SYMBOLS WITH SUPPLEMENTAL MARKING ARE ON THE BOLfOM OF THE SYSTEM.
2
« "WARNING-TO PREVENT FIRE OR SHOCK HAZARD. DO NOT EXPOSE THE UNIT TO RAIN OR MOISTURE"
o
a 2
1
Page 3

INFORMA TiO N
This e quipm ent has been tes ted and fou nd to co mply with li mits for a C lass A dig it al dev ice , pu rsua nt to par t 15
of the FCC Rule s.
These l imit s a re de sig ned t o p rovi de r easo nabl e pro tect ion a gai nst harm ful inte rfer ence when th e equ ipm ent is
operat ed in a c omm ercia l e nvir onme nt.
This e quipm ent gen erat es, u ses, an d ca n ra diate ra dio f requ ency en ergy and, if not ins tall ed an d us ed i n acc orda nce
with t he i nstr ucti on m anua l, m ay ca use harm ful inte rfer ence to radi o c ommu nica tion s.
Operat ion o f t his e qui pmen t in a r eside nti al a rea is l ikely to caus e h armfu l i nter feren ce i n w hich c as e the use r w ill be
requir ed t o cor rec t th e in terf eren ce a t th eir o wn e xpe nse.
WARNIN G
The man ufac tur er c ould voi d th e use r's auth ori ty t o ope rate th e eq uipm ent.
CAUTIO N • To p reven t e lect ric s hock and ris k o f fir e haz ards :
* Do NOT use pow er s ourc es e xcept for th at spe cif ied.
• Do NOT expo se this app lian ce t o rai n o r mo istu re.
This installation should be made by a qualified service person and should abide to all local codes.
¿
2
OÍ
o
o
U
1
Page 4

. Contents
Thank you for purchasing this COLOR VIDEO CAMERA.
Before using this camer a, plea se read thi s opera tion manual carefu lly to obta in
the bes t r esult an d kee p t his m anu al f or f utur e ref eren ce.
1. SAFETY INSTRUCTIONS 6. CONNECTIONS 10
2. PRECAUTIONS 7. NAME AND FUNCTIONS 11
s
6
2
a
4
1
3. FEATURES 8. OPERATING CAMERA 12
4. COMPOSITION 8 9. SPECIFICATIONS..................................36
5. INSTALLATION 10. TROUBLESHOOTING 38
Page 5

1. SAFETY INSTRUCTIONS
Read Instructions
Read all of the safet y and ope rat ing in stru ctio ns
before usi ng th e pr odu ct.
Retain Instructions
Save t his inst ruct ions for late r u se.
Cleaning
Unplug this appli ance from wall outlet bef ore
cleani ng. Do not use liquid clea ners or aeros ol
cleane rs. U se a dam p cl oth for cle anin g.
Water and Moisture.
Do not use this product near water or moistu re.
(For example, near a bathtub, wash bowl, kitchen
Installation
Do n ot place th is product on an unstable cart, stand,
or table. The product may fall causing serious injur y
to a c hild or a dult , an d da mage to the pro duct.
Use only with a cart or stand recommende d by the
manufa ctur er, or so ld w ith the prod uct .
Mounti ng should follow the manufact urer s Instructio ns,
and should use a mounting accessor y recommended
by man ufac ture r.
Power source
This product should be operated only from the type
of pow er s ource in dica ted o n t he m arki ng l abel.
6
If you are not sure of the type of power supplied to
sink, or laundr y tub, in a wet basement, or near a
swimmi ng po oi.e tc)
your ho me, co nsul t your dealer or local power
compan y.
2
Qt
9
o
u
1
Page 6

Handling
2, PRECAUTIONS
¿
O Do n ot d isas sembl e t he ca mer a an d nev er t ouch
parts i nsi de t he ca mer a.
O Do n ot d rop the camer a o r su bjec t it to s hock s
and vi brat ions to avoi d po ssib le da mage .
O Whe n at tach ing or removing the lens, handle
with care in order to that moisture and dust do
not en ter the camer a.
Installation and storage
O
Do no t po int the came ra a t th e su n. T his c ould
damage the cam era wheth er i t i s ope rat ing o r no t.
C Do n ot in sta ll t he c amera wh ere the tempe rat ure
O Be sure the ambient temperatur e is less than
40'c in ins tall atio n inten ded fo r long te rm
contin uous ope rati on.
O Avoi d in stal ling in a hu mid o r d usty plac e.
O Avoi d in stal ling in p lac es w here ther e ar e
strong mag neti c f ields and ele ctric si gnals .
O Avoi d in stal ling in p lac es w here the cam era
would b e s ubje ct t o st rong vibr ati ons.
O Neve r ex pose the cam era t o r ain a nd water .
9
o
y
1
could e xcee d th e a llow able ran ge.
Page 7

3-Axis
3. FEATURES
High Sensitivity 1/3 Inch Sony Super HAD CCD
Min. Illumination (Fl .2,30 IRE); 0.1 Lux (Color)
0.0 Lux (IR LED On)
Day & Night (Programmable)
OSD (On Screen Display)
High Performance Menus For Functions
• Privacy Zone Selectable (4 Programmable Zone)
• Motion Detection Selectable (64 Programmable Zone)
• Sharpness Enhanced Adjustable
• Flickerless Selectable
• Gamma Enhanced Selectable
• BLC Zone Selectable (64 Programmable Zone)
¿
s
D
Oi
9
o
u
I
Page 8

4. COMPOSITION
Operation Manual
Guide Pattern
<
2
C£
o
1
8
I jSgBsn
Service Monitor Cable
Mounting Screw
J—i—CB
Page 9
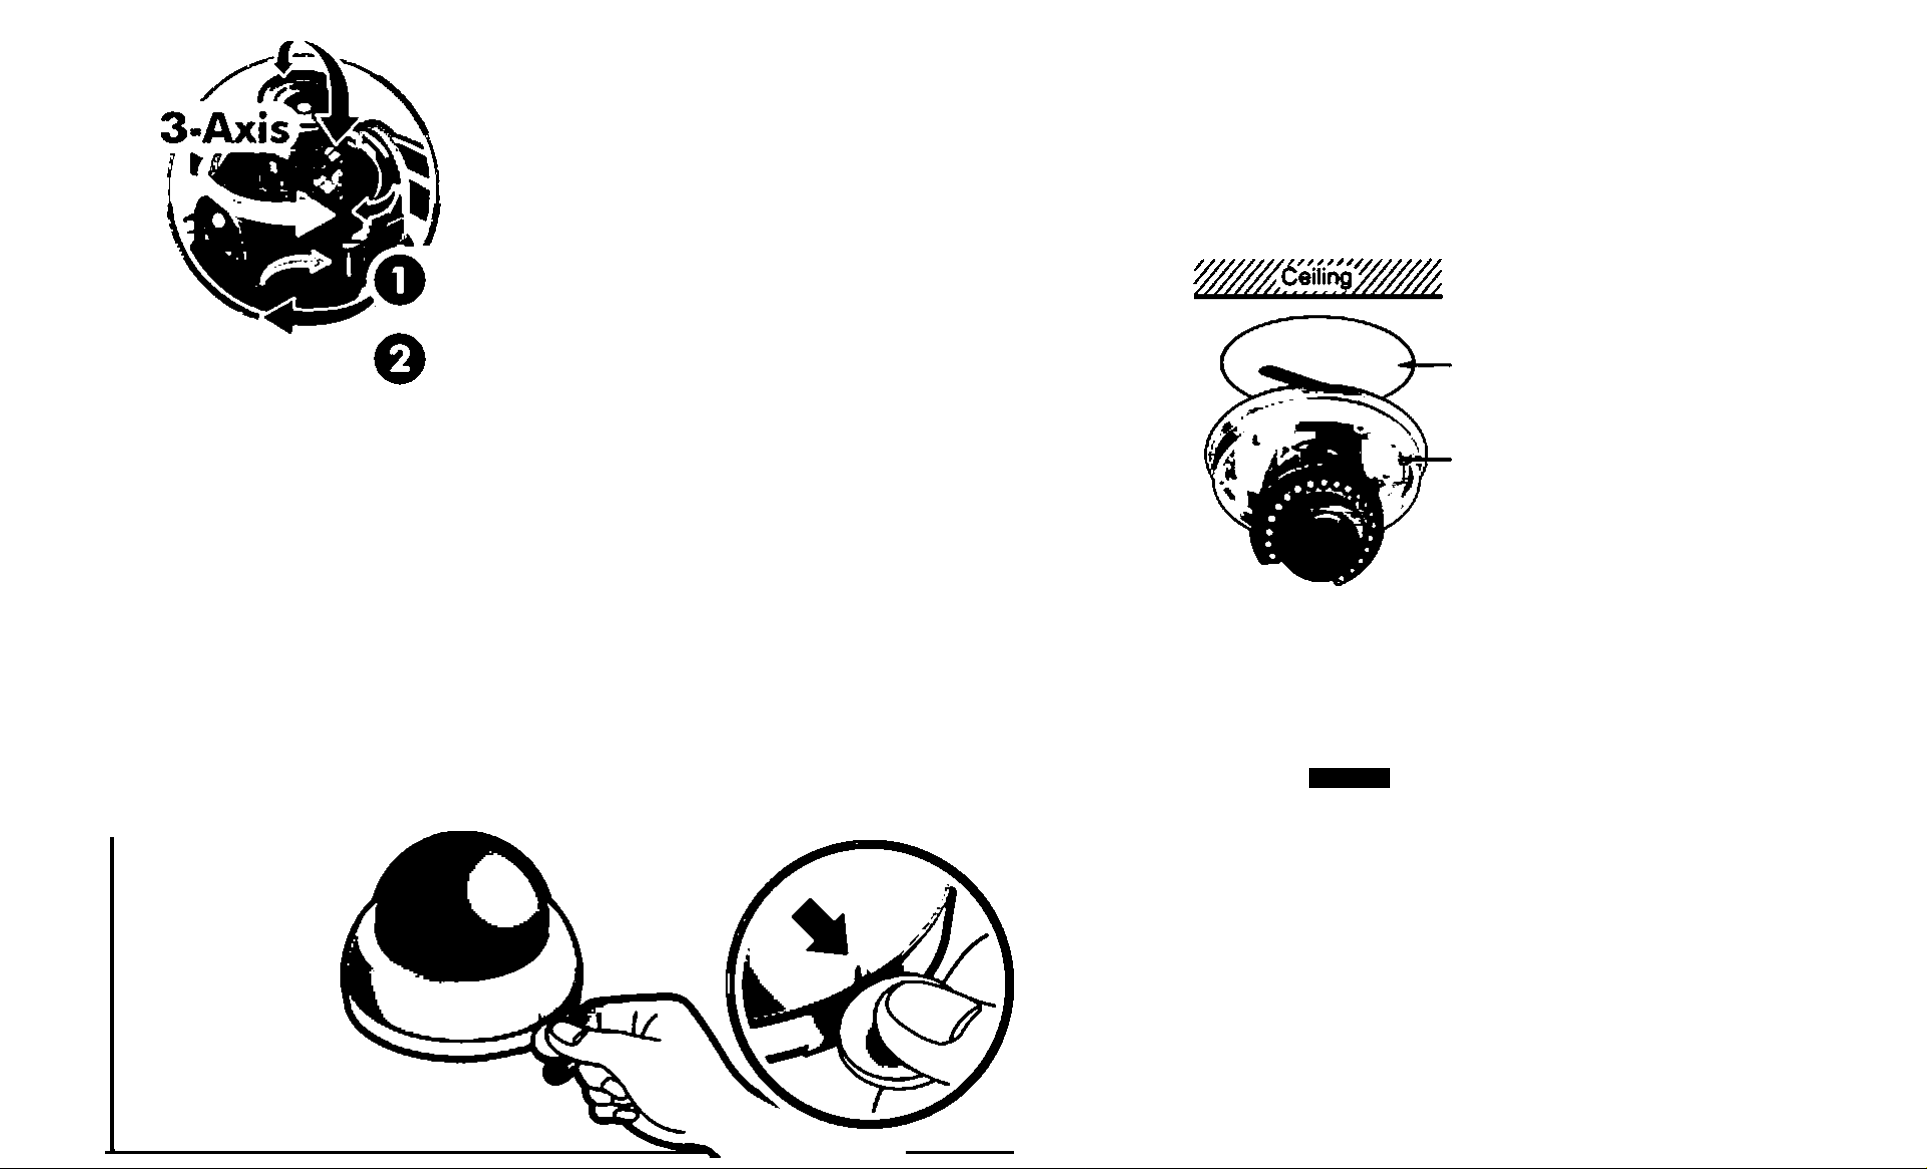
5. INSTALLATION
Stick the guide pattern on the wall or ceiling.
Drill four holes according to the guide pattern then
insert anchors into the drilled holes.
O Draw out power / video wires to the connecting places.
O Fixed the camera to a celling using four screws.
Adjust desired focus and scene by turning and moving
the 3-axis camera bracket by hand.
O Put the dome cover over the base.
O Fix the dome cover on the base by covering.
iiir
Guide Pattern
Dome Base
Mounting
Screw
Dome Cover
<
A
NOTE
^ Insert coin to the side hole and
remove the dome cover by twist coin.
2
oe.
Q
u
1
Page 10
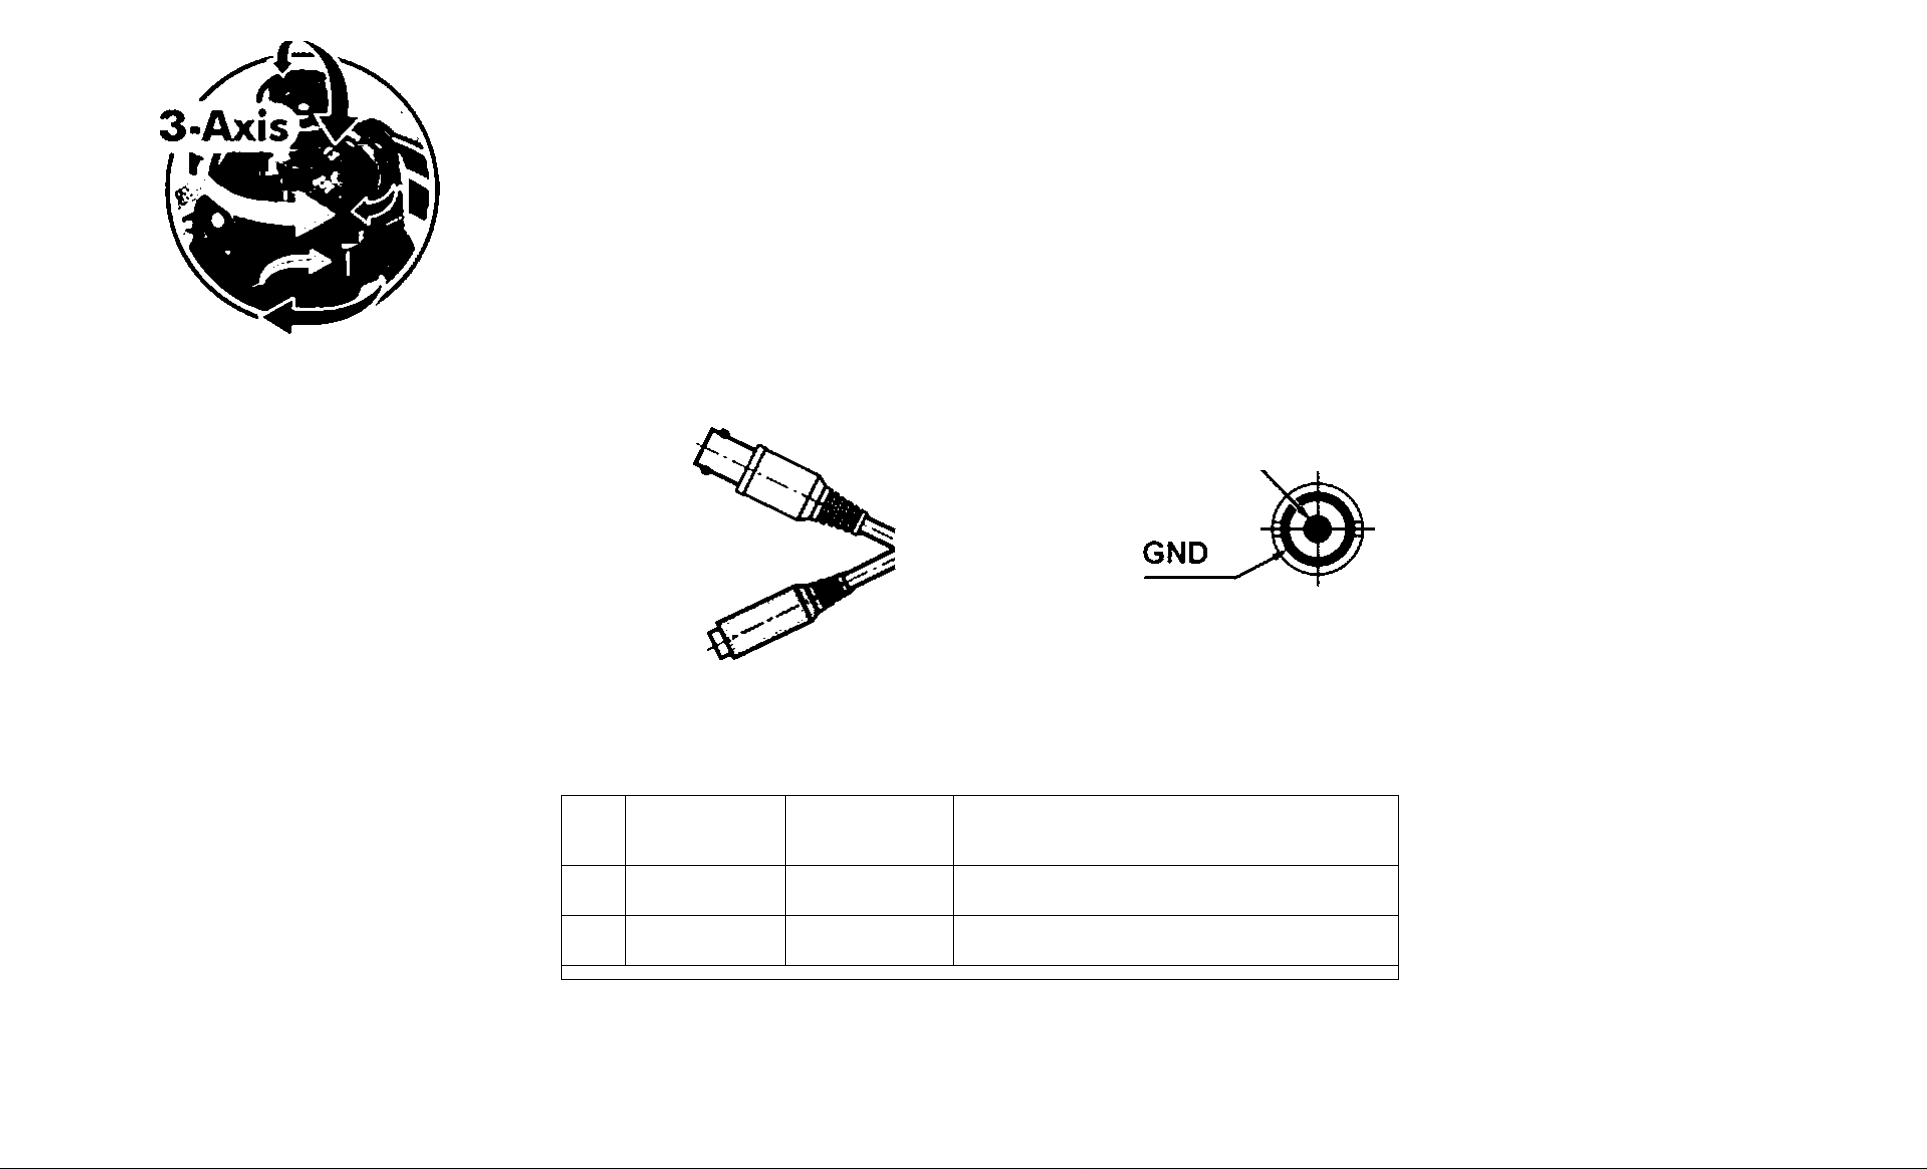
6. CONNECTION
2
O
CD
CD
The wire is polarized. Use 12V DC“ power source.
No.
#7 Video O utp ut Yellow I.OVp- p
#2 Power I npu t Red
Functi on Termin al C olor Remark
Video
(Yellow)
Power- 12VDC
(Red)
12VDC ( 10V- 15V ), 3 60mA (Max )
Video Output
810
1
Page 11
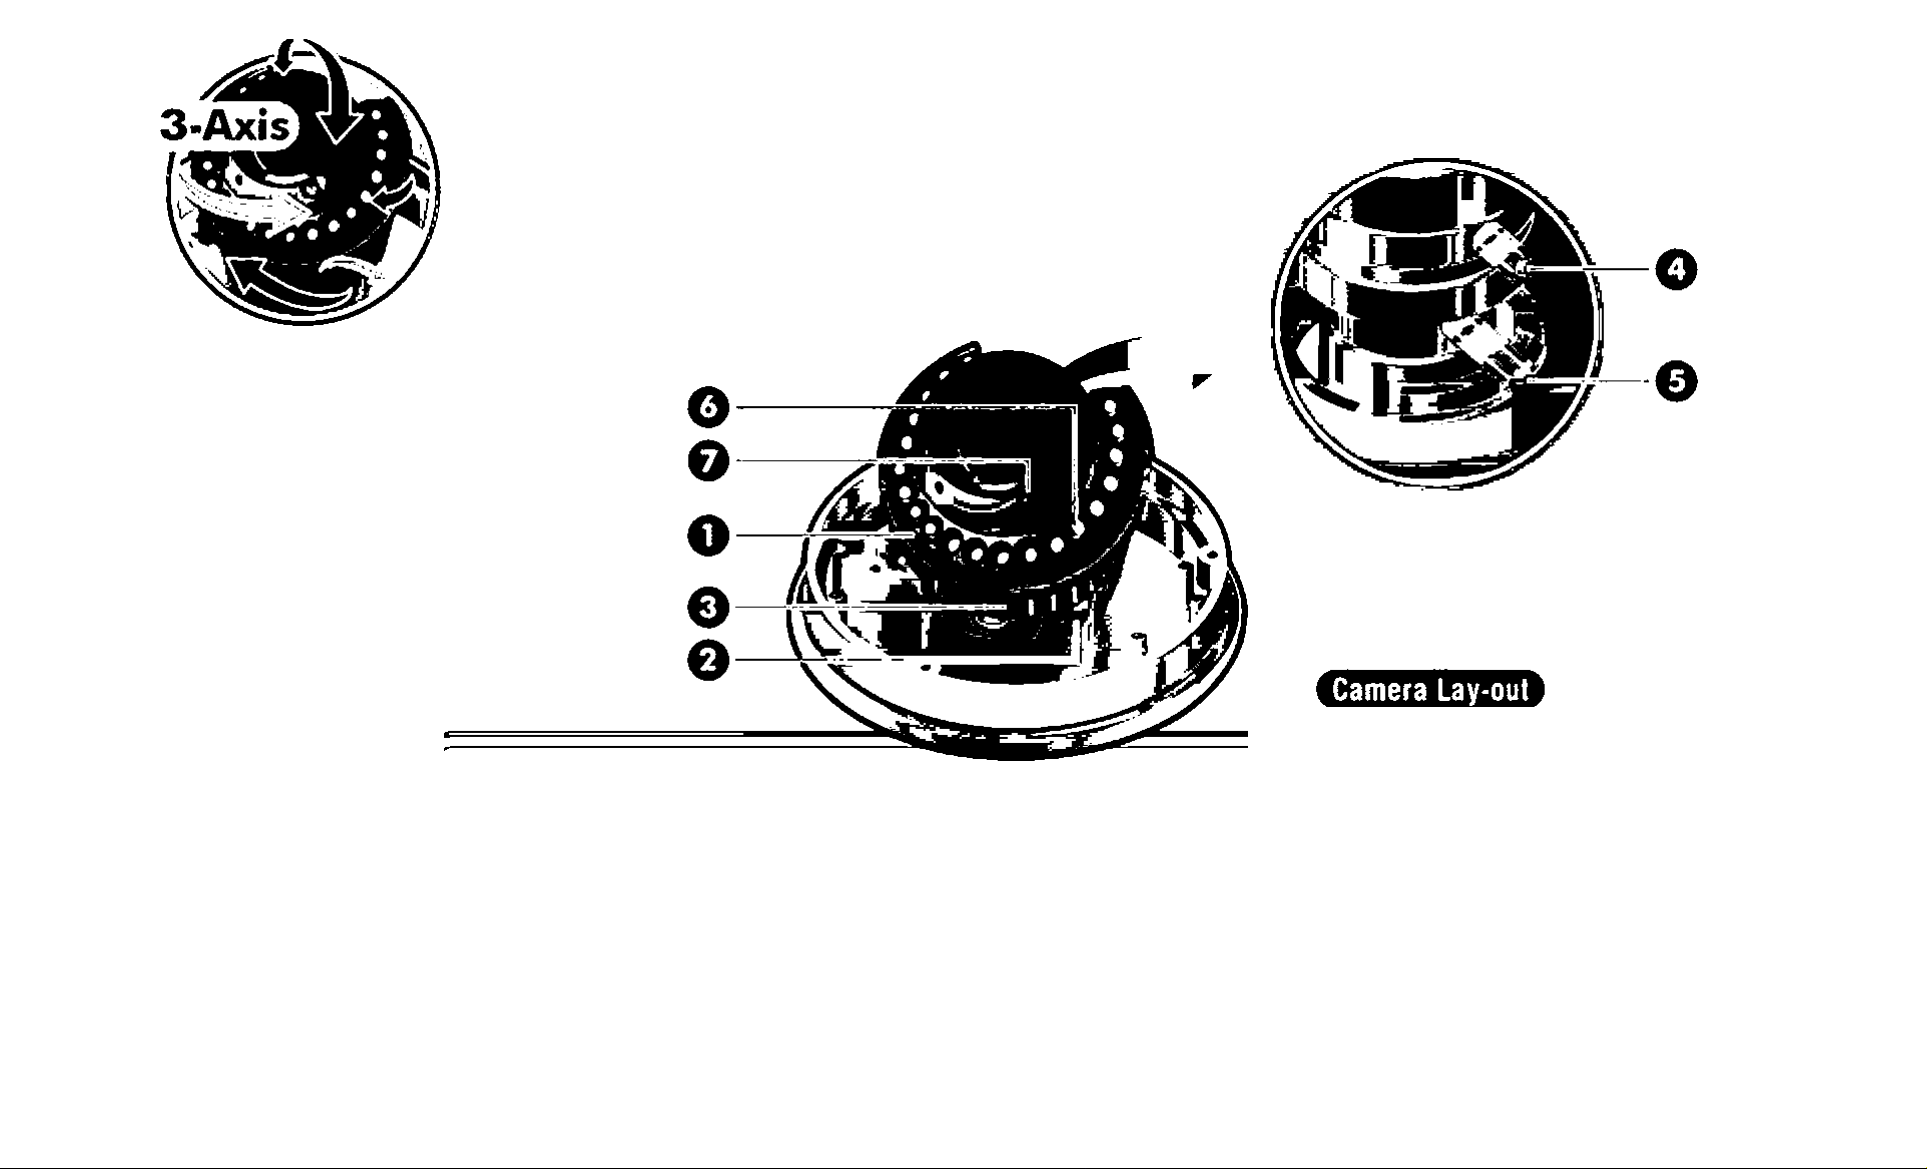
7. NAME AND FUNCTIONS
o
o
o
o
e
o
o
Tilt r otati on: Adj usti ng t he ve rtic al a ngl e.
Pan rot ati on: A dju stin g th e hor izo ntal angl e.
Horizo ntal rot atio n: Ad jus ting the hor izon tal posi tion of t he s cree n.
Focus h andl e: F ocu s (Fa r o r Nea r)
Zoom h andl e: Zo om ( Tel e or Wide )
IR LED( 4mm -9mm ): 8 50nm / 30 *(20 EA), Po wer C onsu mpti on(4 .5W)
Sensor
11
è
2
ce
O
O
u
I
Page 12

8. OPERATING CAMERA
SETUP MENU
CAMERA ID • ON • OFF
SHUHER • AUTO • FLK • FIXED • MANUAL
WHITE BAL. • ATW • AWB • FIXED • MANUAL
FUNCTION • BLC • AGC • DAY NIGHT • PRIVACY
• MIRROR • GAMMA • MOTION
Ul
8
O
ai2
I
ADJUST • CONTRAST • SHARPNESS
• CB_GAIN • CR_GAIN
LANGUAGE • ENGLISH • KOREAN •CHINESE1 •CHINESE2 • JAPANESE
RESET
EXIT
Page 13

^ Push th e Joy stick for one secon d, and the OSD
appear s on the scr een. Mov e th e Jo y Sti ck u p, d own,
left & rig ht to co ntrol th e OS D fu ncti ons.
O Setting up the Menu
SETUP
- Push and hol d ME NU b utto n 1 s eco nd
to acc ess t he s etu p mo de.
Select the sta tus usin g th e
MENU(SET):
SET BY JOY STI CK
Servic e Mo nito r Con nect er:
Use se rvice mo nitor
connec tor t o s et ca mera an gle
& focu s wh en i nsta llin g.
joysti ck, ( up, dow n, l eft, righ t)
SETUP
CAMERA ID OFF
SHUTTER AUTO/
WHITE B AL. ATW
FUNCTI ON
ADJUST
LANGUA GE ENGLIS H
RESET
EXIT
/
/
/
13
â
s
o
o
u
I
Page 14

O Main Menu - SETUP
1 Press MENU button, then SETUP mode is activated.
• MAIN SETU P m enu i s d ispl ayed on t he m oni tor.
2. Select OSD item using UP, DOWN button.
SETUP
CAMERA ID OFF
SHUHER AUTO/
WHITE BAL. ATW
6
2
Il4
i
3. Set details using LEFT, RIGHT button.
4. Select “Exit” and then press the MENU button
to finish the SETUP (Save and Exit)
FUNCTION
ADJUST
LANGUAGE ENGUSH
RESET
EXIT
/
/
/
Page 15

1) CAMERA ID setup (default setting OFF)
0 Pres s ME NU k ey i n ON / state.
(Acces s ID set ting MODE )
O Main Menu - CAMERA ID
(D Pre ss M ENU k ey in C AMERA ID .
(D Cha racte r i s ch anged ea ch l ime UR DO WN i s
presse d. ( Can s elec t u p to 63 l ette rs)
@ Pres s ME NU bu tto n in / t o
exit f rom I D s etup mode
(D Pre ss M ENU b utt on i n 'C to corr ect a nd erase
the ch osen en try.
2) POSITION setup. Press POSITION
0 Move the char acte r u sing UR D OWN , LE FT, RIGHT but ton.
(D Pre ss M enu b utt on t o con fir m se lect ion o f t he ch arac ter.
ID SETU P
CAMERA ID
A
POSITION
RETURN
/ c
6
2
0 Pres s Ret urn to g o t o pr eviou s s cree n. I D Is disp lay ed by pres sin g EX IT o n MA IN M ENU .
u
I
Page 16

O Menu [SHUUER] - SHUTTER AUTO
1) SHUTTER setup (tor LENS MANUAL)
® Press LE FT o r RI GHT b utt on i n SH UTTE R
to sel ect t he m ode to
AUTO ^ ► FLK ◄ ► F IXE D /
◄ ►MAN UAL/.
w Setting Mode : AUTO /
SHUTTER AU TO
BRIGHTNESS 056
/ : RETURN
i
o
u
°16
\
Page 17

1) FIXED / setup
® Press ME NU b utto n in FIX ED /
to dis play the scr een o n t he r ight sid e.
O Menu [SHUTTER] - FIXED Mode Setup
SHUTTER FIXED
<D Pres s LE FT or RIGHT butt on in SHUTTER .
Can be se t in ([NT SC; 1/60 - 1/100,000]
[PAL; 1 /50 - 1/ 100, 000 ]) r ange.
SHUHER M: 1/60
/ : RETURN
Ul
i
O
17°
y
I
Page 18

O Menu [WHITE BALI - WHITE BALANCE Mode Setup
1) WHITE BALANCE setup
® In W HITE BAL ., p ress LEFT . R IGHT butt on
to sel ect t he m ode you wish to ope rate
ATW ◄ ► AW B ◄ ► FIX ED /
◄ ►MAN UAL/.
2) FIXED/setup
® Can s et from MODE 1 t o M ODE 4 .
AWB FIXED
AWB RXED : MODE 1
/ : RETURN
2
O
S18
I
3) MANUAL / setup
® As s hown on the low er ri ght pict ure,
set Re d an d Bl ue co lor val ue t empe ratu re.
0 Pres s ME NU bu tto n in RETU RN
to exi t fro m s etup mode .
AWB MANUAL
RED 113
I
BLUE 255
/ : RETURN
Page 19

1) FUNCTION / setup
® Press ME NU b utto n in FUNT ION
to show th e OS D di spla y on the rig ht.
O Main Menu - FUNCTION
s
FUNCTION
2) Select item using UP, DOWN button.
3) Set details using LEFT, RIGHT button.
4) Click ''Return" to go to MAIN SETUP
BLC OFF
AGC ON/
DAY NIGHT
PRIVACY
MIRROR OFF
GAMMA 0.45
MOTION OFF
RETURN
AUTO/
OFF
è
2
O
19°
u
I
Page 20

O Menu [FUNCTION] - BLC 1
1) BLC SETUP MODE
® Press ME NU b utto n in BLC ON / ,
BLC SETUP
to dis play the scr een o n t he r ight sid e.
2) BLC AREA / setup
® Use UR DO WN, LEF T, R IGHT butt on
to mov e th e ARE A s etup pos itio n.
0 Set o r r eleas e B LC A REA
using MEN U but ton .
0 Pres s ME NU bu tto n fo r mor e t han 1 sec ond
to mov e to BLC ARE A MOD E.
BLC AREA/
BLC RATIO 16
1
RETURN
2
§20
1
Page 21

1) BLC AREA MODE
® Exit from BLC AR EA MO DE
to mov e to BLC SETU P M ODE s cree n.
2) BLC OSD des cript ion
®
ALL CLEAR
(D
ALL
Sfr-S et a ll 64 BLC ARE A
- Clea r a ll s et A REA
O Menu [FUNCTION] - BLC 2
—
BL^
ARM
ALL CLE/,R
SET
ALL
JRN
REl
EXE
r
RETURN ■
<D
EXJT
Retur n to BLC ARE A se tup mode .
• Sav e ARE A a nd r etur n to
BLC SE TUP MODE .
6
t
2
9
21 ^
u
1
Page 22

O Menu [FUNCTION! - BLC 3
1) BLC RATIO setup (BLC LEVEL value setup)
® Use UR DO WN butto n
to mov e to BLC RAT IO.
® Use LEFT . RI GHT butto n
to change BLC LEVEL value (0-63)
0:MIN . 63: MAX
® Press ME NU b utto n in RETU RN
to mov e to FUN CTIO N MOD E.
BLC SETUP
BLC AREA/
BLC RATIO
RETURN
16
I
a
o
9
0 22
u
1
J
Page 23

1) AGC setup
® AGC d efa ult s ett ing ON /
O Menu [FUNCTION] - AGC
d) Pres s M ENU butto n i n ON i/
to dis play the scr een o n t he r ight sid e.
d) Use LEFT , R IGHT butt on
to adj ust AGC G AIN val ue ( 0~25 5)
0;MIN. 255 :MAX
(S) Pr ess MENU butt on t o r eturn
to the pre viou s scr een .
AGC CONTROL
AGC GAIN 095
/ : RETURN
a
Q
e£
Q
23°
u
I
Page 24

O Menu IFUNCTIONI - DAY NIGHT 1
1) DAY NIGHT setup
® Move to DAY NIGH T scr een on t he righ t sid e.
® Chan ge setti ng u sing LE FT, R IGH T butt on.
AUTO / ◄ ► B/W / ◄ ► C OLOR .
2) AUTO ^ mode setup
® Press ME NU b utto n in AUTOsetup mode.
0 Move to s cre en o n th e ri ght side .
FUNCTION
BLC OFF
AGC ON/
DAY NIGHT AUTO/
PRIVACY OFF
MIRROR
GAMMA 0.45
MOTION
RETURN
DAY NIGHT AUTO
OFF
OFF
J
<
i
oc
Q
u
24
1
0 Selec t i tem u sin g UP / DO WN b utt on.
(D Adj ust v alu e us ing L EFT / R IGHT butt on.
0 Pres s ME NU i n RE TURN to retu rn
to the pre viou s scr een .
DELAY
START LEVEL 092
END LEVEL
RETURN
01
---- 074
---- -
1
1
1
Page 25

1) DAY NIGHT OSD description
® DELA Y
C DAY --> NIGH T or NIG HT --> DA Y co nver sion tim e set up
0 : No DAY NIG HT A UTO conv ersio n
1 -63 : C an set f rom 1 s econ d to 15 s econ ds
(D STA RT L EVEL
O
DAY -- > N IGHT con versi on i llu mina tion inte nsi ty s etup 0-2 55 ( DEFA ULT: 4 Lu x)
0: Hig h il lumin ati on i nten sity , 25 5 : L ow i llu mina tion inte nsi ty
O Menu [FUNCTION] - DAY NIGHT 2
Initia l va lue s etu p is rec ommen ded.
@ END LEVE L
O NIGHT --> DA Y co nver sion ill umin ation in tensi ty s etu p 0- 255 ( DEFA ULT : 12 Lux )
0: Hig h il lumin ati on i nten sity , 25 5 : L ow i llu mina tion inte nsi ty
^ Initi al v alu e set up is r ecom mende d.
25
<
UJ
i
u
1
Page 26

O Menu [FUNCTION] - DAY NIGHT 3
1) B/W X mode setup
® Press ME NU i n B/ W / setti ng
<2>
Move to s creen on the righ t s ide.
® Use LEFT , RI GHT butto n
to set BURS T O N/OFF .
(D Att er s etup, re turn to t he prev ious scr een
by pre ssin g ME NU b utto n.
DAY NIGHT B/W
BURST ON
2
0£
O
S26
I
Page 27

1) PRIVACY setup
<D
Detau lt s ettin g O FF - Use LEFT .RIG HT butt on.
Change set up t o ONmode.
O Afte r ON i/ mode set up, 4 ARE A gr oups are
configu re d as d ispl ayed on the righ t-s ide p ict ure.
(I) Pr ess M ENU but ton.
Details of eac h ar ea i s ds playe d.
2) PRIVACY details setup
<D
Selec t ARE A S EL - PRIV ACY 0~3 .
AREA S TATE - 0 ~3 A REA O N/O FF
LEFT - Chan ge l eft por tion of each ARE A si ze.
(D RIG HT - Chan ge r igh t po rtion of eac h AR EA s ize.
TOP - Chan ge t op po rtio n of eac h A REA s ize.
BOTTOM - C hange bo ttom por tion of e ach ARE A siz e.
® COLO R - C han ge e ntir e col or o f t he A REA (16 C OLOR )
O Menu [FUNCTION] - PRIVACY
FUNCTION
BLC ON/
AGC ON/
DAY NIGHT
PRIVACY ON/
MIRROR OFF
GAMMA 0.45
MOTION
RETURN
PRIVACY
AREA SEL AREAO
AREA STATE ON
LEFT 0f7
RIGHT 058
TOP 020
BOTTOM 055
COLOR 001
RETURN
AUTO/
OFF
J
UJ
§
O
27°
u
I
Page 28

O Menu [FUNCTION] - MIRROR
1) MIRROR setup
® MIRRO R d efau lt s ettin g O FF
FUNCTION
ON set ting - U se L EFT, RIG HT bu tto n.
0 Lett and Rig ht s ide is s witc hed
as show n o n th e pi ctur e.
BLC
AGC ON/
DAY NIGHT AUTO/
PRIVACY
MIRROR OFF
GAMMA 0.45
MOTION
RETURN
OFF
OFF
OFF
J
2
¡28
Page 29

1) GAMMA setup (DEFAULT 0.45)
® In F UNCTI ON MODE ,
O Menu [FUNCTION] - GAMMA
FUNCTION
use UR DOW N bu tton to selec t G AMMA .
Use LE FT, RIGH T bu tton
to adj ust GAMMA va lue.
(USER ◄ ► 0 .05 < ► 0.1 0 ◄ ► 0.1 5-1. 0)
BLC OFF
AGC ON/
DAY NIGHT
PRIVACY
MIRROR OFF
GAMMA 0.45
MOTION
RETURN
AUTO/
OFF
OFF
è
oi
2
o
29°
y
I
Page 30

O Menu [FUNCTION] - MOTION
1) MOTION DETECTION setup
® DEFAU LT v alu e OF F
0 In O N / , pres s M ENU b utt on.
0 Displ ay MOTI ON de tai ls.
2) AREA / setup
® In AREA, press MENU butt on, (see p. 31)
3) MOTION TH. Setup
FUNCTION
BLC
AGC ON/
DAY NIGHT AUTO/
PRIVACY
MIRROR
GAMMA 0.45
MOTION
RETURN
OFF
OFF
OFF
OFF
Si
6
2
§30
1
® Set m oti on s ensi tiv ity 0 (MAX )~25 5(MI N)
4) MOTION TRACE setup
® ON ; Dis play moti on d ete ctio n ARE A.
O
w Sett ing valu e ca n be adju ste d
using LEFT or R IGH T bu tton .
L
MOTION
AREA/
MOTION TH. 037
MOTION TRACE
RETURN
OFF
1
Page 31

O Menu ¡FUNCTION] - MOTION AREA 1
1) MOTION AREA setup
® Use UR DO WN, LEF T, R IGHT butt on
to mov e AR EA s etti ng po siti on.
d) Use MEN U bu tton to s et a nd relea se A REA .
(D Pre ss M ENU b utt on f or m ore t han 1 s econ d
to mov e to MOT ION A REA MODE
2) MOTION AREA MODE
® You w ill retu rn t o M OTION AR EA MO DE
after " Exit " f rom M OTI ON A REA MODE .
—
—
MO
noH AR
ALL CLE)
SET
ALL
—
^
EA
R
REl
EXEr
URN
31 ^
i5
§
9
u
1
Page 32

O Menu [FUNCTION] - MOTION AREA 2
1) MOTION OSD description
®
ALL CLEAR ■
®
ALL SET -
@
RETURN -
®
EXIT ■
Save AREA and ret urn t o M OTIO N SE TUP MODE .
Relea se al l s et AR EA
Set a ll 6 4 MOTI ON A REA.
Retur n to MOT ION A REA Set up M ode.
Ul
i
8
32
1
Page 33

1) ADJUST setup
® Press ME NU b utto n in ADJ UST
0 Move to s cre en o n th e ri ght side .
O Each LEVE L v alue can be
L.
adjuste d u sing LEF T, R IGHT butt on.
O Main Menu - ADJUST
ADJUST
CONTRAST 083
1
SHARPNESS 12
1
2) CONTRAST setup
® Adju st Y -gai n val ue (0~25 5)
3) SHARPNESS setup
0 Adju st a pertu re valu e (0- 31)
4) CB-GAIN setup
0 Adju st C OLOR CB_ GAIN val ue ( 0-255 )
5) CR-GAIN setup
0 Adju st C OLOR CR. GAIN valu e ( 0-255 )
CB-GAJN 190
CB-GAJN 205
RETURN
33°
Si
i
o
u
I
Page 34

O Main Menu - LANGUAGE
1) LANGUAGE setup
® DEFAU LT v alu e-ENG LISH
(D Aft er s elect ing LANG UAGE .
change set ting us ing L EFT o r R IGHT but ton.
(D Cho ose the lang uage mod e yo u
wish t o ope rat e in .
SETUP
CAMERA ID OFF
SHUTTER AUTO/
WHITE BAL. ATW
FUNCTION
ADJUST
UNGUAGE
RESET
EXIT
/
/
ENGUSH
/
A
^ ENGLISH < ^ Korean < >■ Chinesel < >■ Chinese 2 ^ ^ Japanese
V.
t
2
8 34
j
Page 35

1) RESET
® Selec t R ESET
Press M ENU but ton.
The scr een on the bott om a ppea rs.
9 Main Menu - RESET
SETUP
CAMERA ID
SHUTTER AUTO/
WHITE BAL. ATW
OFF
d> Sel ect YES o r N O.
® Selec t Y ES t o re set your cam era
to def ault fact ory con diti on
FUNCTION
ADJUST
LANGUAGE ENGLISH
RESET
EXIT
LOAD DEFAULT
YES
NO
/
/
/
j
$
2
O
35°
I
Page 36

9. SPECIFICATIONS
MODEL ■ H D61 H061X
Signal Sys tem NTSC PAL
Image Sens or 2:1 In terl ace T ran sfer 1/3 Inch Su per H AD C CD
Effect ive Pix els 510(H) x49 2(V) 500(H) x58 2(V)
Video O utp ut Compos ite: I.O Vp-p, 75Q , Un bal anced
Sync. S yste m Intern al S ync
Luminan ce S/N Rati o More th an 5 0dB (AGC OFF )
Horizo ntal Reso luti on 380 TV Lin es
2
§36
I
Min. I llum inat ion ( FI . 2) 0.1 Lu x(30 IRE, AGC ON) , 0 Lux( IR LE D)
Lens Manual Vari -foc al ( f=4 -9mm )
Focus Manual
Electr onic Shu tter 1/60- 1 00, 000 1/50 - 10 0,00 0
White Balan ce ATW (1, 800' K-1 0,500 -K) / AW B / Fixed / M anual
Camera ID ON / O FF
Languag e English / K orea n / C hi nese 1 / Chin ese 2 / Japan ese
Page 37

BLC, AG C ON/OFF (Le vel A dju stabl e)
Day & N igh t BW/Col or/A uto
Privac y ON / O FF ( 4 Pro gram mabl e Zon e)
Mirror ON/OFF (Ho rizon tal )
Gamma User /0 .5-1 .0 A djus tabl e
Motion Det ecti on ON / O FF ( 64 Pr ogram mabl e Z one)
Contras t 0 - 255 (Le vel Adju sta ble)
Sharpn ess 0-31 (Level Adj usta ble)
Applica ble Len s Manual Len s
Supply Volt age 12VDC ( 10V- 15V )
Po\wer Con sumpt ion Max. 4. 5W/3 60m A
Operat ing Tempe rat ure -10‘C-+ 50t ) (Re comm enda tion ; - 5'C-+ 40t: )
Storage Te mper atur e -201C- + 6 0‘C
Dome S ize (0) 100 mm
Weight Approx. 366 g
37^
Si
t
6
t
2
9
u
I
Page 38

10, TROUBLESHOOTING
If you hav e tr oubl e ope rat ing y our cam era, ref er t o th e fo llow ing t abl e.
If the guid eli nes d o n ot e nabl e you to solv e t he pr obl em, conta ct a n au tho rized te chnic ian .
Problem Solutions
Uri
a
o
ce
Q
Nothin g appears on the
screen .
The image on the scre en
is dim .
The image on the scre en
is dar k.
The cam era is n ot work ing
properl y, and the surf ace
of the cam era is h ot.
The image on the scre en
flicker s.
• Check tha t the pow er c ord and line con nect ion b etw een t he c ame ra a nd m onito r
are fi xed p rop erly .
• Check tha t you hav e pr ope rly c onn ected VID EO ca ble to the camer a VI DEO outp ut jack .
• Is lens sta ine d wit h d irt? Clea n y our l ens with so ft, cl ean clo th.
• Set t he m onit or t o pro per c on ditio n.
• If the cam era is e xpos ed t o too st rong ligh t, c han ge t he ca mer a pos itio n.
• Adjus t th e len s' focu s pr oper ly.
• Adjus t th e co ntras t f eatu re o f th e mo nitor .
• If you hav e an inte rmed iat e dev ice , set th e 75 Q/ Hi -z p rope rly.
• Adjus t DC Lev el, on t he O SD m enu.
• Chec k th at y ou h ave prope rly conn ecte d t he ca mer a to a n a pprop riat e p ower sou rce.
• Is t he ca mer a fa cing to direc t s unli ght or f luor esen t lig hti ng?
Change th e cam era p osi tion .
°38
u
I
Page 39

Page 40

"^Design and specifications arc
subject to change without notice. P/N:3810-0148B
A-
Rov 0 0 //04
Need Help?
Call 1.800.796.CCTV for sales, service and customer support.
www.honeywellvideo.com
 Loading...