

Honeywell CCB01-010BT-BF, CCB01-010BT, CCB-H-010BT-BF, CCB-H-010BT Quick Start Manual

Xenon™ XP 1952h/1952h-BF
CCB01-010BT/CCB01-010BT-BF
CCB-H-010BT/CCB-H-010BT-BF
Cordless Area-Imaging Scanner for Healthcare and Charge Bases
Quick Start Guide
1952HC-HCBF-EN-QS-01 Rev A
04/19
Agency Model: 1952, 1952-BF, CCB01-010BT, CCB01-010BT-BF,
CCB-H-010BT, CCB-H-010BT-BF
Note: Refer to your User Guide for information about cleaning
your device.
Get Started
Turn off computer’s power before connecting the scanner, then
power up the computer once the scanner is fully connected.
Once the base is connected and powered up, follow the Link the
Scanner (page 5) instructions to link the scanner to the base.
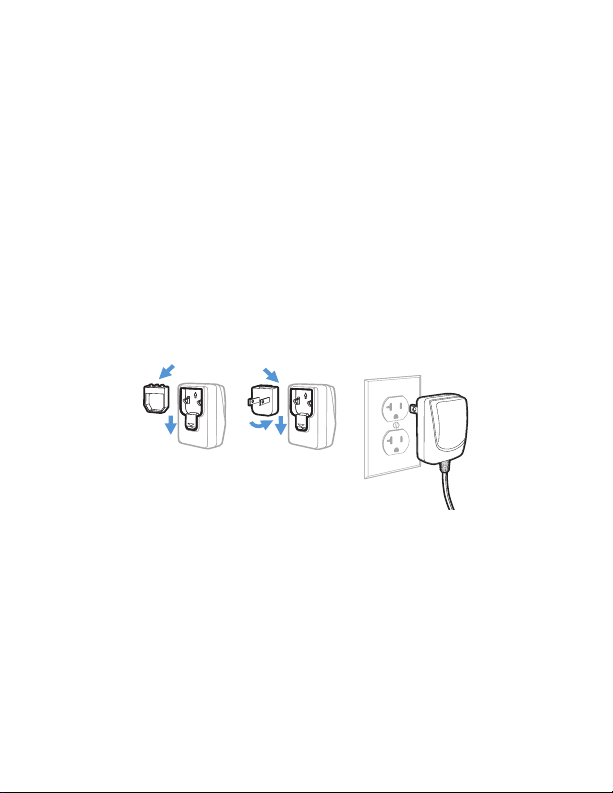
Power Supply Assembly (if included)
Note: The power supply must be ordered separately, if needed.
1
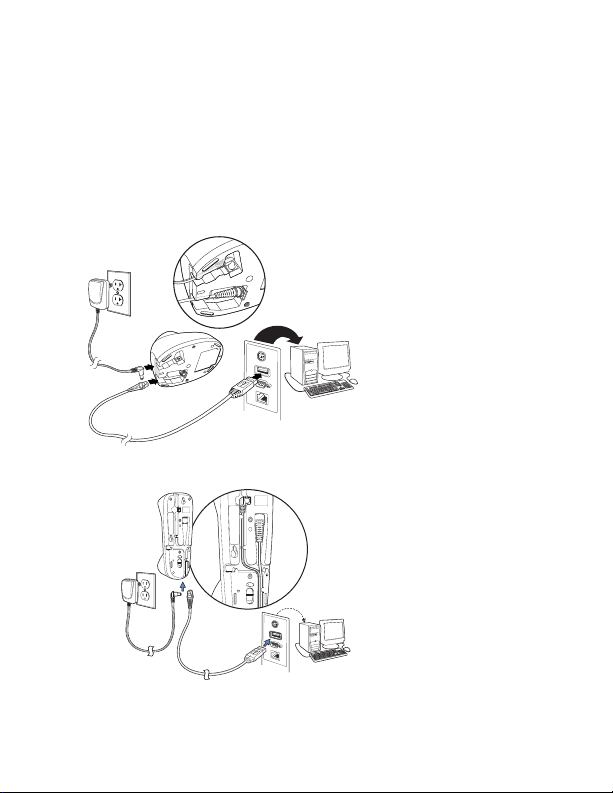
Connect the Scanner
CCB-H-010BT or CCB-H-010BT-BF Base:
CCB01-010BT or CCB01-010BT-BF Base:
USB:
Note: If you are charging the scanner using the USB cable, the
current available for charging is reduced and charge times
are increased. Charging via the power supply is faster.
2
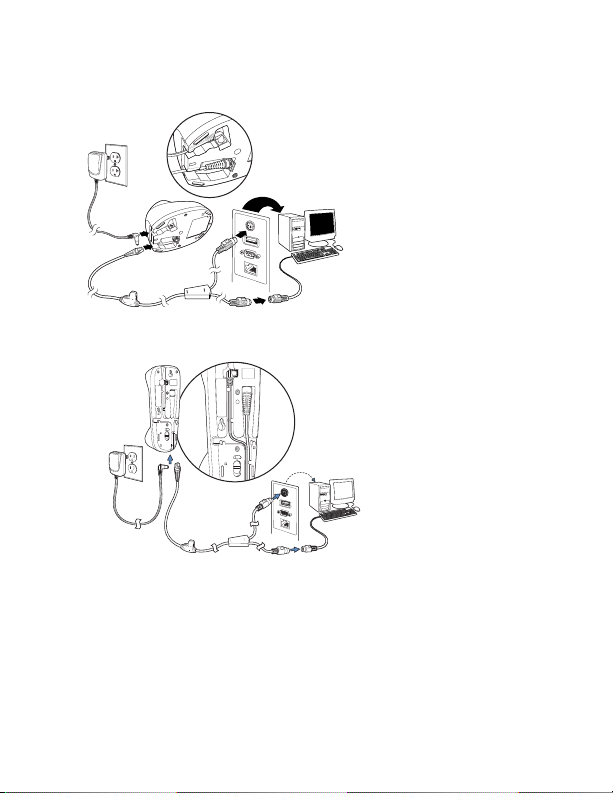
Keyboard Wedge:
CCB-H-010BT or CCB-H-010BT-BF Base:
CCB01-010BT or CCB01-010BT-BF Base:
3
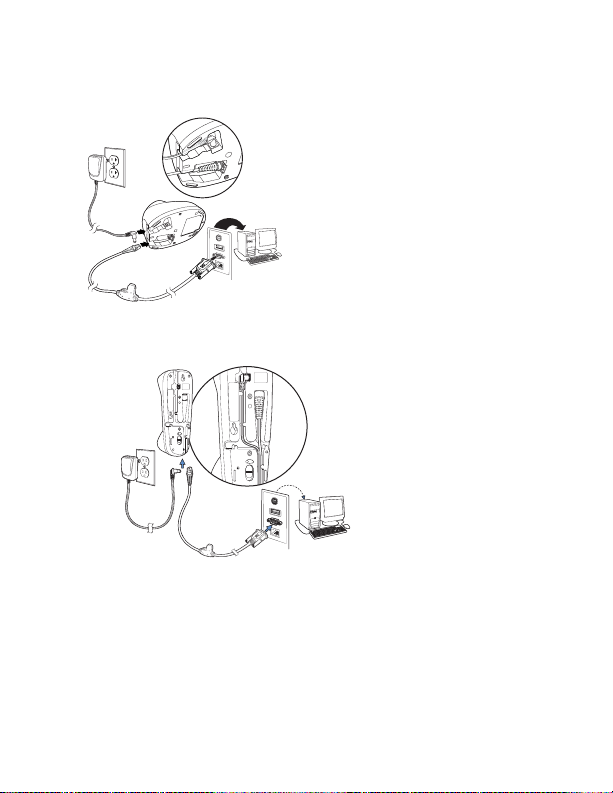
RS232 Serial Port:
CCB-H-010BT or CCB-H-010BT-BF Base:
CCB01-010BT or CCB01-010BT-BF Base:
4

Link the Scanner
Unlink Scanner
Use the following procedure to configure all scanners so they
automatically connect to the base.
1. Scan the bar code on the base.
2. Place the scanner into the base.
3. Power cycle the base to complete the link and establish
communication between the base and scanner.
When the scanner is in the base, the green LED on the base
flashes to indicate the scanner’s battery is charging.
Unlink the Scanner
If the base has a scanner linked to it, that scanner must be
unlinked before a new scanner can be linked. Once the previous
scanner is unlinked, it will no longer communicate with the
base. Scan the Unlink Scanner bar code to unlink a scanner.
5
 Loading...