

Honda Power Equipment BF20 User Manual


Thank you for purchasing a Honda Outboard Motor.
This manual covers operation and maintenance of the Honda Outboard
Motor. All information in this publication is based on the latest product information available at the time of approval for printing.
Honda Motor Co., Ltd. reserves the right to make changes at any time
without notice and without incurring any obligation.
No part of this publication may be reproduced without written permission.
This manual should be considered a permanent part of the Outboard Motor
and should remain with the Outboard Motor when it is sold.
Pay special attention to statements preceded by the following words:
Bmm
life if instructions are not followed.
CAUTION: Indicates a possibility of personal injury or equipment damage if
instructions are not followed.
NOTE: Gives helpful information.
If a problem should arise, or if you have any questions about the Outboard
Motor, consult an authorized Honda dealer.
Ew!m
dable service if operated according to instructions. Read and understand
the Owner’s Manual before operating the Outboard Motor. Failure to do so
could result in personal injury or equipment damage.
Indicates a strong possibility of severe personal injury or loss of
Honda Outboard Motors are designed to give safe and depen-
1

2
CONTENTS
1.
SAFETY INSTRUCTIONS
2.
WARNING LABELS
COMPONENT IDENTIFICATION
3.
4.
INSTALLATION
5.
PRE-OPERATION CHECK
STARTING THE ENGINE ........................................................
6.
7.
OPERATION
a.
STOPPING THE ENGINE ........................................................
l
High altitude operation ......................................................
MAINTENANCE
9.
TRANSPORTING/STORAGE..
10.
11.
TROUBLESHOOTING
SPECIFICATIONS.. ...............................................................
12.
OPTIONAL PARTS
13.
WARRANTY SERVICE
14.
....................................................................
........................................................................
................................................................... 25
................................................................
.......................................................
...............................................................
.............................................. :
.......................................................
.................................................
...........................................................
...........................................................
4
a
10
13
ia
23
24
34
36
37
3%
39
3
1. SAFETY INSTRUCTIONS
To ensure safe operation-
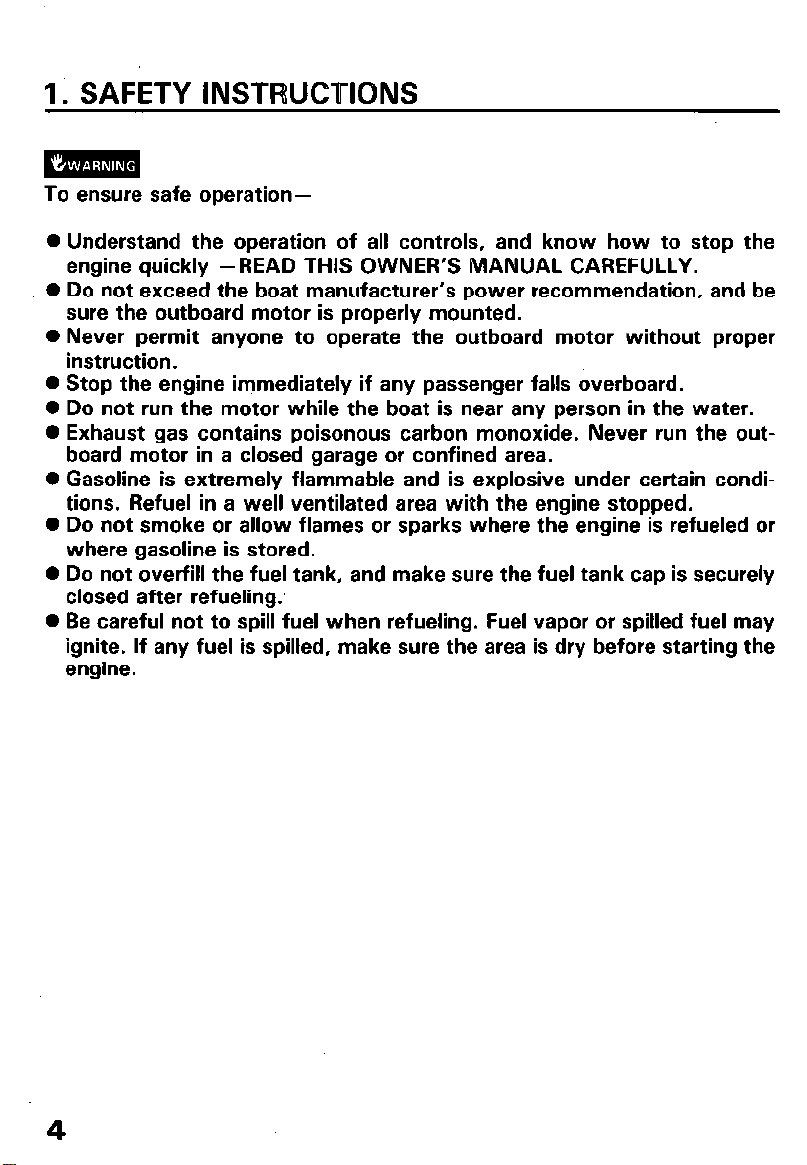
* Understand the operation of all controls, and know how to stop the
engine quickly -READ THIS OWNER’S MANUAL CAREFULLY.
0 Do not exceed the boat manufacturer’s power recommendation, and be
sure the outboard motor is properly mounted.
0 Never permit anyone to operate the outboard motor without proper
instruction.
0 Stop the engine immediately if any passenger falls overboard.
0 Do not run the motor while the boat is near any person in the water.
0 Exhaust gas contains poisonous carbon monoxide. Never run the out-
board motor in a closed garage or confined area.
0 Gasoline is extremely flammable and is explosive under certain condi-
tions. Refuel in a well ventilated area with the engine stopped.
0 Do not smoke or allow flames or sparks where the engine is refueled or
where gasoline is stored.
0 Do not overfill the fuel tank, and make sure the fuel tank cap is securely
closed after refueling.,
0 Be careful not to spill fuel when refueling. Fuel vapor or spilled fuel may
ignite. If any fuel is spilled, make sure the area is dry before starting the
engine.
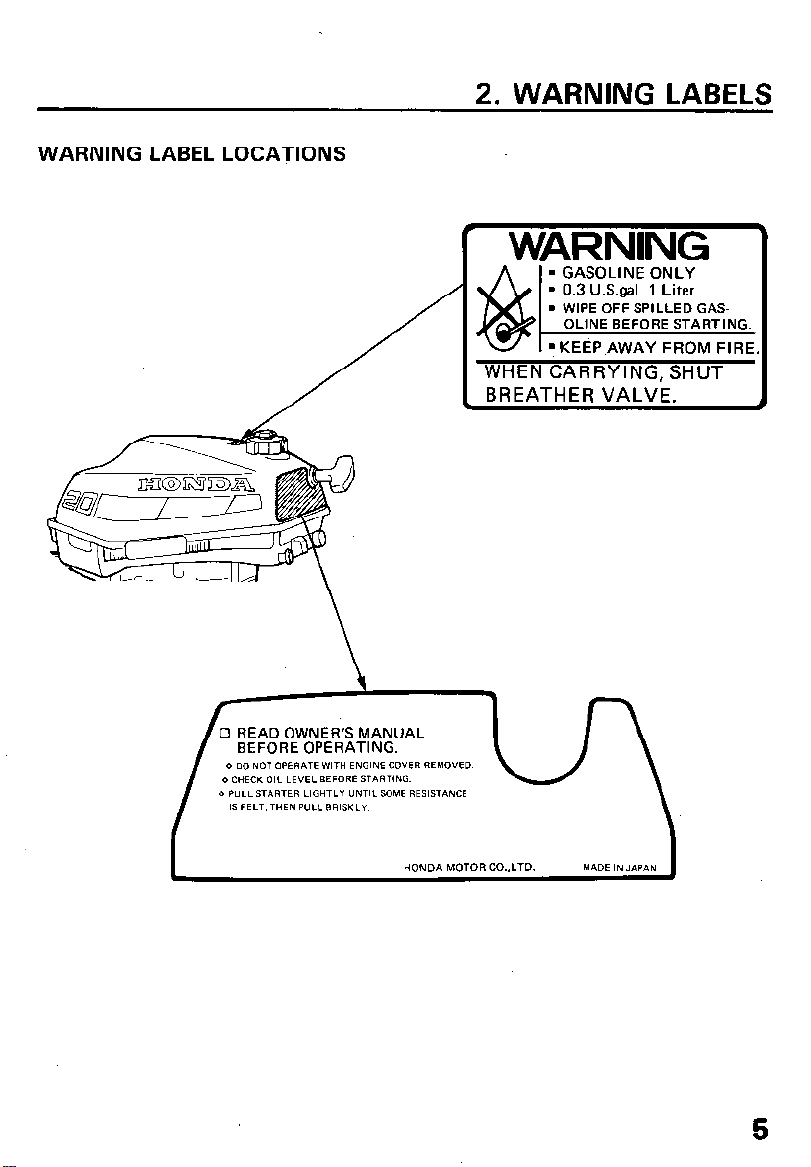
WARNING LABEL LOCATIONS
2. WARNING LABELS
L
WARNING
WHEN CARRYING, SHUT
BREATHER VALVE.
HONDA MOTOR CO.,LTO.
MADE IN JAPAN
5
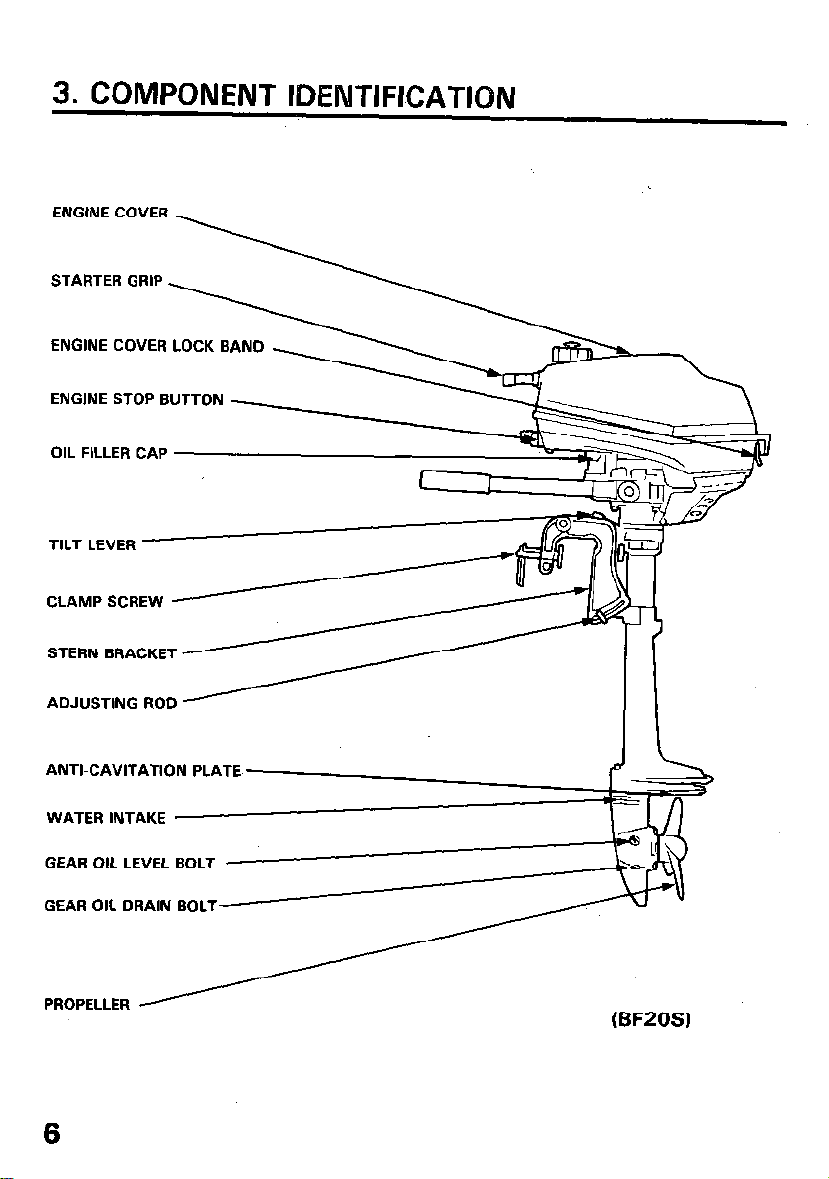
3. COMPONENT IDENTIFICATION
STERN BRACKET
ADJUSTING ROD
ANTI-CAVITATION PLATE
WATER INTAKE
GEAR OIL LEVEL BOLT
GEAR OIL DRAIN BOLT-
PROPELLER
6
(BFZOS)
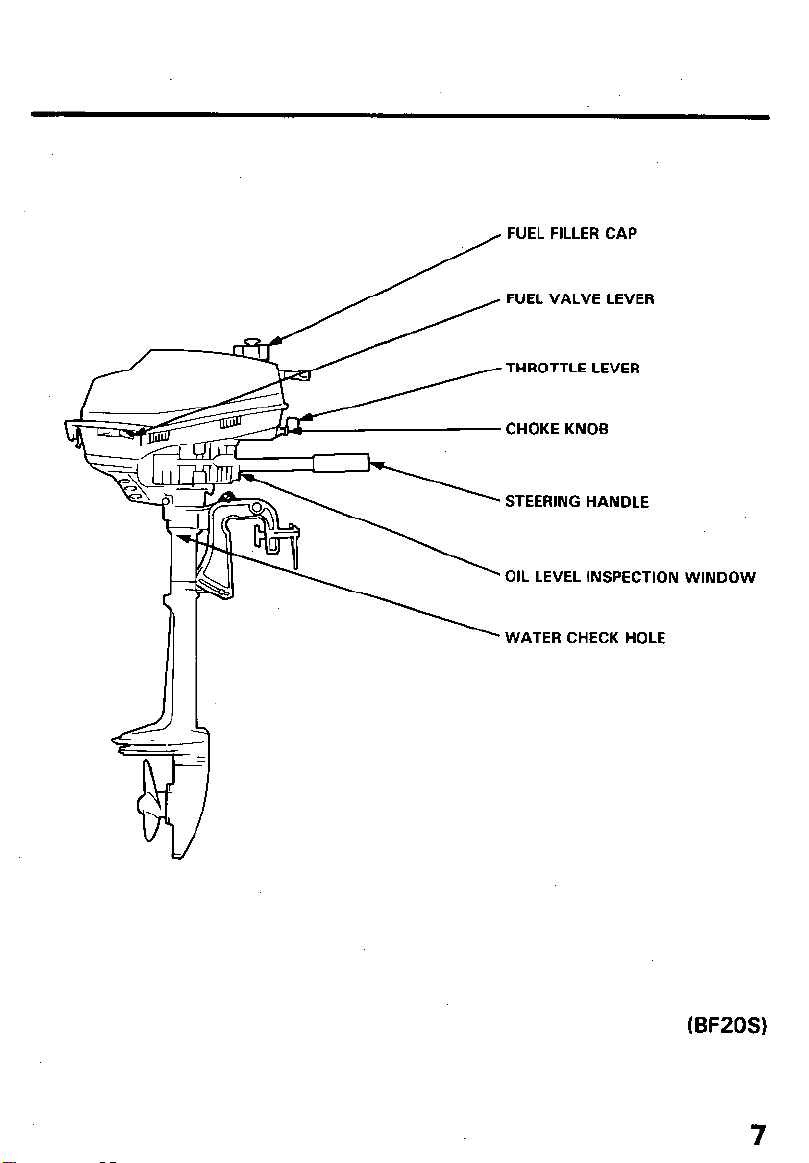
FUEL FILLER CAP
FUEL VALVE LEVER
THROTTLE LEVER
CHOKE KNOB
WATER CHECK HOLE
WINDOW
(BF20S)
7

4. INSTALLATION
It is your responsibility to choose
a boat suitable for the engine (2
horsepower).
manufacturer’s power recommendation. Damage and injury may
result.
1. Installation Position
Install at the stern at the center line
of the boat.
2. Installation Height
Make sure that the transom height
is correct for the motor. Incorrect
installation height will reduce performance.
The motor should be installed so
that the anti-cavitation plate is
2-5 cm (0.8-2.0 in) below the
bottom of the boat.
CAUTION: The water level must
be at least 4 inches above the anticavitation plate, otherwise the
water pump may not receive sufficient cooling water, and the extension case will overheat.
3. Motor Attachment
Attach the stern bracket to the
transom and tighten the clamp
screws.
CAUTION:
0 While operating the boat, check
the tightness of the clamp
screws occasionally.
0 Tie a rope through the hole in the
stern bracket and secure the
other end of the rope to the
boat. This will prevent accidental loss of the motor.
TRANSOM HEIGHT
.-.
P
STERN CENTER
CLAMP SCREW
8

4. Motor Angle
Adjust the motor so the axis of the
propeller is parallel with the water
surface.
CAUSES BOAT TO “SQUAT”
CORRECT
GIVES MAXIMUM PERFORMANCE
CAUSES BOAT TO “PLOW”
INCORRECT
5. Motor Angle Adjustment
” ’
If the propeller axis is not parallel
with the water, adjust the angle of
the motor by relocating the ad-
justing bolt on the stern brackets.
There are four adjustment
positions.
1. Loosen the wing nut to free the
adjusting bolt.
2.Adjust the angle of the motor,
and tighten the wing nut. Be
sure that the bolt head and wing
nut are seated in one of the four
recesses on the adjustment slot.
ADJUSTING ROD
AND WING NUT
9

1. Check the engine oil level.
CAUTION:
0 Engine oil is a major factor affecting engine performance and service
life. Non-detergent and low quality oils are not recommended.
0 Running the engine with insufficient oil can cause serious engine
damage.
Use Honda 4-stroke oil, or an equivalent high detergent, premium
quality motor oil certified to meet
or exceed U.S. automobile
manufacturer’s requirements for
Service Classification SE or SF.
(Motor oils classified SE or SF will
show this designation on the
container. 1
Select the appropriate viscosity for
1
-30 -20
-10 0
60 80 100°F
10 20 30
the average temperature in your
area. SAE low-40 is recommended for general, all-temperature use.
1. Position the outboard motor vertically, and check the oil level in the oil
level inspection window.
2. If the oil level is down toward the lower level mark on the window, fill
up to the 0.4 P mark on the dipstick.
40°C
UPPER LEVEL (0.4 P)
LOWER LEVEL (0.2 f’)
DIPSTICK

2. Check the fuel level
Use any regular grade automotive gasoline (unleaded gasoline is prefer-
red) with a pump octane rating of 86 or higher. Never use an oil/gasoline
mixture or dirty gasoline. Avoid getting dirt, dust or water in the fuel
tank.
CAUTION: Gasoline substitutes are not recommended; they may be
harmful to the fuel system components.
Fuel tank capacity: 1 .O P (0.26 US gal)
0 Gasoline is extremely flammable and explosive under certain
conditions.
Refuel in a well ventilated area with the engine stopped.
0 Do not smoke or allow flames or sparks near the fuel tank.
0 Do not overfill the tank and make sure the filler cap is securely closed
after refueling.
0 Be careful not to spill fuel when refueling. Fuel vapor or spilled fuel
may ignite. If any fuel is spilled, make sure the area is dry before star-
ting the engine.
FUEL FILLER CAP
FUEL TANK
11

3. Check the following items.
0 Check the propeller, the shear pin, and the cotter pin to be sure they
are secure and undamaged.
0 Check the stern bracket to be sure the motor is securely installed.
0 Check steering handle operation.
0 Make sure you have the tool kit and spare parts with you (p. 26).
12
 Loading...