

Page 1
INSTALLATION
www.HandA-Accessories.com
Not Used
4 washer screws
5 x 16 mm
INSTRUCTIONS
Accessory Application
AM/FM CD TUNER
POCKET ATTACHMENT KIT
ELEMENT
(DX)
Publications No.
AII 24298
Issue Date
DEC 2002
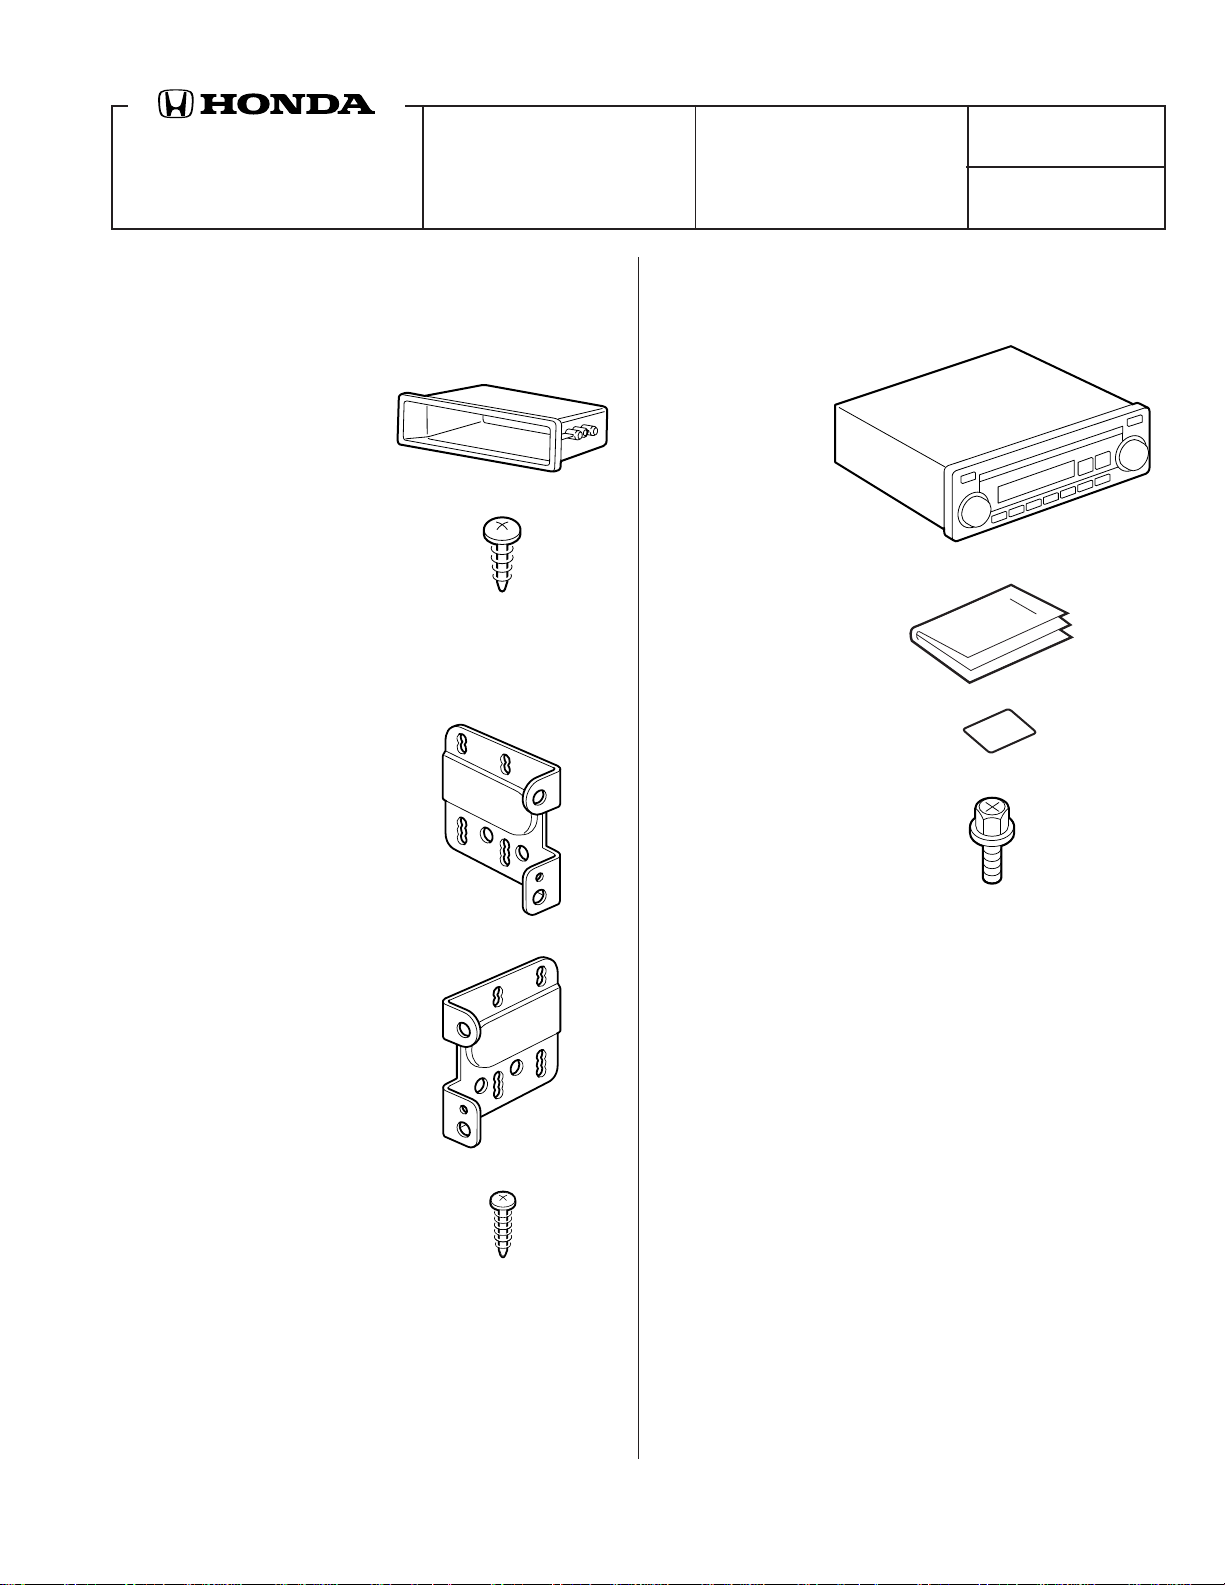
PARTS LIST
Pocket Attachment Kit
P/N 08B60-SCV-100
Pocket
2 Self-tapping screws,
4 x 12 mm
Radio Attachment Kit
P/N 08B02-SCV-100
Bracket "L"
AM/FM CD Tuner
P/N 08A02-4E1-100
AM/FM CD tuner
Owner’s Manual
4 Washer-screw,
5 x 8 mm
Bracket "R"
4 Self-tapping screws,
4 x 16 mm
© 2002 American Honda Motor Co., Inc - All Rights Reserved. AII 24298 (0212) 1 of 3
TOOLS REQUIRED
Phillips screwdriver
Flat-tip screwdriver
Shop towel
08B60-SCV-1000-91
Page 2
INSTALLATION
Customer Information: The information in this
installation instruction is intended for use only by
skilled technicians who have the proper tools,
equipment, and training to correctly and safely add
equipment to your vehicle. These procedures
should not be attempted by “do-it-yourselfers.”
1. Wrap a shop towel around the top of a flat-tip
screwdriver and insert it into the grooves of the
audio panel. Pull the audio panel out toward you to
release the five clips and remove the audio panel.
Take care not to damage the clips and the audio
panel. Disconnect the antenna lead and the 20-pin
connector from the rear of the cover.
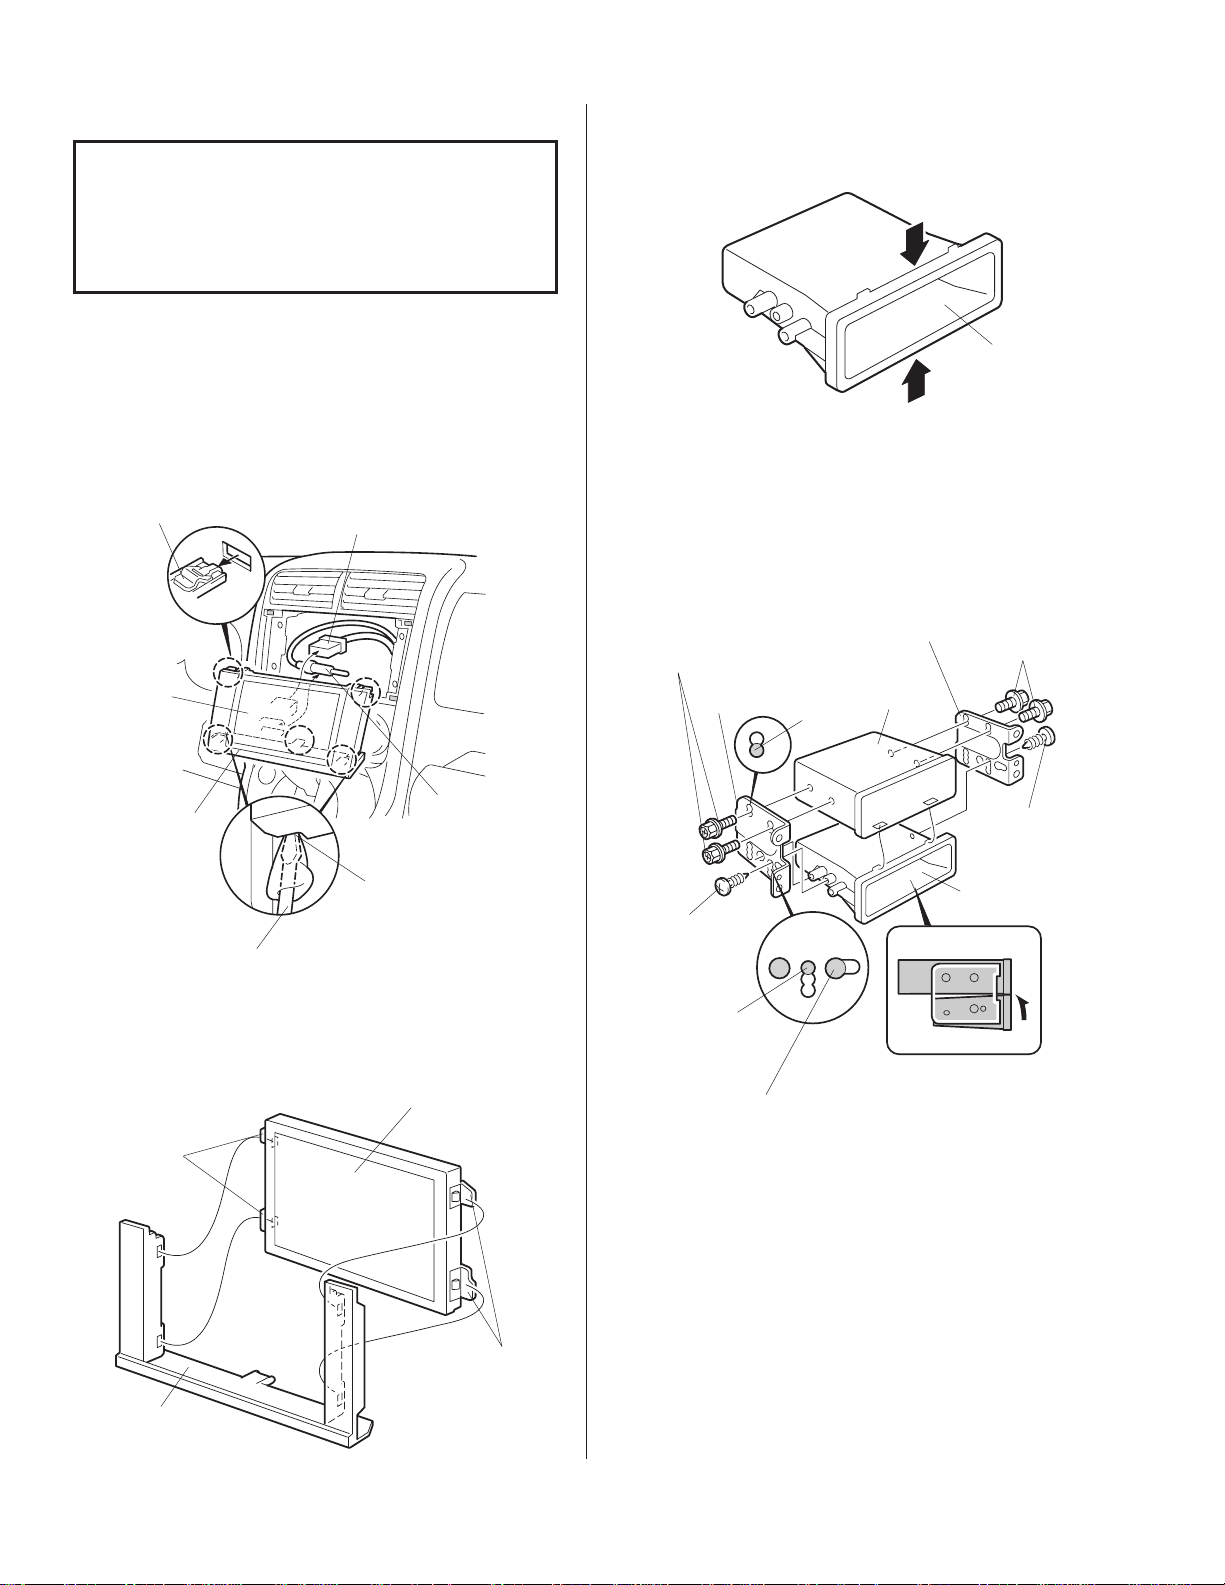
3. Push the front of the pocket from above and below
and hold for one minute to fix the shape.
PUSHDOWN
POCKET
PUSHUP
2008060K
CLIPS (5)
COVER
AUDIO
PANEL
FLAT-TIP
SCREWDRIVER
VEHICLE 20-PIN
CONNECTOR
ANTENNA
LEAD
GROOVES IN
AUDIO PANEL
2828202K
2. Remove and discard the cover from the audio
panel (four tabs).
COVER
(Not reused.)
RETAINING
TAB
4. Position the audio unit on the pocket and install
the two brackets with the four 5 x 8 mm washerbolts and two 4 x 12 mm self-tapping screws.
5 x 8 mm
WASHERSCREW
BRACKET
"L"
4 x 12 mm
SELFTAPPING
SCREW
Use the
upper hole.
Insert the
boss on the
pocket with
this hole.
BRACKET
"R"
Use the
lower
hole
AUDIO
UNIT
Tighten with a screw
while pushing the
front of the pocket in
upward direction.
5 x 8 mm
WASHERSCREW
4 x 12 mm
SELFTAPPING
SCREW
POCKET
2625021K
RETAINING
TAB
AUDIO
PANEL
2018030K
2 of 3 AII 24298 (0212) © 2002 American Honda Motor Co., Inc - All Rights Reserved.
Page 3

Installing the Audio Unit and Pocket Assembly
XXXXXXXXXXX
XXXXXXXXXXX
use the 5 x 16 screws that
were included separately,
not the 4 x 16 self tapping
ones
XXXXXXXXXXXXXXXXXXXXXXXXX 5 x 16 screws
5. While holding the audio unit close to the center
panel opening, plug the vehicle 20-pin connector
and antenna lead into the back of the audio unit.
ANTENNA LEAD
VEHICLE 20-PIN
CONNECTOR
AUDIO
UNIT
4 x 16 mm
SELF-TAPPING
SCREWS
2828210K
6. Slide the audio unit and pocket assembly into the
center panel opening and install the four
4 x 16 mm self-tapping screws.
7. Turn the ignition key on, and enter the radio
anti-theft code.
8. Check the operation of the audio unit as described
in the Owner’s Manual supplied.
9. Set the radio clock.
10. Reinstall all removed parts.
11. Put the AM/FM CD Tuner Owner’s Manual in the
glove box.
© 2002 American Honda Motor Co., Inc - All Rights Reserved. AII 24298 (0212) 3 of 3
 Loading...