

Page 1
One of the best ways to enhance the enjoyment of your new vehicle is to
read this manual. In it, you will learn how to operate its driving controls and
convenience items. Afterwards, keep this owner’s manual in your vehicle so
youcanrefertoitatanytime.
Several warranties protect your new vehicle. Read the warranty booklet
thoroughly so you understand the coverages and are aware of your rights
and responsibilities.
Maintaining your vehicle according to the schedules given in this manual
helps to keep your driving trouble-free while it preserves your investment.
When your vehicle needs maintenance, keep in mind that your dealer’s staff
is specially trained in servicing the many systems unique to your vehicle.
Your dealer is dedicated to your satisfaction and will be pleased to answer
any questions and concerns.
As you read this manual, you will
find information that is preceded by
a symbol. This
information is intended to help you
avoid damage to your vehicle, other
property, or the environment.
Congratulations! Your selection of a 2011 Honda Odyssey was a wise
investment. It will give you years of driving pleasure.
Introduction
2011 Odyssey
Page 2
−
California Proposition 65 Warning
This product contains or emits chemicals known to the State of California to cause cancer and birth
defects or other reproductive harm.
Event Data Recorders
This data belongs to the vehicle owner and may not be accessed by anyone else
except as legally required or with the permission of the vehicle owner.
Service Diagnostic Recorders
This vehicle is equipped with service-related devices that record information about powertrain performance. The data
can be used to verify emissions law requirements and/or help technicians diagnose and solve service problems. It may
also be combined with data from other sources for research purposes, but it remains confidential.
California Perchlorate Contamination Prevention Act
The airbags, seat belt tensioners, and CR type batteries in this vehicle may contain perchlorate materials special
handling may apply. See
www.dtsc.ca.gov/hazardouswaste/perchlorate/
Introduction
WARNING:
This vehicle is equipped with one or more devices commonly referred to as event data recorders. These
devices record front seat belt use, front passenger seat occupancy, airbag deployment data, and the f ailure
of any airbag system component.
2011 Odyssey
Page 3
−
−
−
−
−
−
Your safety, and the safety of others,
is very important. And operating this
vehicle safely is an important
responsibility.
To help you make informed
decisions about safety, we have
provided operating procedures and
other information on labels and in
this manual. This information alerts
you to potential hazards that could
hurt you or others.
Of course, it is not practical or
possible to warn you about all the
hazards associated with operating or
maintaining your vehicle. You must
use your own good judgement.
You will f ind this important safety information in a variety of forms,
including:
This entire book is filled with important safety information please read it
carefully.
how to use this vehicle correctly and safely.
such as Driver and Passenger Safety.
such as Important Safety Reminders or Important
Safety Precautions.
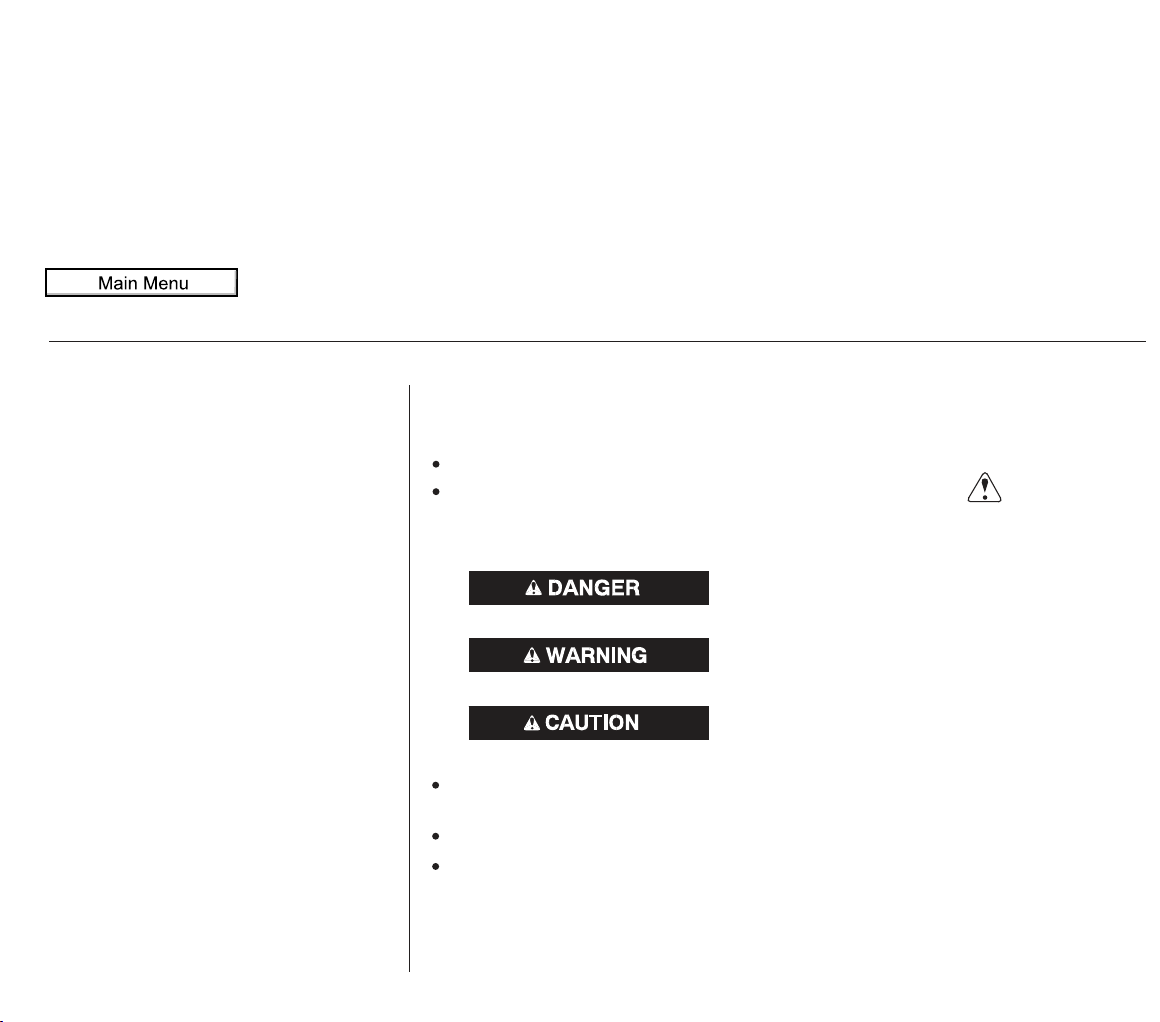
These signal words mean:
on the vehicle.
preceded by a safety alert symbol and one of
three signal words: , , or .
AFewWordsAboutSafety
Instructions
Safety Section
Safety Headings
Safety Labels
Safety Messages
DANGER WARNING CAUTION
You CAN be HURT if you don’t follow
instructions.
You CAN be KILLED or SERIOUSLY
HURT if you don’t follow instructions.
You WILL be KILLED or SERIOUSLY
HURT if you don’t follow instructions.
2011 Odyssey
Page 4

(fluid capacities and tire pressures)
(main controls)
(seat belts, SRS, and child protection)
(indicators, gauges, dashboard, and steering column)
(climate control, audio, steering wheel, rear entertainment, security, cruise control, and HomeLink
)
(fuel, vehicle break-in, and cargo loading)
(engine and transmission operation)
(minder, fluid checking, minor services, and vehicle storage)
(flat tire, jump starting, overheating, and fuses)
(vehicle specifications, tires, and emissions controls)
(warranty and contact information)
(how to order)
Contents
................................................................................................................................................Index .I
Service Information Summary
...............................................................................................Your Vehicle at a Glance .3
............................................................Driver and Passenger Safety .5
..........................................Instruments and Controls .61
..Features .217
.......................................................................Before Driving .539
.........................................................................................Driving .557
.................................................Maintenance .597
........................................Taking Care of the Unexpected .653
..............................................Technical Information .685
..................Warranty and Customer Relations (U.S. and Canada only) . 703
..................................................................................Authorized Manuals (U.S. only) .707
Owner's Identification Form
2011 Odyssey
00X31-TK8-6001
© Amerian Honda Motor Co., Inc. - All Rights Reserved
Page 5
A convenient reference to the
sections in this manual.
A quick reference to the main
controls in your vehicle.
Explains the purpose of each
instrument panel indicator and gauge,
and how to use the controls on the
dashboard and steering column.
ID numbers, dimensions, capacities,
and technical information.
How to order manuals and other
technical literature.
A summary of the information you
need when you pull up to the fuel
pump.
Important information about the
proper use and care of your vehicle’s
seat belts, an overview of the
supplemental restraint system, and
valuable inf ormation on how to
protect children with child restraints.
How to operate the heating and
cooling system/climate control
system, the audio system, rear
entertainment and other
convenience features.
This section covers several problems
motorists sometimes experience,
and details how to handle them.
The Maintenance Minder shows
you when you need to take your
vehicle to the dealer for maintenance
service. There is also a list of things
to check and instructions on how to
check them.
The proper way to start the engine,
shift the transmission, and park; plus
what you need to know if you’re
planning to tow a trailer.
What gasoline to use, how to breakin your new vehicle, and how to load
luggage and other cargo.
A summary of the warranties
covering your new vehicle, and how
to contact us for any reason. Refer to
your warranty manual for detailed
information.
Contents
Your Vehicle at a Glance
Driver and Passenger Saf ety
Instruments and Controls
Features
Technical Information
Warranty and Customer
Relations
(U.S. and Canada only)
Authorized Manuals
(U.S. only)
Index
Service Information Summary
Taking Care of the Unexpected
Maintenance
Driving
Before Driving
Overview of Contents
TM
2011 Odyssey
Page 6
*
*
*
*
*
*
*
*
*
: If equipped
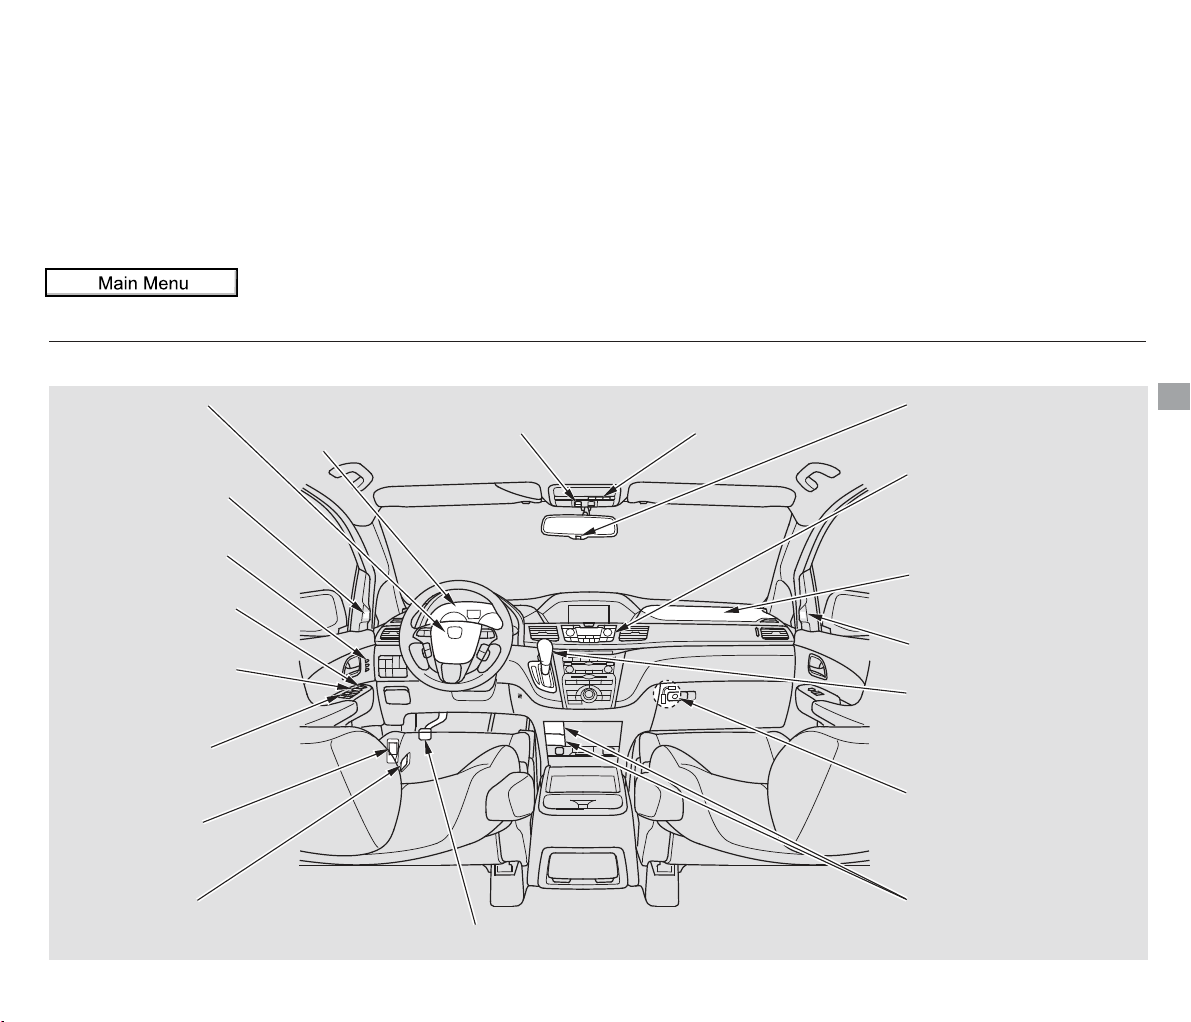
Your Vehicle at a Glance
Your Vehicle at a Glance
PARKING BRAKE PEDAL
MIRROR CONTROL
AUTO BUTTON
PASSENGER’S
FRONT AIRBAG
AUTOMATIC
TRANSMISSION
USB ADAPTER CABLE
DRIVING POSITION
MEMORY SYSTEM
MIRROR CONTROLS
POWER DOOR LOCK
MASTER SWITCH
POWER WINDOW
SWITCHES
FUEL FILL DOOR
RELEASE HANDLE
HOOD RELEASE
HANDLE
GAUGES
BSI ALERT INDICATOR
DRIVER’S FRONT
AIRBAG
ACCESSORY POWER
SOCKETS
HEATING AND
COOLING SYSTEM
CLIMATE CONTROL
SYSTEM
BSI ALERT INDICATOR
(P.
9, 26)
(P.
9, 26)
(P.190)
(P.198)
(P.155)
(P.
192)
(P.
199) (P.211)
(P.
288, 298, 385, 395)
(P.
225)
(P.
218)
(P.
197)
(P.
483)
(P.
195)
INSTRUMENT PANEL
INDICATORS
(P.63)
(P.
77)
(P.
541)
(P.561)
(P.
582)
(P.582)
(P.
544)
MOONROOF
SWITCH
HOMELINK
BUTTONS
2011 Odyssey
Page 7
*
*
*
*
*
*
*
*
*
*
*
*
*
*
*
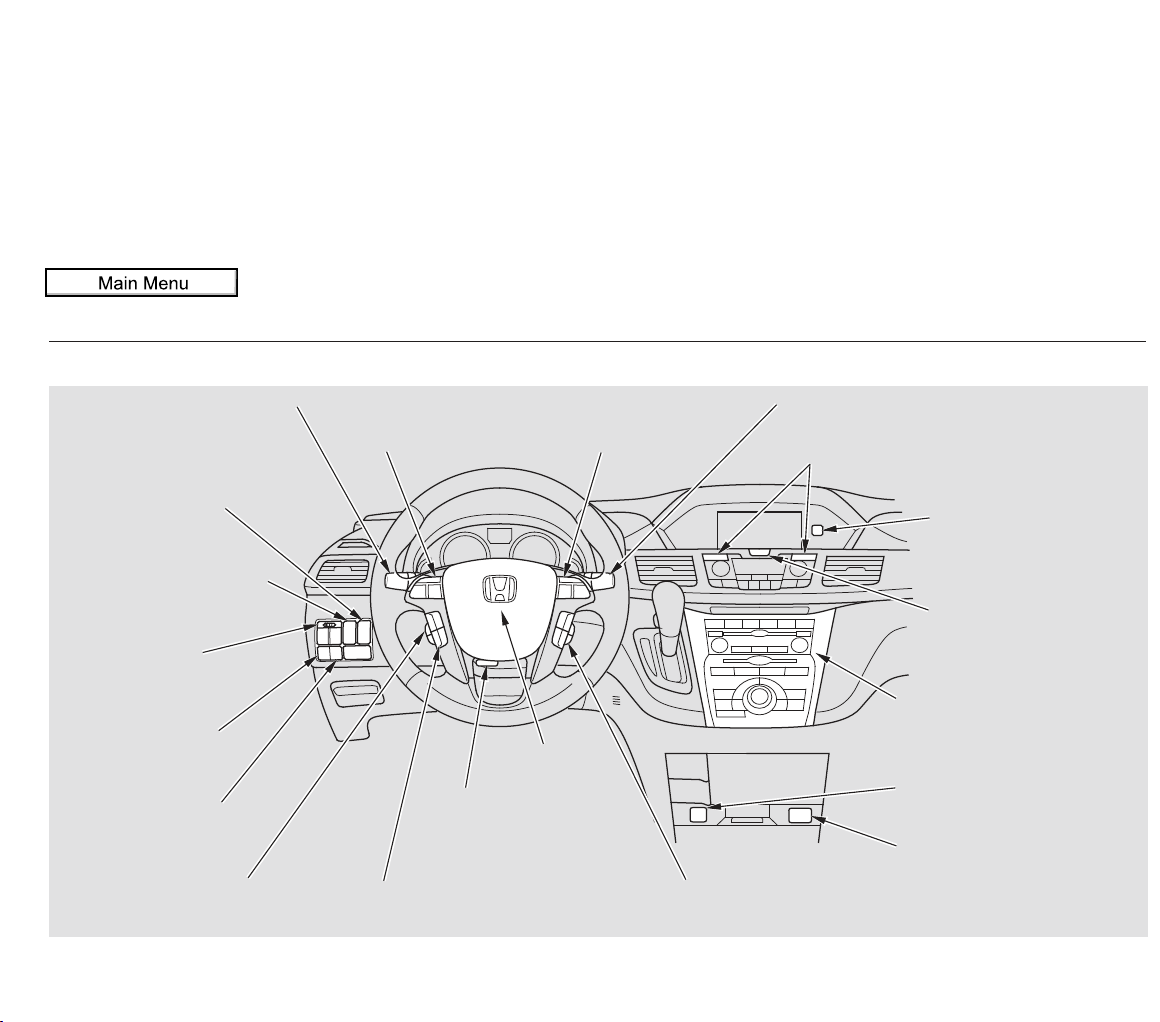
To use the horn, press the center pad of the steering wheel.1:
2 : If equipped
Your Vehicle at a Glance
CRUISE CONTROL
BUTTONS
HORN
WINDSHIELD WIPERS/WASHERS
PASSENGER AIRBAG
OFF INDICATOR
HAZARD WARNING
BUTTON
AUXILIARY INPUT JACK
STEERING WHEEL
ADJUSTMENTS
(P.
33)
(P.136)
(P.
169)
(P.
163)
(P.486)
(P.
143)
(P.
83)
(P.
209)
(P.
412)
(P.
414, 442)
AUDIO SYSTEM(P.
234)
(P.
142)
(P.189)
(P.
135)
(P.
480)(P.411)
(P.
571)
(P.
585)
(P.
496, 517)
BLIND SPOT
INFORMATION SYSTEM
(BSI) OFF SWITCH
POWER SLIDING
DOOR SWITCH
POWER TAILGATE
SWITCH
PARKING SENSOR
SYSTEM SWITCH
VOICE CONTROL BUTTONS
MULTI-INFORMATION
BUTTONS
COOL BOX SWITCH
REAR ENTERTAINMENT
SYSTEM
SEAT HEATER SWITCHES
REMOTE AUDIO
CONTROLS
BLUETOOTH HANDSFREELINK
BUTTONS
(P.
496, 517)
HEADLIGHT/TURN SIGNAL/
FOG LIGHTS
VEHICLE STABILITY ASSIST
(VSA) OFF SWITCH
1
2
2
2
2
2
2
2
2
2
2
2
2
2011 Odyssey
Page 8
−
This section gives you important
information about how to protect
yourself and your passengers. It
shows you how to use seat belts. It
explains how your airbags work. And
it tells you how to properly restrain
infants and children in your vehicle.
.........Important Safety Precautions .
6
.......Your Vehicle’s Safety Features . 7
.......................................Seat Belts . 8
...........................................Airbags . 9
.........Protecting Adults and Teens . 11
.....1. Close and Lock the Doors . 11
...........2. Adjust the Front Seats . 12
............3. Adjust the Seat-Backs . 13
...4. Adjust the Head Restraints . 14
5. Fasten and Position the Seat
.....................................Belts .
15
6. Maintain a Proper Sitting
................................Position .
17
.....Advice for Pregnant Women . 18
...Additional Safety Precautions . 18
Additional Information About Your
.................................Seat Belts .
20
..Seat Belt System Components . 20
......................Lap/Shoulder Belt . 21
Automatic Seat Belt
.............................Tensionners .
22
...............Seat Belt Maintenance . 23
Additional Information About Your
.....................................Airbags .
24
......Airbag System Components . 24
How Your Front Airbags
.........................................Work .
26
...How Your Side Airbags Work . 30
How Your Side Curtain Airbags
.........................................Work .
31
..How the SRS Indicator Works . 32
How the Side Airbag Off
......................Indicator Works .
33
How the Passenger Airbag
...............Off Indicator Works .
33
.............................Airbag Service . 34
...Additional Safety Precautions . 35
Protecting Children General
................................Guidelines .
36
All Children Must Be
...............................Restrained .
36
All Children Should Sit in a Back
...........................................Seat .
37
The Passenger’s Front Airbag
.........Can Pose Serious Risks .
37
If You Must Drive with
.....................Several Children .
39
If a Child Requires Close
..................................Attention .
39
...Additional Safety Precautions . 39
Protecting Infants and Small
...................................Children .
41
.......................Protecting Infants . 41
.........Protecting Small Children . 42
.....................Selecting a Child Seat . 44
....................Installing a Child Seat . 45
...............................With LATCH . 46
.........W
ith a Lap/Shoulder Belt .
50
..............................With a Tether . 52
...........Protecting Larger Children . 54
...............Checking Seat Belt Fit . 54
..................Using a Booster Seat . 55
When Can a Larger Child Sit in
.........................................Front .
56
...Additional Safety Precautions . 57
.............Carbon Monoxide Hazard . 58
...................................Safety Labels . 59
Driver and Passenger Safety
Driver and Passenger Safety
2011 Odyssey
Page 9
−
You’ll find many safety
recommendations throughout this
section, and throughout this manual.
Therecommendationsonthispage
are the ones we consider to be the
most important.
A seat belt is your best protection in
all types of collisions. Airbags are
designed to supplement seat belts,
not replace them. So even though
your vehicle is equipped with airbags,
make sure you and your passengers
always wear your seat belts, and
wear them properly (see page ).
Children age 12 and under should
ride properly restrained in a back
seat, not the front seat. Infants and
smallchildrenshouldberestrained
in a child seat. Larger children
should use a booster seat and a lap/
shoulder belt until they can use the
belt properly without a booster seat
(see pages ).
While airbags can save lives, they
can cause serious or fatal injuries to
occupants who sit too close to them,
or are not properly restrained.
Infants, young children, and short
adults are at the greatest risk. Be
sure to f ollow all instructions and
warnings in this manual.
Alcohol and driving don’t mix. Even
one drink can reduce your ability to
respond to changing conditions, and
your reaction time gets worse with
every additional drink. So don’t drink
and drive, and don’t let your friends
drink and drive, either.
Engaging in mobile phone
conversation or other activities that
keep you from paying close attention
to the road, other vehicles and
pedestrians could lead to a crash.
Remember, situations can change
quickly, and only you can decide
when it is safe to divert attention
away f rom driving.
Having a tire blowout or a
mechanical failure can be extremely
hazardous. To reduce the possibility
of such problems, check your tire
pressures and condition frequently,
and perform all regularly scheduled
maintenance (see page ).
Excessive speed is a major factor in
crash injuries and deaths. Generally,
the higher the speed, the greater the
risk, but serious injuries can also
occur at lower speeds. Never drive
faster than is safe for current
conditions, regardless of the
maximum speed posted.
15
36 57
599
Important Safety Precautions
Always Wear Your Seat Belt
Restrain All Children
Be Aware of Airbag Hazards
Don’t Drink and Drive
Pay Appropriate Attention to the
Task of Driving Safely
Keep Your Vehicle in Safe
Condition
Control Your Speed
2011 Odyssey
Page 10
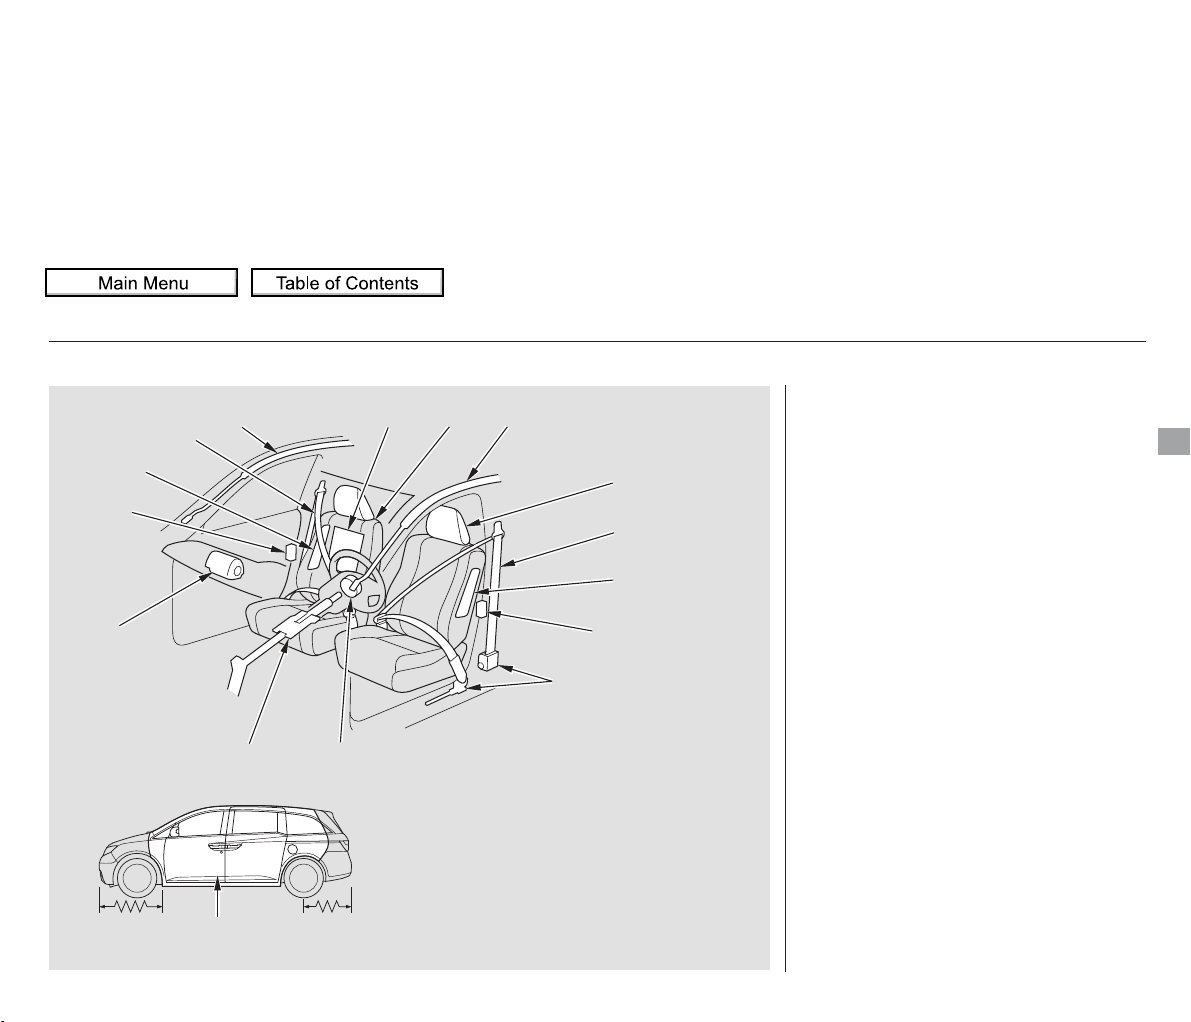
Your vehicle is equipped with many
features that work together to
protect you and your passengers
during a crash.
The following pages explain how you
cantakeanactiveroleinprotecting
yourself and your passengers.
Some features do not require any
action on your part. These include a
strong steel framework that forms a
safety cage around the passenger
compartment, front and rear crush
zones, a collapsible steering column,
and tensioners that tighten the front
seat belts in a crash.
However, you and your passengers
can’t take full advantage of these
features unless you remain sitting in
the correct position and
. In fact, some safety
features can contribute to injuries if
they are not used properly.
Your Vehicle’s Safety Features
always wear
your seat belts
Driver and Passenger Safety
(1) Safety Cage
(2) Crush Zones
(3) Seats and Seat-Backs
(4) Head Restraints
(5) Collapsible Steering Column
(6) Seat Belts
(7) Front Airbags
(8) Side Airbags
(9) Side Curtain Airbags
(10) Door Locks
(11) Front Seat Belt Tensioners
(12) Occupant Position Detection
System (OPDS) Sensor
(2)(2)
(11)
(12) (3)
(9)
(4)
(6)
(8)
(10)
(6)
(8)
(10)
(7)
(5) (7)
(1)
(9)
2011 Odyssey
Page 11
−
−
−
−
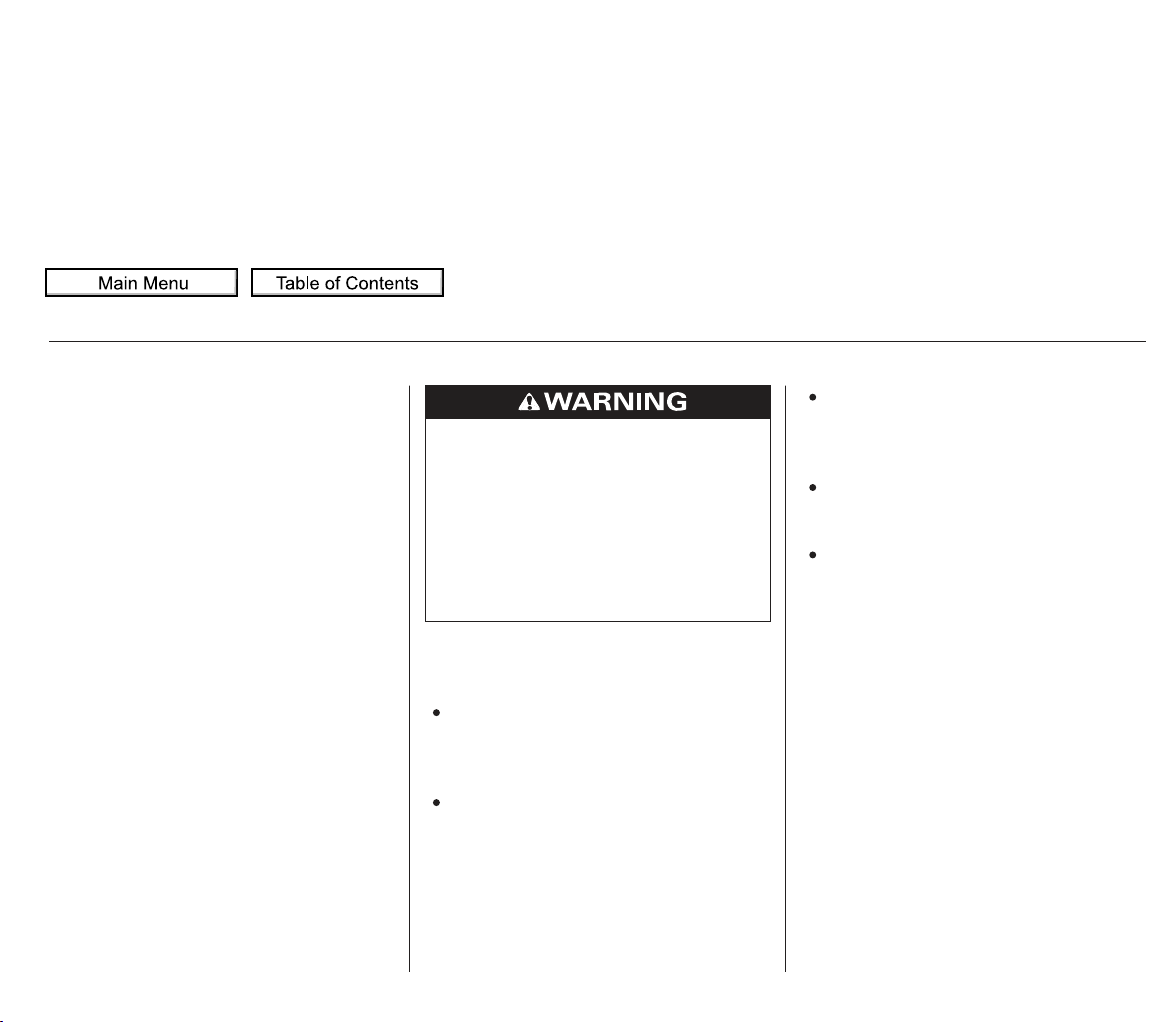
Your vehicle is equipped with seat
belts in all seating positions.
Seat belts are the single most
effectivesafetydeviceforadultsand
larger children. (Infants and smaller
children must be properly restrained
in child seats.)
Not wearing a seat belt properly
increases the chance of serious
injury or death in a crash, even
though your vehicle has airbags.
In addition, most states and all
Canadian provinces and territories
require you to wear seat belts.
When properly worn, seat belts:
Keep you connected to the vehicle
so you can take advantage of the
vehicle’s built-in safety features.
Help protect you in almost every
type of crash, including:
frontal impacts
side impacts
rear impacts
rollovers
Help keep you from being thrown
against the inside of the vehicle
and against other occupants.
Keep you from being thrown out
of the vehicle.
Help keep you in a good position
should the airbags ever deploy. A
good position reduces the risk of
injury from an inflating airbag and
allows you to get the best
advantage from the airbag.
Of course, seat belts cannot
completely protect you in every
crash.Butinmostcases,seatbelts
can reduce your risk of serious
injury.
Always wear
your seat belt, and make sure you
wear it properly.
Your seat belt system also includes
an indicator on the instrument panel
and a beeper to remind you and your
passengers to fasten your seat belts.
Your Vehicle’s Safety Features
Seat Belts
Why Wear Seat Belts
What you should do:
Not wearing a seat belt properly
increases the chance of serious
injury or death in a crash, even
though your vehicle has airbags.
Be sure you and your
passengers always wear seat
belts and wear them properly.
2011 Odyssey
Page 12
CONTINUED
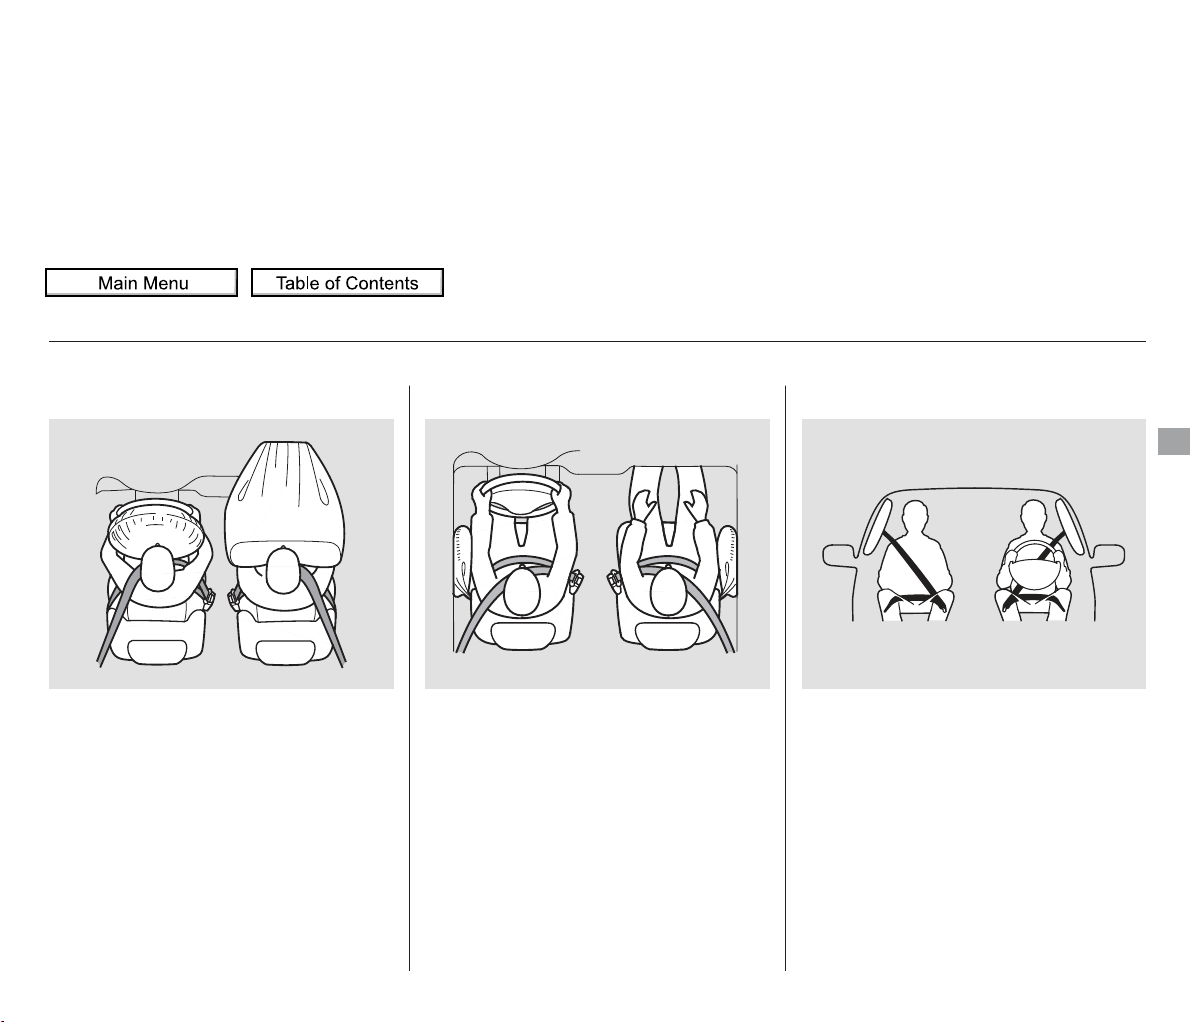
Your vehicle has a supplemental
restraint system (SRS) with front
airbags to help protect the heads and
chests of the driver and a front seat
passenger during a moderate to
severe frontal collision (see page
for more information on how
your front airbags work).
Your vehicle also has side airbags to
help protect the upper torso of the
driver or a front seat passenger
during a moderate to severe side
impact (see page for more
information on how your side airbags
work).
In addition, your vehicle has side
curtain airbags to help protect the
heads of the driver, front passenger,
and passengers in the outer rear
seating positions during a moderate
to severe side impact or rollover (see
page for more information on how
your side curtain airbags work).
26
30
31
Your Vehicle’s Safety Features
Airbags
Driver and Passenger Safety
2011 Odyssey
Page 13
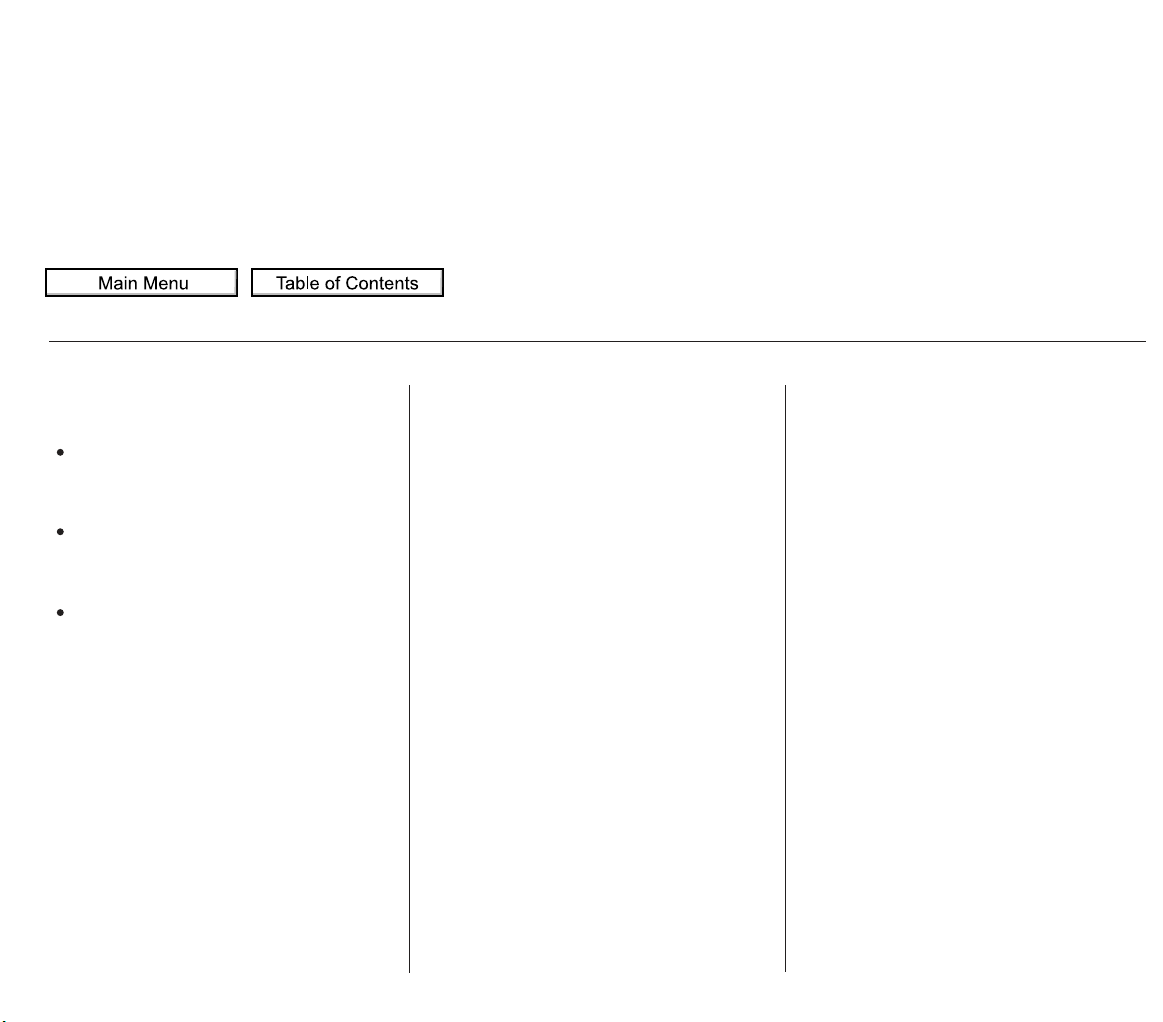
The most important things you need
to know about your airbags are:
They are designed to supplement
the seat belts.
To do their job, airbags must
inflate with tremendous force. So
while airbags help save lives, they
can cause minor injuries or more
serious or even fatal injuries if
occupants are not properly
restrained or sitting properly.
Always wear
your seat belt properly, and sit
upright and as far back from the
steering wheel as possible while
allowing full control of the vehicle. A
front passenger should move their
seat as far back from the dashboard
as possible.
The rest of this section gives more
detailed information about how you
can maximize your safety.
Remember, however, that no safety
system can prevent all injuries or
deaths that can occur in a severe
crash, even when seat belts are
properly worn and the airbags deploy.
Your Vehicle’s Safety Features
Airbags do not replace seat belts.
Airbags offer no protection in rear
collisions, or minor frontal or side
collisions.
Airbags can pose serious hazards.
What you should do:
2011 Odyssey
Page 14
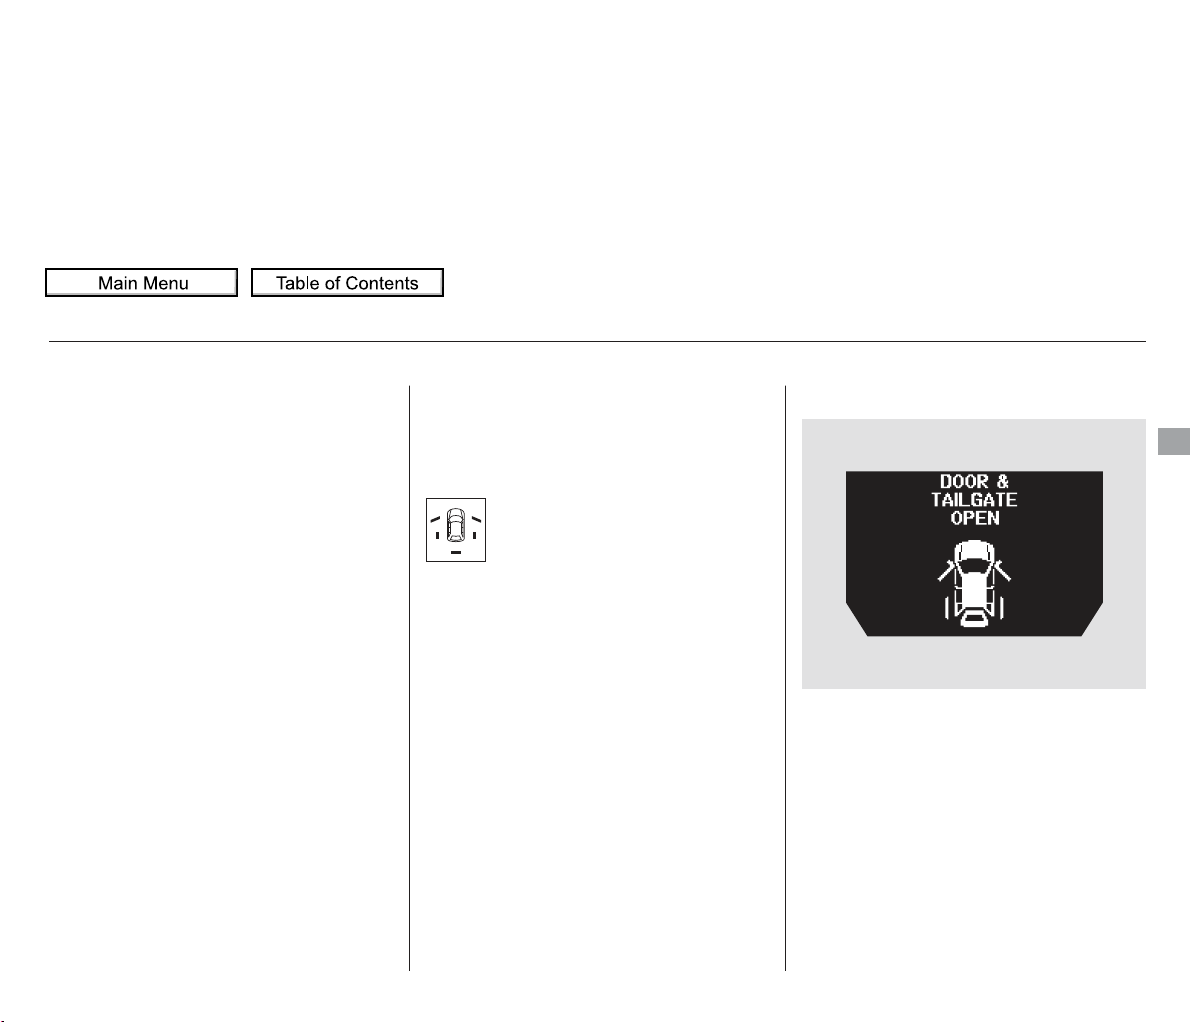
−
After everyone has entered the
vehicle, be sure the doors and the
tailgate are closed and locked.
The following pages provide
instructions on how to properly
protect the driver, adult passengers,
and teenage children who are large
enough and mature enough to drive
or ride in the front.
See pages for important
guidelines on how to properly
protect infants, small children, and
larger children who ride in your
vehicle.
Your vehicle has a door and
tailgate open indicator on the
instrument panel to indicate
when any door or the tailgate is not
tightly closed.
The door and tailgate open indicator
appears on the multi-information
display to indicate when a specific
door or the tailgate is not tightly
closed.
36 57
CONTINUED
On Touring models
Introduction Close and Lock the Doors1.
Protecting Adults and Teens
Driver and Passenger Safety
2011 Odyssey
Page 15
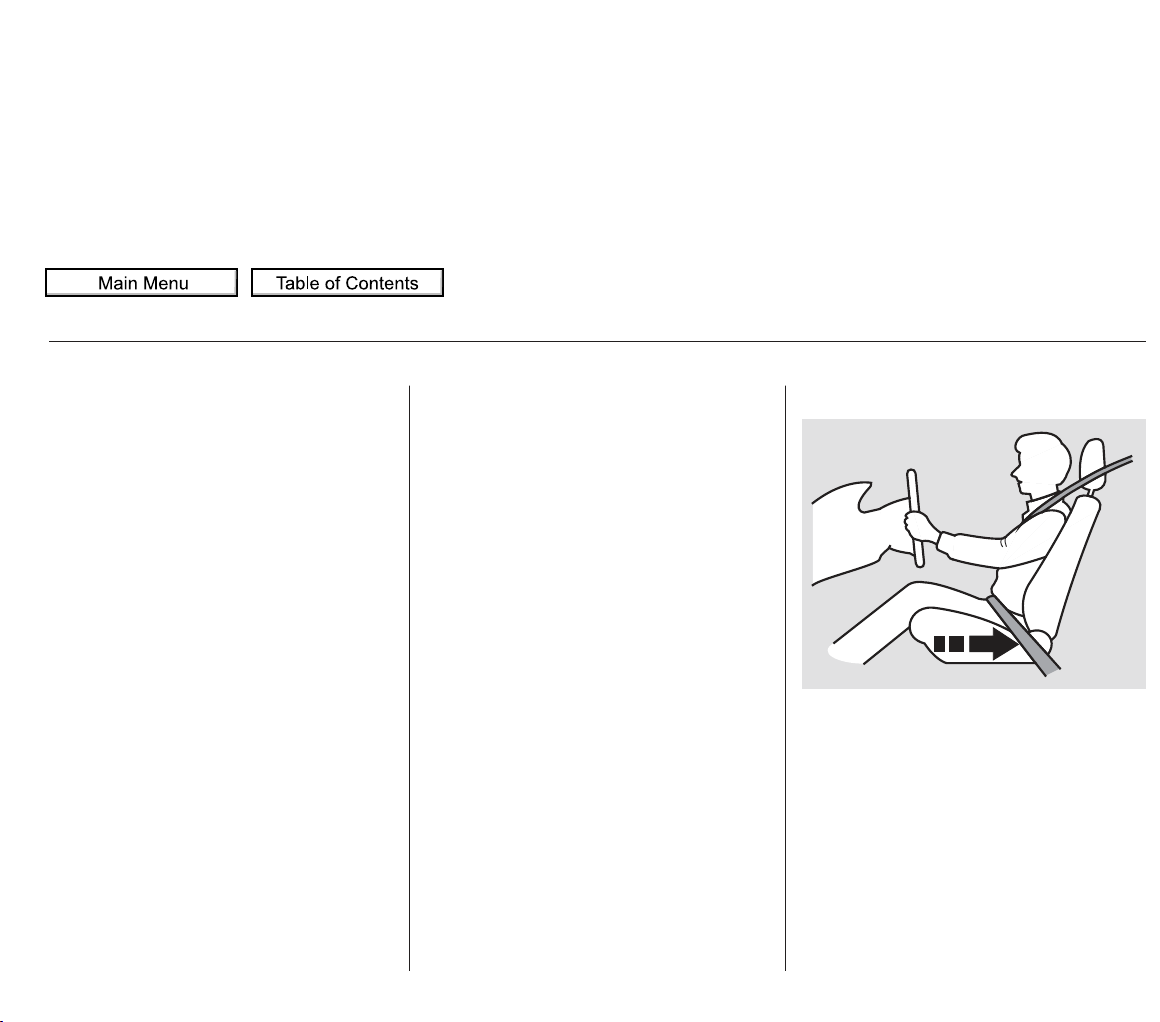
Adjust the driver’s seat as far to the
rear as possible while allowing you to
maintain f ull control of the vehicle.
Have a front passenger adjust their
seat as far to the rear as possible.
When one or more doors are open,
the ‘‘DOOR OPEN’’ message will
come on.
When the tailgate is not tightly
closed, the ‘‘TAILGATE OPEN’’
message will come on.
When both tailgate and one or more
doors are not tightly closed, the
‘‘DOOR & TAILGATE OPEN’’
message will come on.
Locking the doors and the tailgate
reduces the chance of someone
being thrown out of the vehicle
during a crash, and it helps prevent
passengers from accidentally
opening a door or the tailgate and
falling out.
Locking the doors and the tailgate
also helps prevent an outsider from
unexpectedly opening a door or the
tailgate when you come to a stop.
See page for how to lock the
doors and the tailgate, and page
for how the door and tailgate
open indicator works.
This vehicle has auto door locking/
unlocking features. See page for
how to set them.
This vehicle has auto door locking/
unlocking features. See pages
and for how to set them.
75
155
156
122120
Except Touring models
On Touring models
Adjust the Front Seats2.
Protecting Adults and Teens
2011 Odyssey
Page 16
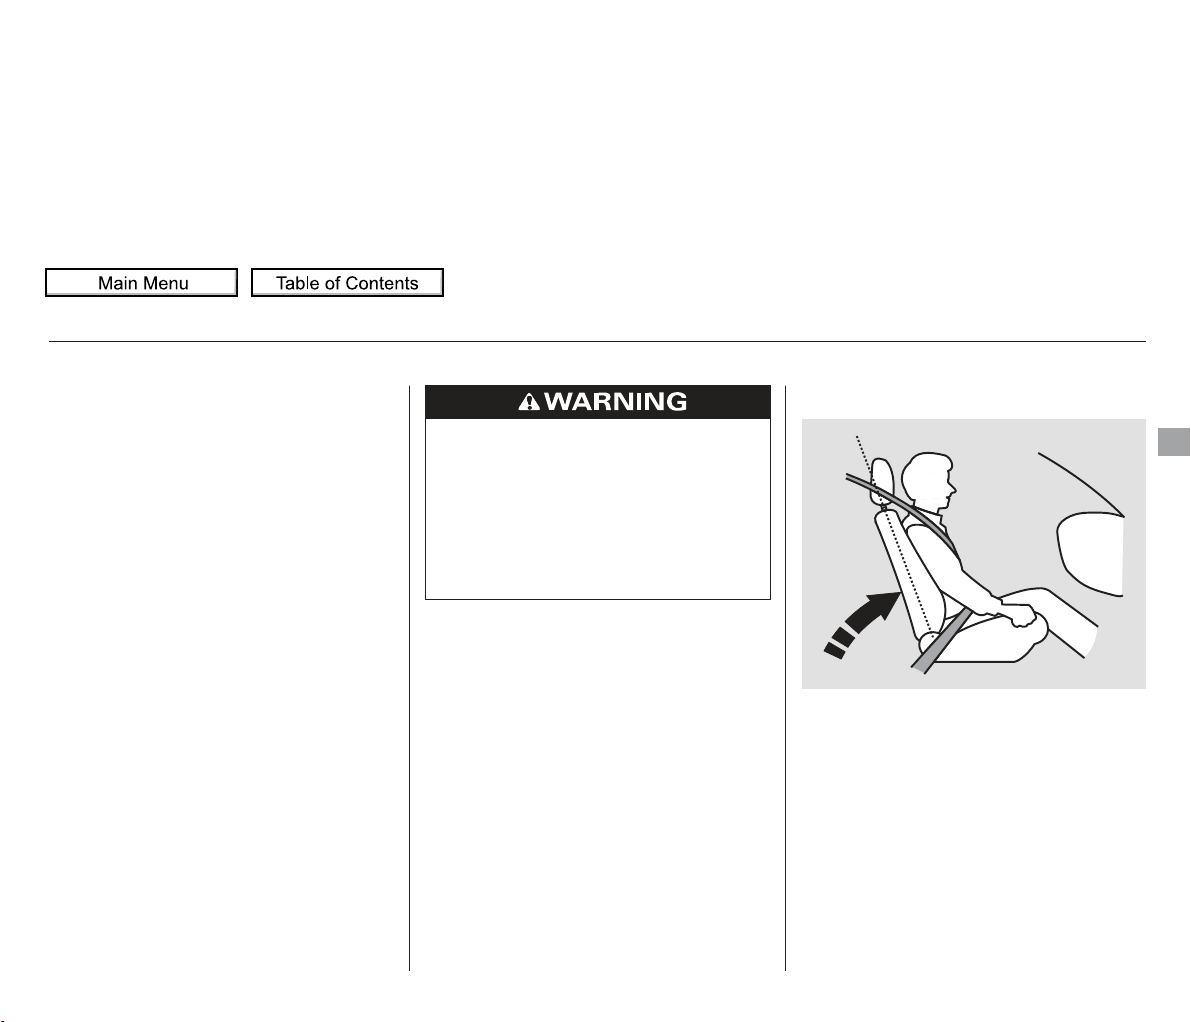
If you sit too close to the steering
wheel or dashboard, you can be
seriously injured by an inflating f ront
airbag, or by striking the steering
wheel or dashboard.
Adjust the driver’s seat-back to a
comfortable, upright position,
leaving ample space between your
chest and the airbag cover in the
center of the steering wheel.
Passengers with adjustable seatbacks should also adjust their seatback to a comfortable, upright
position.
The National Highway Traffic Safety
Administration and Transport
Canada recommend that drivers
allow at least 10 inches (25 cm)
between the center of the steering
wheel and the chest. In addition to
adjusting the seat, you can adjust the
steering wheel up and down, and in
and out (see page ).
After you adjust a manual seat, rock
it back and forth to make sure the
seat is locked in position.
See page for how to adjust a
front seat (power adjustment) and
page for a manual adjustment.
If you cannot get far enough away
from the steering wheel and still
reach the controls, we recommend
that you investigate whether some
type of adaptive equipment may help.
143
175
176
CONTINUED
Adjust the Seat-Backs3.
Protecting Adults and Teens
Driver and Passenger Safety
Sitting too close to a front
airbag can result in serious
injury or death if the front
airbags inflate.
Always sit as far back from the
front airbags as possible.
2011 Odyssey
Page 17
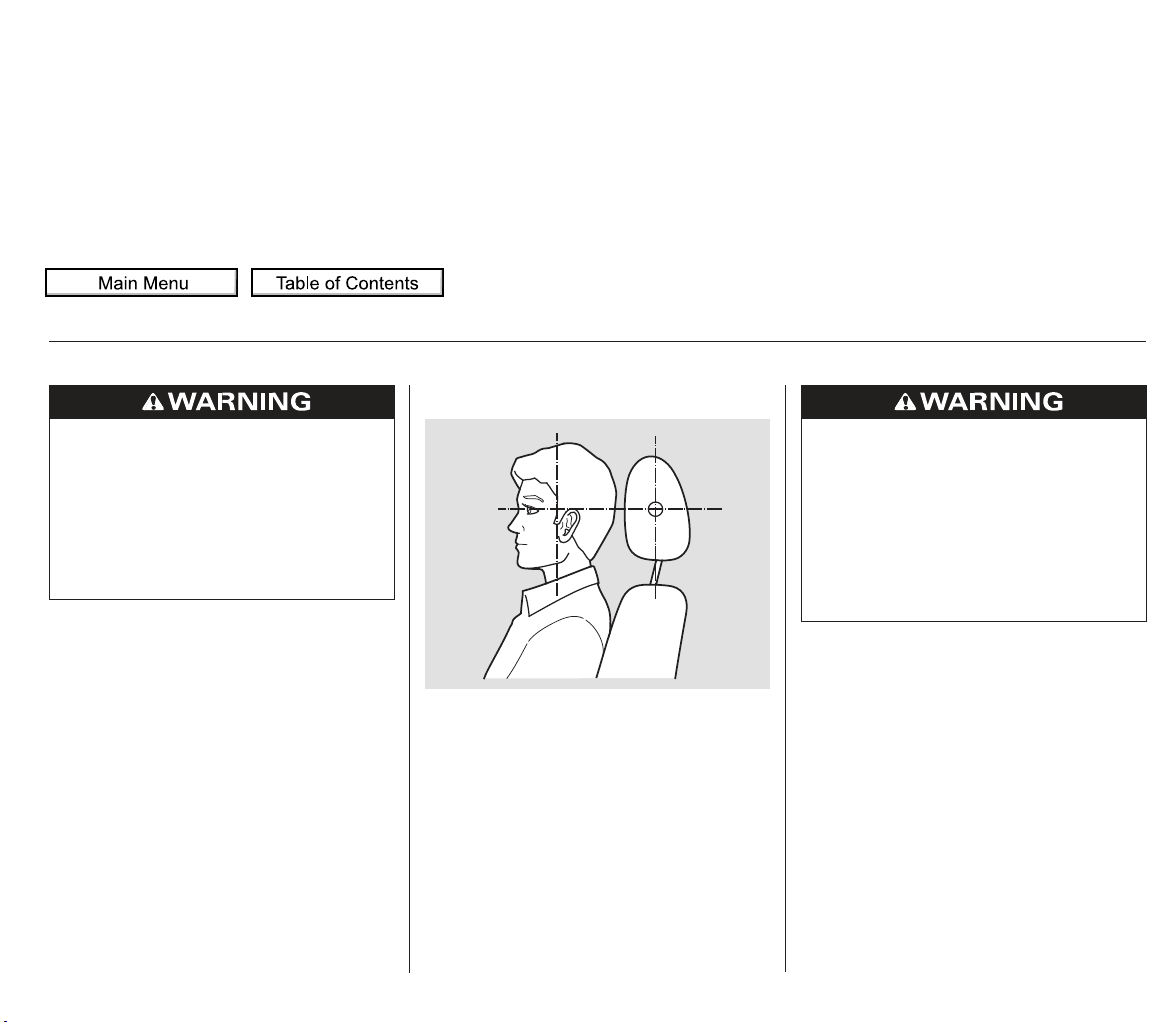
Properly adjusted head restraints
will help protect occupants from
whiplash and other crash injuries.Adjust the driver’s head restraint so
the center of the back of your head
rests against the center of the
restraint.
Reclining a seat-back so that the
shoulder part of the belt no longer
rests against the occupant’s chest
reduces the protective capability of
the belt. It also increases the chance
of sliding under the belt in a crash
and being seriously injured. The
farther a seat-back is reclined, the
greater the risk of injury.
See pages and for how to
adjust the seat-backs.
Have passengers adjust their head
restraints properly as well. Taller
persons should adjust their restraint
as high as possible.
See page for how to adjust the
head restraints and how the driver’s
and front passenger’s active head
restraints work.
175 177
179
Adjust the Head Restraints4.
Protecting Adults and Teens
Improperly positioning head
restraints reduces their
effectiveness and you can be
seriously injured in a crash.
Make sure head restraints are
in place and positioned properly
before driving.
Reclining the seat-back too far
can result in serious injury or
death in a crash.
Adjust the seat-back to an
upright position, and sit well
back in the seat.
2011 Odyssey
Page 18
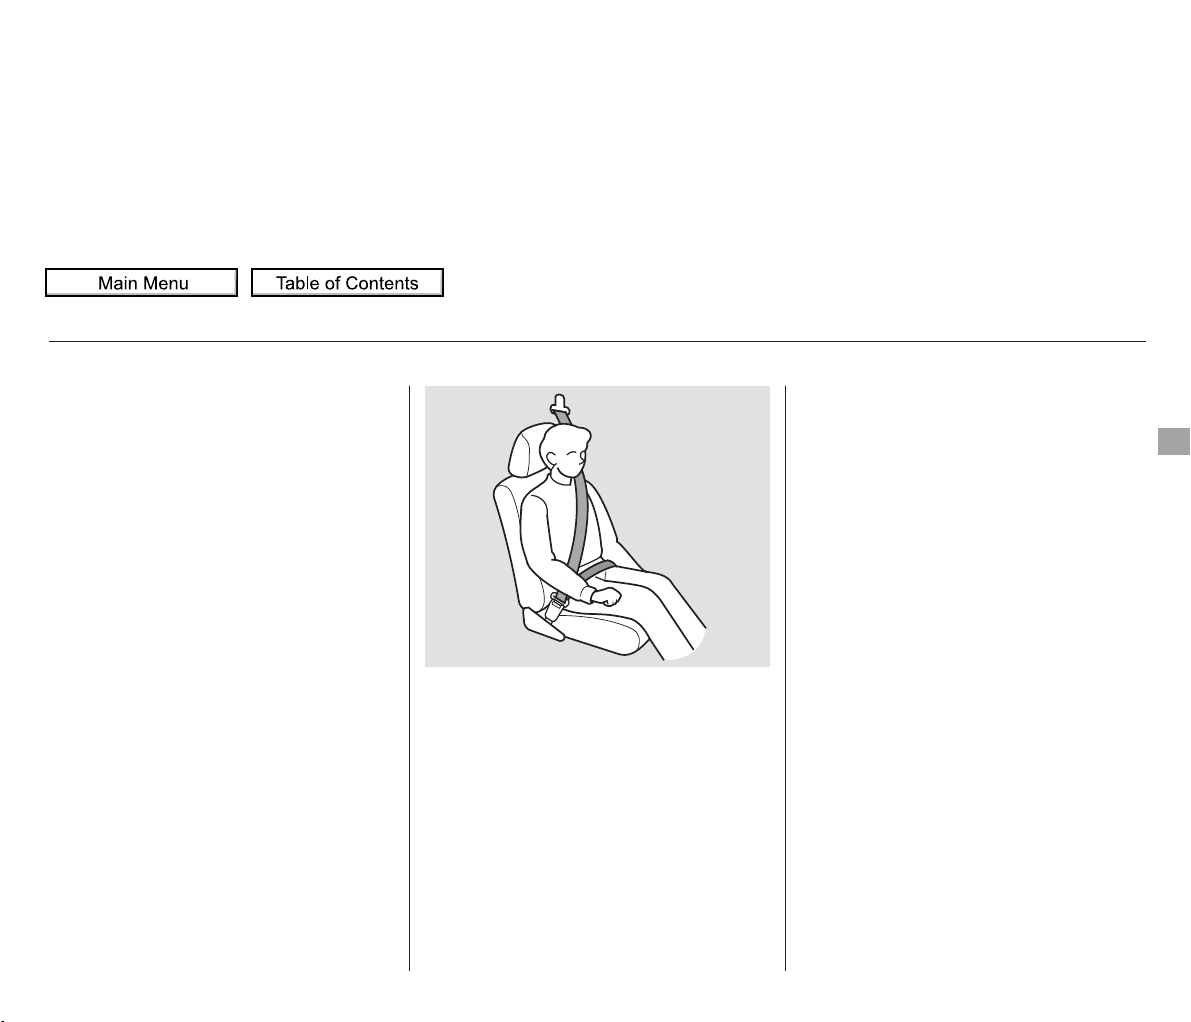
Position the lap part of the belt as
low as possible across your hips,
then pull up on the shoulder part of
the belt so the lap part f its snugly.
This lets your strong pelvic bones
take the force of a crash and reduces
the chance of internal injuries.
Insert the latch plate into the buckle,
then tug on the belt to make sure the
belt is securely latched. Check that
the belt is not twisted, because a
twisted belt can cause serious
injuries in a crash.
This spreads the forces of a crash
over the strongest bones in your
upper body.
If necessary, pull up on the belt again
to remove any slack, then check that
the belt rests across the center of
your chest and over your shoulder.
The center seating position of the
third row has a detachable seat belt
that can be unlatched and retracted
into the ceiling to allow the seat to be
folded down or for the belt to be
stored out of reach of a child. See
pages and for how to unlatch
and relatch the seat belt.
The multi-functional center seat that
canbeinstalledinthecenterseating
position of the second row also has a
detachable seat belt.
188187
CONTINUED
On all models except LX
Fasten and Position the Seat
Belts
5.
Protecting Adults and Teens
Driver and Passenger Safety
2011 Odyssey
Page 19
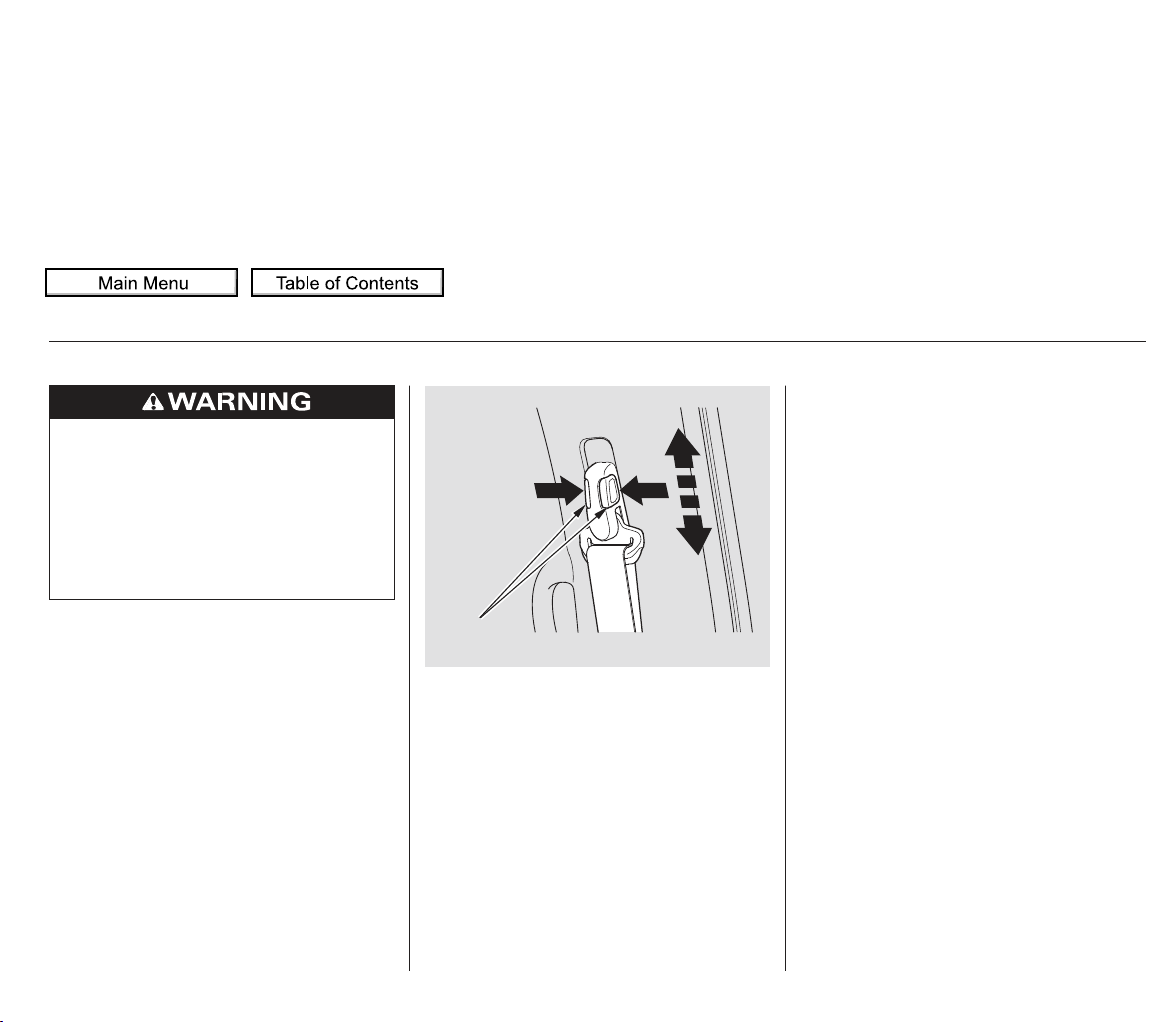
This could cause
very serious injuries in a crash.
If a seat belt does not seem to work
properly, it may not protect the
occupant in a crash.
Using a seat
belt that is not working properly can
result in serious injury or death.
Have your dealer check the belt as
soon as possible.
See page for additional
information about your seat belts
and how to take care of them.
The front seats and second row seats
have adjustable seat belt anchors. To
adjust the height of an anchor,
squeeze the two release buttons, and
slide the anchor up or down as
needed (it has four positions).
If the seat belt touches or crosses
your neck, or if it crosses your arm
instead of your shoulder, you need to
adjust the seat belt anchor height.
20
Protecting Adults and Teens
Never place the shoulder portion of a
lap/shoulder belt under your arm or
behind your back.
No one should sit in a seat with an
inoperative seat belt.
RELEASE
BUTTONS
Improperly positioning the seat
belts can cause serious injury
or death in a crash.
Make sure all seat belts are
properly positioned before
driving.
2011 Odyssey
Page 20
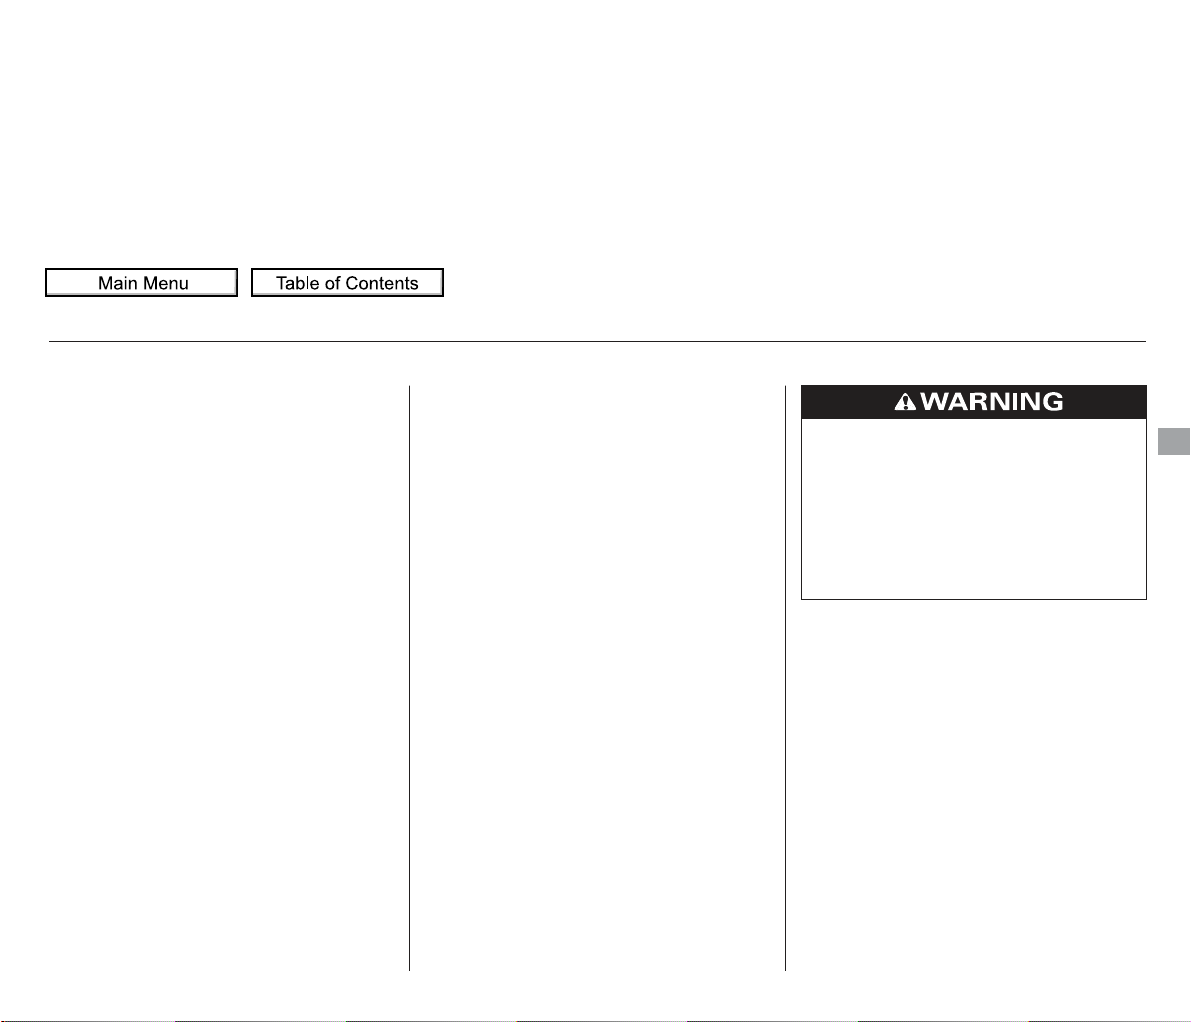
After all occupants have adjusted
their seats and head restraints, and
put on their seat belts, it is very
important that they continue to sit
upright, well back in their seats, with
their feet on the floor, until the
vehicle is safely parked and the
engine is off.
In addition, an occupant who is out of
position in the front seat can be
seriously or fatally injured in a crash
by striking interior parts of the
vehicle or being struck by an
inflating front airbag.
Sitting improperly can increase the
chance of injury during a crash. For
example, if an occupant slouches,
lies down, turns sideways, sits
forward, leans forward or sideways,
or puts one or both feet up, the
chance of injury during a crash is
greatly increased.
Maintain a Proper Sitting
Position
6.
Protecting Adults and Teens
Driver and Passenger Safety
Sitting improperly or out of
position can result in serious
injury or death in a crash.
Always sit upright, well back in
the seat, with your feet on the
floor.
2011 Odyssey
Page 21
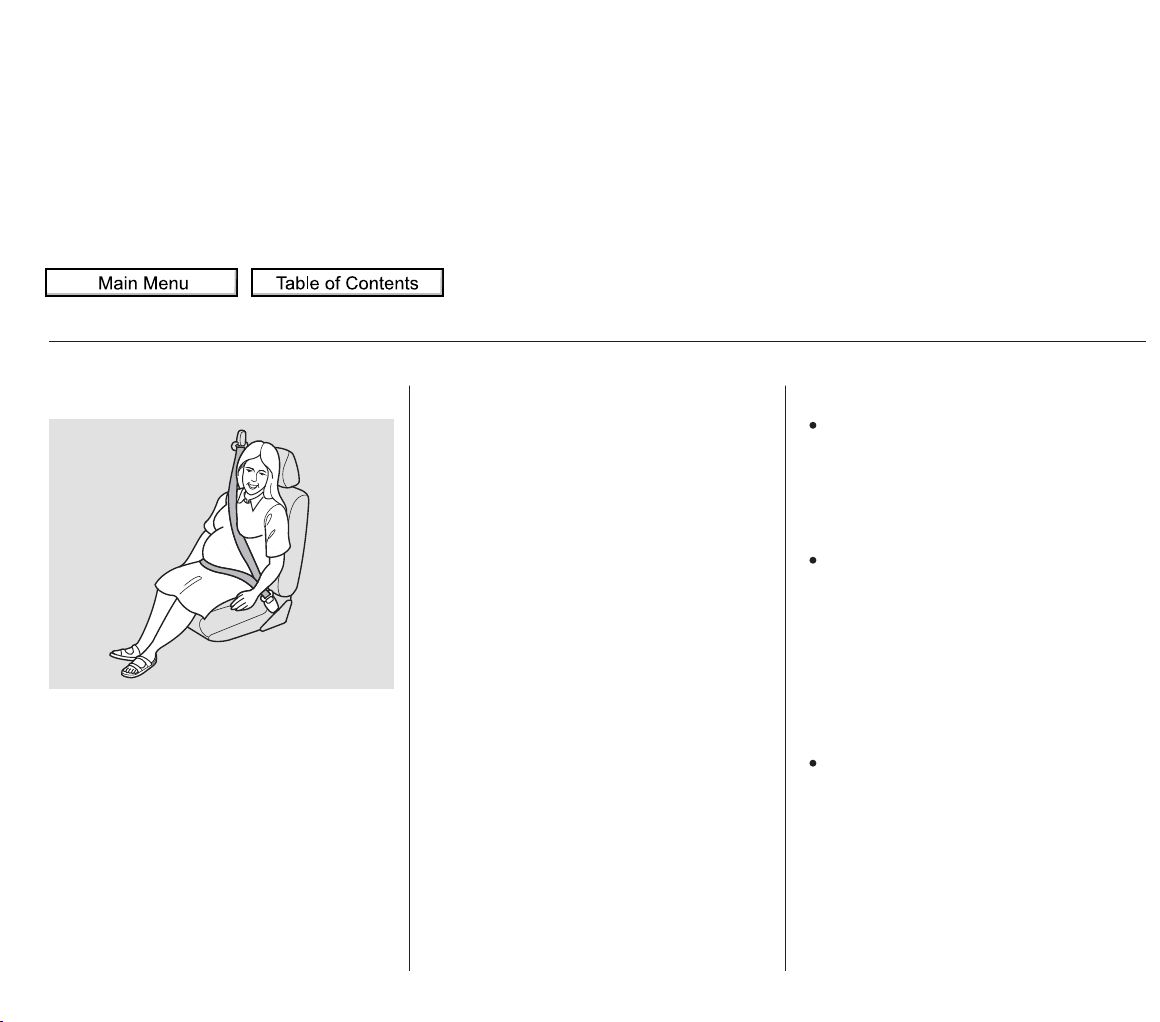
If you are pregnant, the best way to
protect yourself and your unborn
child when driving or riding in a
vehicle is to always wear a seat belt,
and keep the lap part of the belt as
low as possible across the hips.
When driving, remember to sit
upright and adjust the seat as far
back as possible while allowing full
control of the vehicle. When riding
as a front passenger, adjust the seat
as far back as possible.
This will reduce the risk of injuries
to both you and your unborn child
that can be caused by a crash or an
inflating front airbag.
Each time you have a checkup, ask
your doctor if it’s okay for you to
drive.
If they do, they
could be very seriously injured in a
crash.
A passenger who is not
wearing a seat belt during a crash
or emergency stop can be thrown
against the inside of the vehicle,
against other occupants, or out of
the vehicle.
If they do, they
could be very seriously injured in a
crash.
Advice f or Pregnant Women Additional Safety Precautions
Never let passengers ride in the
cargo area or on top of a foldeddown back seat.
Passengers should not stand up or
change seats while the vehicle is
moving.
Two people should never use the
same seat belt.
Protecting Adults and Teens
2011 Odyssey
Page 22
Carrying hard or sharp
objects on your lap, or driving with
a pipe or other sharp object in
your mouth, can result in injuries
if your front airbag inflates.
If your
hands or arms are close to an
airbag cover, they could be injured
if the airbag inflates.
Objects on
the covers marked ‘‘SRS AIRBAG’’
could interf ere with the proper
operation of the airbags or be
propelled inside the vehicle and
hurt someone if the airbags inflate.
If a side airbag or a
side curtain airbag inflates, a cup
holder or other hard object
attached on or near the door could
be propelled inside the vehicle and
hurt someone.
Devices intended to improve
occupant comfort or reposition the
shoulder part of a seat belt can
reduce the protective capability of
thebeltandincreasethechanceof
serious injury in a crash.
Improperly replacing
or covering front seat-back covers
can prevent your side airbags from
inflating during a side impact.
Do not place hard or sharp objects
between yourself and a f ront
airbag.
Keep your hands and arms away
from the airbag covers.
Do not attach or place objects on
the f ront airbag covers.
Do not attach hard objects on or
near a door.
Do not put any accessories on seat
belts.
Do not cover or replace front seatback covers without consulting
your dealer.
Protecting Adults and Teens
Driver and Passenger Safety
2011 Odyssey
Page 23
If either the driver or a front
passenger does not fasten their seat
belt while driving, the beeper will
sound and the indicator will flash
again at regular intervals.
This system monitors the f ront seat
belts. If you turn the ignition switch
to the ON (II) position before your
seat belt is fastened, the beeper will
sound and the indicator will flash. If
your seat belt is not fastened before
the beeper stops, the indicator will
stop flashing but remain on.
If a front passenger does not fasten
their seat belt, the indicator will
come on about 6 seconds after the
ignition switch is turned to the ON
(II) position.
The seat belt system
includes an indicator on the
instrument panel and a beeper to
remind you and your passengers to
fasten your seat belts.
Your seat belt system includes lap/
shoulder belts in all seating positions.
The front seat belts are also
equipped with automatic seat belt
tensioners.
You will also see a ‘‘FASTEN SEAT
BELT’’ or ‘‘FASTEN PASSENGER
SEAT BELT’’ message on the multiinformation display (see page ).
When no one is sitting in the front
passenger’s seat, or a child or small
adult is riding there, the indicator
should not come on and the beeper
should not sound.
90
On Touring models
Seat Belt System Components
Additional Information About Your Seat Belts
2011 Odyssey
Page 24
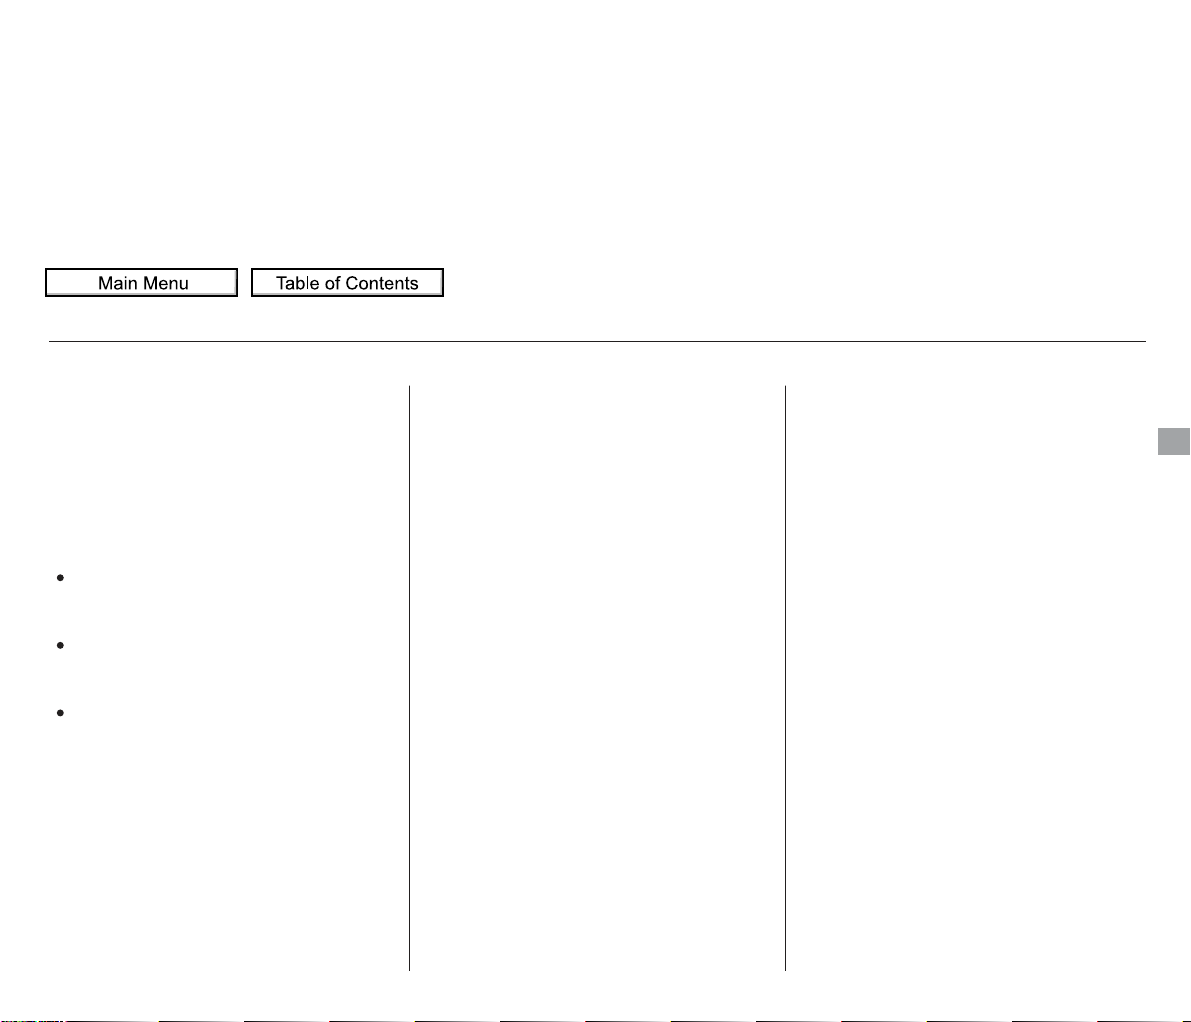
All seat belts have an emergency
locking retractor. In normal driving,
the retractor lets you move freely in
your seat while it keeps some
tension on the belt. During a collision
or sudden stop, the retractor
automatically locks the belt to help
restrain your body.
The seat belts in all positions except
the driver’s have a lockable retractor
that must be activated to secure a
child seat (see page ).
The lap/shoulder belt goes over
your shoulder, across your chest,
and across your hips.
To fasten the belt, insert the latch
plate into the buckle, then tug on the
belt to make sure the buckle is
latched (see page for how to
properly position the belt).
If the indicator comes on or the
beeper sounds when the driver’s seat
belt is latched and there is no f ront
seat passenger and no items on the
front seat, something may be
interfering with the monitoring
system. Look for and remove:
To unlock the belt, press the red
PRESSbuttononthebuckle.Guide
the belt across your body so that it
retracts completely. After exiting the
vehicle, be sure the belt is out of the
way and will not get closed in the
door.
Any items under the front
passenger’s seat.
Any object(s) hanging on the seat
or in the seat-back pocket.
If no obstructions are found, have
your vehicle checked by a dealer.
Any objects, such as a folded-down
second row seat, that is touching
the rear of the seat-back.
15
50
CONTINUED
Lap/Shoulder Belt
Additional Information About Your Seat Belts
Driver and Passenger Safety
2011 Odyssey
Page 25
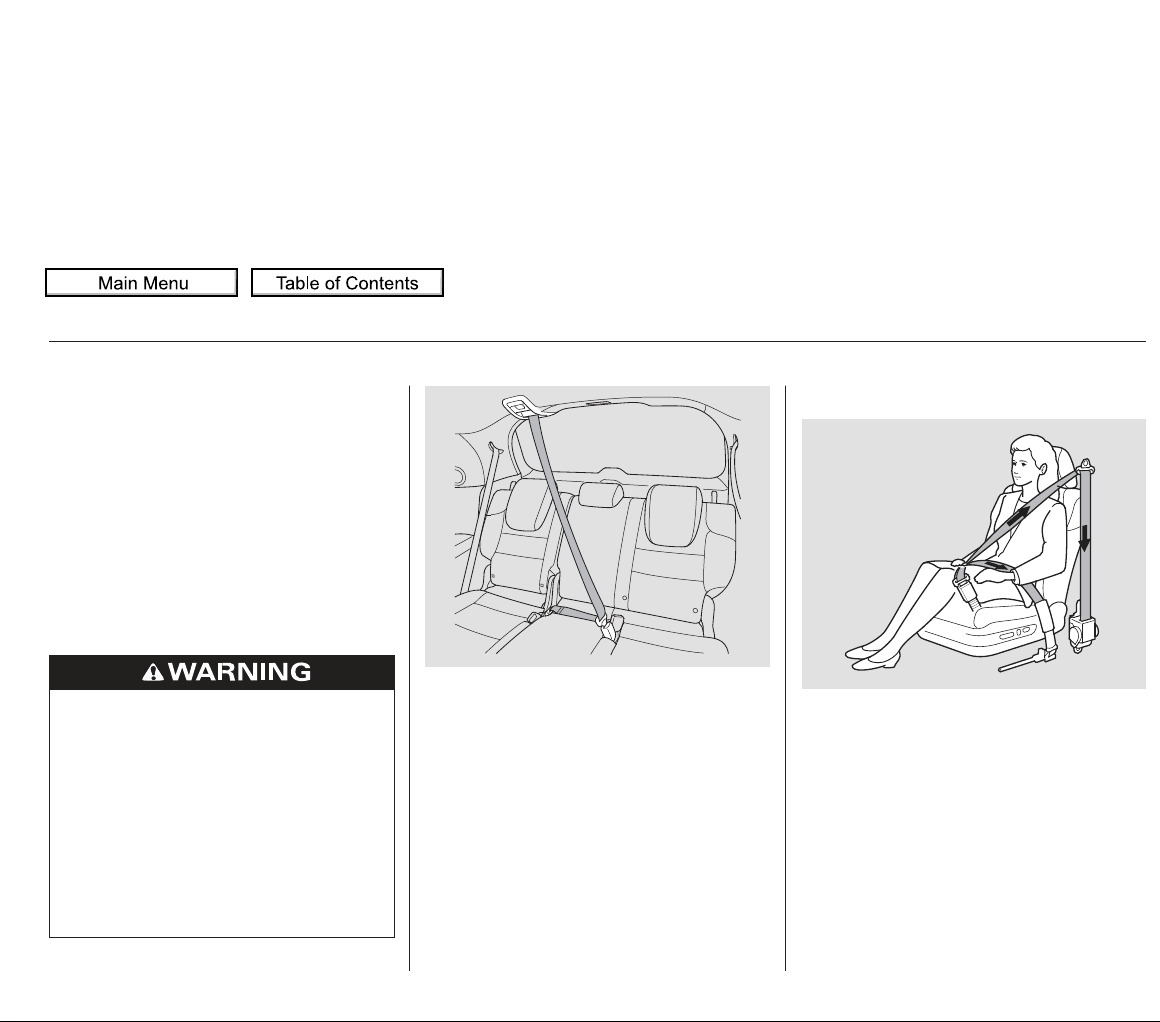
If the shoulder part of the belt is
pulled all the way out, the lockable
retractor will activate. The belt will
retract, but it will not allow the
passenger to move freely.
To deactivate the lockable retractor,
unlatch the buckle and let the seat
belt fully retract. To refasten the
seat belt, pull it out only as far as
needed.
For added protection, the front seat
belts are equipped with automatic
seat belt tensioners. When activated,
the tensioners immediately tighten
the belts to help hold the driver and
a front passenger in position.
The lap/shoulder belt in the center
seating positions on the second
(except LX models) and third row
seats are equipped with a detachable
seat belt that has two parts: a small
latch plate and an anchor buckle.
The detachable seat belt should
normally be latched whenever the
seat-backs are in an upright position.
For more inf ormation about the
detachable seat belt, see page .
187
Automatic Seat Belt Tensioners
Additional Information About Your Seat Belts
Allowing a child to play with a
seat belt or wrap one around
their neck can result in serious
injury or death.
Instruct children not to play with
any seat belt and make sure
any unused seat belt a child
can reach is buckled, fully
retracted, and locked.
2011 Odyssey
Page 26
If a seat belt is worn during a crash,
it must be replaced by the dealer. A
belt that has been worn during a
crash may not provide the same level
of protection in a subsequent crash.
The dealer should also inspect the
anchors for damage and replace
them if needed. If the automatic seat
belt tensioners activate during a
crash, they must be replaced.
For safety, you should check the
condition of your seat belts regularly.
Pull each belt out fully, and look for
frays, cuts, burns, and wear. Check
that the latches work smoothly and
the belts retract easily. If a belt does
not retract easily, cleaning the belt
may correct the problem (see page
). Any belt that is not in good
condition or working properly will
not provide good protection and
should be replaced as soon as
possible.
Honda provides a limited warranty
on seat belts. See your
booklet for
details.
The tensioners can be activated
during a collision in which the front
airbags . In this case, the
airbags would not be needed, but the
additional restraint could be helpful.
If the tensioner is activated, the SRS
indicator comes on and the tensioner
must be replaced.
636
Honda
Warranty Information
do not deploy
Seat Belt Maintenance
Additional Information About Your Seat Belts
Driver and Passenger Safety
Not checking or maintaining
seat belts can result in serious
injury or death if the seat belts
do not work properly when
needed.
Check your seat belts regularly
and have any problem
corrected as soon as possible.
2011 Odyssey
Page 27
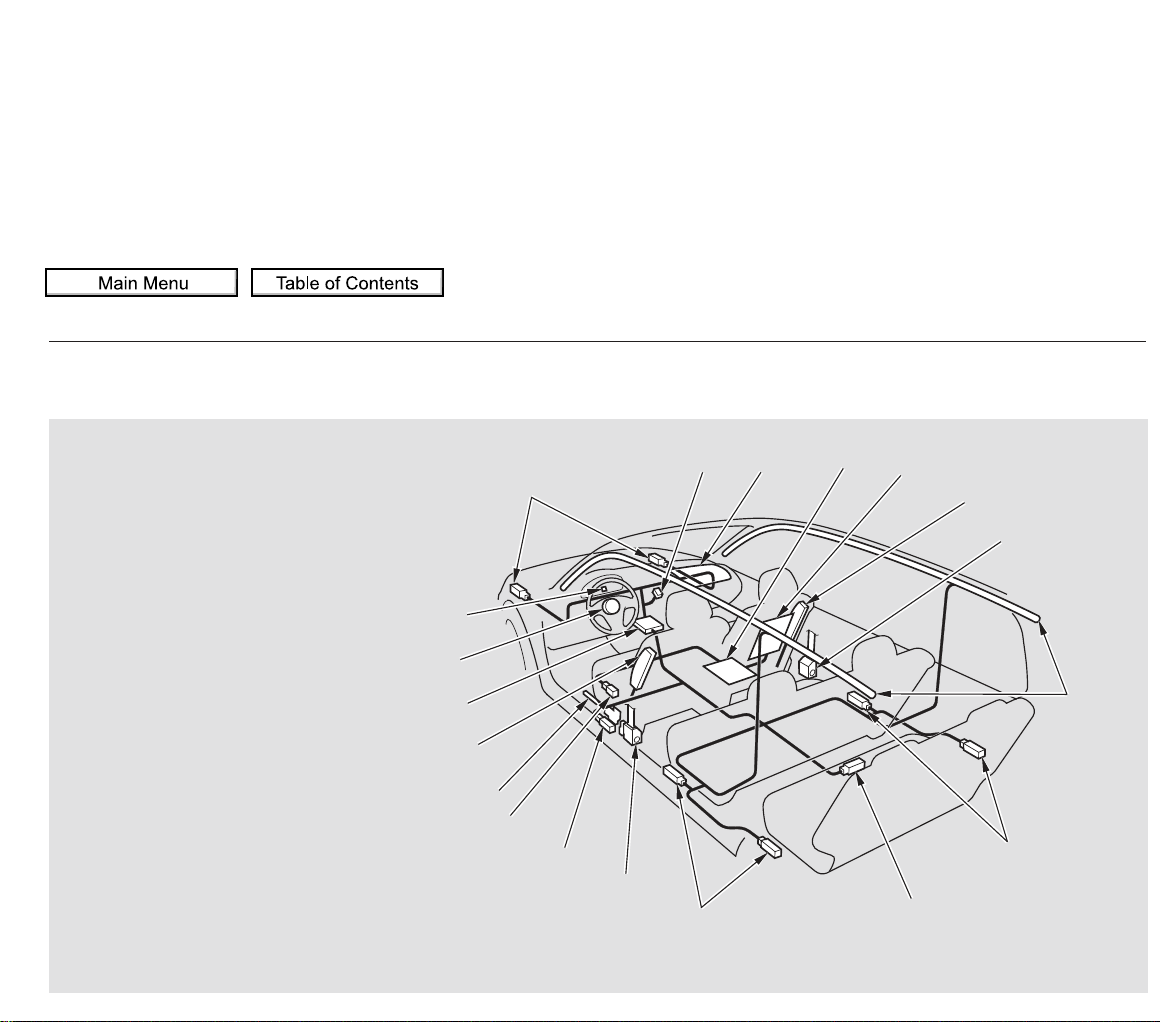
Airbag System Components
Additional Information About Your Airbags
(9)
(15)
(6)
(1)
(4)
(11)
(11)
(14)
(4)
(5)
(12)
(13)(8)
(4)
(5)
(3)
(11)
(7)
(10)
(2)
(6) Side Curtain Airbags
(7) Driver’s Seat Position Sensor
(8) Front Passenger’s Weight Sensors
(9) Front Impact Sensors
(10) Passenger Airbag Off Indicator
(1) Driver’s Front Airbag
(2) Passenger’s Front Airbag
(3) Control Unit/Rollover Sensor
(4) Front Seat Belt Tensioners
(5) Side Airbags
(14) Rear Safing Sensor
(15) Supplemental Restraint System (SRS) Indicator
(11) Side Impact Sensors
(12) Occupant Position Detection System
(OPDS) Sensors
(13) Front Passenger’s Weight Sensors Control Unit/
OPDS Sensors Control Unit
2011 Odyssey
Page 28
Your airbag system includes:
Two SRS (supplemental restraint
system) front airbags. The driver’s
airbag is stored in the center of
the steering wheel; the front
passenger’sairbagisstoredinthe
dashboard. Both are marked ‘‘SRS
AIRBAG’’ (see page ).
Two side airbags, one for the
driver and one for a front
passenger. The airbags are stored
in the outer edges of the seatbacks. Both are marked ‘‘SIDE
AIRBAG’’ (see page ).
Two side curtain airbags, one for
each side of the vehicle. The
airbags are stored in the ceiling,
above the side windows. The front
and rear pillars are marked ‘‘SIDE
CURTAIN AIRBAG’’ (see page
).
Sensors that can detect whether
the driver’s seat belt and the front
passenger’s seat belt are latched
or unlatched (see page ).
A driver’s seat position sensor that
monitors the distance of the seat
from the front airbag. If the seat is
too far f orward, the airbag will
inflate with less force (see page
).
Weight sensors that monitor the
weight on the front passenger’s
seat. If the weight is about 65 lbs
(29 kg) or less (the weight of an
infant or small child), the
passenger’s front airbag will be
turned off (see page ).
Automatic front seat belt
tensioners (see page ).
Sensors that can detect a
moderate to severe front impact,
side impact, or if your vehicle is
about to rollover.
Sensors that can detect whether a
child is in the passenger’s side
airbag path and signal the control
unit to turn the airbag off (see
page ).
26
30
31
22
31
20
29
29
CONTINUED
Additional Information About Your Airbags
Driver and Passenger Safety
2011 Odyssey
Page 29
If you ever have a moderate to
severe frontal collision, sensors will
detect the vehicle’s rapid
deceleration.
If the rate of deceleration is high
enough, the control unit will inflate
the driver’s and front passenger’s
airbags, at the time and with the
force needed.
An indicator on the instrument
panel that alerts you that the
passenger’s side airbag has been
turned off (see page ).
An indicator on the dashboard that
alerts you that the passenger’s
front airbag has been turned off
(see page ).
Emergency backup power in case
your vehicle’s electrical system is
disconnected in a crash.
A rollover sensor that can detect if
your vehicle is about to roll over
and signal the control unit to
deploy both side curtain airbags
(see page ).
A sophisticated electronic system
that continually monitors and
records information about the
sensors, the control unit, the
airbag activators, the seat belt
tensioners, and driver and front
passenger seat belt use when the
ignition switch is in the ON (II)
position.
An indicator on the instrument
panel that alerts you to a possible
problem with your airbag system
components (see page ).
32
32
33
33
How Your Front Airbags Work
Additional Information About Your Airbags
2011 Odyssey
Page 30
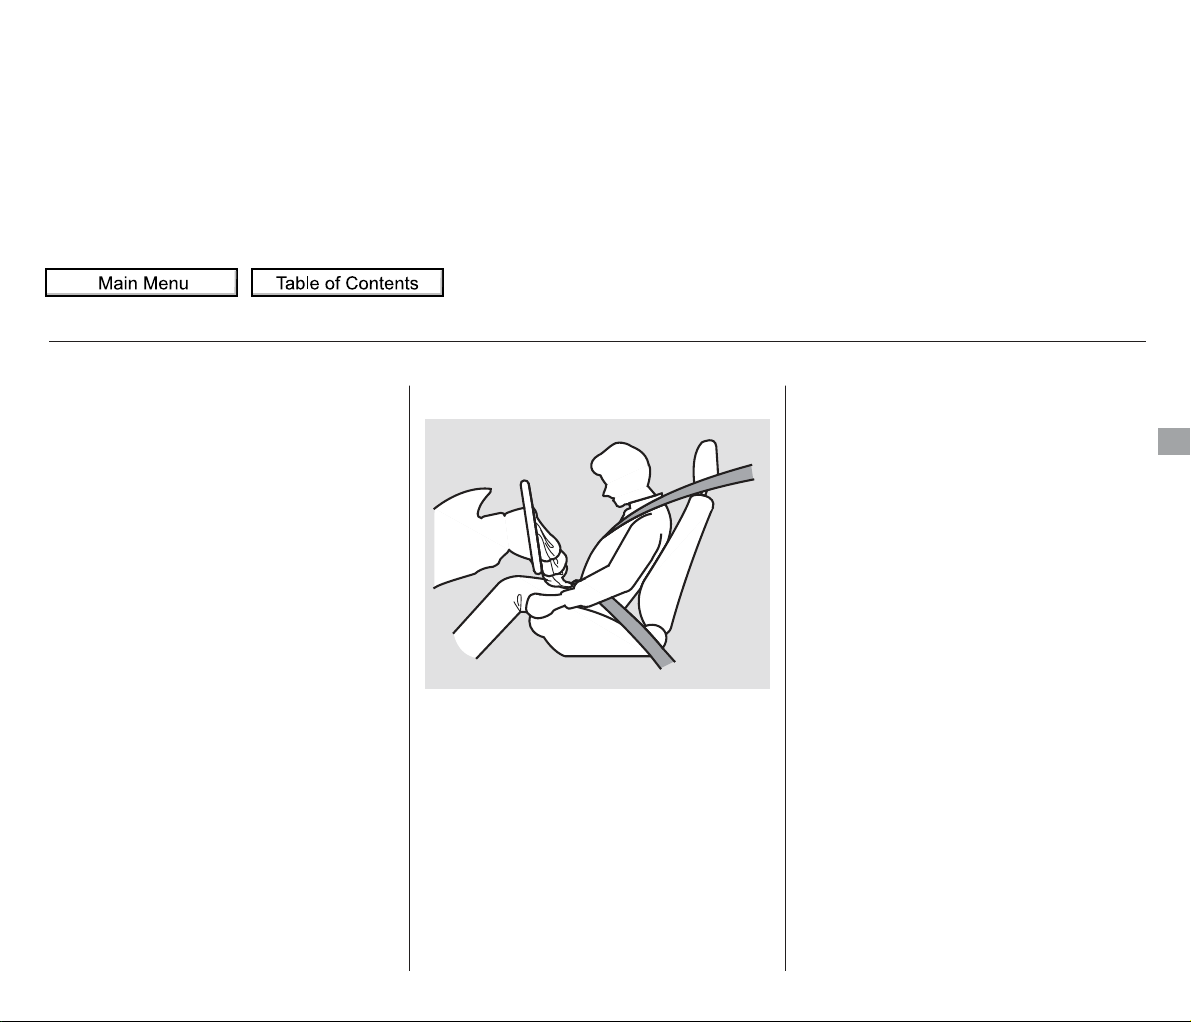
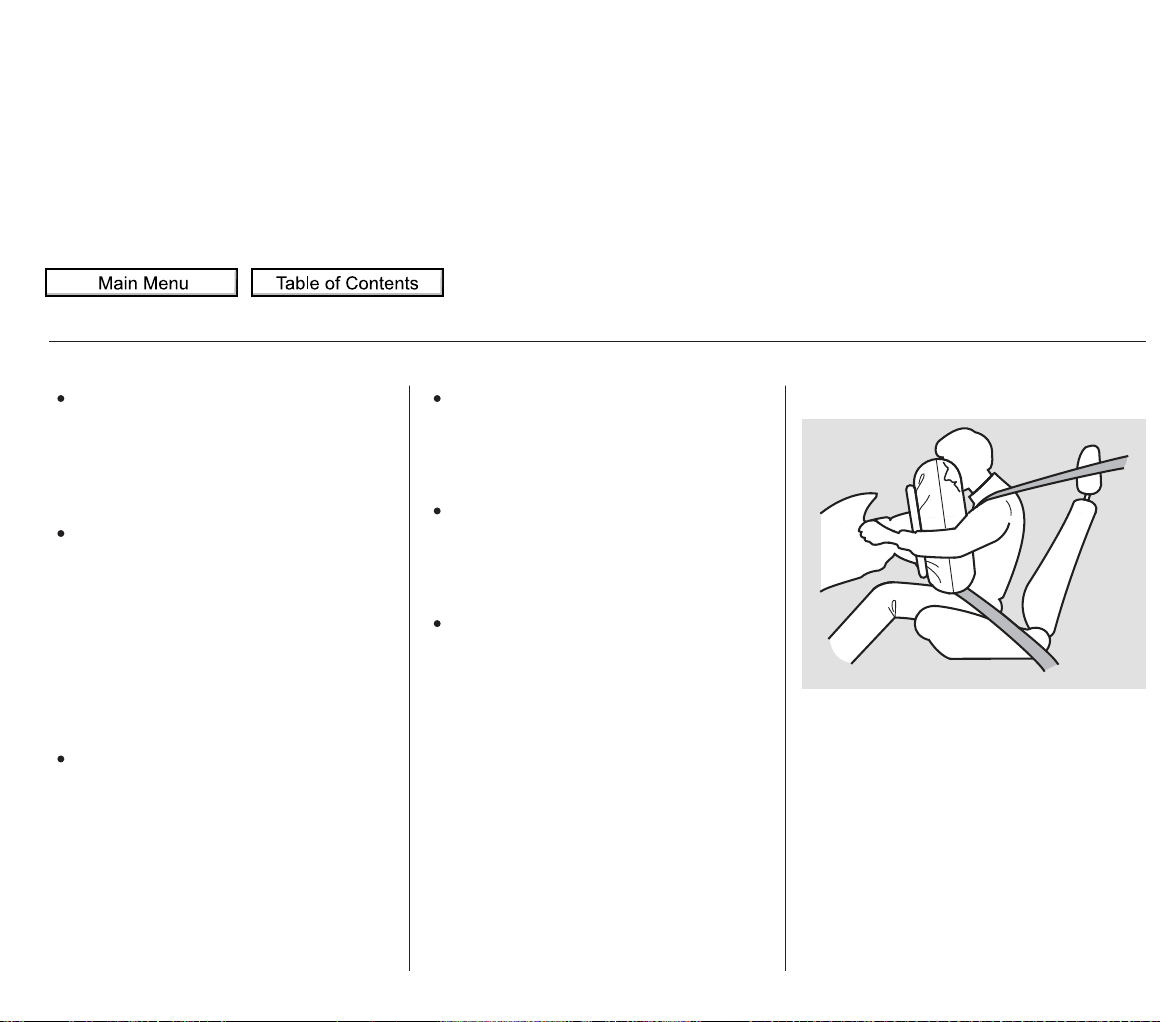
During a frontal crash, your seat belt
restrains your lower body and torso,
and the airbag helps protect your
head and chest.
Although both airbags normally
inflate within a split second of each
other, it is possible f or only one
airbag to deploy.
This can happen if the severity of a
collision is at the margin, or
threshold, that determines whether
or not the airbags will deploy. In
such cases, the seat belt will provide
sufficient protection, and the
supplemental protection offered by
the airbag would be minimal.
Only the driver’s airbag can deploy if
there is no passenger in the front
seat, or if the advanced airbag
system has turned the passenger’s
airbag off (see page ).
After inflating, the front airbags will
immediately deflate, so they won’t
interfere with the driver’s visibility,
or the ability to steer or operate
other controls.
The total time for inflation and
deflation is one-tenth of a second, so
fast that most occupants are not
aware that the airbags deployed until
they see them lying in their laps.
After a crash, you may see what
looks like smoke. This is actually
powder from the airbag’s surface.
Although the powder is not harmful,
people with respiratory problems
mayexperiencesometemporary
discomfort. If this occurs, get out of
the vehicle as soon as it is safe to
33
CONTINUED
Additional Information About Your Airbags
Driver and Passenger Safety
do so.
2011 Odyssey
Page 31
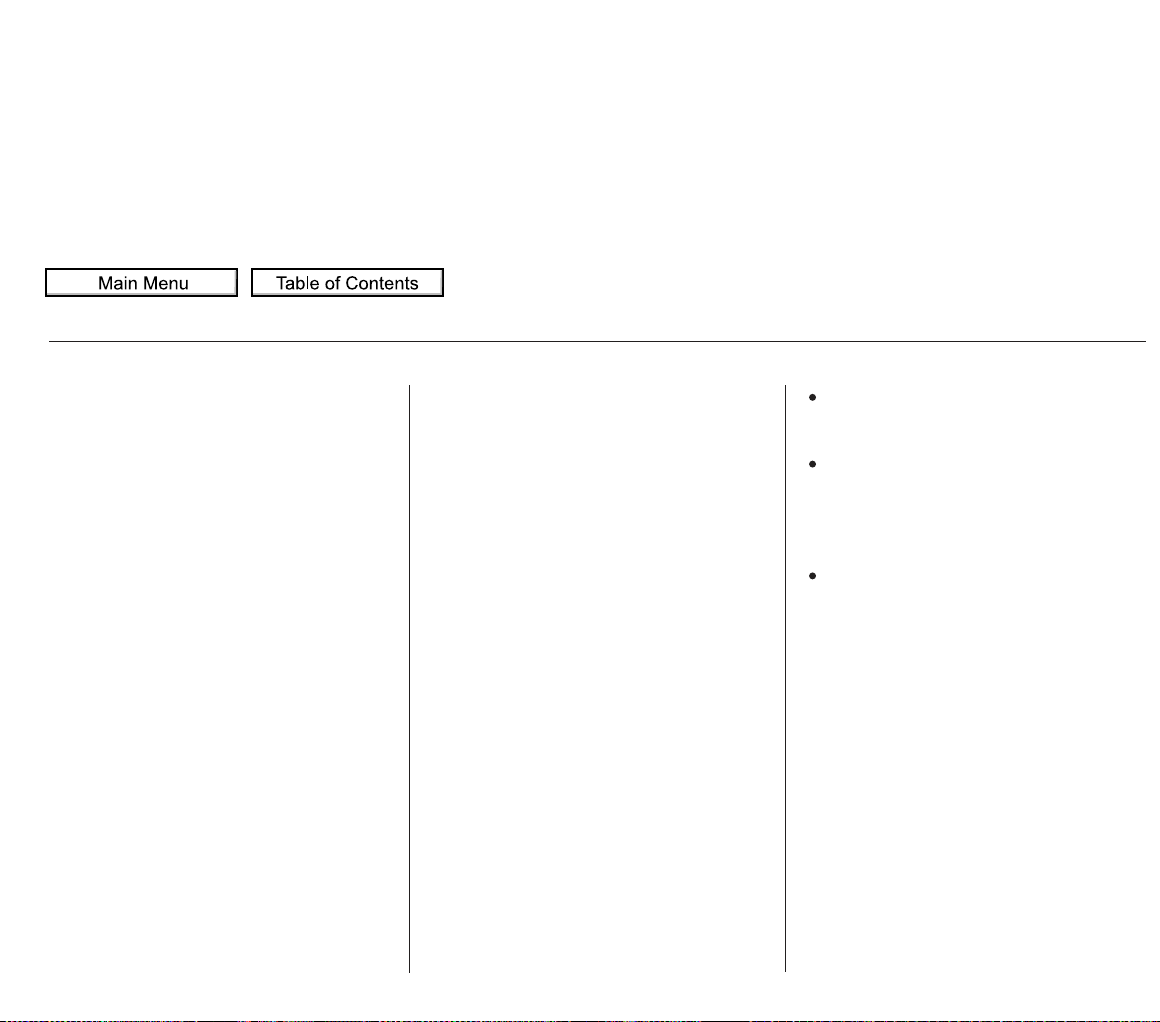
Your vehicle is equipped with dualstage, multiple-threshold front
airbags (SRS). During a frontal crash
severe enough to cause one or both
front airbags to deploy, the airbags
can inflate at different rates,
depending on the severity of the
crash, whether or not the seat belts
are latched, and/or other factors.
Front airbags are designed to
supplement the seat belts to help
reduce the likelihood of head and
chest injuries in frontal crashes.
Your front airbags are also advanced
airbags. The main purpose of this
feature is to help prevent airbagcaused injuries to short drivers and
children or small-statured adults who
ride in front.
For both advanced airbags to work
properly:
Occupants must sit upright and
wear their seat belts properly.
Do not spill any liquids on or
under the seats, cover the sensors,
or put any cargo or metal objects
under the front seats.
Objects placed or pushed under
the front passenger’s seat may
cause the sensor to malfunction,
increasing the risk of injury in a
crash.
Failure to follow these instructions
could damage the sensors or prevent
them from working properly.
Additional Information About Your Airbags
Dual-Stage, Multiple-Threshold
Front Airbags (SRS)
Advanced Airbags
2011 Odyssey
Page 32
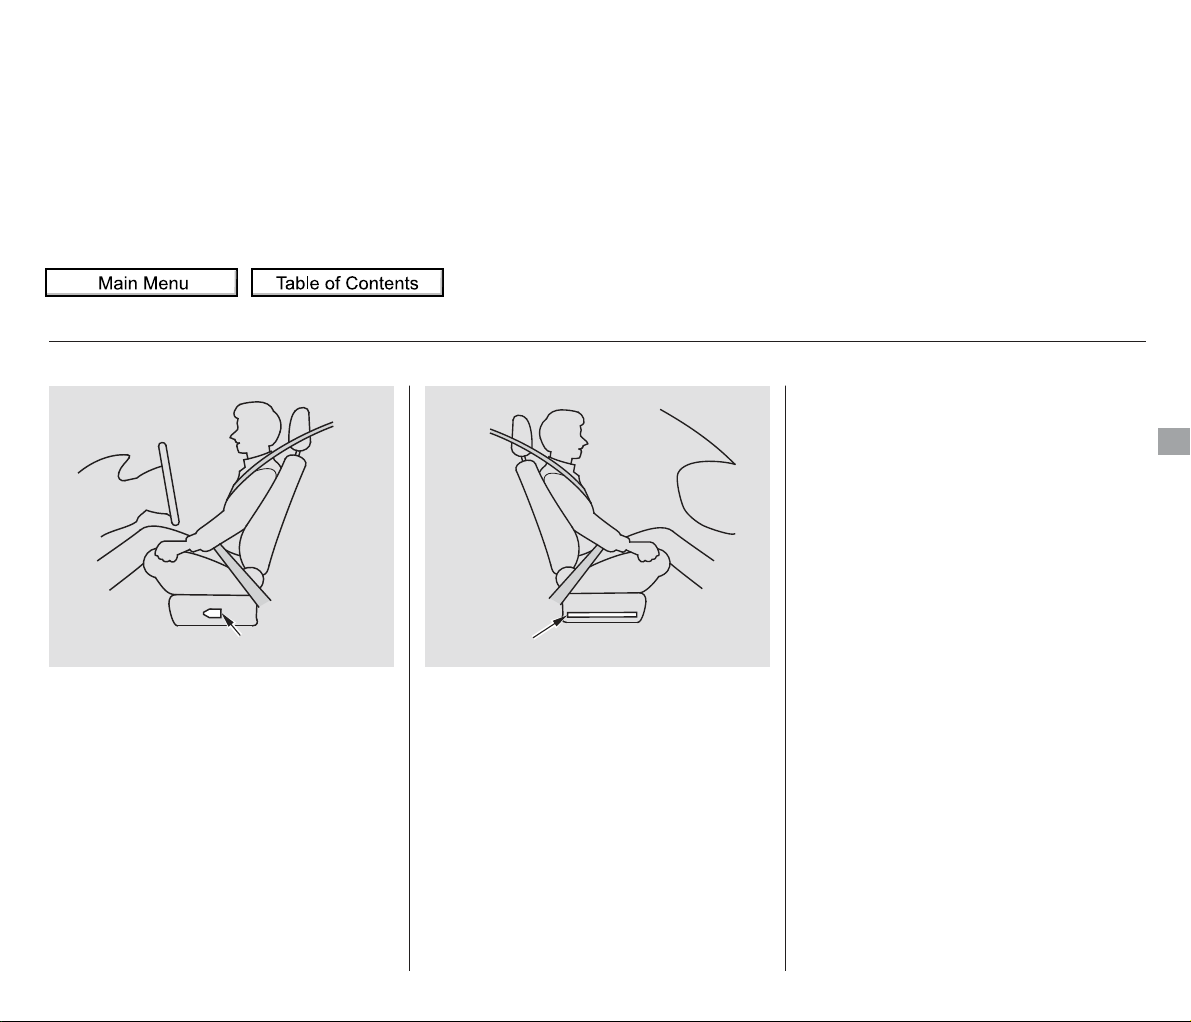
The driver’s advanced front airbag
system includes a seat position
sensor under the seat. If the seat is
too far f orward, the airbag will
inflate with less force, regardless of
the severity of the impact.
If there is a problem with the sensor,
the SRS indicator will come on, and
the airbag will inflate in the normal
manner regardless of the driver’s
seating position.
The passenger’s advanced f ront
airbag system has weight sensors
under the seat. Although Honda
does not encourage carrying an
infant or small child in front, if the
sensors detect the weight of an
infant or small child (up to about 65
lbs or 29 kg), the system will
automatically turn the passenger’s
front airbag off.
Be aware that objects placed on the
passenger’s seat can also cause the
airbag to be turned off.
When the passenger airbag gets
turned off by the weight sensors, a
‘‘passenger airbag off’’ indicator in
the center of the dashboard comes
on (see page ).
If the weight sensors detect there is
no passenger in the front seat, the
airbag is automatically turned off.
However, the passenger airbag off
indicator in this situation will not
come on.
To ensure that the passenger’s
advanced front airbag system will
work properly,
This includes:
33
CONTINUED
Additional Information About Your Airbags
do not do anything
that would increase or decrease the
weight on the front passenger’s seat.
Driver and Passenger Safety
DRIVER’S SEAT POSITION SENSOR PASSENGER’S SEAT WEIGHT SENSOR
2011 Odyssey
Page 33
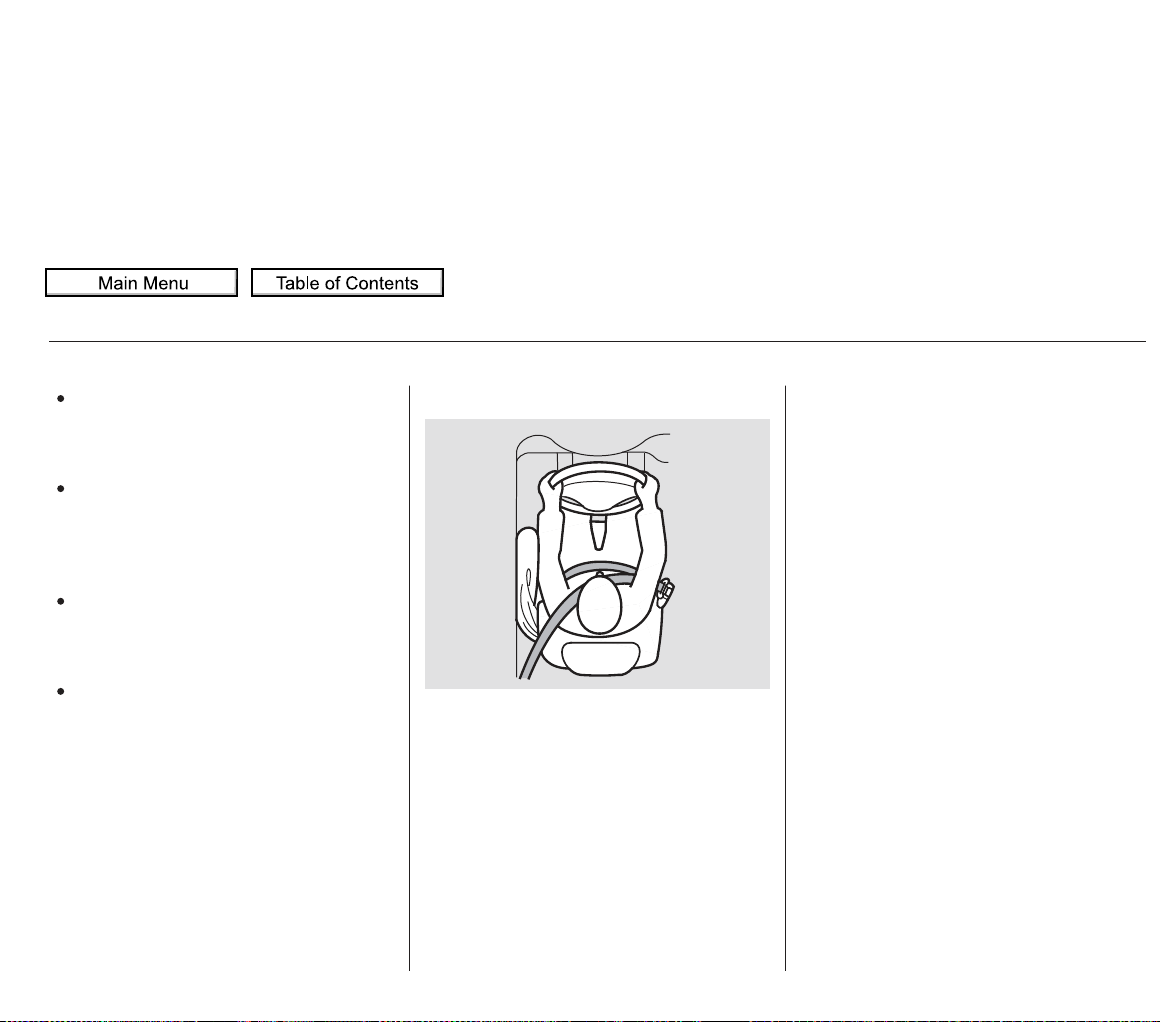
A second row passenger pushing
or pulling on the back of the front
passenger’s seat.
Moving the front seat forcibly
back against cargo on the seat, the
floor behind it, or a folded second
row seat.
Hanging heavy items on the front
passenger seat, or placing heavy
items in the seat-back pocket.
Second-row passengers should not
wedge objects or intentionally
force their feet under the front
passenger seat.
Also,makesurethefloormatbehind
the front passenger’s seat is properly
positioned on the floor (see page
). If it is not, the mat may
interfere with the proper operation
of the front passenger’s seat and its
sensors.
If you ever have a moderate to
severe side impact, sensors will
detect rapid acceleration and signal
the control unit to instantly inflate
either the driver’s or the passenger’s
side airbag.
Only one airbag will deploy during a
side impact. If the impact is on the
passenger’s side, the passenger’s
side airbag will deploy even if there
is no passenger.
To get the best protection f rom the
side airbags, front seat occupants
should wear their seat belts and sit
upright and well back in their seats.
637
Additional Information About Your Airbags
How Your Side Airbags Work
2011 Odyssey
Page 34
CONTINUED
Your vehicle has a side airbag cutoff
system designed primarily to protect
a child riding in the front passenger’s
seat.
Although Honda does not encourage
children to ride in front, if the
position sensors detect a child has
leaned into the side airbag’s
deployment path, the airbag will
Thesideairbagmayalsoshutoffifa
short adult leans sideways, or a
larger adult slouches and leans
sideways into the airbag’s
deployment path.
Objects placed on the front
passenger seat can also cause the
side airbag to be shut off.
If the side airbag off indicator comes
on (see page ), have the
passenger sit upright. Once the
passenger is out of the airbag’s
deployment path, the system will
turn the airbag back on, and the
indicator will go out.
There will be some delay between
the moment the passenger moves
into or out of the airbag deployment
pathandwhentheindicatorcomes
on or goes off.
A front seat passenger should not
use a cushion or another object as a
backrest. It may prevent the cutoff
system from working properly.
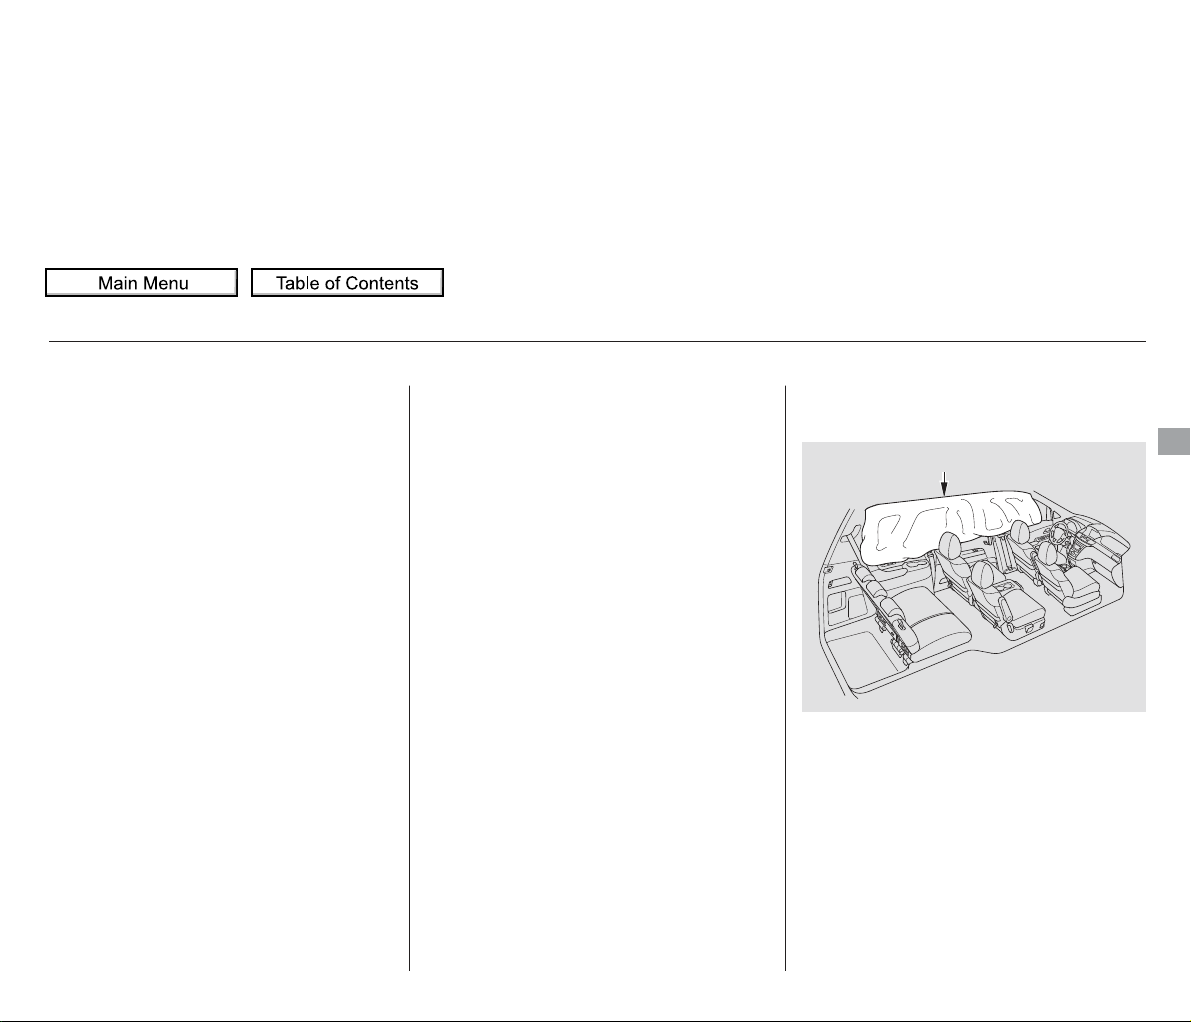
In a moderate to severe side impact,
sensors will detect rapid acceleration
and signal the control unit to
instantly inflate the side curtain
airbag.
33
Additional Information About Your Airbags
Side Airbag Cutof f System
In a Side Impact
How Your Side Curtain Airbags
Work
Driver and Passenger Safety
SIDE CURTAIN AIRBAG
shut off.
2011 Odyssey
Page 35
If the impact is on the passenger’s
side, the passenger’s side curtain
airbag will inflate even if there are no
occupants on that side of the vehicle.
If the rollover sensor detects your
vehicle is about to roll over, it signals
the control unit, which immediately
deploys both side curtain airbags and
activates both front seat belt
tensioners.
The airbag on the passenger’s side
will deploy, and the seat belt
tensioner will activate, even if there
are no passengers on that side of the
vehicle.
To get the best protection f rom the
side curtain airbags, occupants
should wear their seat belts and sit
upright and well back in their seats.
The SRS indicator alerts you to a
potential problem with your airbag
system components.
When you turn the ignition switch to
the ON (II) position, this indicator
comes on for several seconds then
goes off. This tells you the system is
working properly.
If the indicator comes on at any
other time, or does not come on at all,
you should have the system checked
by your dealer. For example:
If the SRS indicator does not come
on after you turn the ignition
switch to the ON (II) position.
If the indicator stays on after the
engine starts.
If the indicator comes on or
flashesonandoffwhileyoudrive.
One or both side curtain airbags may
inflate in a moderate to severe
frontal collision which causes the
front airbags to deploy.
Additional Information About Your Airbags
In a Rollover
How the SRS Indicator
Works
2011 Odyssey
Page 36
CONTINUED
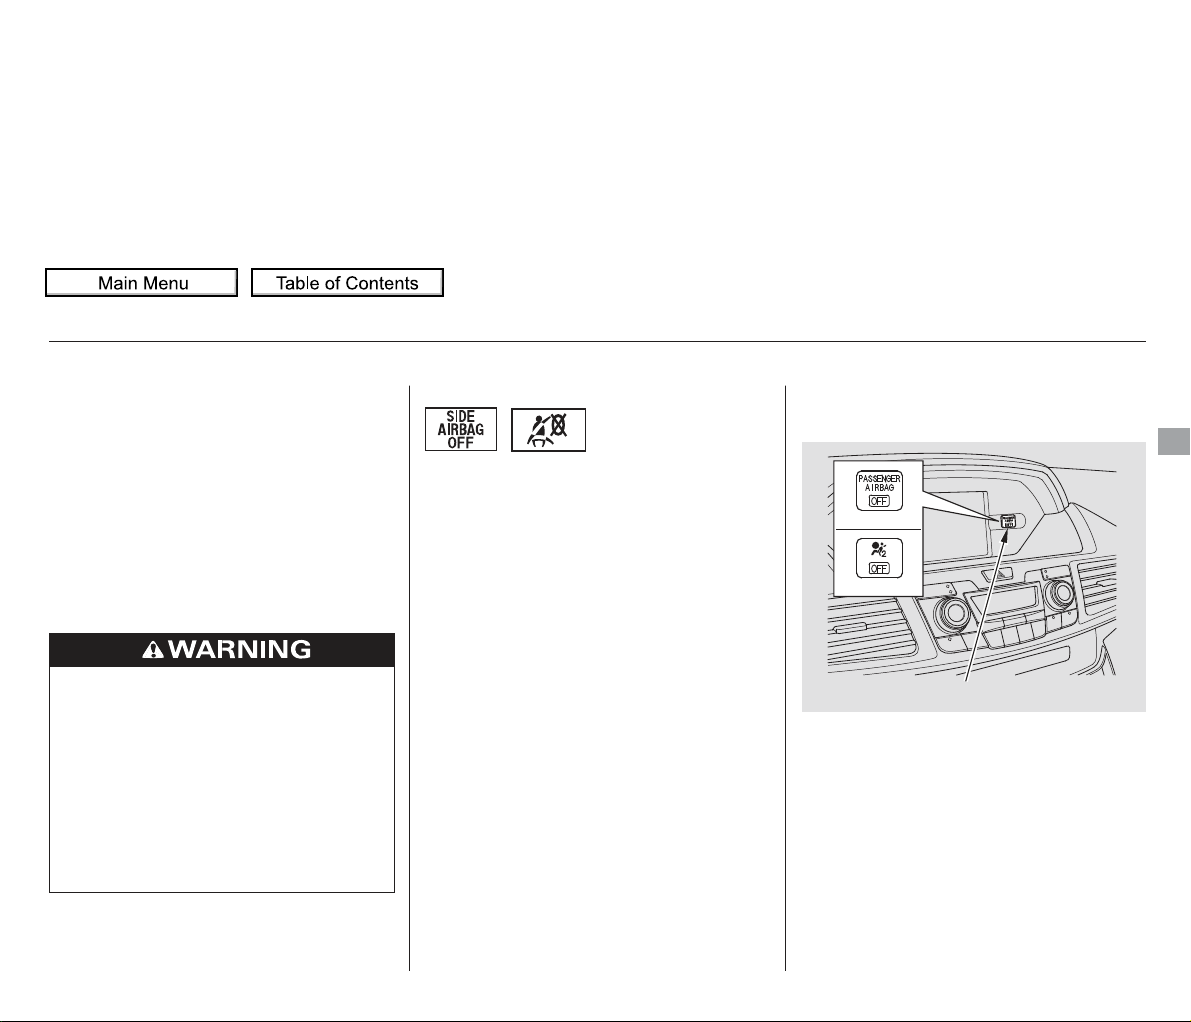
This indicator alerts you that the
passenger’s front airbag has been
shut off because weight sensors
detect about 65 lbs (29 kg) or less
(the weight of an infant or small
child) on the f ront passenger’s seat.
It does there is a problem
with the airbag.
This indicator alerts you that the
passenger’s side airbag has been
automatically shut off. It does
mean there is a problem with your
side airbags.
When you turn the ignition switch to
the ON (II) position, the indicator
should come on for several seconds
andthengooff(seepage ).Ifit
doesn’t come on, stays on, or comes
on while driving without a passenger
in the front seat, have the system
checked.
You will also see a ‘‘PASSENGER
SIDE AIRBAG OFF’’ message on the
multi-information display (see page
).
You will also see a ‘‘CHECK
AIRBAG SYSTEM’’ message on the
multi-information display (see
).
If you see any of these indications,
the airbag system components may
not work properly when you need
them.
68
On Touring models
On Touring models
Additional Information About Your Airbags
How the Passenger Airbag Off
Indicator Works
How the Side
Airbag Off
Indicator Works
not mean
not
Driver and Passenger Safety
PASSENGER AIRBAG OFF INDICATOR
Canada
Canada
U.S.
U.S.
Ignoring the SRS indicator can
result in serious injury or death
if the airbag systems or
tensioners do not work properly.
Have your vehicle checked by a
dealer as soon as possible if
the SRS indicator alerts you to
a possible problem.
page 90
page 90
2011 Odyssey
Page 37
Any airbag
that has deployed must be
replaced along with the control
unit and other related parts. Any
seat belt tensioner that activates
must also be replaced.
Your airbag systems are virtually
maintenance free, and there are no
parts you can safely service.
However, you must have your
vehicle serviced if:
Do not try to remove or replace
anyairbagbyyourself.Thismust
be done by an authorized dealer or
a knowledgeable body shop.
Any items under the front
passenger’s seat.
Any object(s) hanging on the seat
or in the seat-back pocket.
Any object(s) touching the rear of
the seat-back.
If no obstructions are found, have
your vehicle checked by a dealer as
soon as possible.
If the indicator comes on with no
front seat passenger and no objects
on the seat, or with an adult riding
there, something may be interfering
with the weight sensors. Look for
and remove:
Be aware that objects placed on the
front seat can cause the indicator to
come on.
If no weight is detected on the front
seat, the airbag will be automatically
shut off. However, the indicator will
not come on.
The passenger airbag off indicator
maycomeonandoffrepeatedlyif
the total weight on the seat is near
the airbag cutoff threshold.
If an adult or teenage passenger is
riding in front, move the seat as far
to the rear as possible, and have the
passenger sit upright and wear the
seat belt properly.
Additional Information About Your Airbags
Airbag Service
An airbag ever inflates.
2011 Odyssey
Page 38
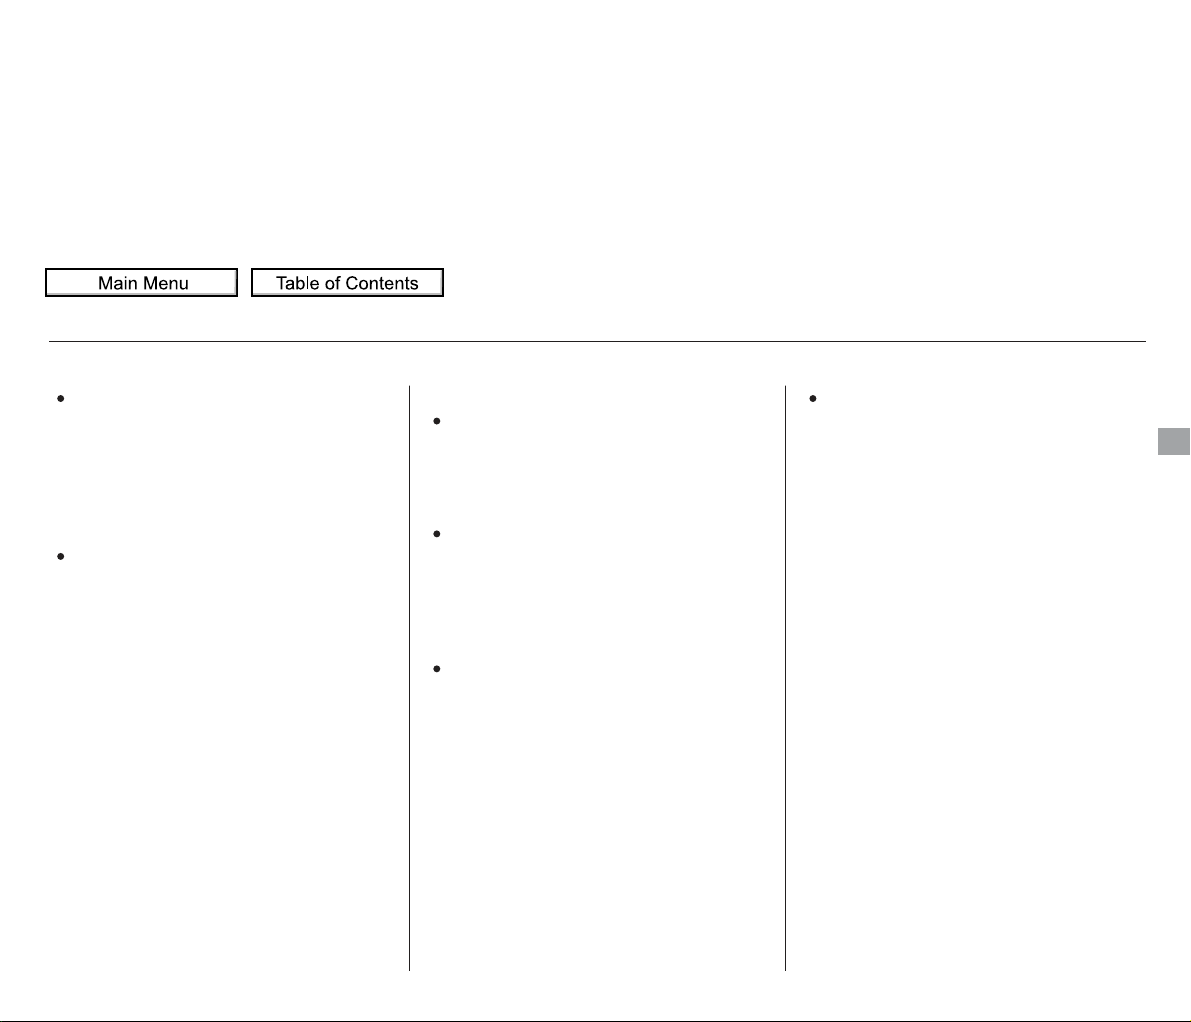
This could make the
driver’s seat position sensor or the
front passenger’s weight sensors
ineffective. If it is necessary to
remove or modif y a front seat to
accommodate a person with
disabilities, first contact Honda
Automobile Customer Service at
(800) 999-1009 in the US, or
Honda Customer Relations at
If water or
another liquid soaks into the seatback, it can prevent the side airbag
cutoff system from working
properly.
Tampering could cause
the airbags to deploy, possibly
causing very serious injury.
Together, airbags and
seat belts provide the best
protection.
Take your vehicle to an
authorized dealer as soon as
possible. If you ignore this
indication, your airbags may not
operate properly.
Even if your
airbags do not inflate, your dealer
should inspect the driver’s seat
position sensor, the front
passenger’s weight sensors, the
front seat belt tensioners, and all
seat belts and their anchors worn
during a crash to make sure they
are operating properly.
Additional Information About Your Airbags
Do not remove or modif y a front
seat without consulting your
dealer.
Do not expose the f ront passenger’s
seat-back to liquid.
Do not tamper with airbag
components or wiring for any
reason.
Donotattempttodeactivateyour
airbags.
The SRS indicator alerts you to a
problem.
If your vehicle has a moderate to
severe impact.
Additional Safety Precautions
Driver and Passenger Safety
1-888-9-HONDA-9 in Canada.
2011 Odyssey
Page 39
−
−
−
Children depend on adults to protect
them. However, despite their best
intentions, many adults do not know
how to properly protect child
passengers.
If you have children, or ever need to
drive with a child in your vehicle, be
sure to read this section. It begins
with important general guidelines,
then presents special information for
infants, small children, and larger
children.
Each year, many children are injured
or killed in vehicle crashes because
they are either unrestrained or not
properly restrained. In fact, traffic
collisions are the number one cause
of death of children age 12 and
under.
To reduce the number of child
deaths and injuries, every state,
Canadian province and territory
requires that infants and children be
properlyrestrainedwhentheyridein
a vehicle.
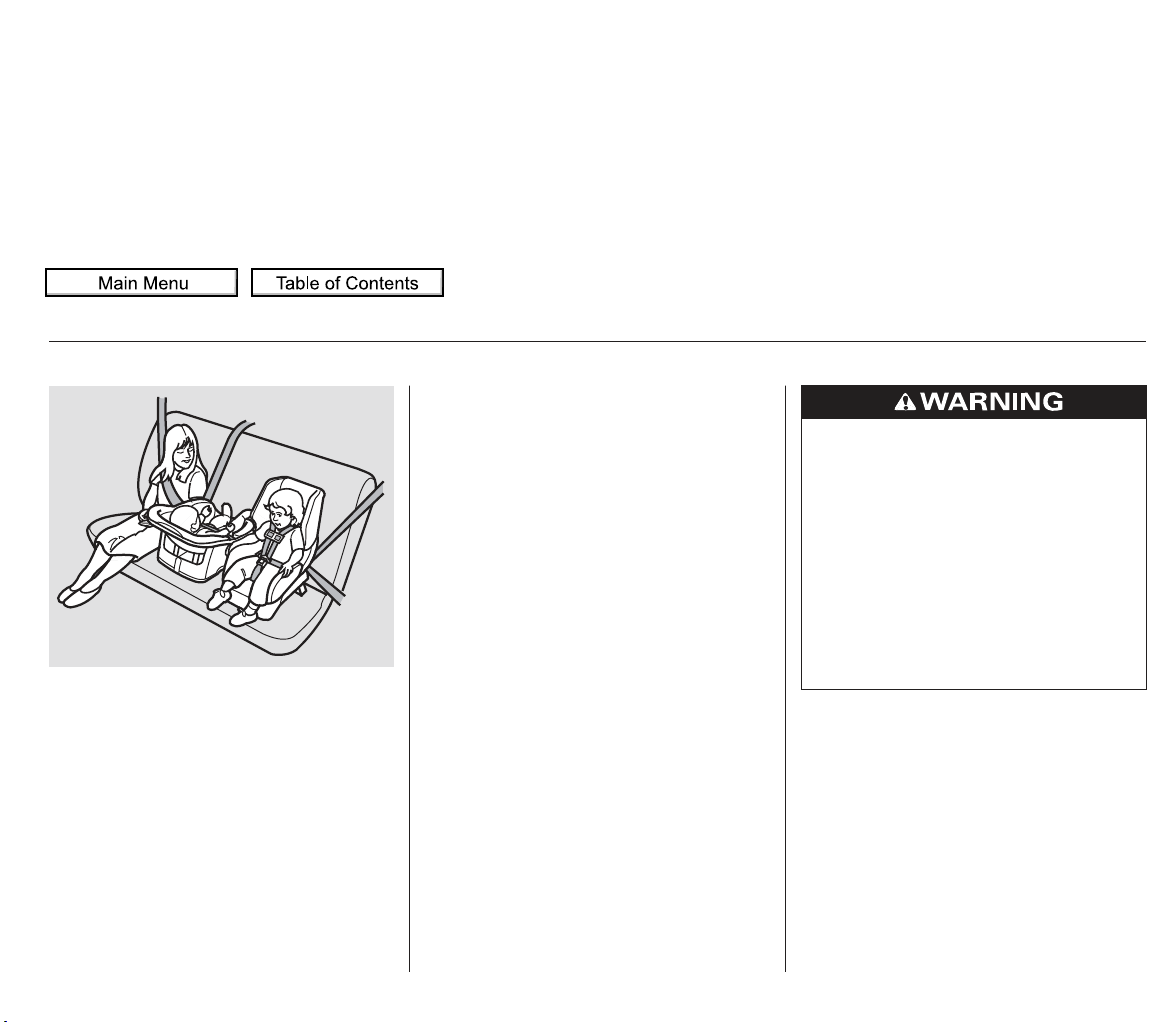
(see pages ).
(see pages ).
41 53
54 57
Protecting Children General Guidelines
All Children Must Be Restrained
Infants and small children must be
restrained in an approved child seat
that is properly secured to the
vehicle
Larger children must be restrained
with a lap/shoulder belt and ride on
a booster seat until the seat belt f its
them properly
Children who are unrestrained
or improperly restrained can be
seriously injured or killed in a
crash.
Any child too small for a seat
belt should be properly
restrained in a child seat. A
larger child should be properly
restrained with a seat belt and
use a booster seat if necessary.
2011 Odyssey
Page 40
−
Front airbags have been designed to
help protect adults in a moderate to
severe frontal collision. To do this,
the passenger’s front airbag is quite
large, and it can inflate with enough
force to cause very serious injuries.
If the vehicle seat is
too far forward, or the child’s head is
thrown f orward during a collision, an
inflating front airbag can strike the
child with enough force to kill or
very seriously injure a small child.
Whenever possible,
larger children should sit in the back
seat, on a booster seat if needed, and
be properly restrained with a seat
belt. (See page for important
information about protecting larger
children.)
Even though your vehicle has an
advanced front airbag system that
automatically turns the passenger’s
front airbag off under certain
circumstances (see page ), please
follow these guidelines:
If
the airbag inflates, it can hit the back
of the child seat with enough force
to kill or very seriously injure an
infant.
According to crash statistics,
children of all ages and sizes are
safer when they are restrained in a
back seat.
Children who ride in back are less
likely to be injured by striking
interior vehicle parts during a
collision or hard braking. Also,
children cannot be injured by an
inflating front airbag when they ride
in the back.
The National Highway Traffic Safety
Administration and Transport
Canada recommend that all children
aged 12 and under be properly
restrained in a back seat. Some
states have laws restricting where
children may ride.
33
54
CONTINUED
The Passenger’s Front Airbag
Can Pose Serious Risks
All Children Should Sit in a Back
Seat
Small Children
Placing a f orward-f acing child seat in
the front seat of a vehicle equipped
with a passenger’s front airbag can
be hazardous.
Larger Children
Children who have outgrown child
seats are also at risk of being injured
or killed by an inflating passenger’s
front airbag.
Never put a rear-facing child seat in
the front seat of a vehicle equipped
with a passenger’s front airbag.
Infants
Protecting Children General Guidelines
Driver and Passenger Safety
2011 Odyssey
Page 41
−
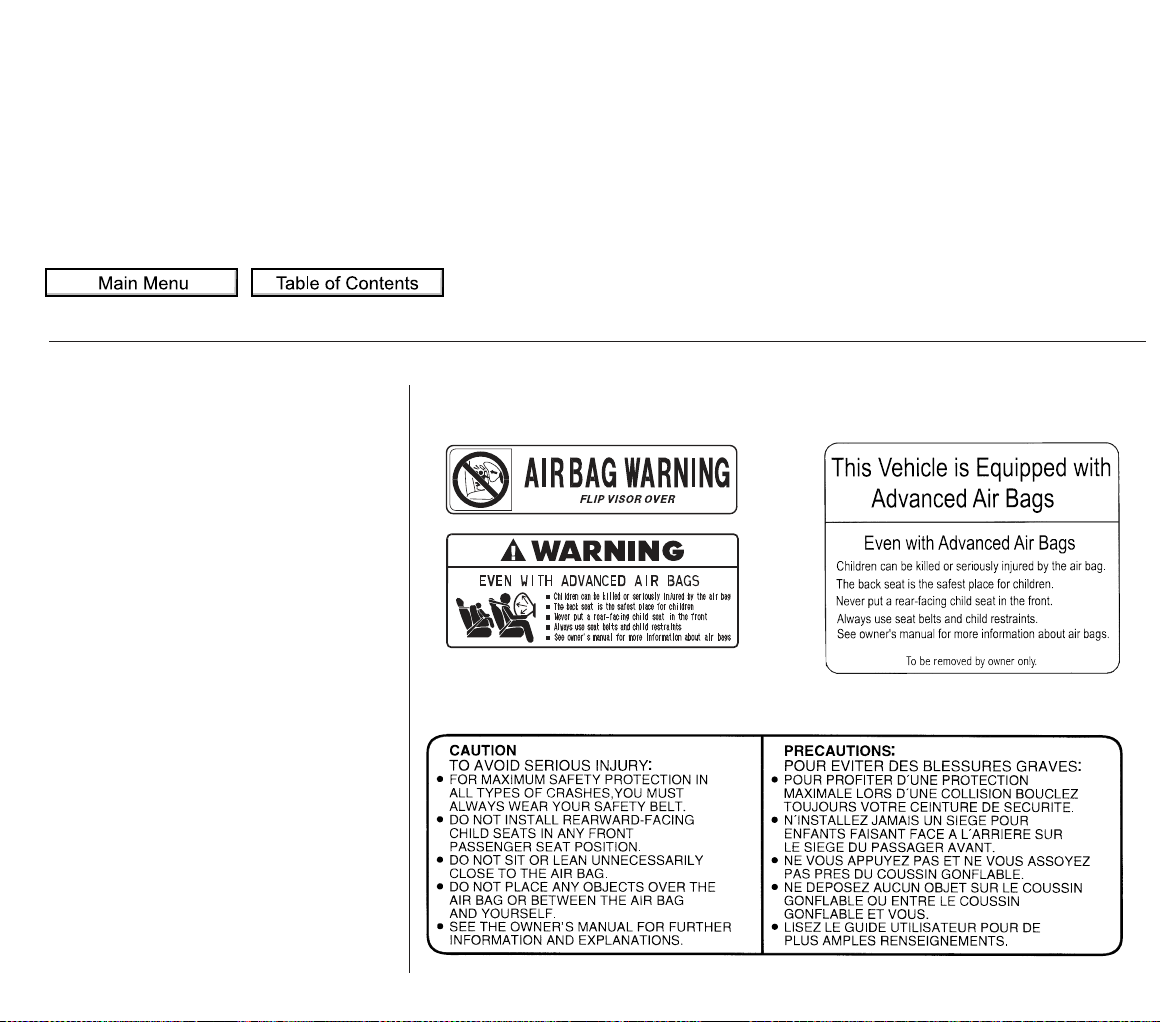
To remind you of the passenger’s
front airbag hazards, and that
children must be properly restrained
in a back seat, your vehicle has
warninglabelsonthedashboard
(U.S. models) and on the front visors.
Please read and follow the
instructions on these labels.
U.S. Models
Canadian Models
Protecting Children General Guidelines
DASHBOARDSUN VISORS
SUN VISORS
2011 Odyssey
Page 42
−
Your vehicle has two rows of back
seats where children can be properly
restrained. If you ever have to carry
a group of children, and a child must
ride in front:
Many parents say they prefer to put
an infant or a small child in the front
passenger seat so they can watch the
child, or because the child requires
attention.
Placing a child in the front seat
exposes the child to hazards in a
frontal collision, and paying close
attention to a child distracts the
driver from the important tasks of
driving, placing both of you at risk.
Place the largest child in the front
seat, provided the child is large
enough to wear the lap/shoulder
belt properly (see page ).
If a child requires close physical
attention or frequent visual contact,
we strongly recommend that another
adult ride with the child in a back
seat. The back seat is far safer for a
child than the front.
If you are not wearing a
seat belt in a crash, you could be
thrown forward and crush the
child against the dashboard or a
seat-back. If you are wearing a
seat belt, the child can be torn
from your arms and be seriously
hurt or killed.
During a crash, the
belt could press deep into the child
and cause serious or fatal injuries.
If they do, they
could be very seriously injured in a
crash.
Move the vehicle seat as far to the
rear as possible (see pages
and ).
Make sure the seat belt is properly
positioned and secured (see page
).
Have the child sit upright and well
backintheseat(seepage ).
15
54
17
175 176
CONTINUED
If You Must Drive with Several
Children
If a Child Requires Close
Attention
Additional Safety Precautions
Protecting Children General Guidelines
Neverholdaninfantorchildon
your lap.
Never put a seat belt over yourself
and a child.
Never let two children use the
same seat belt.
Driver and Passenger Safety
2011 Odyssey
Page 43
−
This
will prevent unintended use of the
doors.
Leaving children without
adult supervision is illegal in most
states, Canadian provinces and
territories, and can be very
hazardous.
For example, infants and small
childrenleftinavehicleonahot
day can die from heatstroke. A
child left alone with the key in the
ignition switch can accidentally set
the vehicle in motion, possibly
injuring themselves or others.
Even very young
children learn how to unlock
vehicle doors, turn on the ignition
switch, and open the tailgate,
which can lead to accidental injury
or death.
Children who play in vehicles can
accidentally get trapped inside.
Teach your children not to play in
or around vehicles.
If a child
wraps a loose seat belt around
their neck, they can be seriously
or fatally injured. (See pages
and for how to activate
and deactivate the lockable
retractor.)
This can prevent children
from accidentally falling out (see
page ).
162
5150
Protecting Children General Guidelines
Use the power sliding door main
switch to prevent children from
operating the sliding doors.
Do not leave children alone in a
vehicle. Keep vehicle keys and remote
transmitters out of the reach of
children.
Lock all doors and the tailgate
when your vehicle is not in use.
Make sure any unused seat belt
that a child can reach is buckled,
thelockableretractoris
activated, and the belt is fully
retracted and locked.
Use childproof door locks to
prevent children f rom opening the
doors.
2011 Odyssey
Page 44
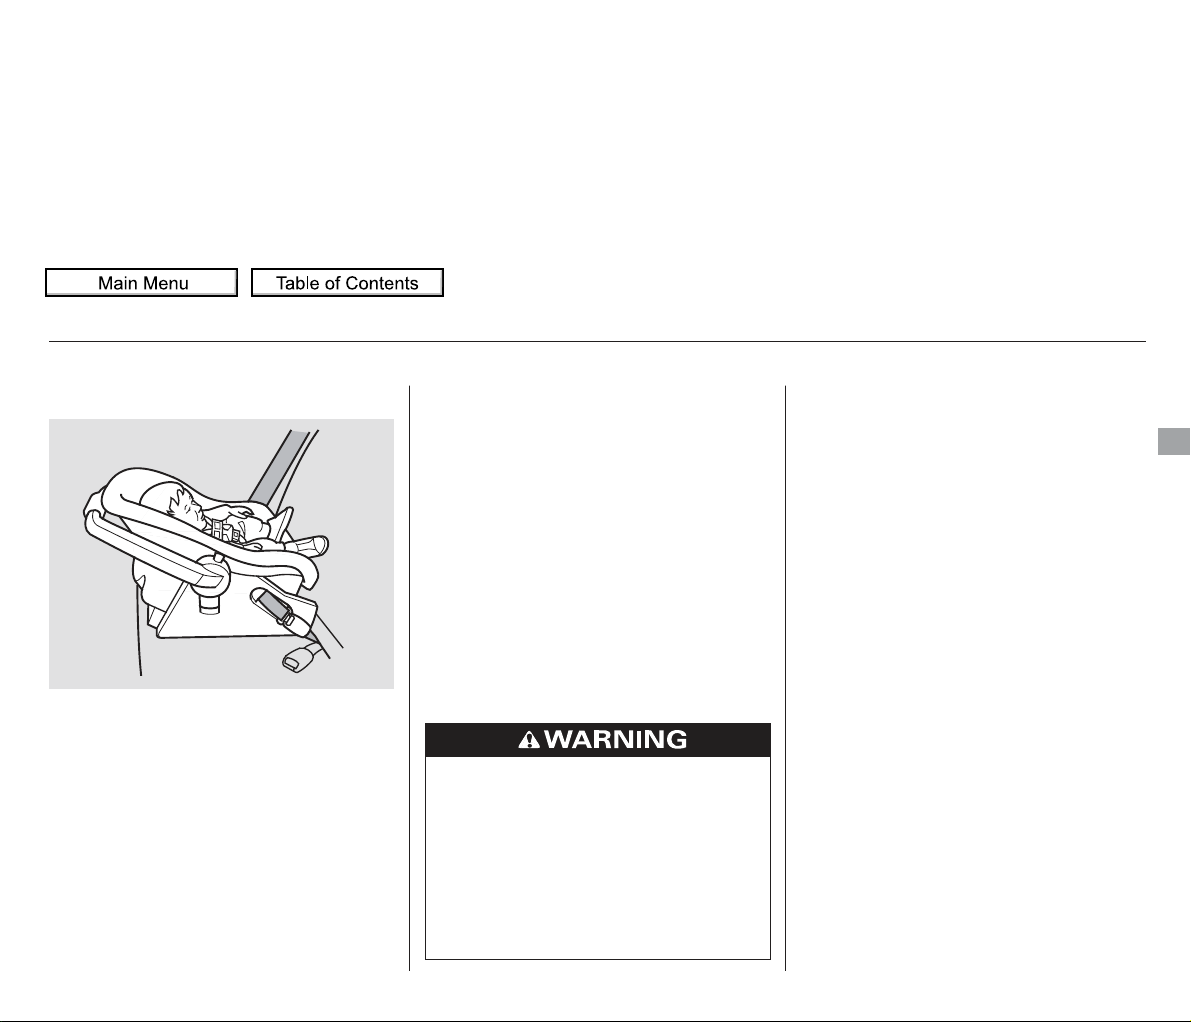
An infant must be properly
restrained in a rear-facing, reclining
child seat until the child reaches the
seat maker’s weight or height limit
for the seat, and the child is at least
one year old.
If the passenger’s front airbag
inflates, it can hit the back of the
child seat with enough force to kill or
seriously injure an infant.
When properly installed in the
second row, a rear-facing child seat
maypreventthedriverorafront
passenger f rom moving their seat as
far back as recommended, or from
locking their seat-back in the desired
position.
If placed
facing forward, an infant could be
very seriously injured during a
frontal collision.
Two types of seats may be used: a
seat designed exclusively for inf ants,
or a convertible seat used in the rearfacing, reclining mode.
Only a rear-facing child seat provides
proper support for a baby’s head,
neck, and back.
A rear-facing child seat can be placed
in any seating position in the second
or third row, but not in the front.
It could also interfere with proper
operation of the passenger’s
advanced front airbag system.
CONTINUED
Protecting Infants
Child Seat Type
Do not put a rear-facing child seat in
a f orward-f acing position.
Rear-facing Child Seat Placement
Never put a rear-facing child seat in
the front seat.
Protecting Infants and Small Children
Driver and Passenger Safety
Placing a rear-facing child seat
in the front seat can result in
serious injury or death during a
crash.
Always place a rear-facing child
seat in the back seat, not the
front.
2011 Odyssey
Page 45
In any of these situations, we
strongly recommend that you install
the child seat directly behind the
front passenger’s seat, move the seat
as far forward as needed, and leave it
unoccupied. Or, you may wish to get
a smaller rear-f acing child seat.
Many states, Canadian provinces and
territories allow a child one year of
age or older who also meets the
minimum size and weight
requirements to transition from a
rear-facing child seat to a forward
facing seat. Know the requirements
where you are driving and follow the
child seat instructions. Many experts
recommend use of a rear-facing seat
up to age two, if the child’s height
and weight are appropriate for a
rear-facing seat.
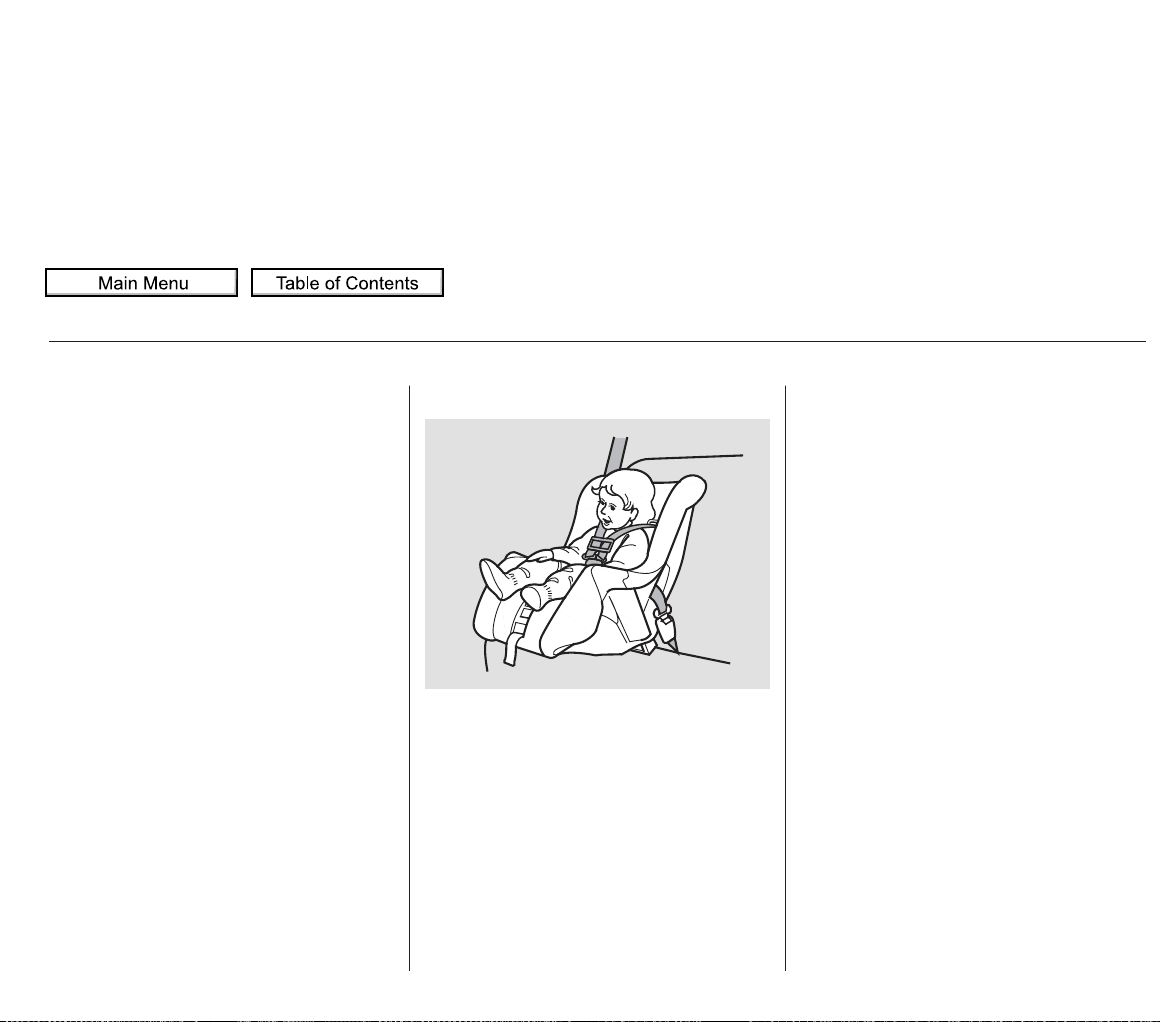
Of the different seats available, we
recommend those that have a f ivepoint harness system as shown.
We also recommend that a small
child use the child seat until the child
reaches the weight or height limit
for the seat.
Protecting Small Children
Child Seat Type
Protecting Infants and Small Children
2011 Odyssey
Page 46
We strongly recommend placing a
forward-facing child seat in a back
seat, not the front.
If the vehicle seat is too
far forward, or the child’s head is
thrown f orward during a collision, an
inflating airbag can strike the child
with enough force to cause very
serious or fatal injuries.
Even with advanced front airbags
that automatically turn the
passenger’s front airbag off (see
page ), a back seat is the safest
place for a small child.
If it is necessary to put a f orwardfacing child seat in the front, move
the vehicle seat as far to the rear as
possible, and be sure the child seat is
firmly secured to the vehicle and the
child is properly strapped in the seat.
33
Child Seat Placement
Placing a f orward-f acing child seat in
the front seat of a vehicle equipped
with a passenger’s airbag can be
hazardous.
Protecting Infants and Small Children
Driver and Passenger Safety
Placing a forward-facing child
seat in the front seat can result
in serious injury or death if the
front airbag inflates.
Ifyoumustplaceaforwardfacing child seat in front, move
the vehicle seat as far back as
possible, and properly restrain
the child.
2011 Odyssey
Page 47
When buying a child seat, you need
to choose either a conventional child
seat, or one designed for use with
the Lower Anchors and Tethers for
CHildren (LATCH) system.
Conventional child seats must be
secured to a vehicle with a seat belt,
whereas LATCH-compatible seats
are secured by attaching the seat to
hardware built into the rear seating
positions.
Since LATCH-compatible child seats
are easier to install and reduce the
possibility of improper installation,
we recommend selecting this style.
Whatever type of seat you choose, to
provide proper protection, a child
seat should meet three
requirements:
In seating positions and vehicles not
equipped with LATCH, a LATCHcompatible child seat can be installed
using a seat belt.
Look for FMVSS 213 or CMVSS
213 on the box.
Rear-facing for infants, forwardfacing for small children.
Before purchasing a conventional
child seat, or using a previously
purchased one, we recommend that
you test the seat in the specific
vehicle seating position or positions
where the seat will be used.
Selecting a Child Seat
The child seat should meet
Federal Motor Vehicle Safety
Standard 213 or Canadian Motor
Vehicle Safety Standard 213.
The child seat should be of the
proper type and size to fit the child.
The child seat should f it the
vehicle seating position (or
positions) where it will be used.
1.
2.
3.
2011 Odyssey
Page 48
After selecting a proper child seat
and a good place to install the seat,
there are three main steps in
installing the seat:
All child seats must be
secured to the vehicle with the lap
part of a lap/shoulder belt or with
the LATCH (Lower Anchors and
Tethers for CHildren) system. A
child whose seat is not properly
secured to the vehicle can be
endangered in a crash.
After installing a child
seat, push and pull the seat
forward and from side-to-side to
verify that it is secure.
A child seat secured with a seat belt
should be installed as firmly as
possible. However, it does not need
to be ‘‘rock solid.’’ Some side-to-side
movement can be expected and
should not reduce the child seat’s
effectiveness.
If the child seat is not secure, try
installing it in a different seating
position, or use a different style of
child seat that can be f irmly secured.
Make sure the child is properly
strappedinthechildseat
according to the child seat maker’s
instructions. A child who is not
properly secured in a child seat
can be seriously injured in a crash.
The following pages provide
guidelines on how to properly install
a child seat. A forward-facing child
seat is used in all examples, but the
instructions are the same for rearfacing child seats.
Properly secure the child seat to
the vehicle.
Make sure the child seat is f irmly
secured.
Secure the child in the child seat.
1.
2.
3.
Installing a Child Seat
Driver and Passenger Safety
2011 Odyssey
Page 49
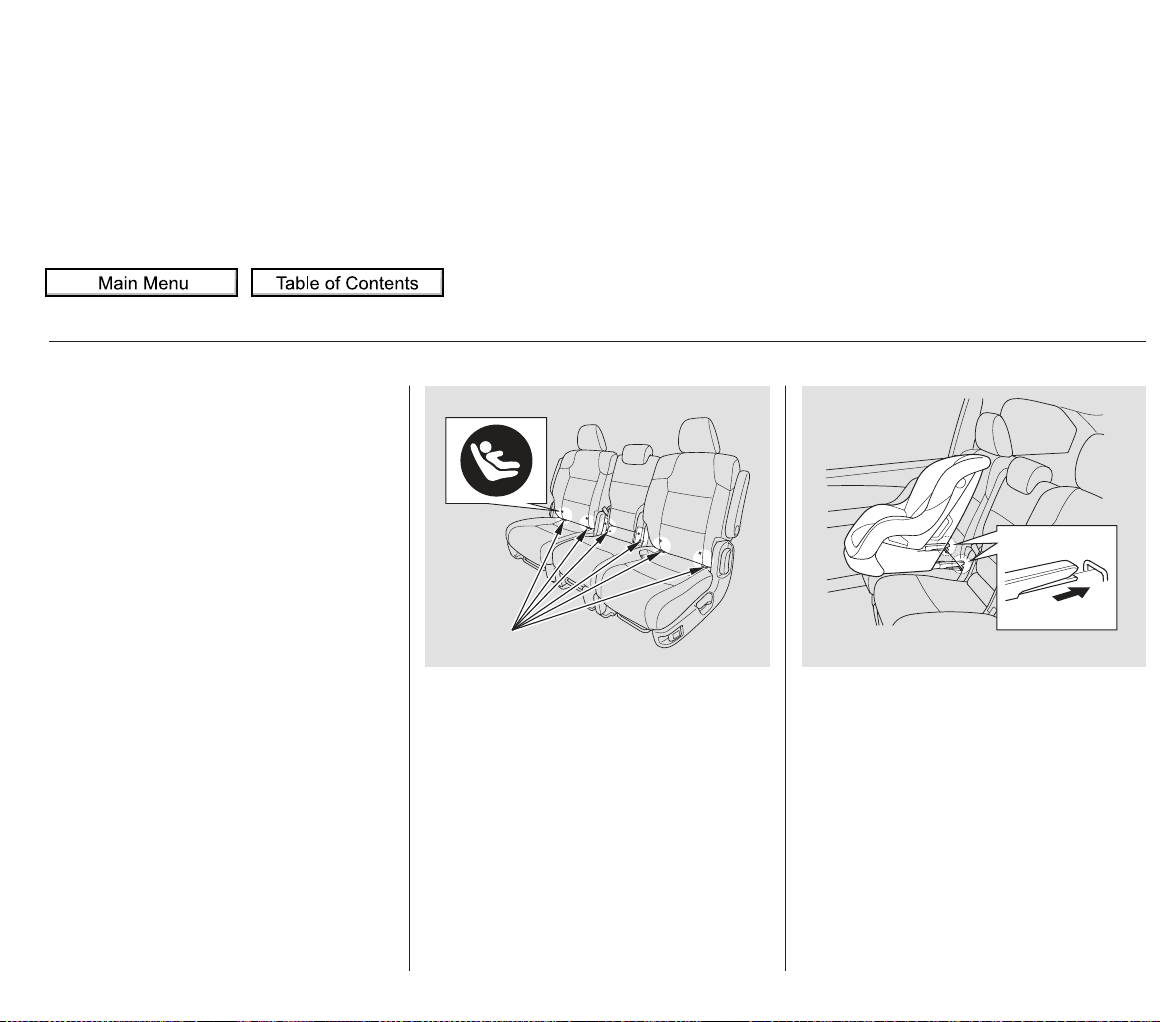
Place the child seat on the vehicle
seat, then attach the seat to the
lower anchors according to the
child seat maker’s instructions.
Some LATCH-compatible seats
have a rigid-type connector as
shown above.
The lower anchors are located
between the seat-back and seat
bottom, and are to be used only with
a child seat designed for use with
LATCH.
The location of each lower anchor is
indicated by a small button above the
anchor point.
Your vehicle is equipped with
LATCH (Lower Anchors and
Tethers for CHildren) at each of the
second and third row seats, and the
second row center seat (except LX
models).
Make sure there are no objects
near the anchors that could
prevent a secure connection
between the child seat and the
anchors.
Move the seat belt buckle or
tongue away from the lower
anchors.
To install a LATCH-compatible child
seat in either outer second row seat:
1.
2.
3.
Installing a Child Seat with
LATCH
Installing a Child Seat
Using the Outer LATCH
LOWER
ANCHORS
BUTTON
Rigid type
2011 Odyssey
Page 50
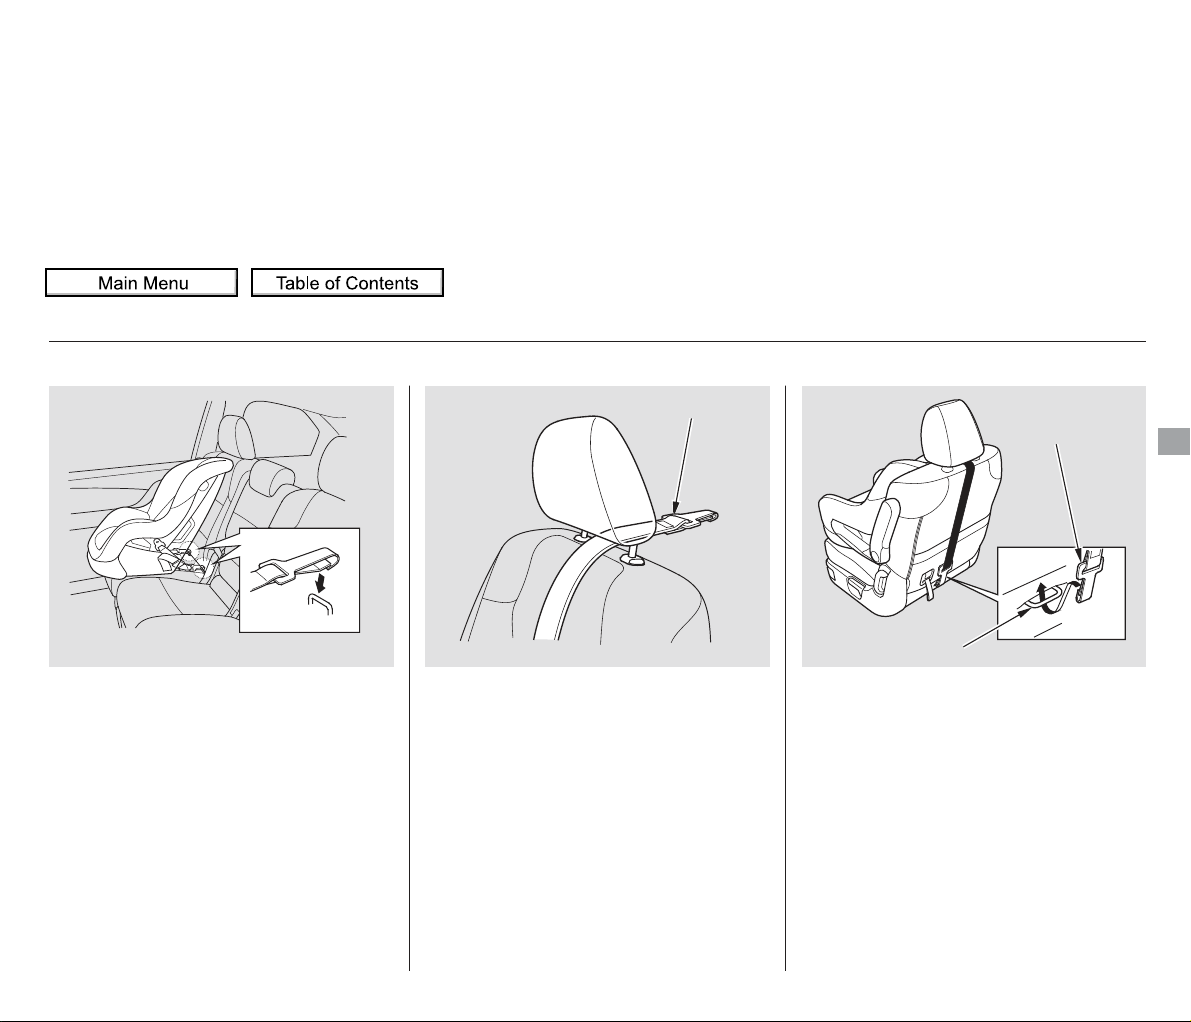
Whatever type you have, follow
the child seat maker’s instructions
for adjusting or tightening the fit.
Other LATCH-compatible seats have
a flexible-type connector as shown
above.
Lift the head restraint (see page
), then route the tether strap
through the legs of the head
restraint and over the seat-back,
making sure the strap is not
twisted.
Attach the tether strap hook to the
tether anchor, then tighten the
strap as instructed by the child
seat maker.
Push and pull the child seat
forward and from side-to-side to
verify that it is secure.
If the tether strap is too long and
cannot be tightened firmly, find a
route where the strap can be
tightened securely.
4.
5. 6.
7.
179
CONTINUED
Installing a Child Seat
Driver and Passenger Safety
ANCHOR
TETHER
STRAP HOOK
TETHER STRAP
Flexible type
2011 Odyssey
Page 51
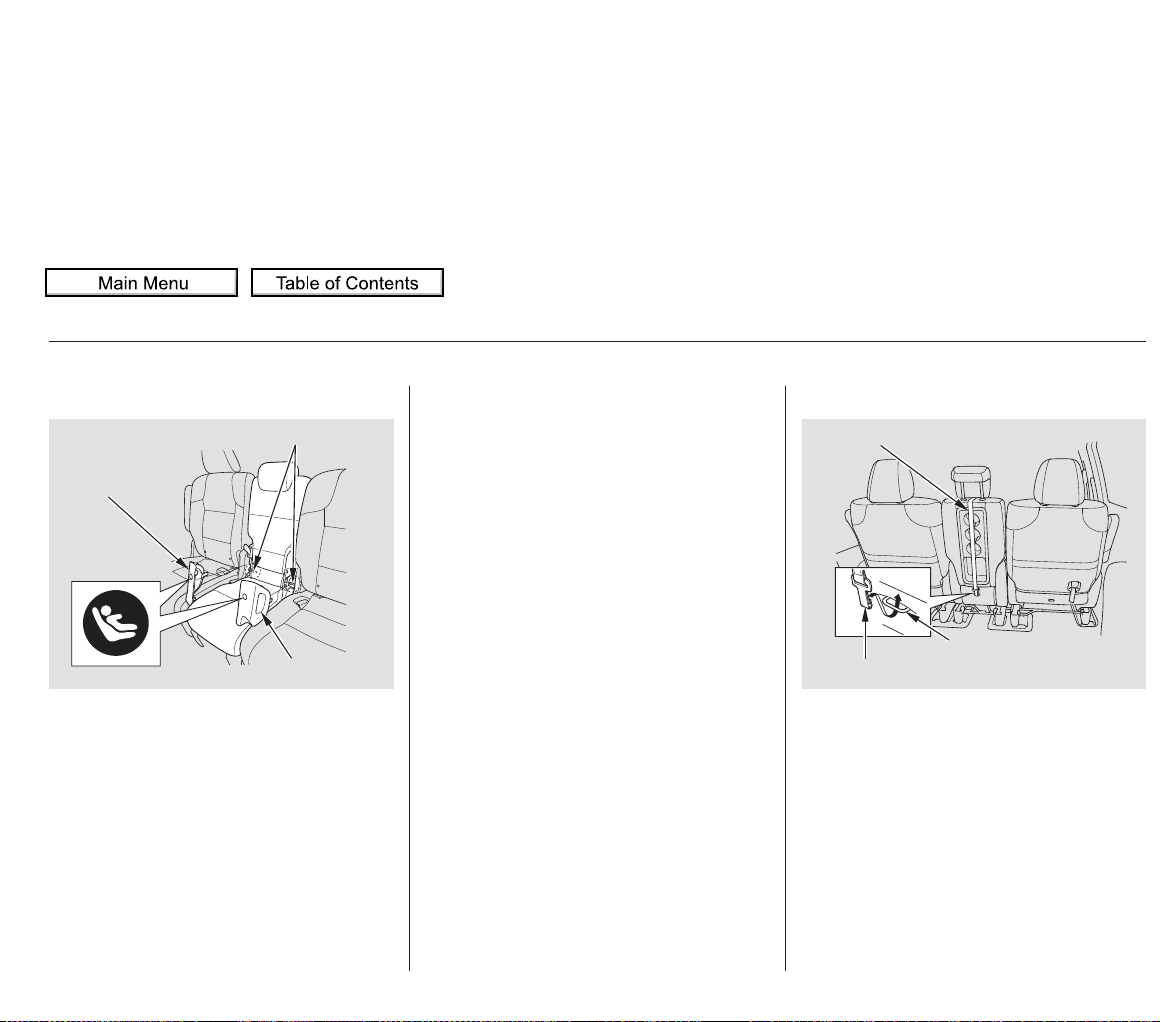
Lift the head restraint (see page
), then route the tether strap
through the legs of the head
restraint and over the seat-back,
making sure the strap is not
twisted.
Attach the attaching clip to the
anchor fitting, then tighten the
strap as instructed by the child
seat maker.
Unlatch the detachable seat belt
anchor latch and retract the seat
belt all the way into the ceiling.
Place the latch plate and anchor
latch in their holding slots (see
page ).
Remove the covers on each lower
end of the seat-back by pulling on
the handles.
To install a LATCH-compatible child
seat in the second row center seat
(except LX models), use the center
lower anchors as shown above.
Follow step 1 through 4 as
described previously to secure the
child seat.
1.
2.
3.
4.
5.
187
179
Installing a Child Seat
Using the Center LATCH
LOWER ANCHORS
BUTTON
TETHER STRAP
ATTACHING CLIP
TETHER ANCHOR FITTING
HANDLE
COVER
2011 Odyssey
Page 52
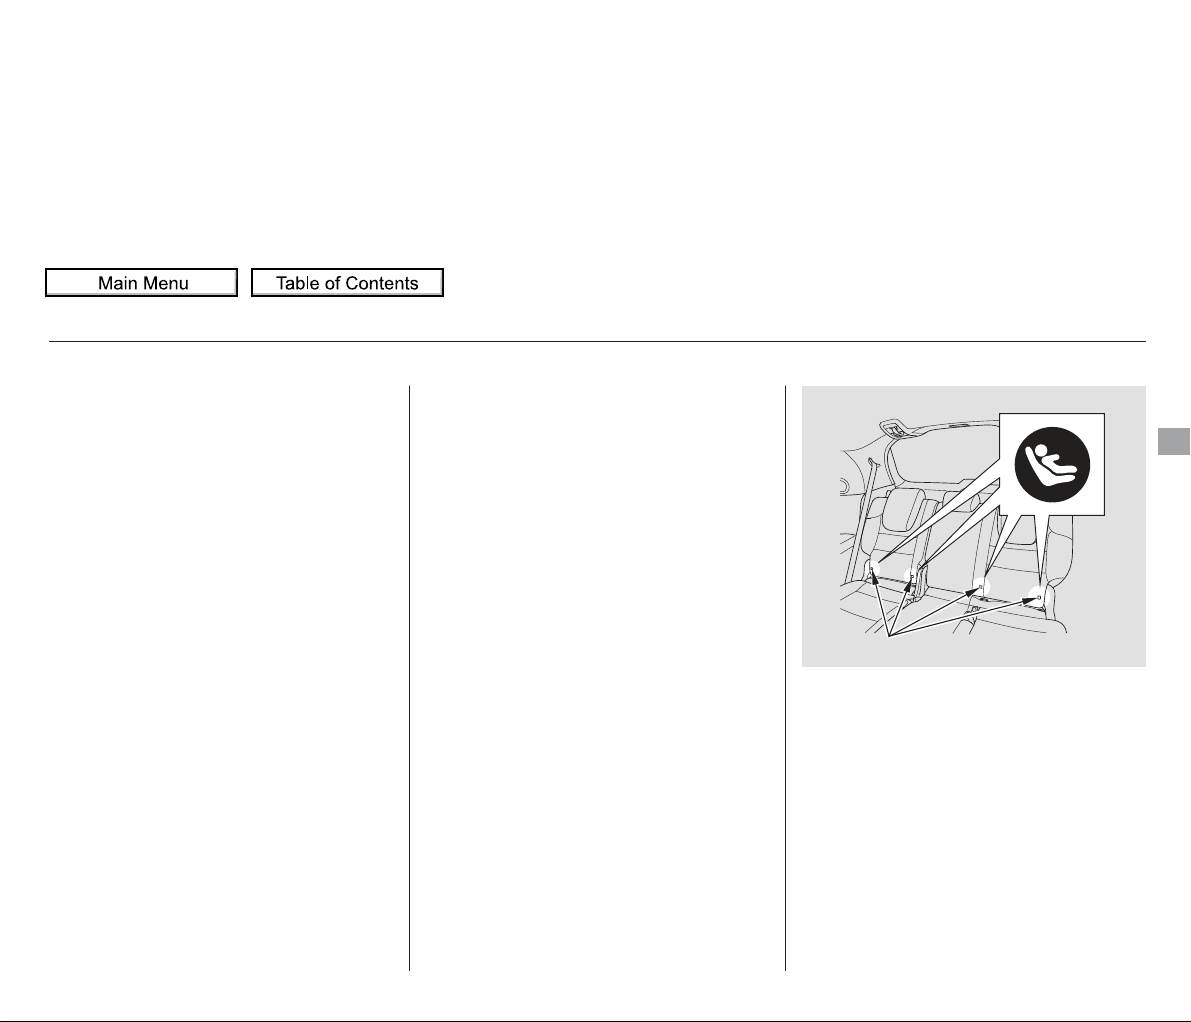
The location of each lower anchor is
indicated by a small button above the
anchor point.
To install a LATCH-compatible child
seat in a third row seat:
Unlatch the detachable seat belt
anchor latch and retract the seat
belt all the way into the ceiling.
Place the latch plate and anchor
latch in their holding slots (see
page ).
Push and pull the child seat
forward and from side to side to
verify that it is secure.
After properly securing the child
seat (see pages and ), lift the
head restraint, then route the
tether strap over the seat-back and
through the head restraint legs.
1.
2.
6.
46 47
187
CONTINUED
Installing a Child Seat
Driver and Passenger Safety
LOWER ANCHORS
BUTTON
2011 Odyssey
Page 53
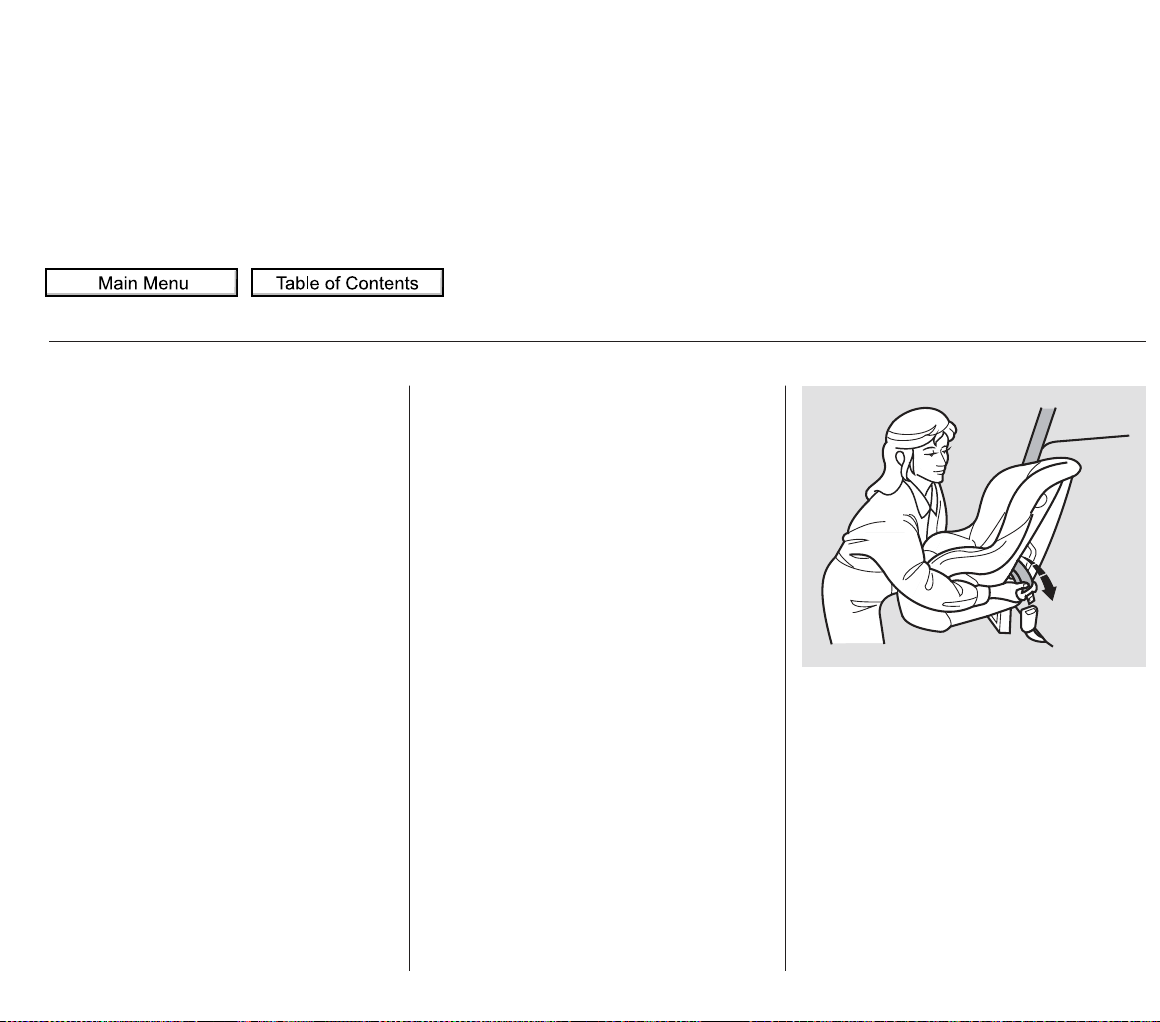
When not using the LATCH system,
all child seats must be secured to the
vehicle with the lap part of a lap/
shoulder belt.
In addition, the lap/shoulder belts in
all seating positions except the
driver’s have a lockable retractor
that must be activated to secure a
child seat.
If you intend to install a child seat in
the center seating position of the
second and third row, make sure the
detachable seat belt is securely
latched (see page ).
You can also remove the rear head
restraints (see page ). The
removedheadrestraintsshouldbe
secured in the cargo area so they
will not be thrown while you are
driving. Make sure to replace the
head restraints when the child
seats are not in use.
Followsteps6and7onpage .
With the child seat in the desired
seating position, route the belt
through the child seat according
to the seat maker’s instructions,
then insert the latch plate into the
buckle and remove any slack from
the lap portion of the belt.
1.
3.
4.
47
180
187
Installing a Child Seat
Installing a Child Seat with a Lap/
Shoulder Belt
2011 Odyssey
Page 54
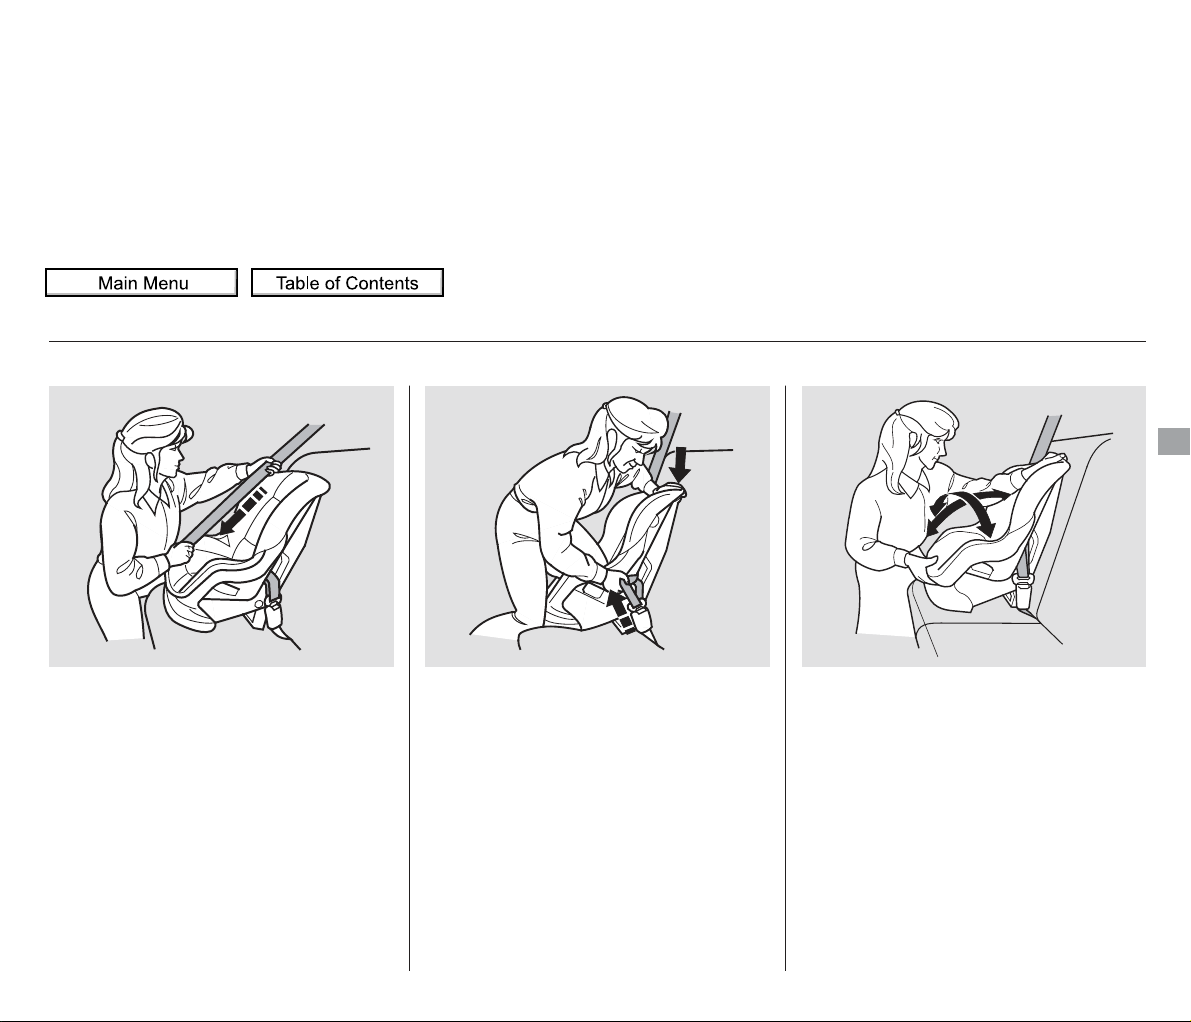
Push and pull the child seat
forward and from side-to-side to
verify that it is secure enough to
stay upright during normal driving
maneuvers. If the child seat is not
secure, unlatch the belt, allow it to
retract fully, then repeat these
steps.
To deactivate the lockable retractor
and remove a child seat, unlatch the
buckle, unroute the seat belt, and let
the belt fully retract.
After confirming that the belt is
locked, grab the shoulder part of
the belt near the buckle, and pull
up to remove any slack from the
lap part of the belt. Remember, if
the lap part of the belt is not tight,
the child seat will not be secure.
To remove slack, it may help to
putweightonthechildseat,or
push on the back of the seat while
pulling up on the belt.
To activate the lockable retractor,
slowly pull the shoulder part of the
belt all the way out until it stops,
then let the belt feed back into the
retractor.
After the belt has retracted, tug on
it. If the belt is locked, you will not
be able to pull it out. If you can pull
thebeltout,itisnotlocked,and
you will need to repeat these steps.
5.4.2.
3.
Installing a Child Seat
Driver and Passenger Safety
2011 Odyssey
Page 55
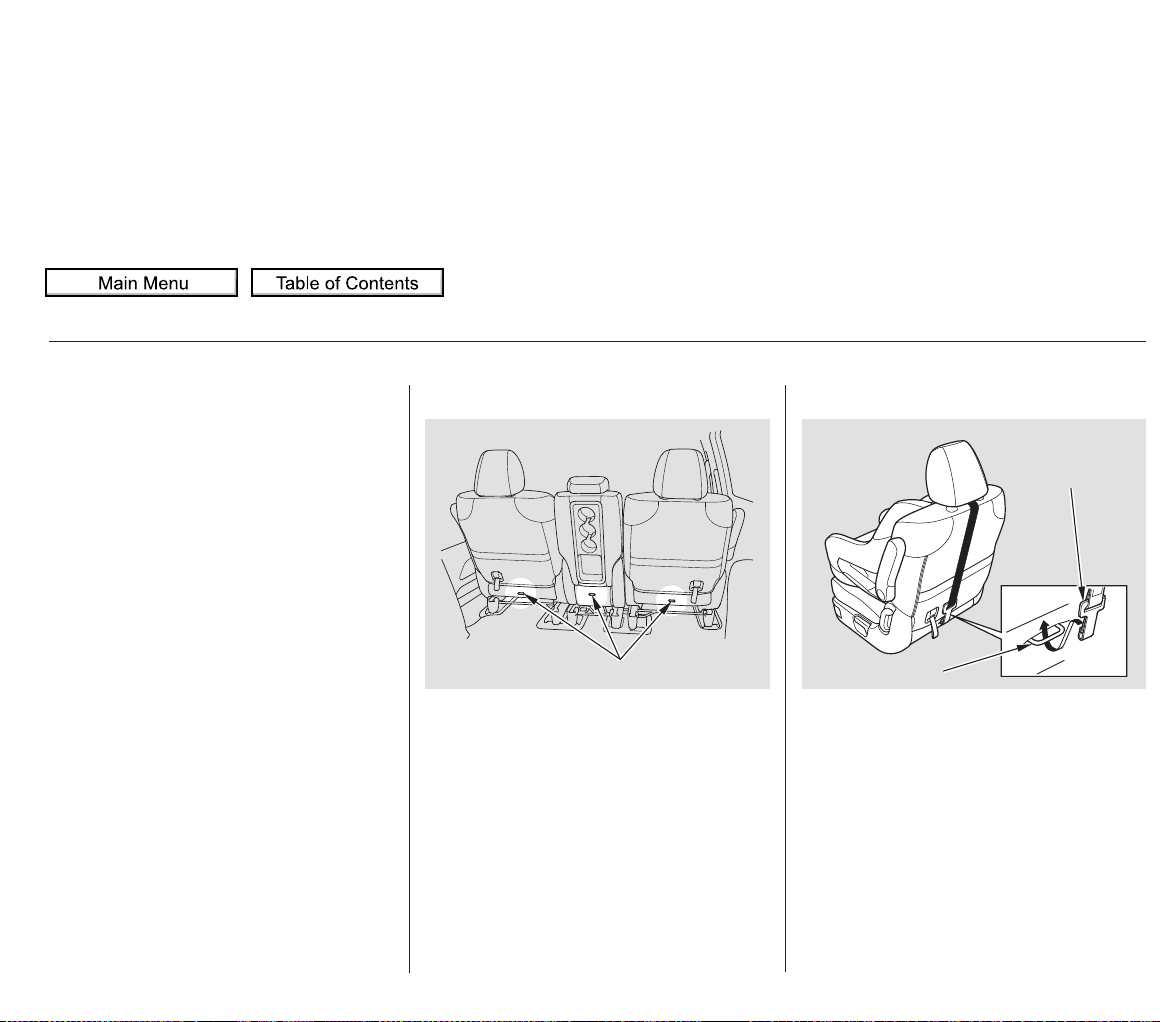
A child seat with a tether can be
installed in any seating position in
the second or third row seats.
Since a tether can provide additional
security to the lap/shoulder belt
installation, we recommend using a
tether whenever one is required or
available.
Each second row seat has a tether
anchorage point behind the seatback.
Attach the tether strap hook to the
anchor, making sure the strap is
not twisted.
After properly securing the child
seat (see pages and ), lift the
head restraint, then route the
tether strap over the seat-back and
through the head restraint legs.
1.
2.
50 51
Installing a Child Seat with a
Tether
Second Row Installation
Installing a Child Seat
TETHER ANCHOR POINTS
TETHER
STRAP HOOK
ANCHOR
Outer Position
2011 Odyssey
Page 56
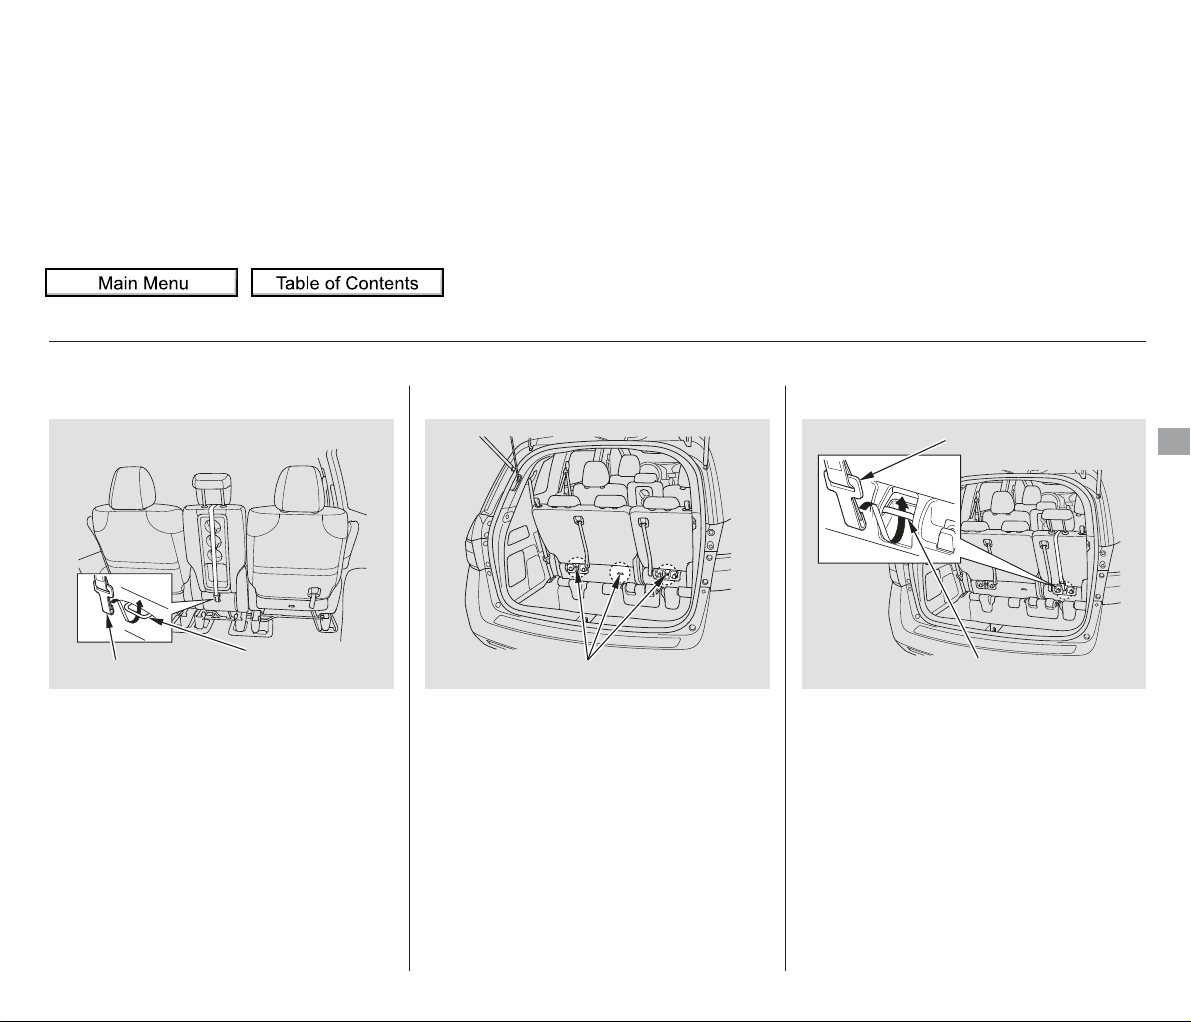
Each third row seat has a tether
anchorage point behind the seatback.
Tighten the strap according to the
seat maker’s instructions.
Attach the tether strap hook to the
anchor, making sure the tether
strap is not twisted.
You can also remove the rear head
restraints (see page ). The
removedheadrestraintsshouldbe
secured in the cargo area so they will
not be thrown while you are driving.
Make sure to replace the head
restraints when the child seats are
not in use.
After properly securing the child
seat (see pages and ), lift the
head restraint, then route the
tether strap over the seat-back and
through the head restraint legs.
Tighten the strap according to the
seat maker’s instructions.
If the tether strap is too long and
cannot be tightened firmly, find a
route where the strap can be
tightened securely.
3.
3.
1.
2.
5150
187
Third Row Installation
Installing a Child Seat
Driver and Passenger Safety
TETHER ANCHOR POINTS
ANCHOR
TETHER STRAP HOOK
ANCHOR
Center Position (except LX models)
TETHER STRAP HOOK
2011 Odyssey
Page 57
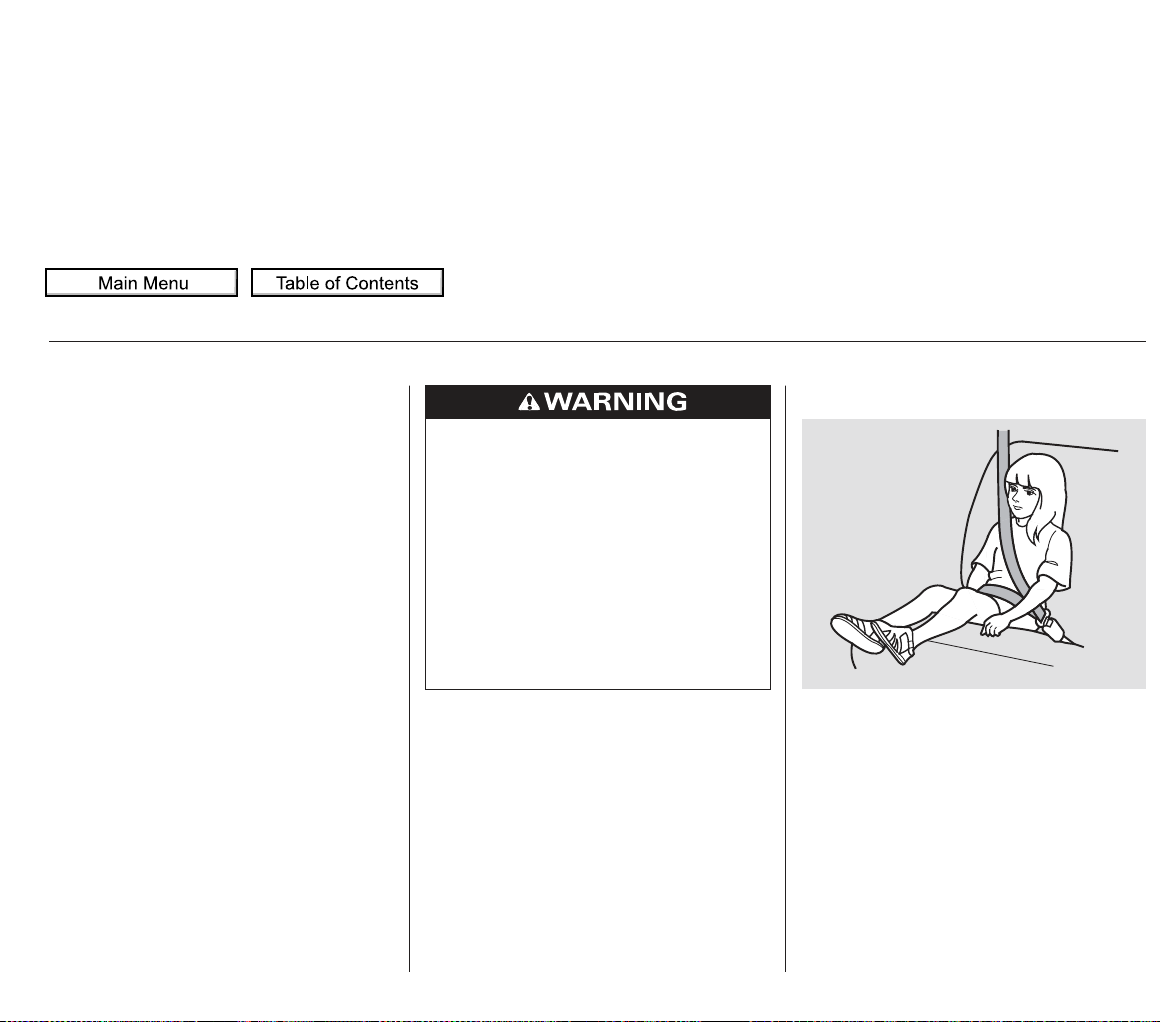
To determine if a lap/shoulder belt
properly fits a child, have the child
put on the seat belt, then ask
yourself:
Does the child sit all the way back
against the seat?
Do the child’s knees bend
comfortably over the edge of the
seat?
When a child reaches the
recommended weight or height limit
for a forward-facing child seat, the
child should sit in a back seat on a
booster seat and wear the lap/
shoulder belt.
The following pages give
instructions on how to check proper
seat belt fit, what kind of booster
seat to use if one is needed, and
important precautions for a child
who must sit in front.
1.
2.
Checking Seat Belt Fit
Protecting Larger Children
Allowing a child age 12 or under
to sit in front can result in injury
or death if the passenger’s front
airbag inflates.
If a child must ride in front,
move the vehicle seat as far
back as possible, use a booster
seat if needed, have the child
sit up properly and wear the
seat belt properly.
2011 Odyssey
Page 58
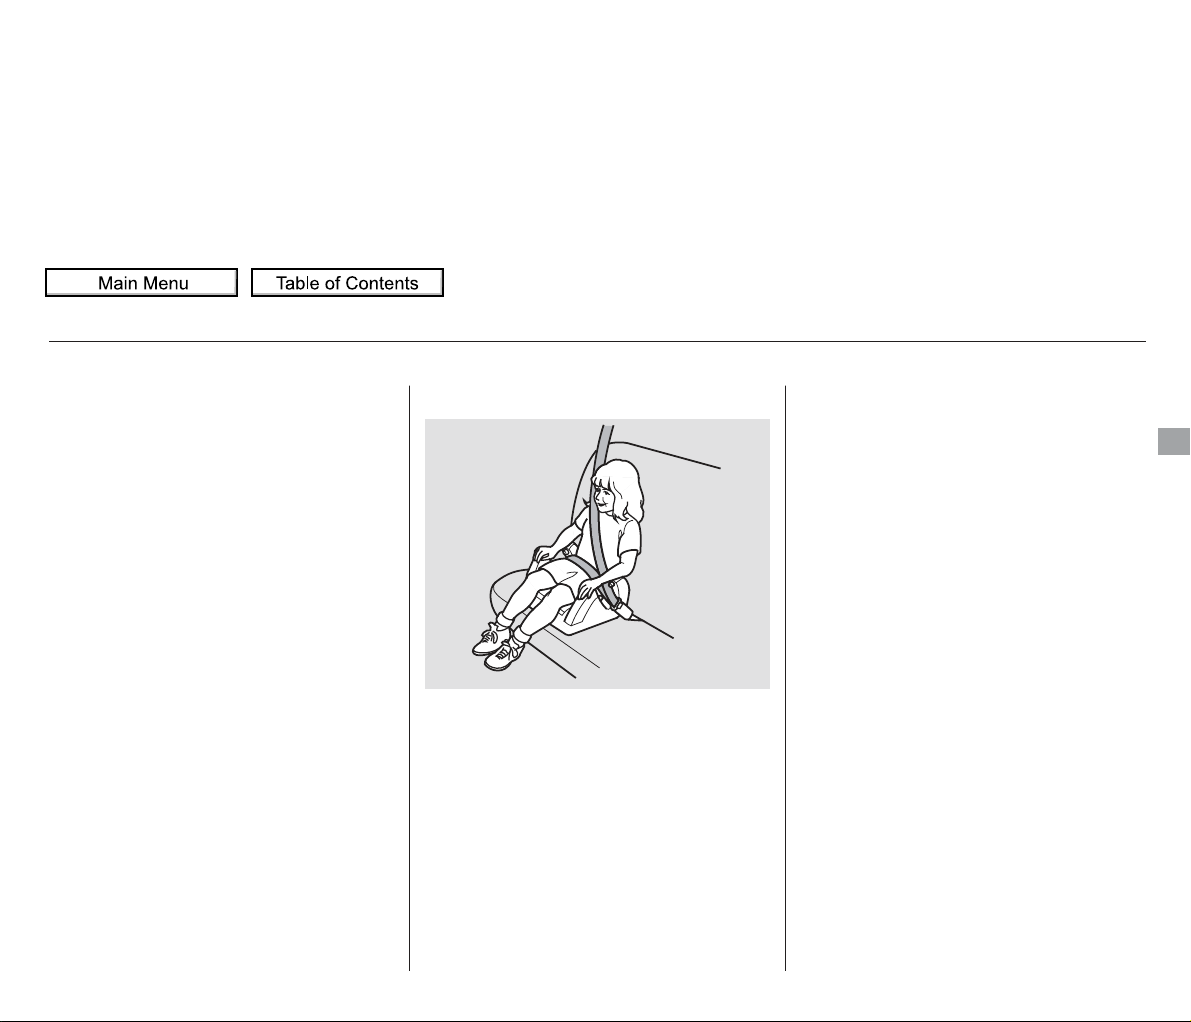
A child who has outgrown a forwardfacing child seat should ride in a
back seat and use a booster seat
until the lap/shoulder belt fits them
properly without the booster.
Does the shoulder belt cross
between the child’s neck and arm?
Is the lap part of the belt as low as
possible, touching the child’s
thighs?
Will the child be able to stay
seated like this for the whole trip?
If you answer yes to all these
questions, the child is ready to wear
the lap/shoulder belt correctly. If
you answer no to any question, the
child needs to ride on a booster seat.
Some states, Canadian provinces and
territories also require children to
use a booster seat until they reach a
given age or weight (e.g., 6 years or
60 lbs). Be sure to check current
laws in the states, provinces and
territories where you intend to drive.
Booster seats can be high-back or
low-back. Whichever style you select,
make sure the booster seat meets
federal safety standards (see page
) and that you follow the booster
seat maker’s instructions.
If a child who uses a booster seat
must ride in f ront, move the vehicle
seat as far back as possible and be
sure the child is wearing the seat
belt properly.
A child may continue using a booster
seat until the tops of their ears are
even with the top of the vehicle’s or
booster’s seat-back. A child of this
height should be tall enough to use
the lap/shoulder belt without a
booster seat.
3.
4.
5.
44
Using a Booster Seat
Protecting Larger Children
Driver and Passenger Safety
2011 Odyssey
Page 59
The National Highway Traffic Safety
Administration and Transport
Canada recommend that all children
aged 12 and under be properly
restrained in a back seat.
If the passenger’s front airbag
inflates in a moderate to severe
frontal collision, the airbag can cause
serious injuries to a child who is
unrestrained, improperly restrained,
sitting too close to the airbag, or out
of position.
A side airbag also poses risks. If any
part of a larger child’s body is in the
path of a deploying side airbag, the
child could receive possibly serious
injuries.
Of course, children vary widely. And
while age may be one indicator of
when a child can safely ride in front,
there are other important factors you
should consider.
Physically, a child must be large
enough for the lap/shoulder belt to
properly fit (see pages and ). If
the seat belt does not fit properly,
with or without the child sitting on a
booster seat, the child should not sit
in front.
To safely ride in front, a child must
be able to follow the rules, including
sitting properly, and wearing the seat
belt properly throughout a ride.
If you decide that a child can safely
ride up front, be sure to:
Carefully read the owner’s manual,
and make sure you understand all
seat belt instructions and all safety
information.
Move the vehicle seat to the rearmost position.
Have the child sit up straight, back
against the seat, and feet on or
near the floor.
Check that the child’s seat belt is
properly and securely positioned.
Supervise the child. Even mature
children sometimes need to be
reminded to fasten the seat belts
or sit properly.
15 54
Protecting Larger Children
When Can a Larger Child Sit in
Front
Physical Size
Maturity
2011 Odyssey
Page 60
This could result
in serious neck injuries during a
crash.
This could
cause very serious injuries during
a crash. It also increases the
chance that the child will slide
under the belt in a crash and be
injured.
If they do, they
could be very seriously injured in a
crash.
Devices intended to
improve a child’s comfort or
reposition the shoulder part of a
seat belt can make the belt less
effective and increase the chance
of serious injury in a crash.
Protecting Larger Children
Additional Safety Precautions
Do not let a child wear a seat belt
across the neck.
Do not let a child put the shoulder
part of a seat belt behind the back
or under the arm.
Two children should never use the
same seat belt.
Do not put any accessories on a
seat belt.
Driver and Passenger Safety
2011 Odyssey
Page 61
Your vehicle’s exhaust contains
carbon monoxide gas. Carbon
monoxide should not enter the
vehicle in normal driving if you
maintain your vehicle properly and
follow the information on this page.
High levels of carbon monoxide can
collect rapidly in enclosed areas,
such as a garage. Do not run the
engine with the garage door closed.
Even with the door open, run the
engine only long enough to move the
vehicle out of the garage.
With the tailgate open, air flow can
pull exhaust gas into your vehicle’s
interior and create a hazardous
condition. If you must drive with the
tailgate open, open all the windows
and set the heating and cooling
system/climate control system as
shown below.Have the exhaust system inspected
for leaks whenever:
The vehicle is raised for an oil
change.
You notice a change in the sound
of the exhaust.
The vehicle was in a collision that
may have damaged the underside.
If you must sit in your parked vehicle
with the engine running, even in an
unconfined area, adjust the heating
and cooling system/climate control
system as follows:
Select the fresh air mode.
Select the mode.
Set the fan speed to high.
Set the temperature control to a
comfortable setting.
1.
2.
3.
4.
Carbon Monoxide Hazard
Carbon monoxide gas is toxic.
Breathing it can cause
unconsciousness and even kill
you.
Avoid any enclosed areas or
activities that expose you to
carbon monoxide.
2011 Odyssey
Page 62
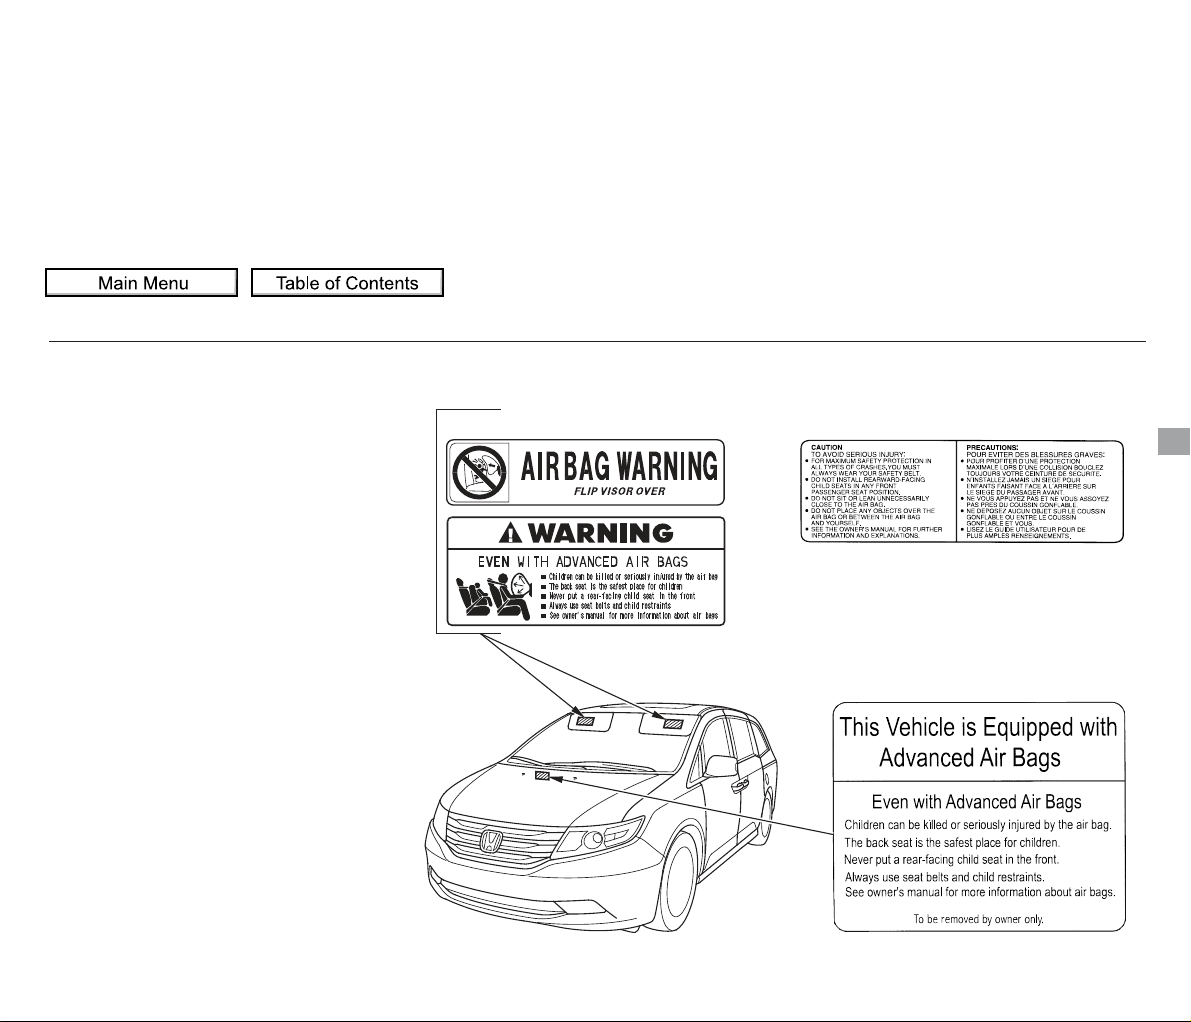
These labels are in the locations
shown. They warn you of potential
hazards that could cause serious
injury or death. Read these labels
carefully.
If a label comes off or becomes hard
to read (except for the U.S.
dashboard label which may be
removed by the owner), contact your
dealer for a replacement.
CONTINUED
Canadian models
U.S. models only
U.S. models
Safety Labels
Driver and Passenger Safety
DASHBOARD
SUN VISORS
2011 Odyssey
Page 63
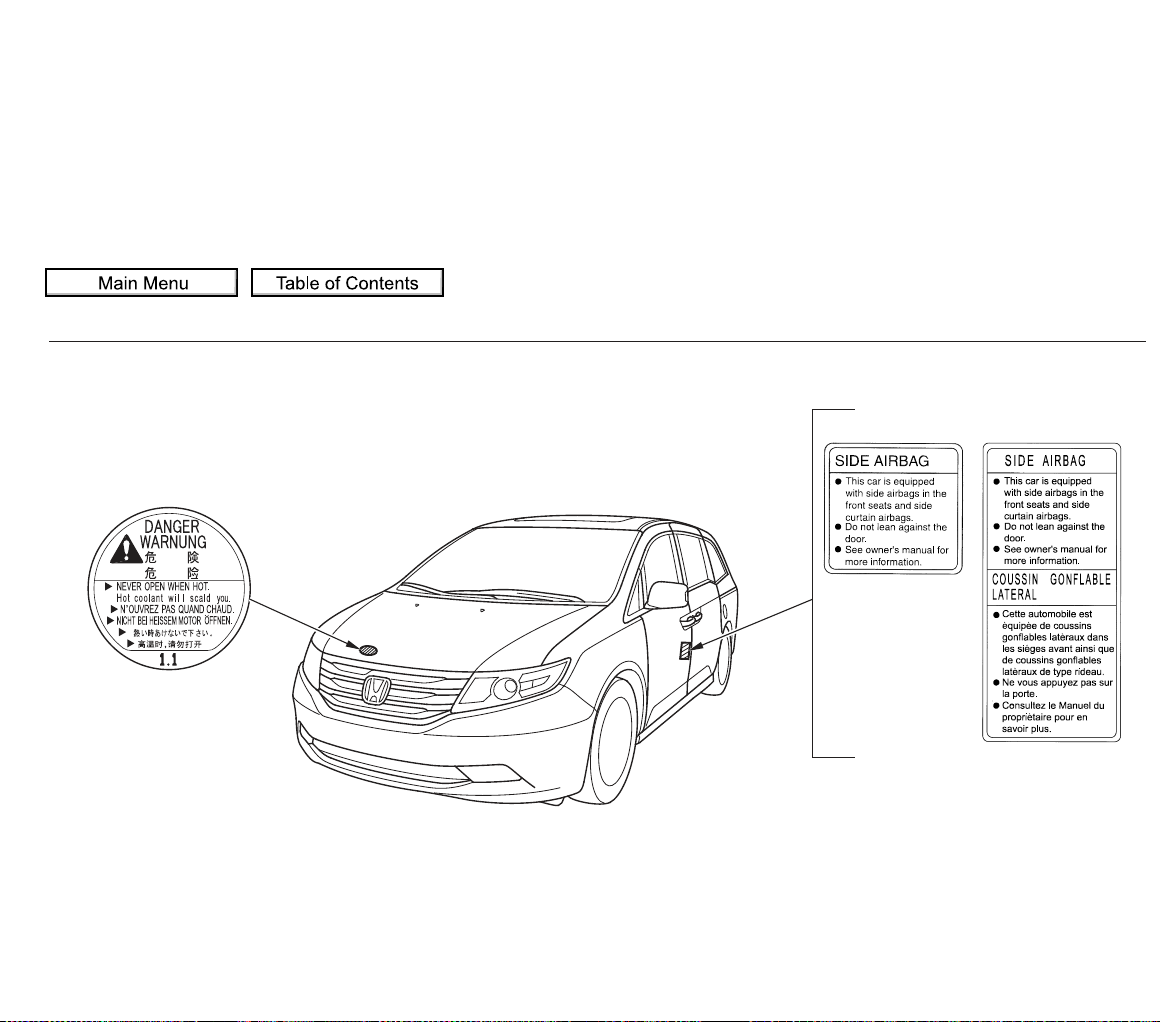
U.S. models Canadian models
Safety Labels
DOORJAMB
RADIATOR CAP
2011 Odyssey
Page 64
This section gives information about
the controls and displays that
contribute to the daily operation of
your vehicle. All the essential
controls are within easy reach.
...........................Control Locations .
62
............................Instrument Panel . 63
..........Instrument Panel Indicators . 65
.............................................Gauges . 77
.............Multi-Information Display . 83
Controls Near the Steering
.........................................Wheel .
134
Windshield Wipers and
.................................Washers .
135
Rear Window Wiper and
...................................Washer .
136
.........Turn Signal and Headlights . 136
.....................................Fog Lights . 139
......Instrument Panel Brightness . 140
...............Hazard Warning Button . 142
...............Rear Window Defogger . 142
......Steering Wheel Adjustments . 143
.............................Keys and Locks . 144
......................Immobilizer System . 145
..............................Ignition Switch . 147
.....................Remote Transmitter . 148
Opening or Closing the Power
.........................Sliding Doors .
151
Opening or Closing the Power
..................................Tailgate .
151
....................................Door Locks . 155
....................Power Door Locks . 155
Auto Door Locking/
..............................Unlocking .
156
............Childproof Door Locks . 162
..........................................Tailgate . 162
..........................Power Tailgate . 163
.................................Sliding Doors . 167
...............................................Seats . 175
..................................Seat Heaters . 189
Driving Position Memory
........................................System .
190
............................Power Windows . 192
.......................................Moonroof . 195
...........................................Mirrors . 197
...............................Parking Brake . 199
.........Interior Convenience Items . 201
.....Removable Center Console . 202
............Flip-up Trash Bag Ring . 203
.....................Beverage Holders . 203
..............Integrated Sunshades . 205
....................Sunglasses Holder . 206
................Conversation Mirror . 207
...................................Sun Visor . 207
............................Vanity Mirror . 208
................................Coat Hooks . 208
..................................Glove Box . 208
...........................Center Pocket . 209
....................................C
ool Box .
209
....................................Coin Box . 211
........Accessory Power Sockets . 211
.......................AC Power Outlet . 212
...............................Interior Lights . 213
Instruments and Controls
Instruments and Controls
2011 Odyssey
Page 65
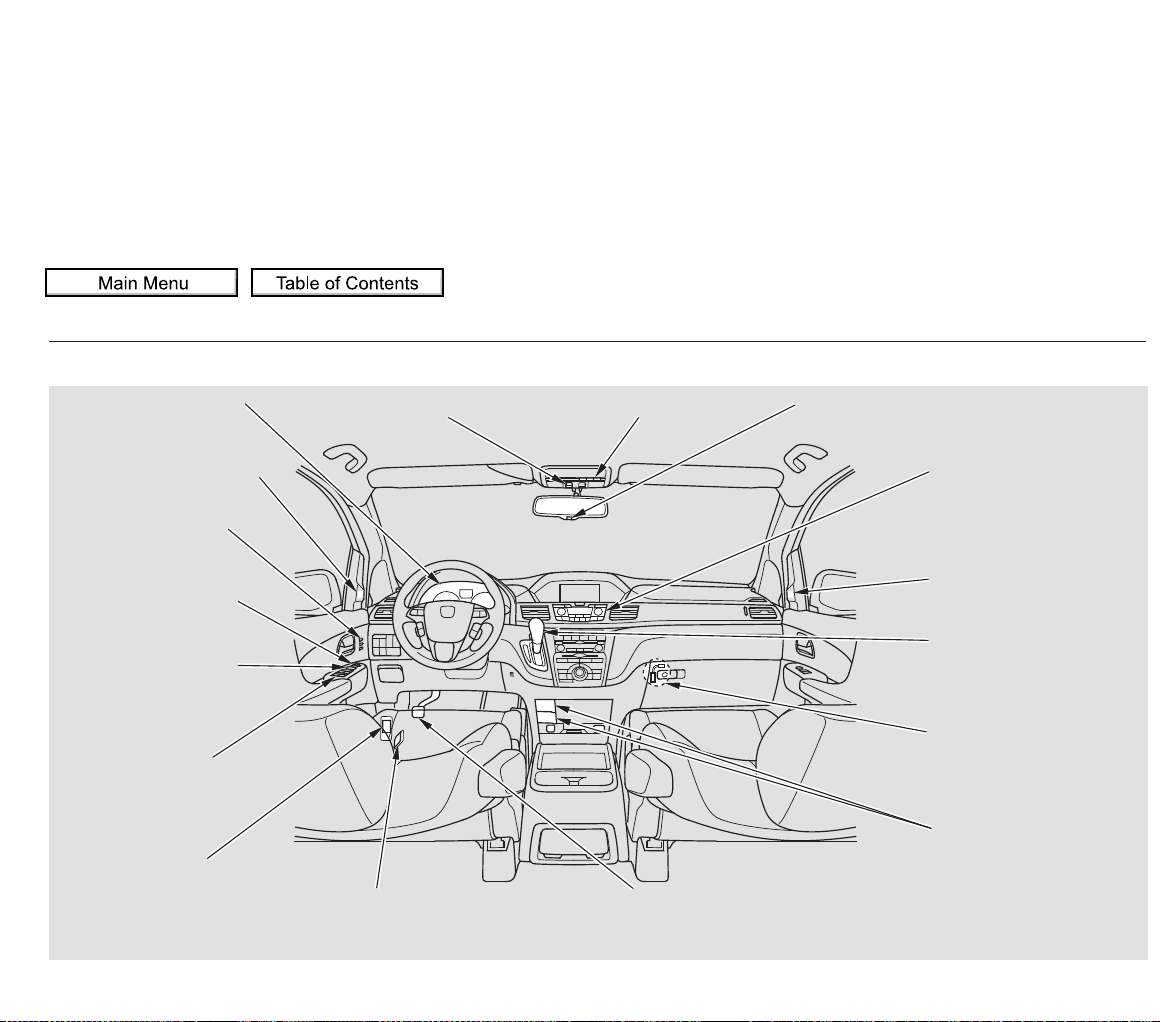
*
*
*
*
*
*
*
*
*
: If equipped
Control Locations
HOOD RELEASE HANDLE PARKING BRAKE PEDAL
FUEL FILL DOOR
RELEASE HANDLE
POWER WINDOW
SWITCHES
POWER DOOR LOCK
MASTER SWITCH
MIRROR CONTROLS
INSTRUMENT PANEL
INDICATORS
GAUGES
MIRROR CONTROL AUTO BUTTON
Vehicle with navigation system is shown.
DRIVING POSITION
MEMORY SYSTEM
CLIMATE CONTROL
SYSTEM
HEATING AND COOLING
SYSTEM
USB ADAPTER CABLE
ACCESSORY POWER
SOCKETS
AUTOMATIC
TRANSMISSION
BSI ALERT INDICATOR
BSI ALERT INDICATOR
(P.
63)
(P.
77)
(P.
190)
(P.
198)
(P.
155)
(P.
192)
(P.199)
(P.
211)
(P.
288, 298, 385, 395)
(P.225)
(P.218)
(P.
197)(P.483)
(P.
195)
(P.
582)
(P.541)
(P.561)
(P.
582)
(P.
544)
MOONROOF SWITCH HOMELINK BUTTONS
2011 Odyssey
Page 66
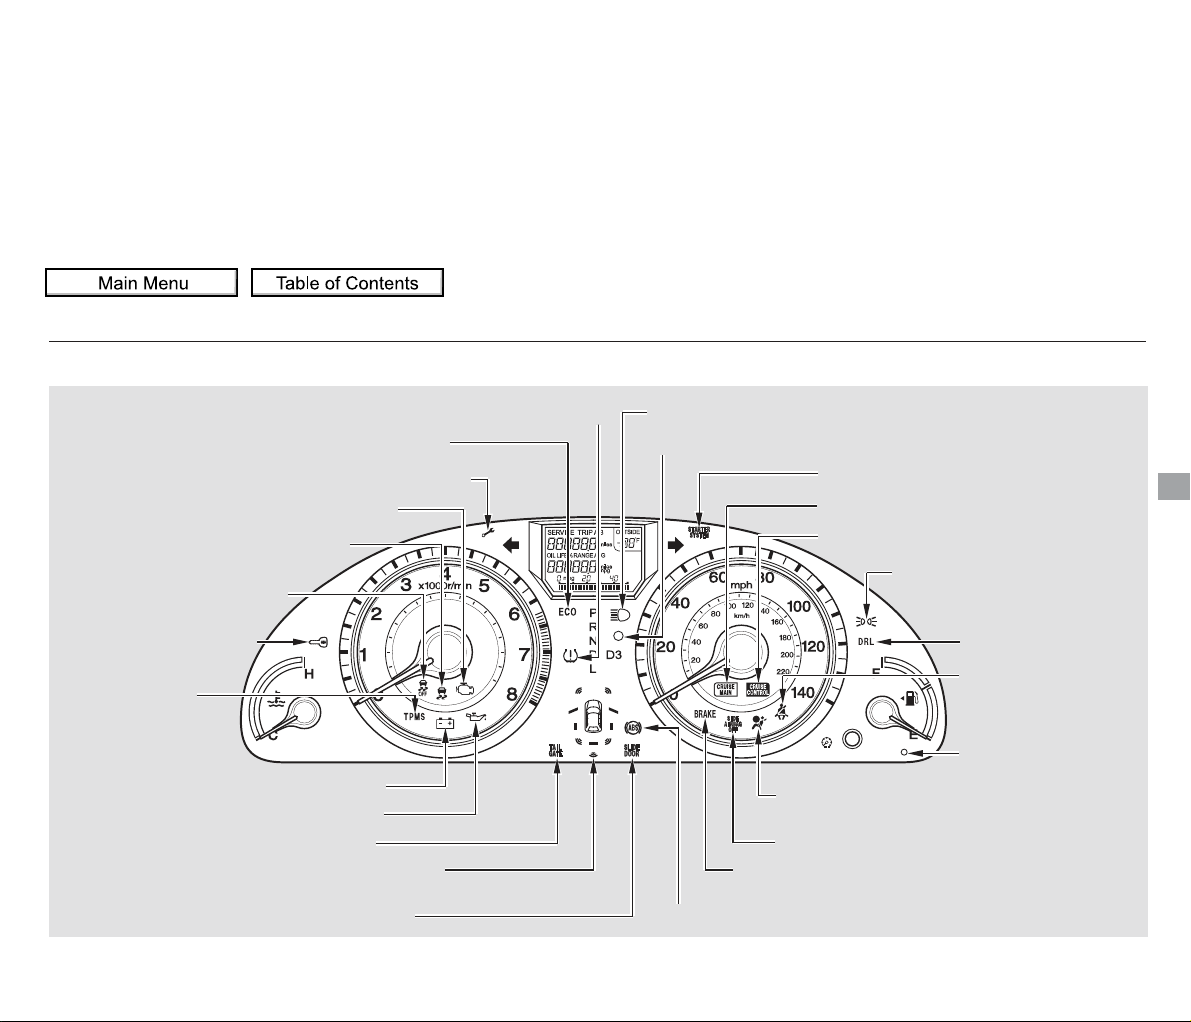
*
*
*
*
*
The U.S. instrument panel is shown. Differences for the Canadian models are noted in the text.
: If equipped
Instrument Panel
Instruments and Controls
LX, EX, EX-L models
LOW TIRE PRESSURE INDICATOR
LIGHTS ON INDICATOR
DAYTIME RUNNING
LIGHTS (DRL)
INDICATOR
SEAT BELT
REMINDER
INDICATOR
LOW FUEL
INDICATOR
STARTER SYSTEM INDICATOR
CRUISE MAIN INDICATOR
CRUISE CONTROL INDICATOR
IMMOBILIZER SYSTEM
INDICATOR
VSA OFF INDICATOR
VEHICLE STABILITY ASSIST (VSA)
SYSTEM INDICATOR
MALFUNCTION INDICATOR LAMP
FUEL ECONOMY INDICATOR
MAINTENANCE MINDER INDICATOR
SIDE AIRBAG OFF INDICATOR
HIGH BEAM INDICATOR
PARKING BRAKE AND BRAKE
SYSTEM INDICATOR
TIRE PRESSURE
MONITORING
SYSTEM (TPMS)
INDICATOR
CHARGING SYSTEM INDICATOR
LOW OIL PRESSURE INDICATOR
DOOR and TAILGATE OPEN INDICATOR
SECURITY SYSTEM INDICATOR
PARKING SENSOR INDICATORS
POWER SLIDING DOOR INDICATOR
POWER TAILGATE INDICATOR
(P.
71)
(P.75)
(P.
69)
(P.
69)
(P.
69)
(P.
72)
(P.
66)
(P.
66)
(P.
74)
(P.75)
(P.
487)
(P.
75)
(P.
66)
(P.
76)
(P.
73)
(P.
76)
(P.
70)
(P.
75)
(P.
75)
(P.
73)
(P.
73)
(P.
65)
(P.
74)
(P.
68)
(P.
67)
SUPPLEMENTAL RESTRAINT
SYSTEM (SRS) INDICATOR
(P.
67)
ANTI-LOCK BRAKE SYSTEM (ABS) INDICATOR (P.
68)
2011 Odyssey
Page 67
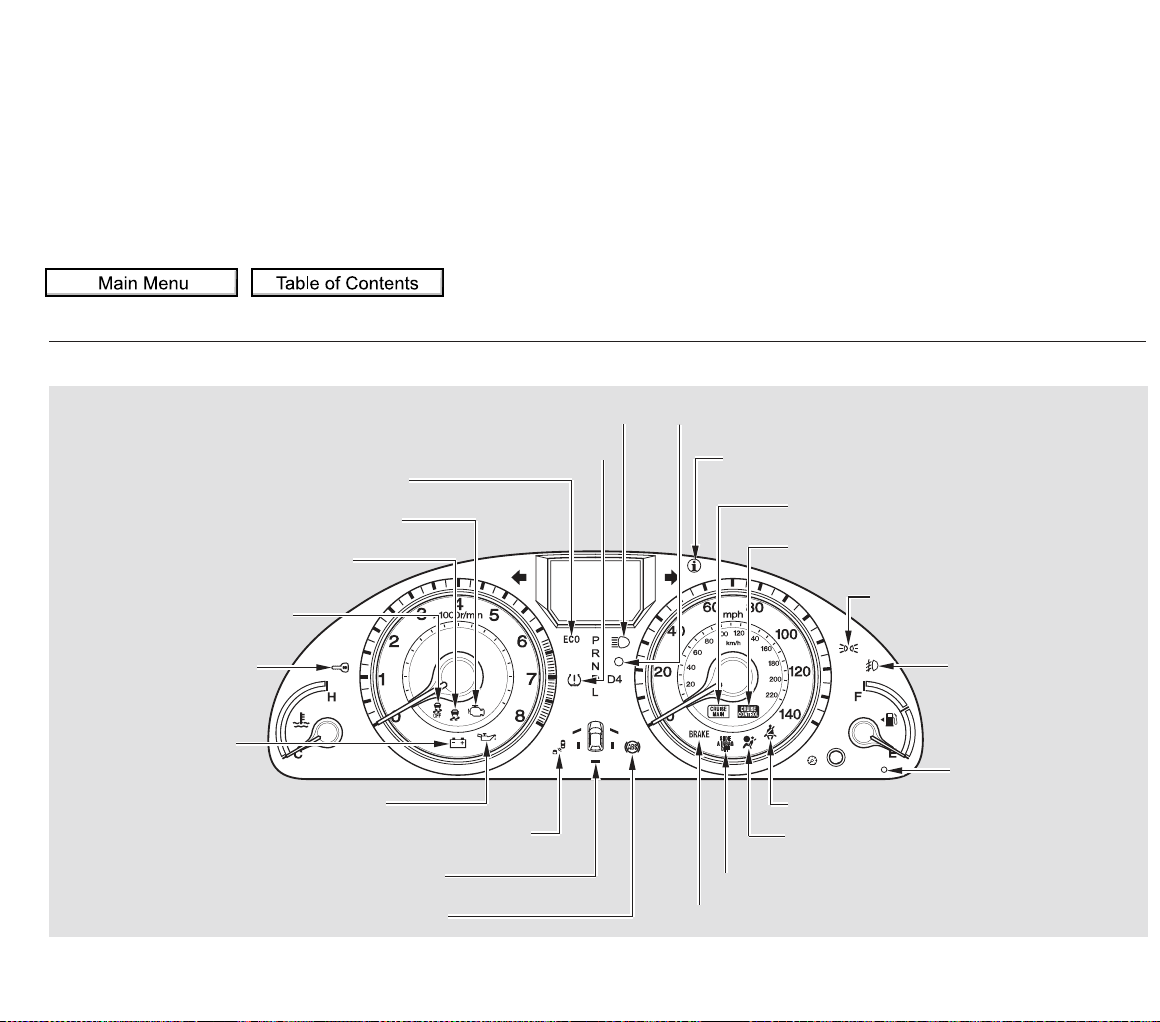
*
*
The U.S. instrument panel is shown. Differences for the Canadian models are noted in the text.
: If equipped
Instrument Panel
Touring models
FUEL ECONOMY INDICATOR
SYSTEM MESSAGE INDICATOR
ANTI-LOCK BRAKE SYSTEM INDICATOR
SIDE AIRBAG OFF INDICATOR
MALFUNCTION INDICATOR LAMP
VEHICLE STABILITY ASSIST (VSA)
SYSTEM INDICATOR
VSA OFF INDICATOR
IMMOBILIZER SYSTEM
INDICATOR
CHARGING SYSTEM
INDICATOR
LOW OIL PRESSURE INDICATOR
PARKING BRAKE AND BRAKE SYSTEM INDICATOR
SEAT BELT REMINDER INDICATOR
SUPPLEMENTAL RESTRAINT
SYSTEM INDICATOR
LOW FUEL
INDICATOR
HIGH BEAM INDICATOR SECURITY SYSTEM INDICATOR
CRUISE MAIN INDICATOR
CRUISE CONTROL INDICATOR
LIGHTS ON INDICATOR
FOG LIGHT
INDICATOR
BLIND SPOT INFORMATION SYSTEM INDICATOR
(P.
73)
(P.
75)
(P.
66)
(P.
69)
(P.
69)
(P.
69)
(P.66)
(P.
66)
(P.
70)
(P.
68)
(P.
76)
(P.
76)
(P.
75)
(P.75)
(P.
73)
(P.
73)
(P.
74)
(P.
65)
(P.67)
(P.
68)
(P.
67)
LOW TIRE PRESSURE/TPMS INDICATOR (P.
71)
DOOR and TAILGATE OPEN INDICATOR (P.75)
2011 Odyssey
Page 68
The instrument panel has many
indicators to give you important
information about your vehicle. This indicator comes on when you
turn the ignition switch to the ON
(II) position. It reminds you and your
passengers to fasten your seat belts.
A beeper also sounds if you have not
fastened your seat belt.
If you turn the ignition switch to the
ON (II) position before fastening
your seat belts, the beeper sounds,
and the indicator flashes. If you do
not fasten your seat belts before the
beeper stops, the indicator stops
flashing but remains on.
If your front passenger does not
fasten their seat belt, the indicator
comes on about 6 seconds after the
ignition switch is turned to the ON
(II) position.
If either of you do not fasten your
seat belt while driving, the beeper
will sound and the indicator will flash
again at regular intervals. For more
information, see page .
You will also see a ‘‘FASTEN SEAT
BELT’’ or ‘‘FASTEN PASSENGER
SEAT BELT’’ message on the multiinformation display (see page ).
20
90
On Touring models
Seat Belt Reminder
Indicator
Instrument Panel Indicators
Instruments and Controls
2011 Odyssey
Page 69
For more inf ormation, see page
.
You will also see a ‘‘CHECK
EMISSION SYSTEM’’ message on
the multi-information display (see
page ).
The engine can be severely
damaged if this indicator flashes
or stays on when the engine is
running. For more information,
see page .
You will also see a ‘‘CHECK
ENGINE OIL LEVEL’’ message
on the multi-information display
(see page ).
This indicator has two functions:
This indicator also comes on when
the battery needs to be replaced
along with a ‘‘REPLACE
BATTERY’’ message on the multiinformation display or a
‘‘CHANGE BATT’’ message on
the information display, depending
on models. For more information,
see page .
If it comes on when the engine is
running, the battery is not being
charged, and you will see a
‘‘CHECK CHARGING SYSTEM’’
message on the multi-information
display or a ‘‘CHECK CHARGE
SYSTEM’’ message on the
information display, depending on
models.
1.
2.
91
91
671
670
669
On Touring models
On Touring models
Instrument Panel Indicators
Malfunction Indicator
Lamp
Charging System
Indicator
Low Oil Pressure
Indicator
2011 Odyssey
Page 70
If it remains on after you have
fully released the parking brake
while the engine is running, or if it
comes on while driving, there
could be a problem with the brake
system. For more information, see
page .
You will also see a ‘‘BRAKE
FLUID LOW’’ or ‘‘CHECK
BRAKE SYSTEM’’ message on
the multi-information display (see
page ).
This indicator has two functions:
Itcomesonwhenyouturnthe
ignition switch to the ON (II)
position. It is a reminder to check
the parking brake. A beeper
sounds if you drive with the
parking brake not f ully released.
Driving with the parking brake not
fully released can damage the
brakes and tires.
You will also see a ‘‘RELEASE
PARKING BRAKE’’ message on
the multi-information display (see
page ) .
You will also see a ‘‘CHECK
AIRBAG SYSTEM’’ message on the
multi-information display (see page
).
This indicator comes on for several
seconds when you turn the ignition
switch to the ON (II) position. If it
comes on at any other time, it
indicates a potential problem with
your front airbags. This indicator will
also alert you to a potential problem
with your airbag system components.
For more inf ormation, see page .
1.
2.
90
90
32
90
672
On Touring models
On Touring models
On Touring models
Instrument Panel Indicators
Supplemental Restraint
System (SRS) Indicator
Parking Brake
and Brake
System
Indicator (Red)
Instruments and Controls
CanadaU.S.
2011 Odyssey
Page 71
This indicator comes on for several
seconds when you turn the ignition
switch to the ON (II) position. If it
comes on at any other time, it
indicates that the passenger’s side
airbag has automatically shut off.
For more inf ormation, see page .
You will also see a ‘‘PASSENGER
SIDE AIRBAG OFF’’ message on the
multi-information display (see page
).
You will also see a ‘‘CHECK ABS
SYSTEM’’ message on the multiinformation display (see page
).
This indicator normally comes on
for a few seconds when you turn
the ignition switch to the ON (II)
position. If it comes on at any
other time, there is a problem with
theABS.Ifthishappens,have
your vehicle checked at a dealer.
With this indicator on, your
vehicle still has normal braking
ability but no anti-lock function.
For more inf ormation, see page
.
33
90
91
568
On Touring models
On Touring models
Instrument Panel Indicators
Anti-lock Brake System
(ABS) IndicatorSide Airbag Off
Indicator
CanadaU.S.
2011 Odyssey
Page 72
Itcomesonasareminderthatyou
have turned off the vehicle stability
assist (VSA) system.
This indicator comes on briefly when
you turn the ignition switch to the
ON (II) position. It will then go off if
you have inserted a properly coded
ignition key. If it is not a properly
coded key, the indicator will blink,
and the engine’s fuel system will be
disabled (see page ).
This indicator normally comes on f or
a few seconds when you turn the
ignition switch to the ON (II)
position.
This indicator normally comes on f or
a few seconds when you turn the
ignition switch to the ON (II)
position. For more information, see
page .
It flashes when VSA is active (see
page ).
You will also see a ‘‘CHECK VSA
SYSTEM’’ message on the multiinformation display (see page ).
Ifitcomesonandstaysonatany
other time, there is a problem with
the VSA system. Take your vehicle
to a dealer to have it checked.
Without VSA, your vehicle still has
normal driving ability, but will not
have VSA traction and stability
enhancement. See page for more
information on the VSA system.
145
91
570
570
570
On Touring models
Vehicle Stability Assist
(VSA) System Indicator
Immobilizer System
Indicator
VSA OFF Indicator
Instrument Panel Indicators
Instruments and Controls
2011 Odyssey
Page 73
This indicator comes on when there
is a problem with the starter system.
For more inf ormation, see page .
If you see a ‘‘CHECK STARTER
SYSTEM’’ message on the multiinformation display, there is a
problem with the starter system (see
page ).
This indicator normally comes on f or
a few seconds when you turn the
ignition switch to the ON (II)
position.
The BSI indicator also comes on if
the rear bumper becomes dirty while
driving. You will see a ‘‘BLIND
SPOT NOT AVAILABLE’’ message
on the multi-information display.
When you clean the rear bumper,
the indicator should go off after you
begin driving again.
When you turn the system on, the
indicator will turn off.
If the indicator comes on at any
other time, there is a problem with
BSI. You will also see a ‘‘CHECK
BLIND SPOT SYSTEM’’ message on
the multi-information display. If this
happens, take your vehicle to a
dealer, and have it checked (For
more information, see page ).
When this indicator is on, BSI is not
working.
92
559
579
On Touring models
On Touring models
Starter System
Indicator
Blind Spot Inf ormation
System (BSI) Indicator
Instrument Panel Indicators
U.S. Canada
2011 Odyssey
Page 74
CONTINUED
This indicator normally comes on f or
a few seconds when you turn the
ignition switch to the ON (II)
position.
This indicator has two functions:
If it comes on while driving, it
indicates that one or more of your
vehicle’s tires are significantly low
on pressure.
You will also see a ‘‘CHECK TIRE
PRESSURE’’ message on the multiinformation display (see page ).
This indicator normally comes on f or
a few seconds when you turn the
ignition switch to the ON (II)
position. If it comes on while driving,
it indicates that one or more of your
vehicle’s tires are significantly low
on pressure.
If this happens, pull to the side of the
road when it is saf e, check which tire
has lost pressure, and determine the
cause. If it is because of a flat tire,
replace the flat tire with the compact
spare (see page ), and have the
flat tire repaired as soon as possible.
If two or more tires are underinflated,
call a professional towing service
(see page ). For more
information, see page .
If this happens, pull to the side of the
road when it is saf e, check which tire
has lost pressure, and determine the
cause. If it is because of a flat tire,
replace the flat tire with the compact
spare (see page ), and have the
flat tire repaired as soon as possible.
If two or more tires are underinflated,
call a professional towing service.
Refer to page for more
information.1.
91
655
683
572
655
574
On Touring modelsOn LX, EX, EX-L models
Instrument Panel Indicators
Low Tire Pressure
Indicator
Low Tire Pressure/
TPMS Indicator
Instruments and Controls
2011 Odyssey
Page 75
If this indicator begins to flash,
there is a problem with the tire
pressure monitoring system
(TPMS). You will also see a
‘‘CHECK TPMS SYSTEM’’
message on the multi-information
display. The indicator continues to
flash for a while (approximately 1
minute), then stays on. If this
happens, have your dealer check
the system as soon as possible.
For more information, see page
.
This indicator normally comes on f or
a few seconds when you turn the
ignition switch to the ON (II)
position.
If this indicator comes on and stays
on at any other time, or if it does not
come on when you turn the ignition
switch to the ON (II) position, there
is a problem with the TPMS. With
this indicator on, the low tire
pressure indicator will not come on
when a tire loses pressure. Take the
vehicle to your dealer to have the
system checked. For more
information, see page .
The left or right turn signal indicator
blinks when you signal a lane change
or turn. If an indicator does not blink
or blinks rapidly, it usually means
one of the turn signal bulbs is
burned out (see pages and ).
Replace the bulb as soon as possible,
since other drivers cannot see that
you are signaling.
When you press the hazard warning
button, both turn signal indicators
and all turn signals on the outside of
the vehicle flash.
2.
577
628 631
573
On LX, EX, EX-L models
Instrument Panel Indicators
Tire Pressure Monitoring
System (TPMS) Indicator
Turn Signal and
Hazard Warning
Indicators
2011 Odyssey
Page 76
If this indicator comes on when the
ignition switch is turned to the ON
(II) position and the parking brake is
released, it means there is a problem
in the high beam headlight’s circuit.
Have your vehicle checked by your
dealer.
This indicator reminds you that the
exterior lights are on. It comes on
when the light switch is in either the
or position. If you turn the
ignition switch to the ACCESSORY
(I) or the LOCK (0) position without
turning off the light switch, this
indicator will remain on. A reminder
chime will also sound when you open
the driver’s door without the key in
the ignition switch.
If you see a ‘‘CHECK DRL
SYSTEM’’ message on the multiinformation display, there is a
problem in the high beam headlight’s
circuit. Take your vehicle to a dealer
to have it checked (see page ).
This indicator comes on with the
high beam headlights. For more
information, see page .
This indicator comes on when you
turn on the fog lights. See page
for information on fog light
operation.
This indicator also comes on when
the light switch is in AUTO and the
lights turn on automatically.
92
137
139
On all models except LX
On Touring models
On Touring models
Instrument Panel Indicators
Lights On Indicator Daytime Running Lights
Indicator
High Beam Indicator
Fog Light Indicator
Instruments and Controls
2011 Odyssey
Page 77
This indicator comes on when the
washer fluid level is low. Add washer
fluid when you see this indicator
come on (see page ).
You will also see a ‘‘WASHER
FLUID LOW’’ message on the multiinformation display (see page ).
This indicator is in the fuel gauge. It
comesonasareminderthatyou
must refuel soon.
When the indicator comes on, there
are about 3.0 US gal (11.4
)offuel
remaining in the tank.
When the needle reaches E, there is
a very small amount of fuel in the
tank.
You will also see a ‘‘FUEL LOW’’
message on the multi-information
display (see page ).
This indicator comes on for a f ew
seconds when you turn the ignition
switch to the ON (II) position. If it
comes on at any other time, there is
a problem in the power tailgate
system. Have the system checked by
your dealer as soon as possible. You
can still open or close the tailgate
manually. For more information on
the power tailgate, see page .
You will also see a ‘‘CHECK POWER
TAILGATE SYSTEM’’ message on
the multi-information display.
92
92
162620
On Canadian models
On Canadian Touring models
On Touring models
On Touring models
On EX-L models
Instrument Panel Indicators
Low Fuel IndicatorWasher Level Indicator
Power Tailgate
Indicator
WASHER LEVEL INDICATOR
LOW FUEL INDICATOR
U.S. Canada
2011 Odyssey
Page 78
This indicator comes on when you
turn on the cruise control system by
pressing the CRUISE button on the
steering wheel (see page ).
This indicator comes on when you
set the cruise control. See page
for information on operating the
cruise control.
This indicator comes on for a f ew
seconds when you turn the ignition
switch to the ON (II) position. If it
comes on at any other time, there is
a problem in the power sliding door
system. With this indicator on, move
themainswitchonthedashboardto
the OFF position, and have the
system checked by your dealer as
soon as possible. You can still open
or close each sliding door manually.
For more information on the power
sliding doors, see page . While the engine is operating in its
most economical range, this
indicator may come on and stay on.
It goes off when your vehicle uses
extra fuel.
The door and tailgate open indicator
also appears on the multi-information
display.
All the lights in the indicator come
on for a few seconds when you turn
the ignition switch to the ON (II)
position.
The appropriate light comes on in
this indicator if the tailgate or any
door is not closed tightly.
You will also see a ‘‘CHECK LEFT
SLIDING DOOR’’ or ‘‘CHECK
RIGHT SLIDING DOOR’’ message
on the multi-information display.
167
480
480
On Touring models
On Touring models
On EX and EX-L models
Instrument Panel Indicators
Cruise Main Indicator
Cruise Control Indicator
Fuel Economy Indicator
Power Sliding
Door Indicator
Door and Tailgate Open Indicator
Instruments and Controls
CanadaU.S.
2011 Odyssey
Page 79
This indicator comes on when there
is a system message on the multiinformation display. Press the INFO
button on the steering wheel (see
page ) to see the message (see
page ).
Most of the time, this indicator
comes on along with other indicators
in the instrument panel such as the
seat belt reminder indicator, SRS
indicator, VSA system indicator, etc.
This indicator comes on for a f ew
seconds when you turn the ignition
switch to the ON (II) position. It
remindsyouthatitistimetotake
your vehicle in f or scheduled
maintenance. The maintenance main
items and sub items will be displayed
in the information display. See page
for more information on the
Maintenance Minder .
This indicator goes off when your
dealer resets it after completing the
required maintenance service.
This indicator comes on when the
security system is set. For more
information, see page .
83
90
479
599
On all models except LX
On Touring modelsOn LX, EX, EX-L models
Instrument Panel Indicators
Maintenance Minder
Indicator
System Message
Indicator
Security System Indicator
SECURITY SYSTEM INDICATOR
TM
2011 Odyssey
Page 80
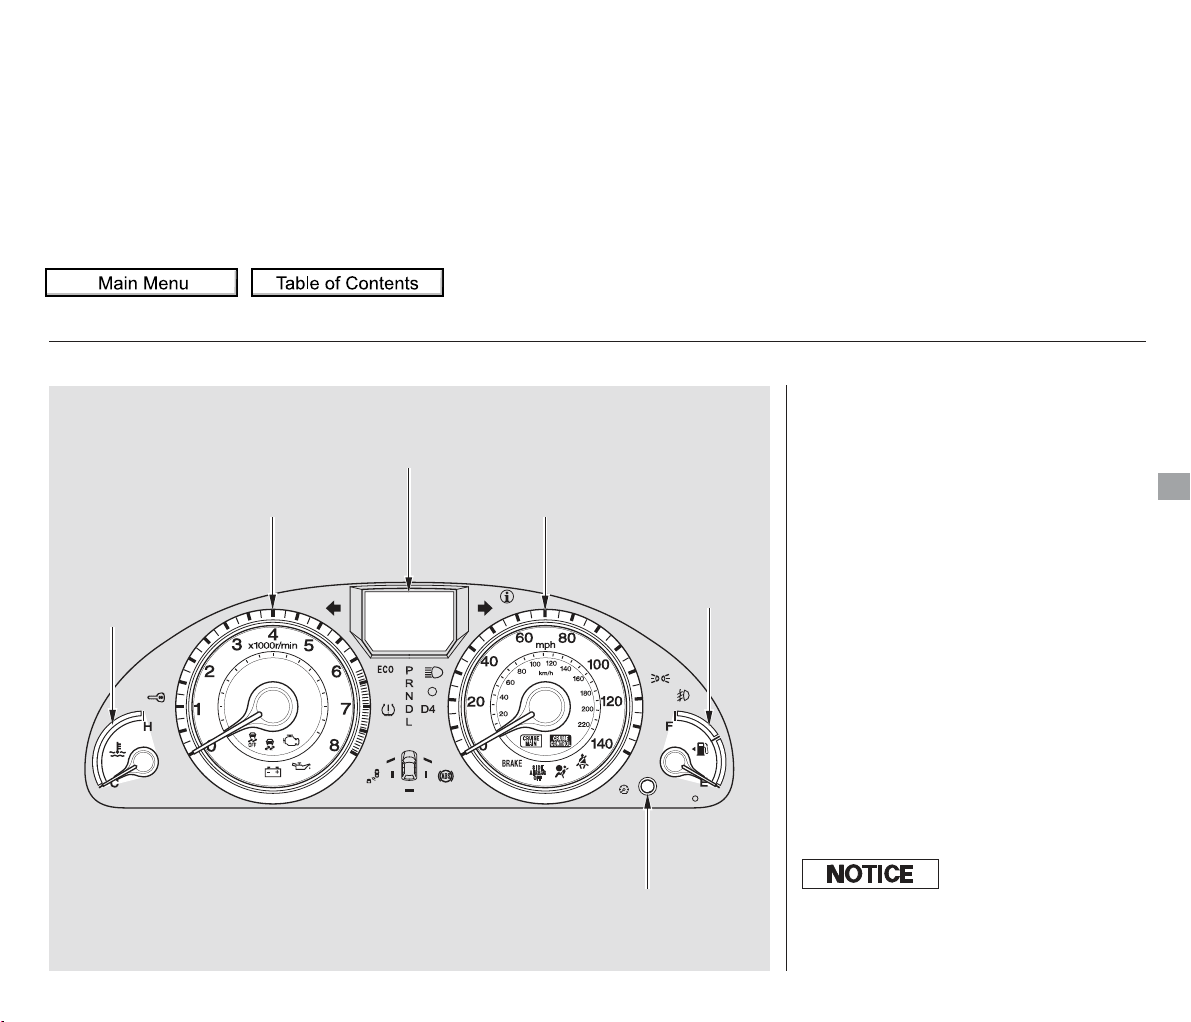
This shows the temperature of the
engine’s coolant. During normal
operation, the pointer should rise
from the bottom mark to about the
middle of the gauge. In severe
driving conditions, such as very hot
weather or a long period of uphill
driving, the pointer may rise to the
upper zone. If it reaches the red
(hot) mark, pull safely to the side of
the road. Turn to page for
instructions and precautions on
checking the engine cooling system.
This shows how much fuel you have.
It may show slightly more or less
than the actual amount. The needle
returns to the bottom after you turn
off the ignition.
667
Temperature Gauge
Fuel Gauge
Gauges
Instruments and Controls
INFORMATION DISPLAY/
MULTI-INFORMATION DISPLAY
TACHOMETER SPEEDOMETER
FUEL GAUGE
TEMPERATURE
GAUGE
SELECT/RESET KNOB
U.S. Touring model is shown.
Avoid driving with an extremely low
f uel level. Running out of f uel could
cause the engine to misf ire, damaging
the catalytic converter.
2011 Odyssey
Page 81
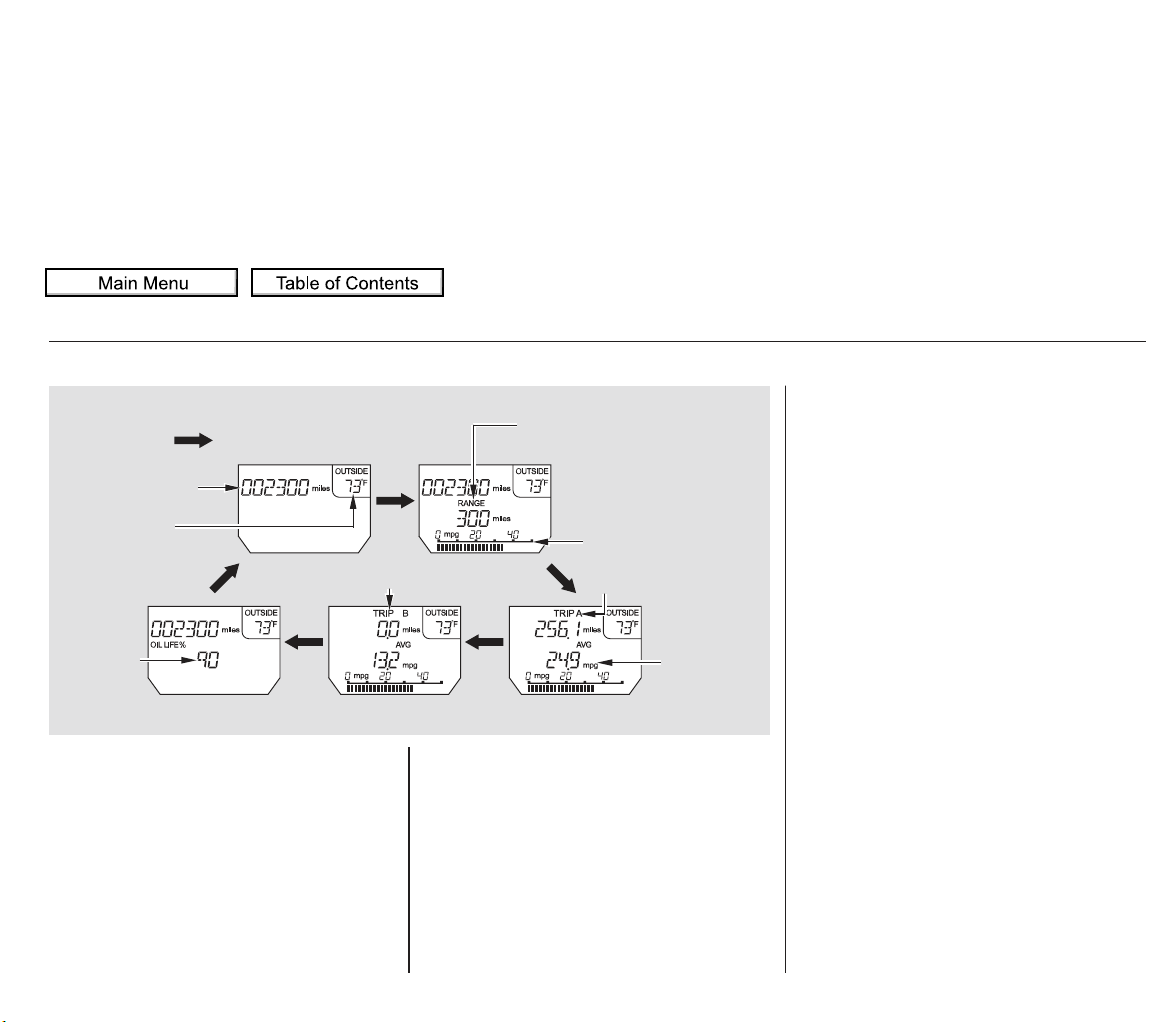
The odometer shows the total
distance your vehicle has been
driven. It measures miles in U.S.
models and kilometers in Canadian
models. It is illegal under U.S.
federal law and Canadian provincial/
territorial regulations to disconnect,
reset, or alter the odometer with the
intent to change the number of miles
or kilometers indicated.
To switch the display, press and
release the select/reset knob
repeatedly. When you turn the
ignition switch to the ON (II)
position, your last selection is
displayed.
This meter shows the number of
miles (U.S.) or kilometers (Canada)
driven since you last reset it.
There are two trip meters: Trip A
and Trip B. Switch between these
displays by pressing the select/reset
knob repeatedly.
Each trip meter works independently,
so you can keep track of two
different distances.
To reset a trip meter, display it, and
then press and hold the select/reset
knob until the number resets to ‘‘0.0’’.
For information about the multiinformation display, see page .
The information display shows the
odometer, trip meter, engine oil life,
outside temperature (if equipped),
instant fuel economy, average fuel
economy, range (estimated distance),
and maintenance item code(s).
83
On Touring models
On LX, EX, EX-L models
Gauges
Information Display
Odometer
Trip Meter
OUTSIDE
TEMPERATURE
INDICATOR
U.S. model with outside temperature indicator is shown.
INFORMATION DISPLAY
TRIP METER B
ODOMETER
RANGE
(ESTIMATED DISTANCE)
: Press the select/reset knob.
AVERAGE
FUEL
ECONOMY
ENGINE
OIL LIFE
TRIP METER A
INSTANT FUEL
ECONOMY
2011 Odyssey
Page 82
When either of the trip meters (trip
A or B) is displayed, your vehicle’s
average fuel economy since you last
resetthattripmetercanbeshown
on the information display (mpg on
U.S. models and l/100 km on
Canadian models). This number is
updated once per 10 seconds. To see
the average fuel economy, press and
release the select/reset knob
repeatedly.
When you reset a trip meter, the
average fuel economy for that trip
meter also resets.
This display shows the estimated
distance you can travel on the fuel
remaining in the tank.
This distance is estimated from the
fuel economy you have achieved
over the last few miles (kilometers),
so it will vary with changes in speed,
traffic condition, etc.
This display shows the instant fuel
economy you are getting.
It shows the number of mpg (U.S.)
or l/100 km (Canada).
Gauges
Average Fuel Economy Range (Estimated Distance)Instant Fuel Economy
Instruments and Controls
2011 Odyssey
Page 83
±±
To adjust the outside temperature
display, press and hold the select/
reset knob for 10 seconds. The
display changes as shown above.
This indicator displays the outside
temperature in Fahrenheit (U.S.
models) or Celsius (Canadian
models).
The temperature sensor is in the
front bumper. The temperature
reading can be affected by heat
reflection from the road surface,
engine heat, and the exhaust from
surrounding traffic. This can cause
an incorrect temperature reading
when your vehicle speed is under
19 mph (30 km/h). When you start
your trip, the sensor is not fully
acclimatized, therefore it may take
several minutes until the proper
temperature is displayed.
If the outside temperature is
incorrectly displayed, you can adjust
it up to 5°F in U.S. models ( 3°C
in Canadian models) warmer or
cooler.
The temperature must be
stabilized before doing this
procedure.
Except LX model
Gauges
Outside Temperature Indicator
NOTE:
OUTSIDE
TEMPERATURE
DISPLAY
: Press and release the
select/reset knob.
2011 Odyssey
Page 84
−−−−
−−−
−
−
−
Select the outside temperature
display by pressing and releasing the
select/reset knob. Press and hold
the same knob for a few seconds to
enter this setting, then turn it to
adjust the temperature. The
following sequence will appear for
each:0,1,2,3,4,5, 5, 4, 3, 2,
1,0(U.S.)or0,1,2,3, 3, 2,
1, 0 (Canada).
IGN ON (II) Immediately turn off
all electrical devices (interior lights,
air conditioning, audio, heated seats,
etc.). Try not to operate other
electrically operated controls such as
the power windows. Driving the
vehicle will recharge the battery. If
the message continues to display
while driving, see your dealer.
IGN ACCESSORY (I) or LOCK (0)
Follow the message and turn off
all electrical devices. Driving the
vehicle will recharge the battery,
however the vehicle may not start. If
it does not start, see jump starting
(see page ), or contact your
dealer.
When the temperature reaches the
desired value, release the select/
reset knob. You should see the new
outside temperature displayed.
In certain weather conditions,
temperature readings near freezing
(32°F, 0°C) could mean that ice is
forming on the road surface.
Whenthebattery’sstateofchargeis
low, the vehicle’s battery
management system triggers a
‘‘BATT LOW’’ message if the
ignition switch is on or of f .
Depending on how low the battery’s
state of charge dropped and how
long it remained low, these
messages may occur frequently. It
may take a number of trips to
sufficiently recharge the battery and
the messages to no longer appear.
665
Gauges
Battery Charge Low
Instruments and Controls
2011 Odyssey
Page 85
The inf ormation display in the
instrument panel shows you the
engine oil life and maintenance
service items when the ignition
switch is in the ON (II) position. This
information helps to keep you aware
of the periodic maintenance your
vehicle needs for continued troublefree driving. Refer to page for
more information.
Your vehicle’s onboard diagnostic
system will detect a loose or missing
fuel fill cap as an evaporative system
leak. The first time a leak is detected
a ‘‘CHECK FUEL CAP’’ message
appears on the information display.
Turn the engine of f, and confirm the
fuel fill cap is installed. If it is, loosen
it, then retighten it until it clicks at
least once. The message should go
off after several days of normal
driving once you tighten or replace
the fuel fill cap. To scroll to another
display, press the select/reset knob.
The ‘‘CHECK FUEL CAP’’ message
will appear each time you restart the
engine until the system turns the
message off.
If the system still detects a leak in
your vehicle’s evaporative emissions
system, the malfunction indicator
lamp (MIL) comes on. If the fuel fill
cap was not already tightened, turn
the engine of f, and check or
retighten the fuel f ill cap until it
clicks at least once. The MIL should
go off after several days of normal
driving once the cap is tightened or
replaced. If the MIL does not go off,
have your vehicle inspected by a
dealer. For more information, see
page .
599
671
Gauges
Maintenance Minder Check Fuel Cap Message
TM
2011 Odyssey
Page 86
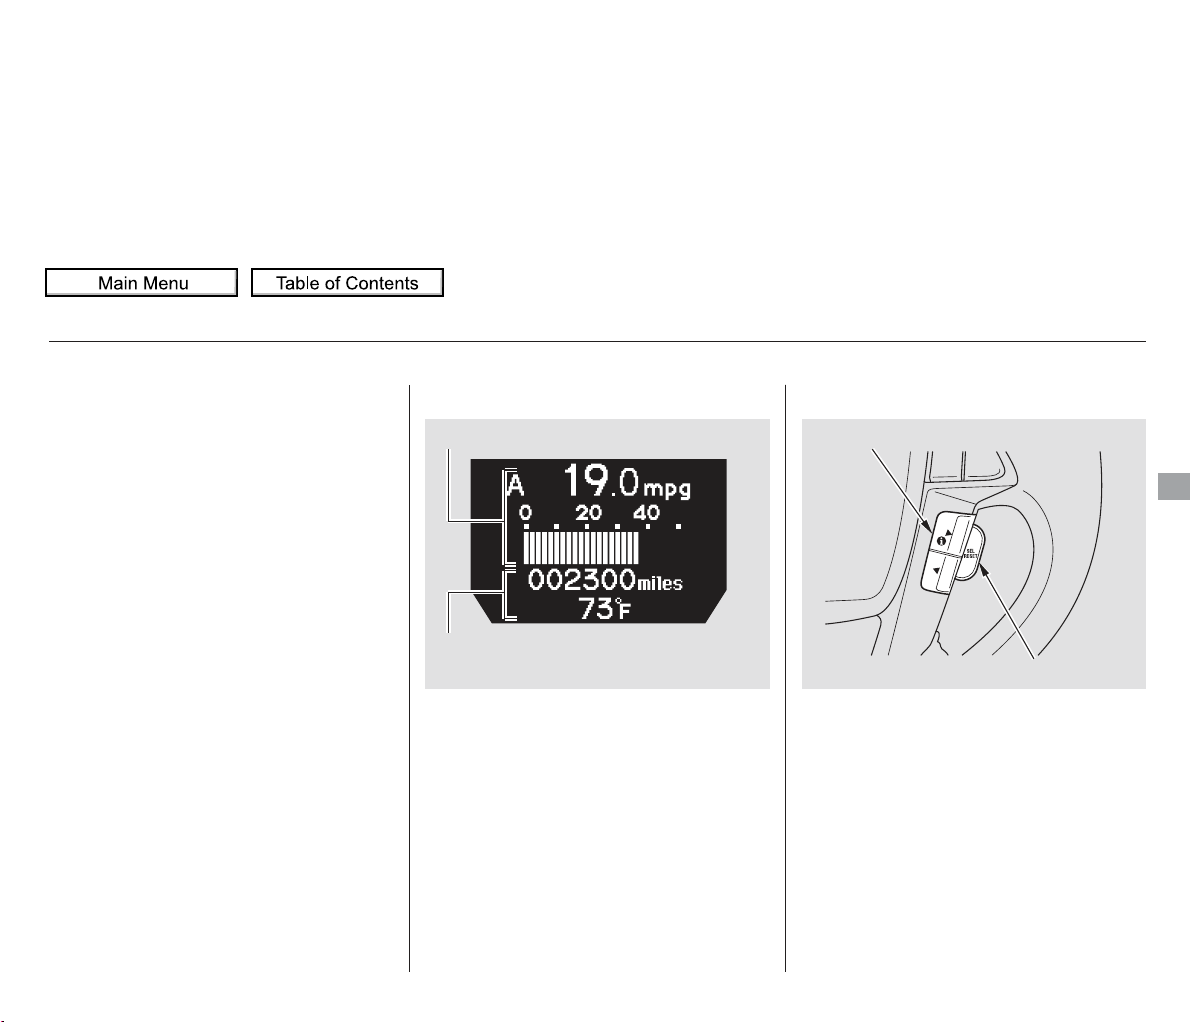
▲
▼
▲▼
CONTINUED
The multi-information display in the
instrument panel displays various
information and messages when the
ignition switch is in the ON (II)
position. Some of the messages help
you operate your vehicle more
comfortably. Others help to keep
you aware of the periodic
maintenance your vehicle needs for
continued trouble-free driving.
To change the display, press the
SEL/RESET button or INFO ( /
)buttononthesteeringwheel
repeatedly until the desired
information appears (see page ).
When you turn the ignition switch to
the ON (II) position, your last
selection is displayed.
The multi-information display
consists of two segments: an upper
segment and a lower segment.
In the normal display mode, the
upper segment displays trip
computer information, such as fuel
economy or average speed. The
lower segment displays the
odometer/trip meter (A/B), outside
temperature, and engine oil life and
maintenance item code(s).
There are two types of messages;
normal display messages and system
messages.
You can select the displayed
language and also customize some
vehicle control settings to your liking
with the multi-information display
and the three buttons on the steering
wheel.
84
On Touring models
Multi-Information Display
Normal Display Messages
Instruments and Controls
INFO ( / ) BUTTON
SEL/RESET BUTTON
UPPER SEGMENT
LOWER SEGMENT
U.S. model is shown.
2011 Odyssey
Page 87
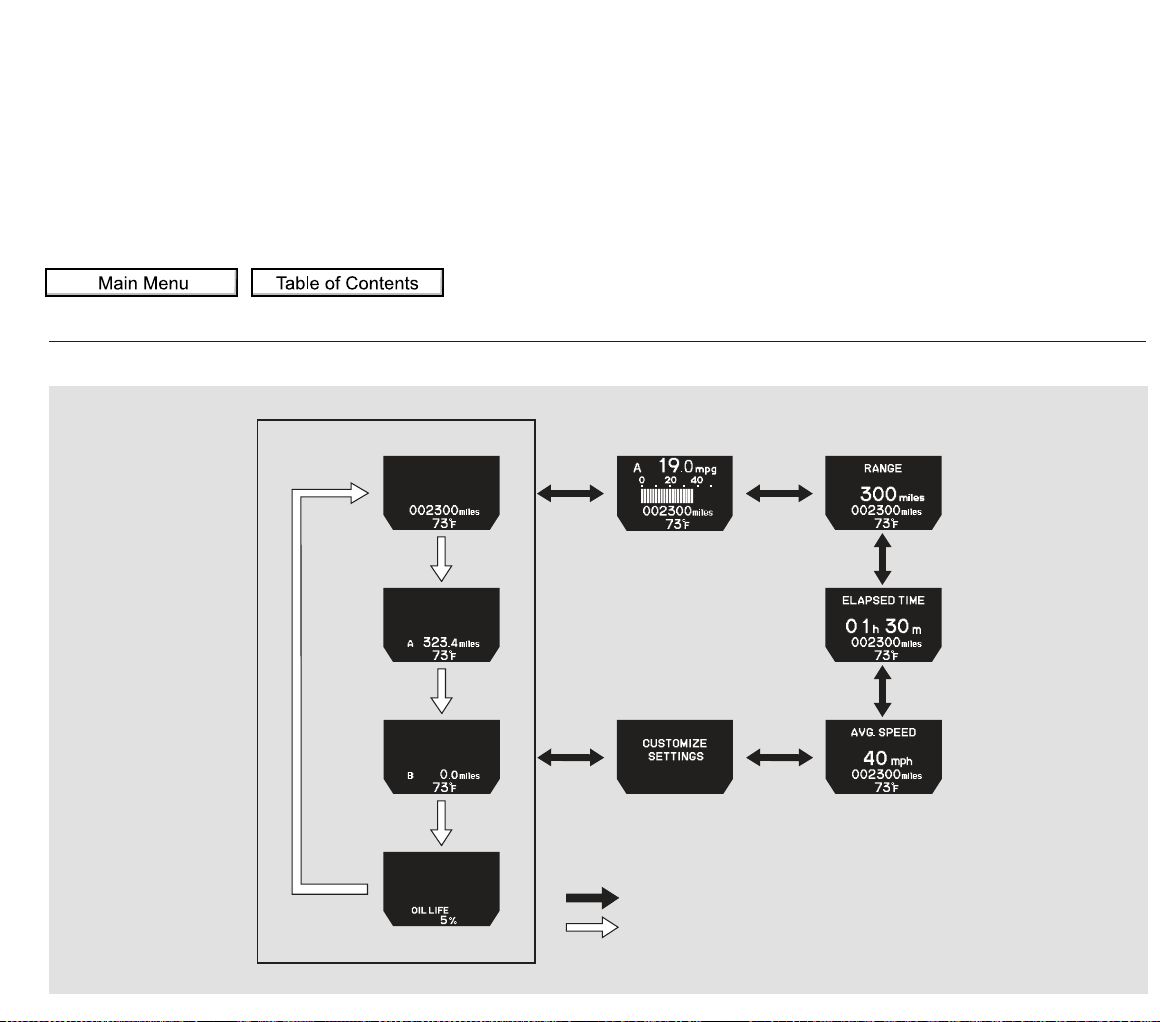
▲▼
Multi-Information Display
: Press the SEL/RESET button.
: Press the INFO ( / ) button.
U.S. model is shown.
2011 Odyssey
Page 88
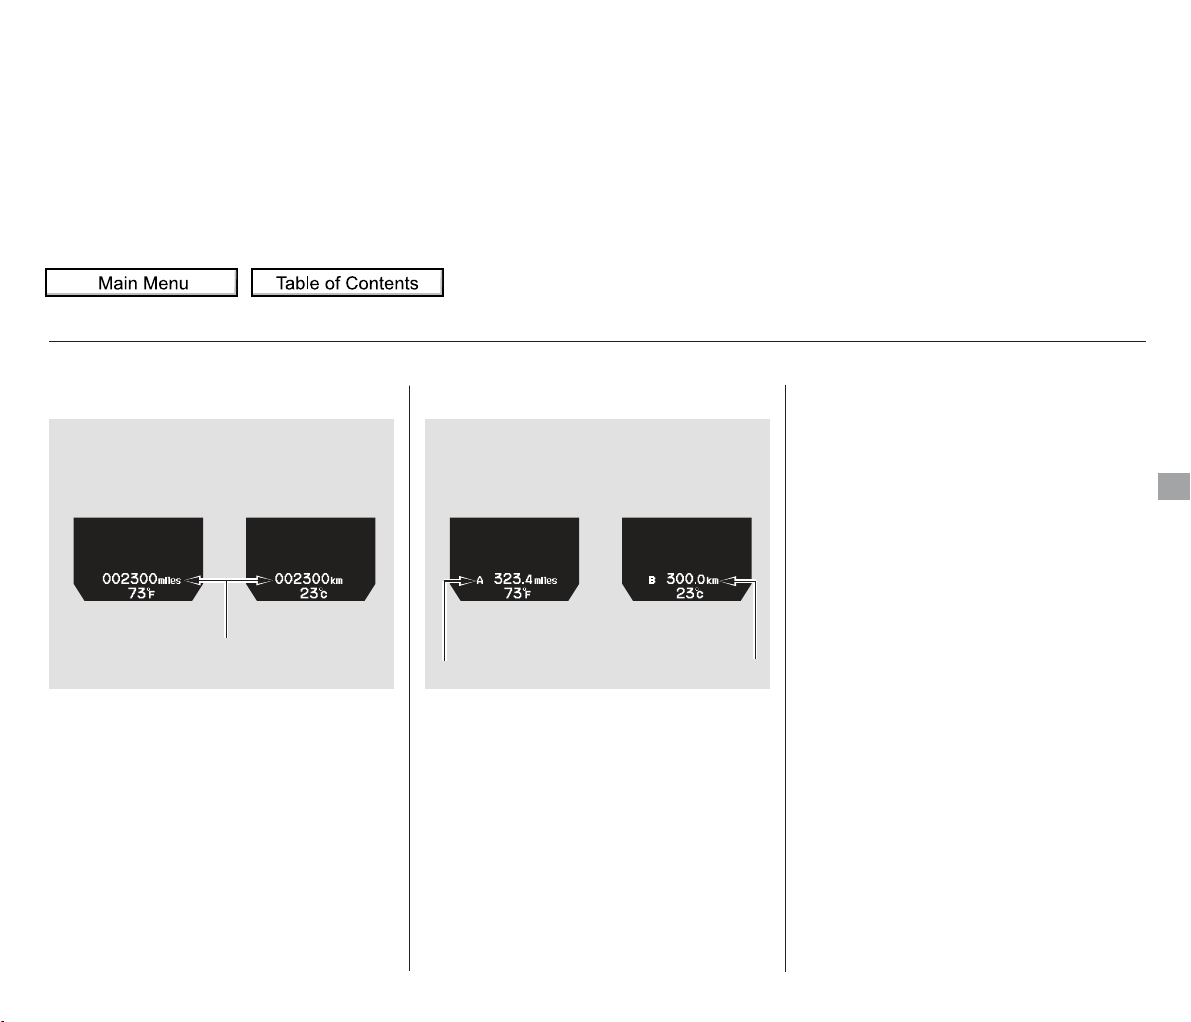
The odometer shows the total
distance your vehicle has been
driven. It measures miles in U.S.
models and kilometers in Canadian
models. It is illegal under U.S.
federal law and Canadian provincial/
territorial regulations to disconnect,
reset, or alter the odometer with the
intent to change the number of miles
or kilometers indicated.
This meter shows the number of
miles (U.S.) or kilometers (Canada)
driven since you last reset it. There
aretwotripmeters:TripAandTrip
B. Each trip meter works
independently, so you can keep track
of two different distances.
To reset a trip meter, display it, and
then press and hold the SEL/RESET
button until the number resets to
‘‘0.0.’’
When you reset Trip A, average fuel
economy A is reset at the same time.
When you reset Trip B, average fuel
economy B is reset.
In the customizing mode, you can set
Trip A and average fuel economy A
to reset at the same time when you
refuel your vehicle (see page ).
105
Multi-Information Display
Odometer Trip Meter
Instruments and Controls
TRIP METER A
Canada
Canada
U.S.
U.S.
TRIP METER B
ODOMETER
2011 Odyssey
Page 89
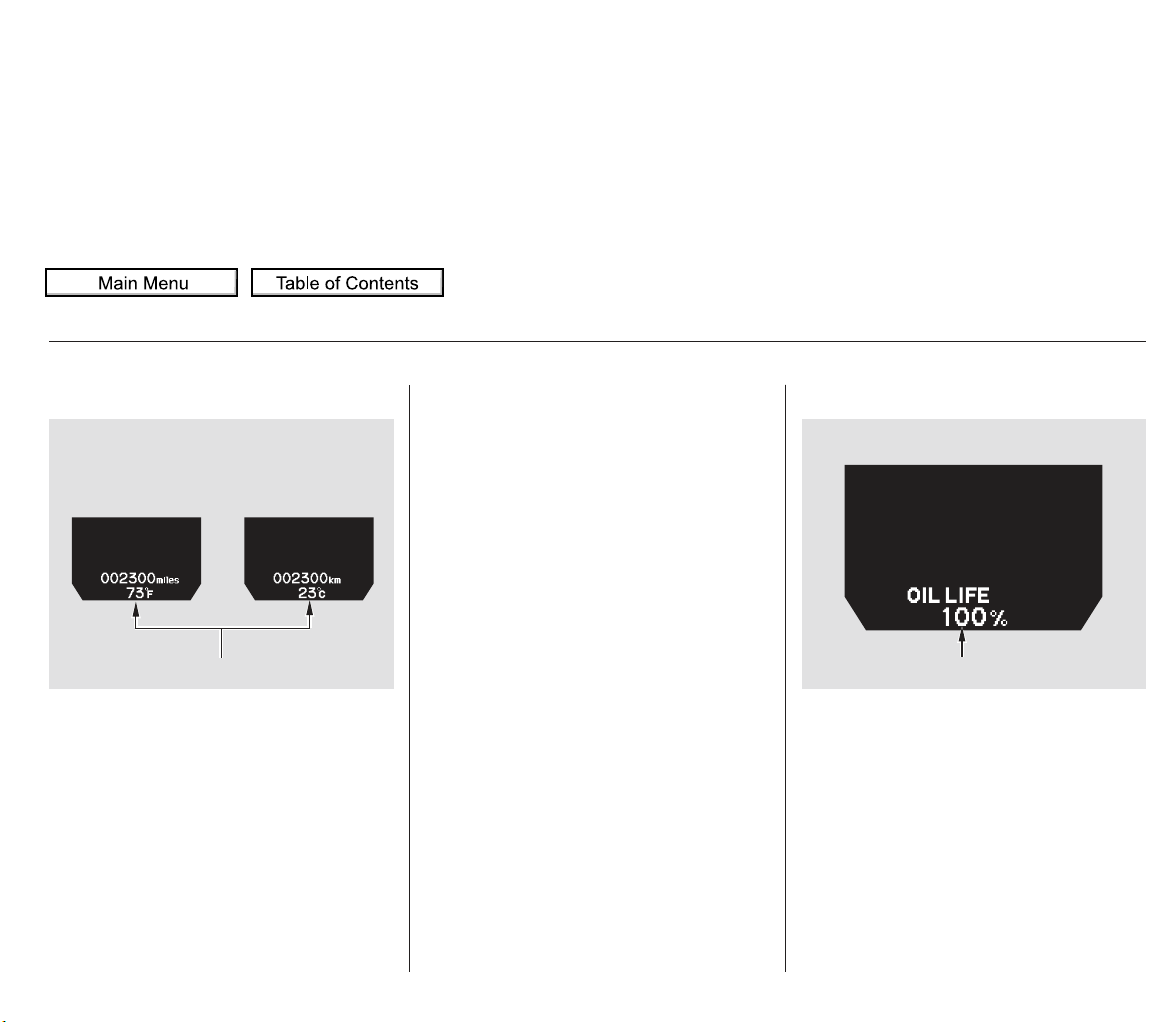
This shows the outside Fahrenheit
temperature in U.S. models, and
Celsius temperature in Canadian
models.
In certain weather conditions,
temperature readings near freezing
(32°F, 0°C) could mean that ice is
forming on the road surface.
You can adjust the outside
temperature display (see page ).
The temperature sensor is in the
front bumper. The temperature
reading can be affected by heat
reflection from the road surface,
engine heat, and the exhaust from
surrounding traffic. This can cause
an incorrect temperature reading
when your vehicle speed is under
19 mph (30 km/h). When you start
your trip, the sensor is not fully
acclimatized, therefore it may take
several minutes until the proper
temperature is displayed.
This shows the remaining engine oil
life. It shows 100% after the engine
oil is replaced and the display is reset.
The engine oil life is calculated
based on engine operating conditions.
For more inf ormation, see page .
103
599
Multi-Information Display
Outside Temperature Engine Oil Life
OUTSIDE TEMPERATURE
U.S.
ENGINE OIL LIFE
Canada
2011 Odyssey
Page 90
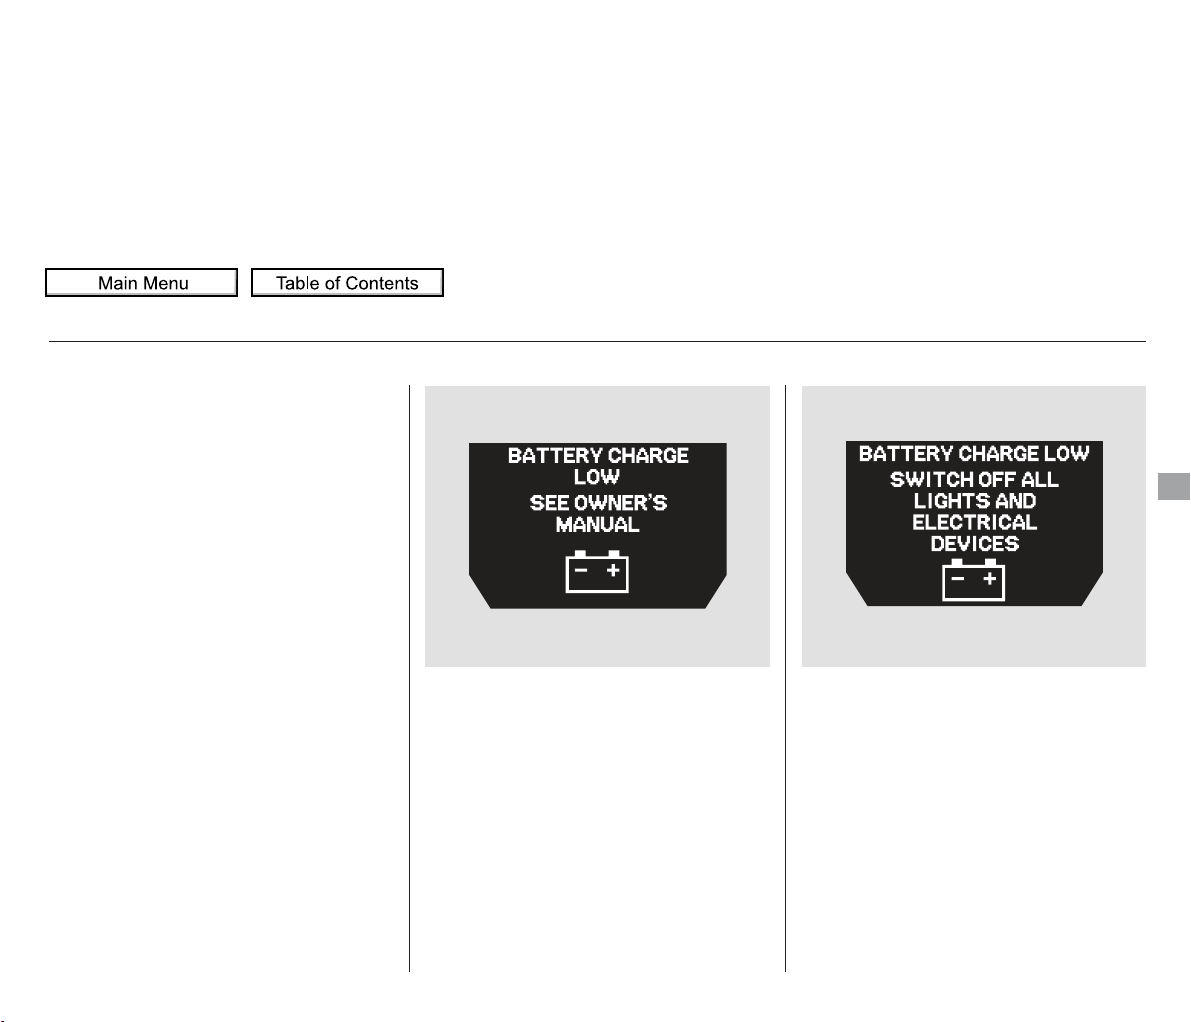
−
−
Whenthebattery’sstateofchargeis
low, the vehicle’s battery
management system triggers one of
the following ‘‘BATTERY CHARGE
LOW’’ messages if the ignition
switch is on or off.
Depending on how low the battery’s
state of charge dropped and how
long it remained low, these
messages may occur frequently. It
may take a number of trips to
sufficiently recharge the battery and
the messages to no longer appear.
IGN ON (II) Immediately turn off
all electrical devices (interior lights,
air conditioning, audio, heated seats,
etc.). Try not to operate other
electrically operated controls such as
the power windows. Driving the
vehicle will recharge the battery. If
the message continues to display
while driving, see your dealer.
IGN ACCESSORY (I) or LOCK (0)
Follow the message and turn off
all electrical devices. Driving the
vehicle will recharge the battery,
however the vehicle may not start. If
it does not start, see jump starting
(see page ), or contact your
dealer.
665
Multi-Information Display
Battery Charge Low
Instruments and Controls
2011 Odyssey
Page 91
Along with the trip meter, the trip
computer calculates these values:
Instant Fuel Economy
Average Fuel Economy
Range
Elapsed Time
Average Vehicle Speed
This shows your instant f uel
economy.
This shows your vehicle’s average
fuel economy in mpg (U.S. models)
or l/100 km (Canadian models) since
you last reset Trip A or Trip B.
You can customize the Trip A and
AVERAGE FUEL A reset condition
on the multi-information display (see
page ).
This shows the estimated distance
you can travel on the fuel remaining
in the fuel tank. This distance is
estimated from the fuel economy
you received over the last several
miles (U.S.) or kilometers (Canada),
so it will vary with changes in speed,
traffic, etc.
105
Multi-Information Display
Trip Computer
INSTANT FUEL MPG (U.S.
models)/INSTANT FUEL L/100 km
(Canadian models)
AVERAGE FUEL A/B
RANGE
2011 Odyssey
Page 92
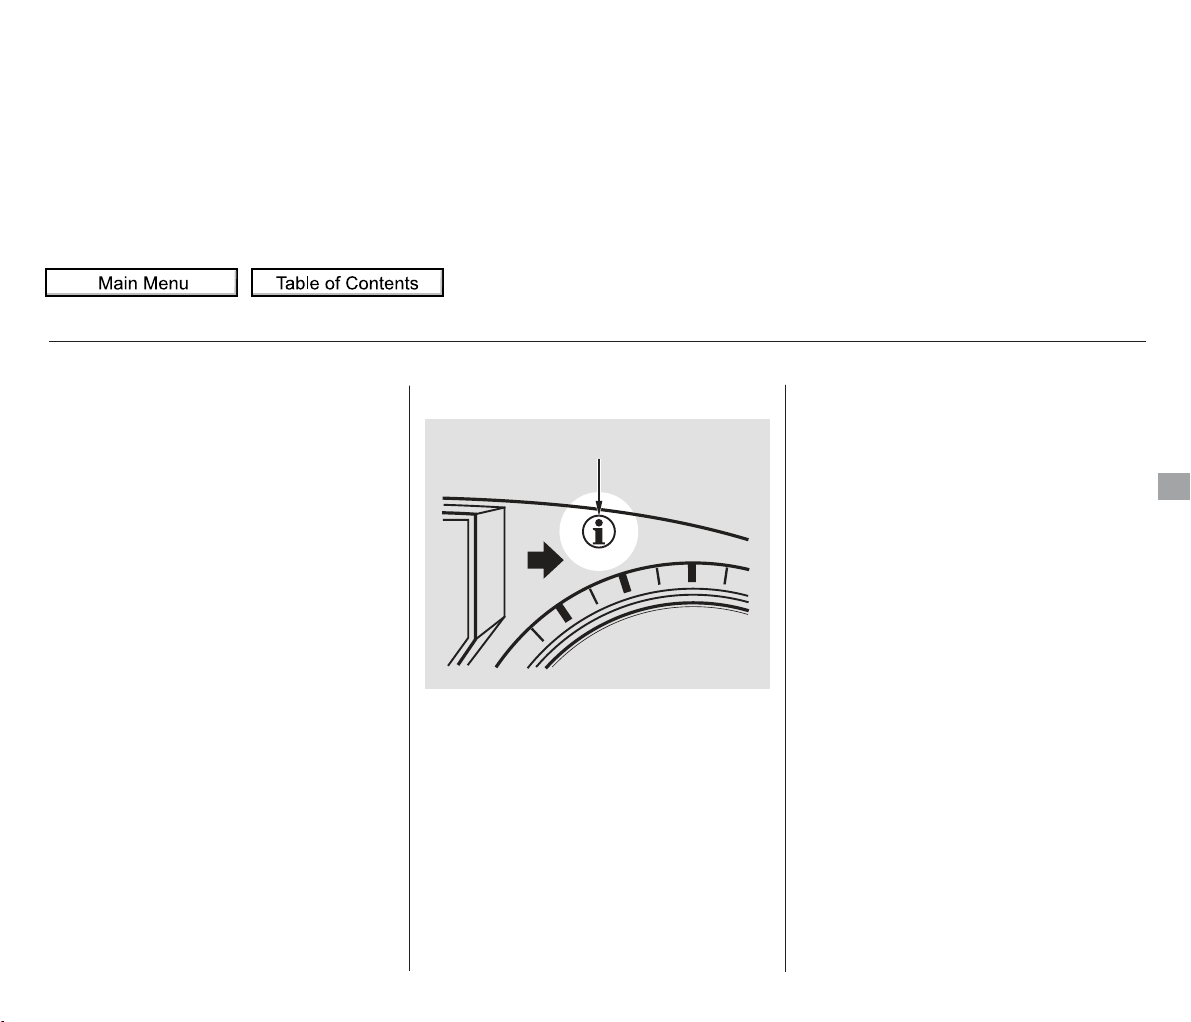
▲▼
The system message(s) triggers the
appropriate indicator(s) on the
instrument panel, including the
system message indicator, to come
on. The system message indicator
does not go off until the problem(s)
is corrected.
You will also hear a beep when the
system message comes on for the
first time.
If there is a problem with your
vehicle, for example the engine oil
level is low or a door is not fully
closed, the multi-information display
will show you the problem. It does
this by interrupting the current
display with one or more messages.
This shows the accumulated
traveling time since you last reset it.
When you turn the ignition switch to
the ON (II) position, ELAPSED
TIME is reset.
If you want to reset the ELAPSED
TIME manually, go to the trip
computer’s ELAPSED TIME display,
andpressandholdtheSEL/RESET
button until the number resets.
You can customize the ELAPSED
TIME reset conditions on the multiinformation display (see page ).
This shows the average speed you
are traveling in miles per hour (mph)
forU.S.modelsorkilometersper
hour (km/h) for Canadian models.
To reset the AVERAGE SPEED you
have traveled, press and hold the
SEL/RESET button until the
number resets.
If there are several messages, each
message is displayed for about 5
seconds.
To switch the message(s) before 5
seconds elapsed or select the normal
display, press the INFO ( / )
buttononthesteeringwheel
repeatedly.
107
Multi-Information Display
System Messages
ELAPSED TIME
AVERAGE SPEED
Instruments and Controls
SYSTEM MESSAGE INDICATOR
2011 Odyssey
Page 93
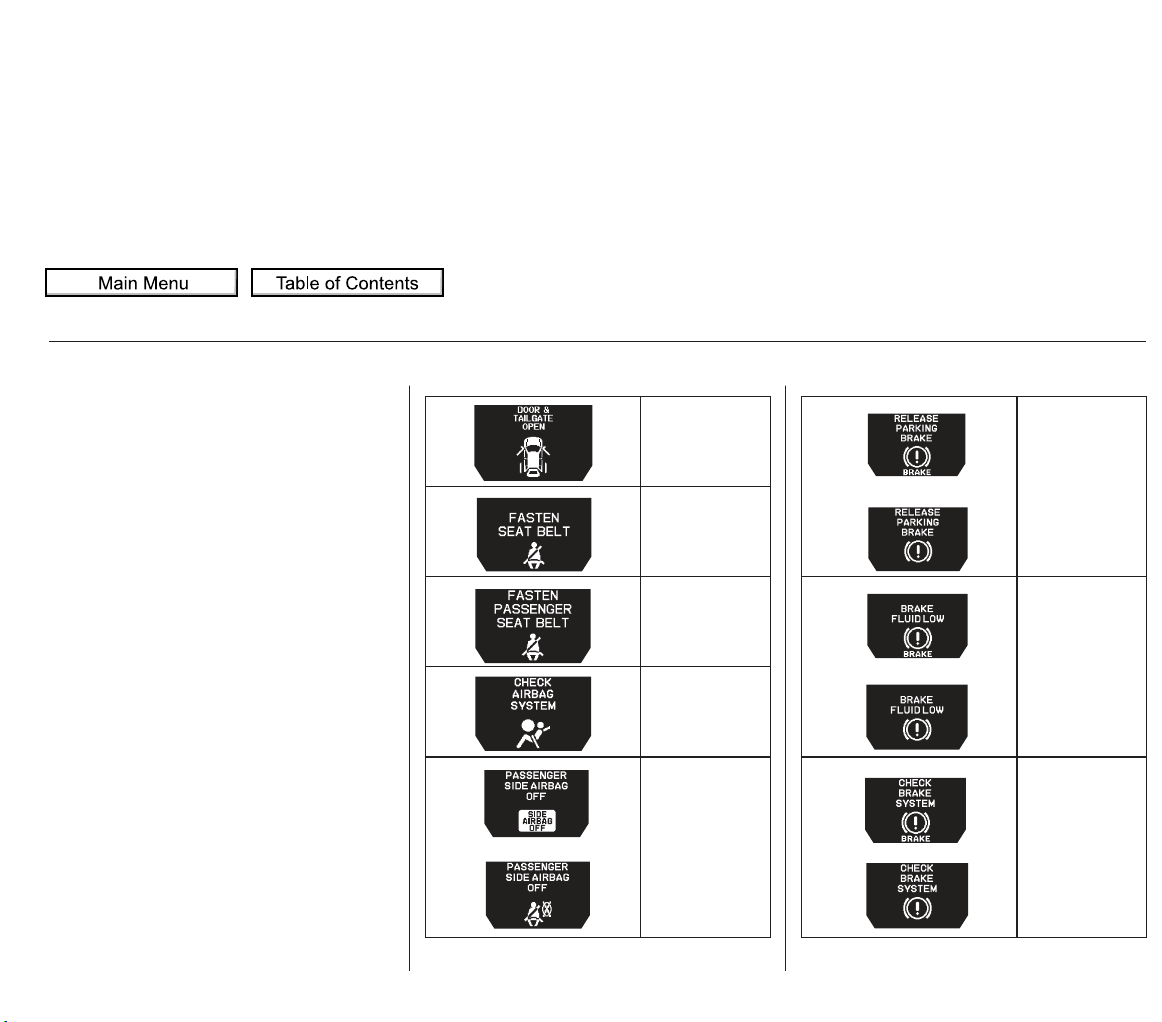
▲▼
If the system message indicator
remains lit on the instrument panel,
you can see the corresponding
message(s) again by pressing the
INFO ( / ) button repeatedly.
Even if you switch the display from
the message to the normal display,
some important messages come on
again at regular intervals until the
problem is corrected.
Here is a list of all messages:
See page
11
See page
20
See page
20
See page
32
See page
33
See page
672
See page
672
See page
199
Multi-Information Display
Canada
U.S.
Canada
U.S.
Canada
U.S.
Canada
U.S.
2011 Odyssey
Page 94
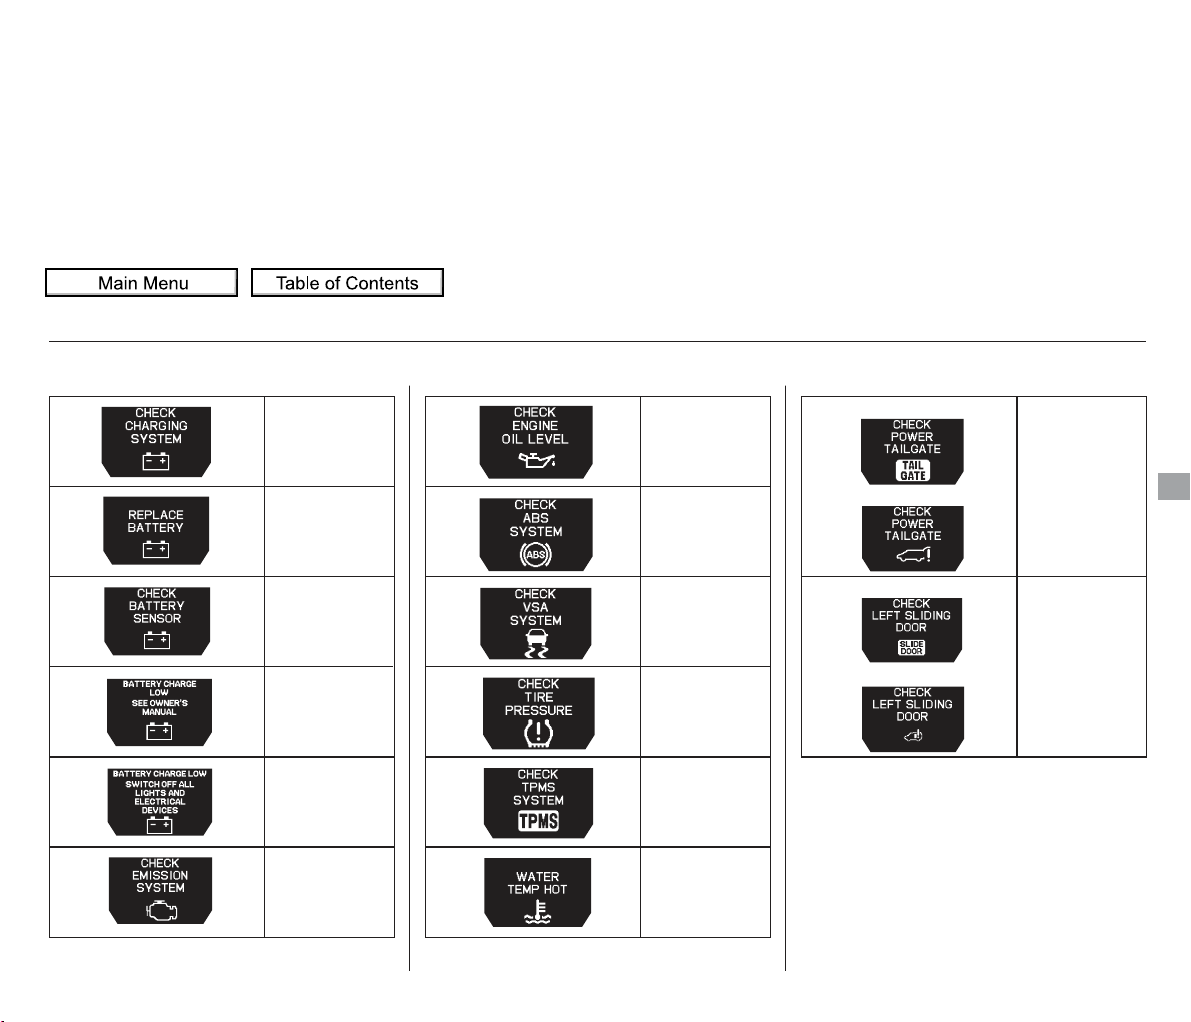
CONTINUED
See page
87
See page
87
See page
162
See page
167
See page
670
See page
670
See page
649
See page
671
See page
669
See page
568
See page
570
See page
575
See page
576
See page
667
Multi-Information Display
Instruments and Controls
Canada
U.S.
Canada
U.S.
2011 Odyssey
Page 95
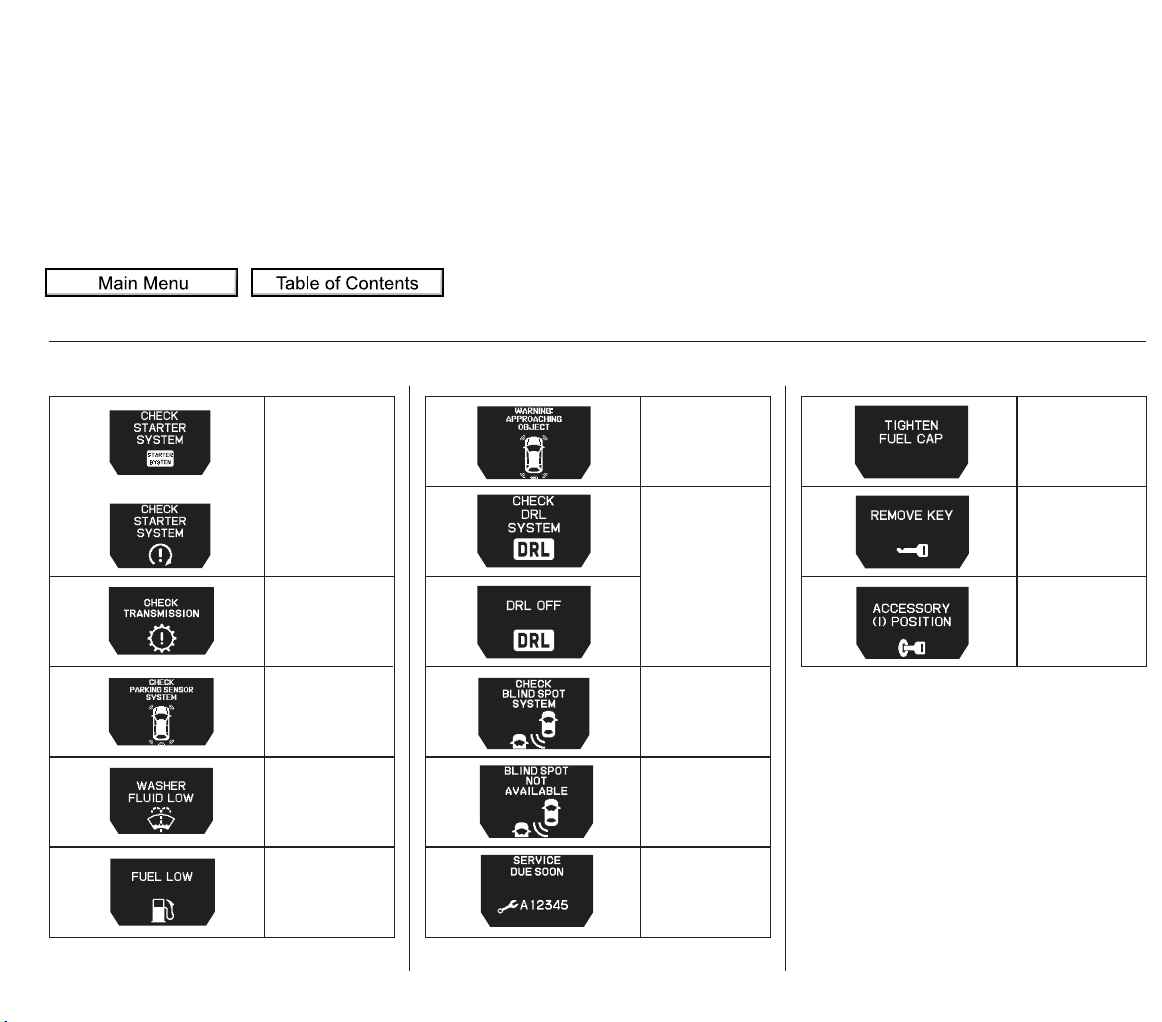
See page
490
See page
74
See page
74
See page
487
See page
139
See page
560
See page
561
See page
586
See page
586
See page
604
See page
543
See page
147
See page
147
Multi-Information Display
U.S.
Canada
2011 Odyssey
Page 96
▲▼
CONTINUED
On Touring Models
You can customize some vehicle
control settings. To change the
settings, the ignition switch must be
in the ON (II) position, and the
vehicle must be stopped with the
transmission in Park.
To enter the customizing mode,
press either INFO button ( / )
repeatedly until ‘‘CUSTOMIZE
SETTINGS’’ is displayed, then press
the SEL/RESET button.
If you try to enter the customizing
mode while the vehicle is moving,
you will see a ‘‘MUST STOP AND
SHIFTTOPARKTOCHANGE
SETTINGS’’ message and you
cannot change the settings.
You can customize some vehicle
control settings for ‘‘DRIVER 1’’ and
‘‘DRIVER 2’’ separately. If ‘‘DRIVER
1’’ or ‘‘DRIVER 2’’ is not displayed,
customizing is not possible.
To have the driver’s ID detected,
make sure your remote transmitter
is linked to the system and the
driver’s door is unlocked with a
corresponding remote transmitter.
If you want the settings as they were
when the vehicle lef t the factory,
select DEFAULT ALL, as described
on page .
If you want to change any vehicle
control settings, select CHANGE
SETTINGS, then press the SEL/
RESET button.
Refer to the table on the next page
about the settings you can customize.
96
Multi-Information Display
Customized Settings
Instruments and Controls
DRIVER’S ID
2011 Odyssey
Page 97
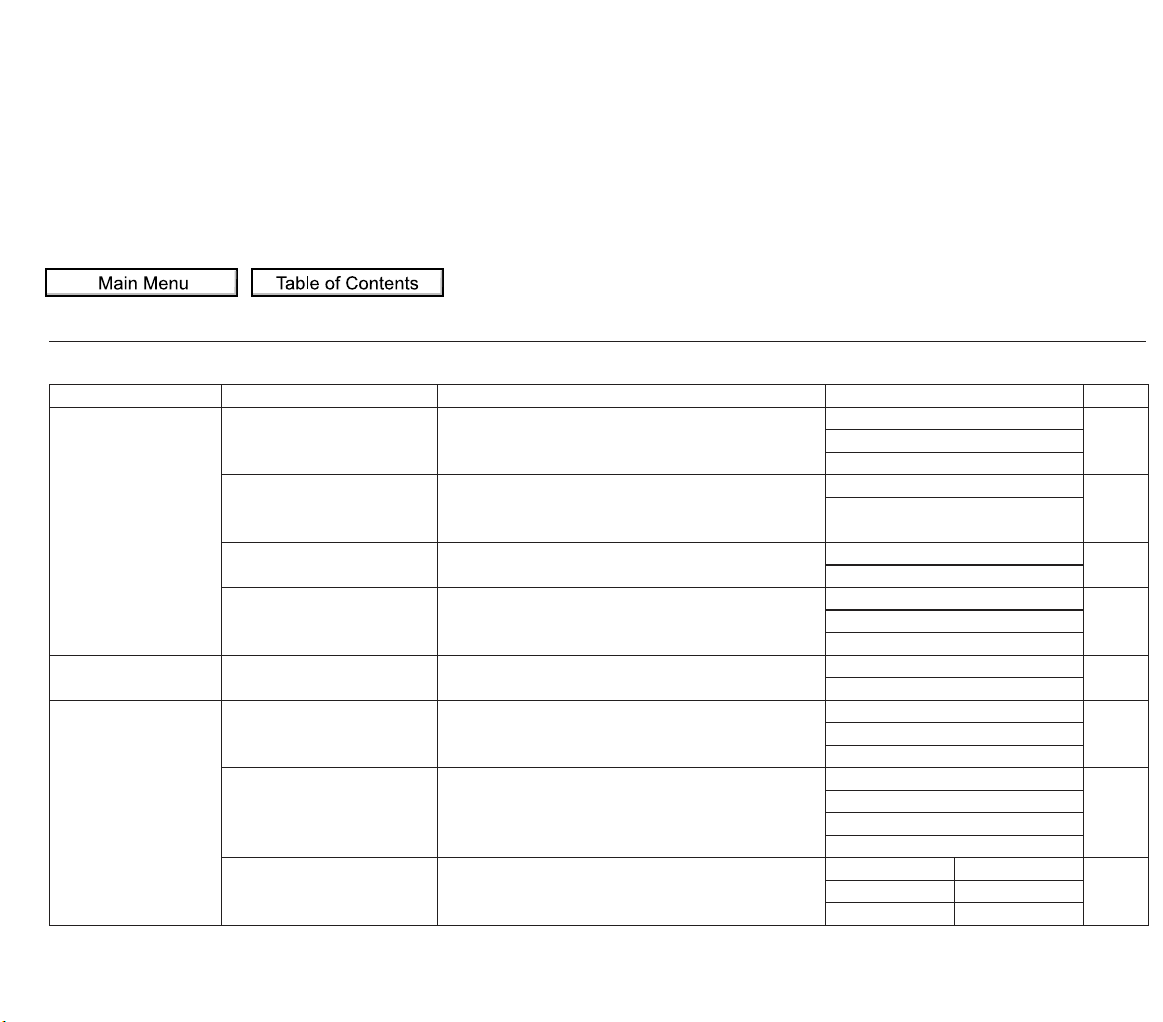
*
*
*
*
*
*
*
*
*
−〜±〜
−〜±〜
*
LOW
MIN
LANGUAGE
SELECTION
ADJUST OUTSIDE
TEMP. DISPLAY
TRIP A RESET WITH
REFUEL
ELAPSED T IME
RESET
MEMORY POSITION
LINK
INTERIOR LIGHT
DIMMING TIME
HEADLIGHT A UTO
OFF TIMER
AUTO LIGHT
SENSITIVIT Y
Changes the language used in the display.
Changes the outside temperature reading above or
below its current reading.
Causes trip meter A and the average fuel economy
to reset when you refuel.
Resets the elapsed time of your current trip.
Changes the driver’s seat and the outside mirror
positions to a stored setting.
Changes how long (in seconds) the interior lights
stay on after you close the doors and the tailgate.
Changes how long (in seconds) the exterior lights
stay on after you close the driver’s door.
Changes the timing of when the headlights come
on. The headlight switch needs to be in the AUTO
position.
METER SETUP
(P.
100)
POSITION SETUP
(P.
109)
LIGHTING
SETUP
(P.
112)
101
103
105
107
110
113
115
117
ENGLISH
FRENCH
SPANISH
5°F 0°F 5°F (U.S.)
3°C 0°C 3°C
(Canada)
ON
OFF
IGN OFF
TRIP A RESET
TRIP B RESET
ON
OFF
15 sec
30 sec
60 sec
0sec
15 sec
30 sec
60 sec
MAX
HIGH
MID
Default setting:
Menu Item DescriptionGroup Setup PageSetting Option
Multi-Information Display
2011 Odyssey
Page 98
Multi-Information Display
Instruments and Controls
*
*
*
*
*
*
*
*
*
*
*
PageMenu Item Setting OptionGroup Setup Description
120
122
124
126
128
130
132
96
AUTO DOOR LOCK
AUTO DOOR UNLOCK
KEY AND REMOTE
UNLOCK MODE
PSD KEYL ESS OPEN
MODE
PTG KEYLESS OPEN
MODE
KEYLESS LOCK
ACKNOWLEDGMENT
SECURITY RELOCK
TIMER
SHIFT FROM P
WITH V EH SPEED
OFF
SHIFT TO P
IGN OFF
OFF
DRIVER DOOR
ALL DOORS
ANY TIME
WHEN UNLOCKED
ANY TIME
WHEN UNLOCKED
ON
OFF
90 sec
60 sec
30 sec
SET
CANCEL
DOOR SETUP
(P.
119)
DEFAULT ALL
(P.
96)
Changes the setting of when to automatically lock
the doors.
Changes the setting of when to automatically
unlock the driver’s/all the doors.
Changes which doors unlock with the remote
transmitter on a first push.
Changes the power sliding door opening setting.
Changes the power tailgate opening setting.
The exterior lights flash each time you press the
LOCK or UNLOCK button. A beeper will also
sound when you press the LOCK button twice.
Changes how long it takes (in seconds) for the
doors to relock and the security system to set after
you unlock but do not open the door.
Set/Cancel all the customized settings as default.
Default setting1:
2 : U.S. models only
2
1
1
1
1
1
1
1
1
DRIVER DOOR /
ALL DOORS
2011 Odyssey
Page 99
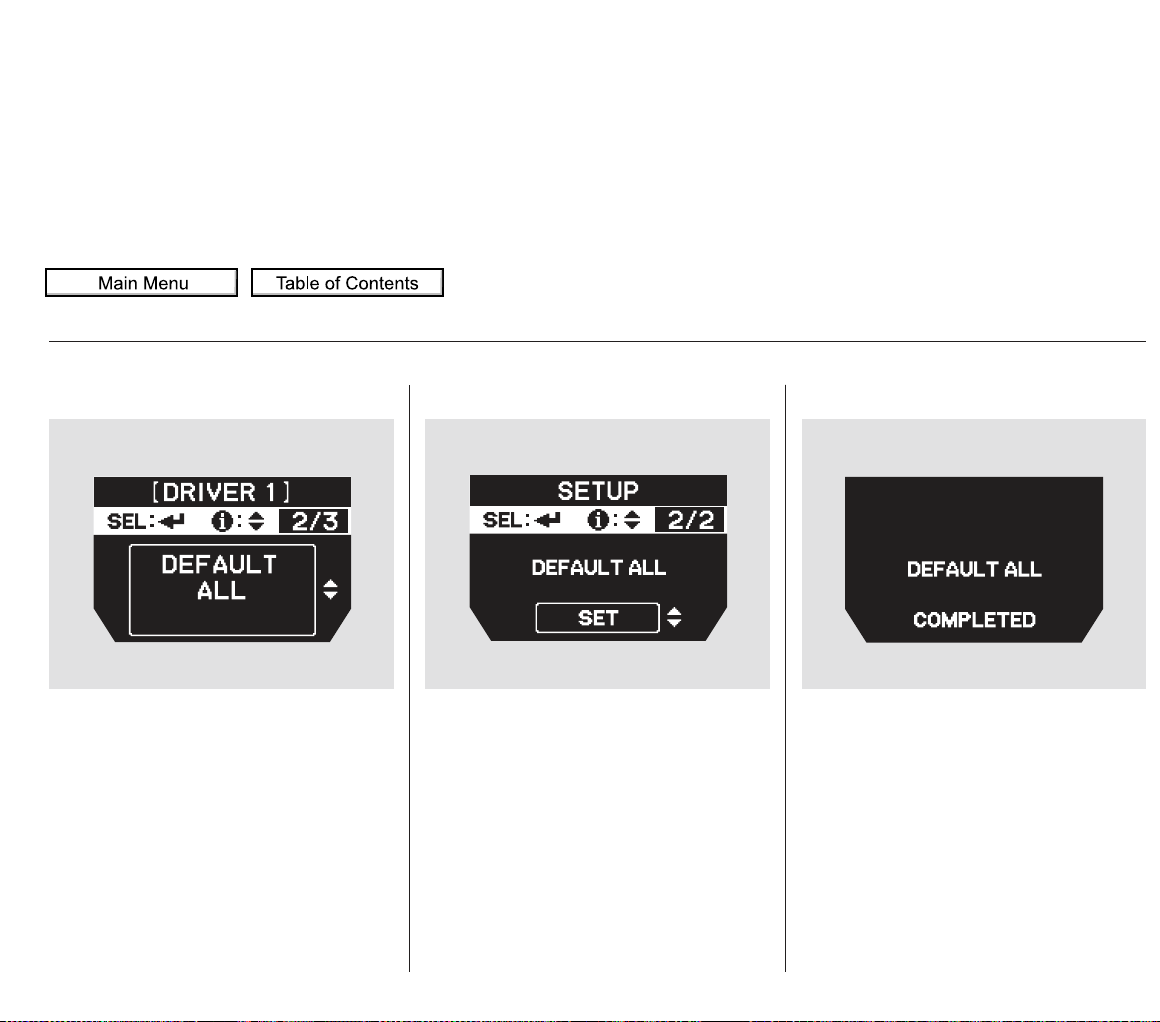
▲▼▲▼
If you want to set the default settings,
press the INFO ( / ) button to
select DEFAULT ALL, then press
the SEL/RESET button.
To set the default settings, press the
INFO ( / ) button to select SET
then press the SEL/RESET button.
When DEFAULT ALL is set, you will
see the above display for several
seconds, then the screen returns to
the default all setting display.
DEFAULT ALL
Multi-Information Display
2011 Odyssey
Page 100
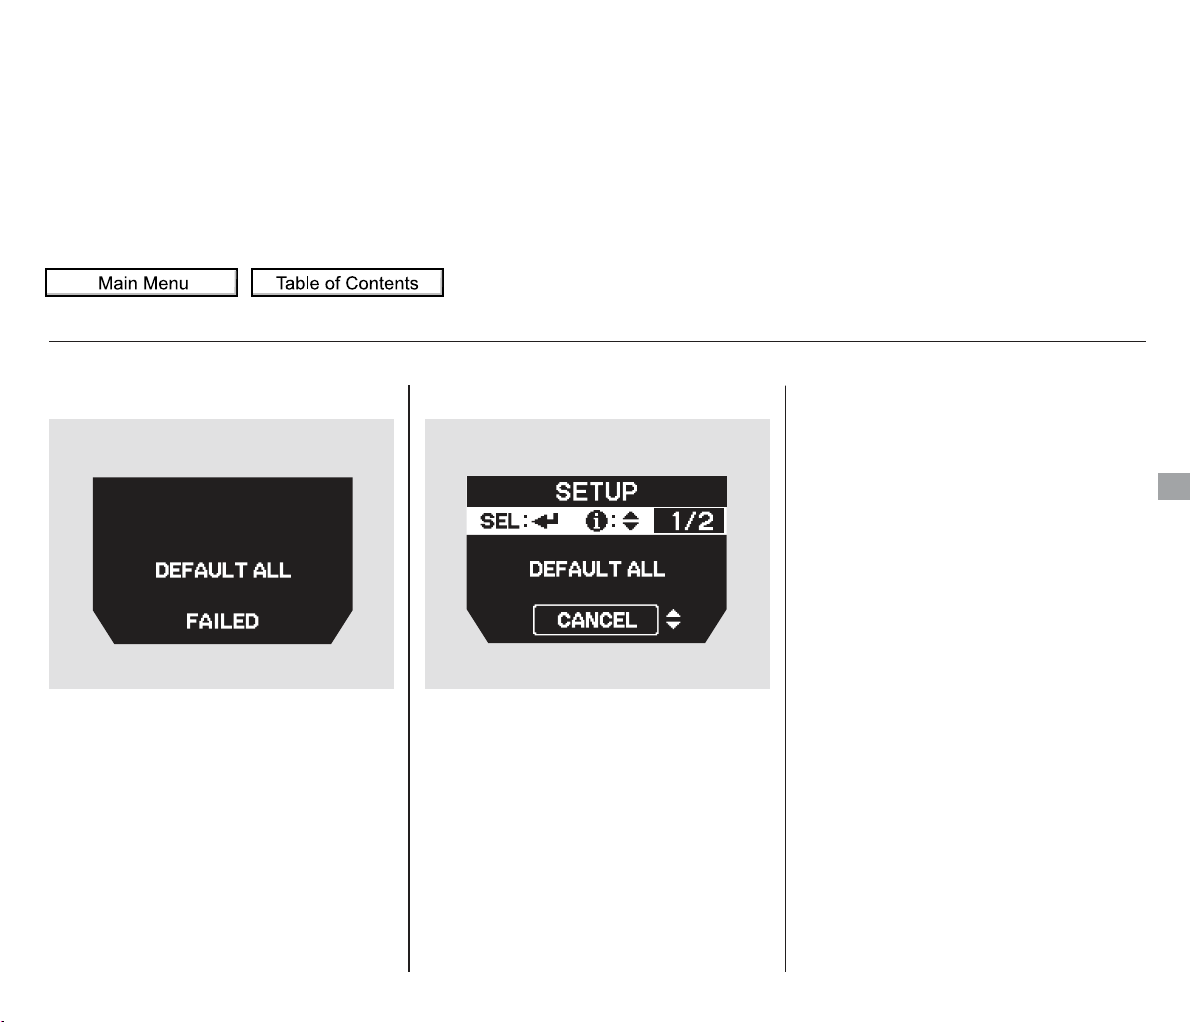
If the setting is not successfully
completed, ‘‘FAILED’’ is shown for
several seconds, and then the screen
goes back to the normal message
mode. Repeat the same procedure to
select DEFAULT ALL.
If you want to cancel DEFAULT
ALL, select CANCEL, then press the
SEL/RESET button. The screen
goes back to the previous display.
Multi-Information Display
Instruments and Controls
2011 Odyssey
 Loading...