

Page 1
QuickPort®USOC Snap-In Connector
DESCRIPTION
Leviton’s QuickPort USOC Snap-In Connectors feature a
wiring configuration label for quick and easy wiring.
INSTALLATION
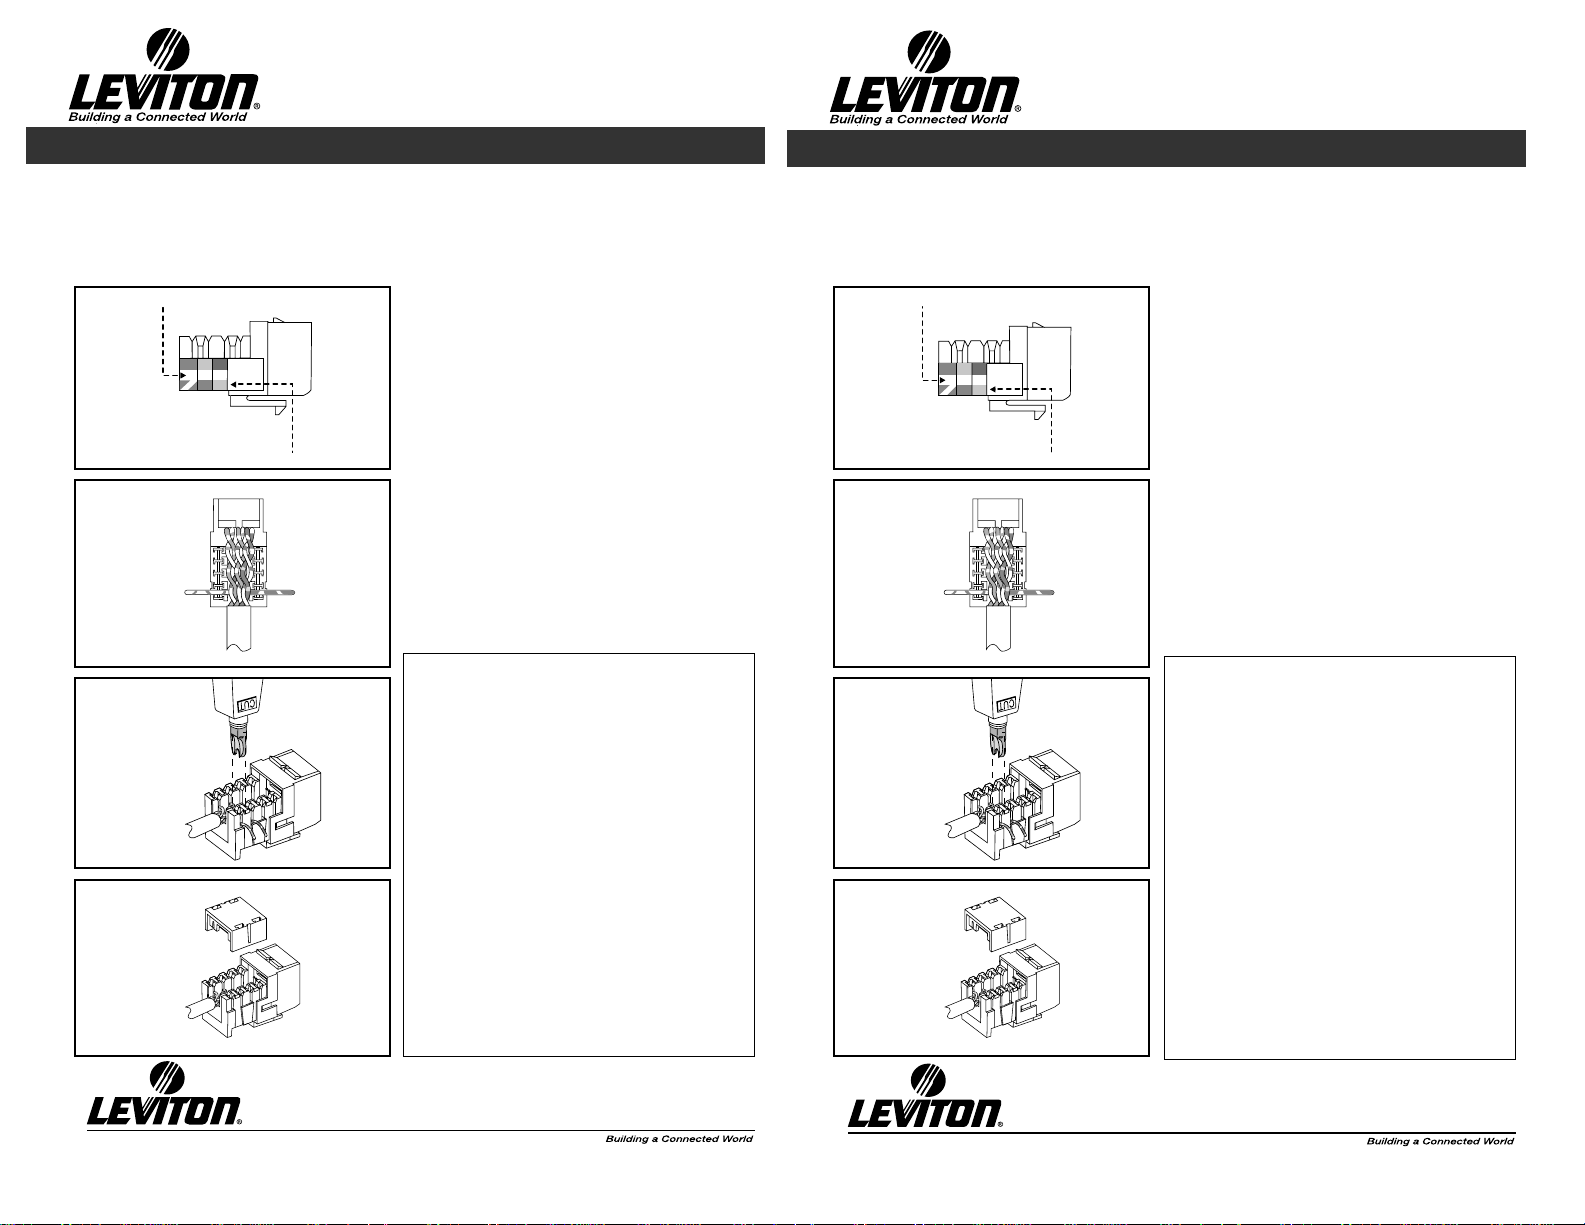
1. Remove jacket from cable.
2. Check jack termination label (located on sides of
jack) for wiring standard and associated color codes.
The label also includes jack pin numbers. (Figure 1)
3. Route the wires for termination as shown in
Figure 2.
4. Using a 110-style punchdown tool, seat the wires into
the IDC slots. With the cutting edge of the tool to the
outside, trim the excess wire flush with the jack body.
(Figure 3)
NOTE: Brown pair of UTP not used for this connector.
5. Place the cap over the termination wires for secure
connection and added strain relief. (Figure 4)
6. Insert jack assembly into platform or wallplate. Note
the “UP” position of the jack.
Instructions for Use
QuickPort®USOC
Snap-in Connector
41106-R*6
41108-R*8
DI-C00-41106-00A
IMPORTANT INSTRUCTIONS
1.
Read and understand all instructions. Follow all warnings and
instructions marked on the product.
2.
Do not use this product near water—e.g., near a tub, wash basin,
kitchen sink or laundry tub, in a wet basement, or near a
swimming pool.
3.
Never push objects of any kind into this product through
openings, as they may touch dangerous voltages.
4.
SAVE THESE INSTRU
CTIONS.
SAFETY INFORMATION
1.
Never install communications wiring or components during a
lightning storm.
2.
Never install communications components in wet locations
unless the components are designed specifically for use in wet
locations.
3.
Never touch uninsulated wires or terminals unless the wiring has
been disconnected at the network interface.
4.
Use caution when installing or modifying communications wiring
or components.
5. To prevent electrical shock, each opening must be filled with a
module.
2222 - 222nd Street SE
Bothell, WA 98021, USA
Phone: (425) 485-4288
Fax: (425) 483-5270
QuickPort®USOC Snap-In Connector
DESCRIPTION
Leviton’s QuickPort USOC Snap-In Connectors feature a
wiring configuration label for quick and easy wiring.
INSTALLATION
1. Remove jacket from cable.
2. Check jack termination label (located on sides of
jack) for wiring standard and associated color codes.
The label also includes jack pin numbers. (Figure 1)
3. Route the wires for termination as shown in
Figure 2.
4. Using a 110-style punchdown tool, seat the wires into
the IDC slots. With the cutting edge of the tool to the
outside, trim the excess wire flush with the jack body.
(Figure 3)
NOTE: Brown pair of UTP not used for this connector.
5. Place the cap over the termination wires for secure
connection and added strain relief. (Figure 4)
6. Insert jack assembly into platform or wallplate. Note
the “UP” position of the jack.
Instructions for Use
QuickPort®USOC
Snap-in Connector
41106-R*6
41108-R*8
DI-C00-41106-00A
IMPORTANT INSTRUCTIONS
1.
Read and understand all instructions. Follow all warnings and
instructions marked on the product.
2.
Do not use this product near water—e.g., near a tub, wash basin,
kitchen sink or laundry tub, in a wet basement, or near a
swimming pool.
3.
Never push objects of any kind into this product through
openings, as they may touch dangerous voltages.
4.
SAVE THESE INSTRU
CTIONS.
SAFETY INFORMATION
1.
Never install communications wiring or components during a
lightning storm.
2.
Never install communications components in wet locations
unless the components are designed specifically for use in wet
locations.
3.
Never touch uninsulated wires or terminals unless the wiring has
been disconnected at the network interface.
4.
Use caution when installing or modifying communications wiring
or components.
5. To prevent electrical shock, each opening must be filled with a
module.
2222 - 222nd Street SE
Bothell, WA 98021, USA
Phone: (425) 485-4288
Fax: (425) 483-5270
3
4
1
2
4
5
6
Color Code for
USOC Wiring
Pin
Number
3
4
1
2
4
5
6
Color Code for
USOC Wiring
Pin
Number
 Loading...