

Page 1
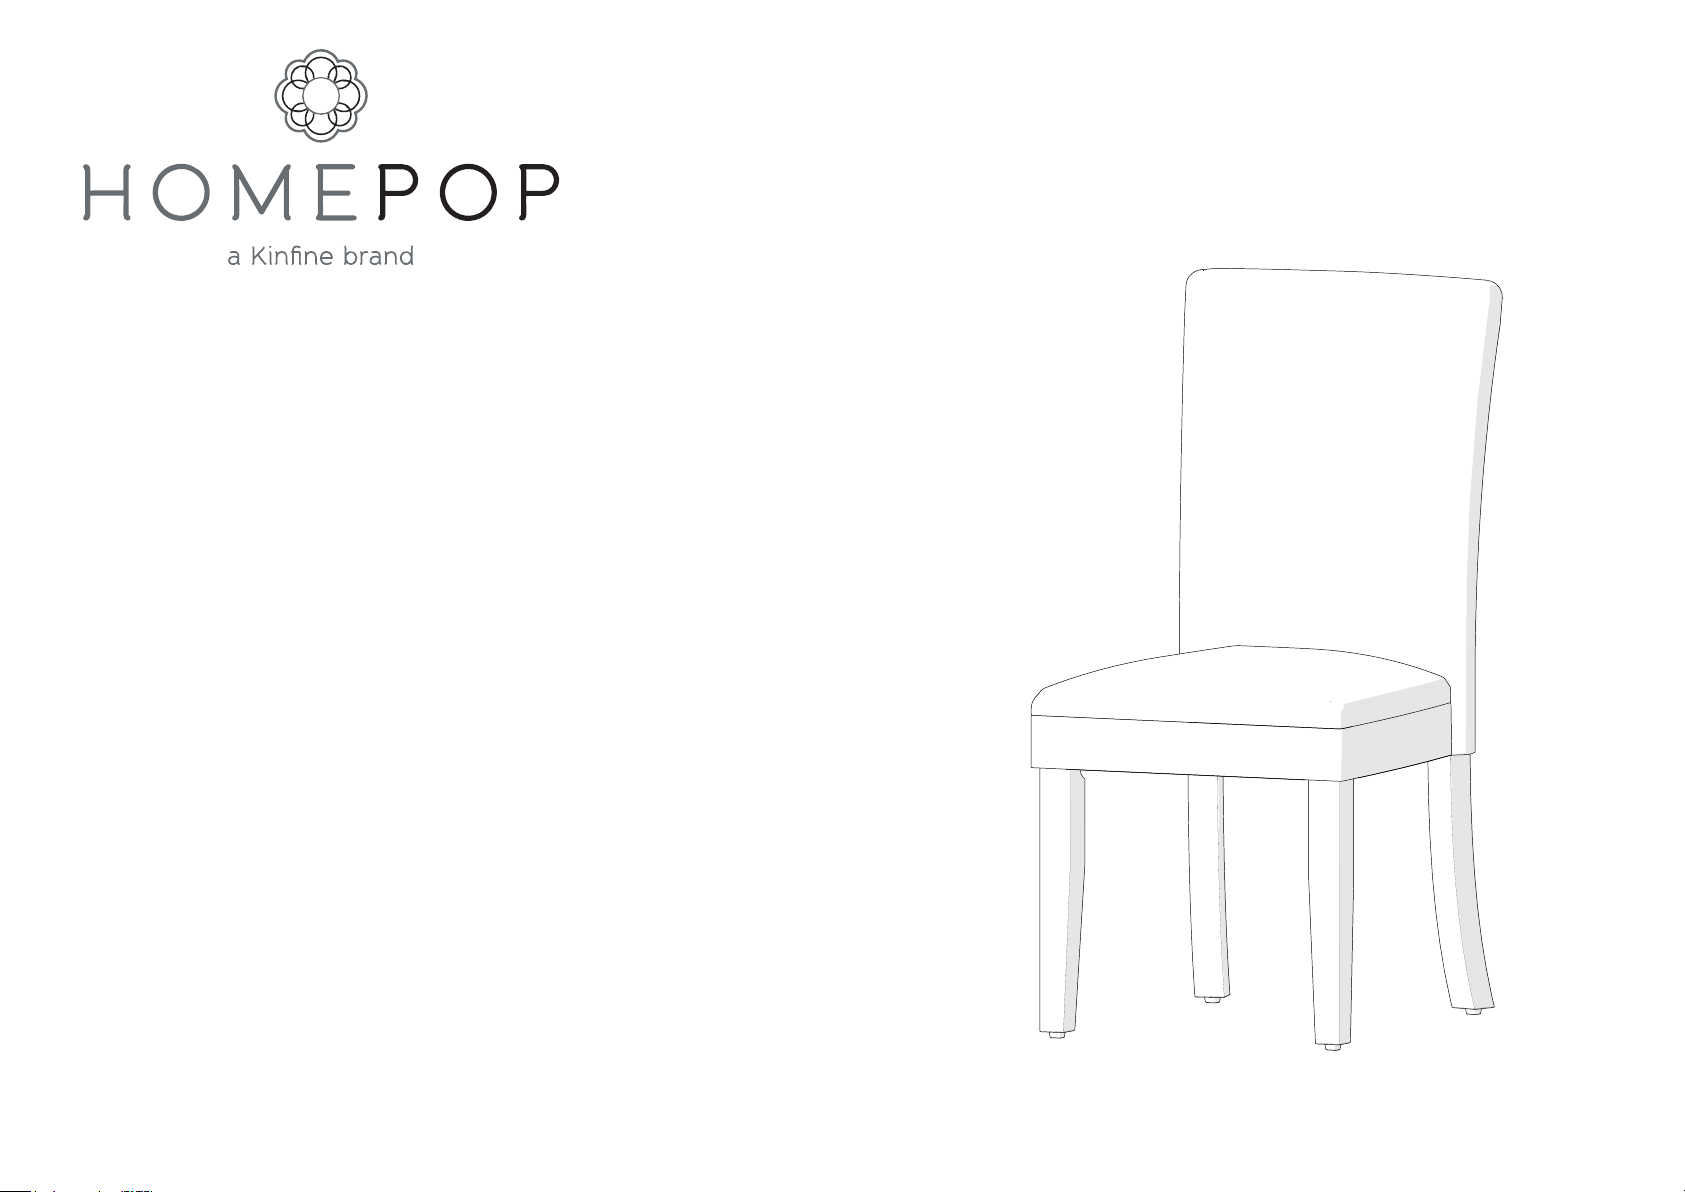
Style Number : N6354
>>assembly instructions
Page 2

Congratulations on your latest HomePop purchase.
Now what? Don’t start sweating over this box of parts. This will be easy. We did the hard work for you.
All you need to do is follow our simple instructions and you’ll be on your way to transforming your
room in no time. Good luck --though we’re confident you won’t need it.
before you begin
1. Check for damaged or missing parts. Customers can email or call 1-888-626-0888 to order missing supplies.service@kinfine.com
2. Use the carton as a working surface to prevent product damage during assembly.
3. Gather all tools prior to assembly.
2
Page 3

table of contents
..............................................
introduction
hardware
parts list
assembly
2
4
5
6 - 10
QUESTIONS?
Just email or call 1-888 -626-0888 p arts and serv ice. For fast s ervice, hav e the style num ber and artic le number rea dy when calli ng.service@k infine.com
3
Page 4
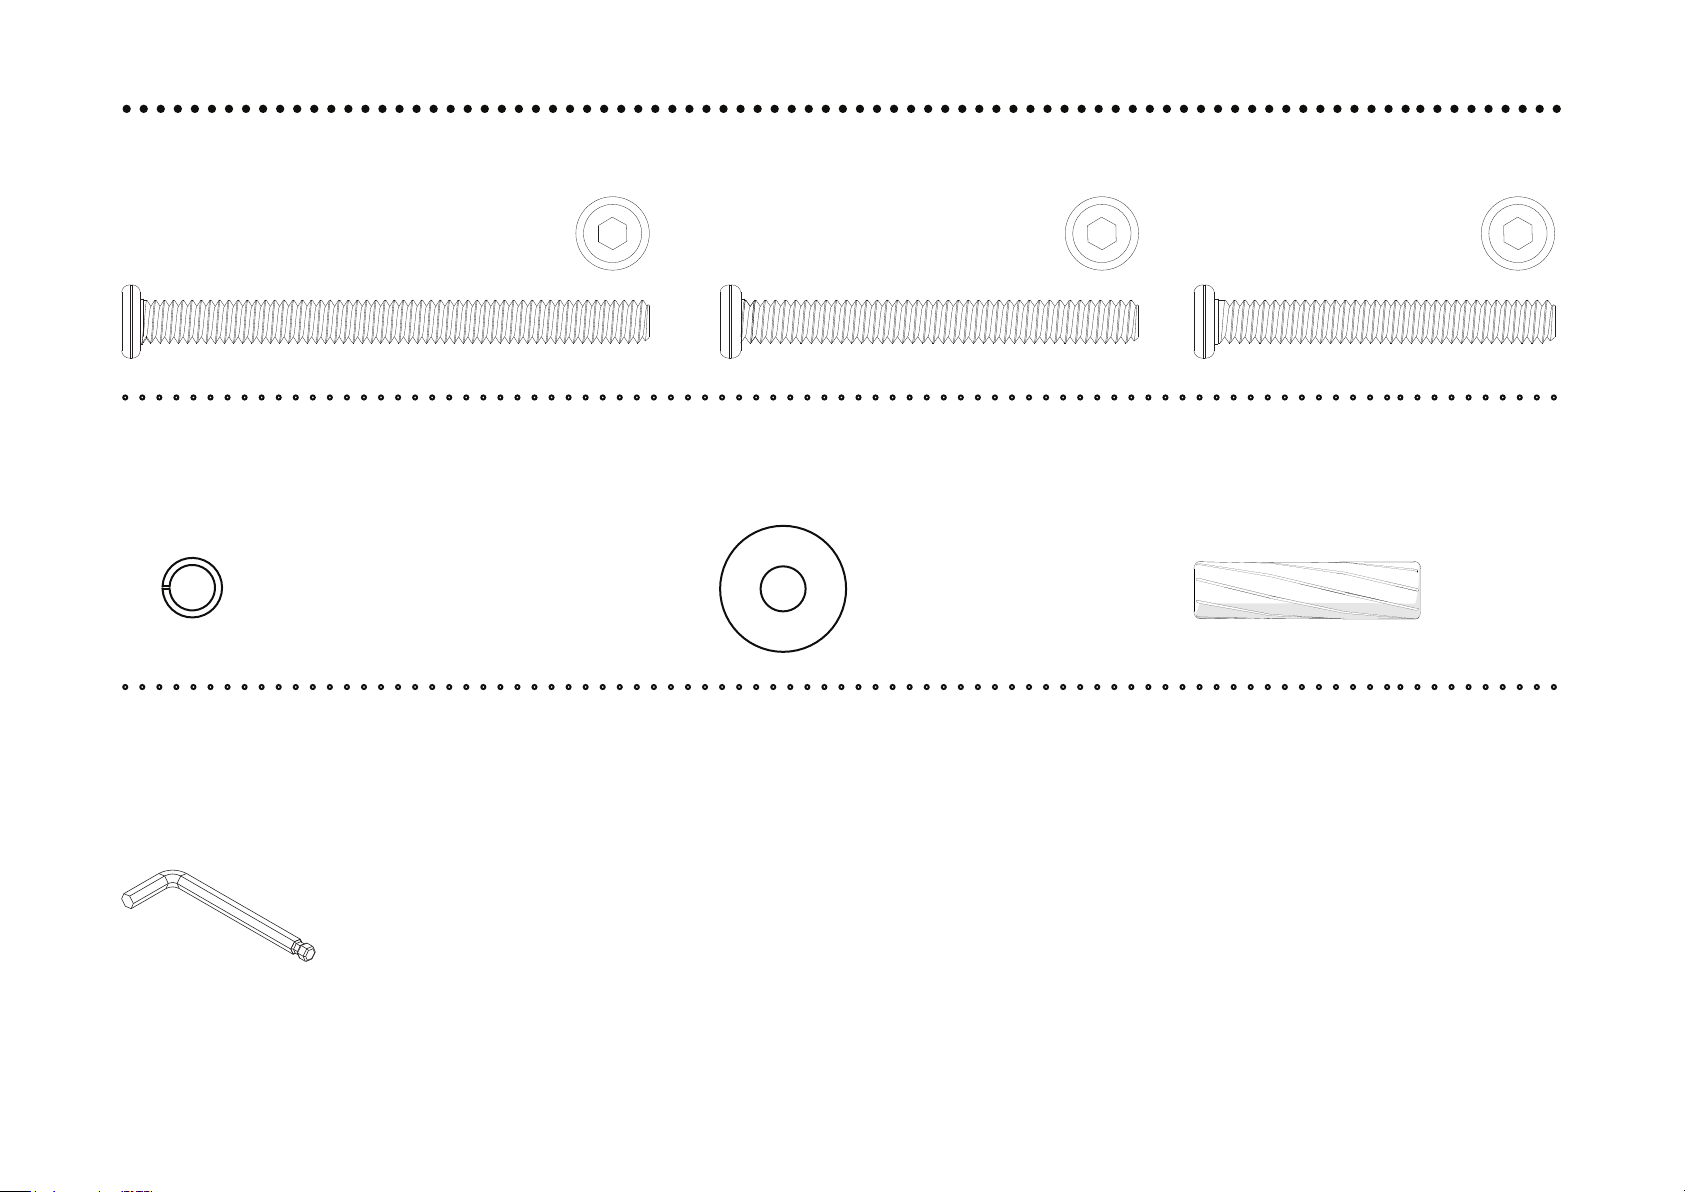
hardware
............................................................................
(A) x 4
5/16" x 90mm
round hex screw
(D) x 10
Φ 8mm lo ck washer
(G) x 1
(B) x 2
5/16" x 70mm
round hex screw
(E) x 10
Φ 22mm fl at washer
(C) x 4
5/16" x 60mm
round hex screw
(F) x 1
dowel 10x40mm
5mm Ba ll end
Hex wrench
4
Page 5
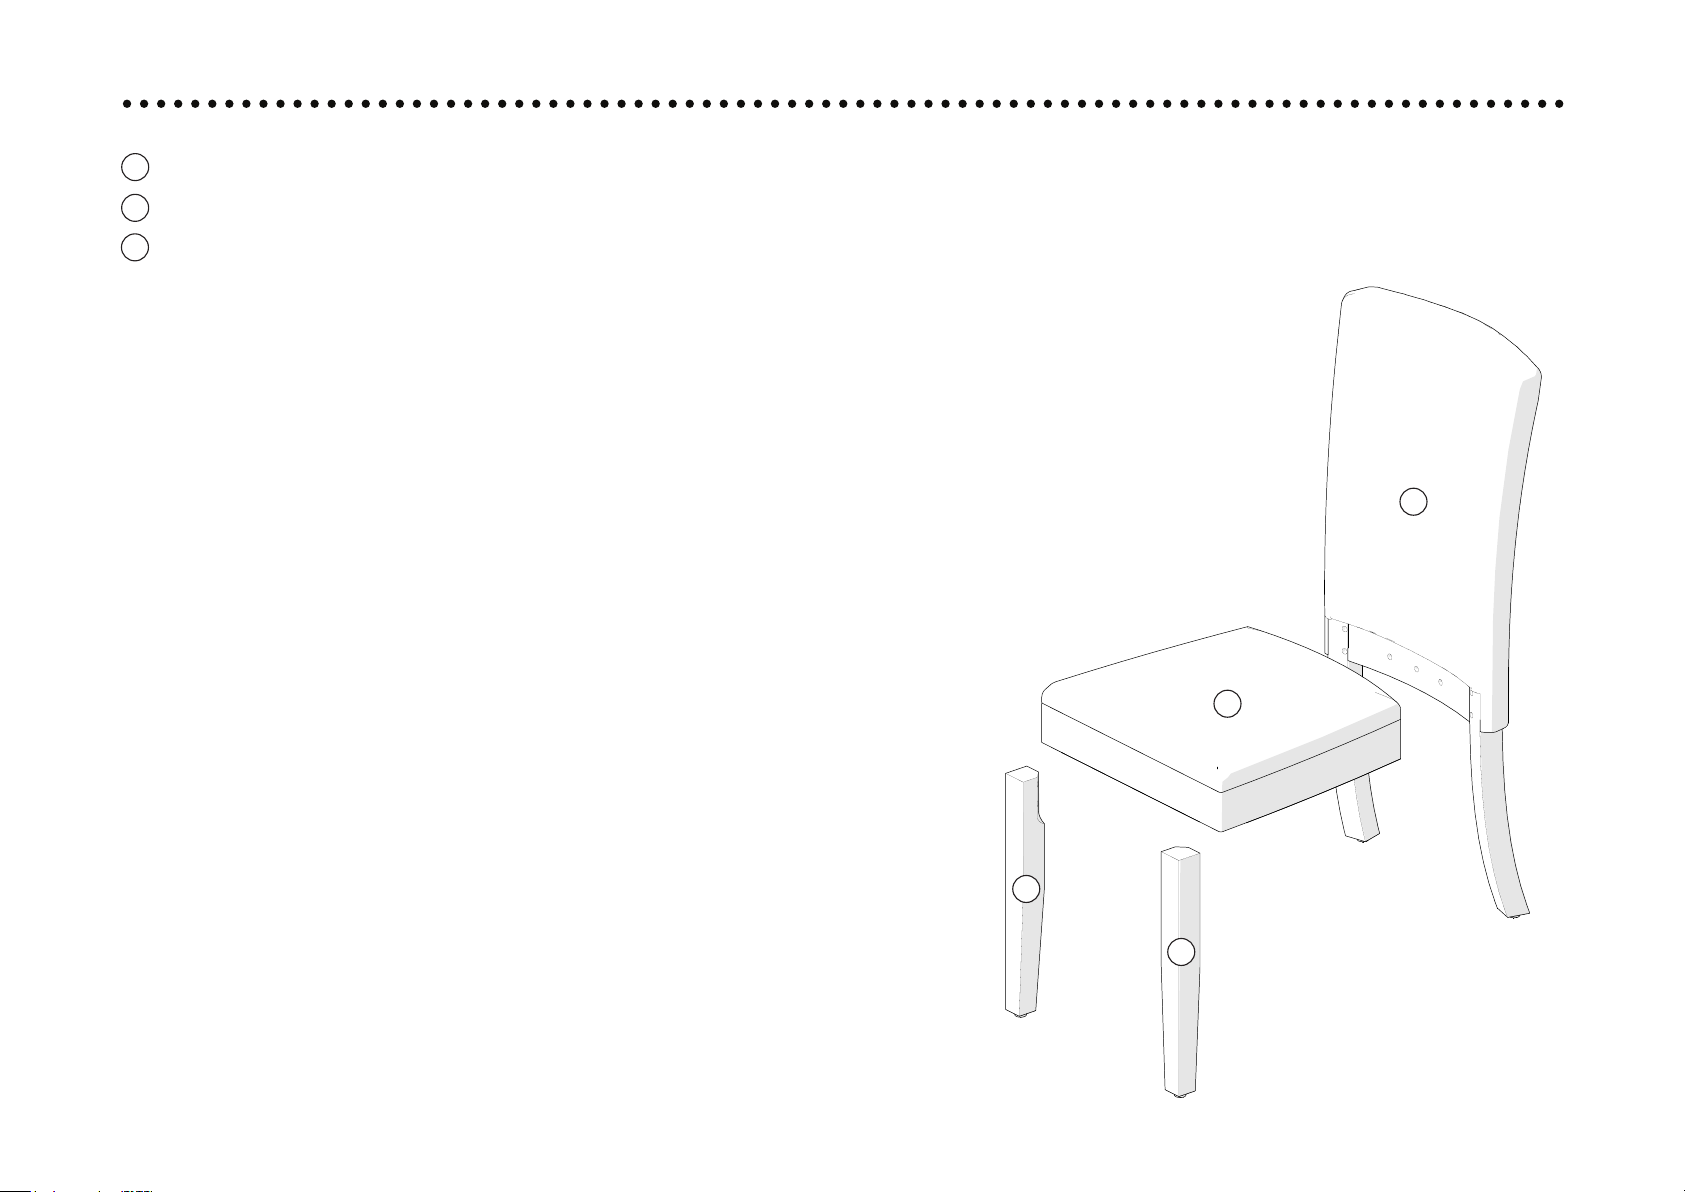
ITEM DESCRIPTION QUANTITY
............................................................................
1
2
3
chair back
seat cushion
leg
1
1
2
1
2
3
3
5
Page 6
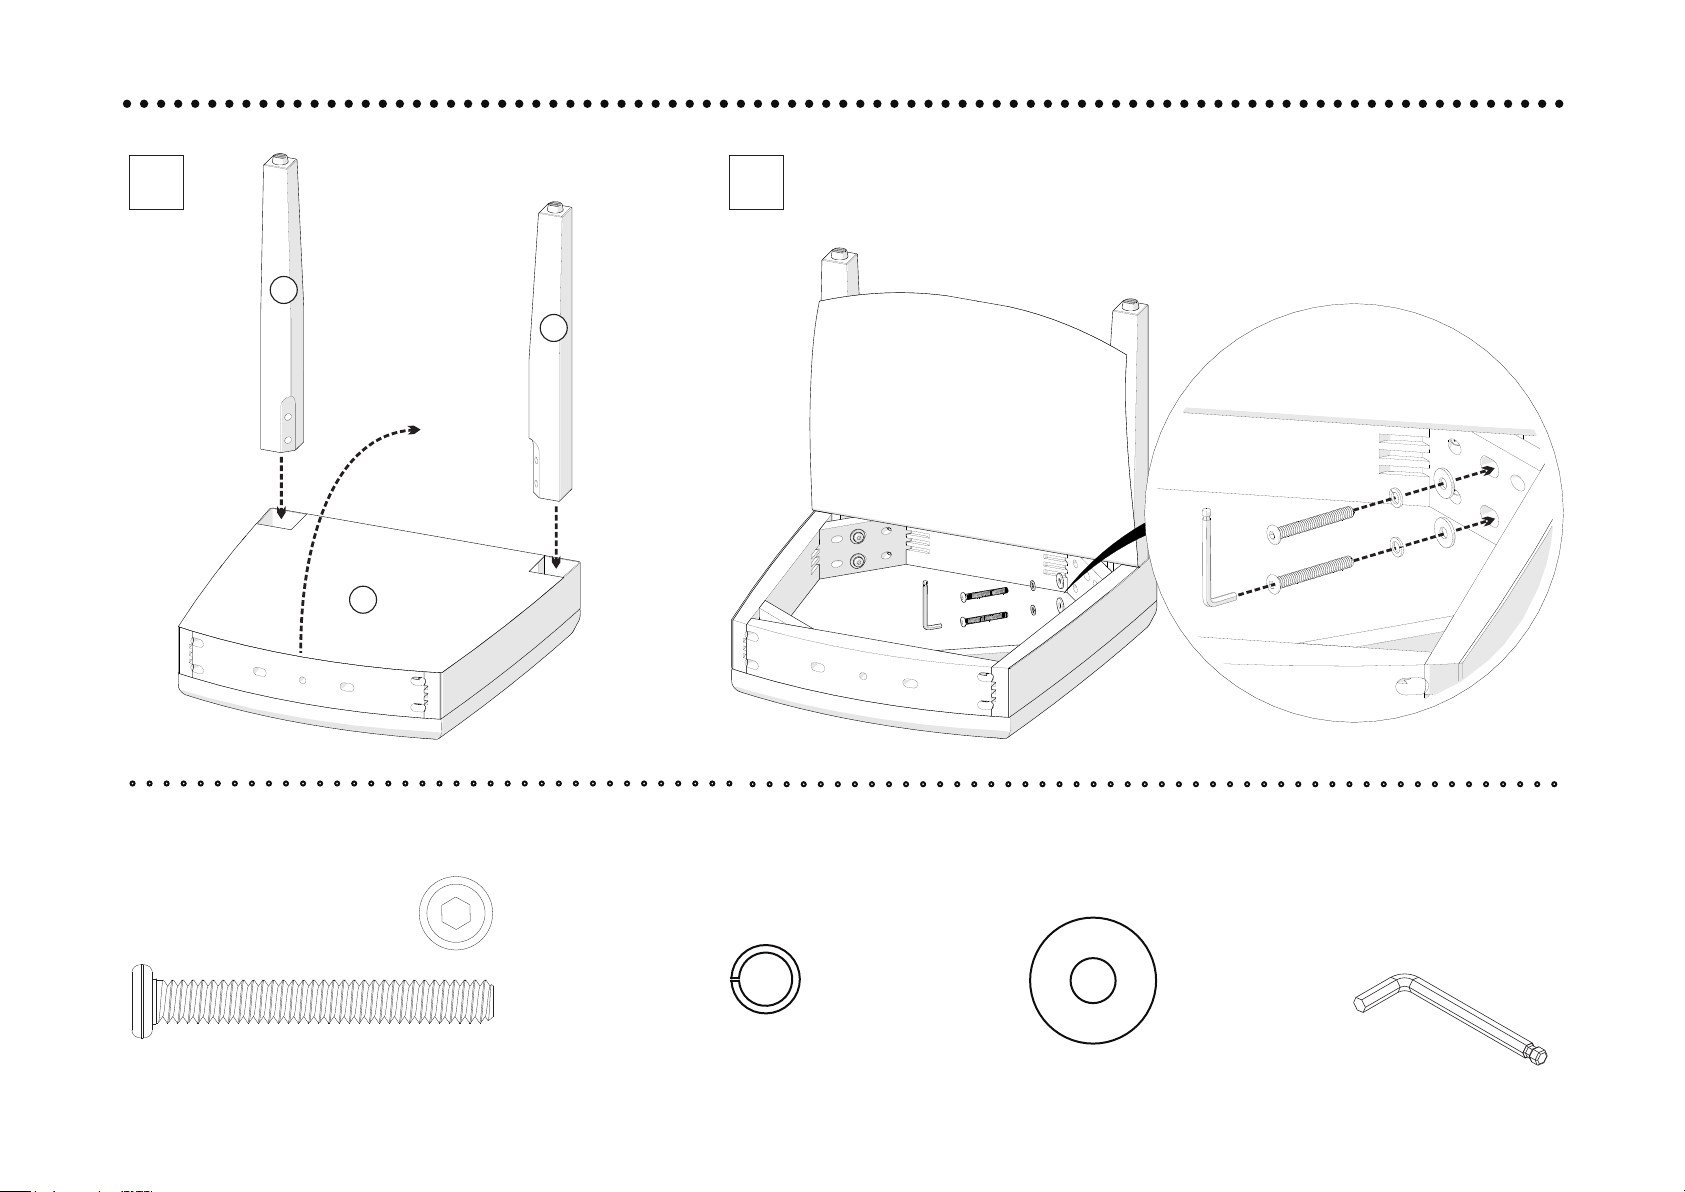
step 1.
............................................................................
1 2
3
3
Open the velcro.
(C) x 4
5/16" x 60mm
round hex screw
Please do not assemble with power tools
G
2
(D) x 4
Φ 8mm lo ck washer
(E) x 4
Φ 22mm fl at washer
C
(G) x 1
5mm Ba ll end
Hex wrench
D
E
6
Page 7
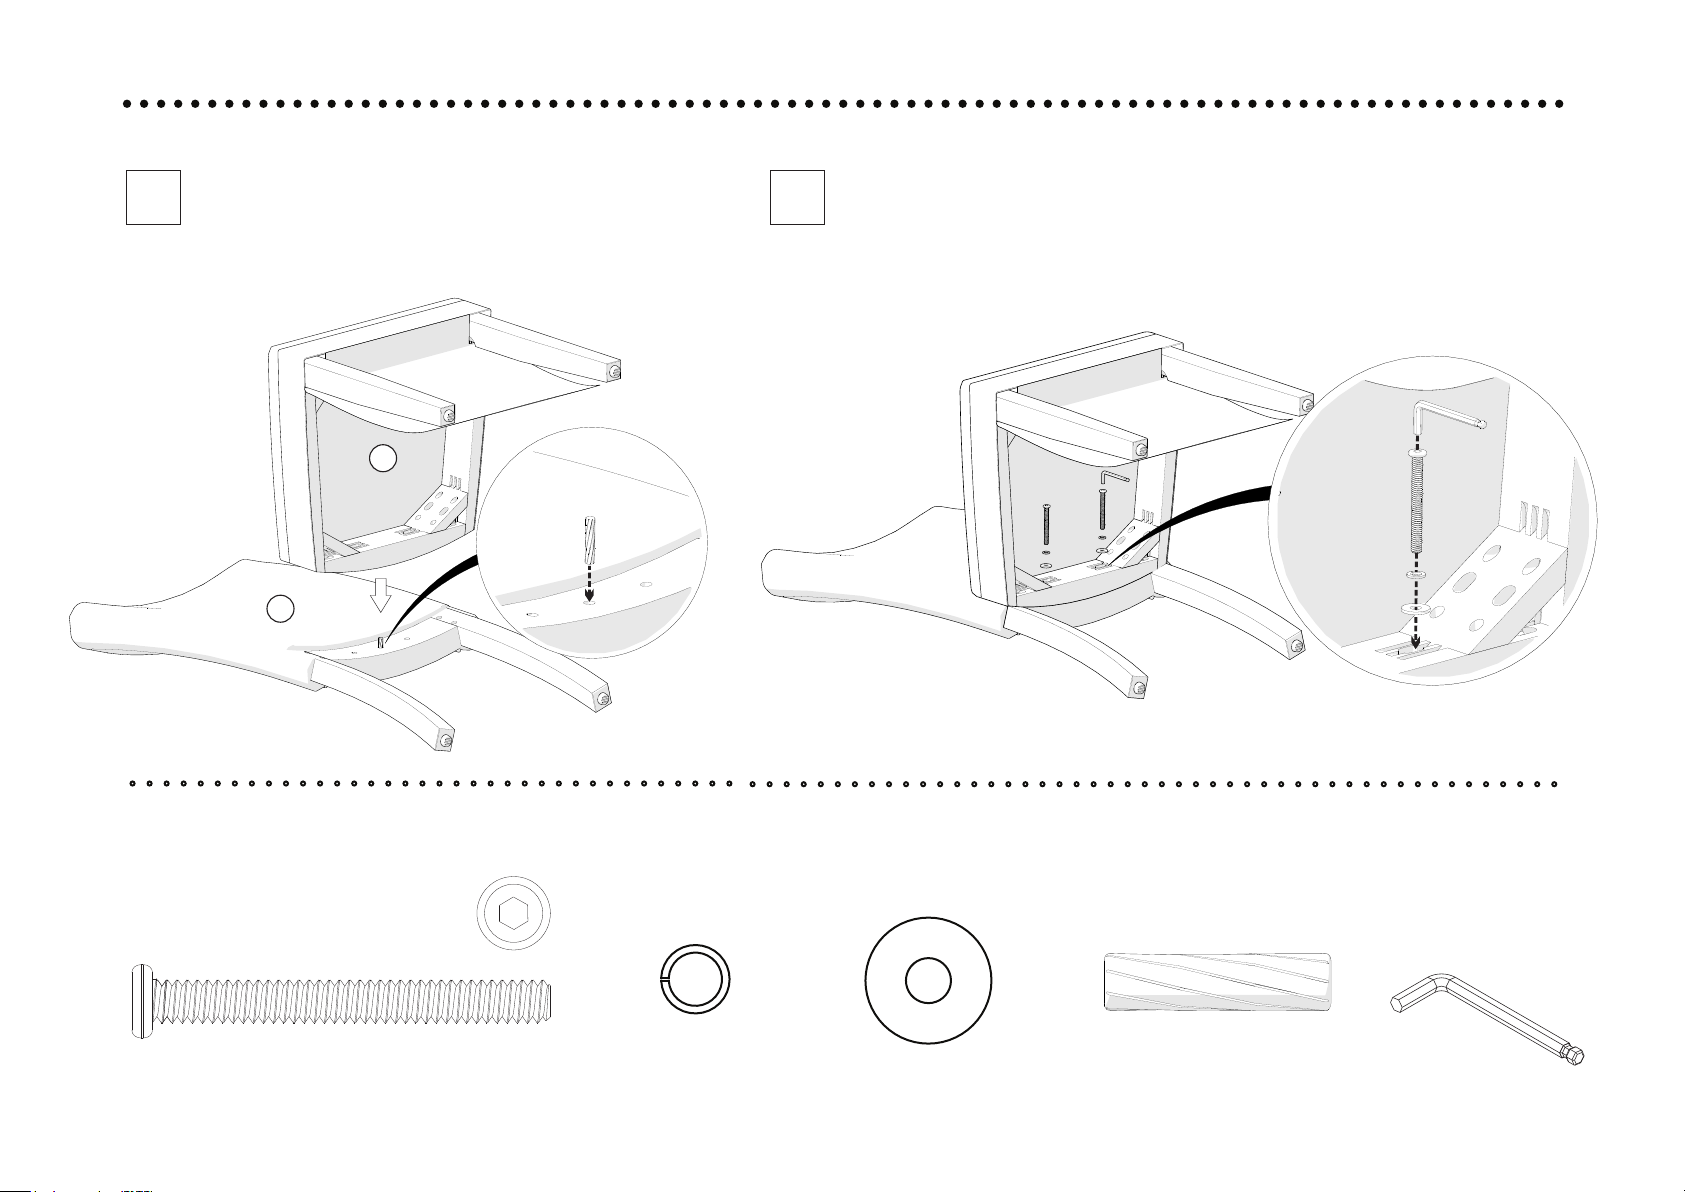
step 2.
............................................................................
Do not tighten these two bolts
1 2
2
F
1
until the next step.
B
D
E
G
(B) x 2
5/16" x 70mm
round hex screw
7
Please do not assemble with power tools
(D) x 2
Φ 8mm lo ck washer
(E) x 2
Φ 22mm fl at washer
(F) x 1
dowel 10x40mm
(G) x 1
5mm Ba ll end
Hex wrench
Page 8
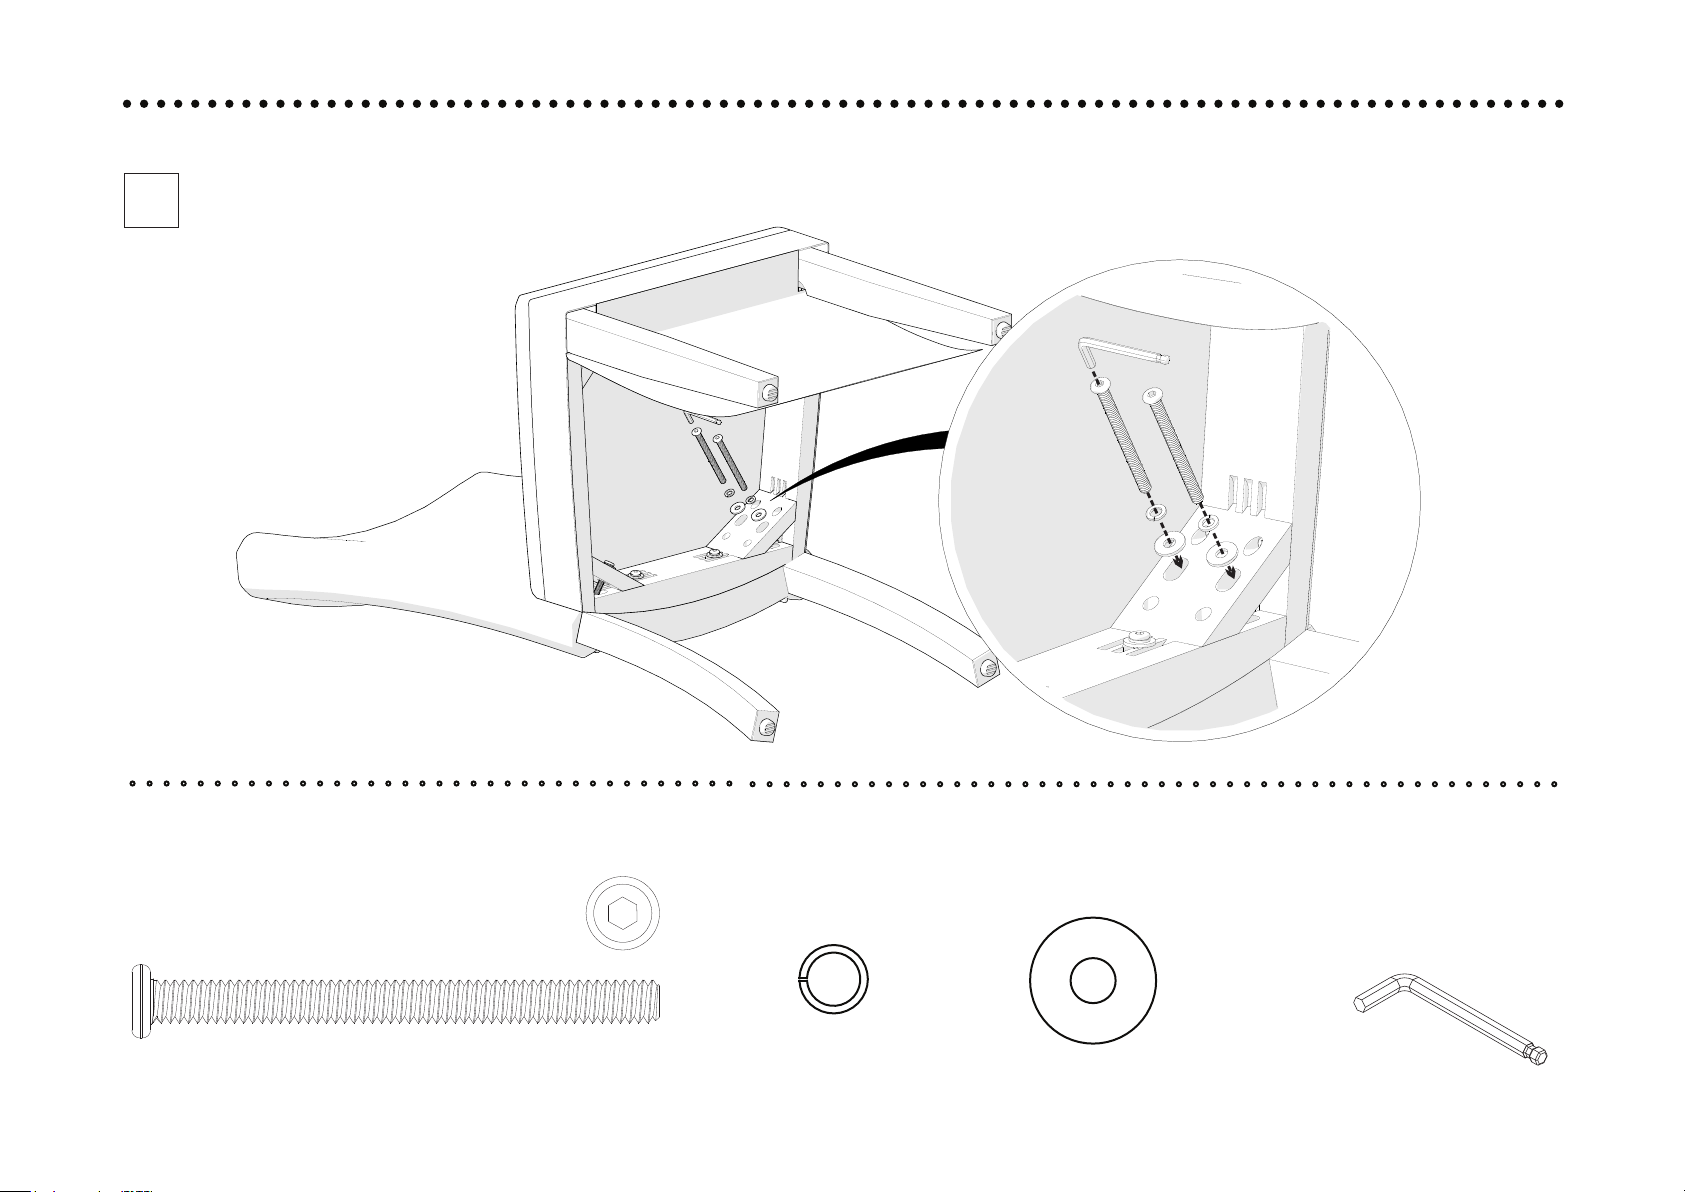
step 3.
............................................................................
1
Now you may tighten all 6 bolts.
G
A
D
E
(A) x 4
5/16" x 90mm
round hex screw
8
until all screws are lined up with the frame. Please do
Please do not assemble with power tools
(D) x 4
Φ 8mm lo ck washer
(E) x 4
Φ 22mm fl at washer
(G) x 1
5mm Ba ll end
Hex wrench
Page 9
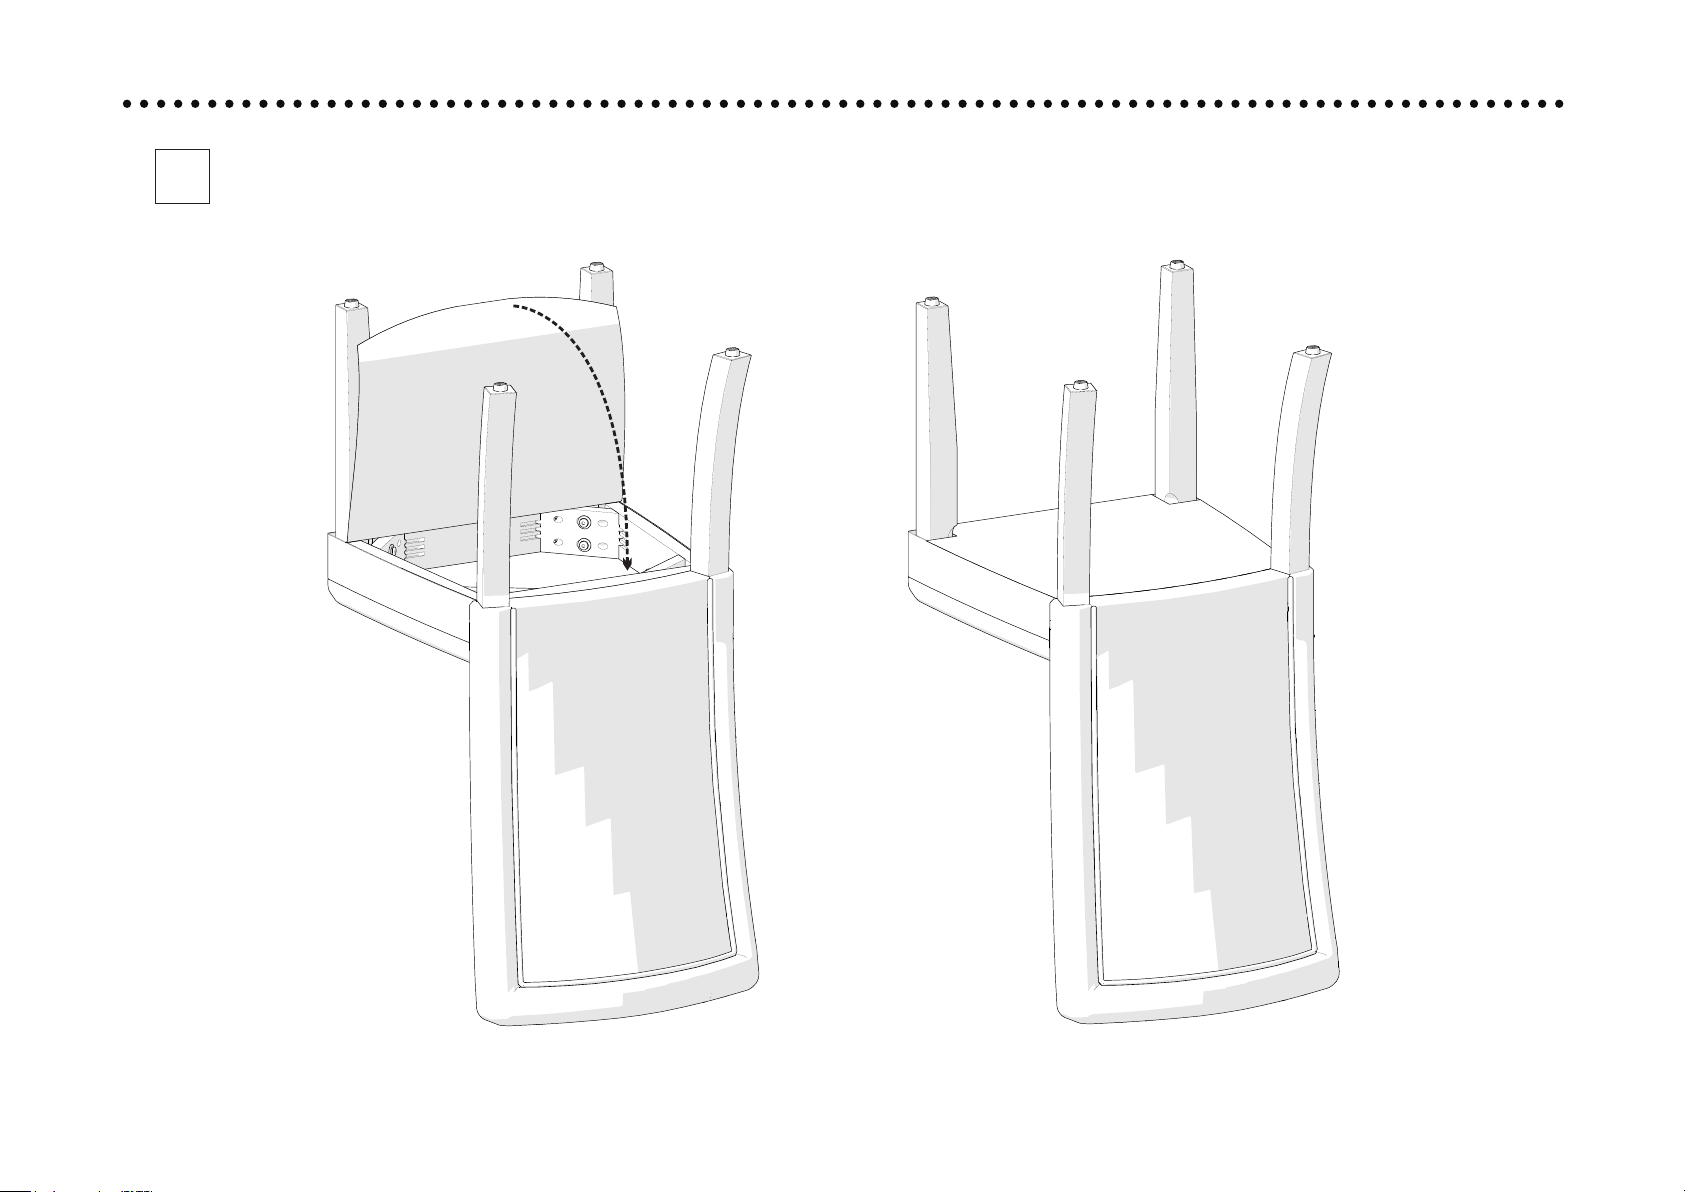
step 4.
............................................................................
1
.
o
cr
l
e
he v
e t
s
o
Cl
9
until all screws are lined up with the frame. Please do
Page 10
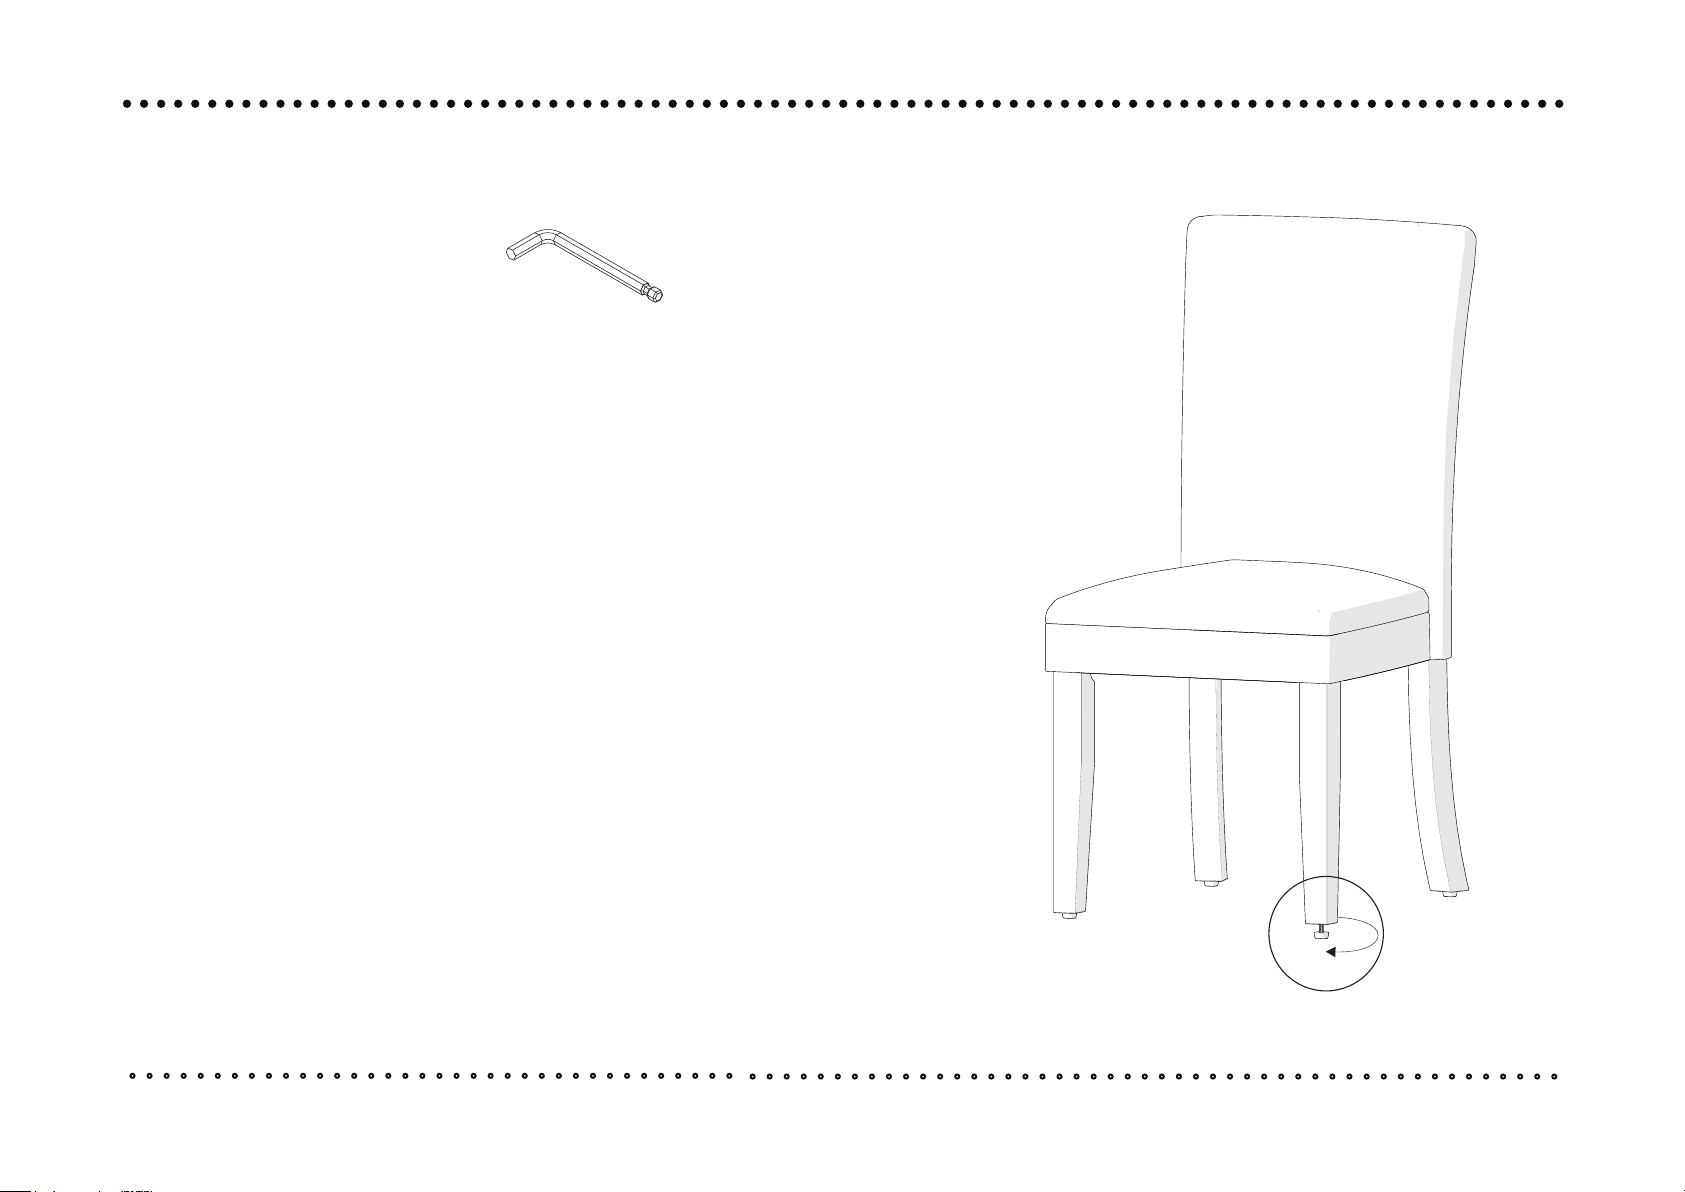
step 5.
............................................................................
A friendly reminder from us:
Please keep the Allen wrench.
After a period of time, there may be a chance the
KD furniture may become loose, please use an
Allen wrench to tighten the loose bolts.
Level the furniture, use leveling feet if needed.
10
Adjustable leveling feet
( This pa rt i s already a tt ached on th e en d cap of 4 legs . )
 Loading...