

Page 1
GARAGE DOOR OPENER BY HOMELINK
®
KIT
P/N 2881814
APPLICATION
All 2015 and newer Slingshot®models
BEFORE YOU BEGIN
Read these instructions and check to be sure all parts and tools are accounted for. Please retain these
installation instructions for future reference and parts ordering information.
DISCLAIMER ACCESSORY WEIGHT
When adding accessories, equipment, passengers and luggage to your vehicle, do not exceed the total weight
capacity of the vehicle or of the front or rear axle (GVWR or GAWR as indicated on the Safety Compliance
Certification label). Ask an authorized dealer for specific weight information if you need assistance. It is the
owner’s responsibility to use the Polaris Slingshot Accessories website as a tool for limiting the amount of
accessories, based on maximum allowable vehicle weight requirements. It may be a violation of the Clean Air
Act or the NHTSA regulations to disregard these requirements. For a complete listing of the accessories that
are available for your vehicle, please contact your authorized dealer or visit the online store web site:
Web Address (United States): http://www.polaris.com/en-us/slingshot/shop/accessories.
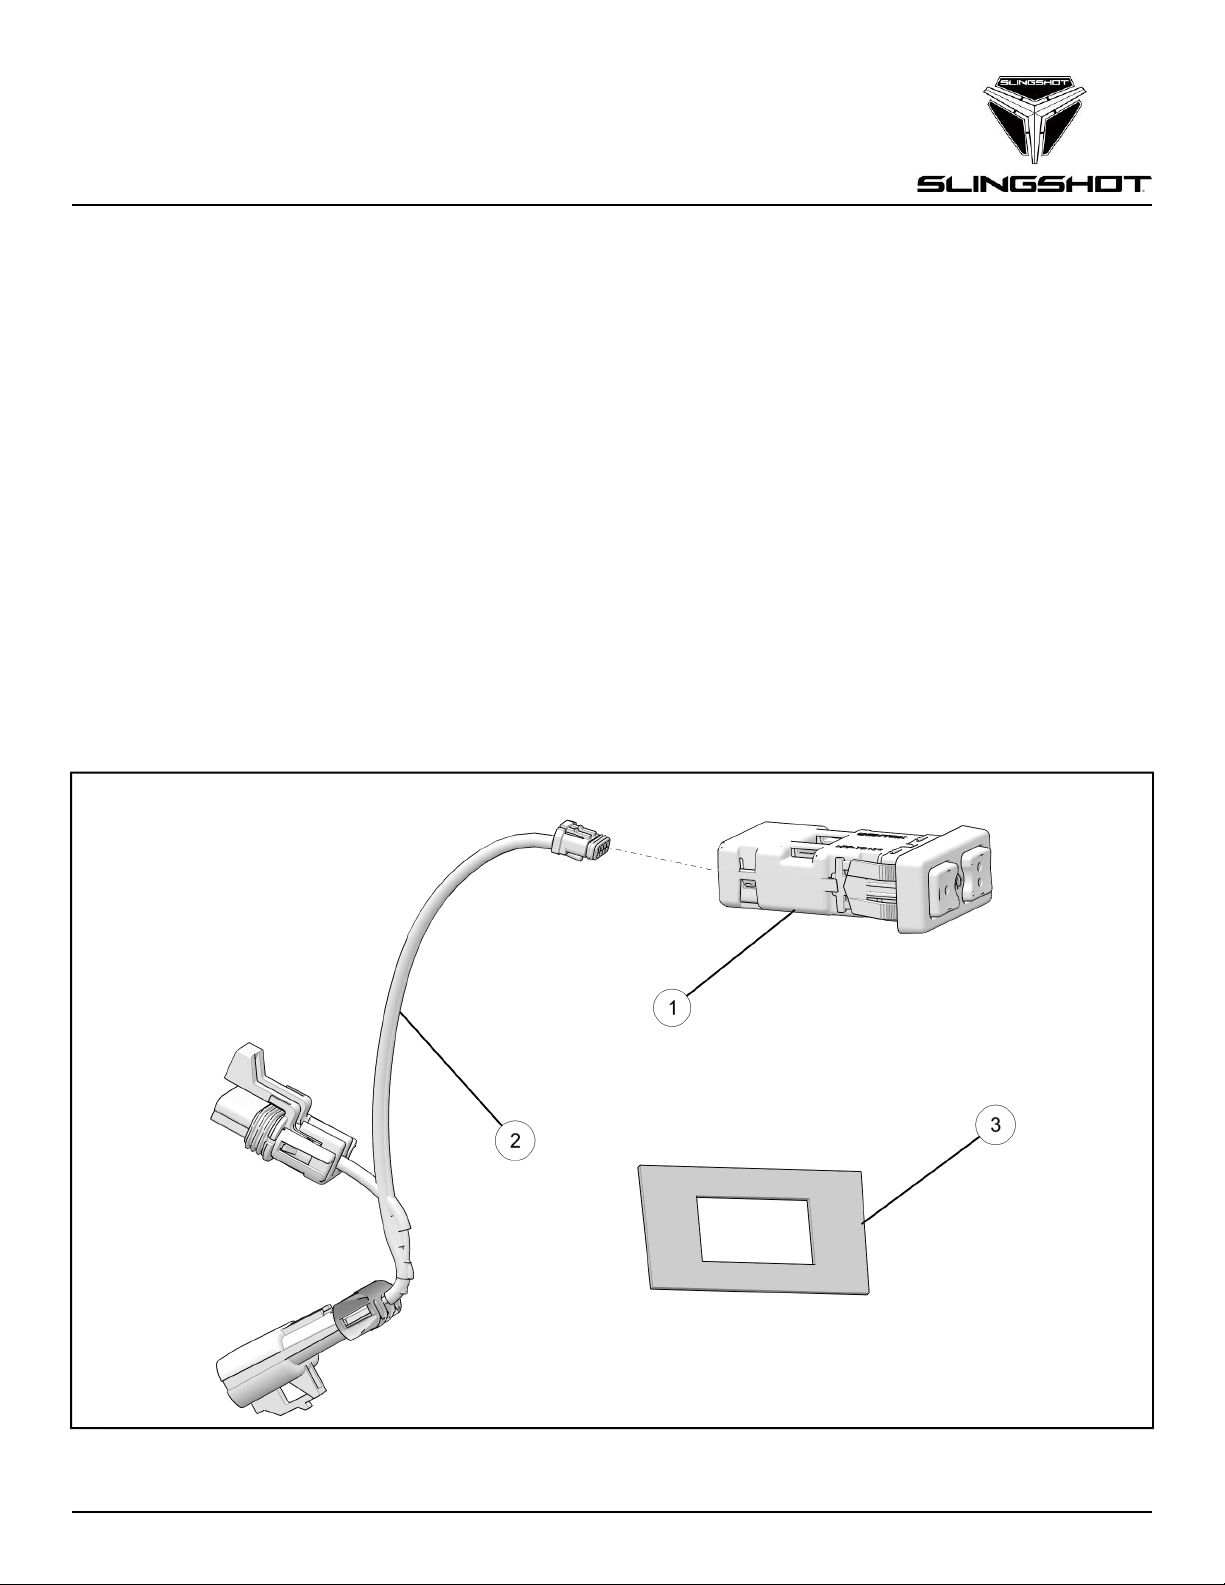
KIT CONTENTS
This kit contains parts for installation of Garage Door Opener by HomeLink®Kit for 2015 – 2017 Slingshot
models only. For 2018 and newer Slingshot®models, full installation will also require Garage Door Opener
Harness Kit PN 2883417 (sold separately).
®
This Kit includes:
Instr 9927730 Rev 02 2017-08 Page 1 of 6
Page 2

REF
1 1 Garage Door Opener Module 4015371
2 1 Garage Door Opener Harness 2413773
3 1 Garage Door Opener Template 5263676
QTY PART DESCRIPTION
1 Instructions 9927730
PART NUMBER
TOOLS REQUIRED
• Drill
• Hex Key Set, Metric
• Tape
• Drill bit: 1/4 in. (6 mm)
IMPORTANT
Your Garage Door Opener by HomeLink®Kit is exclusively designed for your vehicle. Please read the
installation instructions thoroughly before beginning. Installation is easier if the vehicle is clean and free of
debris. For your safety, and to ensure a satisfactory installation, perform all installation steps correctly in the
sequence shown.
ASSEMBLY TIME
Approximately 20 minutes
INSTALLATION INSTRUCTIONS
1. Shift vehicle transmission to NEUTRAL. Turn key
to OFF position and remove from vehicle
Apply parking brake.
HOMELINK®INSTALLATION
1. Place garage door opener templateeon dash
and secure in place with tape.
Mark four holes inside each corner of stencil and
drill using 1/4 in. (6 mm) drill bit.
Use caution not to rub drill on dashboard pieces.
A
2. Connect garage door opener harnesswto garage
door opener module
q
.
Once holes are drilled, use small cutting tool to
connect four drilled corners. Avoid edges of
dashboard pieces when cutting.
Instr 9927730 Rev 02 2017-08 Page 2 of 6
Page 3

3. Route garage door opener harness through
opening created in Step 1 before installing garage
door opener module
in same opening.
q
6. Carefully pull up on tab of electrical harness
connector
connector
7. Connect infotainment harness connectorEto
garage door opener harness connector
Connect electrical harness connector
door opener harness connector
to disconnect infotainment harness
D
from electrical harnessDconnector.
E
.
F
to garage
D
.
G
4. If installing on vehicle model year 2018 or newer,
proceed to Kit Instructions for kit PN 2883417.
If installing on vehicle model year 2014 to 2017,
continue on to step 5.
5. Remove and retain four screws
infotainment assembly
Rest infotainment assembly
console where it will not be damaged.
with wires still attached.
C
, and
B
carefully on center
C
8. Reinstall infotainment assemblyC, and four
retained screws
section.
Torque four bezel mounting screws
specification.
removed in Step 5 of this
B
B
to
TORQUE
2015-2017: 36 in. lbs (4 Nm)
Instr 9927730 Rev 02 2017-08 Page 3 of 6
Page 4

PROGRAMMING 2-BUTTON HOMELINK
®
CAUTION
Before programming HomeLink®to garage door opener or gate operator, ensure that people and objects are
out of way of device to prevent potential harm or damage. Garage door or gate will open and close while
programming HomeLink
garage door or gate can cause serious injury or death to people and pets or damage to objects.
®.
Do not program HomeLink®.if people or pets are in path of door or gate. Moving
Vehicle exhaust contains carbon monoxide, dangerous gas. Do not run vehicle's engine while programming
HomeLink
®.
. Exhaust gas can cause serious injury or death. When programming garage door opener, it is
advised to park outside of garage.
Do not use HomeLink
®
with any garage door opener that lacks safety stop and reverse features as required by
U.S. federal safety standards (this includes any garage door opener model manufactured before April 1, 1982).
Garage door that cannot detect object signaling door to stop and reverse - does not meet current U.S. federal
safety standards.
BEFORE PROGRAMMING HOMELINK
• Garage door opener, gate, or other device may
operate during programing process. Ensure
surrounding area is clear of people or objects to
prevent injury or damage.
• Using new garage door remote batteries is
recommended for most accurate programming.
• Garage door openers manufactured after 1995 may
be equipped with rolling code protection. Stepladder
®
2. Standard Garage Door Opener
a. At garage door opener in garage, locate Learn
or Smart button (usually near where hanging
antenna wire is attached to unit). If there is
difficulty locating Learn or Smart button,
reference garage door opener’s manual.
b. Press and release Learn or Smart button
(name and color of button may vary by
manufacturer).
may be needed to reach Learn or Smart button on
garage door opener.
• Instructions below apply to majority of HomeLink
use cases. Some HomeLink®applications or
HomeLink
®
compatible systems may require slightly
different instructions. Please visit http://www.
HomeLink.com/2-button for device specific
instructions.
®
Once button is pressed, there are typically about 10
– 20 seconds in which to initiate next step.
c. Continue programming with Step 3 of this
section.
NOTE
3. At vehicle, press and release programmed
PROGRAMMING BRAND NEW HOMELINK
ROLLING CODE PROGRAMMING
1. Sommer®Garage Door Opener ONLY
NOTE
If programming two devices, and only one is
Sommer
Follow Reprogramming Single HomeLink
®
, program Sommer®unit first.
instructions for second device.
®
®
Button
HomeLink
sequence up to 3 times to complete training
process. HomeLink
code equipped device.
4. To program additional HomeLink
this process.
5. Once programmed, both HomeLink
original garage door remote may be used to
activate device (e.g. garage door, entry lock, gate,
etc.).
®
button. Repeat press and release
®
should now activate rolling
®
buttons, repeat
®
and/or
a. Press and hold both HomeLink
seconds, until LED turns off. HomeLink
ready to be programmed to Sommer
®
buttons for 20
®
®
rolling
code opener garage door.
b. Continue programming with Step 3 of this
section.
Instr 9927730 Rev 02 2017-08 Page 4 of 6
is now
Page 5

NON-ROLLING CODE PROGRAMMING
REPROGRAMMING HOMELINK®BUTTON
1. Position garage door remote 1 – 3 inches away
from HomeLink
®
buttons, keeping HomeLink
®
indicator light in view.
2. Garage Door Opener and Entry Gate
Programming
• Garage Door Opener Programming
a. Using both hands, simultaneously press and
hold both desired HomeLink
®
button and
garage door remote button. DO NOT release
until HomeLink
®
indicator light flashes slowly
and then changes to solid or rapidly flashing.
Change in flashing indicates frequency
signal has been learned.
b. Continue programming with Step 3 of this
section.
• Entry Gate Programming
NOTE
Some gate operators and garage door openers may
require “cycling” procedure.
a. Using both hands, hold HomeLink
continuously, while simultaneously pressing
and releasing garage door remote button at 2
second intervals. DO NOT release until
HomeLink
®
indicator light flashes slowly and
then changes to solid or rapidly flashing.
Change in flashing indicates frequency
signal has been learned.
®
button
When following procedure is performed, buttons
which are already programmed can be overwritten:
1. Press and hold desired HomeLink
about 20 seconds, HomeLink
®
button. After
®
indicator will start
slowly flashing.
2. Continue with Rolling Code Programming or
Non-Rolling Code Programming section.
ERASING HOMELINK®PROGRAMMING (BOTH BUTTONS)
1. Press and hold both buttons for 10 seconds until
HomeLink
flashing indicator.
®
indicator light changes from solid to
IMPORTANT
If vehicle is sold, erase HomeLink®programming.
FOR FURTHER ASSISTANCE
To view custom training videos and instructions for
major garage door brands, gates, and other
HomeLink
HomeLink.com/.
®
compatible products, visit http://www.
b. Continue programming with Step 3 of this
section.
3. Press and hold programmed HomeLink
and observe indicator light.
• If indicator light is solid/continuous,
programming is complete and device should
activate when HomeLink
®
button is pressed and
released.
• If indicator light blinks rapidly, proceed with
instructions listed in Rolling Code
Programming section.
– Second person may make following steps
quicker and easier.
– Use stepladder or other stable, safe device.
®
button
Instr 9927730 Rev 02 2017-08 Page 5 of 6
Page 6

FCC (USA) AND IC (CANADA)
FCC (USA) AND IC (CANADA)
This device complies with FCC rules part 15 and
Industry Canada RSS-210. Operation is subject to
following two conditions:
1. This device may not cause harmful interference.
2. This device must accept any interference that may
be received including interference that may cause
undesired operation.
WARNING
Transmitter has been tested and complies with FCC
and IC rules. Changes or modifications not expressly
approved by party responsible for compliance could
void user’s authority to operate device.
This equipment complies with FCC radiation exposure
limits set forth for uncontrolled environment. End
Users must follow specific operating instructions for
satisfying RF exposure compliance. This transmitter
must be at least 20cm from user and must not be colocated or operating in conjunction with any other
antenna or transmitter.
Term “IC:” before certification/registration number only
signifies that Industry Canada technical specifications
were met.
Cet appareil est conforme aux normes FCC partie 15
des règles et Industrie Canada RSS-210. Son
fonctionnement est soumis aux deux conditions
suivantes:
1. Ce dispositif ne peut causer des interférences
nuisibles, et
2. Cet appareil doit accepter toute interférence qui
peuvent être reçues, y compris les interférences
qui peuvent provoquer un fonctionnement
indésirable.
WARNING
L'émetteur a été testé et est conforme aux règles de
la FCC et IC. Les changements ou modifications non
expressément approuvés par la partie responsable
de la conformité pourraient annuler l'autorité de
l'utilisateur à utiliser l'appareil.
Cet équipement est conforme aux limites FCC
d'exposition aux radiations définies pour un
environnement non contrôlé. Les utilisateurs finaux
doivent suivre les instructions de fonctionnement
spécifiques pour satisfaire aux normes d'exposition
aux RF. Cet émetteur doit être d'au moins 20cm de
l'utilisateur et ne doit pas être co-située ni fonctionner
en conjonction avec une autre antenne ou émetteur.
Le terme "IC:" devant le numéro de certification /
enregistrement signifie seulement que les
spécifications techniques d'Industrie Canada ont été
respectées.
FEEDBACK FORM
A feedback form has been created for the installer to provide any comments, questions
or concerns about the installation instructions. The form is viewable on mobile devices
by scanning the QR code or by clicking HERE if viewing on a PC.
FEEDBACK FORM
Instr 9927730 Rev 02 2017-08 Page 6 of 6
 Loading...