

Home Legend Hardwood and Bamboo T-molding User Manual

Doc.ID: 148 Effective: 8-8-2013
Title: Installation Hardwood/Bamboo T-molding Rev.:0
Hardwood and Bamboo T-molding
T-molding transition piece is used to transition between floors of similar heights. They often used to provide
expansion gaps for large areas or for when the floor is interrupted by wall openings or permanent fixture such
as a kitchen island. There are several ways to accomplish the task of installing T- molding. This is just one of
them.
Step 1.
Determine where the T-Molding will be installed. The usual location is
between two sections of flooring. Mark an area the width of the Tpost of the molding plus the required expansion gap on either side of
the post.
Step 2.
Apply adhesive to area where the foot of the T-molding will be secured
to the subfloor.
Step 3.
Secure the T-mold in place by pressing it down into the adhesive beads
and press down to secure completed bond between the T-post and the
subfloor.
Step 4.
Allow the glue to cure. Follow glue manufacturer’s instruction for
length of cure time.

Doc.ID: 148 Effective: 8-8-2013
Title: Installation Hardwood/Bamboo T-molding Rev.:0
Step 5.
Prevent damage. When moving heavy object across the T-molding, do not drag the heavy object across the
top of it. Place plywood board over it and roll the object on the plywood Installation is complete and the floor
can be placed in service.
.
Doc.ID: 095 Effective: 2-11-2013
Title: Installation Hardwood/Bamboo Stair Nose Rev.:2
Hardwood/Bamboo Stair Nose
Stair molding allows you to create stairs out of the hardwood/bamboo
of your choice. The stair nose is the trim piece that covers the front
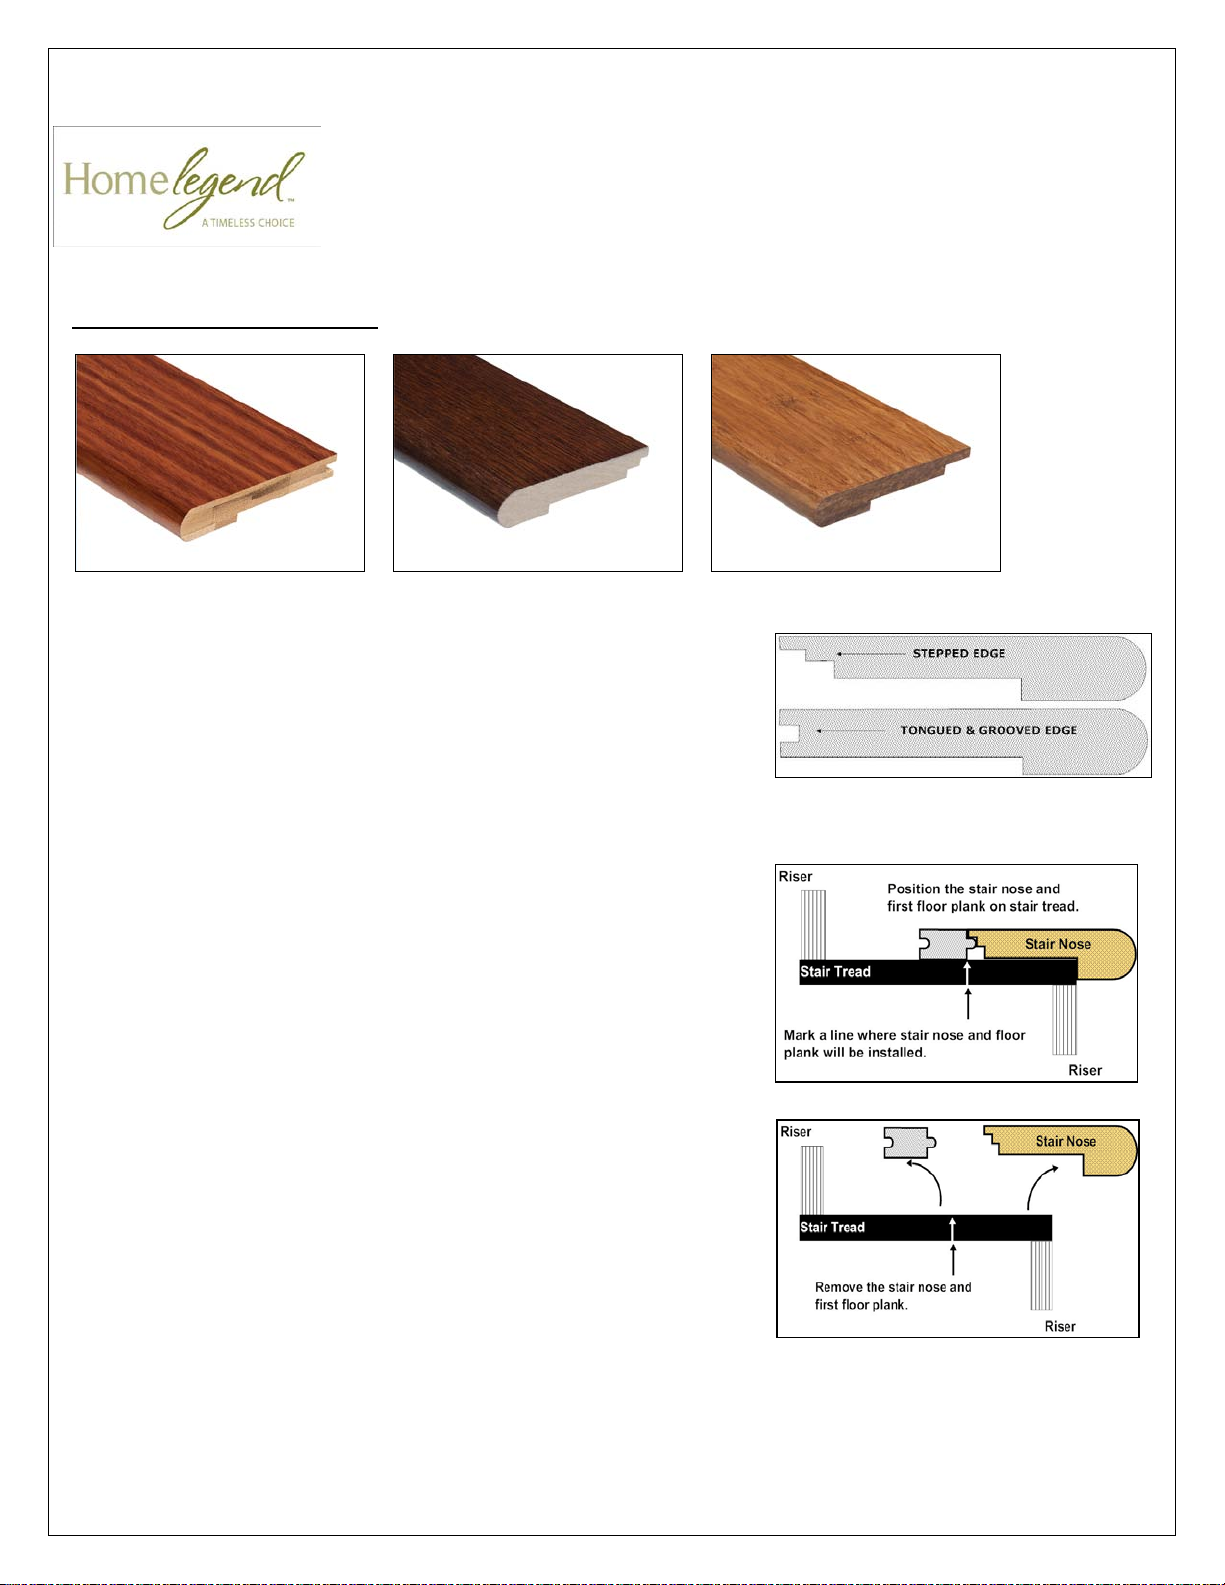
edge of the step. The back end of the stair nose can be grooved or
stepped down. This installation procedure describes the step profile.
The step of the stair nose rests on the tongue of the floor. For the
groove profile, the method is similar, but the groove of the stair nose
is mated to the tongue of the floor.
Step 1.
Take a stair nose molding piece and place it on the edge of the step,
where it will be installed. Place the flooring plank to be used as the
new stair tread against the stair nose. Mark at where the position of
the floor as indicated in diagram.
Step 2.
Remove the pieces.

Doc.ID: 095 Effective: 2-11-2013
Title: Installation Hardwood/Bamboo Stair Nose Rev.:2
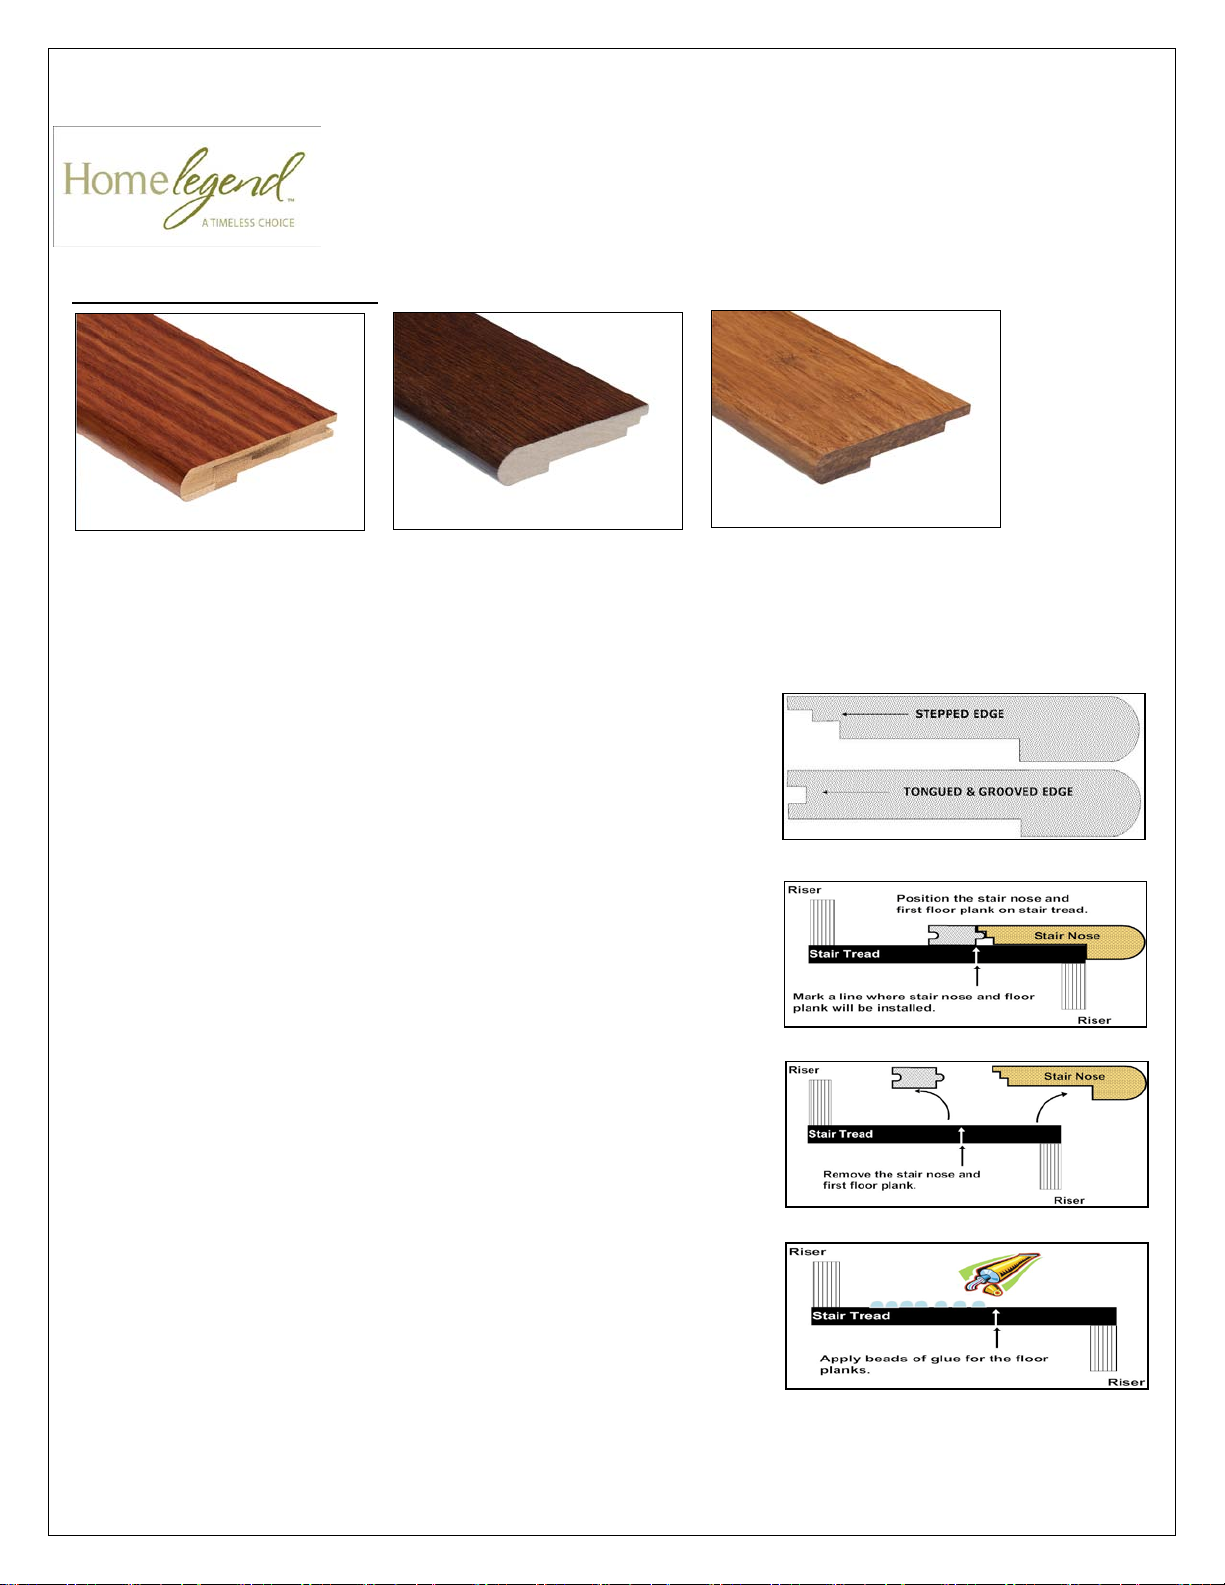
Step 3.
Apply several beads of flooring adhesive or construction adhesive to the
surface of the stair tread. This is to bond the flooring plank to the
surface of the stair tread, thereby making it the new stair tread, to
match with the stair nose that will be installed.
Step 4.
Press the flooring planks firmly into the adhesive to ensure maximum
bonding.
Step 5.
Apply beads of the construction adhesive along the entire width and
edge of the stair tread.
Step 6.
Replace the stair nose onto the edge of the step, into the newly laid
adhesive beads. Push the stair nose against the riser and the tongue
of the flooring until it is flush with the flooring plank.
As previously done with the flooring plank, press the stair nose firmly
into the adhesive to ensure maximum bonding to the stair tread.
At this time, both the flooring and the stair nose can be reinforced
with 1-1/4” finish nails. Counter sink the nails. Fill the holes with
color-matched putty.
Step 7.
Allow the glue to cure. Follow glue manufacturer’s recommendation. Once cured, the stair nose installation is
complete and it is available for immediate use.
Doc.ID: 095 Effective: 2-11-2013
Title: Installation Hardwood/Bamboo Stair Nose Rev.:2
Hardwood/Bamboo Stair Nose
The stair nose trim piece covers the front edge of the stair tread. The stair tread is usually covered with the same
floor covering as the connecting floor. The result is stairway which coordinates with the rest of the floor in the
house.
The back end of the stair noses are built in two profiles. One profile is a
“grooved” and the other is “stepped.” This installation procedure
describes the step profile. The step of the stair nose rests on the
tongue of the floor. For the groove profile, the method is similar, but
the groove of the stair nose is mated to the tongue of the floor.
Step 1.
Take a stair nose molding piece and place it on the edge of the step,
where it will be installed. Place the flooring plank to be used as the
new stair tread against the stair nose. Mark at where the position of
the floor as indicated in diagram.
Step 2.
Remove the pieces.
Step 3.
Apply several beads of flooring adhesive or construction adhesive to the
surface of the stair tread. This is to bond the flooring plank to the surface
of the stair tread, thereby making it the new stair tread, to match with
the stair nose that will be installed.
 Loading...