

Page 1
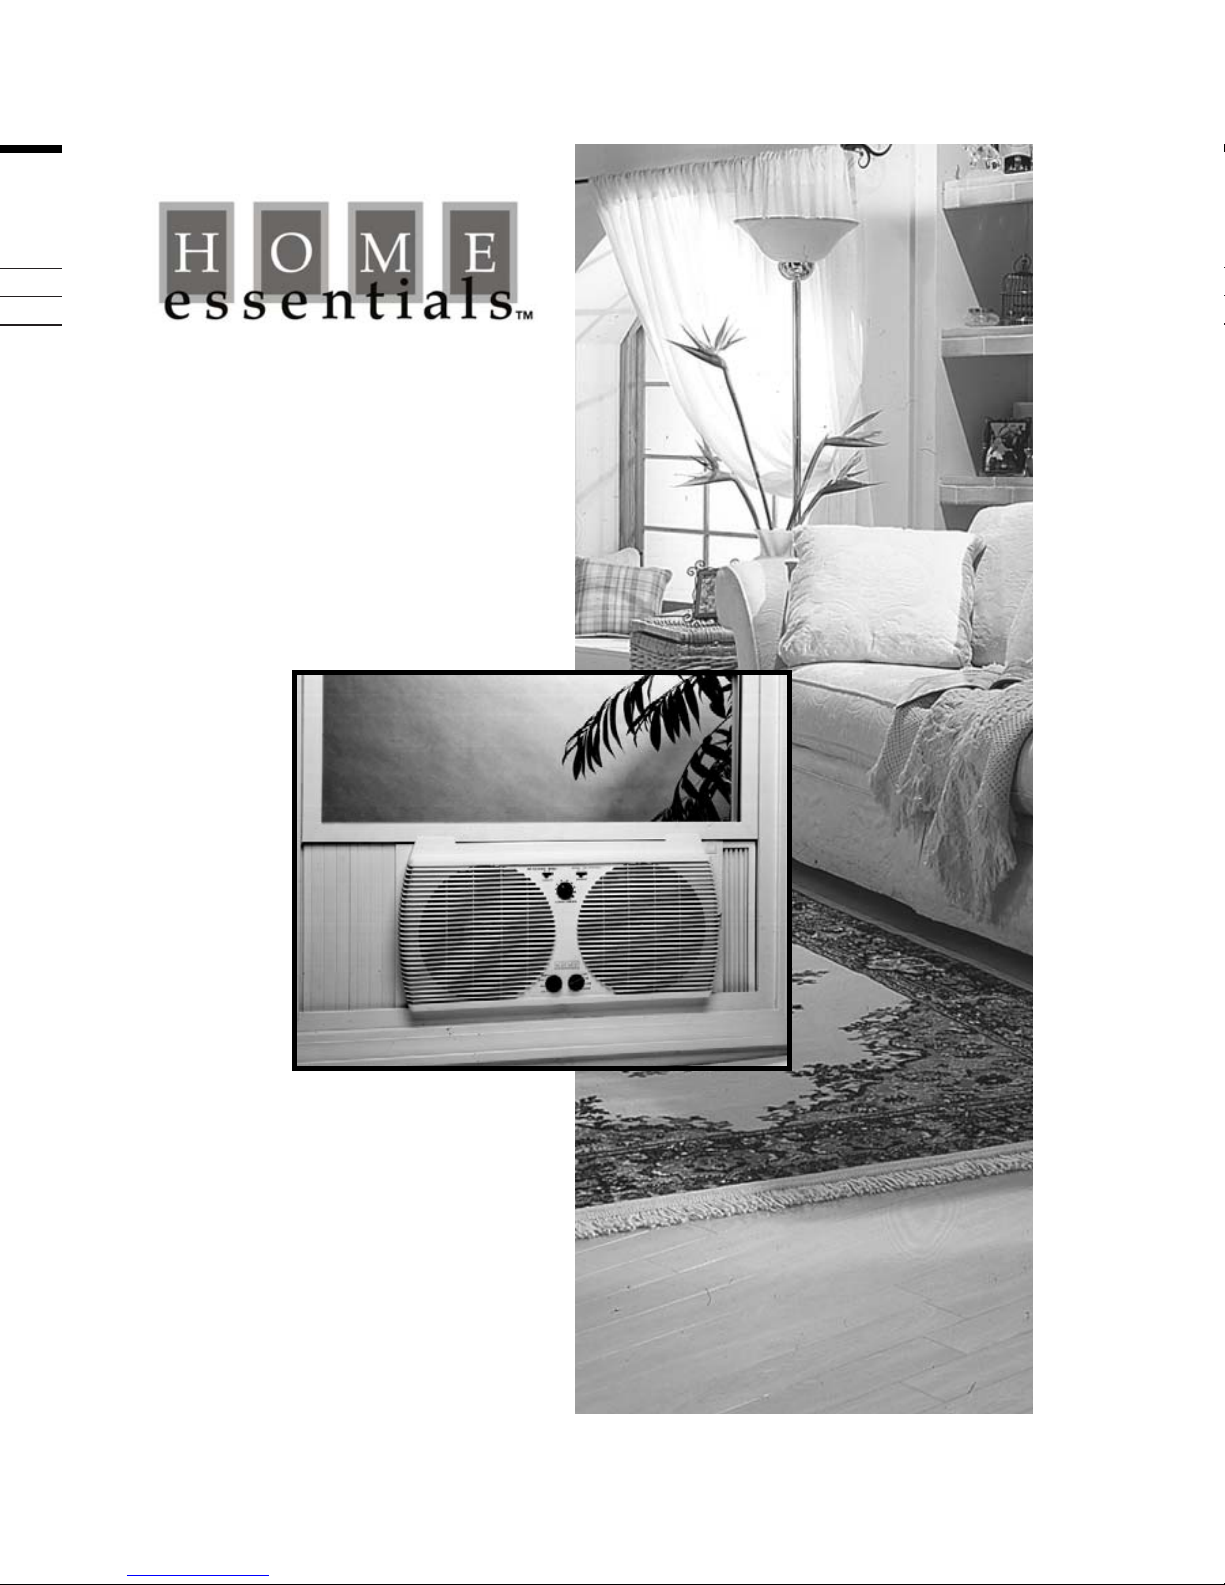
Twin Window Fan
With Thermostat
Owner’s Manual
Model HE5085
UPC CODE:
0-72000-78421-1
PRODUCT CODE:
0-063141-113
CAUTION:
Carefully Read
Instructions and
Procedures for
Safe Operation
Page 2
INSTALLATION GUIDE:
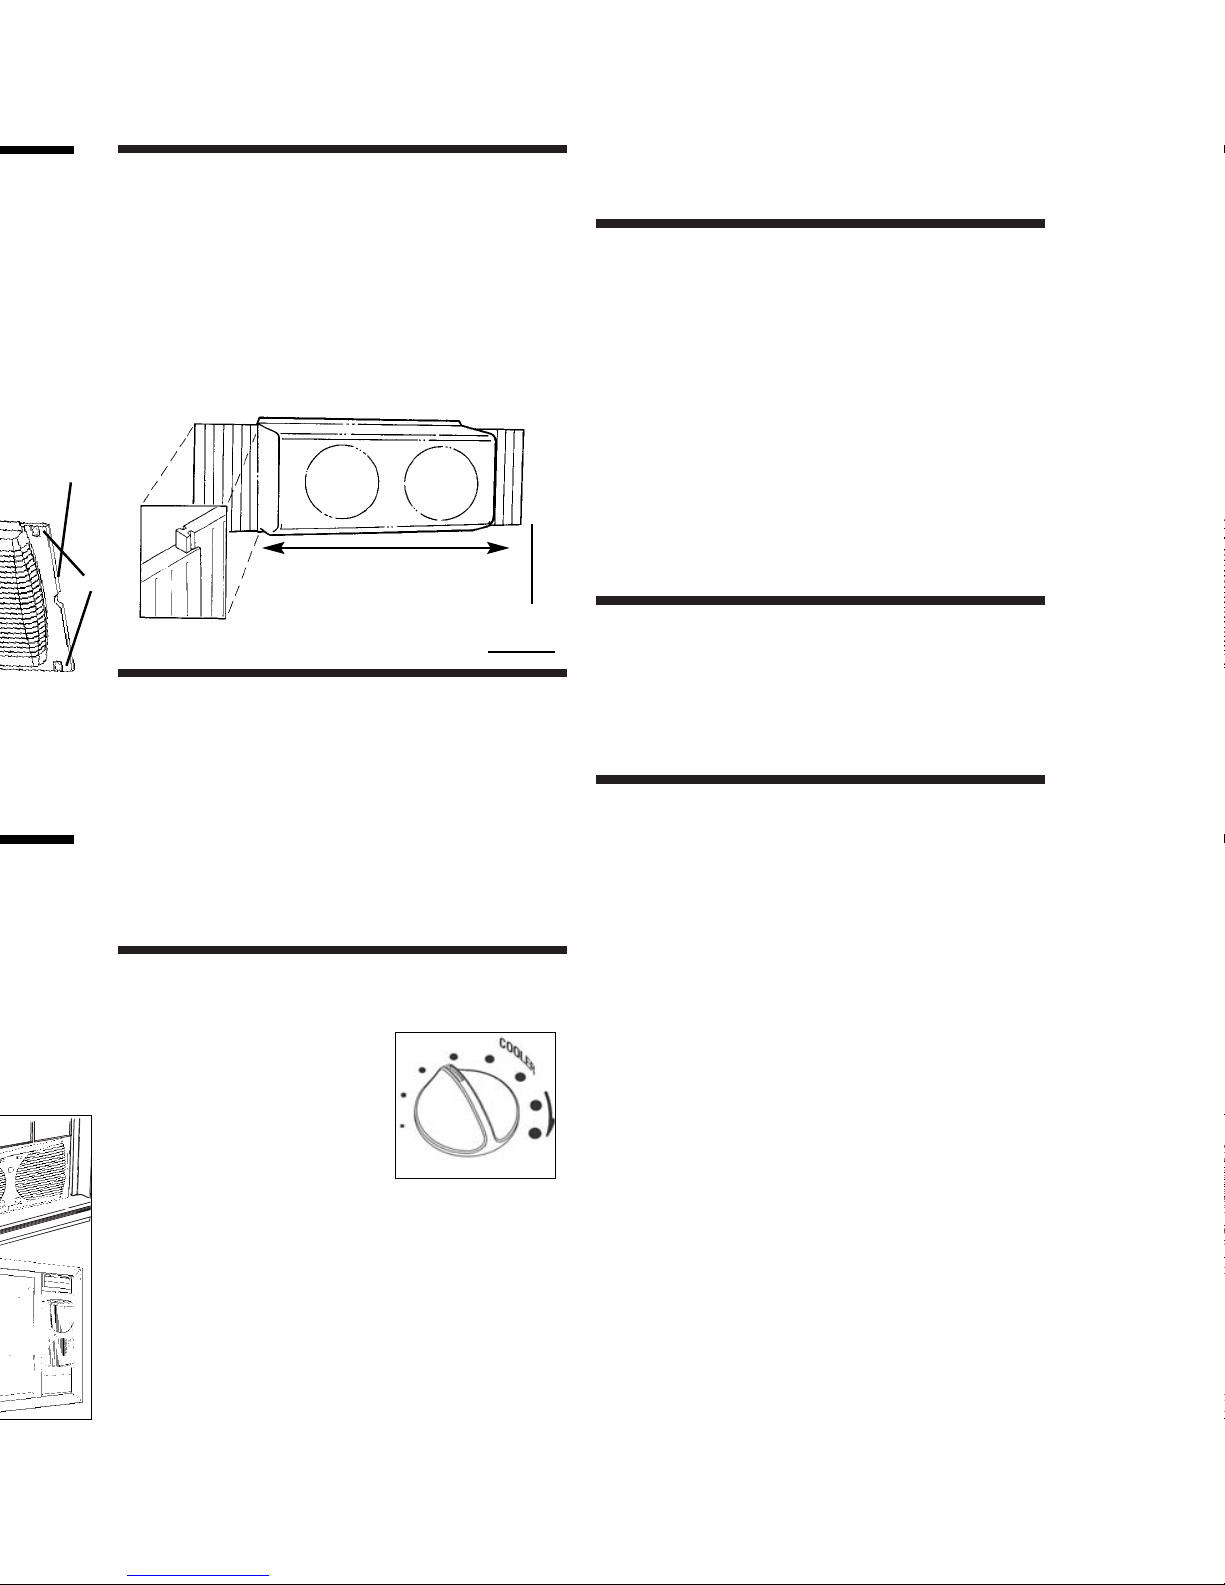
For 24” to 27” : Use up to 3” of right side, pull out extender panel
For 28” to 34” : Use one 3” extender panel on the left side. Adjust the
pull out extender on the right side for a tight fit (from .5” to 7”).
For 35” to 37” : Use two 3” extender panels on the left side. Adjust the
pull out extender on the right side for a tight fit (from .5” to 7”).
Larger than 37” : Additonal extender panels will required.
OPERATING INSTRUCTIONS:
• Make sure rotary switches are in the OFF position.
• Plug into 120V AC electric outlet.
• Set the individual fan motors on either INTAKE, EXHAUST or AIR
EXCHANGE using the control lever.
• To start the unit, turn the rotary switches to desired speed (HI, MED,
LO). Note: If unit will not start, please check that Comfort Control
Thermostat is set to HI/largest dot.
• When operating both fans on EXHAUST, set the Comfort Control
Thermostat all the way to high by turning the dial CLOCKWISE (to the
right) toward the largest dot.
THERMOSTAT INSTRUCTIONS:
Your window fan is equipped with a Comfort Control Thermostat that auto-
matically turns the fan ON and OFF depend-
ing on the preset comfort level. This is ideal
for operation at night when the temperature
drops. It is labeled Comfort Control.
• While the Window Fan is on, turn the
Comfort Control Thermostat dial counter-
clockwise towards the smaller dots until
the fan stops (Away from Cooler). This is
the selected comfort level.
• If the fan is stopped and you want to turn it back on, turn the Comfort
Control Thermostat dial clockwise until the fan starts, towards the larg-
er dots (Towards Cooler).
SET DIAL TO DESIRED SHUT-OFF POINT. Turning dial (as noted above)
helps you locate the prevailing temperature on the dial.
IMPORTANT: If you desire continuous running of the fan, the Comfort
Control Thermostat dial should be turned all the way to the right to the
largest dot.
PLEASE READ AND SAVE
THESE IMPORTANT
SAFETY INSTRUCTIONS
When using electrical appliances, basic safety precautions should always be
followed to reduce the risk of fire, electric shock, and injury to persons,
including the following:
1. Read all instructions before using the appliance.
2. To avoid fire or shock hazard, plug the appliance directly into a 120 V
AC electrical outlet.
3. Keep the cord out of heavy traffic areas. DO NOT let the cord hang over
the edge of a table or counter. To avoid fire hazard, NEVER put the cord
under rugs, near heat registers, radiator, stoves, or heaters.
4. To protect against electrical hazards, DO NOT immerse in water or other
liquids. Do not use near water.
5. Close supervision is necessary when any appliance is used by or near
children, or by disabled people.
6. Always unplug the fan before moving it, putting on or taking off parts,
cleaning, or whenever the fan is not in use. Be sure to pull by the plug
and not the cord.
7. Avoid contact with moving parts. DO NOT operate without fan grills
properly in place.
8. DO NOT operate any appliance with a damaged cord or plug, if motor
fan fails to rotate, after the appliance malfunctions, or if it has been
dropped or damaged in any manner. Return appliance to manufacturer
for examination, electrical or mechanical adjustment, or repair.
9. DO NOT operate in the presence of explosive and/or flammable
fumes.
10. Use appliance only for intended household use as described in
this manual. Any other use not recommended by the manufacturer may
cause fire, electric shock, or injury to persons. The use of attachments
not recommended or sold by Home Essentialsmay cause hazards.
11. DO NOT use outdoors.
12. Always use on a dry, level surface.
13. Keep unit away from heated surfaces and open flames.
14. WARNING: To reduce the risk of fire or electric shock, DO NOT use this
fan with any solid-state speed control device.
15. DO NOT attempt to repair or adjust any electrical or mechanical functions on this unit. Doing so will void your warranty. The inside of the
unit contains no user serviceable parts. All servicing should be performed by qualified personnel only.
PLEASE READ AND SAVE
THESE IMPORTANT
SAFETY INSTRUCTIONS
PRE-INSTALLATION INSTRUCTIONS:
Carefully unpack all contents of carton.
• The window fan comes fully assembled and is ready for immediate
installation.
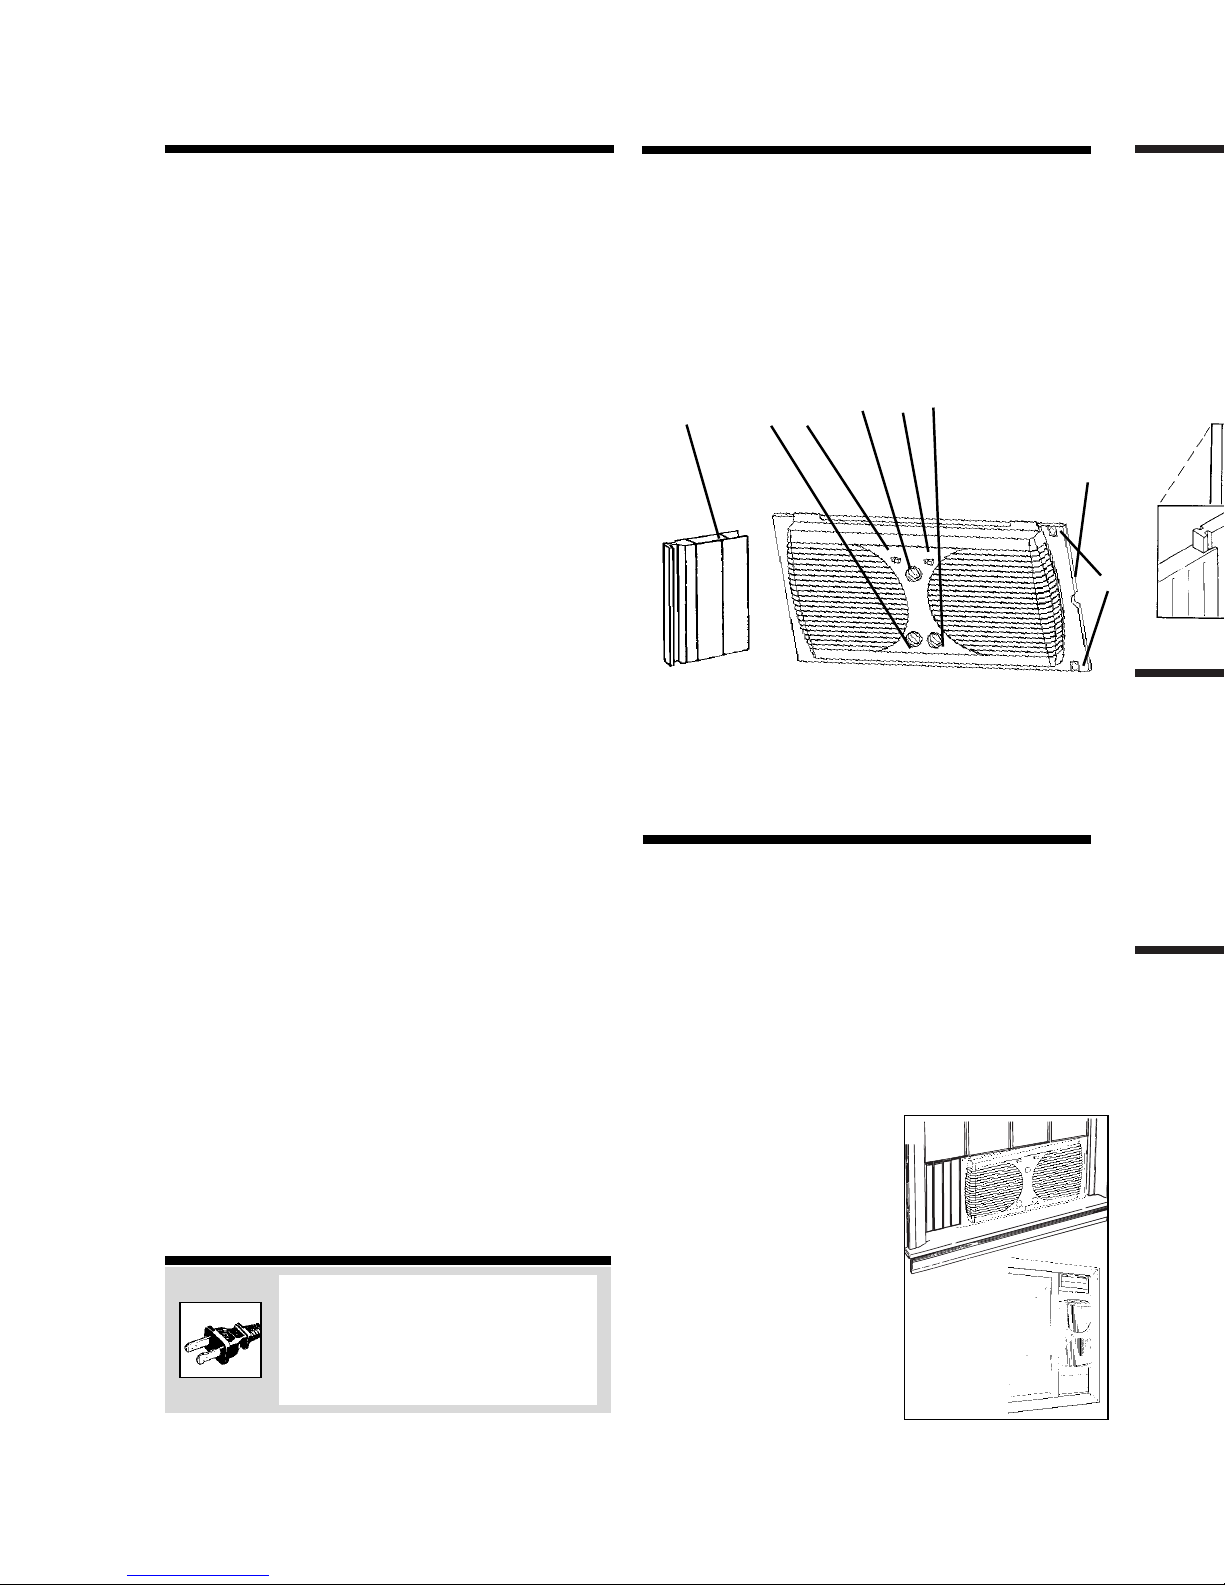
• Before installation, familiarize yourself with the built-in 7”extender on
the right side of the fan, and the two additional 3” extenders which
attach to the left side of the fan housing (see figure 1) The extra
extenders are packed in styrofoam at each end of the box.
WE RECOMMENDED KEEPING YOUR WINDOW SCREEN IN PLACE
INSTALLATION INSTRUCTIONS:
This window fan has been designed to fit double-hung, slider, and casement
windows. For safety, we recommend you leave your window screen in
place.
For double hung and slider windows:
Note: For slider windows, set the fan vertically in your window opening,
with the left side on the bottom.
1. Set the fan into your window opening.
2. If the fan does not fit snugly to the top and bottom of the window casing, attach the included extender panel(s) and pull out the built-in
extender screen until the fan sits safely in your window (See Figure 2).
3. To keep the fan in place, carefully
close the window so that the bottom
edge of the window rests on the flat
area on the top of the fan.
For casement windows:
For a safe fit you will need a specially
designed mounting bracket. This, and the
needed hardware, can be provided to you
free of charge. Installation instructions are
included with the bracket. Please call the
Consumer Service number located at the
end of this manual.
THIS PRODUCT IS EQUIPPED WITH A POLARIZED AC
(Alternating Current) PLUG (a plug having one blade
wider than the other). This plug will fit into the power
outlet only one way. If the plug does not fit fully into
the outlet, reverse the plug. If it still does not fit, contact qualified personnel to install the proper outlet.
DO NOT DEFEAT THE SAFETY PURPOSE OF THIS
POLARIZED PLUG IN ANY WAY
A
B
C
D
E
F
G
H
Figure 1
A. Slide-on Extender
B. Left Fan Speed Control
C. Left Fan Intake - Exhaust/Air Exchange
D. Comfort Control Thermostat
E. Right Fan Intake -Exhaust/ Air Exchange
F. Right Fan Speed Control
G. Built-in Extender (not shown)
H. Extender Locks
LEFT
Extra Extender Panels
UNIT’S LENGTH
FRONT VIEW
Two 3.0” extenders, (Included in your box packed at both ends)
FIGURE 2
Page 3
INSTALLATION GUIDE:
For 24” to 27” : Use up to 3” of right side, pull out extender panel
For 28” to 34” : Use one 3” extender panel on the left side. Adjust the
pull out extender on the right side for a tight fit (from .5” to 7”).
For 35” to 37” : Use two 3” extender panels on the left side. Adjust the
pull out extender on the right side for a tight fit (from .5” to 7”).
Larger than 37” : Additonal extender panels will required.
OPERATING INSTRUCTIONS:
• Make sure rotary switches are in the OFF position.
• Plug into 120V AC electric outlet.
• Set the individual fan motors on either INTAKE, EXHAUST or AIR
EXCHANGE using the control lever.
• To start the unit, turn the rotary switches to desired speed (HI, MED,
LO). Note: If unit will not start, please check that Comfort Control
Thermostat is set to HI/largest dot.
• When operating both fans on EXHAUST, set the Comfort Control
Thermostat all the way to high by turning the dial CLOCKWISE (to the
right) toward the largest dot.
THERMOSTAT INSTRUCTIONS:
Your window fan is equipped with a Comfort Control Thermostat that automatically turns the fan ON and OFF depending on the preset comfort level. This is ideal
for operation at night when the temperature
drops. It is labeled Comfort Control.
• While the Window Fan is on, turn the
Comfort Control Thermostat dial counterclockwise towards the smaller dots until
the fan stops (Away from Cooler). This is
the selected comfort level.
• If the fan is stopped and you want to turn it back on, turn the Comfort
Control Thermostat dial clockwise until the fan starts, towards the larger dots (Towards Cooler).
SET DIAL TO DESIRED SHUT-OFF POINT. Turning dial (as noted above)
helps you locate the prevailing temperature on the dial.
IMPORTANT: If you desire continuous running of the fan, the Comfort
Control Thermostat dial should be turned all the way to the right to the
largest dot.
• WARNING: BE SURE FAN IS SECURELY INSTALLED IN YOUR
WINDOW AT ALL TIMES. DO NOT LEAN OR PUSH ON FAN
WHILE IT IS IN THE WINDOW.
CLEANING/MAINTENANCE INSTRUCTIONS:
Follow these instructions to correctly and safely care for your Home Essentials
window fan. Please remember:
• Always unplug the fan before cleaning or disassembling
• Do not allow water to drip on or into the fan motor housing
• Do not use any of the following as a cleaner: gasoline,
thinner, benzine
Fan blade and Front Grill Cleaning:
Step 1: Using a Philips head screwdriver, remove the screws that hold the
front and rear grills together.
Step 2: Clean the blades and grills with a soft cloth moistened with a mild
soap solution.
Step 3 :Securely fasten the front and rear grill back together.
FAN STORAGE:
For all window fans, and fans that come already assembled.
• It is important to keep it in a safe, dry location
• We recommend using the original (or appropriately sized) box
• Please remember to protect the fan from dust or moisture
SERVICE INSTRUCTIONS:
1. Do NOT attempt to repair or adjust any electrical or mechanical
functions on this unit. Doing so will void the warranty.
2. If you have any questions regarding this unit’s operation or believe any
repair is necessary, please call our 1-800 number to speak with a
Consumer Service Representative.
3. If you need to exchange the unit, please return it in its original carton,
with a sales receipt, to the store where you purchased it. If you are
returning the unit more than 30 days after the date of purchase, please
see the enclosed warranty.
4. If you have any other questions or comments, see our correspondence
below:
Please call 1-800-546-5637
Consumer Returns
P.O. Box 769
Milford, MA 01757-0769
COMFORT CONTROL
G
H
PULLS OUT UP TO 7.0”
LEFT
Extra Extender Panels
RIGHT
Built-In, Pull Out Extender
UNIT’S LENGTH
24”
FRONT VIEW
Two 3.0” extenders, (Included in your box packed at both ends)
FIGURE 2
Page 4
THREE (3) YEAR LIMITED WARRANTY
SAVE THIS WARRANTY INFORMATION
A. The quality controls used in the manufacture of this Home Essentials
product are to ensure your satisfaction.
B. This Warranty applies only to the original purchaser of this product.
C. This Warranty applies ONLY to repair or replacement of any supplied or
manufactured parts of this product that, upon inspection by Home
Essentials authorized personnel, proves to have failed in normal use due to
defects in material or workmanship. Home Essentials will determine
whether to repair or replace the unit. This Warranty does not apply to
installation expenses.
D. Operating this unit under conditions other than those recommended or at
voltages other than the voltage indicated on the unit, or attempting to service
or modify the unit, will render this WARRANTY VOID.
E. Unless otherwise proscribed by law, Home Essentials shall not be
liable for any personal injury, property or any incidental or consequential damages of any kind (including water damage) resulting
from malfunctions, defects, misuse, improper installation or alteration of this product.
F. All parts of this Home Essentials product are guaranteed for a period of 3
years as follows:
1. Within the first 30 days from date of purchase, the store from which you
purchased your Home Essentials product should replace this product if it
is defective in material or workmanship (provided the store has in-stock
replacement.)
2. Within the first 3 years from date of purchase, subject to the conditions
in paragraph H, Home Essentials will repair or replace the product if it is
defective in material or workmanship providing it is returned to Home
Essentials, freight prepaid, with PROOF OF PURCHASEdate, together with
$7.50 for handling and return packing/shipping charges.
G. If you have any problem with this product, please write our Consumer
Service Department.
H. IMPORTANT Return INSTRUCTIONS Your warranty depends on your follow-
ing these instructions if you are returning the unit more than 30 days after
the date of purchase:
1.Carefully pack the item in its original carton or other suitable box to
avoid damage in shipping.
2.Before packing your unit for return; be sure to enclose:
a) your name, full address with zip code and telephone number,
b) a dated sales receipt or PROOF OF PURCHASE,
c) your $7.50 check for return packaging, and
d) The model number of the unit and the problem you are having.
(Enclose in an envelope and tape directly to the unit before the box is
sealed.)
3.Home Essentials recommends you insure the package (as damage in
shipment is not covered by your warranty).
4.All shipping charges must be prepaid by you (as noted in paragraph F).
5.Mark the outside of your package:
Home Essentials
Consumer Returns
32B Spur Drive
El Paso, TX 79906
This warranty gives you specific legal rights, and you may have other rights
which vary from state to state. The provisions of this warranty are in addition
to, and not a modification of, or subtraction from, the statutory warranties and
other rights and remedies contained in any applicable legislation. To the extent
that any provision of this warranty is inconsistent with any applicable law, such
provision shall be deemed voided or amended,as necessary, to comply with such
law.
For your own records, staple or attach your sales receipt to this manual.
Also, please take a moment to write the store name/location and date
purchased below.
STORE NAME:
LOCATION:
DATE PURCHASED:
(STAPLE RECEIPT HERE)
HE508501UM1 Printed in China
Twin Window Fan
With Thermostat
Owner’s Manual
Model HE5085
Made for Kmart Corporation
Troy, Michigan 48084, in China
UPC CODE:
0-72000-78421-1
CAUTION:
Carefully Read
Instructions and
Procedures for
Safe Operation
 Loading...