How it Works
Log In / Sign Up
Buy Points
How it Works
FAQ
Contact Us
Questions and Suggestions
Users
Homedics
Loading...
P
PA-100H
PA-100H-2EU
PA-100H-3GB
PA-1H
PA-1HWA
PA-200H
PA-300H
PA-350HBL
PA-400H
2
PA400HWTAU
PA-4H
PA-5H
2
PA-B100
PAC-20
PAC-25
PAC-25-EU2
PAC-30
PAC30AU
PAC-35
PA-M
PA-M1
PA-MET1
PA-MH
2
PA-MHA-GB
PA-MH-THP
PA-MHW-GB
PAQ-30H
PAQ-30H-2EU
PAQ-30H-2GB
PAR-100
PAR-100C
PAR-120
PAR-150
PAR-200
PAR-250
2
PAR-270
PAR-300
PAR-350
PAR-70
ParaSpa
ParaSpa Deluxe
ParaSpa ELITE
ParaSpa SELECT
PAR-WAX
PARWAXD
PAR-WAXE
PA-X
PAX-TL1
PB-100
PC-400
PDM-100
2
PDM-100A
PDM-200
PDM-200-CA
PED-100
PED-100B
PED-1200
2
PED-1200-EU
PED-200
PED-500-EU
2
Pedicure Foot Spa
PM-30BX
PM-30BX-0EU
PM-30BX-0GB
PM-30CTM
PM-35
PM-35BX
2
PM-35TL
PM-4C
PM-50
2
PM-606
PP-BPCUFF5
PRO
PRX-500
PS-150
PS-200
PS-250
PS-251
PS-300
PS-350
PSL-1000-GB
PX-100
PX-101-EU
PX-130
Q
QRM-360H-EU
2
QRM-360H-GB
QRM-400
QRM-400H
QS-SAN-PH100
QS-UHECM45D
R
RC-100
RC-QUAD
RC-QUAD-2EU
RC-QUAD-3GB
RF-101
RFX-1H-EU
RFX-1H-GB
RMM-250
RMM-300H
RMM-300H-2EU
Loading...
Loading...
Nothing found
PDM-100
Downloadable Instruction Book
21 pgs
1.29 Mb
0
User Manual
44 pgs
660.92 Kb
0
Table of contents
Loading...
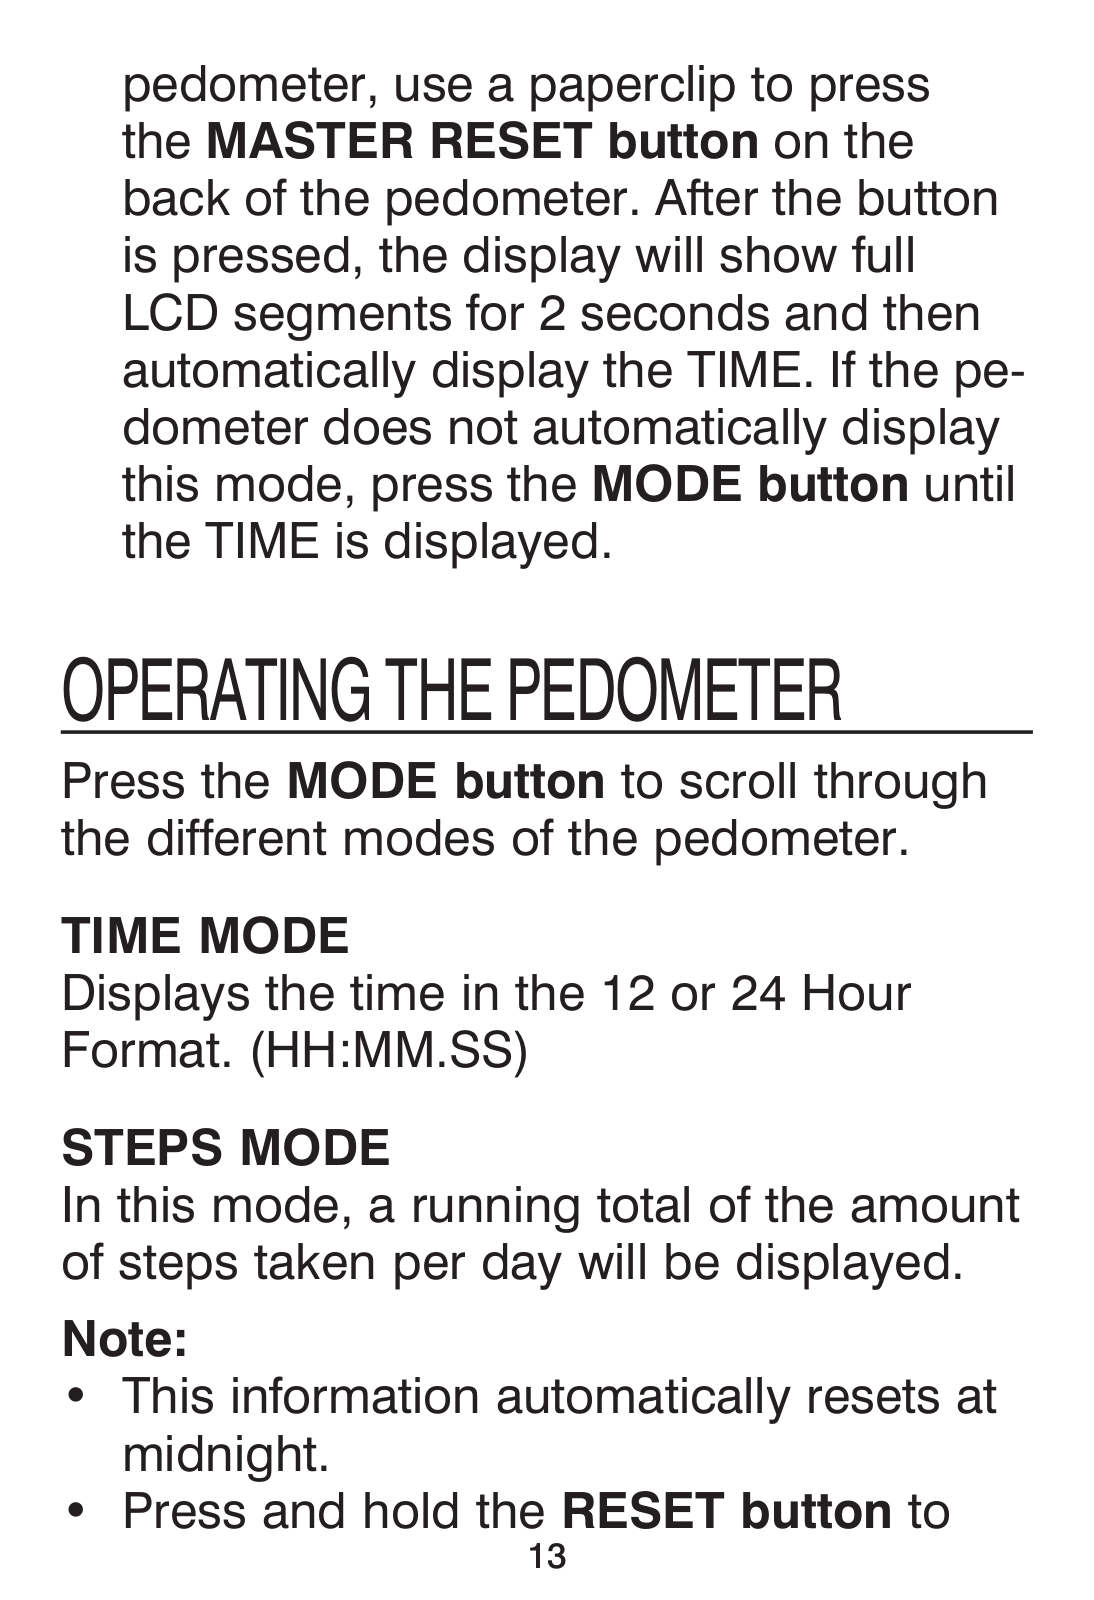
Homedics PDM-100 User Manual
...
Homedics User Manual
Download
Specifications and Main Features
Frequently Asked Questions
User Manual
Download
Loading...
+
30
hidden pages
Unhide
You need points to download manuals.
1 point = 1 manual.
You can buy points or you can get point for every manual you upload.
Buy points
Upload your manuals
 Loading...